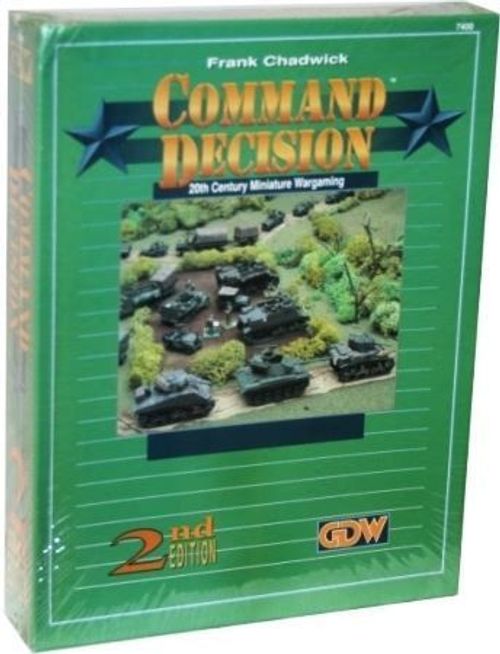
Command Decision 2nd Edition
Command Decision 2nd Edition Rulebook
Table of Contents
Table of Contents
- BASIC RULES
- SEQUENCE OF PLAY
- COMMAND CONTROL
- TERRAIN
- TROOP QUALITY
- MOVEMENT
- FACING
- VISIBILITY AND SPOTTING
- FIRE COMBAT
- ANTITANK FIRE
- HIGH EXPLOSIVE FIRE
- SMALL ARMS FIRE
- INDIRECT FIRE
- AMMUNITION
- MORALE
- CLOSE ASSAULT
- SPECIAL STANDS AND WEAPONS
- ADVANCED RULES
- SPECIAL STANDS AND WEAPONS (ADVANCED)
- TERRAIN (ADVANCED)
- NIGHT
- WEATHER AND SEASONS
- ENGINEERING
- SUPPLY
- AIRCRAFT
- PARACHUTE LANDINGS
- INDIRECT FIRE DEVIATION (OPTIONAL)
- MAP FIRE (OPTIONAL)
- GAME REFERENCE CHART
- COMMAND DECISION EXTENDED ERRATA
BASIC RULES
The basic rules for Command Decision cover all details necessary for play of the game.
Scales
Each inch on the playing surface represents 50 yards of actual ground. Each game turn represents 15 minutes of elapsed time. Each towed weapon or vehicle model represents from 4 to 6 actual heavy weapons or vehicles. Each personnel stand represents from 40 to 60 men (approximately a platoon).
Two scales of miniatures may be used: HO scale (15mm) or 1:285 scale. The rules are written for HO scale, with ranges, movement, etc. in inches. When using 1:285 scale, two options are available: a) Use the HO scale measurements for range, movement, etc. (This shows the relationship between the scale of the miniatures and the ground scale better than HO scale, but requires a large playing surface in relation to the size of the miniatures.) b) Use centimeters in place of inches for range, movement, etc. For example, a vehicle listed as having a 20 inch movement allowance would have a 20cm movement allowance under this option.
Stands
The mounting conventions for models are given in the organization booklet.
For convenience of terms, the rules use stand in general to mean any individual stand or individual towed weapon or vehicle model. (When dealing with vehicles or towed weapons by themselves, the rules drop the word "stand", as these models are usually not mounted on stands.) There are three main types of stands, each of which is itself divided into several types:
Vehicles consist of all vehicles, including towed trailers and horse-drawn artillery limbers. A vehicle model represents the vehicles and their crews. Vehicles are divided into two types: AFVs (armored fighting vehicles) and soft (non-armored) vehicles. AFVs are further subdivided into three types: light, medium, and heavy. These divisions are listed on the vehicle characteristics charts. Vehicles are either wheeled or tracked, which can be determined from the model itself. Halftracks are treated as wheeled vehicles except when noted otherwise.
Towed Weapons consist of all towed guns and towed mortars. Towed weapons are divided into three types: light, medium, and heavy, as listed on the weapons characteristics charts. A towed weapon model represents only the towed weapons themselves; their crews are represented separately as personnel stands.
Personnel stands consist of all other stands. These include many types, such as infantry, cavalry, machinegun, towed weapons crews, antitank rifleman, man-packed medium mortars, etc. (Note: The term man-packed refers to personnel stands with certain types of weapons. For example, man-packed mortars refer to personnel stands equipped with mortars; towed mortars and mortars mounted on vehicles are not man-packed.) The rules distinguish between two sizes of personnel stands: standard-sized and double-sized. A standard-sized stand is the stand with the standard-size base; a double-sized stand is any stand larger than standard size.
Charts
Game information for vehicles, weapons, and personnel are listed on the national data charts. Command Decision contains national data charts for typical troops, weapons, and vehicles of Germany, Italy, the Soviet Union, the United Kingdom, and the United States of America. The national organization charts list game organization of typical divisions, brigades, regiments, and battalions for these countries. The game reference chart contains information frequently used in play.
The Referee
Command Decision may be played with or without a referee. While a referee is recommended, one is not necessary.
A referee should be a player who knows the rules well. He supervises the scenario being played but doesn't play on either side. His primary tasks are to generate the scenario (by determining the terrain of the playing surface and each side's forces and objectives) and to keep track of hidden stands. Additional tasks for the referee are to keep the game moving at a brisk rate and to adjudicate any rules disputes. The referee's word is law during the course of the game, even if his ruling is directly contrary to the rules. (Each group of players will have varying opinions about the value of specific weapons, the best way of representing specific battlefield activities, and so on. The middle of a game is definitely not the best time to debate such points, and the best way to avoid this is to make the referee's rulings final for the scenario being played.)
Playing Conventions
All die rolls in the game use a decimal die, rolling numbers from 1 to 10. On a decimal die with a "0" digit, treat the "0" as "10".
Players may not pre-measure distances during play for any purposes such as for movement or to determine firing ranges. The players must make decisions to move or fire based on their own judgment without pre-measurement and must suffer the consequences of ordering an infantry dash to cover that is too far away or firing at enemy troops that are out of range.
All measurements are made from the center of a personnel stand or vehicle and from the center of the trunnion for towed weapons.
All modifiers to combat and all halving is cumulative, unless specifically stated otherwise in a rule. For example, a movement allowance which is halved twice is quartered.
SEQUENCE OF PLAY
Each game turn is played in a series of phases. In general, the phases are resolved in sequence, with all action in one phase being resolved before another phase is begun. However, the opportunity fire phase can interrupt the movement phase, as explained in the opportunity fire rule. All activity within each phase by both sides is simultaneous. For example, in the movement phase both sides move their stands at the same time. When simultaneous activity in a phase creates a conflicting situation (such as opposing forces attempting to move through each other's position), actions are resolved proportionally, as given in later rules. The phases are:
- Command Phase
- Movement Phase
- Opportunity Fire Phase
- General Fire Phase
- Close Fire Phase
- Morale Phase
- Close Assault Phase
COMMAND CONTROL
Command control is the most important single aspect of Command Decision. Understanding of this rule is essential for effective play of the game.
All movement and command control activities occur through use of orders. For example, a stand may not move unless it receives an order allowing it to move. Orders are not required for firing, although the order a stand receives may modify its ability to fire.
Orders are issued by commanders (any command stand) and staffs (any staff stand, such as a staff radio truck). Most stands require orders from a command or staff stand; certain stands are self-ordered.
Orders
Orders are issued during the command phase of a game turn and have effect throughout the entire game turn. During the command phase, players choose the orders issued by their command and staff stands and select the orders for their self-ordered stands.
There are eight orders that may be issued: cautious advance, full advance, travel march, disengage, rally, regroup, take command, and no order. Orders are shown by use of order chits. When an order is issued, the appropriate order chit is placed on the playing surface adjacent to the stand or group of stands receiving the order. An order cap chit is placed over the order chit to conceal the specific order given from the opposing players; the orders are revealed later in the turn as they take effect. The orders are:
Cautious Advance allows a stand or group of stands to move up to half of its movement allowance. Place the order chit next to the stand or group and point the arrow on the chit in the intended direction of movement. Stands which receive cautious advance orders may not fire in the opportunity fire phase but are eligible to fire in the general and close fire phases.
Full Advance allows a stand or group of stands to move up to its full movement allowance. It need not move its full movement allowance but it must move at least half of its movement allowance. Place the order chit next to the stand or group and point the arrow on the chit in the intended direction of movement. Stands which receive full advance orders may not fire in the opportunity and general fire phases but are eligible to fire in the close fire phase.
Travel March may be issued only to a stand or group of stands on a road. The order allows a stand or group of stands to move up to twice its full movement allowance along the road, but it must stay on the road for its entire movement. It need not move twice its full movement allowance but it must move at least its full movement allowance. Place the order chit next to the stand or group and point the arrow on the chit in the intended direction of movement. Stands which receive travel march orders may not fire in the opportunity, general, or close fire phases.
Disengage allows a stand or group of stands to move up to its full movement allowance directly away from the nearest visible enemy stand. It need not move its full movement allowance but it must move at least half of its movement allowance. Place the order chit next to the stand or group and point the arrow on the chit in the intended direction of movement. Stands which receive disengage orders may not fire in the opportunity and general fire phases but are eligible to fire in the close fire phase.
Rally enables a stand or group of stands to recover lost morale. Place the order chit next to the stand or group. A demoralized stand which receives a rally order is no longer demoralized. A non-demoralized stand which receives a rally order recovers one lost morale level. A stand which receives a rally order may not move in the movement phase and may not fire in the opportunity, general, or close fire phases.
Regroup is issued to a pair of eliminated personnel stands and allows one of the stands to return to play. Place the order chit next to the command or staff stand issuing the order. A single regroup order may be issued only to one pair of eliminated stands. The personnel stands must be subordinate to the stand issuing the order and must be exactly the same type (such as a pair of submachinegun stands, a pair of command stands, etc.). One of the stands is returned to play and the other is completely out of the game (and may not be included in future regroup orders). The stand returned to play is placed next to the stand that issued the regroup order. A stand which receives a rally order may not move in the movement phase and may not fire in the opportunity, general, or close fire phases.
Take Command is issued by a command or staff stand to a stand or group of stands that are not subordinate to the stand issuing the order. Place the order chit next to the stand or group. A stand receiving a take command order becomes subordinate to the stand issuing the order (and its associated staff or command stand, as appropriate), in place of its previous subordination. For example, if a player wishes to attach a tank company to an infantry battalion, he has the battalion commander take command of the tank company, making it subordinate to him. When a stand receives a take command order, it remains subordinate to the stand issuing the order for the rest of the game or until it receives another take command order. A stand which receives a take command order may not move in the movement phase but is eligible to fire in the opportunity, general, and close fire phases.
If a command stand receives a take command order, its staff (if any) and its subordinate stands also become subordinate to the stand issuing the take command order. For more details on this, see the chain of command rule, below.
No Order is used for deception purposes. A command or staff may issue a "no order" order to a stand or group of stands in the same manner as any other order. Place the order chit next to the stand or group. A "no order" order has no special effect; its use is to deceive opposing players that a stand or group actually has no orders.
Cautious advance, full advance, travel march, and disengage are movement orders. A stand which does not receive one of these four orders is a stationary stand for the purposes of the rules. (Note that a stand which receives a cautious advance but does not actually move is not considered to be a stationary stand.)
Issuing Orders
Command stands and staff stands issue orders. Each of these stands may issue only one order per command phase. Each order must be issued to a single stand or group of stands subordinate to the stand issuing the order. For the purposes of orders, a group of stands consists of any (up to all) subordinate stands that are within 6 inches of where the order chit is placed. Note that not all subordinate stands within 6 inches of the order chit need be included in the group receiving the order. If the stand issuing the order is within 6 inches of where the order chit is placed, it may be included in the group receiving the order.
A command stand may issue an order to any subordinate stand or group within its line of sight (see line of sight in the visibility and spotting rules). If a command stand has an associated staff and is adjacent to it, the command stand may issue an order to any subordinate stand or group anywhere on the playing surface. An associated staff is the staff of the military unit commanded by the command stand. For example, the associated staff of a battalion commander is the battalion staff. No other staff is the battalion commander's associated staff.
A staff may issue an order to any subordinate stand or group anywhere on the playing surface. Note that the staff's commander need not be adjacent (or even in play) for the staff to issue an order. A staff may issue an order even if its command stand issues an order. Example: In a command phase, a command stand and its associated staff stand are adjacent. The command stand issues an order to a subordinate group; since the command stand is adjacent to its subordinate staff, the group receiving the order need not be in the command stand's line of sight. The staff stand also issues an order, to a different subordinate group.
A demoralized command or staff stand may not issue any orders.
Self-Ordered Stands
Recon and forward observer stands are self-ordered stands. In the command phase, the player may select any movement order (cautious advance, full advance, travel march, disengage) or the "no order" order for each of his non-demoralized self-ordered stands. The order for a self-ordered stand affects only the self-ordered stand itself and no other stands. A self-ordered stand is not required to use its self-ordering ability. A self-ordered stand may receive orders from command and staff stands to which it is subordinate (see the organization booklet).
Chain of Command
The national organization charts show the chain of command and subordination for the various military units. For example, all stands of a regiment are subordinate to the regiment's command and staff stands. Similarly, all stands of a battalion are subordinate to the battalion's command and staff stands; note that they are also subordinate to the battalion's regimental command and staff stands. However, they are not subordinate to the command or staff stands of any of the other battalions of the regiment.
When issuing take command orders, command and staff stands (only) may not be subordinated to a command stand at the same or lower level in the chain of command. For example, a regiment command stand may take command of a battalion command stand, but a battalion command stand may not take command of a regiment or a battalion command stand.
No Orders
A stand which does not receive an order or receives a "no order" order has no orders for the turn. It may not move in the movement phase but is eligible to fire in the opportunity, general, and close fire phases.
Order Conversion
There is one case in which an issued order may be converted to another order during the course of a turn. If a stand receives a full advance order but halts its movement before it moves more than half its movement allowance, its order may be converted from full advance to cautious advance. A player may not voluntarily halt the movement of a stand and use this rule at any time; he may only do so when movement must be halted (such as a stand being pinned by opportunity fire) or when the rules specifically allow the movement to be halted (such as coming under fire in the opportunity fire phase).
Revealing Orders
In the command phase, all players of both sides issue all their orders before any are revealed and resolved. Orders are revealed when they take effect: movement orders (cautious advance, full advance, travel march, disengage, no order) at the start of the movement phase, and other orders (rally, regroup, and take command) in the command phase.
Order Caps
Order caps are counters which are placed over the order chits in order to conceal the order from the opposing players. They also serve to remind the owning players of the number of orders they may issue and help to mark which stand issued the orders. An order cap has two sides: a dark green side, which is the side placed facing up when concealing an order chit, and a printed side, which distinguishes which type of stand issued the order.
At the start of the game, each side takes their order caps: one command order cap for each command stand, one staff order cap for each staff stand, and one self-order cap for each self-ordered stand. Note that since a side will have order caps, by type, equal to the number of stands that can issue orders, the side will have a convenient reminder of how many orders can possibly be issued per turn. This will help prevent inexperienced players from mistakenly issuing more than one order per command or staff stand.
TERRAIN
Terrain has many effects on movement, line of sight, and combat. The specific effects of terrain are covered in the appropriate rules (such as the effects of terrain on movement in the movement rule). If a specific type of terrain is not mentioned in a rule, then it has no effect on the topic covered by the rule. For example, brush provides cover and thus has line of sight and combat effects, but it does not affect cross-country movement. The types of terrain covered in the basic rules are as follows:
Forest, a densely wooded area.
Woods, a wooded area more open than forest.
Swamp, a marshy, wooded area.
Creek, a stream smaller than a minor river.
Ford, a shallow crossing place on a stream.
Town, a built-up area. A town may consist of wood buildings or stone/cement buildings, which have differing combat effects.
Rubble, the ruins of a town of stone/cement buildings. For all game purposes, when the rules mention town, rubble has the same effect unless stated otherwise.
Miscellaneous cover, such as brush or very open woodland, which provides cover but has no significant effect on movement.
Contour line, which shows changes in elevation. The playing surface is assumed to be level, and contour lines are used to show hills and ridges above level ground and gulleys and depressions below it.
Cover
Forest, woods, swamp, town, and miscellaneous cover are cover terrain. Cover has effects on line of sight and combat.
TROOP QUALITY
Each vehicle and personnel stand has one of four troop quality categories. The categories are: green, experienced, veteran, and elite. (Towed weapons per se do not have troop quality, but note that their gun crew personnel stands do.) Troop quality affects the ability of stands in the game such as for chance of hitting in fire combat, rate of fire, and (for personnel) effects of hits due to fire combat. The effects of troop quality are given in the appropriate rules and are summarized on the troop quality summary on the game reference chart.
MOVEMENT
Stands are moved in the movement phase. Each vehicle and personnel stand has two movement allowances. A vehicle has a cross-country movement allowance and a road movement allowance; a personnel stand has a walking movement allowance and a running movement allowance. A towed weapons stand has no movement allowance; in order to move it must be towed or man-handled. Movement allowances are listed on the national data charts: vehicles have their cross-country and road movement allowances given on the vehicle characteristics charts and personnel stands have their walking and running movement allowances given on the personnel movement charts. All personnel stands move as infantry unless listed otherwise on the chart (such as for cavalry). Two types of personnel stands move as vehicles: motorcycles and bicycles. These stands are treated as vehicles for all movement purposes but otherwise are personnel stands.
A movement allowance states the basic distance in inches a stand may move in a single movement phase. The actual distance that a stand may move in a particular movement phase depends upon the orders given to the stand. For example, a stand ordered to full advance may move its full movement allowance and has to move at least half its movement allowance, while a stand with no orders may not move at all.
A vehicle may use its road movement allowance only if it moves exclusively along a road for its entire movement phase. If any of its movement is off-road, then it must use its cross-country movement allowance. Also, it must use its cross-country movement allowance when moving due to a disengage order, even if it moves exclusively along a road. A personnel stand always uses its walking movement allowance unless enemy stands are visible to it or it comes under fire. A personnel stand may use its running movement allowance as follows: a) in any turn when any enemy stand is visible to the personnel stand at the start of the movement phase, b) in any turn immediately following a turn in which it or any friendly stand within 6 inches of it was fired upon. A personnel stand equipped with heavy infantry weapons may not run. (A personnel stand has heavy infantry weapons if the weapon it is equipped with is listed as such on the weapons characteristics charts. Most heavy infantry weapons are man-packed mortars and heavy machineguns.)
No stand may move through or end its move in a position physically occupied by an enemy stand. A stand may move through a position physically occupied by another friendly stand, as long as it does not end its move in the same position with another stand.
A group of stands that receives a movement order moves as a group. No stand of the group may move farther than its movement allowance (as modified by the order) permits, and all stands of the group must end their movement within 6 inches of a common point. For example, if a group consisting of both infantry and vehicle stands receives a movement order, the stands move as a group and the vehicles may not leave the infantry behind.
Cross-Country Movement
If a vehicle moves off-road for any portion of its movement in a movement phase, it must use its cross-country movement allowance for the entire phase.
A stand must move in the direction shown by the arrow on its order chit and end its move facing in the direction shown by the arrow. Small changes of direction during movement are allowed to avoid obstacles; it must return to the axis of advance shown by the arrow on order chit. (In refereed games, the referee determines what is reasonable. In non-refereed games with players needing a hard-and-fast rule, a stand may not use more than 20% of its movement allowance per movement phase to dodge an obstacle.)
Road Movement
Stands which move along a road may use the road movement rules for the portion of their movement along the road. The direction arrow on the order chits does not limit a stand to moving in a single direction when moving along a road. If the stand starts the movement phase on a road, the direction arrow indicates the initial direction the stand moves along the road. If the stand starts off-road, the arrow indicates its cross-country movement direction (per above). When the stand reaches a road, it may subsequently move along the road. When moving along a road, a stand may follow the road as it twists and turns. When it reaches a crossroads or fork in the road, it may take any road from the intersection that the owning player chooses. However, a stand may move only one way along a road in a movement phase. Once having moved one way along a particular stretch of road, it may not move back the other way along the same stretch of road in the same movement phase. If at any time a stand moves off the axis of advance shown by the arrow on its order chit while following a road, it may not leave the road for the rest of its move in that movement phase.
A stand may not use road movement to move through a point where the road is blocked. A friendly vehicle blocks a road; the wreckage of a destroyed vehicle blocks a road. If possible given its order type and movement allowance, a stand may use its cross-country movement ability to move through or around the point where the road is blocked and resume road movement after doing so. This is treated the same as moving to avoid an obstacle (per above).
A stand which ends its move while moving along a road faces in the direction of its final movement along the road.
Note that a vehicle may use its road movement allowance only when moving exclusively along a road in a movement phase and may not use it at all when under a disengage order. However, even though it may not be able to use its road movement allowance, it may use the road movement rules when on a road.
Terrain Effects on Movement
Terrain affects the movement of stands. Certain types of terrain cost double or quadruple the standard movement rate. Each inch of double-cost terrain moved through costs a stand 2 inches of its movement ability; each inch of quadruple-cost terrain moved through costs a stand 4 inches of its movement ability.
Personnel stands pay double cost when moving through forests and swamps and when moving across or along creeks.
Tracked vehicles pay double cost when moving through woods and when moving across creeks. They may not enter forests or swamps and may not move along a creek. They pay a 1 inch penalty for each contour line crossed (moving either up or down).
Wheeled vehicles pay quadruple cost when moving through woods. They may not enter forests or swamps, move along a creek, or cross a creek except at a ford. They pay double cost when crossing a creek at a ford and pay a 2 inch penalty for each contour line crossed (moving either up or down). For terrain effects on movement purposes, all halftracks are treated as wheeled vehicles.
Transport Vehicles
Transport vehicles may carry personnel stands and may tow weapons; these vehicles and their transport capacities are identified on the national data charts.
A transport vehicle capable of carrying personnel stands has a transport capacity number which specifies the number of stands it may carry. For example, a heavy truck may carry three personnel stands. A double-sized stand counts as two stands against transport capacity. Motorcycle and cavalry stands, although they are personnel stands, may not be transported. A patrol counts as half a stand for transport purposes.
Personnel stands mount and dismount from transport vehicles during movement. It costs a personnel stand half its movement allowance to mount or dismount.
A transport vehicle capable of towing has a towing capacity letter (L, M, H) corresponding to the type of towed weapon it may tow. A transport vehicle may also tow a towed weapon that is lighter than the vehicle's towing capacity. For example, a light truck (towing capacity M) may tow a medium or light towed weapon.
A towed weapon must be limbered to its towing vehicle in order to be towed. Once limbered, it must be unlimbered from its towing vehicle in order to fire. The gun crew of a towed weapon pays a movement cost to limber or unlimber the towed weapon. However, the gun crew does not pay any mounting/dismounting cost when simultaneously mounting/dismounting a transport vehicle and limbering/unlimbering a towed weapon from the same transport vehicle. Limber and unlimbering costs are:
For a light towed weapon, it costs the crew half its movement allowance to limber or unlimber.
For a medium towed weapon, it costs the crew all of its movement allowance to limber and half its movement allowance to unlimber.
For a heavy towed weapon, it costs the crew all of its movement allowance to limber or unlimber.
A transport vehicle pays half its movement allowance when a stand mounts/limbers onto it or dismounts/unlimbers from it.
If a transporting vehicle moves prior to dismounting or unlimbering, the transported/towed stand is assumed to have moved the same proportion of its movement. Similarly, if a stand moves prior to its mounting/limbering, the transport vehicle is assumed to have moved the same proportion of its movement. Example: A personnel stand moves one quarter of its movement allowance and then mounts onto a transport vehicle which hasn't moved at all. Both the mounting stand and the vehicle pay half their movement allowances for the mounting. If the personnel stand did not move prior to mounting, the transport vehicle would have half its movement allowance remaining for movement. Since the personnel stand did move one quarter its movement allowance prior to mounting, the vehicle has only one quarter of its movement allowance remaining for movement.
Special Movement Cases
Backing Up allows a vehicle to back up. It moves in the direction of the arrow on its order chit but faces opposite to the direction of the arrow. A vehicle that receives a cautious or full advance order may back up; it pays quadruple costs when backing up.
Man-Handling allows unlimbered light and medium towed weapons to be moved by their crews or other personnel stands. To man-handle a towed weapon, the personnel stand must be adjacent to the gun and must be given a cautious or full advance order. A towed weapon is man-handled the following distance in a movement phase: for a light towed weapon, 2 inches with a cautious advance order or 4 inches with a full advance order; for a medium towed weapon, 1 inch with a cautious advance order or 2 inches with a full advance order.
AFV Passengers are personnel stands riding on AFVs. Any personnel stand except cavalry, motorcyclists, bicyclists, or double-sized stands may be AFV passengers. One personnel stand may ride on each qualified AFV. Any tracked AFV that is not a transport vehicle and does not have a casemate gun may have AFV passengers. For example, the following vehicles may have AFV passengers: an M4 tank, a Sturmgeschutz IV assault gun, and an SU-100 self-propelled gun (all are tracked AFVs with turrets or with hull guns), while the following vehicles may not have AFV passengers: a Wespe self-propelled howitzer (casemate gun), an M3A1 scout car (wheeled AFV), and a Universal Carrier (transport vehicle).
Dismounted Troops are cavalry, bicycle, and motorcycle troops which have dismounted from their horses, bicycles, or motorcycles. These troops may dismount/mount the same way personnel stands dismount/mount transport vehicles: spend half their movement allowance to do so. Once dismounted, these stands move the same as other personnel stands do. Keep track of where these stands dismount, as this is where they leave their horses, bicycles, or motorcycles. They may only remount in the same place where they dismounted. If an enemy stand moves through or occupies the place where the stands dismounted, they may not remount.
Movement to Contact
Occasionally stands will be ordered to move into or through the positions occupied by non-moving enemy stands. Move the stands until they come in contact with the enemy stands. Occasionally opposing stands will be ordered to move into or through each other's positions or a common point. Use proportional movement to determine the point of contact (if any). Move the stands a portion of their movement (such as a quarter or a fifth) until they come in contact. In either case, show the intended final destination of the moving stands by placing the stands' order chits at those points. During the normal sequence of the turn, resolve all fires, morale checks, and close assaults as normal, based on the locations of the stands at those times. When the stands' path to their intended final destination is opened (due to fire, morale check, or close assault), the stands (if still capable) advance on their final destination until they reach it or come in contact with other enemy stands (in which case the movement to contact rule again is followed). The stands cease moving on their final destination when blocking enemy stands are not cleared from their path or when the moving stands receive any adverse result (such as from fire, morale, or close assault) which prevents them from moving further. In these cases, movement ceases even if the stands have not fulfilled the minimum movement requirements for full advance or travel march orders.
FACING
All stands have facing; they must face in a specific direction. In the movement phase, stands which move have their facing determined by their movement (see the cross-country and road movement rules). Stands which did not move cannot change their facing in the movement phase. All stationary stands may change facing at the start of the general fire phase. All stands may change facing at the start of the close fire phase.
Stands have front and flank facings (see diagram). The front 90 degrees facing of a stand is its front; the stand's remaining 270 degrees area is its flank. (Facing diagram: the front is a 90 degree arc, 45 degrees to each side of the stand's direction of facing; the remainder is the flank.)
Facing is important for stands with restricted fields of fire. The following have all-around fields of fire: all personnel stands, all vehicle weapons in turrets, and all towed weapons mounted on turntables. Everything else has a restricted field of fire: all hull-mounted vehicle weapons, all vehicle weapons in casemates, and all towed weapons not mounted on turntables. The vehicle characteristics charts list the weapons of vehicles and their three types of mountings (turret, hull, or casemate). The weapons characteristics charts list which towed weapons have turntables.
Weapons with a restricted field of fire may only fire from the front 90 degrees facing of their stands.
Facing is important for AFVs that are hit by antitank fire. AFVs have front and flank armor ratings, as listed on the vehicle characteristics charts. The antitank fire rules cover this in detail.
VISIBILITY AND SPOTTING
Opposing stands are not visible to one another at all times. Instead, enemy stands may be hidden from view and must be spotted by stands with lines of sight to them before they become visible to friendly stands.
Hidden Stands
Stands which are not visible to enemy stands are hidden from view of the opposing players. Some or all stands may start the game hidden, depending upon the starting situation (such as a move to contact scenario) and the referee's determination. There are two methods to keep track of hidden stands, depending upon whether or not a referee is available.
If a referee is available, then the hidden stands are not placed or represented on the playing surface at all. Instead, the owning players keep track of their hidden stands on a map of the playing surface. Orders issued to hidden stands do not have their chits placed on the playing surface. Instead, keep track of them on the map of the playing surface along with the hidden stands. The referee keeps track of the location of the hidden stands and resolves all game functions involving them without giving away information about them to the opposing side. For example, if one side has a hidden stand and the referee determines that an opposing stand could possibly spot it, he resolves the spotting attempt himself and informs the opposing side of the fact only if the stand succeeded in spotting the hidden stand.
If a referee is not available, then numbered counters are used to represent the hidden stands on the playing surface. Each side should have the same amount of numbered counters, regardless of the number of stands each side may have. For each side, each hidden stand should be assigned a numbered counter, which is used on the playing surface in place of the hidden stand. The owning player treats the numbered counter exactly the same as the hidden stand; the numbered counter has no purpose or ability other than concealing the specific type of the hidden stand from the opposing side. Numbered counters with no hidden stands assigned to them may be used as dummies. A dummy is treated the same as a hidden stand. On a turn-by-turn basis, the owning player may choose to treat a dummy as if it were the same type as any of his stands available to him in the game for movement and spotting purposes. For example, he might choose to treat the dummy as a recon vehicle, if he has recon vehicles in the game. When playing with numbered counters, spotting is done by the players in cooperation. The spotting player will state which of his stands is attempting to spot and the opposing player will give the spotting category and type (vehicle or other) of the counter. If the spotting attempt succeeds, the numbered counter is replaced on the playing surface by the appropriate stand. A dummy is removed from the playing surface when spotted; it may not subsequently be returned to play.
Visibility
The normal maximum visibility range is 60 inches. This maximum is increased by 10 inches for every elevation level difference between two points. To calculate the elevation difference, start at the higher of the two points and find the contour lines between the two points: each contour line crossed going downslope adds one level and each contour line crossed going upslope subtracts one level.
Line of Sight
A stand may be visible to another stand if it is within visibility range and an unblocked line of sight can be traced between the two stands. A line of sight is a straight line between two stands. It is blocked if it passes through an obstacle: a friendly stand (but not an enemy stand), cover, hill, or smoke (including smoke from a destroyed vehicle). A disabled vehicle, friendly or enemy, never blocks line of sight. (For line of sight purposes, a hill is any elevation level between two stands that is higher than the elevation of either stand.) A line of sight is blocked if it is traced through smoke or cover. It is blocked if it is traced into or from cover or smoke, to or from a stand entirely in the cover or smoke. If an edge of a stand in cover or smoke is at or beyond the edge of the cover or smoke, then line of sight is not blocked by the cover or smoke when traced to or from that edge of the stand. A line of sight between stands in the same wooded area (woods, forest, etc.) is not blocked if the stands are at or within 2 inches of one another.
When a line of sight is traced between stands at different elevation levels, the line of sight may pass over an obstacle (rather than through it) and thus not be blocked. The line of sight passes over an obstacle based on the type of obstacle and the minimum elevation difference between the two stands. At the minimum elevation difference for an obstacle, the line of sight is not blocked if the obstacle is closer to the stand on the higher elevation and if the obstacle is not within 2 inches of either stand. Above the minimum elevation difference for an obstacle, the line of sight is not blocked if the obstacle is not within 2 inches of either stand. The minimum elevation difference for obstacles is:
- Friendly Stand: 1 level
- Hill: 2 levels for each elevation level the hill is above the lower stand
- Cover: 2 levels
- Smoke: 3 levels
Example: One stand is two elevation levels above another. There is a town between the two stands. While it is at least 2 inches from either stand, it is closer to the lower stand than the higher. Thus, the line of sight between the two stands is blocked. If the elevation difference between the stands was 3 or more levels, the line of sight would be unblocked.
Spotting
Spotting takes place in the movement phase and at the end of each fire phase. Each time spotting may occur, a spotting attempt may be made for each hidden stand if at least one enemy stand has an unblocked line of sight to the hidden stand. Regardless of how many enemy stands may have unblocked lines of sight to a hidden stand in a phase, only one spotting attempt is made. The spotting attempt is based on the stand which has the best chance to spot the hidden stand.
In the movement phase, spotting is resolved at the end of the phase but is assumed to take place at the point during the phase when a spotting stand has its best chance to spot the hidden stand. If both the spotting and hidden stands are moving, use proportional movement if necessary to determine if the hidden stand is physically within the spotting stand's line of sight at any point during the movement.
The chance to spot a stand depends upon the category of the stand being spotted, the type of stand being spotting, and the distance between the stands, as given on the spotting chart on the game reference chart. If the stand being spotted fired during the phase in which a stand attempts to spot it, its spotting category is raised by one. The spotting chance is modified by the type and status of the spotting stand, as given on the spotting modifier list next to the spotting chart. (Note: stands are stationary or moving for all spotting purposes based on their orders for the turn.) A die is rolled to resolve the spotting attempt; if the number rolled is equal to or less than the spotting chance number, the stand is spotted and is no longer hidden. A spotted stand is visible to enemy stands which can trace an unblocked line of sight to it and is no longer hidden. Once spotted, a stand remains visible to enemy stands as long as at least one enemy stand can trace an unblocked line of sight to it.
Example: At the end of the general fire phase, a stationary AFV is attempting to spot a hidden stand in front of the AFV. The hidden stand, a vehicle, is stationary under cover but fired during the phase. The distance between the two stands is 20 inches. Although the hidden stand is stationary under cover (category I), the fact that it fired raises it to category II. The basic spotting chance is 8 (category II, vehicle, spotting range under 30 inches), which is modified by -1 (-3 for spotting stand being AFV spotting to front, +2 for spotting stand being stationary) to 7. If the spotting die roll is 7 or less, the hidden stand is spotted.
FIRE COMBAT
There are three categories of fire combat: antitank, high explosive, and small arms. Fire combat may occur in any or all of the three fire phases: opportunity, general, and close. All fire is directed at individual stands, which are referred to as targets for purposes of fire combat.
There are two types of fire: direct fire and indirect fire. Most stands are capable of direct fire. For direct fire, a stand fires directly at a target; the target must be visible and in the firing stand's unblocked line of sight. Some stands are capable of indirect fire. Indirect fire allows a stand to fire at a target that is not in the firing stand's unblocked line of sight. However, the target must be visible and in the unblocked line of sight of the spotter for the firing stand.
The fire from a stand depends upon the weapons with which the stand is equipped. The national organization and data charts list the weapons of stands. For example, a German Sturmgeschutz IIIF assault gun has a 75L43 gun, which fires according to the 75L43 gun statistics on the weapons characteristics charts.
Many vehicles have more than one weapon mounted on them, in various mountings (turret, casemate, hull). A vehicle may fire all its weapons in a fire phase. However, all weapons on the same mounting which do fire must fire at the same target.
Fire Phases
Fire combat occurs in the three fire phases. Stands are eligible to fire in some or all of these phases depending upon the orders they received for the turn. For example, a stand which received a full advance order may not fire in the opportunity or general fire phases but is eligible to fire in the close fire phase, while a stand which received no orders is eligible to fire in all three phases. A stand which is eligible to fire in a phase may fire in that phase, even if it has fired in previous fire phases in the same turn.
A stand which is eligible to fire in a phase may fire in the phase if it has a visible target in its line of sight. (Note that the target must be both visible and in the firing stand's line of sight, per the visibility and spotting rules.) However, a stand which is spotted and becomes visible in a phase may not be chosen as a target that phase; it may be chosen as a target only in following phases. For example, a stand which is spotted in the general phase may not be chosen as a target that phase but may be chosen as a target in the close fire phase. Additional restrictions or rules on firing in a phase depend upon which fire phase is being resolved.
All fire in a fire phase is simultaneous. When resolving fire in a phase, note the results achieved against stands, but do not apply the results until the end of the phase, after all stands have fired.
Opportunity Fire is resolved in the opportunity fire phase, which follows the movement phase. A stand eligible to fire may fire direct fire at any target that is visible and in the firing stand's line of sight at any time during the movement phase.
A stand eligible to fire may fire indirect fire at its target point if there is a target there that is visible and in the line of sight of the firing stand's spotter at any time during the movement phase. However, it may fire in the opportunity phase only if it fired at the same target point in the previous turn. If it fires during the opportunity fire phase, it must also fire at the target point during the general fire phase.
When firing in the opportunity fire phase, stands which are targets of fire or which pass through the blast area of fire are moved back to where they take fire, and their order chits are placed in their intended final positions. Opportunity fire is resolved against each of these stands, after which the owning player may continue to move the stand to its intended final position (if the results of the fire allow such movement). However, a player may elect to halt the stand's movement at the point where it received fire.
If a vehicle ends its movement (either voluntarily or involuntarily) due to opportunity fire physically occupying a point on a road, the road is blocked at that point. All stands which passed through that point using road movement in the movement phase must use proportional movement. Those which pass through the point after the road is blocked must either move to avoid the block (if possible; see the road movement rules) or halt their movement at the point where they encounter the block.
General Fire is resolved in the general fire phase. A stand eligible to fire may fire direct fire at any target that is visible and in the firing stand's line of sight at the start of the phase. A stand eligible to fire may fire indirect fire at its target point if a target is there that is visible and in the line of sight of the firing stand's spotter at the start of the phase. Note that a stand eligible to fire in this phase may fire even if it also fired in the opportunity fire phase.
Close Fire is resolved in the close fire phase. A stand eligible to fire may fire direct fire at any visible target in the firing stand's line of sight at the start of the phase, and within 10 inches of the firing stand. A stand eligible to fire may fire indirect fire at its target point if a target is there that is visible, in the line of sight of the firing stand's spotter at the start of the phase, and within 10 inches of the spotter. Note that a stand eligible to fire in this phase may fire even if it also fired in the opportunity and general fire phases.
Restrictions on Fire
Personnel stands with heavy infantry weapons must be stationary in order to fire in any fire phase of the turn.
Towed weapons must be unlimbered in order to fire. Some towed weapons have further restrictions: they may fire only in the general and close fire phases, and only if they are stationary. Weapons with these restrictions are marked for this on the weapons characteristics charts.
Restricted field of fire stands may only fire at targets through their front facings. The following have restricted fields of fire: all hull-mounted vehicle weapons, all vehicle weapons in casemates, and all towed weapons not mounted on turntables. Stands with all-around fields of fire may fire at targets through any of their facings. The following have all-around fields of fire: all personnel stands, all vehicle weapons in turrets, and all towed weapons mounted on turntables.
Vehicle passengers (including AFV passengers) may not fire, except for small arms fire in the close fire phase.
Hull weapons are weapons mounted in the hull of an AFV, as listed on the vehicle characteristics charts. If an AFV is in a hull-down position in respect to another stand, the AFV's hull guns may not fire direct fire at that stand. (See the terrain rule in the antitank fire rule for the definition of hull-down.)
Rate of Fire
Each weapon has a rate of fire (ROF), as listed on the weapons characteristics charts. The ROF lists the number of times a stand with a specific weapon may fire it in a fire phase. For example, the 76L39 gun of a Soviet T-34/41 tank has a ROF of 2; the tank thus may fire its 76L39 twice per fire phase. The ROF of a weapon is given after each type of round for the weapon. A weapon is not required to fire the same type of round for each shot it fires, but it must use the ROF of the round with the lowest ROF when firing different types of rounds in a fire phase.
A stand may use a weapon's full ROF in a fire phase only if it fires all shots at the same target. If it fires at different targets in the same fire phase, it has its ROF reduced by 1. For example, a stand with a weapon having a ROF of 3 may fire three times at one target (for a total of 3 shots) or once at each of two targets (for a total of 2 shots) in a single fire phase. Note that weapons with ROFs of 1 or 2 may only fire at a single target in a fire phase.
An elite stand has its ROF increased by 1. For example, an elite Soviet T-34/41 would have a ROF of 3 for its 76L39 gun.
Range
Range affects fire as specified in the rules for the various categories of fire. Since pre-measurement of range is not allowed, there may be occasions when stands fire at targets out of range. All fire against targets out of range automatically misses.
Effects of Fire
Hits due to fire combat affect stands, depending upon the actual result achieved and the type of target stand. Results are:
Hit. A personnel stand is affected by hits depending upon its troop quality. A green stand is eliminated when it takes its first hit. An experienced stand is forced back when it takes its first hit and is eliminated when it takes its second hit. A veteran stand suffers no effect from its first hit, is forced back when it takes its second hit and is eliminated when it takes its third hit. An elite stand suffers no effect from its first and second hits, is forced back when it takes its third hit and is eliminated when it takes its fourth hit. A player keeps track of hits on his personnel stands by any convenient method. (Colored pipe cleaners are useful for this: use green for hits which cause no effect and yellow for hits which cause forced back results.)
Pinned. When a stand is pinned, it is affected for the result of the turn it takes the pinned result and throughout the entire next turn. A pinned stand may not fire and may not move toward any visible enemy stand. (It may move lateral to or away from visible enemy stands.) Use pinned markers to keep track of pinned stands.
Forced back. A stand which is forced back must immediately move away from the closest visible enemy stand. It must move as directly away from the enemy stand as possible, as long as it does not move toward any other enemy stand. If no enemy stand is visible to a forced back stand, it moves toward the closest cover. A forced back stand moves its full cross-country movement allowance, unless it reaches cover. A stand that starts in or reaches cover may not be forced back out of cover, although it may be forced back deeper into cover if possible. A forced back stand is also pinned.
If the gun crew of a towed weapon is adjacent to its weapon and is forced back, the weapon is limbered (for free) if transport is present and moves with its forced back crew. If no transport is present, the towed weapon is abandoned by its crew. A towed weapon that is abandoned may be destroyed by an enemy stand; if an enemy stand is adjacent to the abandoned weapon at the start of a fire phase in which it is eligible to fire, it may destroy the abandoned weapon. If it does so, it may not fire that phase.
Eliminated. A stand which is eliminated is removed from the playing surface. If personnel, it is available for regrouping.
Damaged. A vehicle may be damaged. A damaged vehicle has its movement allowances halved and its rate of fire reduced by 1. A damaged vehicle which receives a second damage result is disabled. Use any convenient method to keep track of damaged vehicles. (White pipe cleaners are useful.)
Disabled. A vehicle may be disabled. A disabled vehicle is out of play for all game purposes such as movement, firing, spotting, etc. A disabled vehicle is not removed from the playing surface, as its presence may affect road movement. (Also, in campaign games, a disabled AFV may be recovered and repaired.) A disabled AFV which received a second disabled result is destroyed. If an AFV has any passengers when it is disabled, the passengers automatically dismount and are pinned. Use a piece of white cotton arranged to resemble smoke to mark a disabled vehicle.
Destroyed. A vehicle or towed weapon may be destroyed. A destroyed stand is out of play for all game purposes such as movement, firing, spotting, etc. Remove a destroyed towed weapon from the playing surface. Do not remove a destroyed vehicle from the playing surface, as its presence may affect lines of sight (per below) and road movement. The wreckage of a destroyed vehicle is assumed to be on fire for the rest of the game, and smoke from the wreckage blocks lines of sight through the point containing the wreckage. If a vehicle has any passengers when it is destroyed, the passengers automatically dismount, take one hit, and are pinned. Use a piece of black-colored cotton (arranged to resemble smoke) to mark a destroyed vehicle.
ANTITANK FIRE
All antitank fire is direct fire. Stands with antitank weapons may fire antitank fire against vehicles. Antitank fire may be fired against all types of vehicles (AFV and soft), but not against any other type of stand. Each antitank weapon has a hit number and penetration for each of its range bands, as listed on the weapons characteristics charts (in the form hit number:penetration number). A weapon may have several lines on the chart, one for each of the types of rounds it has. The standard antitank round is the armor piercing (AP) round. Special types of rounds are covered below.
Range
Range affects both the hit and penetration numbers, as specified on the weapons characteristics charts for each listed range band. A target is in a range band if the distance between the firing stand and target is equal to or less than the specified range of the band. For example, a target at a distance of 9 inches is in the 10-inch range band. Targets beyond the last listed range band for the weapon are out of range.
Hitting
To determine if antitank fire hits its target, find the hit number for the weapon for the appropriate range band. Modify the hit number due to troop quality: decrease the hit number by 1 for a green stand; increase it by 1 for a veteran or elite stand. Halve the hit number due to cover or hull-down position (see below); when halving the hit number drop fractions. Roll the die; if the number rolled is equal to or less than the modified hit number, the target is hit.
Penetration and Damage
A soft vehicle hit by antitank fire has a 50% chance of being destroyed. Roll the die: on a roll of 1 through 5, the target is destroyed; on a roll of 6 through 10 the hit has no effect (as the shot is assumed to pass through the soft vehicle without causing significant damage).
An AFV hit by antitank fire takes damage only if the shot penetrates the AFV's armor. AFVs have front and flank armor values, as listed on the vehicle characteristics chart (in the form front/flank). An AFV uses its front value if fired at from its front; otherwise it uses its flank value. Some AFVs have hull-down armor values (when different from the front values), as listed on the chart (in parentheses following the front value). An AFV uses its hull-down value if fired at through its front while it is in a hull-down position (see terrain, below).
To determine if a hit AFV is penetrated, roll the die and add the number rolled to the penetration number of the weapon at the appropriate range band. If the result is less than the appropriate armor value, the shot failed to penetrate and has no effect on the target. If the result is equal to the value, the target is forced back. If the result is 1, 2, or 3 greater than the value, the target is damaged. If the result is 4, 5, or 6 greater, the target is disabled. If the result is 7 or greater, the target is destroyed.
Example: A German 37L40 gun with a veteran crew (antitank stats of 6:-2 for the 15-inch range band) fires against the flank of a Soviet T-34/41 tank (armor values of 7/4) at a range of 15 inches. The hit number is 6 and is modified to 7 due to veteran troop quality. A 3 is rolled for hitting, which means the target is hit. A 7 is rolled for penetration and is added to the -2 penetration number for a result of 5. The penetration result is 1 higher than the tank's flank armor, so the tank is damaged. If the Germans had a front shot on the T-34 instead of a flank shot, the hit would have failed to penetrate the front of the T-34.
Hits from antitank rifles have their effects modified. A hit on a soft vehicle by an antitank rifle has a 50% chance of damaging (not destroying) the vehicle. A hit on an AFV by an antitank rifle has any penetration result greater than 3 treated as 3. (Note that this means a single antitank rifle hit can damage but not disable or destroy its target.)
Terrain
Shots against a target stationary in cover have their antitank fire hit numbers halved.
Shots against a hull-down AFV have their antitank fire hit numbers halved, and hits from this fire use the AFV's hull-down armor value for determining penetration. If an AFV is both stationary in cover and hull-down, the hit chance is halved only once, not twice.
An AFV may be hull-down only through its front facing. It is hull-down (through its front facing) against stands at elevations lower than that of the AFV; it is hull-down against stands at the same elevation if the stand is on a different hill. It is not hull-down against stands at higher elevations or against stands at the same elevation if on the same hill (see the hull down diagram below for examples).
Hull-Down Diagram: The AFV is hull-down against shots from A and B, but not against shots from C, D, and E.
Special Antitank Ammunition Types
Some weapons have special antitank ammunition types (HVAP: high velocity armor piercing; HC: hollow charge; APDS: armor piercing discarding sabot) available. When a weapon has a special antitank round available, the weapon has a separate line for that ammunition on the weapons characteristics chart. When a weapon uses a special type of ammunition, the hit and penetration numbers for that type of ammunition are used in place of the standard armor piercing ones.
The penetration number and procedure for hollow charge ammunition differs from the standard case. The penetration number lists the multiplier to the penetration die roll. Instead of rolling the die and adding the number rolled to the penetration number (as for standard penetration), roll the die and multiply it by the number given as the hollow charge penetration multiplier to get the penetration result. For example, if the penetration number of a weapon firing a hollow charge round is "x2," then the die is rolled and is multiplied by 2 to determine the penetration result.
HIGH EXPLOSIVE FIRE
High explosive (HE) fire may be either direct fire or indirect fire, depending upon the capabilities of the individual HE fire weapons. Stands with HE weapons may fire HE fire against any stands (vehicles, towed weapons, personnel). Except for small caliber HE, which is treated the same as small arms, each shot from an HE fire weapon has a burst area and fire value, as listed on the weapons characteristics charts. The burst area is a square; the length of the sides of the square varies per HE fire weapon and is listed on the HE fire characteristics chart. The fire value is used to resolve the effects of HE fire on targets within the burst area.
Procedure
For each HE shot fired by an HE weapon, each target in its burst area is attacked by its fire value. Each stand (including friendly stands) in the burst area is attacked. For each stand, the chance of a hit is the fire value, as modified by terrain and target type as listed on the high explosive fire chart on the game reference chart. The die is rolled for each stand; if the die roll is equal to or less than the fire value, the target suffers an HE hit.
(On the high explosives fire chart, the modifier for being stationary is not cumulative. A stationary stand receives this modifier only if it does not receive any other modifier on the chart.)
If a transport vehicle carrying or towing stands or an AFV with AFV passengers is in the burst area of an HE shot, separate HE attacks are made on all stands present.
An AFV which takes an HE hit is damaged. A soft vehicle which takes an HE hit is destroyed. A towed weapon which takes an HE hit is unaffected (however, see direct fire HE below). A personnel stand which takes an HE hit takes one damage hit.
Direct Fire HE
The direct fire range of HE fire weapons is 50 inches. When a direct fire HE shot is fired, a target is chosen. Any stand within range may be the target stand. The burst area is placed so that the target is within the burst area. As long as the target is in the burst area, the firing player may position the burst area as he wishes. The HE fire is resolved as described above. In addition, the shot has a chance of scoring a direct hit on the target stand. Resolve this chance of a direct hit the same as for a hit by antitank fire, using the hit number on the HE line for the weapon on its weapons characteristics chart. (If no hit number is listed for a weapon at a particular range, it may not score a direct hit when firing at that range.) If a hit is achieved, the target takes a direct hit from the HE fire. The effects of a direct hit by HE fire depend upon the target type:
If the target is an AFV, check for penetration and any resulting damage the same as for antitank fire, using the penetration number on the HE line on the chart for the weapon.
If the target is a soft vehicle, it is destroyed.
If the target is a towed weapon, it is destroyed and its gun crew stand (if adjacent to the towed weapon) takes a hit. (Note: A direct HE hit is the only way a towed weapon is destroyed.)
If the target is a personnel stand, it is attacked twice instead of once due to the HE shot (per procedure, above). However, for each of these attacks, the total HE fire modifier the stand would receive is reduced by 3 (but never go above 0). For example, a personnel stand in a bunker (-4) would have its HE fire modifier of -4 reduced to -1 if it suffers a direct hit from HE fire.
Example: A British Sherman tank fires two rounds of HE from its 75L38 gun at a German infantry stand in an entrenchment. The firing player places the 1-inch square burst area for the shots so that another German infantry stand in an adjacent entrenchment is in the burst area. The range is 25 inches, which gives a hit number of 2 for a direct HE hit on the target. The die roll for a direct HE hit for the first shot is 7; no direct HE hit is scored. Thus, each stand in the burst area is attacked once, and each stand receives the full -3 HE fire modifier for the entrenchment. The die roll for a direct HE hit for the second shot is 2; the target takes a direct HE hit. The target thus is attacked twice due to this shot and has its HE fire modifier for the entrenchment reduced by 3 to 0. The other stand in the burst area is attacked once and receives the full modifier for the entrenchment.
Indirect Fire HE
HE weapons capable of indirect HE fire have their indirect fire characteristics listed on the weapons characteristics chart. The chart lists the ROFs and ranges for indirect fire HE weapons. Indirect fire HE shots follow the indirect fire procedure (see the indirect fire rules) and the HE fire procedure (above). Note that indirect fire HE has no chance of scoring a direct HE hit; only direct fire HE may.
Small Caliber HE Weapons
Various small caliber HE weapons (as shown on the weapons characteristics charts) have their fire treated as small arms fire, not as HE fire. If such a weapon also has an HE line in its listing, then the HE line is used for its shots against AFVs. For shots against all other stands except AFVs, its fire is treated as small arms fire.
SMALL ARMS FIRE
Small arms fire consists of fire from personnel stands, machineguns, and some small caliber HE weapons. The small arms abilities of personnel stands are listed on the small arms fire characteristics charts. A personnel stand of a type not listed on the charts has the small arms fire ability of an infantry stand, except for patrols, which are treated as submachinegun armed. The charts list the ROF and effective range of small arms fire for the stands. For small caliber HE weapons, the weapons characteristics chart lists the fact that the weapon is treated as small arms and the effective range of its fire for this purpose, in place of its HE burst area and fire value. For example, the German 37L45 antitank gun has small arms effect when firing HE and has an effective range of 25 inches for this.
The maximum range of small arms fire is twice its listed effective range; small arms fire beyond its effective range is at extreme range.
Most small arms fire is direct fire, although certain personnel stands are capable of indirect small arms fire, due to their intrinsic light mortars. Indirect small arms fire is covered below. Any stand may be the target of small arms fire.
Procedure
Small arms fire is directed at a group of stands in close proximity to one another: one target stand is selected and fired upon, and all small arms fire shots are distributed at random among all enemy stands that are within 4 inches of the target stand and at the same range (effective or extreme) as the target stand.
To resolve small arms fire, find the hit number of the fire by cross-indexing the troop quality of the firing stand with the range, as given on the troop quality summary on the game reference chart. For each target stand, modify the hit number as listed on the small arms fire chart on the game reference chart. For each shot, roll one die and compare the die roll to each target's modified hit number. If the die roll is equal to or less than the modified hit number, a small arms fire hit is achieved.
A small arms fire hit has different effects, depending upon the target type. It causes one hit on a personnel stand. It has no effect on a towed weapon, medium AFV, or heavy AFV. It affects a soft vehicle or light AFV the same as a personnel stand: these hits are assumed to be hits on the vehicle's crew. When sufficient hits are accumulated to cause a result on a personnel stand, the vehicle suffers that result (treat elimination as disabled).
Special Cases
A halftrack is always considered to be crewed and thus may fire its MGs (if any), even if it is not carrying any passengers.
Passengers on/in a vehicle may fire small arms fire, but only in the close fire phase and only as direct fire.
Small Arms Indirect Fire
Personnel stands specifically designated weapons stands (including command weapons stands) on the organization charts have light mortars included with their intrinsic weapons. Such a stand may conduct small arms direct fire attacks, as described above. In addition, it has the ability to make small arms indirect fire attacks. It may make a small arms indirect fire attack in any fire phase. If it does so, it has a ROF of 1 and may not make a direct fire attack that phase. For a command weapons stand, the spotter for the indirect fire may be any stand subordinate to the stand. For any other weapons stand, the spotter may be its command stand or any stand subordinate to its command stand. Small arms indirect fire is resolved the same as small arms direct fire (including range). Other than the requirement for having a spotter, small arms indirect fire is not bound by the requirements of other indirect fire (such as having to be plotted in the command phase).
INDIRECT FIRE
Indirect fire allows a stand with indirect fire HE weapons to fire at a target point that is not in the firing stand's unblocked line of sight. Indirect fire HE weapons have their indirect fire characteristics listed on the weapons characteristics charts. The charts list the maximum indirect fire range for indirect fire HE weapons; effective range is half or less of the maximum range while extreme range is greater than half maximum range.
Indirect fire HE weapons have minimum indirect fire ranges; the weapon may not fire indirect fire at a target point that is less than the weapon's minimum range. The minimum indirect fire range of an indirect fire weapon is one tenth (1/10) its maximum indirect fire range.
The indirect fire rule is used for the plotting, spotters, and accuracy of indirect fire HE shots; the effects of indirect fire HE shots (burst area, fire values, hit effects) is given in the high explosive fire rule.
Plotting
Indirect fire for stands with HE weapons must be plotted in the command phase of the turn in which the stands are to fire indirect fire. Any stand firing indirect fire in a turn must be stationary that turn. Thus, it cannot be given a movement order and also fire indirect fire in the same turn. Also, a towed weapon must be unlimbered in order to fire indirect fire. (Note that since unlimbering is a form of movement, a towed weapon that is limbered in the command phase of a turn will not be able to fire indirect fire that turn.)
To plot an indirect fire mission, the plotting player must record the following information: 1) which stand is firing; 2) what type of round (HE or smoke) it is firing or if it is firing a ranging shot; 3) the target point it is firing at; 4) whether it is firing converged or dispersed sheaf; and 5) the spotter for the mission. An indirect fire mission may include more than one indirect fire stand, as long as all the stands fire at the same target point and use the same spotter.
Spotters
In order for a stand to fire indirect fire, it must have its target point under observation by a qualified spotter. All battalion-level or higher command or staff stands and all forward observer stands are qualified spotters for all friendly indirect fire stands. All company-level command stands and all recon stands are qualified spotters for all indirect fire stands of their battalion, regiment, and/or brigade.
Any point on the playing surface that is in the unblocked line of sight of a spotter may be chosen as the target point for the fire mission observed by the spotter. The target point must be in the
unblocked line of sight of the spotter during the command phase for indirect fire to that point to be plotted. A spotter may observe for only one indirect fire mission per turn.
Sheaf
If an indirect fire mission consists of fire either from a stand with a rate of fire greater than one or from more than one stand, then the mission must be specified for converged or dispersed sheaf. Converged sheaf means that all shots fired in the indirect mission fall in the same burst area. Dispersed sheaf means that the shots fired in the mission are spread out to cover a wider area: 1) the burst area of one shot must be at the target point; 2) the burst areas of each of the other shots are placed adjacent to the target point, perpendicular to the direction of fire; 3) the blast areas are placed so that the target point is in the center of them.
(Dispersed Sheaf Diagram: a row of adjacent blast areas perpendicular to the direction of fire from the firing weapon, with the target point at the center.)
Firing and Accuracy
Once a fire mission is plotted for a turn, the stands plotted for indirect fire are eligible to fire in each fire phase of the turn (per the fire combat rule). For a stand to fire in a fire phase, the spotter must be able to see a visible enemy stand within the blast area containing the target point. Both the target point and the enemy stand must be in the unblocked line of sight of the firing stand's spotter.
When an indirect fire mission fires on a target point for the first time, the accuracy of the mission is checked. Accuracy is a function of troop quality and range. Cross-reference the troop quality of the firing stand (if several stands are firing in one mission, use the lowest troop quality present) with the appropriate range column on the troop quality summary to find the accuracy number. Roll the die. If the die roll is equal to or less than the accuracy number, the mission is on target; otherwise it deviates. If the mission is on target, its shots are resolved using the procedures in the high explosive fire rule. If the mission deviates, its shots automatically miss and have no effect (but ammunition is still expended, see the ammunition rule). If a mission deviates when it fires on its target point for the first time, it automatically deviates in all following fire phases of the same turn if called in again that turn.
A mission that deviates may have its fire adjusted. If the same mission (same firing stands, same spotter, same target point) is plotted again, the mission will automatically be on target.
Once a mission is on target (by either initial accuracy or adjustment), it remains on target as long as the firing stands remain stationary, do not fire direct fire at any target, and do not fire at any other target point (for indirect fire). Also, once a mission is on target, its target point may be shifted up to 4 inches in any direction and remain on target. A target point is shifted by plotting the new target point for the mission in a command phase; the spotter must have an unblocked line of sight to the new point. If the target point is shifted more than 4 inches, this constitutes a new indirect fire mission, and accuracy must be checked for its first fire as above.
The first time a mission fires, the firing player may have it fire a ranging shot instead of firing for effect. Accuracy is checked for a ranging shot as above. A ranging shot has no effect on stands in the target area, and the mission may not fire for effect in the same phase in which it fires a ranging shot. However, a ranging shot expends no ammunition.
Opportunity Fire
A stand may fire indirect fire in the opportunity phase only if it fired at the same target point in the previous turn. If it fires during the opportunity fire phase, it must also fire at the target point during the general fire phase. No corrections for accuracy are allowed for indirect fire in the opportunity phase.
AMMUNITION
Note: In general, limited ammunition tends not to have a major effect on play except in the case of indirect fire weapons. Beginning players should use the ammunition rules only for indirect fire weapons; add the full ammunition rules only after the players have gained experience.
Weapons 37mm or larger in size have limited supplies of ammunition in the game; other weapons do not. For weapons on vehicles, the number of rounds carried in the vehicle for its weapon is listed on the vehicle characteristics chart. For example, the U.S. M4 (75) medium tank carries 18 rounds for its 75L40 tank gun. For towed weapons, ammunition is carried by their gun crew stands. For personnel stands with intrinsic weapons requiring ammunition, the ammunition is carried by the stand itself. For ammunition carried by personnel stands (including gun crew stands), the amount of ammunition carried is based on the size of the stand: a standard-sized base stand carries a half ton of ammunition; a double-sized base stand (except for man-packed mortar stands) carries a full ton of ammunition; a man-packed mortar stand carries a half ton of ammunition.
The number of rounds per ton of ammunition varies depending upon the caliber of the weapon, as given on the chart below:
Ammunition Chart
Guns and Howitzers
| Type | Rounds/Ton |
|---|---|
| 37mm, 40mm, 2 pdr | 50 |
| 45mm | 30 |
| 47mm, 50mm | 26 |
| 57mm, 6 pdr | 20 |
| 65mm, 70mm | 14 |
| 75mm, 76mm, 3", 77mm | 10 |
| 7 pdr, 18 pdr | 10 |
| 85mm, 88mm, 90mm | 8 |
| 18/25 pdr, 3.7", 95mm | 8 |
| 100mm, 105mm, 107mm, 4.5" | 6 |
| 122mm, 128mm, 60 pdr, 5.5" | 4 |
| 149mm, 150mm, 6" | 3 |
Mortars
| Type | Rounds/Ton |
|---|---|
| 3", 8cm, 81mm, 82mm | 20 |
| 3.7" | 15 |
| 10cm, 107mm, 4.2" | 10 |
| 12cm, 120mm | 6 |
| 160mm | 2 |
MRLs
| Type | Rounds/Ton |
|---|---|
| 82mm MRL | 3 |
| 4.5" MRL | 1 |
| 132mm MRL | 1 |
| 15cm NW | 4 |
| 15cm PW | 2 |
| 21cm NW | 1 |
| 28/32cm NW | 1 |
| 30cm NW | 1 |
| 300mm M-30/31 | 1 |
Each time a weapon that requires ammunition is fired, one of its rounds of ammunition is used. (Note that multiple shots due to ROF in the same fire phase each use one round.) Once a weapon uses all of its ammunition, it may not fire. A stand may not be resupplied with ammunition during the course of a game. Each player must keep a roster for each of his stands which have ammunition; he keeps track of ammunition expenditure for each of his stands on this roster.
Non-standard types of rounds may be available for some weapons. All weapons capable of indirect fire have smoke rounds available. Some weapons have special antitank rounds available (HC: hollow charge, HVAP: high velocity armor piercing, APDS: armor piercing discarding sabot); weapons which may have special antitank rounds available have lines for those rounds on the national characteristics charts. For example, the German 50L42 gun may have HVAP available. When non-standard types of ammunition are available, each type of ammunition must be kept track of separately for stands with such.
Non-standard ammunition is available only in limited quantities. A stand may carry at most a total of 3 non-standard rounds. For example, a German Panzer III F tank carries 20 rounds for its 50L42 gun. It may carry no more than 3 HVAP rounds; the remaining 17 must be standard rounds. Non-standard antitank rounds are available only on or after specific times. Each weapon with such rounds has a year indicated on the line for that round on its listing; the round is not available in games covering periods before the year listed for that round. Note: The rule on limited quantities of non-standard ammunition is simplified for ease of play. Especially for special antitank ammunition, it reflects the limited quantities of such ammunition when that ammunition was available at all. Referees should feel free to reduce further or prohibit the availability of non-standard ammunition in their games as they see fit.
Smoke
Indirect fire weapons with smoke rounds may create smoke screens, by firing smoke rounds. The indirect fire procedure is followed for firing smoke, except that: 1) no target is required to be at the target point; 2) accuracy is not checked - the mission is automatically on target. Smoke fire missions are resolved in the command phase, after all orders are issued and indirect fire missions are plotted.
A smoke screen from one smoke round is equal in width to the width of one blast area (of the firing weapon) and is equal in length to three blast areas. Each additional shot in the mission increases the length of the screen by three blast areas. (If different sized weapons are used in a single mission, use the blast area of the smallest weapon for the size of the smoke screen.) A smoke screen lasts for the entire turn in which it is created, and is removed at the end of that turn. Smoke blocks lines of sight, as given in the visibility and spotting rules. In the opportunity and general fire phases, add 1 to the hit chance number for all direct fire against a stand emerging from a smoke screen in the movement phase. For example, if a direct fire shot on a stand normally has a hit number of 5, then the hit number is increased to 6 (in the opportunity and general fire phases) if the target emerged from a smoke screen in the movement phase.
MORALE
All vehicle and personnel stands have morale ratings. (Note that while towed weapons do not have morale ratings their gun crews do.) The referee determines the morale ratings of stands prior to play of the game. (The national organization charts give guidelines for morale ratings.)
All stands check morale by group. For morale purposes, a group consists of a group of stands operating under the same order (see the command control rule), otherwise it consists of a single stand.
Morale is checked in the morale phase. A group must check morale if it has been fired at in any phase of the turn. (Indirect fire which deviates is ignored for this purpose, but all other fire is included, even if it missed or had no effect. Note that small arms fire on medium and heavy AFVs, even though it has no effect on them, causes morale checks for them.) A group must check morale if any stand in the group has an unblocked line of sight to a friendly stand that is eliminated or destroyed due to fire in any phase of the turn.
To check morale, roll a die for each group and compare the roll to the modified current morale rating of each stand in the group. The current morale rating is the original morale rating minus any permanent morale reductions. The current morale rating is modified as listed on the morale modifiers chart on the game reference chart; however, for every 6 stands in a group, one -1 morale modifier is ignored. If the die roll is equal to or less than the modified current morale rating of the stand, it passes the morale check. Otherwise, it fails the check and is affected by morale. (Note that while morale is checked by group, the stands in a group may be affected by the check differently, if their modified current morale ratings differ from one another.) Morale results are:
- If the result is 1 or 2 higher than the modified current morale rating, the stand is pinned.
- If the result is 3 or 4 higher, the stand is forced back and suffers a permanent morale reduction of 1.
- If the result is 5 or 6 higher, the stand is demoralized and suffers a permanent morale reduction of 2.
- If the result is 7 or higher, the stand is eliminated (if personnel) or disabled (if vehicle).
To keep track of permanent morale reductions and demoralization, place morale reduction or demoralization markers (as appropriate) next to the affected stands.
A demoralized stand may never fire. It may not move unless it is not in cover and enemy stands are visible to it. If any are visible, it must move away from them until it reaches cover. If it is unable to move away (for any reason, such as being surrounded), it is eliminated per morale result 7 above. A demoralized stand which receives a second demoralized result is eliminated, per morale result 7. A stand which becomes demoralized remains demoralized until rallied.
CLOSE ASSAULT
Close assault occurs in the close assault phase. When a personnel stand is in contact with an opposing stand, a close assault occurs. There are two types of close assaults: personnel versus personnel and personnel versus vehicle. If a vehicle with passengers is in a close assault, its passengers automatically dismount (for free) for the close assault. Note: Towed weapons are ignored for close assaults, except that if a stand is in contact with an opposing towed weapon, then it is automatically in contact with the weapon's crew, if the crew is adjacent to the weapon.
Close assault is fought in rounds. The first round is fought by resolving all individual close assaults, with stands being forced back or destroyed. If after a round is fought personnel stands are still in contact with opposing stands, another round is fought. Rounds continue until no personnel stands are in contact with any opposing stands.
Each individual close assault involves one or more personnel stands against just one opposing stand. Occasionally, opposing players may have several stands mutually in contact with one another. In this case, the players alternate selecting one of their personnel stands that is in contact to close assault one of the opposing stands; the players alternate doing this until all personnel stands are allocated to close assaults. (Each player rolls the die to determine which player allocates first; higher roll wins. Reroll ties.)
Personnel vs Personnel
A close assault consisting of personnel versus personnel is resolved by each player rolling a die. Each player's die roll is modified based on the type of stands the player has in the close assault, as given on the personnel vs personnel section of the close assault chart on the game reference chart. For example, if three Soviet submachinegun stands are in a close assault against one German engineer stand, then the Soviet player receives a +10 modifier to his die roll (+2 for each submachinegun stand, +2 each for both extra stands), while the German player receives a +2 modifier to his die roll (+2 for the engineer stand).
The side with the higher die roll wins the individual close assault. Each stand of the losing side in the individual close assault takes one hit and is forced back. If the die rolls are equal, then this individual close assault has no effect.
Personnel vs Vehicle
A close assault consisting of personnel versus a soft vehicle is automatically won by the personnel, and the soft vehicle is destroyed.
A close assault consisting of personnel versus an AFV is resolved by the player with the personnel (only) rolling a die. If the die roll is 1 or 2, each personnel stand takes a hit and is forced back. If the die roll is not 1 or 2, it is then modified, as given on the personnel vs AFV section of the close assault chart. If the modified die roll is greater than 9, the AFV is destroyed. If neither side in the close assault is forced back or destroyed, then this close assault has no effect.
SPECIAL STANDS AND WEAPONS
Patrols
A patrol is a personnel stand and is represented by a single figure mounted on a base. A patrol is treated the same as a recon stand for the purposes of command control (and thus is a self-ordered stand).
At the start of the command phase, before orders are issued, a player may form and disband patrols. Every recon vehicle may dismount its crew as a patrol. Place the patrol adjacent to the vehicle. While its crew is dismounted, the vehicle is treated as being disabled. Only the patrol formed from a vehicle may recrew the vehicle. The patrol must be adjacent to the vehicle to recrew it. Every recon personnel stand may break down into two patrols. Remove the recon stand and put the two patrol stands in its place. Only the two patrol stands of the recon stand may be reformed into the recon stand; the two stands must be adjacent to be reformed. Remove the two patrol stands and put the recon stand in their place.
Patrols have all the characteristics of other personnel stands, with the following exceptions:
- A patrol counts as a half stand for transport purposes.
- A patrol may always move at the running rate.
- A patrol may fire only in the close fire phase.
- If fired on in any phase, at the end of the phase a patrol may immediately move 8 inches away from the enemy firing stand, if visible and in the patrol's unblocked line of sight. However, the patrol may not move closer to any other visible enemy stand when making this move.
Flamethrowers
A stand equipped with flamethrowers has enough fuel to make two flame attacks per game. Flamethrowers may not be resupplied with fuel in the course of a game. Once a stand has exhausted its flamethrower fuel, it may no longer make flame attacks. (However, it may still function as a normal stand of its type: engineers if a flamethrower engineer stand, infantry if a flamethrower infantry stand, and so on.)
In a fire phase, a stand with flamethrowers may make a flame attack in place of any other fire for the phase. Any one target within 2 inches of the stand may be attacked. Any target attacked by a flame attack at a range of 1 inch or less is eliminated: a personnel stand is eliminated, while a vehicle or towed weapon is destroyed. Any target attacked at a range greater than 1 inch up to 2 inches (inclusive) is destroyed on a die roll of 5 or less.
Infantry Antitank Weapons
Many personnel stands may have infantry-carried antitank weapons, such as antitank rifles, bazookas, panzerfausts, piats, etc. The organization charts list which personnel stands have integral infantry antitank weapons.
A stand with infantry antitank weapons has a ROF of 1 for these weapons. Antitank rocket launchers and antitank grenade launchers (but not antitank rifles) have a limited supply of ammunition; they have only 2 rounds available. These weapons may be fired only in the close fire phase. The above restrictions (ROF of 1, limited ammunition, close fire phase only) do not apply to stands equipped exclusively with such weapons (such as a Soviet antitank riflemen stand or an American bazooka stand); they apply only to other types of personnel stands which also have these weapons (such as a U.S. infantry stand that has bazookas).
Infantry antitank weapons are fired using the procedure used for all other antitank fire, using the information for these weapons from the weapons characteristics chart.
Submachinegunners
A submachinegun stand may fire in the opportunity and general fire phases even if given a cautious advance or full advance order.
Heavy Infantry Weapons
Personnel stands with heavy infantry weapons have the following limitations: 1) they may never run; 2) they may fire only when stationary.
Forward Observers
A forward observer personnel stand is treated the same as a patrol for transport, fire combat, and close assault purposes. A forward observer vehicle may dismount its crew, which is then represented as a forward observer patrol.
A forward observer stand is treated as a recon stand for the purposes of command control and spotting.
Command Stands
A "pure" command stand is treated the same as a patrol for transport, fire combat, and close assault purposes. A pure command stand is any stand listed on the organizations as a "command stand." Other types of command stands (such as a "command weapons stand") are treated as regular stands, not as patrols.
ADVANCED RULES
The advanced rules for Command Decision add more detail to the game, but at a cost of greater complexity and slightly longer playing time. Players should use these rules after they are familiar with the basic rules, but only if they wish to add the detail these rules present. Any of these rules may be added if the referee determines that it is necessary for the purposes of a particular game. The optional rules in this section should only be used if the players decide to use them.
SPECIAL STANDS AND WEAPONS (ADVANCED)
Certain specialized pieces of equipment require special treatment in the rules, but this treatment adds to the game's complexity and should only be implemented after a little experience with the game system has been acquired.
Towing/Pushing Vehicles
A disabled vehicle may be pushed out of the way by any recovery vehicle and by any vehicle of equal or greater weight class. Weight classes are, from lightest to heaviest, as follows: soft vehicle, light AFV, medium AFV, heavy AFV. To push a vehicle out of the way, the pushing vehicle must start adjacent to the vehicle and receive a full advance order. It takes the pushing vehicle's entire movement allowance for the turn to push the vehicle out of the way.
A disabled vehicle may be towed by a recovery vehicle or another vehicle of equal or greater weight class. To prepare a vehicle for towing, the towing vehicle must spend one movement phase stationary and adjacent to the vehicle to be towed. When a vehicle tows another vehicle, its available movement allowance is quartered.
A vehicle which is destroyed during the course of a game may not be pushed out of the way, as it is assumed that the wreck is on fire and too dangerous to do so. If a game is played with wrecks (destroyed vehicles) present from the start of the game, these wrecks may be pushed out of the way. A destroyed vehicle may not be towed, as it is assumed that the vehicle is destroyed sufficiently to prevent towing.
Recovery Vehicles
The vehicle characteristics charts do not list recovery vehicles. For early war periods, use tractors (heavy tractors when present) as recovery vehicles. During the war, the combatants developed a wide variety of recovery vehicles based on unarmed versions of their tanks. Thus, in mid to late war periods, use unarmed tanks as recovery vehicles. Note: Recovery vehicles were not combat vehicles and were usually not present on the battlefield.
Command Vehicles
If a command vehicle is disabled, its assumed command personnel may switch to an adjacent vehicle at the start of a command phase.
If a command vehicle is destroyed, its assumed command personnel are considered eliminated.
Amphibious Vehicles
Some vehicles have amphibious capabilities; such vehicles are indicated on the vehicle characteristics charts by an A after their cross-country movement allowance. An amphibious vehicle may move across water at its cross-country movement rate, paying quadruple costs to do so. However, an amphibious vehicle may not move both on land and across water in the same turn; it may only do one or the other in a turn. An amphibious transport vehicle may not tow a towed weapon or trailer when moving across water.
Trailers
A transport vehicle capable of towing may tow trailers. A light trailer is towed the same as a light towed weapon; a medium trailer is towed the same as a medium towed weapon. Trailers may only be used to carry cargo (see the supply rules); they may not carry personnel stands. A trailer's transport capacity may be combined with that of the towing vehicle. For example, a jeep (transport capacity of 1/2) and light trailer (transport capacity of 1/2) combination has a capacity of 1. An assault boat trailer carries two assault boats and is a medium trailer for towing purposes.
Rocket Launchers
Multiple rocket launchers (MRLs, such as German nebelwerfers and Soviet katyushas) may not fire ranging shots. Also, since they have large blast areas, if an MRL mission deviates, the direction and distance of the deviation must be determined. Roll one die and consult the deviation diagram (reroll rolls of 9 and 10) to determine direction the mission deviates from the target point. Roll the die again; double the number rolled for green troops and half it for elite troops. The number rolled is the number of inches the mission deviates from the plotted target point. Use the deviation direction and distance to find the actual target point of the mission.
Once an MRL fires, it may not fire again until it is reloaded. It takes the MRL crew one complete turn to reload its MRL; the crew must spend the turn stationary.
An MRL is automatically spotted in the fire phase in which it fires if an enemy stand has an unblocked line of sight to it.
Antiaircraft Machineguns
An antiaircraft machinegun (AAMG) on a vehicle always has an all-around field of fire, regardless of its mounting. A vehicle which fires its AAMG in a fire phase may only fire its machineguns in that phase; it may not fire any of its other weapons.
Recoilless Guns
A recoilless gun is automatically spotted in the fire phase in which it fires if an enemy stand has an unblocked line of sight to it.
Personnel stands and soft vehicles within 1 inch of the back (not front) 90 degree facing of a recoilless gun may take damage when the gun fires. For each of these stands, roll the die; the stand is affected on a roll of 6 or greater. If affected by the back-blast, a personnel stand takes one hit and a soft vehicle is damaged.
British Antiaircraft Guns (Optional)
Treat AP ammunition for all British antiaircraft guns as a special type of ammunition, which is kept track of separately from its HE ammunition. For example, a British 3.7-inch AA gun may have at most 3 AP rounds.
Rear-Firing Mounts (Optional)
Some vehicles have weapons on rear-firing mounts. A rear-firing mounted weapon may only fire through the vehicle's 90 degree rear facing.
British 2-pounder and 6-pounder antitank guns on portee mounts are rear-firing.
The Soviet T-35 tank is a multi-turreted tank. In the game, weapons on its subsidiary turrets are counted as hull-mounted weapons on the vehicle characteristics chart. However, of these weapons, only one 45mm gun and one machinegun are front-firing (may fire through the tank's 90 degree front facing); the other 45mm gun and machinegun are rear-firing.
TERRAIN (ADVANCED)
Rivers and canals may not normally be crossed by any stands except for amphibious vehicles. Shallow rivers may have fords; these fords are the same as fords on creeks. Rivers and canals may be crossed by boats. A boat (including an assault boat) may carry one personnel stand or one light towed weapon. An assault boat may make one round trip across a river or canal in a turn. (Note: In games involving rivers, the referee should determine in advance the chance of a side finding boats locally, if any are available.)
Bridges span water barriers and allow stands to cross these barriers. A bridge is treated the same as a road for movement purposes. There are four types of bridges: light, medium, heavy, and reinforced. Only personnel stands may use light bridges. Only personnel stands, towed weapons, soft vehicles, and light AFVs may use medium bridges. All stands except heavy AFVs may use heavy bridges. All stands may use reinforced bridges.
Heath is brush-covered, uneven terrain. Any stand that is stationary in heath is treated as being in cover. However, heath does not block line of sight. AFVs stationary in heath are treated as being hull-down. Wheeled vehicles except halftracks pay quadruple cost when moving in heath; all other stands pay double cost when moving in heath.
Cliffs and escarpments for game purposes are areas sloped so steeply that movement is impossible there. An area of the playing surface with 3 or more contour lines per inch is a cliff or escarpment. No stand may move in or through such an area.
Steep slopes are areas containing 2 contour lines per inch. Only personnel stands may move upslope or downslope in a steep slope area. (Note that vehicles may move through steep slope areas as long as they do not move upslope or downslope when doing so.)
River banks may affect movement. The embankment may vary from gentle (no effect) to steep (same as steep slopes) to cliffs (impassable).
Hedgerows (bocage) are treated as cover. Vehicles may not move through a hedgerow. Personnel stands may do so, paying a 2 inch penalty. Medium and heavy AFVs equipped with hedgerow cutters may move through hedgerows, paying half their movement allowance. A gap is created in a hedgerow where an AFV equipped with hedgerow cutters moves through it. A gap is treated as open terrain by personnel stands, tracked vehicles, and halftracks but remains impassable to wheeled vehicles.
Sand slows the movement of stands. Personnel stands, tracked vehicles, and halftracks pay double cost in sand; wheeled vehicles pay quadruple cost in sand.
Marshy ground is treated the same as medium mud; see the weather and seasons rule.
Stone walls may freely be crossed only by personnel stands. Soft vehicles and light AFVs may not cross a wall. Medium and heavy AFVs may cross a wall, at a cost of half their movement allowance. A gap is created in a wall where an AFV crosses it; the gap is treated the same as a gap in hedgerow. A personnel stand adjacent to a wall is under cover for any direct fire that crosses the wall. An AFV adjacent to a wall is hull-down against any direct fire that crosses the wall. A stone wall does not block line of sight.
Hedgelines may freely be crossed by all stands. A stand adjacent to a hedgeline treats the hedgeline as cover for any direct fire on the stand that crosses the hedgeline. A hedgeline does not block line of sight.
Railroad embankments do not affect movement. A personnel stand adjacent to an embankment is under cover for any direct fire that crosses the embankment. An AFV adjacent to an embankment is hull-down for any direct fire that crosses the embankment. (Not all railroads have embankments.)
High embankments of roads and railroads block line of sight. Personnel stands pay a 2 inch penalty to get on or off a high embankment. Vehicles may not get on or off a high embankment except at entrances (such as where a road crosses the high embankment); when on the embankment, vehicles may move only along the embankment. A stand on a high embankment is at the same elevation as the surrounding ground. It is skylined (during daytime) for all direct fire except from stands at the same or lower elevations. The hit number (chance of hitting) of a skylined stand by direct fire is increased by 1.
Fortifications
Bunkers, pillboxes, and entrenchments provide protection from fire combat, as given on the various charts on the game reference chart. Each bunker, pillbox, or entrenchment may contain 1 personnel stand. An entrenchment may contain 1 light towed weapon and its crew. For a stand to use one of these fortifications, it must occupy the fortification and be stationary. Cavalry, bicycle, and motorcycle troops must be dismounted in order to use a fortification.
Weapons pits provide protection from fire. A weapons pit may contain 1 towed weapon and its gun crew. A weapons pit provides protection only to its front and sides. It is open in the back, and all fire through the back of a weapons pit is not affected by the weapons pit.
Antitank ditches may not be crossed by vehicles. Personnel stands may cross antitank ditches, paying a 2 inch penalty to do so. Personnel stands in an antitank ditch are treated as entrenched for the purposes of small arms fire. A crossing point may be built across an antitank ditch (see the engineering rules); stands treat the crossing point as open terrain.
Barbed wire may not be crossed by wheeled vehicles except halftracks. Personnel stands adjacent to wire may cross it if they receive a cautious advance order and spend their entire available movement allowance to cross. Tracked vehicles and halftracks may cross barbed wire (at no penalty) and create a gap where they cross. A gap through barbed wire is treated as open terrain for all stands.
Destruction
Various man-made objects may be destroyed during the course of a game. Each of these objects has a damage capacity; when the damage points it takes equals or exceeds its capacity it is destroyed.
An object may take damage when it is in the blast area of HE weapons. It takes damage points equal to the fire value of the HE round minus 4 (treating results below 0 as 0). For example, an object in the blast area of a U.S. 105mm howitzer would take (5 - 4 =) 1 damage point. If a stand in or on the object takes a direct hit from the HE fire, the object automatically takes 1 damage point.
A wooden building has a damage capacity of 6. When destroyed, it is on fire for the rest of the game. No stand may occupy a burning building. If a stand is occupying a wooden building when it is destroyed, it must move from the building in the next movement phase or be eliminated/destroyed. Smoke from a burning building blocks line of sight through the building's position.
A stone/cement building has a damage capacity of 15. When destroyed, it becomes rubble.
A bridge has a damage capacity based on its size: light 3, medium 6, heavy 9, and reinforced 12. A destroyed bridge no longer functions as a bridge. Also, for every 3 damage points a bridge takes before being destroyed, it is treated as being 1 bridge class lighter. For example, a heavy bridge which has taken 3, 4, or 5 damage points is treated as a medium bridge.
A bunker has a damage capacity of 6. When destroyed, it is treated as an entrenchment.
A pillbox has a damage capacity of 12. When destroyed, it no longer has any effect in the game.
NIGHT
All spotting attempts at night receive a -6 spotting modifier, in addition to any other modifiers. Also, maximum visibility range is reduced at night to the following:
- 2 inches usually;
- 4 inches on cloudless nights with a full or near-full moon.
In a fire phase, a stand is automatically spotted at maximum daytime visibility by any stand that traces an unblocked line of sight to it if the stand fired in that phase.
Illumination negates the effects of night on spotting. An illuminated stand may be spotted at maximum daytime visibility, and the night spotting modifier is not used for the spotting attempt on it. A stand is illuminated if it is within 1 inch of a small fire (such as campfires) or 3 inches of a large fire (such as a burning building).
The referee may allow some indirect fire weapons to have some illum rounds available in night games. Use the blast area of the weapon as the area illuminated by an illum shot; it has no effect other than illumination. Determine deviation as for MRLs if an illum fire mission deviates.
Sound (Optional)
Sound-spotting may occur at night. A stand that does not fire has a chance to sound-spot enemy stands that are moving (not stationary). The standard (daytime) spotting procedure is followed, except: 1) the spotting attempt always uses category II; 2) the maximum "visibility" range for spotting personnel stands is 20 inches. If the sound-spotting attempt succeeds, the spotted stand does not become visible. Instead, the referee tells the spotting player the type of sound heard (personnel moving, vehicle engines, tank tracks, etc.) and the direction from which the sound is coming.
A stand may not sound-spot in noisy or sound-deadening conditions: during rain or snow storms, if a stand which is firing or being fired on is either within 10 inches of the spotting stand or is closer to the spotting stand than the stand being spotted is, etc. Note: Due to the wide range of possible circumstances, the rules cannot define all situations where sound-spotting may or may not be possible. The referee should use his best judgment in these cases.
WEATHER AND SEASONS
The effects of adverse weather conditions may be added to the game. The effects of weather on maximum visibility range are for daytime; adverse weather at night reduces maximum visibility range to 2 inches. When visibility is decreased to 5 inches or less due to weather conditions, vehicles using their road movement rates pay double costs.
Fog or mist reduces maximum visibility range as determined by the referee prior to the start of the game. (For example, heavy fog might reduce visibility range to 2 inches, while a light mist might reduce visibility range to 40 inches.)
Smoke and dust may occur in the course of large battles, in dry regions (such as the steppes of Russia in the summer or in the desert). Firing and movement may produce smoke and dust that has the effect of mist over the battlefield and sometimes even the effect of fog in some places. The referee should use his discretion to impose smoke and dust conditions (and their severity) in the course of a game if he thinks conditions warrant. Note: The smoke referred to in this rule is not the same as smoke from indirect fire or from burning vehicles; it does not block line of sight.
Rain reduces maximum visibility range and may affect ground conditions. Visibility range is reduced to: 15 inches in light rain, 5 inches in steady rain, and 2 inches in heavy rain. If it rains long enough, ground conditions will be affected by mud. Count the number of turns of rain, counting a turn of light rain as 1/2 turn and a turn of heavy rain as 2 turns. Mud conditions prevail after the following number of turns: light mud after 12 turns, medium mud after 24 turns, and heavy mud after 48 turns. (Note that the referee may specify that it has been raining for a number of turns prior to the start of the game.) Mud is covered below.
Snow reduces maximum visibility and may affect ground conditions. Visibility range is reduced the same as rain for light, steady, and heavy snow. If it snows long enough, ground conditions will be affected by snow cover. Count the number of turns of snow, the same as for rain. Standard snow cover conditions prevail after 12 turns, and deep snow cover conditions prevail after 24 turns. Snow cover is covered below.
Ground Conditions
Weather and/or seasons may affect ground conditions.
Mud affects movement in all terrain except on hard-surfaced roads.
In terrain with light mud, all stands pay double costs.
In terrain with medium mud, personnel stands pay double costs and vehicles pay quadruple costs; vehicles may become mired when moving cross-country.
In terrain with heavy mud, personnel stands pay double costs and vehicles pay quadruple costs. Vehicles may become mired when moving cross-country; wheeled vehicles except halftracks may become mired when moving on dirt roads.
At the end of each movement phase in which a vehicle which moves has a chance to mire, check to see if the vehicle becomes mired. Roll the die and consult the miring chart; the vehicle becomes mired if the roll is equal to or less than the miring chance number. When a vehicle becomes mired, it may not move by itself until it becomes unmired. A vehicle may attempt to unmire itself. To do so, it must be given a cautious advance order and must spend its entire available movement allowance in the attempt. Roll the die for the attempt; on a roll of 1 the vehicle unmires itself and may move in following turns. A mired vehicle may be towed by another vehicle (see towing/pushing vehicles rule). After being towed for at least 1 inch, the mired vehicle becomes unmired. Halftracks are treated as tracked vehicles for miring purposes. Recovery vehicles never mire.
Snow Cover affects movement in all terrain except on plowed roads. Vehicles may not use their road movement allowances except on plowed roads. In standard snow cover, all stands pay double costs. In deep snow cover, personnel stands pay double costs and vehicles pay quadruple costs.
Ice affects the movement of vehicles. Vehicles pay double costs when moving on icy terrain, such as an icy road. Also, vehicles pay a penalty equal to half their movement allowance when crossing contour lines and may not traverse steep slopes.
Frozen lakes, rivers, canals, and creeks are treated as clear (icy) terrain by some or all stands, depending upon the extent of freezing (as determined by the referee at the start of the game). The extent of freezing determines which stands treat the stream as clear terrain:
- none.
- personnel and light towed weapons.
- personnel, soft vehicles, and all towed weapons.
- personnel, soft vehicles, towed weapons, and light AFVs.
- personnel, soft vehicles, towed weapons, light AFVs, and medium AFVs.
- personnel, soft vehicles, towed weapons, light AFVs, medium AFVs, and heavy AFVs.
If a stand attempts to move on ice that hasn't frozen enough to support it, the stand breaks through the ice at that point and is affected as follows: a personnel stand takes a hit and moves back to solid ground; a vehicle is disabled; a towed weapon is rendered useless, being unable to be moved or fired.
In areas with snow cover, frozen lakes may be covered with snow and thus will not be visible, looking much like a snow-covered clearing. In a game where one side (or both) is not familiar with the local terrain, these lakes should not be shown on the playing surface. Instead, the referee keeps track of them on a map. The referee checks to see if stands break through the ice when they move onto a snow-covered lake and immediately informs the player if this happens. A stationary personnel stand will discover if it is on a snow-covered lake at the point it occupies; the referee informs the player of this at the end of the movement phase.
Flooded rivers and creeks may impede movement. Treat the 2-inch strip of ground along a creek or a gentle-sloped bank of a river as heavy mud. Also, flood water from extensive flooding may block access to some bridges, as determined by the referee.
Seasons
The referee may impose weather and ground conditions depending upon season. As a general guide to seasons, use the following:
Northern Europe has a muddy spring, often rainy. The summer is usually dry but occasionally has rain storms; the steppes region in the east is often dry and occasionally dusty. The autumn is muddy and rainy. The winter is cold, with rain, snow, and freezing conditions; the farther north or east, the colder it is.
Southern Europe and Northwest Africa have a dry summer season and a rainy winter season.
The North African desert region is usually dry year-round and often dusty. It does have infrequent rain storms, some of which may be intense.
ENGINEERING
The following engineering rules are intended mainly for pre-game purposes (such as the referee allowing a side a certain number of hours of engineering before the game starts) or for campaign game purposes. Most of the following engineering tasks would usually not be done during actual battle conditions. The tasks that might be performed in battle conditions are specified as such below; tasks not specified in this way may not be performed in battle.
Bridging
Engineers may emplace bridges they have available, may build bridges from local materials, or may repair existing bridges. The bridging chart specifies the number of stands needed for these tasks and the time required to do them. When more than one stand is required for a task, all stands must be engineers in order to do the task in the stated time. However, as long as at least one engineer stand is doing the task, the other stands may be any personnel stands (except patrols, command stands, or staff stands). In this case, the time required for the task is doubled.
When repairing a bridge, the player is not required to repair it to its original strength. For example, a heavy bridge may be repaired as a medium bridge. A bridge may not be repaired so that it is stronger than what it was originally.
Various engineer formations have transportable bridges, as listed on the national organization charts. A heavy bridge equals 4 stands for transport purposes. (Note that it can be transported by a heavy truck with a medium trailer.) A medium bridge equals 3 stands for transport purposes.
Mines
Engineers may lay minefields, including dummy minefields. Minefields are laid in 1 inch by 1 inch squares. One ton of mines (see the supply rules) provides enough mines for 8 1x1 minefields. Place 1 inch by 1 inch pieces of paper where minefields are laid; mark on the hidden side of the paper whether the minefield is real or dummy. When a minefield square is entered by any stand for the first time, it is revealed to be real (and has effect) or dummy (and is removed from the playing surface).
In battle conditions, an engineer stand may lay either 2 real and 2 dummy minefield squares or 4 dummy minefield squares in a turn. The stand must receive a cautious advance order in order to lay mines. In non-battle conditions, an engineer stand may lay either 8 real and 8 dummy minefield squares or 16 dummy minefield squares in an hour.
At the instant a stand enters a real minefield square, it is attacked. Regardless of the result of the attack, the stand may elect to cease movement for the turn at that point. If a stand continues to move through a minefield square once entering it (even if the movement occurs in a different turn), it is attacked again. This procedure is followed for each minefield square a stand enters.
To resolve a minefield attack on a stand, roll one die. For personnel stands other than cavalry, a roll of 1-3 means the stand takes a hit. For cavalry and vehicles, a roll of 1-5 means the stand takes a hit. Towed weapons are not affected by mines. A minefield hit on a personnel stand is the same as a hit in fire combat; a minefield hit on a soft vehicle destroys the vehicle; a minefield hit on an AFV damages the AFV. (A towed weapon is unaffected by mines.) A stand must take a morale check in the morale phase of the turn in which it takes a minefield hit.
In battle or non-battle conditions, an engineer stand may lift a minefield square in 2 turns. A lifted minefield square is removed from the playing surface.
Fortifying
Personnel stands may emplace and dig-in. A personnel stand requires 2 hours to emplace. An emplaced personnel stand is treated as being in cover for spotting purposes as long as it is stationary in its emplacement and does not leave it at any time. Personnel stands may dig-in. For each group of 4 stands, 8 hours is required to dig-in. This yields 1 entrenchment for one of the stands, with the other stands being emplaced. Every additional 8 hours the group of stands continues to dig-in yields another entrenchment for the group. If a gun crew is in the group, it may dig a weapons pit in place of an entrenchment.
An engineer stand emplaces and digs-in the same as other personnel; it may dig a weapons pit the same as a gun crew. A bulldozer may build an entrenchment or a weapons pit in 1 hour.
An engineer stand may build 1 bunker in 8 hours. It may convert 2 already-built entrenchments to bunkers in 8 hours.
An engineer stand may build 1 inch of antitank ditch in 8 hours; a bulldozer may build 1 inch of antitank ditch in 1 hour. In battle or non-battle conditions, an engineer stand may build a crossing at a point across an antitank ditch in 1 hour; a bulldozer may build one in 1 turn.
Each ton of wire (see the supply rules) provides 12 inches of barbed wire. An engineer stand may lay 12 inches of wire in 1 hour. An engineer stand may create a gap in barbed wire in 1 turn, in battle or non-battle conditions.
Demolitions
Each ton of demolitions yields 3 damage points when detonated. Demolitions may be emplaced on/in structures (such as bridges or buildings); an engineer emplaces 1 ton of demolitions in an hour. When a structure is prepared for demolition, the preparing player must specify where the demolitions point is. It may be on any side of the structure and must be 2 inches from the structure.
A player may attempt to demolish a prepared structure (in both battle and non-battle conditions) in any fire phase if he has a stationary engineer stand at the demolitions point. The chance for successful demolition is based on the troop quality of the engineers which emplaced the demolitions: green: 4, experienced: 6, veteran: 8, elite 10. The die is rolled, and if the roll is equal to or less than the engineer troop quality number, the demolitions go off, yielding their damage points. If the demolitions fail to go off, the player must reset the charges: an engineer stand at the demolitions point must spend 1 turn stationary and not firing. Future demolition attempts use the troop quality of the resetting engineer stand.
If an opposing engineer stand at the demolitions point or anywhere directly between the demolitions point and the structure spends 1 turn there stationary, the wires are cut and the demolitions may not be set off. The wires may be restored if a friendly engineer stand resets them at the point where they were cut.
When demolitions are set off, all stands on/in the structure take an HE attack with a fire value equal to half the damage points of the demolitions (round fractions down). The stand receives no cover modifiers for the structure. Also, if the structure is destroyed by the demolitions, any stand on/in it is eliminated/destroyed.
Adverse Conditions
All engineering tasks take twice the stated time to perform when done in adverse weather or ground conditions.
SUPPLY
Ammunition and engineering ordnance (mines, barbed wire, demolitions) are carried by supply vehicles, which may resupply stands. Resupply is mostly for campaign game purposes, as no resupply is usually allowed in the course of a single game. The exceptions to this are military units listed on the national organization charts shown as having supply vehicles present. In this case, the supply vehicle may be used to resupply stands of that unit in the course of a game. It may resupply adjacent stands, as long as the supply vehicle and stand being resupplied are stationary and adjacent for a turn.
A supply vehicle carries 1 ton of supplies per stand capacity. For example, a supply vehicle with a capacity of 2 stands may carry 2 tons of ammunition. Ammunition is carried in 1-ton increments, by caliber and type (such as 1 ton of 82mm mortar rounds); engineering ordnance is carried in 1-ton increments by type (such as 1 ton of mines). A supply vehicle may mix the load it carries, as long as it carries its supplies in 1-ton increments. For example, a supply vehicle with a capacity of 2 tons could carry two different 1-ton loads or one 2-ton load.
Fuel (Optional)
Fuel considerations for motor vehicles may be added to the game. Rather than having to keep tedious track of fuel tankage and use, the following works simply and well: In a single game, the referee may specify that some (or all) vehicles of one side start the game out of fuel. An out of fuel vehicle may not move. In a campaign game setting, a vehicle has enough fuel for an engagement (single game) before needing to be refuelled. The referee determines if fuel is available for refuelling between engagements.
AIRCRAFT
Each aircraft model represents four aircraft. Aircraft may fly bombing, strafing, or transport missions, either by flight (1 model) or squadron (3 models). Typical aircraft are listed on the aircraft characteristics charts. At the start of the game, the referee determines which side if any has aircraft available (only one side should have aircraft available), which aircraft are available, if any special restrictions are in effect (such as aircraft available only on turns 6 through 9, or all aircraft must enter from a specific side of the playing surface), and whether the pilots are experienced or inexperienced. Aircraft are available only in good weather and only during daytime.
Each aircraft is available for only one turn. Fighters, dive bombers, and attack bombers may make up to three passes (fly three missions) in a turn. All other aircraft may make only one pass in a turn. An aircraft which makes a pass in a turn does not return in later turns, even if it did not make all the passes it was capable of in the turn it was present.
In a turn, the first pass of an aircraft occurs in the opportunity fire phase, the second in the general fire phase, and the third in the close fire phase.
An aircraft is always spotted and is visible to all stands which have unblocked lines of sight to it. An aircraft is always considered to be above the minimum elevation difference for all obstacles.
Missions
Aircraft fly missions. An aircraft mission is similar to an indirect fire mission: it is plotted in the command phase of the turn it is to occur. For each mission, the plotting player must record: 1) which aircraft are flying the mission, 2) the mission type, 3) the target point, and 4) the flight path and direction. A bombing mission for an aircraft which can drop fewer than all its bombs in one pass must have the number of bombs being dropped plotted. For aircraft making more than one pass in a turn, the mission of each pass is recorded separately. For example, a fighter equipped with rockets could have the following missions in a turn: 1st pass: strafing attack at target point X; 2nd pass: rocket attack at target point Y; third pass: strafing attack at target point Z.
There are four types of aircraft missions in the game: bombing, strafing, tank busting, and paradrop. Each mission has a target point, which is where the bombing, strafing, or paradrop begins. Any target point may be chosen; unlike indirect fire, a spotter is not required. The flight path is the straight-line path the aircraft fly over the playing surface; the aircraft follow the flight path per their flight direction when flying the mission. A compass direction may be used for the flight path (such as east to west); a point on the edge of the playing surface may be chosen, with the flight path being the straight line from that point through the target point.
Aircraft with bombing ratings may fly bombing missions. The bomb rating is the number of bombs the aircraft carries; each bomb has a 4-inch burst area and a fire value of 7. An aircraft with a bombing rating of 1/2 has a bomb with a 2-inch burst area and a fire value of 7. Certain aircraft may carry rockets (as indicated on the aircraft characteristics charts); a rocket has a 3-inch burst area and fire value of 5. An aircraft with both bombs and rockets may not mix bombs and rockets in a single bombing pass; separate passes must be made for bombs and rockets. There are several types of bombers: heavy bombers, medium bombers, attack bombers, and dive bombers. Fighters flying bombing missions are treated as attack bombers.
When resolving a bombing mission, the accuracy of the mission must be checked. The bombing column of the aircraft chart on the game reference chart gives the bombing accuracy number and its modifiers. If the bombing player rolls equal to or greater than the modified accuracy number, the mission is on target. If not, it misses and its deviation is determined. Roll the die and consult the deviation diagram (the same as for MRLs) for deviation direction, rerolling rolls of 9 or 10. Roll the die again for deviation distance, and multiply the roll by the multiplier given on the bombing deviation column. The result is the distance of the deviation. Find the actual target point by using the deviation direction and distance; resolve the effects of bombing at this point.
Medium and heavy bombers drop their bombs in a line parallel to their flight paths; place the burst area of the first bomb at the target point, place the next burst area adjacent to it parallel to the flight path, and so on. Attack and dive bombers drop one or more bombs per pass; all bombs dropped in a pass land at the target point, using the same burst area.
Note: Aircraft rockets were (mostly) a wartime innovation. For a simple rule on their availability, use the following: Soviet aircraft may have rockets in any war years, but rocket-armed aircraft are rare in the early war years. Aircraft of other nations have rockets only from 1944 on.
Fighters and attack bombers may fly strafing missions. An aircraft may make up to two strafing passes per game. Strafing is resolved as small arms fire; the strafing rating is the rate of fire of the aircraft's strafing weapons. The chance to hit for strafing is given on the aircraft chart; all small arms modifiers apply. For 6 inches starting at the target point of a strafing run, all stands (enemy or friendly, visible or not) within 1/2 inch of the flight path are targets of the strafing attack.
Aircraft with antitank guns may fly tank busting missions. An aircraft may make up to three tank busting passes. The mission is flown similar to a strafing mission. Instead of making small arms attacks, vehicles (visible or otherwise) in the strafing area may be attacked by antitank fire. Any vehicles in the area may be chosen as targets (per ROF restrictions). However, at least one vehicle in the area must be attacked if any are present, including friendly vehicles. The attack is resolved the same as antitank fire, with the following: 1) the aircraft's antitank gun has hit and penetration ratings of 7:0; 2) the ROF of the weapon is given on the aircraft characteristics chart; 3) the target does not get any benefit for being hull-down; 4) inexperienced pilots have their chance to hit reduced by 1. If a hit is achieved, roll the die to determine if the deck (top) armor is hit; it is hit on a roll of 8 or less. Deck armor automatically has an armor value of 1. If the deck armor is not hit, the front or flank armor is hit instead, depending upon the direction of the attack, and the appropriate value is used. If the front armor is hit and the target is hull-down, its hull-down armor value is used.
Transport aircraft may fly paradrop missions. A transport aircraft has a capacity of three stands. The target point of the mission is the start of the drop zone for the paradrop. See the parachute landing rules for details.
Observation Aircraft
The referee may determine that a side has an observation aircraft available. An observation aircraft is a light aircraft; if available, it is available throughout the game. During the movement phase, an observation aircraft may fly to anywhere on the playing surface and does not need an order to do so. An observation aircraft may make spotting attempts per the spotting rules. (Treat an experienced pilot as a green troop-quality stand for spotting purposes.) The referee may allow some observation aircraft to act as spotters for indirect fire.
Antiaircraft Fire
Antiaircraft guns (including AA machineguns) may fire at aircraft when they make passes. They may fire at an aircraft at any point along its flight path. The range of the attack is the distance from the gun to the aircraft at that time. Only heavy AA guns may fire on heavy bombers; only light AA guns and AA MGs may fire on strafing aircraft. The chance to hit for an AA shot from an AA gun is the same as for antitank fire, using the weapon's HE line on its chart, with one exception: the hit number may never be greater than 2. An AA MG has a chance to hit based on the range: a hit number of 2 at effective range and a hit number of 1 at extreme range. If the aircraft is hit, roll a die and apply all applicable modifiers from the AA die roll modifiers list. Use the modified die roll on the AA damage table to determine the result to the aircraft. Results are:
Morale: An inexperienced pilot breaks off the mission and returns to base. An experienced pilot ignores this result.
Damaged: The aircraft breaks off the mission and returns to base.
Shot down: The aircraft is destroyed. (Although damaged and shot down results have the same effect in a game, they are included as separate results for campaign game purposes.)
An aircraft which returns to base is unavailable for any further passes in the game.
An aircraft may take AA fire at any point along its flight path. When resolving a mission, the player designates the flight path but does not designate the target point in advance. Instead, he moves the aircraft along the flight path, with the opposing player stopping the aircraft when he wishes to fire against it. When the aircraft reaches its target point, it resolves its mission. If it is affected by AA fire before it reaches its target point, its mission does not occur. Once at its target point, its mission is performed; while it may be subsequently affected by AA fire, its mission is not affected.
PARACHUTE LANDINGS
Parachute landings by paratroops are resolved as follows: At the start of the game, plot the mission as for any aircraft mission. Assign each paratroop stand a number, and write that number on a 1/2-inch square piece of paper. Place the pieces of paper 1 inch apart on a yardstick. When the paradrop mission arrives at the target point, place the yardstick along the flight path, with the first piece of paper on it over the target point. Next, raise the yardstick a distance above the playing surface (18 inches for experienced pilots, 24 inches for inexperienced pilots) and turn it over, allowing the pieces of paper to fall to the playing surface. This determines where the paratrooper stands land.
If the piece of paper lands number side down in wooded terrain or in buildings, its paratrooper stand takes one hit. (It is unaffected if its piece of paper lands number side up.) If the piece of paper lands number side down in a river, canal, or other deep water, its stand is eliminated; if it lands there number side up, its stand takes one hit and is placed on the nearest point of land.
All paratrooper stands are disrupted on the turn they land. A paratrooper stand is disrupted on the turn following its landing if its numbered piece of paper landed face down. A disrupted paratrooper stand may not be given orders and may not move or fire.
INDIRECT FIRE DEVIATION (OPTIONAL)
Instead of just determining deviation for MRLs, determine it for indirect fire from all HE weapons. Roll one die and consult the deviation diagram (reroll rolls of 9 and 10) to determine the direction the mission deviates from the target point. Roll the die again; double the number rolled for green troops and halve it for elite troops. The number rolled is the number of inches the mission deviates from the plotted target point. Use the deviation direction and distance to find the actual target point of the mission.
MAP FIRE (OPTIONAL)
Indirect fire may be plotted for target points which are not under observation by a spotter. In addition to the usual items to be plotted, a player must also plot for a map fire mission the number of consecutive turns the fire will occur and the intensity of the fire (light, medium, heavy). Light intensity means the mission fires in the general fire phase, medium intensity in the opportunity and general fire phases, and heavy intensity in all three fire phases. Once plotted, the map fire mission must be executed. The indirect fire deviation rule must be used for all map fire. The mission automatically deviates. On the first turn of the fire (only), the deviation distance roll is doubled. On following turns, the mission automatically deviates from its impact point of the previous turn.
GAME REFERENCE CHART
(Transcribed from the printed "Command Decision Game Reference Chart".)
Spotting Chart
Chance of spotting (roll equal to or less than the number); distances are the range between the stands.
| Category of Stand Being Spotted | Type of Stand Being Spotted | Chance of Spotting |
|---|---|---|
| I Stationary under cover | Vehicle | up to 5": 8; up to 10": 4; up to 20": 0 |
| I Stationary under cover | Other | up to 2": 8; up to 4": 4; up to 8": 0 |
| II Moving under cover or stationary in open | Vehicle | up to 30": 8; up to 60": 4 |
| II Moving under cover or stationary in open | Other | up to 15": 8; up to 30": 4; up to 60": 0 |
| III Moving in open | Any | up to 30": 12; up to 60": 10 |
| IV Moving and firing in open | Any | up to 60": Auto |
Spotting Modifiers
| Spotting Stand Is | Modifier |
|---|---|
| AFV spotting to front | -3 |
| AFV spotting to flank | -6 |
| Recon | +1 |
| Stationary | +2 |
| Green | -1 |
| Veteran | +1 |
| Elite | +2 |
Antitank Fire Penetration Results
| Result | Effect |
|---|---|
| 0 | Forced back |
| +1, 2, 3 | Damaged |
| +4, 5, 6 | Disabled |
| +7 or more | Destroyed |
HE Fire Modifiers
| Target Is | Modifier |
|---|---|
| Patrol | -1 |
| Stationary personnel | -2 |
| Light AFV | -2 |
| Medium AFV | -3 |
| Heavy AFV | -4 |
| Terrain Is | Modifier |
|---|---|
| Wooden building | -2 |
| Stone/cement building | -4 |
| Entrenchment | -3 |
| Weapons pit | -3 |
| Bunker | -4 |
| Pillbox | -5 |
Small Arms Fire Modifiers
| Target Is | Modifier |
|---|---|
| Patrol | -1 |
| Stationary personnel | -1 |
| Uphill | -1 |
| In cover | -1 |
| AFV passenger | -1 |
| In building | -2 |
| In rubble | -3 |
| In entrenchment | -2 |
| In bunker | -2 |
| In weapons pit | -2 |
| In pillbox | -3 |
| Light AFV | -3 |
| Firing Weapon Is | Modifier |
|---|---|
| Firing from bunker | +1 |
| Heavy machinegun | +1 |
| Small-caliber HE | +1 |
Close Assault Modifiers
Personnel vs. Personnel
| Stand Type | Modifier |
|---|---|
| Patrol stand | -2 |
| Machinegun stand | -2 |
| Towed weapons crew stand | -2 |
| Submachinegun stand | +2 |
| Engineer stand | +2 |
| Cavalry stand | +2 |
| Each additional stand | +2 |
| Higher morale | +Difference |
Personnel vs. AFV
| Stand Type | Modifier |
|---|---|
| Patrol stand | -2 |
| Engineer stand | +2 |
| Soviet antitank rifle stand | +2 |
| Any stand vs. light AFV | +1 |
| Each additional stand | +1 |
Troop Quality Summary
| Type | Hit Effects 1st | 2nd | 3rd | 4th | Hit Chance* Eff | Ext | AT Fire Hit Modifier | ROF Modifiers |
|---|---|---|---|---|---|---|---|---|
| Green | Elim | — | — | — | 3 | 1 | -1 | — |
| Trained | FB | Elim | — | — | 3 | 1 | -1 | — |
| Experienced | FB | Elim | — |
*For indirect fire and small arms fire. Eff: Effective range. Ext: Extreme range. FB: Forced back. Elim: Eliminated. NE: No effect.
Morale Results
| Result | Effect |
|---|---|
| +1, 2 | Pinned |
| +3, 4 | Forced back; morale -1 |
| +5, 6 | Demoralized; morale -2 |
| +7 or more | Eliminated (personnel); disabled (vehicle) |
Morale Modifiers
| Condition | Modifier |
|---|---|
| Each AFV in group destroyed this turn | -2 |
| Each AFV in group damaged or disabled this turn | -1 |
| Each stand eliminated in group this turn | -2 |
| Each other casualty suffered in group this turn | -1 |
| Each friendly group within sight eliminated this turn | -2 |
| Any enemy personnel within 10" of group | -1 |
| Any enemy AFV within 10" of group | -2 |
| Stand is in travel march | -2 |
| Stand is pinned | -1 |
| Stand is under cover | +2 |
Orders Summary
| Order | Movement | Opportunity | General | Close |
|---|---|---|---|---|
| Movement orders | ||||
| Cautious advance | Up to 1/2 MA | N | Y* | Y* |
| Full advance | 1/2 to full MA | N | N | Y* |
| Travel march | Full MA to twice MA | N | N | N |
| Disengage | 1/2 MA to full MA | N | N |
*Except for indirect fire, for which the stand must be stationary. MA: Movement allowance. N: No. Y: Yes.
(The reference chart sheet also carries the printed order chits: Cautious Advance, Full Advance, Travel March, Disengage, Rally, Regroup, Take Command and No Order; the pages are printed graphics only.)
COMMAND DECISION EXTENDED ERRATA
The product you have purchased is an updated and expanded edition of Command Decision. The alterations and expansions are contained in three items not found in the original first edition. These are:
-
This Errata Folder. This folder contains rules clarifications and modifications which have resulted from three years of additional playing experience and advice from customers. They make for a more realistic game in most cases and further simplify the mechanics of the game rather than complicating them. The original philosophy of the game, as explained in the designer's notes, has not changed. To help you integrate these changes, the general game reference chart has been redone to incorporate the revisions.
-
Bastogne. This complete campaign manual was originally published as a separate product. Included as an example of the sort of historical campaign that is possible, it provides additional unit organizations, as well as weapons ratings.
-
Barbarossa/25. Also a complete campaign manual originally published as a separate product. Unlike Bastogne, it shows how to scale large historic conflicts down to manageable proportions. Like in Bastogne, additional organization charts and weapons ratings are included to expand the scope of the basic game.
National Data Charts
Jagdpanther and Mobelwagen Armament. The German Jagdpanther and Mobelwagen were listed with incorrect main armaments in the National Data Charts. The Jagdpanther's correct armament notation is C:88L71(12), 1 MG. The Mobelwagen's correct armament notation is T:37L98 AA (20).
Vehicle-Mounted 20mm Guns. Tank-mounted and armored car-mounted 20mm guns do not have effective HE ammunition as a general rule, and the current HE firing statistics make these guns entirely too powerful.
When firing at soft targets (and thus using the small arms fire rules), each of these weapons is assumed to have an ROF of 1 instead of 3. These weapons do not receive the +1 modifier for autocannons. (This rule applies to the German 20L55, the Italian 20L65 when mounted in tanks and armored cars, and the Soviet 20L75.) This rule does not apply to AA guns mounted on vehicles.
National Organization Charts
Battalion Patrols. All Veteran and Elite infantry battalions should have one patrol stand subordinated to the battalion headquarters. This does not apply to battalions which already have one or more recon stands or vehicles.
Separate Command Stands (Optional). All command infantry and command weapons stands at company level should be broken up into an infantry or weapons stand and a single-figure command stand. For example, a German infantry company which formerly consisted of two infantry stands and a command infantry stand would now consist of three infantry stands and a single-figure command stand.
Vehicle Crews. Each combat vehicle (tank, SP gun) has a patrol-sized crew which may dismount. Noncombat vehicles (trucks, halftracks, wagons) have a dismountable crew half this size. For every one combat vehicle or two noncombat vehicles which have their crew dismount, place one crew dismount stand on the table. A crew dismount stand is a single-figure stand, the same as a patrol stand.
Like a patrol stand, it may only fire in the close fire phase. Unlike a patrol stand, it is not self-ordering, may not immediately withdraw when fired on, and does not receive the favorable patrol modifier when fired on. Players may combine two crew dismount stands to form a two-figure infantry platoon stand. Dismounted vehicle crews have a troop quality one lower than their normal mounted troop quality.
Basic and Advanced Rules
Command Control
Disengage. The rules do not explain what happens when a unit is ordered to disengage. The unit must move at least half its movement allowance and may move up to all its movement allowance directly away from the closest visible enemy unit. Enemy units may not conduct opportunity fire against a disengaging unit except in the following two instances:
- A disengaging unit which moves through an established artillery barrage suffers opportunity fire.
- A disengaging unit which moves closer to an enemy unit than it was at the start of the turn may be fired on during opportunity fire by that unit (provided it was otherwise eligible to conduct opportunity fire). This is a rare case, but it does happen. Since the disengaging unit must move directly away from the closest enemy unit, a different enemy unit placed along its retreat route would be able to conduct opportunity fire.
Limits on Disengagement. A disengage order may never be issued to the following types of units: unlimbered towed weapons, Green troops, or pinned units.
Troop Quality
Trained Troops. A fifth troop type is added to those already in the game: Trained. This category falls between the current categories of Green and Experienced. Trained troops fire as Green troops but respond to casualties as Experienced. The reference charts included in this edition of the game include the information necessary to run Trained troops.
From 1941 on, Italian infantry should be rated as Trained, not Green. In 1941 Soviet infantry may be Trained as well as Green and Experienced. (Soviet tank battalions in 1941 are still considered Green.)
Visibility and Spotting
AFV Spotting (Optional). Normally once a target is spotted, all enemy units are presumed to be aware of the target and capable of seeing it if a line of sight exists between it and them. However, enclosed armored fighting vehicles had considerable difficulty in spotting enemy positions, even when friendly troops were already engaging them. As a result, treat enclosed nonrecon AFVs (tanks, assault guns, and armored cars) as an entirely separate force for spotting. If a non-AFV unit spots a target, all non-AFV units see it, but AFVs must spot it independently. If an AFV unit spots a target, all friendly units (including non-AFVs) see it.
Hedgerows and Roadways. Hedgerows and elevated roadways (including high rail embankments) block LOS between two units on the same elevation as the obstacle, but do not block LOS for any units on higher ground.
Fire Combat
Close Fire/Close Assault. Stands in contact with enemy stands at the start of the close fire phase may not fire or be fired at during close fire. (They take part in close assault, assuming they pass their morale check.)
Pinned Effects on Fire. The conventional fire value of all attacks against pinned units is halved. This halving is done after all other modifiers to the fire value have been made. Round all fractional fire values down.
Voluntary Pin. A group of stands all operating under the same order may, at any time, voluntarily become pinned. This represents the unit scattering and taking cover, particularly when under air attack or artillery bombardment.
High Explosive Fire
Direct-Fire HE. The direct-fire HE rule is poorly worded and has caused considerable confusion among players. This correction is intended to both simplify the current rule and provide a better explanation.
Whenever a weapon fires HE, it is assumed that the round falls in the general area in which it was aimed. As a result, a roll is always made for casualties for each stand within the blast area of the round.
This covers fragmentation effects and is resolved exactly as if the round had been fired by an indirect fire weapon and was on target.
Sometimes an HE round hits its intended target exactly, however, and this is the purpose of the HE direct hit roll. If the firing player rolls a successful direct hit, the round either landed directly in the middle of the largest concentration of enemy troops, or actually hit a towed gun, vehicle, or entrenchment (instead of merely landing close enough for the target to suffer fragmentation effects, as with indirect fire). If a direct hit is scored, the following effects take place:
- If the target was a personnel stand, the stand takes one hit.
- If the target was a towed gun, the gun is destroyed.
- If the target was a soft vehicle, the vehicle is destroyed, and each passenger stand takes one hit.
- If the target was an AFV, resolve an antitank attack against the vehicle using the penetration of the HE round.
All the above effects are the additional effects which result from the direct hit. The basic roll for HE casualties against every stand in the burst area is still conducted.
Woods and Direct-Fire HE. Woods do not normally provide any protection against HE fire. This is because throughout most of the war neither side had a fuse in widespread use which would produce reliable airbursts. As a result, the effects of HE assume ground bursts. Units in woods receive some protection against fragmentation, but this is largely offset by the fact that incoming artillery shells often detonate in the branches and thus produce much more lethal airbursts. As a result, it seemed like a fair compromise to simply have woods provide no cover against HE.
However, this rationale does not hold true for direct-fire HE, where the rounds come in on a much flatter trajectory. When conducting direct-fire HE at targets in woods, the target should receive a cover modifier of -1.
Small-Caliber HE. All small-caliber guns which fire as if they were small arms do so with a modifier of -1 to reflect the low bursting power of their rounds. This includes most HE-firing weapons up to 50mm in caliber. There are two exceptions to this rule:
- AFV-mounted 20mm guns do not suffer the -1 listed above, but instead have their ROF reduced to 1 when firing at soft targets. This is explained in the National Data Charts section.
- Small-caliber weapons (20mm to 40mm) designated as AA guns have a very high ROF and are usually provided with large supplies of HE ammunition. These weapons receive a +1 to hit instead of a -1 when firing HE.
Small Arms Fire
Small Arms Hit Distribution. The requirement that small arms hits be distributed randomly among all enemy stands within four inches of the target stand is intended to prevent the firing player from singling out special stands (such as command stands, gun crews, etc.) and concentrating on them. Instead, infantry tends to perform direct fire into a general area, and casualties are distributed fairly randomly.
It is not intended that small arms hits on exposed infantry be distributed among nearby AFVs (thus rendering the hits meaningless) or nearby troops in cover. Instead, small arms hits should be distributed among soft targets in the same cover as the designated target stand.
For example, if several stands were outside of a building and several more were inside, all within four inches of each other, the firing player could select a stand in the building or in the open. If a stand in the building were selected, all fire would be resolved using the building modifiers, and all hits would be allocated solely among stands in the building. If a stand outside the building were selected, then fire would be resolved without the building modifier, and all hits would be allocated among the stands in the open.
Indirect Fire
Spotters. In order for a command, recon, or FO stand to spot for a fire mission in a turn, it must have selected a No Order chit in the command phase.
Accuracy. If an artillery mission is spotted by the FO of the firing unit, no accuracy roll is made; the fire is automatically on target.
Medium Mortars. Medium mortars (three inches up to 82mm) need never preplot their fire. If they are battalion mortars, they may fire at any target visible to any stand in the battalion. If they are regimental or brigade mortars, they may fire at any target visible to any command stand in the regiment or brigade. In neither case is a command stand required to remain stationary and call fire. Medium mortars never roll for accuracy; they are always on target.
Time on Target. The U.S. Army pioneered an artillery technique called "Time on Target" (TOT) in which artillery batteries in a variety of locations all fired at different times which were carefully calculated to place all rounds on the target at exactly the same time. This was much more effective in terms of casualty production and had a greater effect on enemy morale than regular artillery fire, but required careful calculations well in advance.
From 1944 on, the U.S. player may have one TOT mission plotted at the start of each scenario. The TOT mission must have a specific predetermined target point.
Whenever the player asks for the TOT, as many artillery units may fire it as he wishes. The mission is resolved normally with the following exceptions:
- No accuracy roll is made. All fire missions are on target.
- All damage is doubled. The same number of die rolls is made, but each successful roll produces two hits on the target stand instead of one.
- All enemy units in the burst area of the mission suffer a -2 morale modifier for that turn only.
Ammunition Use. If an artillery mission is not on target, no ammunition is used. (The artillery unit is spending the turn firing individual ranging shots that the spotter will correct onto the target.) Once on target, artillery units use one shot per ROF number per turn of firing, not per phase.
Morale
Morale Modifiers Due to Casualties. A group suffers a -1 morale penalty for each stand in the group which suffers one or more hits in a turn, not -1 per hit. Likewise, the group suffers a -1 modifier for each vehicle in the group which is damaged or disabled in a turn. Thus, if a Veteran company suffers two hits each on two stands, it suffers a -2 morale modifier, not -4. A group suffers a -2 morale penalty for each stand from the group completely eliminated during a turn and for each vehicle destroyed. A group suffers a -2 morale penalty (and must check morale even if it was not fired at) for each friendly group (not stand or vehicle) which it sees eliminated. Patrols and separately moving recon stands do not count for this purpose.
Special Stands and Weapons
SMGs and Vehicle MGs. Submachinegunners and vehicle-mounted machineguns (such as the machineguns on tanks and halftracks) may fire as if they had moved one movement category less than their actual order indicates. If they move full, then they fire as if they conducted a cautious advance. If they conduct a cautious advance, they fire as if they did not move. If they conduct a road march, they still suffer the same restrictions as any other unit conducting a road march.
This rule will often allow moving vehicles and submachinegunners to conduct opportunity fire. Stationary units, however, are always allowed to conduct their opportunity fire first. The moving vehicle or submachinegunner may only conduct opportunity fire if it survives the enemy stationary opportunity fire and did not suffer a result (such as a forced back) which would prevent it from firing.
Aircraft
Aircraft Missions. The current rule on aircraft missions is too cumbersome. Use the following rule instead.
Aircraft make only one pass per turn, and they do so during the general fire phase. Aircraft may loiter over the battlefield for up to four turns, and may make passes on any or all of those turns. Passes are not recorded. Instead, the owning player simply places the aircraft over the target and facing in the direction of its flight path.
If both players have aircraft over the table at the same time, then the player with the most aircraft places his first.
Bomb Effects. Each bomb has a two-inch (not four-inch) burst area and a fire value of 7. An aircraft with a bombing rating of 1/2 has a bomb with a one-inch burst area and a fire value of 7.
Morale Effects of Bombing. All units attacked by bombs or rockets (that is, all units which have one or more stands in the burst area of a bomb or rocket) suffer a -1 penalty when checking morale. All units attacked by dive bombers in 1941 or earlier suffer a -2 morale penalty.
These penalties are in addition to all other possible morale modifiers.
Bombing Accuracy. When checking bombing accuracy, the mission is on target if the player rolls a number equal to or less than the bombing accuracy number. The accuracy number for aircraft bomb and rocket attacks is 3, not 5. All modifiers remain as printed, but are made to the accuracy number, not the die roll. For example, a heavy bomber hits on a die roll of 1 (3-2), while a dive bomber hits on a roll of 7 or less (3+4).
Antiaircraft Fire. If an aircraft suffers a morale result from antiaircraft fire, the owning player makes a morale check.
Inexperienced pilots pass the morale check on a roll of 3 or less. Experienced pilots pass the check on a roll of 7 or less.