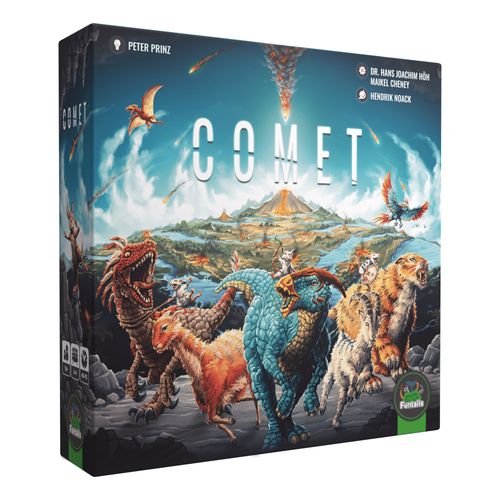
Comet
Comet Rulebook
Table of Contents
Table of Contents
Contents
- 1 rulebook
- 100 silver cards
- 50 gold cards
- 1 comet card
- 10 hero cards
- 4 savior boards
- 1 mammoth
- 1 giant tortoise
- 12 saviors tokens in 4 different colors
- 1 double-sided game board
Overview Animal Cards
Animal cards are the most common and important type of cards in the game. All silver cards and most gold cards are animal cards. The animals on the gold cards have stronger abilities or score more rescue points than similar animals on silver cards.
Animal cards have a double function: on the one hand, they show the animals you can rescue during the game, along with their abilities, rescue points, and the distance of their nest from the safe cavern. On the other hand, they also show the areas you can enter, in case you want to use the card to move your saviors instead.
Anatomy of animal cards:
- Animal Name
- Area Symbols — Areas that can be entered when the animal is used to move your savior tokens. Here 1x water and 1x lava.
- Ability — E.g.: During movement on your turn, you may exhaust this card to play an additional card for movement.
- Nest Distance — This animal hatches on a nest field with this number. The nest distance is equal to the number of fields to the safe cavern.
- Rescue Points — This is the number of rescue points you get at the end of the game if you rescued this animal.
Overview Utility Cards
Some of the gold cards are utility cards. Utility cards allow you to perform a special action once and are then discarded. You can play as many utility cards as you like during your turn. Note, however, that they may only be used during certain types of turns (e.g. only during a move turn or during a hatch turn).
Anatomy of utility cards:
- Utility Name
- Ability — E.g.: While hatching on your turn, you can play this card to reduce the nest distance of an animal you are hatching by up to 3.
Overview Hero Cards
Hero cards show the heroic animal that will lead and guide your rescue mission. Every player plays a unique hero, who influences the playing strategy with different abilities from the start.
Anatomy of hero cards:
- Hero Name
- Ability — E.g.: While moving on your turn, you may exhaust this card to gain 1 wild symbol.
- Rescue Points — Some heroes offer ways to get extra rescue points at the end of the game, e.g.: You receive 2 rescue points at the end of the game for each white egg on the bottom left on your rescued animal cards.
Game Setup
-
Place the game board in the center of the table and choose which side to play. Both sides are for any number of players, they differ only in the game experience. Use the side with the blue dotted eggs for your first game.
-
Place the mammoth and the giant tortoise next to the game board.
-
Shuffle all the silver cards thoroughly and place them face down next to the game board. Leave space next to them for a discard pile of the silver cards. The 100 silver cards are now divided into the draw pile and the comet pile according to the number of players, as in the table below.
Number of Players Number of Silver Cards in Draw Pile Number of Silver Cards in Comet Pile 2 55 45 3 70 30 4 85 15 The comet pile is not needed until the comet phase at the end of the game. Put the comet card on top of the comet pile so you don't accidentally draw from the wrong pile until you reach the comet phase.
-
Shuffle all the gold cards and place them face down next to the board. Leave space next to them for a discard pile of the gold cards. Put the top 4 cards of this pile next to it as a face up display.
The player who last saw an animal of an endangered species starts the game.
Gameplay
During the game, you will hatch animal cards and move them with your savior tokens across the board to the safe cavern. Only when a savior token has arrived there, you can use the ability of the rescued animal card for subsequent rescues. Before the rescue, the card text on animal cards is inactive.
The game is played in clockwise order. On your turn, you must perform one of the following 3 actions:
A) Hatch B) Move C) Rest
Then, refill the display of gold cards up to 4 face up cards.
After that, it's the next players turn.
A) Hatch — You hatch a new animal.
To hatch your animal, place the animal card from your hand on a free space above your savior board. Then place the corresponding savior token on a nest field on the game board that corresponds to the nest distance on the animal card.
If all nests with this number are already occupied, choose the next free nest with a higher nest distance. It is not allowed to voluntarily choose a nest with higher nest distance while a suitable nest is free. If there is no free nest with a higher nest distance either, you cannot hatch this animal at the moment.
Example: Toby wants to hatch a Dodo. To do this, he places the card face up in the second space of his savior tableau. Now he places the corresponding savior token on a nest that corresponds to the nest distance on the animal card (here on nest 8).
B) Move — You move one or more of your saviors.
To move one or more of your savior tokens, play a silver or gold animal card from your hand. This card is immediately discarded to the appropriate discard pile.
In general, only one animal card may be played for movement.
If you use an animal card for movement, you only use the two area symbols on the animal card (these are shown twice on each card, one on the left and one on the right, to improve the usability for left- and right-handed players). You can only move your savior tokens to adjacent unoccupied areas shown on the discarded animal card.
The five area types are: meadow, jungle, desert, water and lava.
However, you may play any number of additional cards with a wild symbol to add any of the five area symbols (but not a nest) to your movement options.
The area symbols can be used in any order and can be divided among different savior tokens of your own. Each area symbol can only be used for one movement step.
Adjacent fields occupied by tokens (your own and other players' saviors / mammoth / giant tortoise) can be skipped for free.
You move your savior token either to an adjacent unoccupied field or to an unoccupied field directly behind the skipped token(s) that matches the used area symbol.
To move to the safe cavern field, you can use any area symbol (or a wild).
When you have moved a savior token to the safe cavern, place it back on your savior board and put the assigned animal card to your rescued animals in the area below your savior board.
From now on you can use the abilities of the rescued animal (see Using the Abilities of your Rescued Animals).
Examples:
Kate places a card with a lava and a desert symbol on the discard pile and moves one of her saviors to a desert and then to an adjacent lava field.
Kate could also have divided her movement among her saviors. In this case, she would move one savior to a desert field and the other savior to a lava field.
Max places a card with a meadow and desert symbol on the discard pile and moves one of his saviors to a meadow. Then he skips the two fields occupied by the mammoth and Frances' savior to move his savior to the adjacent desert field behind them.
Frances adds 2 additional cards with wild symbols to her card with water and jungle symbols and moves her savior as follows: ① Wild symbol -> ② water symbol -> ③ wild symbol (skipping the field occupied by Kate's savior) -> and finally moves to the safe cavern with the jungle symbol ④. Then she places the savior back on her savior board and puts the animal card to her rescued animals in the area below her savior board.
C) Rest
You ready your hero and exhausted rescued animals again and draw new cards.
Note: Readying animals and drawing cards does not happen automatically at the beginning of your turn or in action A or B. You must choose action C if you want to ready your exhausted animals again or draw cards.
This action is done in 5 steps in the following order:
- Ready all your exhausted animal cards and your hero card (turn them back 90° so they are vertical again, see Using the abilities of your rescued animals).
- Discard any number of hand cards to the appropriate discard piles.
- Take 1 gold card from the face up display.
- Draw silver cards until you reach your hand size limit (at the start of the game the limit is 5 cards, which can be increased by certain animals).
- Refill the face up display of gold cards up to 4 cards (if the gold pile is depleted, the discard pile of the gold cards is shuffled face down to create a new draw pile).
Using the Abilities of your Rescued Animals
Just like your hero, many animals, after being rescued themselves, can help you in your further rescue operations.
Some animals have permanent effects such as: "You may hatch animals on occupied nest fields."
Other animals have activated abilities that may only be used at certain times. The following symbols determine the possible times for each:
- Hatch symbol — Use this action only during a turn in which you perform the hatch action.
- Move symbol — Use this action only during a turn in which you perform the move action.
- Between-turns symbol (two figures, one above the other with a down arrow) — Use this ability between the turns of two players. When one player ends their turn, you can perform this action before the next player's turn begins. If more than one player wants to use such an ability, they will do that in clockwise order starting with the player whose next turn is coming up.
Some animal cards must be exhausted in order to use their ability: to use this ability exhaust this card (turn it 90° so that the card is horizontal instead of vertical).
You can only reuse the ability of exhausted animal cards after you have used the Rest action on your turn.
Abilities of animal cards that have not yet been rescued (i.e. their savior tokens are still moving on the board) cannot be used.
End of Game: Comet Phase
The comet phase begins as soon as the draw pile of silver cards is depleted. When that happens, perform the following steps in sequence:
- Remove the comet card from the comet pile (see Game Setup step 3). The silver cards which were set aside as the comet pile become the new silver draw pile.
- If you were not able to draw enough silver cards from the pile during a drawing action, continue drawing silver cards from the new pile until you have drawn the appropriate number of cards.
- All players take turns choosing whether they want to either draw silver cards up to their hand size limit, or ready all their exhausted cards instead.
- After that, play continues as usual.
In case the comet pile is also depleted, the discard pile of silver cards is shuffled face down and laid down as a new silver draw pile.
During the comet phase, only the two actions Hatch and Move remain available. The Rest action can no longer be used in the comet phase.
Everyone continues to play with their remaining cards until they run out of options. If someone can't or doesn't want to perform an action on their turn, they are skipped from now on and the remaining players continue to take turns until noone wants to perform an action any more. Then the final scoring follows.
Scoring
Add up all your rescue points. You gain rescue points as shown below:
-
Each rescued animal gives you the number of points on the bottom right of the animal card. Remaining hand cards and hatched animal cards still attached above the savior board at the end of the game have not been rescued and therefore do not score rescue points.
-
Some animals give you extra rescue points for certain combinations of rescued animals according to the information in their card text.
Example: If you have rescued 4 Vicuñas, you will receive an additional 10 points.
-
Some hero cards grant you additional rescue points according to the information in their text box.
Example: You gain 2 points for each blue egg on your rescued animal cards.
The player with the most rescue points wins.
FAQ
Hero Cards
Giant Beaver — Does not count itself as a rescued beaver (counts only the Primal Beaver and Giant Beavers on animal cards).
Quagga — At the beginning of the game, your increased hand card limit already applies. Therefore you draw 6 silver cards instead of 5.
Animal Cards
Tasmanian Wolf — Use the Tasmanian Wolf between the turns of two players. When one player ends their turn, you can take a silver card which was just played from the discard pile, before the next player's turn begins.
If more than one player wants to use such an ability, they will take turns starting with the player whose next turn is coming up next.
If a player has already taken the desired card with their Tasmanian Wolf, then you cannot take that card, and your Tasmanian Wolf will not become exhausted.
You may only take a silver card that was played for movement, not a card discarded during the "Ready exhausted animals and draw cards" action.
Crescent Wallaby — You may only take a card from the face up gold card display (do not draw from the face down pile).
Primal Squirrel — You may only take a card from the face up gold card display (do not draw from the face down pile).
Tunnel — The movement enabled by the tunnel takes place in one piece, so it must not be split. All 3 steps must be taken at once and by a single savior. This movement may pass through occupied fields but may not end on an occupied field.
You may use the tunnel action (as a whole) between two movements enabled by area symbols on played cards.
Jumping Hill — May be played in combination with other cards for movement. Area symbols and jokers of all cards played for movement may be used in any order.
Lizard Set — You get 15 rescue points for each set of 3, consisting of 1 Iguana + 1 Gecko + 1 Salamander. Chameleons can be used as substitutes for any lizards.
Calculation example: Iguana + Gecko + Chameleon = 15 points.
Mammoth Rider and Tortoise Rider — You may also place the mammoth and the giant tortoise tokens on unoccupied nest squares.
Mauritius Parrot — Use the Mauritius Parrot between the turns of two players. When one player ends their turn, you can use the area symbols of a card which they just played to move your own saviors, before the next player's turn begins.
If more than one player wants to use such an ability, they will take turns starting with the player whose next turn is coming up next.
You may only use the area symbols of a card that was played for movement, not symbols on a card that has been discarded during the "Ready exhausted animals and draw cards" action.
Raptor — The area symbols of all cards played for movement may be used in any order.
Brachiosaurus — You can move 1 savior to a directly adjacent nest or the safe cavern.
Or you can move 1 savior to a nest or the safe cavern located directly behind tokens/areas, which you may skip.
You may use this movement between two movements enabled by area symbols on played cards.
Guardians and Scouts — All guardians and scouts allow you to skip fields of certain area types when moving as if they were occupied fields. You still need the appropriate area symbol (of the field you want to enter) to be able to move at all.
Golden Mole Rat — Move a savior to an adjacent field. You are not allowed to move to an occupied field.
You may use this movement between two movements enabled by area symbols on played cards.
Any further questions?
Have a look at the online Comet FAQ here: funtails.de/en/comet/
Icon Overview
- Exhaust symbol — To use this ability exhaust this card (turn it 90° so that the card is horizontal instead of vertical).
- Hatch symbol — Use this action only during a turn in which you perform the Hatch action.
- Move symbol — Use this action only during a turn in which you perform the Move action.
- Between-turns symbol — Use this ability between the turns of two players. When one player ends their turn, you can perform this action before the next player's turn begins. If more than one player wants to use such an ability, they will do that in clockwise order starting with the player whose next turn is coming up.
- Number in a hexagon (e.g. 3) — Move a savior token by the printed amount of fields without skipping over any tokens. This movement may pass through occupied fields but may not end on an occupied field.
- Number in a circle (e.g. 2) — Reduce a nest distance by the printed number when hatching.
- Area icons — Meadow, jungle, desert, water and lava areas.
- Giant tortoise icon — Place the giant tortoise on a free area or nest of your choice.
- Mammoth icon — Place the mammoth on a free area or nest of your choice.
- Nest field icon — Nest field.
- Wild symbol — Represents any of the five area symbols (but not a nest). Cards with wild symbol can be played in addition to the movement card.