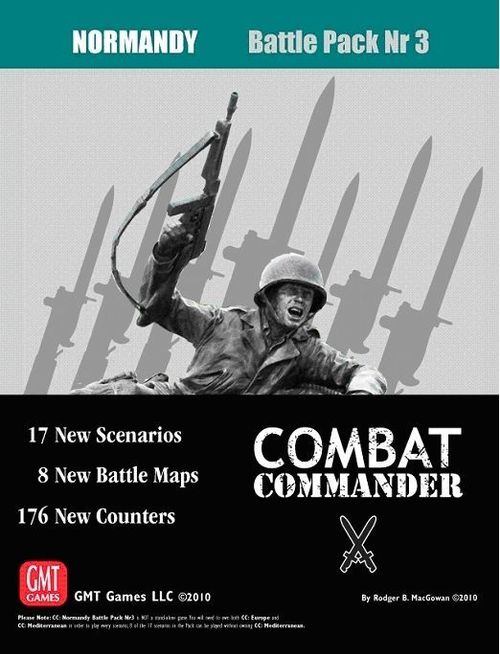
Combat Commander: Battle Pack #3 – Normandy
Combat Commander: Battle Pack #3 – Normandy Rulebook
Table of Contents
Table of Contents
- Normandy Campaign (Scenario 56)
- General
- C1. Scenario Generation
- C1.1 The Battlefield
- C1.11 Campaign Positions
- C1.12 Map Configuration
- C1.2 Year & Nationality
- C1.3 Troop Quality
- C1.4 Objectives
- C1.5 Orders of Battle
- C1.51 Campaign Forces
- C1.52 Divisional Reserves
- C1.53 Regimental Resource Pool
- C1.54 Determining the Command Section
- C1.55 Determining the Campaign Sections
- C1.55 Initial VP Cost of Forces
- C1.6 Leaders
- C1.7 Support Rolls
- C1.71 Standard Support Rolls
- C1.72 American Armor Support
- C1.73 German Armor Support
- C1.74 German Artillery Support
- C1.75 Allied Air Superiority
- C1.8 Posture
- C1.9 German Defensive Preparation
- C1.91 German Defense in Depth
- C1.10 Initial Placement
- C2. Special Rules
- C2.1 Normandy Special Rules
- C2.2 Americans in the Bocage
- C2.3 American Armor Support
- C2.4 German Armor Support
- C2.5 German Artillery Support
- C2.6 Allied Air Superiority
- C3. Battle Results
- C3.1 Campaign Victory
- C3.2 Remove Fatigued Units from the Line
- C3.3 Determine the Campaign Position
- C3.4 Promotion of the Command Section Leader
- C3.5 Troop Quality Adjustment
- C3.6 A Day of Rest
- C3.7 Regimental Request for Divisional Units
- C3.8 Begin Hostilities
- Example: Bocage Destruction and Optional Armor Support
- C4. Optional Rules
- C4.1 American Armor Support (Optional)
- C4.2 German Armor Support (Optional)
- Normandy Special Rules
- Designer's Note
Normandy Campaign (Scenario 56)
General
- Scenario 56 is a "campaign" played as a series of linked "battles". Each battle is the equivalent of a standard CC scenario. The campaign is meant to be played over a long day or a weekend, or even spread over several evenings. The players choose their side for the whole campaign. One player is the American commander and the other is the German commander.
- The Random Scenario Generator (RSG) published in CC: Mediterranean is used to create each battle of Scenario 56, with the changes given in the following rules.
- The campaign can represent up to seven battles. The first three battles represent the action of 11 to 13 July 1944. There was no action on 14 July 1944 [C3.6]. The other four battles represent the action of 15 to 18 July 1944.
- The first battle of the campaign begins at "Campaign Position" A1. There are five Campaign Positions in total. The result of each battle determines the Campaign Position used for the next battle of the campaign.
- Once the Campaign Position is determined, the players orient the map and gather their "Sections" and any "Reinforcements" for the battle to be played on that map.
- The players then decide whether to augment their forces with armor, artillery and/or air support.
- Both players then complete their battle OB following the standard CC generation rules (to determine posture, initiative, orders, time, the extra support OB, etc.).
- The battle is played and a winner is determined as in every other CC scenario.
- The Campaign Position for the next battle of the campaign is determined by the side that has just won the battle (American or German).
- The winner of the battle promotes its Command Section Leader. Both players determine whether additional Divisional Resources are available for future battles.
- The campaign continues until one of the players has won four battles.
To begin the first battle, place the Scenario 56 sheet within reach of both players. On it, place the following markers and units:
- Campaign Position: place the "Battle" marker on Campaign Position A1.
- Troop Quality: place the two "Troop Quality" markers in the Line box of each side.
- Command Section Leader: place the six counters "2Lt", "1Lt" and "Cpt" for Craighead and Heinzmann in the "Command Platoon Leader" box.
- Available Divisional Resources: place the following leaders in this area:
- American: Cpl Slingluff, Cpl Miller, Sgt Ewing, Lt Richardson.
- German: Cpl Wetteman, Cpl Rubart, Sgt Gessler, Lt Von Hoffman.
- Regimental Resource Pool: place the following leaders in the "Regimental Resource Pool" area:
- American: Sgt Craighead, Sgt Krauss, Sgt Bowen, Lt Cawthon.
- German: Sgt Heinzmann, Sgt Ehnert, Sgt Hummer, Lt Becker.
- American Support: place the American "Armor Available" marker in box 5 of the Support Track.
- German Support: place the following markers on the Support Track:
- German "Armor Available" in box 1.
- German "Artillery Available" in box 11.
- "Fortification Points" in box 7.
- Air Superiority: place the American Air Superiority marker ("Ground Support / Recall") in the "Air Superiority" box, with "Recall" face up.
On the Counter Sheet, place the Year marker in the 1944 box. Place the VP marker in box 0 of the Victory Point track.
C1. Scenario Generation
C1.1 The Battlefield
C1.11 Campaign Positions
RS.1 is not used to choose the battlefield. Each battle of the campaign is played on a map associated with a relative geographic position that starts east of the Martinville ridge near St. Lô and progresses west toward the town. These positions are called "Campaign Positions", or "CP" for short. The game begins at CP A1 and progresses toward American victory at CPs A2, A3 and A4. Each time the Americans lose, the game returns directly to Campaign Position G1 (except from A4).
- A1: Map 2 (just outside the village of St. André de l'Epine, where the offensive began for the 29th ID).
- A2: Map 42 (moving west toward Hill 122, at the top of the Martinville Ridge).
- A3: Map 43 (moving west along the ridge to the village of Martinville).
- A4: Map 44 (moving west down the ridge toward the village of La Madeleine, near St. Lô).
- G1: Map 2 (a generic dense bocage position representing the halt of the American offensive).
C1.12 Map Configuration
Once the CP is determined for a battle of the campaign, the map associated with the current CP is placed on the table and oriented at random as follows: the American player reveals the top card of his deck, then, using only the white die, orients the map so that the direction corresponding to the compass is his friendly board edge. A map must be oriented at random each time it is used for a battle at the same CP.
C1.2 Year & Nationality
RS.2 is not used. The players choose the German or American faction permanently for the whole campaign. The year is 1944 for the entire campaign.
C1.3 Troop Quality
RS.3 is not used. The Troop Quality of both sides is automatically Line for the first battle, and will be predetermined for each additional battle.
C1.4 Objectives
Follow rule RS.4 as written for each battle of the campaign.
C1.5 Orders of Battle
RS.5 is not used to generate the players' OBs. Instead, both players begin each battle with a "Command Section" made up of platoons of Elite, Line or Green quality (Line being the default quality). This base force can be improved by purchasing "Campaign Sections".
C1.51 Campaign Forces
The Campaign Forces Table (on page 2 of Scenario 56) shows all the forces available for the campaign. This table is a limited, fixed reserve of sixteen Sections for both players. Each Section is commanded by a specific leader, a "Section Leader", who is used throughout the campaign to identify that particular Section.
EXAMPLE: For the first battle, the American player wants to add the C Rifle Section and the E Team to his OB. He gathers his three available Campaign Section Leaders and places Sgts. Krauss and Bowen in his closed fist, keeping the other leader (Lt Cawthon) hidden (it may be on his knees or in his other hand). The German player decides to add only his D Veteran Section to his OB and secretly places Lt. Ehnert in his closed fist. Both players reveal their choices simultaneously. The three Section Leaders, along with the contents of their respective Sections, are added to their owner's forces for the battle to come.
[Note: the printed example calls Ehnert a "Lt."; the setup list above places Sgt Ehnert in the German Regimental Resource Pool. Transcribed as printed.]
Both players gather the units and weapons listed for the Campaign Sections purchased (including the Section Leader).
C1.52 Divisional Reserves
The Divisional Reserves Table (on page 2 of Scenario 56) is used by the players to determine which additional Campaign Sections will be available for use in later battles of the campaign. As the request for additional resources is random [C3.7], the players may find themselves short of resources if they are not careful.
C1.53 Regimental Resource Pool
At the start, the two parts of the Regimental Resource Pool (located on page 1 of Scenario 56) contain the following Sections:
- American: the Command Section, 1 Rifle Section (C), 1 Team Section (E) and 1 Engineer Section (G).
- German: the Command Section, 1 Veteran Section (D) and 2 Paratrooper Sections (E & F).
To show that a Section is available in this way, place its Section Leader's counter in the Regimental Resource Pool (this has already been done for the players' starting Sections). As long as a Section Leader occupies the Regimental Resource Pool, its Section is available for use: either by default (the Command Section, per C1.54), or on purchase (the Campaign Sections, per C1.55). When an available Section is purchased, it is no longer immediately available, but it may later be replaced [C3.7].
C1.54 Determining the Command Section
Both players gather all the units and weapons listed for their Command Section. The type of platoon that makes up each Command Section is shown on the Campaign Forces Table, and is based on the side's current Troop Quality (as shown on page 1 of Scenario 56 and determined at the end of each battle [C3.5]), with "Line" being the default type for both sides in the initial battle.
So for the first battle, the American Command Section is led by Sgt Craighead and consists of 3 Line Platoons and an MMG. The German Command Section is led by Sgt Heinzmann and consists of a Scout, 3 Rifle Platoons and 2 Light Mortars.
C1.55 Determining the Campaign Sections
Each player secretly decides how to attach each of his available Campaign Sections to the forces of the battle in progress. This is done by gathering all the Section Leaders currently in the Regimental Resource Pool. Each player then places any number (even zero) in his closed fist above the table. The players then reveal the contents of their fists simultaneously.
C1.55 Initial VP Cost of Forces
[Note: the printed Play Book numbers both this rule and the one above as C1.55; both are kept as printed.]
The players must now pay for their initial forces using the Point Values listed on the Campaign Forces Table (on page 2 of Scenario 56).
- The American player moves the VP marker a number of spaces toward his opponent equal to the total cost of all Sections purchased for this battle.
- The German player then does the same for the cost of his forces.
C1.6 Leaders
RS.6 is not used. Each player's Leaders have already been allocated through the Sections in the previous steps.
C1.7 Support Rolls
Carry out the following steps in order.
C1.71 Standard Support Rolls
Follow RS.7 as written for each battle of the campaign.
C1.72 American Armor Support
The American player starts the campaign with 5 Armor Support Points. The "Armor Available" marker and the Support Track on page 1 of Scenario 56 are used to keep track of these points. They are spent, if the player wishes and regardless of posture, by spending one point per scenario. This option cannot be chosen more than 5 times during the whole campaign.
If an Armor Support Point is available, the American player may choose it now. He deducts this point from those remaining on the Support Track. He receives the 75mm Radio (8 FP) as armor support [C2.3]. He then moves the VP marker 4 spaces toward the German player.
In addition, the American player receives two Demolition Charges. He then moves the VP marker 1 space toward the German player.
Finally, he may choose to make a free Deploy event [E52] during initial placement, to allow the creation of Engineer Teams [C2.2].
C1.73 German Armor Support
The German player starts the campaign with 1 Armor Support Point. The "Armor Available" marker and the Support Track on page 1 of Scenario 56 are used to keep track of this point. It is spent, if the player wishes and regardless of posture, during this step. Once used, it is no longer available.
If the Armor Support Point is available, the German player may choose it now. He moves the marker to box "0" of the Support Track. He receives the 105mm Radio (10 FP) as armor support [C2.4]. He then moves the VP marker 4 spaces toward the American player.
In addition, if the American player has already chosen the American Armor Support option for this battle [C1.72], it is cancelled: the American Radio is eliminated, and the Armor Support Point used to choose that option is permanently lost.
C1.74 German Artillery Support
The German player starts the campaign with 11 Artillery Support Points. The "Artillery Available" marker and the Support Track on page 1 of Scenario 56 are used to keep track of these points. They are spent, if the player wishes and regardless of posture, by spending up to three points per scenario. These points are deducted from the current total on the Support Track. This option cannot be chosen more than 11 times during the whole campaign.
IMPORTANT: If the German player has chosen the German Armor Support option [C1.73] for the battle in progress, then German Artillery Support is not available for this battle.
If German Artillery Support is available, the German player may choose it now. He deducts one, two or three Artillery Support Points from the current total on the Support Track. He then receives the 150mm Radio (12 FP) and moves the VP marker 5 spaces toward the American player. For each Artillery Support Point spent for the battle in progress, the German player receives a Pre-Registered Fire marker to use during this battle.
C1.75 Allied Air Superiority
If the American Armor Support is not available, or has not been chosen, the Air Superiority marker is placed on its "Ground Support" face, visible, on page 1 of Scenario 56.
C1.8 Posture
Follow RS.8 as written for each battle of the campaign. Each player's Order Limit is determined via the Campaign Forces Table, according to the Sections acquired for the battle in progress. Each side's Troop Quality begins as Line but may change after each battle under rule C3.5.
EXAMPLE: An American force made up of the Command Section, the C Rifle Section and the E Team Section gives the American player an Order Limit of 2 + 1 + 1 = 4.
C1.9 German Defensive Preparation
Follow RS.9 as written for each battle of the campaign. Then carry out the following additional step.
C1.91 German Defense in Depth
The German player starts the campaign with 7 Fortification Points. The "Fortification Points" marker and the Support Track on page 1 of Scenario 56 are used to keep track of these points. Fortification Points are spent, if the player wishes and regardless of Posture, to buy Support Fortification OBs. The cost of Fortification OBs bought this way for any battle is (a) deducted from these 7 Fortification Points and (b) deducted from the German total VP on the Victory Point track. No more than 7 may be spent during the whole campaign.
C1.10 Initial Placement
Players follow steps RS.10 to RS.16 as written.
EXAMPLE: An American force made up of the Command Section, the C Rifle Section and the E Team Section gives 2 + 4 + 4 = 10 in Initiative and a Surrender Level of 3 + 3 + 3 = 9. A German force made up of the Command Section and the D Veteran Section gives 1 + 4 = 5 in Initiative and a Surrender Level of 3 + 3 = 6. As the American player has the higher Initiative, he plays first.
Note that each player's Surrender Level and Initiative total are determined via the Campaign Forces Table. Weapons assigned to a particular Section must be placed in the possession of a unit belonging to the same Section. Any Fortification bought with Fortification Points (above) is placed at the same time as the units of that side.
C2. Special Rules
The following Special Rules apply during each battle fought in a campaign scenario.
C2.1 Normandy Special Rules
The Normandy Special Rules No1 to No4 apply.
C2.2 Americans in the Bocage
In June and July 1944, three different doctrines for attacking German bocage-based defenses were developed. This rule, together with the use (when available) of American Armor Support [C2.3], represents the doctrine developed specially by the 29th Infantry Division.
Any American Team that possesses a Demolition Charge is defined as an "Engineer Team". An Engineer Team activated for a Fire order, and located in a hex containing at least one Bocage hexside, may make an in-hex Fire attack with the Demolition Charge against one or two of that hex's Bocage hexsides.
NOTE: Only one Targeting Roll is made, even if the player attacks one or two Bocage hexsides in the hex.
A Targeting Roll [O18.2.2] with a range of "1" must be made. If the Demolition Charge hits (the roll is not 1●1), the targeted Bocage hexsides are destroyed and a "Bocage Busted" marker is placed on the destroyed hexsides. Any Bocage hexside so marked on the map no longer has any terrain effect until the end of the scenario.
The Demolition Charge used is then placed in the next available Time box on the Time Track. During the reinforcement segment of a Time trigger, the American player may directly assign an available Demolition Charge to a team that is not currently carrying a weapon. If no team is available, the Demolition Charge is eliminated.
C2.3 American Armor Support
While the Engineer Teams of the 29th Infantry Division created openings in the Bocage, the advancing units received crucial covering fire from the 747th Tank Battalion.
The American Radio (received under C1.72) represents the direct fire of a section of Shermans located off-map. As a result, the Radio has a blast radius of one hex (the hex occupied by the SR) instead of the usual 7 hexes. During the Accuracy step [O18.2.2], if the Radio's Targeting Roll "hits", you do not check drift (the SR lands directly on its target). If the Targeting Roll "misses", the SR drifts as if it were a "normal" hit [O18.2.2.1].
If the final hex is occupied, a Fire attack [O20.3] is resolved on that hex. After its effects are applied, a second Fire attack is immediately resolved against the same hex.
The target hex can therefore be attacked twice in a row with 8 FP for a single Artillery Request. Each Fire attack uses a separate die roll, although only one Targeting Roll was made.
C2.4 German Armor Support
In general, German armor was heavily tied down by Allied air superiority. On rare, notable occasions, the regiments defending the 3rd Fallschirmjäger Division received brief but fierce support from anti-tank units and Flak batteries.
The German Radio (received under C1.73) represents the direct fire of a few Sturmgeschütz assault guns just off-map. As a result, the Radio has a blast radius of one hex (the hex occupied by the SR) instead of the usual 7 hexes. During the Accuracy step [O18.2.2], if the Radio's Targeting Roll "hits", you do not check drift (the SR lands directly on its target). If the Targeting Roll "misses", the SR drifts as if it were a "normal" hit [O18.2.2.1].
C2.5 German Artillery Support
The German mortar batteries had pre-registered a dense grid of target points on the Martinville Ridge.
At any time during the game, the German player may take a Pre-Registered Fire marker and place it in a hex on the map. This may be done up to a number of times equal to the number of Pre-Registered Fire markers purchased for the battle, and the markers may not be moved once placed. German artillery attacks are always accurate when the SR is placed in a hex containing such a marker. In that case, do not make a Targeting Roll for the artillery attack. Instead, proceed directly to the Accuracy test as if the target had "hit" [O18.2.2.1], after placing the SR.
C2.6 Allied Air Superiority
Allied air superiority was almost completely established from the very start of the invasion. However, with so many pressing needs, the delivery of air-ground support was reserved for the most critical requests. When the 747th Tank Battalion was sent to other areas during the St. Lô offensive, the ground troops were more exposed, so they received more air-ground support.
Each American Interdiction event is treated as an Air Support event for as long as the Allied Air Superiority marker remains on its "Ground Support" face, visible.
The first German Interdiction event turns the Air Superiority marker over to its "Recall" face. As soon as the Air Superiority marker is on its "Recall" face, the American and German Interdiction events work normally again.
C3. Battle Results
At the end of each battle, the winner is noted and the following steps are carried out, in the order given, before the next battle begins.
C3.1 Campaign Victory
Campaign Victory is awarded to the first player to win four battles of the campaign.
C3.2 Remove Fatigued Units from the Line
Remove the leaders of both sides from the map and the Counter Sheet. Place the Command Section Leader in its own Regimental Resource Pool (on page 1 of Scenario 56). Place the other leaders in the Exhausted Units box (on page 1 of Scenario 56). Then remove from the map and the Counter Sheet all other units, weapons and markers.
C3.3 Determine the Campaign Position
If no one has yet won the campaign, move the Battle marker (on the Campaign Position Map, page 1 of Scenario 56) to the next Campaign Position, depending on the American victory or defeat in the battle just played.
- If the American player won, move the Battle marker to the next higher Campaign Position that has not yet been played (in the order A1, A2, A3 and finally A4).
- If the American player lost, move the Battle marker to Campaign Position G1, unless the game was lost at Campaign Position A4, in which case the next battle takes place at A4.
The campaign always begins at Campaign Position A1 (map 2). If the American player wins the first battle, advance the Battle marker to Campaign Position A2 (map 42).
Suppose the American player loses the first battle, so the Battle marker moves to CP G1 (map 2) and the second battle is fought. If the American player wins at G1, the Battle marker moves to CP A2. Because the battle at CP A1 has already been fought, A2 is next.
However, if the American player loses the second battle, the Battle marker stays at G1, and the third battle will also take place at that position.
Each time the American player wins, he advances toward the town of St. Lô (just past Campaign Position A4). Otherwise, the German player has trapped the American player in the Bocage.
The Campaign Position Map on page 1 of Scenario 56 shows the possible paths for the Battle marker from the current Campaign Position.
C3.4 Promotion of the Command Section Leader
Each Command Section Leader begins at the formal rank of Sergeant. With each campaign success, the Command Section Leader receives a promotion (from Sergeant to 2nd Lieutenant, to 1st Lieutenant and finally Captain), whether or not the leader was killed in the battle.
If the American player won the battle, promote his Command Section Leader to the next rank by replacing the leader counter currently in the Regimental Resource Pool with the appropriate counter from the Command Section Leaders box.
Otherwise, promote the German Command Section Leader to the next rank by replacing the leader counter currently in the Regimental Resource Pool with the appropriate counter from the Command Section Leaders box.
For example, after three battles have been completed with 2 American victories and 1 German victory, the fourth battle is fought with 1Lt Craighead and 2Lt Heinzmann.
C3.5 Troop Quality Adjustment
The winner of the battle may choose one of these options:
- Increase its Troop Quality by one level (from Green to Line, or from Line to Elite); or
- Decrease its opponent's Troop Quality by one level (from Elite to Line, or from Line to Green).
Keep track of individual Troop Qualities on the appropriate section of the Scenario 45 sheet.
[Note: the printed text cites "scenario 45" here, while the rest of this rule and the scenario are for Scenario 56. Transcribed as printed.]
C3.6 A Day of Rest
The fourth day of the offensive, 14 July 1944, was declared a Day of Rest by General Gerhardt, commander of the 29th Infantry Division. This interval in the campaign represents the organizational reshuffling that took place that day.
If three battles of the campaign have just been completed, carry out the following steps in the order given. Note that this "rest" occurs only once in the campaign.
- Move all American Section Leaders from the Exhausted box to the Available Divisional Resources box.
- The German player makes two rolls on his Divisional Reserves Table (page 2 of Scenario 56). If a roll matches one of his Section Leaders currently in the Exhausted Units box, he may move that leader to his Available Divisional Resources box.
C3.7 Regimental Request for Divisional Units
Finally, the players may attempt to receive one or more Campaign Sections for use in a later battle. The loser of the last battle makes one roll on his Divisional Reserves Table (page 2 of Scenario 56). The winner of the last battle makes two rolls, chooses one to use on his Divisional Reserves Table, and ignores the other result. If a resulting Section Leader is available in the Available Divisional Resources box (that is, it is not currently in the Regimental Resource Pool box or the Exhausted Units box), the player places the leader in the Regimental Resource Pool, making that Section available for purchase in a later battle. Otherwise, he receives nothing.
C3.8 Begin Hostilities
Reset the VP marker to "0". Reset the Air Superiority marker to its "Recall" face. Begin the next battle at step C1.1, The Battlefield.
Example: Bocage Destruction and Optional Armor Support
A. The American Engineer Team (F8) is activated to fire by Lt. Cawthon (F9) and makes an in-hex Fire attack with the Demolition Charge. A Targeting Roll of 7 or more is needed (the base FP of the attack is 1, plus the Smoke Hindrance of 5). The American player designates hexsides "6" and "1" of F8 as the target and succeeds on his Targeting Roll. He places a "Bocage Busted" marker on both destroyed hexsides.
[Note: the parenthetical as printed adds up to 6, not 7. Transcribed as printed.]
B. Because LOS checks are free, the player checks whether there is an unobstructed LOS from a friendly map edge to the chosen target hex. He draws a line from G7 to a friendly map-edge hexside at D10, and places the Spotting Round (SR) in G7. Both conditions needed for a Targeting Roll are met. A result of 3 or more is needed (Sgt. Bown is the Spotter), otherwise the SR is subject to drift. Assuming the Targeting Roll is accurate, the player immediately makes two Fire attacks on G7, using FP 8 for both attacks.
C. Later, in another player turn, Lt. Cawthon activates the Engineer Teams in E10 and E8 with a Fire Order. The player designates hexsides "6" and "1" of E10 as the target and succeeds on his Targeting Roll. He places a "Bocage Busted" marker on both destroyed hexsides.
D. He then designates hexsides "2" and "4" of E8 as the target and succeeds on his Targeting Roll. He places a "Bocage Busted" marker on both destroyed hexsides.
E. Because Sgt. Bowen cannot observe F6, the player waits a later turn to activate Lt. Cawthon with an Artillery Request, to use the off-map Armor Support. He traces a line from F6 to a point on a friendly map-edge hexside at E10. He activates Lt. Cawthon with an Artillery Request and places the SR in F6. A Targeting Roll of 9 or more is needed (the Spotter's range to the target, plus the Smoke Hindrance of 8), otherwise the SR drifts. If the Targeting Roll succeeds, he immediately makes two attacks at FP 8 against F6. Otherwise, the SR may drift into any hex adjacent to F6. If that hex is occupied, he makes two attacks at FP 8 against that final target hex.
C4. Optional Rules
Players who want a little more detail in the Armor Support rules (C2.3 and C2.4) may choose to use the optional rules. Players will find a closer interaction between the destruction of the Bocage and Armor Support. If you decide to use them, use both.
C4.1 American Armor Support (Optional)
Use this rule instead of C2.3.
The American Radio (received under C1.72) represents the direct fire of a section of Shermans off-map. As usual, a friendly leader must be activated for an Artillery Request, but two conditions must be met to make the Targeting Roll: (1) the friendly leader serves as Spotter [O18.2.1], and (2) there must be an LOS from the friendly map edge to the target hex. Treat any point on the friendly map edge as a central point, and trace an unobstructed LOS from the chosen point to the central point of the target hex.
The Radio has a blast radius of a single hex (the hex occupied by the SR) instead of the usual 7 hexes. During the Accuracy step [O18.2.2], if the Targeting Roll "hits", do not check drift (the SR lands directly in the target hex). If the Targeting Roll "misses", the SR drifts only one hex, as if a normal SR had hit [O18.2.2.1].
If the final target hex is occupied, a Fire attack [O20.3] is resolved against that hex and its results applied. A second Fire attack is then immediately resolved against that hex.
C4.2 German Armor Support (Optional)
Use this rule instead of C2.4.
The German Radio (received under C1.73) represents the direct fire of a section of a few Sturmgeschütz assault guns off-map. As usual, a friendly leader must be activated for an Artillery Request, but two conditions must be met to make the Targeting Roll: (1) the friendly leader serves as Spotter [O18.2.1], and (2) there must be an LOS from the friendly map edge to the target hex. Treat any point on the friendly map edge as a central point, and trace an unobstructed LOS from the chosen point to the central point of the target hex.
The Radio has a blast radius of a single hex (the hex occupied by the SR) instead of the usual 7 hexes. During the Accuracy step [O18.2.2], if the Targeting Roll "hits", do not check drift (the SR lands directly in the target hex). If the Targeting Roll "misses", the SR drifts only one hex, as if a normal SR had hit [O18.2.2.1].
If the final target hex is occupied, a Fire attack [O20.3] is resolved against that hex and its results applied. A second Fire attack is then immediately resolved against that hex.
Normandy Special Rules
There are three independent sections covered by these rules. The Normandy rules (No1–No4) cover the rules generally applicable to most scenarios. The Night rules (No5–No6) are designed specifically for scenarios taking place at night. The Beachhead rules (No7–No9) are designed specifically for scenarios taking place on invasion beaches.
Rules No1–No4 apply in full to all scenarios stating that "the Normandy Special Rules apply". In that case, they must be used in conjunction with any other special rules the scenario may have.
Rules No5 and No6 apply in full to all scenarios stipulating that "the Night Special Rules apply". In that case, they must be used in conjunction with any other special rules the scenario may have.
Rules No7–No9 apply in full to all scenarios stipulating that "the Beachhead Special Rules apply". In that case, they must be used in conjunction with any other special rules the scenario may have.
No1. Bocage
Hedges have their Movement and Cover values increased by one (to "+2" and "2", respectively).
No2. Rural Roads
For maps containing fewer than two multi-hex Buildings, any hex with a drawn Road is considered a Rural Road hex, with ditches and an irregular surface. Rural Roads do not reduce the Cover of their hex by 1. All other rules concerning normal Roads [T93] also apply to Rural Roads.
No3. Limited Smoke Barrage
If, during an FFE (Fire For Effect), the active player chooses "Smoke" instead of HE, he must break his Radio immediately after placing the Smoke.
The Radio is obviously not "broken" in the strict sense of the term. This mechanism simulates the fact that large-caliber smoke rounds were far rarer than HE rounds, and consequently the artillery commander used these smoke rounds sparingly. Thus, a player will want a second "Asset Request" card in hand to fire Smoke, so that his very next order can be an "Asset Request" for a "Battery Access". Smoke concentrations will therefore be half as effective as HE concentrations, but will still be the right choice in certain tactical situations.
[Note: the printed text names this order "Asset Request", where the base Combat Commander: Europe rulebook calls it "Artillery Request". Transcribed as printed.]
No4. Indirect Mortar Fire
No4.1 Scouts
Scouts are normal leaders in all cases, with two exceptions:
a) Independent: having no command value, a Scout cannot increase the characteristics of the friendly units and weapons it is stacked with, nor can it activate other friendly units the way leaders can.
b) Mortar Observer: the "M" in place of the command value of an unbroken Scout represents its ability to activate, and possibly observe for, friendly mortars anywhere on the map.
No4.2 Scouts & Mortar Activation
A Scout may be activated to fire if it then activates one or more friendly unbroken units that are not Suppressed and that possess a mortar. These units may be anywhere on the map, and the Scout itself must have an enemy unit in its LOS, which must also be within range of the activated mortar.
No4.3 Scouts & Observation for Mortars
When a mortar fires, its owner may choose to trace the LOS to the target hex from the friendly Scout that activated it, instead of from the mortar itself. The Targeting Roll must always use the range from the mortar's hex to the target hex, but any Hindrance modifying the roll is based on the LOS from the activated Scout's hex.
[Note: the printed text reads "xible" for "cible" (target). Transcribed as "target" here.]
No5. Night
No5.1 Night Command & Control
Each side's Discard Limit becomes "all". This means that if a player announces no order for his turn, he must discard all the cards in his hand.
No5.2 Night Movement
Each Terrain Type (thus the terrains above the dotted line on the Terrain Chart) has its Movement Cost increased by 1. Terrain Features, such as Roads, Trails or Hills, are not affected.
No5.3 Night Visibility
There is an automatic Hindrance of X, where X is the range from the observing unit's hex to the target unit's hex (so always a minimum of 1). As usual, this Night Hindrance is not cumulative with other Hindrances (such as Smoke or an Orchard).
Note also that the presence of a Starshell [No6] within a 2-hex radius of the target hex completely cancels this Hindrance.
No5.4 Night Radios
Radios may not be chosen from a faction's Support Table during play. However, when a night scenario assigns a Radio to one or both sides in the starting forces, they are fully functional (both for the FFE [O18.2] and for Starshells [No6]), unless the scenario's special rules change this.
No5.5 Night Air Support
Air Support events have no effect.
No6. Starshells
Starshells are markers representing various types of parachute illumination shells used during night actions. They are intended only for use in conjunction with the Night rules above.
No6.1 Placement
A Starshell may be placed on the map via an "Artillery Request" order. A Radio does not need to be in play for this. Instead, when an "Artillery Request" order is announced at night, the active player simply activates an unbroken leader (only). He then carries out the following steps, in the order given:
- Place the SR in any hex in LOS of the activated leader.
- Make an Accuracy Roll, then a drift test, following the procedure used for an artillery strike [O18.2.2].
- Place a "Starshell" marker in the hex where the SR drifts.
- Remove the SR from the map.
No6.2 Effects
A Starshell illuminates its own hex, as well as all hexes within a 2-hex radius around it. Night Hindrance [No5.3] is completely ignored if the target hex is illuminated. The illumination status of the hex from which the attack originates, or of any intervening hex, does not matter.
No6.3 Elimination
Starshells may be removed from the map in one of three ways:
- All Starshells are removed from the map when a Breeze event [E48] occurs.
- During his turn, a player announces an "Artillery Denied" order to remove one Starshell marker from the map.
- During step 4 of each Time Marker Advancement [6.1.2], the triggering player may choose to remove one Starshell marker instead of removing a Smoke marker.
No7. Invasion Terrain
No7.1 Beach
MOVEMENT COST: 1½
COVER: 0
LOS: Clear
Sand: the Attack Total of any Radio or artillery weapon attacking a Beach hex is always reduced by 2.
Terrain Type: the Beach sits between Open Ground and Marsh in the Terrain Type hierarchy [T78.1].
No7.2 Shingle
This represents a natural defensive element of the invasion beach itself. Shingle forms a steep slope of rubble and small stones, giving an average protective element of 2 metres between the slope rising gently from the sea and the mainland. Although it is neither an obstacle nor a hindrance in itself, this slope offers a good element of cover against fire coming from inland.
MOVEMENT COST: +1 if moving from a Beach hex to a non-Beach hex. Moving across a Shingle hexside in the other direction (non-Beach to Beach) incurs no additional movement cost.
COVER: none; or 3 if the Fire crosses a Shingle hexside of the Beach hex when entering that hex (not applicable to Mortar or Artillery fire).
Units in a non-Beach hex gain no cover from Shingle.
LOS: Clear
Terrain Feature: Shingle is a Terrain Feature [T78.1].
Example of Shingle:
A. The British platoon in H7 receives Shingle cover against fire from J7, thanks to the Shingle drawn on the hexside of the target hex. The platoon has no protection against fire from K8.
B. The British platoon in I8 receives Shingle cover against fire from J7 and K8.
C. The British platoon in I9 has no protection against K8. It does not receive protection against J7, because the fire crosses a Shingle hexside that is not part of the target hex.
D. The British platoon in I10 has no protection against J7. K8's LOS is blocked by the fortification. However, if the LOS were not blocked, the platoon would benefit from Shingle cover against K8.
E. The two German platoons in J7 and K8 do not receive the protection offered by Shingle: the platoon in J7 is on the non-Beach side of the Shingle drawing, and the platoon in K8 is not in a Shingle hex.
No7.3 Water Barrier
A Water Barrier represents a body of water deep and/or wide enough to hinder non-amphibious movement, from an anti-tank ditch to a river to the ocean itself.
The following section entirely replaces rule T98.
MOVEMENT COST: All. A moving unit must begin its Movement order adjacent to the Water Barrier hex it wishes to enter, and may not enter any other hex. A unit loses all of its remaining MPs after entering a Water Barrier hex, even if that hex contains a leader.
COVER: -2
LOS: Clear
Liquid Terrain: no weapon of any kind may fire from a Water Barrier hex. No Blaze, Smoke or Fortification of any kind may ever occupy a Water Barrier hex.
No7.4 Communication Trench
MOVEMENT COST: 1
COVER: 4 or 5 against Mortars and Artillery
LOS: Clear
Concealed Movement: a unit moving from one Communication Trench hex to another cannot be the target of Opportunity Fire. A unit moving from a Communication Trench hex to an adjacent hex containing a Trench, Pillbox or Bunker (or vice versa) cannot be the target of Opportunity Fire.
Terrain Type: a Communication Trench sits between Buildings and Woods in the Terrain Type hierarchy [T78.1].
No7.5 Hedgehogs
MOVEMENT COST: 1
COVER: 1
LOS: Clear
Terrain Type: a Hedgehog sits between the Water Barrier and the Ditch in the Terrain Type hierarchy [T78.1].
No8. No Swimming
The player with the "Defense" posture may not gain Exit VPs.
No9. Bunker Destruction
When the Allied player makes a Fire attack with a Demolition Charge against an adjacent hex containing a Bunker or Casemate, and rolls a "double" on his Fire roll, eliminate the Fortification in that hex. The Bunker/Casemate is eliminated before the Defense rolls are made.
This rule represents the use of Bangalore torpedoes, bazookas or other highly explosive weapons at close range.
Designer's Note
In our hobby, people often joke that "you can never have too many games about Normandy". Why is that? In my mind, it is because this is a story of justice and of a large number of people engaged in a common cause. There are many ways to show this story. We must show the fighting on the beaches and in the canals, in the bocage and the meadows, by night and in the towns (the basic form of the battle), on maps derived from real places (the where), using special rules (the how). But to be faithful to the story, we need to show as many different nations as we can (well, that is the how). As you play with this work in your hands, know that we have tried to capture an essential insight, however limited, into the human beings who fought in Normandy in 1944.
[Note: the designer's closing paragraph of thanks to playtesters and supporters is omitted as acknowledgement, not rules.]