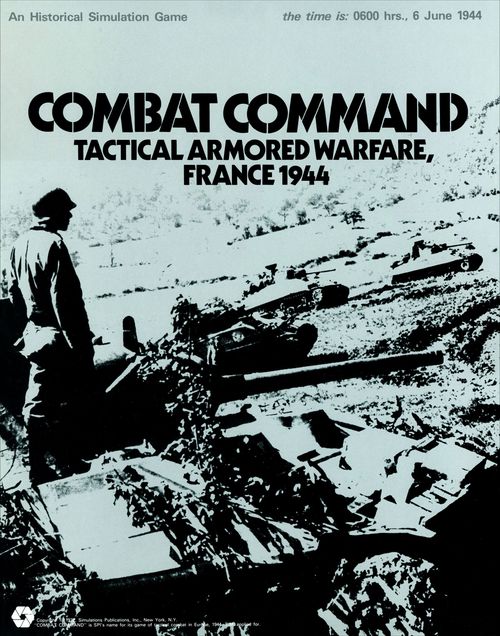
Combat Command: Tactical Armored Warfare, France 1944
Combat Command: Tactical Armored Warfare, France 1944 Rulebook
Table of Contents
Table of Contents
- General Course of Play
- The Playing Pieces
- Necessary Equipment Not Supplied With the Game
- Preparing to Play
- Game Length
- Sequence of Play: The Game Turn
- Movement
- Combat
- Weapons Effectiveness
- Sample Attack (Direct Fire)
- Zones of Control
- Stacking and Unit Breakdown
- Improved Positions
- Wreckage
- Air Strikes
- How to Set-up the Game and How to Use the Scenarios
- Scenario 1: U.S. Airborne Assault
- Scenario 2: German Delaying Action
- Scenario 3. German Armored Assault
- Scenario 4: Allied Mobile Armored Action
- Scenario 5: U.S./German Armored Action
- Scenario 6: U.S. Delaying Action
- Experimental Optional Rules
- Mnemonics
- Combat Command: Designer's Notes
General Course of Play
The 28" by 22" map shows a typical area of northern France, with terrain that affects movement and combat (see Terrain Effects Chart). A hexagonal grid has been superimposed over the map to enable the Players to determine movement, position, and firing ranges of their units. One Player is the United States Player, who controls the United States units, while the other Player is the German Player, who controls the German units. Each Player maneuvers his units and fires his weapons ("attacks") against the units of the Enemy Player, in an attempt to destroy as many Enemy units as possible (see Combat Results Table), and gain certain geographic objectives, while minimizing Friendly losses, and denying the Enemy his geographic objectives.
The Playing Pieces
The square, die-cut pieces (hereafter called units) represent platoon, battery, and company-size military organizations of several different types (e.g., artillery, infantry, armor, etc.). The numbers shown represent that unit's abilities with respect to combat and movement.
Typical Unit
Labels on the sample counter, as printed:
- Attack Strength (upper left)
- Weapon Category (top center)
- Range Allowance (upper right)
- Stacking Points / Size Symbol (left, below the Attack Strength)
- I.D. Number / Unit Symbol (right)
- Designation (bottom center)
- Defense Strength (bottom left)
- Movement Allowance (bottom right)
Definition of Terms
Attack Strength is the basic offensive power of a unit (see Combat).
Defense Strength is the basic defensive power of a unit (see Combat).
Range Allowance is the maximum number of hexagons through which a unit may project its Attack Strength, i.e., fire its weapons.
Movement Allowance is the basic maximum number of hexagons which a unit may move in one Movement Phase.
Weapon Category refers to the type of shell which the unit fires (see Weapons Effectiveness Chart).
Stacking Point / Size Symbol: the horizontal slashes located directly under a unit's Attack Strength indicate the size of the unit and the number of Stacking Points which the unit is. A single slash indicates a Stacking Point / platoon-sized unit. A double slash indicates a two Stacking Point / company-sized unit. A company is always two Stacking Points and a platoon is always one Stacking Point, without exception. See Stacking Rules.
I.D. Number: An arbitrarily assigned identity number useful in keeping track of specific units.
Unit Class System
- CLASS 1a: U.S. Truck units
- CLASS 1b: German Truck units
- CLASS 1c: German Wagon units
- CLASS 1d: All other units with a Movement Allowance greater than "one" (i.e., all other vehicle units).
- CLASS 2: All units with a Movement Allowance of "one" (i.e., infantry, engineers, and Observers).
- CLASS 3: All units with a Movement Allowance of "zero" (i.e., all non-self propelled guns).
Note: All class 1 units are readily identifiable, since they all have silhouettes of the vehicles printed on them. These silhouettes are all to a common scale, except in the case of some of the longer-barreled tanks. Class 2 units use the standard abstract military organization symbols and class 3 use tactical weapon symbols.
Unit Identification Table
The following is a breakout of all the various types of counters supplied in the game. The number of counters available of each type is given in parentheses at the end of each listing.
U.S. Units
- Class 1a Vehicles: Truck Company (2); Truck Platoon (5)
- Class 1d Vehicles (Armored): M-4 "Sherman" Tank Company (1); M-4 "Sherman" Tank Platoon (5); M-4a "Sherman" Tank Platoon (2); M-5 Light Tank Platoon (2); M-7 Self-Propelled 105mm Howitzer Platoon (3); M-8 "Greyhound" Armored Car Platoon (2); M-10 "Wolverine" Tank Destroyer Platoon (1); M-18 "Hellcat" Tank Destroyer Platoon (2); M-24 "Chaffee" Tank Platoon (1); M-26 "Pershing" Tank Platoon (1); M-36 Tank Destroyer Platoon (1); M-4 105mm Assault Howitzer (1); M-15A1 Self-Propelled Anti-Aircraft (1); M-3 Halftrack Company (2); M-3 Halftrack Platoon (7)
- Class 2 Infantry: Infantry Company (6); Infantry Platoon (20); Armored Infantry Company (3); Armored Infantry Platoon (11); Engineer Platoon (2); Observer Section (2)
- Class 3 Towed Artillery: 105mm Howitzer Battery (2); 105mm Field Artillery Battery (3); 155mm Field Artillery Battery (1); 57mm Anti-Tank Gun Battery (2); 50 cal. Heavy Machinegun Platoon (2); 81mm Mortar Platoon (2); Dug-in Markers (10)
German Units
- Class 1b Vehicles: Truck Company (2); Truck Platoon (6)
- Class 1c Vehicles: Wagon Platoon (2)
- Class 1d Vehicles (Armored): SdKfz 251/1 Halftrack Company (2); SdKfz 251/1 Halftrack Platoon (6); PzKpfw IVh Tank Company (1); PzKpfw IVh Tank Platoon (5); PzKpfw V "Panther" Tank Company (1); PzKpfw V "Panther" Tank Platoon (4); PzKpfw VI "Tiger I" Tank Platoon (1); StuG III Assault Gun Company (1); StuG III Assault Gun Platoon (3); "Wespe" 105mm Self-Propelled Artillery Battery (1); SdKfz 234/1 Armored Car Platoon (1)
- Class 2 Infantry: Infantry Company (4); Infantry Platoon (14); Submachinegun Infantry Company (1); Submachinegun Infantry Platoon (5); Engineer Platoon (1); Observer Section (1)
- Class 3 Towed Artillery: 81mm Mortar Platoon (2); 120mm Mortar Platoon (1); 75mm Anti-Tank Gun Battery (2); 88mm Anti-Tank Gun Battery (1); 20mm FLAK Battery (3); Dug-in Markers (10)
For use by Both Players
- Wreck Markers (13)
- Game Turn Marker (1)
Types of Units (Counter Symbols)
- Infantry (cross symbol)
- Armored Infantry (boxed cross symbol)
- Engineers (box with bars)
- Observer (triangle)
- Mortar (vertical stem with bursting head)
- Howitzer (inverted T)
- Field Artillery (inverted T with "FA")
- Anti-Tank Gun (inverted arrow)
- Anti-Aircraft Gun / Heavy Machine Gun (upward arrow)
Game Charts and Tables
Various visual aids are provided to simplify and illustrate certain game functions. These are the Combat Results Table, the Terrain Effects Chart, the Weapons Effectiveness Chart, and the Scenario Charts. Each of these charts are fully explained where they are presented.
Necessary Equipment Not Supplied With the Game
In order to play Combat Command, Players must supply their own die. Dice can usually be purchased in "5&10 cent" stores or can be scavenged from old games.
Preparing to Play
Take the Map sheet and fold it back against itself along the machine folds in order to make it lie flat. Place it on a smooth table top. Players may wish to lightly tape the mapsheet to the table using pieces of masking tape to prevent the map from shifting during play. Familiarize yourself with the counters using the Unit Identification Table before punching out the die-cut squares. Keep the units separated by color and type. Store them in labelled envelopes when not in use. This greatly facilitates future game set-ups. Read through the rules quickly and then play a trial game, referring back to them as necessary. Do not try to memorize the rules; let the game teach them to you as you play. Do not take any of the rules for granted, as you will find many substantial differences in the play of Combat Command as compared to that of other tactical games.
Players will discover game mechanics which may seem strange at first, especially when compared with other Simulation games. They should keep in mind two basic facts: that each unit does not represent an individual man, or single armored vehicle or gun, but rather groups of these types; also, each hex equals 750 meters. Thus it is perfectly feasible that each side could have units in the same space, and "co-exist" for a time. Also, units are so small in relation to the terrain encompassed by a single hex, that there is relatively little restrictions on movement except in narrow areas such as a road.
Game Length
All games are ten Game-Turns in duration. At the end of the last phase of the tenth Game-Turn, Players determine the game-winner according to the Victory Conditions given in the Scenario being played.
Sequence of Play: The Game Turn
Combat Command is played in turns. Each of these Game-Turns is composed of two Player-Turns. Each Player-Turn is composed of five basic Phases during which specific game actions are performed. In one Scenario, the U.S. Player has an additional Phase in his Player-Turn, called the Air Strike Phase.
Outline of a Complete Game-Turn
1. First Player-Turn
A. Offensive Fire Phase: the First Player allocates his units to Offensive Fire attacks. Offensive Fire attacks are resolved one by one in any order that the First Player desires. Losses are extracted from the Second Player's units immediately as they occur. Units which fire in this Phase may not move in Phase "B," nor may they attack in Phase "C" or "D."
B. Movement Phase: First Player may move all, some or none of his units as he desires, in any direction, up to their full Movement Allowance, consistent with the rules of Movement. Units which fired in Phase "A" may not be moved. The Second Player may execute Fire attacks against First Player units which attempt to leave Second Player Zones of Control (see Zones of Control) and make Modified Close Assaults (see Close Assaults).
C. Overrun Phase: First Player may execute Overrun attacks against Enemy units. Losses are extracted immediately as they occur.
D. Close Assault Phase: First Player executes any Close Assault attacks and losses are extracted from the Second Player's units immediately as they occur.
E. Air Strike Phase: only the U.S. Player has an Air Strike Phase, and he has it only in the Scenario which calls for it. The U.S. Player allocates and resolves all Air Strikes, and losses are extracted from Second Player's units immediately as they occur.
F. Defensive Fire Phase: the Second Player may allocate his units to Defensive Fire attacks against the First Player's units. Attacks are resolved one by one and losses are extracted from the First Player's units immediately as they occur. NOTE: even though it is the Second Player who takes all the action in this Phase, nevertheless, the Phase is still considered to be part of the First Player's Turn.
2. Second Player-Turn
The Second Player repeats Phases "A" through "F" using his own units to make Offensive Fire attacks, move, execute Overruns and Close Assaults, and he suffers Defensive Fire at the hands of the First Player.
3. Indicate the passage of one complete Game-Turn by moving the Game-Turn marker on the time record scale.
Note that a Player's units which have fired in the Defensive Fire Phase may immediately be fired again in the following Offensive Fire Phase. Note that the determination of who is the "First Player" and who is the "Second Player" is made in the Scenario being played. The U.S. Player is not always the "First Player" as the Sequence of Play might seem to indicate.
Movement
General Rule
During a Player's Movement Phase, the Player may move as many or as few of his units as he desires. Each unit may be moved as many hexes as desired within the limits of its Movement Allowance, the Terrain Effects Chart, and the Zone of Control Rules.
Procedure
Move each unit individually, tracing the path of its movement through the hexagonal grid.
Movement Example
The numbers in the hexagons indicate the number of Movement Points which the unit must expend in order to enter that hex.
Cases
(A) Movement is calculated in terms of hexagons. Each unit expends one or more Movement Points of its total Movement (point) Allowance for each hex entered. See the Movement section of the Terrain Effects Chart for a full list of these different "entry costs."
(B) In any given Movement Phase of a Player-Turn, the Player may move all, some, or none of his units. Movement is never required; it is always voluntary. (Exception: See Combat Results Explanation "Retreat.")
(C) Units are moved individually, in any direction or combination of directions. A unit may be moved as many or as few hexes as the owning Player desires, as long as its Movement Allowance is now exceeded in a single Movement Phase. Unused Movement Points, however, may not be accumulated from Phase-to-Phase or transferred from unit-to-unit. Each unit must finish movement before moving another unit.
(D) No Enemy movement is permitted during a Player's Movement Phase.
(E) Any units which have fired in the preceding phase (the Offensive Fire Phase) may not be moved during the ensuing Movement Phase.
(F) In any given Movement Phase, as Friendly units leave an Enemy unit's Zone of Control, they may be attacked (see Zone of Control).
(G) Enemy units and Friendly units may occupy the same hex simultaneously, unlike many other simulation games. They may also move through each other.
(H) Friendly units may pass through or onto other Friendly units as long as the Stacking limit is never exceeded (see Stacking) by the combined Stacking Points of the stationary and moving units.
(I) Units may form into companies or platoons at any time during the Movement Phase. (See Stacking and Unit Breakdown.)
(J) Road Movement
Two types of roads are to be found on the Game Map: Primary roads and Secondary roads. Units moving on roads may do so at the Road Movement Rate. Only Class 1 units (vehicles) may use the Road Movement Rate (see Terrain Effects Chart). Units may only use the Road Movement Rate if they are entering the Road hex through a Road hex-side. If entering a Road hex through a non-road hex-side, the unit must pay the full entry cost of the other terrain in the hex being entered.
Class 1 Units may not enter Road hexes containing other Class 1 units and still be considered to be travelling at the Road Movement Rate. In effect, the presence of one other vehicle unit (whether Enemy or Friendly) negates the road, and such a hex may only be entered at the non-road movement rate as dictated by the other terrain in that hex. The presence of Wrecks also negates the road in a hex.
Class 1 units moving through Woods hex-sides may only do so on roads and may only move on such roads at the Road Movement Rate. In other words, there can never be more than one Class 1 unit (or Wreck) on a given Woods/Road hex except when the hex is partially Woods and partially Clear Terrain. Other classes of units are not affected by this limitation.
(K) Transporting Units
Class 2 and 3 units (infantry, engineers and non-self-propelled guns) may be transported by Class 1 (vehicle) units, in order to increase their mobility. The Class 1 unit is called the transport unit, while the transported Class 2 or 3 unit is called the passenger unit. To symbolize that a unit is being transported, place it directly under the transport unit(s). Passenger units may not move independently in any Movement Phase that they were picked up, carried, or dropped; they may function in all of the other phases of a Game-Turn if they are not passengers (i.e., in the vehicle) during those phases.
The following units are used in the transport role with these particular passenger units:
-
Class 1a and 1b (Truck) units and Halftrack (Class 1d) units may transport any Class 2 or 3 units as passengers;
-
Class 1c (Wagon) units may only transport Class 3 (Non-self-propelled gun) units;
-
Only German non-halftrack Class 1d units (tanks, assault guns, etc.) may transport, and these units may only transport Class 2 (infantry and engineer) units. U.S. non-halftrack Class 1d units may never transport any units.
Transport units suffer a movement penalty for picking up (i.e., beginning the transport function) and dropping (i.e., ending the transport function) passenger units. To pick up a Class 2 passenger unit (infantry/engineers), the transport unit must expend an additional six Movement Points; to drop a Class 2 passenger unit, the transport must expend an additional three Movement Points. To pick up a Class 3 unit, the transport unit must expend an additional three Movement Points; to drop a Class 3 unit, the transport unit must expend an additional two Movement Points. These costs apply no matter what type the transport unit is; only the Class of the passenger unit matters. To pick up a unit, the transport unit must be in (or move to) the same hex as the passenger; a unit may not be dropped if the transport unit does not have the requisite number of Movement Points to expend. No actual movement on the hexagon pattern is accomplished by the additional costs of picking up or dropping; the passenger unit is simply placed under, or out from under, the transport unit.
Transport units may only carry units of the same size as themselves, as expressed in Stacking Points. Thus a one Stacking Point transport unit may only carry a one Stacking Point passenger unit. To carry a two Stacking Point unit (or two one Stacking Point units), a Player would need one two-Stacking Point transport unit. Observer units (with zero Stacking Points) may be transported by any appropriate unit without affecting the transport unit's capacity for carrying other units, i.e., Observer units get a "free ride." Transport units, however, must still pay the appropriate Movement Point costs to pick-up or drop-off Observer units.
Passenger units suffer a number of impairments while being carried. They may not attack, nor may they be used to spot or observe or in any manner be used to assist other units in firing. Passenger units being transported by Class 1a, 1b, 1c or halftrack units lose their Defense Strength while being transported, and defend solely with the transport unit's Defense Strength. If the Transport unit is destroyed, all the passenger units are also destroyed. If the transport unit has lost its Movement Allowance due to a combat result of dispersal or retreat, the passenger units may not be dropped until the vehicles regain their Movement Allowance. When a transport vehicle is dispersed, its passengers are not dispersed.
German units being transported by non-halftrack Class 1d units form a special case. As with other transport units, if the transporting unit is destroyed, so are the passenger units. Also, the same procedure for transport units dispersed or retreated applies. In this type of transport, the passenger units may be attacked apart from the vehicle. Each passenger unit defends with a Defense Strength of one. These units still may not attack, spot or observe.
Transport units are never inhibited by the act of transporting; they are able to attack and defend and spot normally, and their movement is only affected by the additional cost for picking up or dropping units.
(L) Units are moved individually, and each unit must be moved completely before another unit is moved. Thus a Player may not move a unit partially, move a second unit, and then finish the first unit's movement. This is very important, since stacking limitations are effective during movement. Once a Player has finished moving a unit, it may not be moved again in the same Movement Phase.
Summary of Movement Point Costs for Transport Units Picking Up and Dropping Passengers
| Type of Passenger | Pick-Up | Drop-Off |
|---|---|---|
| Class 2 | 6 | 3 |
| Class 3 | 3 | 2 |
Combat
General Rule
There are four modes of Combat: Fire Combat, Overrun Combat, Close Assault Combat, and Air Strike Combat. Air Strike Combat is explained in a separate rule section, as it is not used in all of the Scenarios.
Procedure
Determine type of attack, making adjustments to Attack Strength as necessary for Weapons Effectiveness, Terrain Effects, condition of defending unit (dispersed or not), and type of Attack. Total up the adjusted Attack Strength(s) of the attacking unit(s), and compare the total Attack Strength to the total Defense Strength of the unit(s) under attack. State the comparison of the two Strengths as a probability ratio, simplified downward to the nearest whole number on the Combat Results Table. Example: 29-10 (or 2.9 to 1) would be simplified as 2:1 odds on the Combat Results Table. Roll the die, and read the result on the appropriate line, under the computed odds. Apply each result immediately, before going on to resolve any further combat.
Cases
(A) Every attacking unit attacking the same defending unit(s), and using the same mode of attack, must combine their Attack Strengths into one Combined Attack Strength before computing the odds comparison. You may not attack the same unit more than once per phase (exception: Zones of Control, Cases A and D).
(B) A unit may never divide its individual Attack Strength among different targets, nor may a unit ever use its Attack Strength more than once during a Friendly Player-Turn.
(C) Class 3 units of a non-AP Weapon Category may triple their Attack Strength during any phase; after this tripled Attack Strength is used, the firing unit is removed from the Game-Map and considered eliminated. They have expended their ammunition.
(D) During the course of a Friendly Player-Turn, a given Enemy unit could conceivably be attacked as many as four times; once during the Offensive Fire Phase, again during the Overrun Phase, again during the Close Assault Phase and lastly during the Air Strike Phase (assuming, of course, that Air Strikes are available, and that the hapless unit has survived the preceding three attacks). Remember, however, that Friendly units may never participate in more than one attack during the entire Friendly Player-Turn.
1. Fire Combat
(a) Fire Combat takes place during the Offensive Fire Phase, the Movement Phase, and the Defensive Fire Phase. The Player whose Turn it is fires his weapons during the Offensive Fire Phase. During his Movement Phase, any of his units which leave an Enemy-controlled hex may be fired at by the controlling Enemy unit (see Zone of Control). During the Defensive Fire Phase, the Enemy Player may fire his weapons.
(b) The following are the major items to be considered when executing a Fire Attack:
Range-the Range Allowance of the firing unit(s) and the distance to the target-hex.
Category of Weapon-there are three basic weapon categories: Armor Piercing (AP), High Explosive (HE), and Rapid Fire (RF). These categories actually describe the type of shell being fired. Do not confuse Weapon Category with Target Type.
Target Type-there are two basic types of target: Armored Targets (Class 1d vehicles) and Non-armored Targets (i.e., all other units, including trucks and wagons). Do not confuse Target Type with Weapon Category - just because a unit is an Armored Vehicle does not necessarily mean that its weapon fires Armor Piercing ammunition. (See Weapons Effectiveness Chart for a fuller explanation of Weapon-to-Target relationships.)
Blocking Terrain-see Line of Sight, Cases f and g.
Condition of Target-the terrain in the target hex and the state of the target unit (i.e., dispersed or normal).
Attack Strength vs. Defense Strength-the final adjusted Combat Odds in a given fire attack after Terrain Effects and Weapons Effectiveness have all been taken into consideration.
(c) There are two techniques of fire which can be used in Fire Combat: Direct Fire and Indirect Fire. All units which have an Attack Strength may use direct fire, while only units with a Range Allowance of "7" or higher may use Indirect Fire. For an explanation of the Indirect Fire technique, see Case i.
(d) Direct Fire is flat-trajectory, line-of-sight fire against targets which can be directly observed by the units firing at them. Units may use Direct Fire against targets which are in the same hex as themselves or which are any number of hexes distant up to a maximum of six hexes or up to the limit of the firing unit's Range Allowance, whichever is LESS. Units may never use the Direct Fire technique at ranges of greater than six hexes, even if the unit's Range Allowance is greater than six.
(e) Range is determined by counting the fewest number of hexes from the firing unit to the target hex (as if one were moving a unit, but completely disregarding terrain effects).
(f) Line of Sight / Line of Fire (LOS / LOF)
In order to fire at a given target hex, the Attacking Player must be able to trace a perfectly straight line unobstructed by terrain from the center of the hex containing his firing unit to the center of the target hex. Players should use a straight-edge (such as a ruler or stiff cardboard) in order to delineate the Line of Sight (since one can only direct fire against targets which one can "see," the terms "Line of Sight" and "Line of Fire" are identical and will be used interchangeably).
(g) Obstructing Terrain and Covering Terrain
There are three types of Obstructing Terrain which interrupt the Line of Sight and thereby prevent Direct Fire:
-
Town Heavy hex-sides - the heavied-up black hex-sides found on some Town hexes.
-
Woods hex-sides - any hex-side which is wholly or PARTIALLY covered by the woods-pattern.
-
Hill-crest hex-sides - when a unit is on a Hill-crest hex, a Line of Sight may be traced from it or to it as long as the Line of Sight does not pass through more than one Hill-crest hex-side. When units are on opposite sides of a Hill-crest hex-side and neither unit is actually in a Hill-crest hex, then the Line of Sight between them is obstructed by the Hill-crest hex-side. Note that the only sides of a Hill-crest hex which are actually considered to be "Hill-crest hex-sides" are those hex-sides against which the denser edge of the slope splash butts exactly. The plain sides of a hill-crest hex do NOT obstruct fire, nor are they considered in any way to be at a higher level than ordinary terrain. The heavy-hex-side symbols superimposed on the ridge-like terrain (where slope meets slope directly) always obstruct fire (just like Town heavy hex-sides), since there is no true Hill-crest hex on either side of those particular slopes.
Illustrations on the sheet show a Hill-crest hex-side and a Ridge hex-side.
(h) Judging the Line of Sight.
Lay the straight-edge from the center of the firing hex to the center of the target hex. If any point along the straight edge passes through obstructing terrain, then the Line of Sight is blocked and direct fire may not take place. If the straight edge passes exactly through the "corner" of a hex at the intersection of a blocked hex side and an unblocked hex side, then consider the Line of Fire to be obstructed. If the straight edge passes exactly through the length of a blocked hex side, then consider the Line of Sight to be blocked. All ambiguous cases should be decided in favor of the defending unit. Players should keep in mind the spirit of the rules which are attempting to represent three-dimensional effects in a two-dimensional game-environment.
The sheet illustrates a Clear Line of Sight from a Firing Unit to a Target Unit, and an Obstructed Line of Sight (blocked by a wood hex-side) from another Firing Unit to the same Target Unit.
Covering Terrain. There are two types of covering terrain: Woods hexes and Town hexes. Friendly units may not fire at Enemy units in covering terrain (even though in all respects their Line of Sight is Clear) unless there is a Friendly unit in the target hex. See Spotting, Case k. Units which are in covering terrain may fire out of such terrain, assuming that their Line of Sight is not obstructed by any of the three types of obstructing hex-sides mentioned previously.
Fire is never obstructed by units (either Enemy or Friendly). Players may trace a line of sight into or through any and all types of units.
(i) Indirect Fire and Observers
Units with a Range Allowance of "7" or greater have the capability of using the Indirect Fire technique. Indirect Fire cannot be obstructed by terrain (and there is no need to trace a Line of Sight for the firing unit). In order to use Indirect Fire upon a given target hex, that hex must be under observation by a Friendly Observer unit. The Observer unit must be able to trace a Line of Sight to the target hex (under the exact same restrictions as tracing a Line of Sight for Direct Fire purposes; in effect, the Observer is a "weaponless" Direct Fire unit with a maximum range-of-observation of six hexes). The Observer unit may be in the same hex as the Target. The Observer may observe for any number of Indirect Fire attacks in a single Fire Phase. The Observer must be in a normal, non-passenger, undispersed state. They may be "Dug-in" (see Improved Positions).
Direct and Indirect Fire may be concentrated upon the same target in the same phase, as long as the requirements for both types of fire are met for the respective units. Targets in covering terrain must still be spotted even when firing indirectly, although the Observer unit itself need not do the spotting: the target may be spotted for the Observer by another Friendly unit.
When a unit fires using the Indirect Fire technique, its Attack Strength is HALVED. This halving is in addition to any other considerations affecting the Attack Strength of the unit.
Units may execute Indirect Fire attacks against targets which are adjacent to them or which are at any point within their range.
(j) Attacking stacked Target-hexes.
When defending units are stacked together in a given target hex, they may be singled out and attacked as individual units or they may be attacked in small groups of units or the entire stack may be attacked at once (combining all their Defense Strengths). As long as no target unit is attacked more than once in a given Fire Phase (Offensive or Defensive) and as long as no unit fires more than once in a given Fire Phase, the target units in a given hex may be attacked in any combination the firing Player chooses within the following restrictions:
-
Target units in Covering Terrain (Woods or Towns) must be combined and attacked as a whole Defense Strength. If there are any armored units (Class 1d) in such a stack, then the whole stack is treated as an Armored Target.
-
When target units are not in Covering Terrain, they may only be lumped together by target type (i.e., Armored or Non-Armored) or attacked individually. Mixed target types may not be combined into a single target.
(k) Spotting Targets in Covering Terrain.
When attempting to use Direct Fire upon, or Observe, targets in Covering Terrain (Woods or Town hexes), a Friendly unit must be in the same hex as the target in order to "spot" it. The "spotter" may be any type of Friendly unit as long as it is in a normal (undispersed) state. Units which are passengers may not spot, but the transport vehicle may. A single unit may spot for any number of attacks upon the hex it is in, and may itself participate in attacks against the units it is spotting or against units in other hexes. The spotter is not affected by Friendly fire, whether Direct or Indirect. The act of spotting a target does not relieve the attacker of any of the obstructing effects of blocking terrain hex-sides. The spotting effect lasts only as long as there is a Friendly unit in the target hex; it does not persist, even though the target units may have remained in place and the spotting unit eliminated or withdrawn. The Attacking Player must add "one" to his die roll number when attacking units in Covering Terrain.
2. Overrun Combat
(a) Overrun attacks are executed during the Overrun Phase. Only Class 1d units are capable of making Overrun attacks. Special exception: German Wespe and U.S. M-7 units may not participate in Overrun attacks.
(b) Procedure: the Overrunning units must be in the same hex as the units which are to be Overrun. They may have begun the Player-Turn in that hex, or they may have moved to it during the Movement Phase. All of the Enemy units in the hex must be treated as one combined Defense Strength. Do not take Weapons Effectiveness into account; simply use the printed Attack Strength(s) of the Overrunning units. Calculate the combat odds and then raise them by one column (e.g., "2 to 1" becomes "3 to 1"). Roll the die and subtract "2" from the die-number (e.g., a die-roll of "2" reduces to "0"). Extract losses from the defending units.
(c) All types of Enemy units may be Overrun. Overrun attacks may only be executed in Clear terrain or Clear terrain / Road hexes.
(d) Units may not attack in the Overrun Phase if they participated in Fire Combat during the Offensive Fire Phase in that Player-Turn. Half-track (RF) units may not participate in Overrun attacks if one-half or more than one-half of the Enemy Defense Strength in a hex is composed of non-halftrack Armored vehicles (Class 1d).
(e) As many as six Friendly Stacking Points of Class 1d units may participate in a given Overrun attack.
(f) Units may not move at the Road Movement Rate in the Player-Turn in which they participate in an Overrun attack. Overrunning units may be carrying passenger units or may have unloaded passenger units in the hex which they are Overrunning.
3. Close Assault Combat
(a) Close Assault attacks are executed during the Close Assault Phase of a Player-Turn. Only Class 2 units may execute Close Assault attacks. All types of Enemy units may be attacked using the Close Assault method.
(b) Procedure: Units participating in a Close Assault attack must be in the same hex as the Enemy units which are the object of the attack. The Close Assaulting units may have begun their Player-Turn in that hex or they may have been moved there during the Movement Phase. Do not take Weapons Effectiveness into account; simply use the printed Attack Strength of the Close Assaulting units. Close Assaulting units must attack all of the Enemy units in the hex, treating them as a combined Defense Strength regardless of Target type. If any of the participating Friendly units are Engineers, the combat odds are raised by one column (as in Overruns). Calculate the odds, roll the die and subtract "2" from the die number. Extract losses from the Enemy units.
(c) Close Assaults may be made in any type of terrain. Terrain effects are taken into account, as well as any additional modifications to the attacker's die roll due to the state of the defending units.
(d) Class 2 units may be delivered to a hex, for purposes of Close Assault, by transporting vehicle units. They must, however, have been dropped during the Movement Phase.
(e) Units which have participated in Fire Combat during the Offensive Fire Phase may not participate in Close Assaults in the same Player-Turn.
(f) Modified Close Assault: During the Enemy Movement Phase, Friendly Class 2 units may conduct Modified Close Assaults against Enemy units which move into their hex. Modified Close Assaults are executed exactly as normal Close Assaults except that there is no subtraction of "2" from the die-roll (the Engineer odds bonus does apply). In a given Enemy Movement Phase, every time a new Enemy unit enters the hex, Friendly Class 2 units may conduct a Modified Close Assault (they must, however, attack all the Enemy units in the hex, even those which they may have already Close Assaulted during an earlier part of the same Phase). This opportunity to attack is in addition to the fire attack which may be made against the Enemy unit as it leaves the outer Zone of Control to enter the Friendly occupied hex.
Weapons Effectiveness
(See chart on map.)
General Rule
Certain kinds of weapons are more (or less) effective when fired at certain types of targets. There are three categories of weapons (differentiated by the type of projectile being fired):
Rapid Fire (RF): Machine-gun and sub-machine gun solid shot (bullets).
Armor Piercing (AP): High velocity shells specially designed for use against armor.
High Explosive (HE): Lower velocity shells which rely primarily on blast and fragmentation for their effectiveness.
There are two basic types of targets:
Armored Targets: All Class 1d vehicles (Tanks, Assault Guns, Halftracks, etc.)
Non-armored Targets: All other units (including trucks, wagons, infantry, guns, etc.)
It is important that Players make a clear separation in their minds between the type of target a unit is and the category of weapon that the unit fires. Don't confuse the two: just because a unit happens to fire AP weapons, it doesn't necessarily mean that the unit is an Armored Target.
Procedure
When firing at a given unit, determine the Target-type and the Weapons Category of the attacking unit. Consult the Weapons Effectiveness Chart and perform the indicated modification of the unit's Attack Strength. Any Modification of a unit's Attack Strength due to Weapons Effectiveness is in addition to modifications due to Terrain.
Cases
(A) Weapons effectiveness is only taken into account during Fire Combat. Fire Combat occurs during the Offensive Fire Phase, the Movement Phase, and the Defensive Fire Phase. Weapons Effectiveness is not taken into account when conducting Close Assault, Overrun, or Air Strikes.
(B) Whenever a unit has an odd-numbered Range Allowance, drop the fraction when computing "half range." For example, a U.S. M26 (AP) unit has a Range Allowance of "5"; half range for this unit would be "2". A unit with a Range Allowance of only "1" would have to be in the same hex as the target in order to be considered at "half range or less."
(C) The U.S. infantry units which are called "Armored Infantry" are not Armored Targets. The title only reflects the organizational characteristics of these particular infantry units. Just keep in mind this simple rule: all vehicle units, except wagons and trucks, are Armored Targets and the only Armored Targets in the game are these Class 1d vehicles.
(D) When Enemy units are stacked together in Towns or Woods, the entire stack must be treated as one combined Defense Strength. If any of the Enemy units in such a stack are Armored Targets (Class 1d), then the entire stack is treated as if it were an Armored Target. This is the only case in which a Non-armored unit will be treated as an Armored Target.
Sample Attack (Direct Fire)
During the Offensive Fire Phase of the U.S. Player-Turn, (Fifth Game-Turn) the U.S. Player wishes to fire into a partial Woods hex containing three German units and one U.S. unit. The German units are: a Halftrack Platoon, an Infantry Platoon "dug-in" and a dispersed 75mm Anti-Tank Gun Battery. The U.S. unit in the Woods hex with the Germans is an M-5 Tank Platoon. The U.S. units outside the Woods which have been allocated to fire at the Germans are: an M-7 platoon at 6 hex range, a 105mm Howitzer Battery at 2 hex range, and an M-4 Tank Platoon at 2 hex range.
Terrain Considerations: since the German units are in Covering Terrain, they must be spotted. The M-5 platoon fulfills this requirement. Also, since the target is in Covering Terrain, it must be attacked as one combined Defense Strength (the units may not be singled out for attack). Add "1" to the U.S. die-number due to Woods.
State of Target: the 75mm Anti-Tank Gun Platoon is dispersed, but since it does not constitute half or more than half of the total target Defense Strength, the target is considered to be normal (undispersed). The Infantry Platoon is in an Improved Position (dug-in), and since all the German units are being attacked as one group, the entire stack benefits from the dug-in marker. Add "1" to the U.S. die-number.
Weapons Effectiveness: since one of the units is an Armored Target (the Halftrack), and the target is in Covering Terrain, the entire target is considered to be an Armored target. The M-5, which is participating in the attack as well as the spotting, is firing at less than half range. Its Attack Strength is doubled (to "6"). The M-4 Tank Platoon is at greater than half range so its Attack Strength is normal ("13"). The M-7 is an HE weapon firing upon an Armored target at greater than half range. Its Attack Strength is halved (to "6"). Since the 105mm Howitzer Battery is at less than half range, its Attack Strength remains normal ("8"). Total U.S. Attack Strength is "33" vs. a total German Defense Strength of "14." "33 to 14" simplifies to "2 to 1". Total die-number additions is "2". The Result: the U.S. Player rolls the die obtaining a "3". This is changed to a "5" and the result is "R" (retreat). The "R" result has no effect upon the dug-in Class 2 unit; it causes the Class 3 unit to be dispersed; and it forces the Halftrack Platoon to be retreated ten Movement Points of distance. The Halftrack unit may not move in its ensuing Movement Phase, the 75mm Anti-Tank Gun Battery remains dispersed until the beginning of the next U.S. Offensive Fire Phase. The German Infantry Platoon is unaffected.
Zones of Control
General Rule
The six hexagons surrounding a unit, and the hex that the unit occupies constitute that unit's Zone of Control. Hexes upon which a unit is exerting its Zone of Control are called Controlled hexes. Friendly units must announce their intentions to leave Enemy Controlled hexes during the Movement Phase, and before they move, they may be attacked in the hex they are about to leave.
Cases
(A) Only the units exerting the Zone of Control may attack, and such units may attack as many times as their Controlled hexes are vacated. (Note: this is in exception to the rule that units may only attack once per Phase, Combat: Case A).
(B) All rules of Combat apply, with the exception of the Case noted above and Case F below. All Combat Results take effect immediately.
(C) If the attack results in a "no-effect" combat result, the moving unit may continue with any remainder of its Movement Allowance. (Note: there is no additional movement cost to enter or leave enemy controlled hexes.)
(D) Only two types of Enemy attacks may take place during a Player's Movement Phase: Direct Fire (as above) and Modified Close Assault (see Combat for a full description of these types of attacks). Modified Close Assault attacks are made immediately whenever units move directly on top of Enemy Class 2 units (the defending units may fire, within the usual combat rules, at the moving units before they enter the hex, in addition to making the Modified Close Assault once the moving units enter the same hex).
(E) Targets in Covering Terrain must still be spotted.
(F) Since Players may only move one unit at a time, and since only moving units may be fired upon in the Movement Phase, there will never be an instance in which the non-moving Player fires his controlling units at more than one moving Enemy unit at a time (even when the moving unit is in Covering Terrain).
Zone of Control Example
The German unit may fire at the moving U.S. unit each time it attempts to leave a hex controlled by that German unit. Results are applied immediately as they occur.
(The sheet illustrates a U.S. Unit moving out of a hex controlled by an adjacent German Unit, passing through a hex in the German unit's Zone of Control.)
Stacking and Unit Breakdown
(more than one unit per hexagon)
General Rule
Each Player may have as many as six Stacking Points of units per hexagon. Each platoon-size unit equals one Stacking Point, and each company-size unit equals two Stacking Points, without exception.
Cases
(A) Stacking limitations apply at all times, even during a Movement Phase of a Player-Turn. Therefore a unit may not move through a hex if the total Stacking Points of the moving and stationary Friendly units exceeds six. See also, Movement Case J.
(B) Enemy units, Friendly units being transported (see Movement Case K), Dug-In markers, and Observer units have no Stacking Points for the purpose of Friendly Stacking Point limitations (i.e., they have no affect on stacking and are ignored for Friendly stacking purposes).
(C) Each Wreck marker equals one Stacking Point (see Wreckage).
(D) Units may be "broken-down" (into smaller units) or recombined at any time during the Movement Phase. Units, however, may never break down if this would violate the Stacking Limit. To break down or recombine units, simply remove the unit(s) to be replaced, and place the unit(s) replacing it on the same hex.
Units break down and recombine in the following fashion:
- Class 1d non-halftrack units, and Class 2 units: one company = three platoons
- Class 1a, Class 1b, and Halftrack units: one company = two platoons
Note that Class 3 units are only available in platoon-sized counters.
Stacking Point Symbols: One Stacking Point (Platoon) = a single slash; Two Stacking Points (Company) = a double slash.
Improved Positions
(Dug-In marker, shown as a hexagon marked "+1")
General Rule
Class 2 units may attempt to "Dig-In" in order to improve their defensive ability. When attacking a "Dug-in" unit, the attacker adds "one" to the die roll.
Procedure
A Class 2 unit may attempt to dig-in at the end of any Friendly Movement Phase in which it did not move. Roll the die for each unit attempting to dig-in; if a "one" or a "two" is rolled, the unit is considered "Dug-In" (place a Dug-In marker on the hex) while if a "three" through a "six" is rolled, it is considered to have no effect: the unit is not "Dug-In."
Cases
(A) In all Scenarios, Class 2 units which start on the game-map may be considered dug-in, except in Town-hexes.
(B) Class 2 units may Dig-In anywhere except Town hexes.
(C) Regardless of the type of attack against Dug-In units, "one" is added to the attacker's die-roll (in addition to any effects due to terrain, condition of unit, or type of attack).
(D) Once a Dug-In position is established, other Friendly Class 2 units may move into the hex containing the Dug-In position, and consider themselves Dug-In (without having to roll the die).
(E) Dug-In markers are removed if the Dug-In units are destroyed, or if they leave the hex in which they were Dug-In.
(F) If a hex is attacked containing a mixture of Dug-In Class 2 units and any other type of units, all the units get the die-roll benefits of being Dug-In. Of course if the Class 2 units were not attacked, the other units in the hex would not get the benefit of being Dug-In if they (the other units) were the exclusive object of the attack.
Wreckage
(Wreck marker shown)
General Rule
Destroyed Class 1d units (Armored vehicles) are replaced with Wreck markers equal in number to the Stacking Points of the destroyed Class 1d unit. Wrecks affect Movement and Stacking.
Cases
(A) Each Wreck marker is equivalent to one Stacking Point; thus if a two Stacking-Point Class 1d unit is destroyed, replace it with two Wreck markers.
(B) Any number of Wreck markers negate the effect of a road in a hex (see Movement Case J).
(C) Wreck markers may never be attacked, but may be removed. To remove a Wreck marker, a Class 1d unit must remain adjacent to the Wreck marker for one full Friendly Movement Phase (the unit must begin and end the Movement Phase adjacent to the Wreck marker). The Wreck marker is removed at the end of the Movement Phase. Either Player's units may remove any Wrecks, regardless of origin. Each Wreck marker is removed individually. Thus if two Wreck markers are in a single hex, two Class 1d units could remove them both in one Movement Phase, or one Class 1d unit could remove one for each full Friendly Movement Phase spent adjacent.
(D) The act of remaining adjacent to a Wreck marker for an entire Movement Phase does not require the removal of the Wreck marker; it merely makes removal possible; the Player may wish to leave the Wreck in place.
Air Strikes
General Rule
One of the scenarios specifies that the U.S. Player receives a certain number of Air Combat Strength Points on certain Player-Turns. These Air Combat Points are used during the Air Strike Phase of the U.S. Player-Turn. Air Combat Points may not be saved or accumulated for use in subsequent Player-Turns.
Procedure
Air Strike Combat is resolved in a manner similar to other types of Combat. The U.S. Player allocates his available Air Combat Points to attacks against specific targets, comparing the number of Air Combat Points being used in a given attack to the Defense Strength of the German target units. The die is rolled for each air strike and the results are read from the Combat Results Table.
Cases
(A) Targets are attacked just as in ground Fire Combat. The U.S. Player may single out individual German units in a given attack, or he may attack groups of units in a stack, or attack the entire stack at once.
(B) Targets in Covering Terrain: German units in Woods or Town hexes must be treated as a single, combined Defense Strength. They must be spotted by a U.S. ground unit in the same hex. In addition to adding "1" to the die roll for the Air Strikes against targets in Woods or Towns, the effective value of the allocated Air Combat Points is cut in half. For example: if the U.S. Player allocated eight Air Combat Points to an attack against a Town hex containing three German units with a combined Defense Strength of "4," then the Combat odds would be 1 to 1 (adding "1" to the die-roll number).
(C) Weapons Effectiveness and Target-type rules have no bearing upon Air Strike Combat. Players should simply use the printed value of the units to arrive at the Defense Strength of units under attack. Armored and Non-Armored targets may be attacked in combination, unlike normal Fire Combat. Blocking terrain has no effect upon Air Strikes (only Covering Terrain has an effect). Improved Position rules apply to targets of Air Strikes.
(D) "R" (Retreat) results do not apply to Air Strike Combat. Treat "R" results as "no-effect." Treat "DR" as "D."
(E) Air strikes may not in any way be combined with other types of combat; they may only be performed in the Air Strike Phase.
How to Set-up the Game and How to Use the Scenarios
Each Scenario constitutes a separate game representing a particular battle. Players may only deploy and move their units on the "Battlefield" given in each Scenario, and may never use sections of the map not called for in the particular Scenario. Each Player selects his forces on the basis of the Order of Battle given for each Scenario. Information is given as to who deploys first, and who moves first. Whenever units start on the Game-Map, they may be Dug-In (if they are Class 2 units). In addition, they may be deployed inverted to conceal their identity. These units stay inverted until they fire, move, are fired at, or are spotted, at which time they are turned face-up. Before forces are deployed, they may be combined into Company size units (Note: all forces in the Orders of Battle are given in Platoon size). The section marked Special Rules in some of the Scenarios indicate rules not normally used that must be used in the given Scenario. At the Completion of the tenth Game-Turn, each Player's performance is evaluated in terms of the given Victory Conditions of each Scenario.
Note: Players should be aware that the Scenarios are not exact recreations of the units or terrain involved, although the Scenarios do depict actual small-unit actions on the Western Front. Rather the Scenarios are abstractions which recreate similar terrain features to the actual battlefields. You could take a map out of the actual area and point out salient features as represented on the Game-Map. By the same token, the forces are not necessarily identical to the original forces, but are given on the same equivalent force-levels as existed in the actual actions.
Scenario 1: U.S. Airborne Assault
United States Airborne Assault: 6 June 1944. Spearheading the Allied invasion of France, elements of the US 82nd Airborne Division land among elements of the German 709th Division guarding the area behind "Utah" beach.
Battlefield: Southwest quadrant of the Mapsheet.
Orders of Battle
United States: Twenty infantry (RF). Must be air-dropped (see Special rules).
German: Nine infantry (RF), three 20mm flak (HE), one 75mm anti-tank Gun (AP), two 81mm mortar (HE), two wagons, one truck. Deploy first, move first.
Reinforcements: At the start of the fourth Player-Turn, the German Player receives five infantry (RF), one Assault Gun III (AP), one Armored Car (AP), one 120mm mortar (HE), five trucks; units enter on the northern edge of the Game-Map.
Special Rules
Each platoon must be air-dropped (company-sized units may not be dropped). Pick one hex as the "Drop Zone," and roll the die. A "one" or a "two" means that the first platoon lands in the drop zone, a roll of "three," "four," "five," or "six" means that the unit "Scatters" (see Scatter Diagram in the southwest quadrant of the Game-Map), and you must roll the die again to determine the direction that the unit "Scatters" in. Roll the die again after the direction is determined, to determine the number of hexes that the unit scatters in that direction. The unit lands on that hex and it is this hex which must be used as the new drop zone. The procedure is then repeated for the remaining nineteen platoons. If any units land off the Game-Map or out of the SW quadrant, they are considered to be destroyed. After all units have completed the air-drop, they may Close Assault any units they have landed directly on top of, and the Germans may not attack using Zone of Control Rules or Defensive Fire. At this point the Game begins normally; Germans move first.
Victory Conditions
The German Player wins if he can trace a road from the north to the south edge of the quadrant, or the east to west edge of the quadrant, unoccupied by undispersed U.S. units.
The U.S. Player wins by preventing the German Player from winning.
Scenario 2: German Delaying Action
German Delaying Action: 12 August 1944; The Battle of Argentan. After the Allied breakout from the Normandy beachhead, German units used delaying tactics to allow the bulk of their forces to withdraw from France. Here elements of CCA, 5th U.S. Armored Division run into remnants of the German 116th Panzer Division.
Battlefield: Entire Mapsheet.
Orders of Battle
United States: Eleven armored-infantry (RF), two M-18 (AP), five M-4 (AP), two M-4a (AP), one 105 AH (HE), one M-5 (AP), two M-7 (HE), seven halftracks (RF), three trucks, one 57 anti-tank (AP), two Observer; Deploy first, East of River, move first.
Germans: Four infantry (RF), one sub-machine gun (RF), one engineer (RF), one Assault Gun III (AP), one Pz. IV (AP), one 88mm anti-tank (AP), one 75mm anti-tank (AP), two 81mm Mortar (HE), one 120mm Mortar (HE), two halftrack, three trucks, one Observer; Deploy West of River.
Special Rules
The bridges across the river are destroyed, and only fords may be used to cross the river.
Victory Conditions
The United States Player must trace a primary road from the east edge of the Game-Map off the northwest quadrant (any one of the four roads) uncovered by undispersed German units (for the purposes of Victory Conditions consider the bridges intact).
The German Player wins by preventing U.S. victory.
Scenario 3. German Armored Assault
German Armored Assault: 8 August 1944, the Mortain Counteroffensive. Soon after the Allied breakout from the Normandy beachhead, the Germans launched a desperate counterattack to seal off the Allied penetration. Here elements of the U.S. 30th Infantry Division (1/117 Infantry, 1/120 Infantry, 2/120 Infantry, 2/117 Infantry and 1/119 Infantry) fight off assault elements of the German 1st SS and 2nd SS Panzer Divisions.
Battlefield: Western half of the Mapsheet.
Orders of Battle
United States: Ten infantry (RF), two 57mm anti-tank (AP), three 105mm field artillery (HE), two 155mm field artillery (HE), two 105mm infantry gun (HE), two heavy machine gun (RF), two 81mm mortar (HE), two Observer. Deploy first anywhere in the southern half of the Game-Map.
Reinforcements
At the beginning of the U.S. Player's sixth Player-Turn, he receives three M-4 (AP), one M-18 (AP), one M-10 (AP), five infantry (RF), and five trucks on the northern edge of the Game-Map.
German: Twelve infantry (RF), five Pz IV (AP), four Pz V (AP), one Pz VI (AP), three Assault Gun III (AP), one Wespe (HE), one 120mm mortar (HE), two 81mm mortar (HE), six halftrack (RF), six trucks. Move first, enter on south edge of the Game-Map.
Victory Conditions
The German Player wins if he can trace a road from the southern edge of the Game-Map to the northern edge of the Game-Map, unoccupied by U.S. units.
The U.S. Player wins by preventing German Victory.
Scenario 4: Allied Mobile Armored Action
Allied Mobile Armored Action: 13 September 1944; The Encirclement of Nancy. When Allied forces neared the German border, the German "delaying action" solidified into determined defense. Here CCA, 4th U.S. Armored Division, breaking out from a bridgehead on the Moselle River, slices through scattered elements of the German 553rd Volksgrenadier and 15th Panzergrenadier Divisions. The objective was to encircle Nancy.
Battlefield: Northern half of the Mapsheet.
Orders of Battle
United States: One M-36 (AP), three M-4 (AP), two M-4a (AP), one 105mm AH (HE), three M-7 (HE), two M-8 (AP), two M-5 (AP), two 57mm anti-tank (AP), ten armored-infantry (RF), two engineer (RF), seven halftrack (RF), four truck, two Observer. Move first, enter on eastern edge of the Game-Map.
German: Four infantry (RF), two sub-machine gun (RF), one 81mm mortar (HE); Deploy in Town Number Two. Two infantry (RF), one engineer (RF), one sub-machine gun (RF), one 88mm anti-tank (AP), one 75mm anti-tank (AP), two 20mm flak (HE); Deploy in Town Number One. Two infantry (RF), two sub-machine gun (RF), one 75mm anti-tank (AP), one 120mm mortar (HE); deploy on the ridge-tops in the northwest quadrant. Germans deploy first.
Reinforcements
At the beginning of the German Player's second Player-Turn he receives one Pz IV (AP), one Assault Gun III (AP), three infantry (RF), one halftrack (RF), two truck; on the northern edge of the northeast quadrant.
Victory Conditions
The U.S. Player wins if Town Number One is free of German units by the end of the Game.
The German Player wins by preventing U.S. Victory.
Scenario 5: U.S./German Armored Action
U.S./German Armored Action: 19 September 1944; Breaching the West Wall. The fortified positions along the German border known as the "West Wall" were the most firmly defended positions that the Allied armies encountered as they approached Germany. Here CCR, U.S. 5th Armored Division runs into German "reserves" they didn't expect to encounter: elements of the Panzer Lehr and 2nd Panzer Divisions, as well as the 108th Panzer Brigade.
Battlefield: Southern half of the Mapsheet.
Orders of Battle
United States: Nine armored-infantry (RF), three M-4 (AP), two M-7 (HE), one M-18 (AP), seven halftrack, one Observer; Move first, enter on western edge of the Game-Map.
Reinforcements: On the U.S. fifth and sixth Player-Turns he receives seventy Air-Combat points; these must be used each turn in accordance with the Air Strike rules.
German: The German Player receives no units at start.
Reinforcements: At the beginning of the German Player's third Player-Turn, he receives three Pz V (AP), eight infantry (RF), two 81mm mortar (HE) on the southern edge of the Game-Map.
At the beginning of the German Player's fifth Player-Turn, he receives two Pz IV (AP), one Pz V (AP), two Assault Gun III (AP), six infantry (RF) on the southern edge of the Game-Map.
Victory Conditions
The U.S. Player wins if he can trace a road leading from the western edge of the Game-Map to Town Number Seven, free of German units. The German Player wins if he can trace a road leading from the eastern edge of the Game-Map to Town Number Four, free of U.S. units, and have Town Number Four free of U.S. units.
If neither Player wins, or if both Players win, the Game is a draw.
Scenario 6: U.S. Delaying Action
U.S. Delaying Action: 20 December 1944; The German Race Past Bastogne. On 16 December, the "Battle of the Bulge" began. The Germans were eventually halted by scratch combat units as are shown here (including elements of C Company/129th Ordnance Battalion, 705th Tank Destroyer Battalion, 203rd AA Battalion, 158th Engineer Battalion and the 7th Canadian Forestry Company). Advance and recon elements of the German 116th Panzer Division attempt to get behind Bastogne before U.S. defenses could be prepared.
Battlefield: Eastern half of Mapsheet.
Orders of Battle
United States: Six infantry (RF), one M-10 (AP), one M-24 (AP), one AAHT (HE), two truck; Deploy first, on the western side of the river.
German: Three infantry (RF), two sub-machine gun (RF), one 81mm mortar (HE), one 120mm mortar (HE), one Armored Car (AP), one Assault Gun III (AP), three Pz V (AP), three halftrack (RF), three truck; Move first, enter on road at the northern edge of the Game-Map (enter on the road closest to the river).
Special Rules
This Scenario takes place in the Ardennes, a rough, heavily wooded area in Western Europe. Treat all hexes, and hex-sides (except town and ridge-tops) as woods; all vehicles must stay on roads.
Victory Conditions
The German Player wins if he can trace a road from where he entered upon the south or west edge of the Game-Map, free of U.S. units.
The U.S. Player wins by preventing German Victory.
Experimental Optional Rules
Some or all of the following optional rules may be added to the game at the discretion of the Players.
1. Naturalistic Line of Sight
When determining the Line of Sight, base the blocking effects of terrain upon the actual contours of the symbols rather than upon hex sides. For instance, Towns would block the Line of Sight if the straight edge passes through the Town symbol itself, or if it touches the edge of the Town symbol.
2. Bridge Destruction
The bridges on the map may be destroyed in two different ways:
(a) Demolition: If an Engineer unit begins its Movement Phase on one side of a bridge and can end its Movement Phase on the opposite side of the bridge (in an undispersed, normal condition), then the bridge is considered to be demolished and the hex side is treated as a River hex side.
(b) Heavy Bombardment: Consider the bridge to have a native defense strength of "10". If by firing AP or HE weapons during the Offensive Fire Phase, the Player can obtain an "X" result against the bridge, then the bridge is destroyed. Do not consider Weapons Effectiveness; simply use the printed value of the counters. AP weapons, however, must be used at point-blank range, i.e., the AP units must be directly adjacent to the bridge.
Mnemonics
There are many operations in the game which require that the Player remember, over the course of several Phases, the state of a given unit and the time at which it returns to normal or has the ability to fire again or whatever. In order to assist the Player's memories, we suggest the use of the following mnemonic devices.
(a) When a unit fires during the Offensive Fire Phase, place a heads-up penny on top of the unit to indicate that it has done so, and to indicate that it may not move or attack again during that Player-Turn. Remove the pennies at the end of the Close Assault Phase. When an Enemy unit is dispersed or retreated during the Friendly Offensive Fire Phase, place a tails-up penny on top of the unit. Remove the penny at the beginning of the next Friendly Offensive Fire Phase.
(b) When a unit becomes dispersed or retreated due to Enemy fire during the Friendly Movement Phase place a heads-up nickel on top of the unit (remember that dispersed counters will also be turned face-down). Remove the nickel at the beginning of the next Friendly Movement Phase.
(c) When an Enemy unit is retreated or dispersed during the Friendly Overrun Phase, place a tails-up nickel on top of the unit. When an Enemy unit is retreated or dispersed during the Close Assault Phase, place a heads-up dime on it. Remove the nickels and dimes when these Friendly Phases next occur.
(d) When a Friendly unit is dispersed or retreated during the Defensive Fire Phase, place a tails-up dime on it. Remove the dime when this phase next occurs.
(e) Remember that U.S. infantry types never recover from dispersal. See Combat Results Explanation.
(f) If Players have sets of blank counters (available from Simulations Pub.) they may wish to make "Phase Markers" instead of the coin mnemonic system. Simply write on the counter, in abbreviated form, the phases/Player-Turn in which events occur and place these markers on dispersed and retreated units to indicate their time of return to normal. Make several counters of each of the following Phase/Player Turn Abbreviations: Off.F/U.S.; Mov/U.S.; OVR/U.S.; CA/U.S.; Air/U.S.; G-Def/U.S.; Off.F/Ger; Mov/Ger; Ovr/Ger; U.S.-Def/Ger.
It is only due to production limitations that such counters were not supplied with the game (there simply wasn't enough space on the counter sheet form).
Combat Command: Designer's Notes
PanzerBlitz (published by Avalon Hill) proved to be a very popular game. It was complex, but most people were enthusiastic about its apparent realism and authenticity. In point of fact, PanzerBlitz was not all that realistic or authentic. The game did have its good points. That it moved at all was a credit to its play-mechanics. What was lacking was an awareness, and implementation, of some of the more critical aspects of small unit operations. Chief among these aspects is the "confusion factor", which becomes nearly decisive at the platoon level. Other aspects left untreated in PanzerBlitz were the near simultaneity of action and reaction at that scale, as well as a more realistic handling of combined arms coordination.
Not all of these problems (nor others unmentioned) have been solved in Combat Command. By merely changing the scale and some of the combat and movement mechanics we have introduced more change in the game than these innovations themselves suggest. One rather obvious result is that the game is simpler, easier to play. This is essential for any game. Too much time spent on the mechanics makes the simulation more of an exercise than a game. The game-system for platoon level simulation as it now stands in Combat Command is not yet perfect. But we do feel it's superior to the system we first introduced in Tactical Game 3 and PanzerBlitz. We are working on still better game-systems for this scale of operations. When we finish them, we'll publish them!