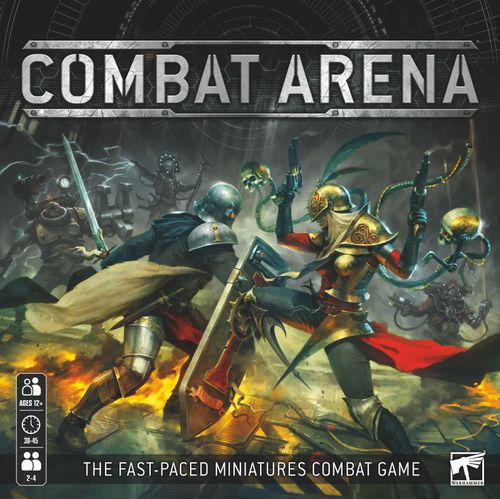
Combat Arena
Combat Arena Rulebook
Table of Contents
Table of Contents
Objective of the Game
Combat Arena is a fast-paced combat game, pitting a variety of characters against each other in the violent training arenas aboard a Rogue Trader's personal spacecraft. Each of the fighters is taken from a different area of Imperial society, and each has their own unique attacks and weapons. Whichever you choose, your objective is simple: be the last warrior standing.
This booklet lists the components found within this game and explains how to use them. It includes the rules for fighting battles in the combat arena aboard the spacecraft Ultimatum, and also offers alternative ways to play the game, from team games to deadly one-on-one battles.
The game takes place over a number of rounds, during which players will have several chances to take actions. Each player has a hand of Action cards which they can use to make attacks with their fighter, manoeuvre them around the arena to avoid their opponents' blows, or resolve more unusual actions. Their fighter also has a store of Energy which will rise and fall as they make attacks, use certain actions, or are wounded in the arena.
Prepare for Combat
Setting Up
Pick which side of the arena board you want to use and place it face up in the middle of the playing area, where everyone can reach it. Place the Energy track and Injury markers next to it. Shuffle the Critical Injury cards and put them face down next to the arena. Each player then rolls a dice, re-rolling ties. The player with the highest score picks one of the available fighters and takes the miniature for that fighter along with their Fighter Reference card and the tokens that bear their fighter's symbol (one circular Energy token, one small Health marker and three Damage markers). They also take the four Initiative cards with their chosen fighter's symbol.
If a player picks Daedalosus, they should also take the four Omniscan markers. If a player picks Gotfret de Montbard, they will only have two Damage markers.
The player who picked the first fighter places their Fighter Reference card face-up on the table in front of them and puts their Health and Damage markers on it as shown in Figure 2. They then set up the miniature for their fighter in an empty starting hex. These are marked with a green outline. You can choose any facing (see Figure 1). Finally, they place their Energy token on the highlighted space on the Energy track (see Figure 3).
Once they have done so, the player who picked their fighter second does the same, and so on, until all players have picked a fighter, placed their Fighter Reference card and set up their miniature in a starting hex.
Once each player has set up their fighter, the game begins!
Facing
Fighters must face one of the edges of their hex – use the way they're looking to determine this. The hexes around them are then divided into their front and rear arcs. The hex directly in front of them is the one in the middle of their front arc.
How to Play
Rounds
The game is split into rounds, each of which has two stages: Prepare and Fight. Once you've completed both stages, a new round begins.
Stage One: Prepare
Shuffle together the 24 Action cards and deal five to each player to form their hand. These should be kept secret. Discard any remaining cards.
Then, each player puts as many Initiative cards forward as their current Energy level (see Figure 3). Shuffle these Initiative cards together and put the resulting Initiative deck next to the arena.
Everyone starts in the same place on the Energy track, so for the first turn, everyone puts in 3 Initiative cards.
Stage Two: Fight
Draw the top card of the Initiative deck. The player whose card is drawn takes a turn. On their turn, they resolve an action with their fighter – how to resolve actions is described over the page.
After the action is resolved, draw another Initiative card and repeat the process above. If there are no cards left in the Initiative deck, a new round begins.
As you draw each Initiative card, place it face up on top of the last one that was drawn. Only the top one should be visible – you cannot look through the pile to see which ones have already come out!
Fighter Reference Cards
Each fighter has a Unique action, which only they can perform (see overleaf).
The Kill Zones shows which hexes the fighter can target with their ranged or melee attacks.
Each fighter has a unique rule described on their reference card.
Your fighter's Health is measured by a marker that travels down this track.
These are the damage boxes. At the start of the game the two Wounded boxes will be covered, so use the rules in the Healthy boxes.
Put a Damage marker over each of the 'Wounded' spaces at the bottom of your card, and a Health marker at the top of the Health track.
Actions
On a player's turn, they resolve an action with their fighter in one of two ways:
- They reveal an Action card from their hand, choose one of the three actions printed on it and resolve that action. They then discard that card.
- They discard any two Action cards from their hand (ignoring the actions printed on those cards) to resolve the Unique action printed on their Fighter Reference card.
When you discard Action cards, place them into a face-up pile next to the arena board.
Each Action card has three actions: a Move action at the top, an Attack action in the middle, and a Special action at the bottom.
Some actions printed on Action cards have an Energy Modifier; move your token up or down the Energy track accordingly before resolving the action.
Energy Modifier icons: the left icon is a -1 Energy Modifier (move your token down one space) and the right icon is a +2 Energy Modifier (move your token up two spaces).
You cannot move your token off either end of the Energy track; if your token is in the bottom space, for example, and you resolve an action with a -1 Energy Modifier (like the one shown above), your token stays where it is.
Move Actions
When you resolve a Move action, you can move your fighter up to the number of hexes shown by the action. You can move in any direction, but you can't move into a hex that is occupied by another model, or an arc-snare. Once you've moved, set your facing according to the facing icon on the action you chose (see Figure 6 opposite).
Attack Actions
To resolve an Attack action, you must first pick whether you want to make a Melee or Ranged Attack action. You must have an enemy fighter in the Kill Zone for the type of attack action you have chosen. The Kill Zone diagrams on your Fighter Reference card show where you can attack – the white hex shows your position, and the arrow shows your facing (see Figure 4).
Pick an enemy in your Kill Zone and roll the number of dice shown by the action. Each dice that scores your To Hit value or higher is a hit. If you score no hits, move your Energy token up one space as your fighter readies themselves for a counter-attack! You'll find the To Hit value on your Fighter Reference card. Some Attack actions have different To Hit values depending on where your target is (see Figure 5).
Each hit you score inflicts wounds on the target of that Attack action – check the Wounds value on your Fighter Reference card to see how many. Wounds are explained on the opposite page. Before the wounds are inflicted, the player controlling the target can play a Deflect, Parry or Dodge Special action, if they have one in their hand, by discarding that Action card – these represent the fighter deflecting a shot with their armour, parrying a blow with one of their weapons or simply dodging aside. A player can only play one card for each attack you make.
Special Actions
When you resolve a Special action, follow the text on the card.
No Actions
If you wish, you can take no action when your Initiative card is drawn. If you take no actions, you must discard an Action card from your hand. If your Initiative card is drawn and you have run out of cards to play, your fighter can resolve no actions.
Pushing Fighters
Some actions (such as Shove) let you push another fighter into another hex. The pushed fighter is moved one hex directly away from your fighter, without changing their facing.
If a pushed fighter cannot be moved, because the arena wall or another fighter is in the way, they suffer D3 wounds instead. If a fighter would be pushed into an arc-snare, the player that controls that fighter must roll a dice, discarding any number of Action cards from their hand and adding 1 to the result for each card discarded. On a total of 4 or more, their fighter stays in their current hex. On a 1-3, they are blasted into unconsciousness and are defeated (see opposite)!
Dice
Combat Arena includes six six-sided dice. If a rule asks you to roll a D3, roll a dice and halve the result, rounding up. If you are told to re-roll any dice, roll them again, ignoring the first result. You can never re-roll a dice more than once.
Fighter Arcs
Some actions specify that you must be in a fighter's front or rear arc to carry them out. In order to be in a fighter's front or rear arc, the hex your fighter is standing in must be within that area, as shown below.
In the example above, the arrow shows Gotfret de Montbard's facing. All of the green hexes are in his front arc, and the red hexes are in his rear arc. Gotfret's Storm Shield ability can be used against fighters in his front arc. It can therefore be used against attacks made by Aradia Madellan or Neyam Shai Murad. Daedalosus is in Gotfret's rear arc, so the Storm Shield ability cannot be used against attacks made by Daedalosus.
Facing Icons
- If an action has a hexagon icon, you can choose your facing.
- If an action has an icon showing a hex with a green arrow pointing away from the hex, face directly away from the last hex you moved out of. (In other words, face in your direction of travel.)
- If an action has an icon showing a hex with a red arrow pointing back at the hex, face the last hex you moved out of. (You are effectively backing out of the hex.)
Actions with either of these icons can't change your facing if you don't move.
End of Round
When there are no cards left in the Initiative deck, the round ends. Each player takes back their Initiative cards, and discards any Action cards remaining in their hand. Then a new round begins.
Wounds and Injuries
When your fighter suffers any wounds, move your fighter's Health marker one space down the track for each wound they have suffered. When the marker reaches the bottom space on the track, cover the top space with an Injury marker. That space is now lost and can no longer be used. Then, if you have not yet moved the full number of spaces required, move your Health marker to the new top space and continue moving down the track again from this new top space (see Figure 7).
Whenever you add an Injury marker to the track, draw a Critical Injury card. Once you have finished moving the Health marker, resolve any Critical Injury cards you drew.
Figure 7 example: Daedalosus suffers six wounds. His Health marker moves to the bottom of the track, so his player covers the top space with an Injury marker. He still has two wounds to take, so he moves his marker to the new top space (for one wound) and moves it down one more (for the last). As one Injury marker was placed, the player draws one Critical Injury card and resolves it.
Defeat
If the bottom space of your fighter's Health track is covered by an Injury marker, they are defeated. Fighters can also be defeated as a result of certain Critical Injury cards, or by being pushed into an arc-snare (see Pushing Fighters, opposite). When your fighter is defeated, their miniature is removed from the arena immediately, and their marker is removed from the Energy track. The fighter who defeated your fighter moves their Energy token up D3 spaces.
Despite your fighter's ignominious loss, you may yet have a chance for revenge. Turn your Fighter Reference card over and read the 'Fate of the Defeated' rules there.
Winning the Game
The conditions of victory are simple: the last warrior standing wins!
Counting Distances
These diagrams show you what the rules mean when they refer to distances. When counting the distance between two hexes, count the shortest distance possible (which can be straight through arc-snares).
- B is within two hexes of A.
- B is within one hex of A.
- B is within four hexes of A.
Combat Variants
Brothers in Arms
If you have four players, this variant lets you play a two-on-two team battle.
Split the players into two teams, however you see fit. If both members of a team are slain, the other team claims victory.
Follow all of the rules for setting up and playing, with the following exception. Once per round, when your Initiative card is drawn, you can let your teammate take the turn instead. Take the Initiative card that was drawn and put it in front of you until the end of the round as a reminder that you cannot do this again.
Kingslayer
This variant works with three or four players, with one player taking the role of the Champion, standing alone against the others.
Determine which player will be the lone Champion in any way you see fit. The remaining players are the Challengers, and must work together to slay the Champion. If they do so, any of them who are still alive are victorious. If all the Challengers are slain, the Champion claims a glorious victory.
Follow all of the rules for setting up and playing as normal, with the following exceptions. In each Prepare stage, the Champion is dealt two additional Action cards if there were two Challengers at the start of the fight, or four additional Action cards if there were three.
Whenever the Champion's Initiative card is drawn, they can choose two Action cards from their hand and resolve an action from each of them in whatever order they wish.
Single Combat
If you have two players, this variant adds a little uncertainty to spice up the battle! In the Prepare stage of each round, add an unused Initiative card (belonging to neither player) into the deck before shuffling it. When that card is drawn, each player rolls a dice. The player that rolls the highest can take a turn, as though their Initiative card had been drawn. If both players roll the same number, they must each discard a random Action card from their hand, and the next Initiative card is drawn.
Combat Protocols
This variant can be played with up to four players and will use X-101 as an additional fifth fighter. X-101 is not controlled by a player and cannot be selected by any of the players when picking fighters, but instead is used in the following way.
To set up this game variant, when creating the Initiative deck, add two X-101 cards to the deck. X-101 should be set up in the centre of the arena.
During the Prepare step, after players have drawn Action cards, place the remaining Action cards face down near the arena board.
When X-101's Initiative card is drawn, it will perform the following actions:
Turn X-101 so that they are facing towards the enemy fighter that is the fewest hexes away. This fighter will be X-101's target for this turn. Move X-101 one hex directly towards that fighter. If this would cause X-101 to move into an arc-snare, X-101 does not move. If two or more enemy fighters are equidistant from X-101, the player with the lowest Energy can pick which of these fighters is treated as being X-101's target. If this is also tied, the players controlling each of these fighters should roll a dice, re-rolling ties. The fighter controlled by the player with the lowest score is treated as being X-101's target.
Draw an Action card from the top of the Action card deck and resolve the Attack Action detailed on it against X-101's target. If X-101 is within one hex of their target, they will resolve a Melee Attack action. If not, they will resolve a Ranged Attack action. If X-101's target is not in the Kill Zone for either type of attack, X-101 will not attack that turn. If the attack action would push the enemy fighter, X-101 will push them directly away.
X-101's Energy is not tracked on the Energy track when playing this variant and is always treated as being 2. Rules which move X-101's Energy token have no effect.
When X-101 is wounded, the player who caused the wounds moves the Health marker on X-101's Fighter Reference card. When X-101 suffers a critical injury, the player who caused that injury should draw a critical injury card for X-101 – then move the attacking fighter's Energy token up one space. If a critical injury effect would require X-101 to take any actions (rolling a dice, moving an injury marker etc.) the player who caused that injury should carry out this action.
Fighter Reference Cards
Source note: the fighter profiles on pages 9–13 of the rulebook are flavour text and are not reproduced. The per-fighter ability text printed on the Fighter Reference cards, the Critical Injury cards, and the Action card texts is printed only on the components themselves and is not legible in the rulebook pages, so it is not transcribed here. The rules reproduced below are the Unique actions and abilities shown legibly on the example cards in the rulebook (Figures 2 and the figures on pages 5–6).
Neyam Shai Murad
Unique Action: Empty the Guns. Discard any two Action cards to resolve this action. Roll 1 dice for each fighter that is within one hex of this fighter. On a 2+, that fighter suffers 2 wounds. The players controlling the targets cannot play any Deflect or Parry actions against this attack.
Daedalosus
Unique Action: Scan for Weakness. Discard any two Action cards to resolve this action. Place an Omniscan marker on the Fighter Reference card of an enemy fighter in Daedalosus' front arc. You can re-roll To Hit rolls of 1 for Attack actions that target a fighter with an Omniscan marker.
Electroshock. Roll a dice if an enemy fighter suffers any wounds from a Melee Attack action resolved by this fighter.