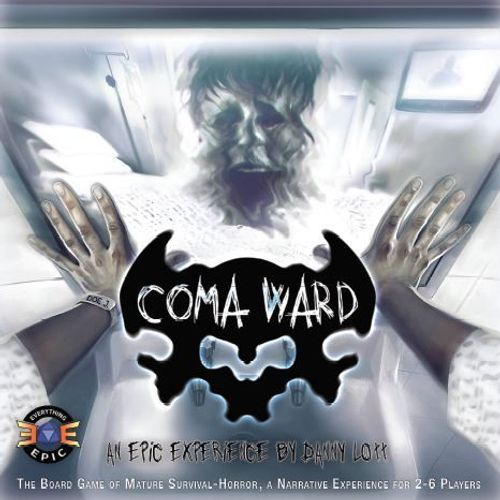
Coma Ward
Coma Ward Rulebook
Table of Contents
Table of Contents
Overview
In Coma Ward, 2 to 6 players take on the role of a group of amnesiacs who have just awoken from comas. Players know little about their characters and even less about the abandoned hospital they occupy. Scattered throughout the hospital are clothes, tools, and other useful items. There are also unknown terrors waiting in the empty halls and undiscovered rooms.
Coma Ward is played over two Acts: the Prologue and the Phenomenon. During the Prologue, players must find clues to determine who they are and why they are all in this hospital together. Once players as a group have discovered three clues, they will be able to unravel the mysteries and comprehend the Phenomenon that has caused this ghastly situation. The combination of clues, and the order in which they are revealed, will determine which Phenomenon is then played during Act II. Each Phenomenon is a unique scenario with special victory conditions, which can range from group victory conditions for cooperative Phenomenon, where all players win or lose the game together, to specific individual victory conditions for secretive and competitive Phenomenon.
As you explore the hospital, you must monitor your character's Health and Terror levels. As a character's Health decreases, so do their Strength and Dexterity. As a character's Terror increases, they lose Focus, making it more difficult to accomplish tasks, and their unique Neuroses become more pronounced.
Characters in Coma Ward are intentionally not fully formed: they have no name, age, gender, race, occupation, or personality. Players are encouraged to use this blank slate as their canvas. All characters are equal in Health, Terror, strength, dexterity, and focus. The only prefabricated aspect of characters are their flaws. In Coma Ward, each character has a neurosis of some kind, and each player will also draw a quirk. These traits allow for distinct interactions between characters.
Components
- 6 Pillbox Player Mats (one in each player color)
- 6 Health Sliders
- 6 Terror Sliders
- 3 Clue Tokens
- 72 Pill Tokens (12 in each player color)
- 18 Rummage Tokens
- 2 Portal Tokens
- 10 Monster Tokens
- 6 Neurosis Strips
- 6 Character Standees (one in each player color)
- 1 Double Sided Map Board
- 12 Phenomenon Boxes (also referred to as envelopes and tapes)
- 20 Six-Sided Dice
- 61 Hallucination Cards
- 13 Room Effect Cards
- 25 Room Tiles
- 11 Hallucination Room Tiles
- 11 Hallucination Room Effect Cards
- 6 Player Reference Cards
- 52 Item Cards
- 10 Quirk Cards
Prologue Setup
- Choose either side of the Map Board to use and then place the board in the center of the table. (It doesn't matter which side you choose, they're mechanically the same.)
- Shuffle the Room tile cards and place them face down next to the map board.
- Shuffle the Hallucination room tile cards, Hallucination cards and Item cards to make separate, face down decks for each within reach of all players. Shuffle the Clue cards into the top fifteen cards of the Item Deck.
- Each player selects their player mat and Neurosis. Each player also takes all the components in their player mat's color: 12 pill tokens, and a player standee. Set your Health tracker to 5 Health, the second space to the right of the stat names. Set your Terror tracker to 4 Focus and 1 Terror of the Terror track. Place your Neurosis strip on your player mat with the side with 3 abilities face-up.
- If this is your first game and you would like an easier experience, return all Quirk cards to the box. Otherwise: shuffle the Quirk cards and deal one to each player. Return all unused Quirk cards to the box. Players should now secretly look at their Quirk card and once read, place it face down on the table in front of them. Do not reveal your quirk to other players.
- Each player places their standee on the Nurses station on the 2nd floor.
- Place all rummage and clue discovery tokens within reach of all players.
- The player who has most recently been to the hospital takes the first turn. If no one can remember a hospitalization, the youngest player, who was likely born in a hospital, goes first.
Character Stats
Characters have five stats: Health, Strength, Dexterity, Terror, and Focus. Strength and Dexterity are determined by Health and are printed as the top three stats of the player mat in the player's color. Focus is determined by Terror which are the bottom two stats on the player mat in white. No Item or effect may cause your Health to exceed five, nor cause your Terror to decrease below zero. Stats are tracked by the black Health and Terror sliders. When you gain or lose health or terror, simply slide the slider to the right or left the number of spaces equal to what was gained or lost.
-
Health: Your Health is vital to your survival: if it ever reaches 0, your character dies and you are eliminated from the game. In some Phenomenon, being eliminated may actually benefit you, and in others, eliminated players may return to the game with new goals and abilities. (Each Phenomenon is different). Health also governs the Strength and Dexterity statistics: your current Strength and Dexterity values are the numbers directly under your current Health on your player mat.
-
Strength: Your Strength determines how many dice you roll when you resolve an attack check (see page 8) in combat. Some Hallucination cards and Phenomenon events will also require you to make a pure Strength check. Finally, your Strength value is the exact number of item cards your character may carry at one time.
-
Dexterity: Your Dexterity determines how many dice you roll when you resolve a dodge check in combat. Some Hallucination cards and Phenomenon events will also require you to make a pure Dexterity check. Finally, your Dexterity value represents the maximum number of spaces you can move per turn.
-
Terror: Your Terror determines how crippling your fear is becoming. Increasing Terror will result in activating more advanced forms of your Neurosis, but will also give you adrenalin bonuses, which represent extra dice to use on specific stat checks. However, a high Terror score will also adversely affect your Focus, which can make performing actions without incurring in potentially negative consequences much more difficult. If a Player would ever increase their Terror beyond 5, they lose that much health instead. That's right, players can be scared to death! Your Focus value is the number directly beneath your current Terror on the player mat.
-
Focus: Your Focus represents how well your character is able to concentrate on the task at hand and consequently what the result of your actions will be. Some Hallucination cards and Phenomenon events will also require you to make a pure Focus check.
Gameplay
Making a Check
Various cards, items, and phenomena will call for you to resolve a check based on one of your stats. Each of the checks will have various results based on the number of successes you get. To do so, you first have to create a pool of dice. The player attempting the check takes a number of dice equal to the value of the stat the check is based on: this is the dice pool for the test. At this point, before rolling the dice, the current player also adds to their pool any extra dice granted by items or other game effects. Note: in Coma Ward no effect can modify the actual faces of the dice after rolling.
After rolling, the current player verifies the outcome of the test.
- Success: 5 or 6
- Failure: 1, 2, or 3
- Suspense: 4
For each 4 rolled, you may re-roll the die that came up 4, plus one additional die, adding the new successes to your pool of set-aside successes.
Example: Angelica has entered an unknown tile. She reveals the Neonatal ward tile and places her player standee on it. Since she revealed a tile, she must pass a focus check of 3 to avoid drawing a Hallucination card (see Revealing New Tiles page 9).
Angelica currently has a focus of 4, and no items to add dice to her dice pool. Thus, she rolls four dice, resulting in rolls of 1, 4, 5, and 6. Angelica places the 5 and 6 aside, counting both as successes. Angelica takes the 4 result to re-roll; since re-rolls allow for another die to be added to the new pool and she has a failure result rolled in the old pool, she takes the 1 from the old pool to re-roll as well. Her new results are a 4 and a 6. She places the 6 with the previous successes, bringing the success total to three. If Angelica wanted to, she could continue rolling until rolls no more 4s. Since her target was three successes, she passes her focus check.
Focus checks
Some effects in the game (specifically, when Rummaging for Items or Revealing New Tiles) require players to resolve a focus check. This check represents players struggling to prevent their Terror from overcoming them as they search for useful items and clues. Focus checks have only two possible outcomes, as listed below:
- 0-2 Successes: The player to the left of the current player becomes the narrator of the events, and draws a Hallucination card and resolves it, as described in the Hallucination card section on page 6.
- 3+ Successes: The active player draws an item card.
Remember: if your terror would ever increase and it's already at maximum, you lose that much health instead. You CAN get scared to death.
Hallucination Cards
Hallucination cards are drawn when a player fails a focus check while revealing a tile. They could represent actual physical encounters, or they could simply be just tricks your mind plays on you!
When a Hallucination card is drawn, the player to the current player's left becomes the narrator of the events of the card: they read aloud to the current player the situation text and the bold option titles only. Most Hallucination cards present a choice for the current player to make. You may attempt to memorize the deck, but it is a fool's errand – the same Hallucination scenario could result in wildly different outcomes depending on which version of the card was drawn! Once the current player selects an option among those available, the narrator reads aloud the result of the choice, which is immediately resolved. Hallucination cards can result in positive effects, like finding an item, or any variety of negative effects – or, perhaps, both.
Hallucination card layout: First, read this and the available options. Do not read text after the option until after the player who's turn it is makes the choice. If it's a "Roll a [stat] check" – just read that part and wait for them to make the roll before continuing. This makes it more suspenseful.
Example card "A Shadowy Figure Stands Before You.":
- Option 1 – Talk: The figure turns toward you and tilts its head curiously before vanishing into a mist of echoes. Draw an item card.
- Option 2 – Approach: The figure walks into the wall, fading with each step, leaving only an ashen silhouette behind. End your turn immediately.
- Option 3 – Exit: Resolve a dexterity check. 0-1 Successes: The figure lunges at you, a hideous mouth forming on its empty face. As you fall backwards into the hall, the figure is gone. Increase your Terror by 1, then immediately move to the hallway. 2+ Successes: You leap aside as the figure lashes at you. With a hideous wail and a face wracked with agony, the figure vanishes. You may immediately resolve a free rummage action.
Item Cards
Item cards are either drawn when a player passes a Focus check (as consequence of revealing a new tile or rummaging for items), or they experience a favorable Hallucination outcome. All items drawn from the item deck are public knowledge and are revealed immediately when drawn.
There are five item types in the game: Weapons, Clothing, Food, Medicine, and the all-important Clues. Some Phenomena add other types of special items. You may only carry a number of items equal to your Strength value, which represents your carried items limit. Clothing and Clues do not count against the carried items limit (unless stated on the item card).
Clothing Item Cards
Clothing can reduce damage when you are attacked, or increase your carried items limit.
Example: Sneakers (Clothing item card). Rules: "While carrying this item: +1 Dexterity. Each copy of sneakers after the first one counts toward your carried item limit."
Weapon Item Cards
Weapons are a type of item that can be used to resolve an attack against other players or enemies. Even if a player may carry up to as many weapons as their carried items limit allows, they may only use one two-handed weapon, or up to two one-handed weapons when attacking (see Attacking and Stealing Items on Pg. 8 for more information).
An attack made without a weapon is an unarmed attack. Players can always elect to resolve an unarmed attack even when carrying weapons. An unarmed attack always deals 1 damage if the combat check is successful.
Example: Syringe (Weapon item card). Rules: "One-handed dexterity weapon. +1 to attack checks. 1 damage. If you use the vial while you have this card, after rolling for the vial's effect, apply that effect twice."
Food and Medicine Item Cards
Food and medicine are generally one-time use items, and they can both be used to either increase or decrease the Health and Terror levels on willing subjects. Medicines can also be used on unwilling subjects if you can subdue them by means of a successful attack check.
Example: Snack Bar (Food item card). Rules: "You may discard this item to: +1 Health, -1 Terror."
Example: Vial (Medicine item card). Rules: "Discard this item to roll a die: 1-2) -1 Health. 3-4) +1 Terror. 5-6) +1 Health & -1 Terror."
Some medicines have an effect that can be used later: in this case, the medicines are kept in front of you, and do not count toward your carried item limit.
Clue Item Cards
Clues are the most important item type: once three clues have been discovered, the Prologue ends and the Phenomenon begins. If you draw a clue when resolving an effect that causes you to draw item cards, immediately end that effect and discover the clue instead. When you discover a clue, place one of the numbered clue discovery marker on the space where it was found (use marker 1 for the first clue, and so on). Some Phenomenon events could reference the spaces where specific clues were found. Place discovered Clues in a stack in reach of all players. This way players know the order clues were discovered. Clues are community property and do not count against any player's carried items limit.
Example: Clue A (Clue item card). Rules: "If this is the third clue revealed: reveal the Phenomenon. If this is the first or second clue revealed: the player who revealed this clue gains +1 on their next attack check. If the Phenomenon has already been revealed: discard this card, and draw another item card."
Quirk Cards
Quirks are small, unique tics that each character has. They serve to encourage players to take slightly divergent and unique strategies during the Prologue. Players who satisfy the requirements of their Quirks will find themselves better prepared to face the Phenomenon. Each time you satisfy the condition on your quirk card, place a pill token on it. Do not reveal your quirk card to the other players unless required to do so by a card or a Neurosis ability. Pay close attention to the difference between player and person on your Quirk card!
Turn Structure
Coma Ward is played in a series of rounds, in which each player will get a turn. A turn is comprised of the following steps, in order:
- You may take any number of Free Actions, but may not take the same Free Action more than once
- You may take exactly one Main Action
- Resolve End of Turn effects on your current space and any items or conditions you may have
- Check / Flip your Neurosis Strip (see page 12)
- Play passes to the left
Actions are the key to the game: they will help you and our possible allies prepare, by exchanging or using items, for the fresh horrors revealed during the Phenomenon. They will also help you uncover rooms of the hospital as you search for answers in this terrifying place, while other actions will allow you to strike down the awful nightmares and unrelenting monstrosities of Coma Ward, be they other players or something even more insidious.
Free Actions
Before taking a Main action of their turn, a Player may resolve any number of the free actions listed below. Each free action can only be resolved once per turn. So, a player cannot move twice, or trade with another player more than once.
Resolve any number of the following free actions, before taking a main action:
- Move a number of spaces up to current dexterity value
- Trade items with another willing player
- Use any number of your carried items
- Drop any number of your carried items on your current space
Movement
Players can move a number of spaces in any direction, including diagonally, up to their current Dexterity. They may move through solid black walls. They cannot move from one tile directly to another one: they must use at least one move to pass through the hallway. If a player would move on an undiscovered tile (indicated by the gray square) they must end their move and reveal that tile. See Revealing a tile, next page.
Players may enter and exit spaces occupied by other players. After the Phenomenon is revealed, certain cards may activate when a player enters or leaves a space occupied by another player. Starting a turn on a space does not constitute entering it; entering a space means moving to a new space while resolving a movement action.
While resolving a move action, players may travel between floors using the stairs, or the elevator. The stairs allow players to travel between floors at a cost of 1 move per floor. For a cost of one Move, you may attempt to use the elevator to access any floor. Roll a die. If the result is a 1, the elevator does not move and your Move is wasted, however, you may make as many attempts to use the elevator as you have Move to spend.
Example: Fiona rolls to use the elevator: Nothing Happens! She uses a 2nd point of movement to try the elevator again: Success!
Trading Items
You may trade items with any willing players occupying your current space; if any of these players is unwilling to trade, you may attempt a Steal action instead (see Main actions below). There are no restrictions on the number of items you may give or receive, but at the end of the exchange, neither player can have more items than their carried items limit. You may trade with multiple players in a turn, as long as all players are on your current space and as long as you are involved in each trade made on your turn (for example, You may trade with multiple players in one turn, so long as they are all on the same space with you and you are involved in each successive trade. For example, if Bob is on the same space with Sue and Jane, then Bob may trade with Sue and then trade with Jane, but Sue cannot trade directly with Jane on Bob's turn). Players may give items without requesting items in return. If you trade with a player, you may not attack them in the same turn.
Use Item(s)
During your turn, you may use any items in your possession. Most of these items will heal you or reduce your Terror. Most food and medicine items must be discarded or returned to the box when used. You may use as many items as you like when you take this action and you may use your items on other willing players.
Drop Item(s)
If you find yourself hauling around more items than your Carried items limit, you can simply drop them on the floor in the space you're in. To do so, place any dropped item cards face up on the space you're on.
Main Actions
After you have finished your Free Actions, you must take one Main Action. You may not take additional Free Actions after your Main Action has been completed, so time your actions wisely! If a player ends their movement on an unexplored Tile, they will immediately Reveal the Tile, which counts as their Main Action.
Resolve one of the following main actions:
- Reveal a new tile (only if you ended your move on an empty space)
- Rummage on a revealed tile
- Attack or Steal from another player or enemy
- Pick up any number of dropped items on this space
Revealing New Tiles
When a player ends their move on an empty gray square next to a hallway space, a new room tile is drawn and revealed. The revealing player reads any text on the room tile. The newly revealed tile is placed on the gray square and the current player's standee is placed on the newly revealed tile. If this tile has any "when revealed" effect, the current player must immediately resolve this effect. Then, the current player must resolve a focus check (see page 5). After resolving the focus check, if the current player is still on the newly revealed tile, resolve any tile effects beginning with "If you end your move on this tile…"
Room Tile Cards
Most rooms have matching cards that have their rules on them as to not block the artwork on the tile itself. When you explore the room, simply read the title and check if it has a number next to it. If it does, draw the corresponding room tile card to reveal the effect. If the effect is ongoing you can set this card to the side near its matching tile.
Example Room Effect card: "Medical Laboratory" – 1. The first time you end your Move here, may draw a Hallucination card. If you do, -2 Terror before the Hallucination card resolves.
Note: Revealing a tile always ends your move. Hallucination cards granting additional moves do not permit you to enter unrevealed Room Tiles. If you activate any tile effects that begin with "The first time you…", place a pill token on that tile as a reminder.
Rummaging for Items
If your player standee is on any Room or Hallucination tile, you may rummage for items. To rummage, make a focus check (as described on page 5). If you pass the focus check, place a Rummage Token on the tile and draw an Item Card. Rooms with a Rummage token may not be Rummaged again.
Attacking or Stealing Items
During the Prologue, players have no way to determine whether anyone is friend or foe. Establishing dominance through violence has helped many escape dire situations. In other words, attacking other players might be the only way to survive.
To attempt an attack or a steal action against another player, you must both occupy the same space. The current player declares whether they are attempting to attack or steal, and then they resolve an attack check, rolling dice equal to the appropriate Stat plus the attack bonus of up to two hands of carried weapons. Unarmed Attacks always check Strength.
Example: Bruce has a Strength of 3 and is carrying the Broom, a two-handed weapon giving him +4 to Strength attacks. Hence, he rolls 7 dice.
The defending player chooses to perform either a dodge or a counter-attack check (see below). The defending player rolls the dice and the number of successes rolled by attacker and defender are then compared, with the player who rolled the most successes being the winner.
Dodge Check:
The defender rolls a number of dice equal to two plus their current Dexterity value.
Example: Jane has a Dexterity of 3 and a pair of Sneakers, giving her +1 Dexterity. Bruce attacks Jane and she decides to Dodge. She'll roll 6 dice, 4 for her stats and an extra 2 because she's dodging.
If the Attacker Wins: if resolving an Attack action, the defender loses Health equal to the total damage rating of the weapons the attacker used,
The defender can discard clothing items or use any special abilities to reduce damage at this time.
If resolving a Steal action, the defender gives the attacker one item of the attacker's choice.
If the defender wins: No Health or Items are lost and the defender moves one space away from the attacker.
In case of a tie, the defender wins, and neither player loses Health, items, or moves.
Counter-Attack Check:
The defender resolves an attack check, just like the Attacker did.
If the Attacker wins:
If resolving an Attack action, the defender loses Health equal to the total damage rating of the weapons the attacker used,
The defender can discard clothing items or use any special abilities to reduce damage at this time.
If resolving a Steal action, the defender gives the attacker one item of the attacker's choice.
If the defender wins: the attacker loses Health equal to the damage rating on the weapons the defender used, the attacker can discard clothing items or use any special abilities that reduce damage at this time. The attacker is damaged, even if they were stealing.
In case of a tie, the defender wins, and neither player loses Health or items.
Medicine As An Attack:
Some medicine cards allow you to use the medicine on an unwilling player on your space. To do so, attempt an attack check against the target. The defender chooses to dodge or counter-attack, just like a regular attack or steal attempt.
If the defender wins, resolve the attack like a standard dodge or counter-attack check.
If the attacker wins, they can use that medicine's effect on the defender.
How Many Dice to Roll During Combat
| Action | Attacker: What to Roll | Attacker Wins | Defender: What to Roll | Defender Wins |
|---|---|---|---|---|
| Attack | Weapon(s) + Appropriate Stat | Defender takes damage equal to your weapon total | Dodge: Dexterity +2 | No Damage, you may move 1 space |
| Steal | Weapon(s) + Appropriate Stat | Take an item from Defender of your choice | Counter-Attack: Weapon(s) + Appropriate Stat | Attacker takes damage equal to your weapon total |
In the event of a tie, Defender wins. Nothing happens; no damage, no moving, and no stealing.
Unarmed Attacks always check Strength and Deal 1 Damage (unless an ability states otherwise).
Character Death
If a character is reduced to zero Health, they have died and are eliminated from the game. Remove that player's standee from the board. Any items that character was carrying are dropped on the space where they died. If you have any phenomenon-specific cards that trigger an effect when a character dies or if they were the last character remaining in the game, resolve these effects as instructed by the cards.
Pick Up Items
You may pick up all the items placed on your current space. If you exceed your carried items limit, you must drop items until you are at, or below, your carried items limit.
Revealing the Phenomenon
When the third clue is discovered, and the last clue discovery marker placed, the Prologue ends. The current player will immediately end their turn, and becomes the Phenomenon narrator.
Each player reveals their quirk card and resolves the effects on it, if applicable. Any player who didn't complete their Quirk card's task to unlock the reward, return it to the box.
The Phenomenon narrator consults the Phenomenon chart at the end of this rulebook to determine which Phenomenon box to open and removes only the Phenomenon instructions from it. They read the Introductions aloud, and players then set up the components in the box as described in the Phenomenon instructions Setup section. Do not reveal the Epilogue card(s) contained in the box yet; knowing your end before your journey has begun will surely bring your doom! Also, no one likes spoilers, so don't be like that… okay?!
The next player in turn order, after the Phenomenon narrator, takes the first turn of the Phenomenon.
Turns structure remains the same for the Phenomenon, unless the Phenomenon rules indicate otherwise.
Sometimes Phenomenon tuck boxes are referred to as Envelopes, Boxes, or Tapes - these terms all refer to the tuck boxes the Phenomenon came in.
IMPORTANT: Endgame conditions written on the Phenomenon slip might (or might not!) contain all the information on how to win a scenario: some scenarios come with special conditions that are filed on specific cards and represent important plot twists in the story. If a card gained in a phenomenon details an endgame condition or special rule not listed on the Phenomenon slip, follow the instructions of the card.
Neurosis and Adrenaline
At the beginning of the game, be sure to completely read the side of your Neurosis Strip that has 3 abilities, this is the side you will start the game with. A Neurosis is a special set of abilities and conditions for each character. As your Terror track goes up and down, your Neurosis will evolve according to your character's current mood. At the start of the game, characters begin with the leftmost neurosis ability active. As they gain terror the ability will change. Note the lines between each neurosis ability. When your terror is from 0-1, the leftmost ability is active, 2-3 the middle ability, and 4-5 the rightmost ability.
As players are exploring the hospital, at the end of each turn, they will check their Neurosis. If the player met the condition to allow them to flip their Neurosis Strip to the P side, they may do so at this time. Note that once flipped, the Neurosis Strip may not be reset to the original side.
When you flip your Neurosis strip to the back side marked "Neurosis P", your abilities change. Usually these abilities are better and more powerful. This represents how your Character is coping with the stress of the situations. As players are exploring the hospital, at the end of each turn, they will check their Neurosis. If a player has met the condition for their current Neurosis to trigger, they may resolve that effect.
Remember: As a player's Terror increases in addition to changing the neurosis ability, on the far right they may trigger their Adrenaline ability, which works as a special boost to their stats. As long as their terror is in that zone in the neurosis strip, the Adrenaline ability is active. If it ever is reduced below that zone, the Adrenaline ability is deactivated.
Example: Fiona's Terror is 4, so she currently has the rightmost Neurosis Ability on her Neurosis Strip. Her current Neurosis Ability is "Petrified." If she fails a focus check, she will reduce her Terror by one. She also has Adrenaline: +2 Dexterity. This means all of her Dexterity checks and Attack checks made with Dexterity weapons get 2 extra dice and she can move 2 extra spaces when moving.
Neurosis Strip (1. starting side; 2. "P" side; 3. Adrenaline effect)
- Nervous: If you end your movement on a space occupied by no other players, reduce your Terror by 1. If this would make your Terror drop below 0, you may flip this track to its P side.
- Anxious: The first time another player enters your space this round, you may immediately move to an adjacent space.
- Petrified: Every time you fail a focus check, reduce your Terror by 1. Adrenaline: +2 dexterity.
- P. Neurosis – Brave: Every time you resolve an attack check or draw an item card, reduce your Terror by 1.
- P. Neurosis – Unstable: Instead of rolling dice while resolving a focus check, you may automatically score a number of successes equal to your current Health. Adrenaline: +1 strength, +2 dexterity.
Glossary of Terms
- Adrenaline: A boost to certain stats Players get from their Neurosis. See Neurosis and Adrenaline page 12.
- Ally: Any non-hostile entity that is not a Player. Some Phenomena introduce Allies.
- Attack: An attempt to damage another Player or Enemy by making an Attack Check. A Player's Attack value is their Strength statistic, plus bonuses from up to two hands of carried Weapons. See Checks in Combat page 10.
- Attacker: During an Attack or Steal action, the Player who initiated the Attack. See Checks in Combat page 10.
- Carried Items Limit: The maximum number of Items a Player may carry. This is determined by your Strength stat, but can be modified by Clothing and other types of Items page 6.
- Character: A player avatar in the world of Coma Ward. This refers to the character in the game, not to the Person sitting at the gaming table in the real world.
- Check: Any dice roll that determines success or failure of an action. See Making Checks page 5.
- Clothing: A type of Item that provides damage reduction or increases a Player's Carried items limit. Does not count toward player carried item limit unless stated on the card. See Item Cards page 6.
- Clue: A type of Item that triggers the Phenomenon when three Clues have been Revealed. See Item Cards and Revealing the Phenomenon page 11.
- Counter-Attack: A special Attack Check executed by the Defender during an Attack or Steal action that, if successful, will damage the Attacker. See Checks in Combat page 10.
Frequently Asked Questions
Q: Main Actions – I know I MUST take a Main Action every turn on my turn, but what if something in the game is preventing me from doing so?
A: In very rare instances you may find that you can not do a main action. You may not pass. If you are unable for some reason to do any of those actions, you may rummage a tile that has already has a rummage token on it.
Note: Unable does not mean that you "Don't want to" it means that your character may not move or something similar within the game that forces them to be stuck somewhere that they are unable to perform that action. Main actions include: Reveal a new tile, rummage a tile, attack a target or steal an item, or pick up an item.
Q: Some items (Vitamins, Painkillers, and so on) can be used more than once before being discarded. May I spend more than one of their uses at the same time? For example, may I use both counters from a Vitamin card to add 2 successes to the same check being resolved?
A: Yes you can use Vitamins and Painkillers multiple times in a single use. So, for example, you can use both Vitamin triggers to add 2 successes to a check.
Q: When a player's instructed to search for a specific card or a card of their choice in a deck, how is the process handled?
A: Players are allowed to search the deck, but not that deck's discard pile unless allowed by a specific game effect. After finding the wanted card, players reshuffle the deck, without shuffling in the discards.
Q: When an effect instructs players to move X spaces away, what does it mean?
A: They must move the exact number of spaces indicated by the effect; while moving, they can use stairs and elevators as per normal movement rules. They cannot end their movement on an unrevealed space if they have already revealed a tile.
Q: Some items and effects in the game will provide you with a bonus to one of your stats. What does this mean?
A: This bonus represents the number of extra dice you add to your pool at the beginning of the check, and they are cumulative with bonuses deriving from other items / effects.
Phenomenon Chart
After the 3rd clue has been discovered, the Phenomenon narrator checks in which order the clues were discovered and compares with the Phenomenon chart below to determine which numbered Phenomenon box to open.
| 1st Clue | 2nd Clue | 3rd Clue | Ph # | Phenomenon |
|---|---|---|---|---|
| A | B | C | Ph 1 | Rabid |
| A | C | B | Ph 2 | Shades of the Unknown |
| B | A | C | Ph 3 | The Land in Between |
| B | C | A | Ph 4 | Dissociation |
| C | A | B | Ph 5 | The Monarch, the Torturer, and the Fractured Mind |
Guest Writer Phenomena Explanation: For this expansion of Coma Ward there is no Phenomena Reveal Chart. Once the third clue is revealed, players are encouraged to either choose a Phenomenon at random or play the Phenomenon that interest them the most.
Expansion Phenomena Chart
After the 3rd clue has been discovered, the Phenomenon narrator checks in which order the clues were discovered and compares with the Phenomenon chart below to determine which numbered Phenomenon box to open.
| 1st Clue | 2nd Clue | 3rd Clue | Ph # | Phenomenon |
|---|---|---|---|---|
| A | C | D | Ex 1 | Messiah Complex |
| A | D | C | Ex 2 | To Hell & Back |
| C | A | D | Ex 3 | Ghost of a Chance |
| C | D | A | Ex 4 | A Time & Reality Dissolve |
| D | A | C | Ex 5 | Sanctuary Part 1 |