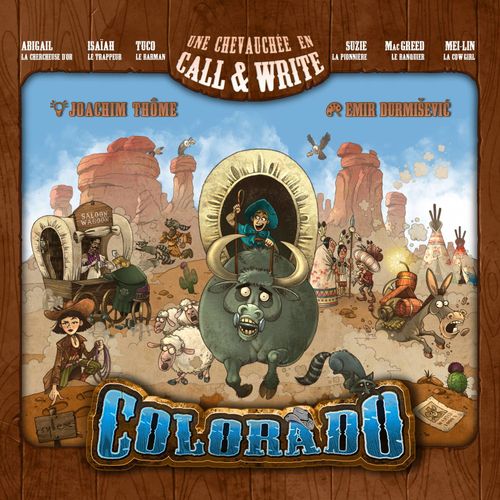
Colorado
Colorado Rulebook
Table of Contents
Table of Contents
Goal of the Game
Throughout the game, you earn points by completing all the legs in the regions on your Roadmap, or by completing the tracks on the Reward Chart before others. These points are recorded in the medals on the Reward Chart.
Each new region you discover will also earn you points at the end of the game.
The player with the most points will be declared the winner.
Components
- 78 game cards
- 4 player aids
- 4 erasable markers
- 1 Caller token
- 20 gold nuggets
- 4 personal boards: Roadmap
- 1 common board: Reward Chart
Set Up
- Place the Reward Chart in the center of the playing area.
- Form a nugget tokens pool, and give 3 nuggets to each player.
- The last player to have visited an abandoned mine in a rusty wagon oozing coal residue gets the Caller token. This is the player who will start the game. You can also determine this by the method of your choice.
- Shuffle all the cards into a deck. Each player builds their starting hand by drawing cards that they can see at any time without ever showing them to the other players. The first player draws 4 cards, the second draws 5, the third draws 6 and the fourth draws 7.
- Each player draws 1 last card and places it face up in front of them, creating their play area.
- Each player takes a Roadmap and a marker. Notice the player symbol (pickaxe, wagon wheel, horseshoe or barrel) on each Roadmap.
- On each Roadmap there are 2 red flags. Each player ticks off one of them to be the starting point of their expedition.
The Reward Chart consists of different areas, divided into 4 lines preceded by the player symbols (pickaxe, wagon wheel, horseshoe or barrel). The line of your player symbol is called your track.
- On the Reward Chart, each player checks the first empty box in the area corresponding to that flag (the checked flag's area) on their track. Thereafter, it will be the same each time a player ticks a flag on their Roadmap.
Game Turn
Each turn consists of 3 phases described below. The turns follow these 3 phases until the end of the game is reached (Endgame).
I. Call
The player with the Caller token calls a card from the opponent of their choice.
The Caller asks for 1 card from the player of their choice, specifying its color and value.
The Caller cannot ask for a card already placed in their play area. The designated player has then 3 possibilities according to the cards in their hand:
- The player has the requested card. → They give it to the Caller.
- The player does not have the requested card, but has a card of the same suit or the same value. → They give the Caller a card of their choice having the same suit or the same value as the one requested.
- The player has no cards of the requested suit or value. → They announce it to the Caller who randomly draws a card from their hand.
Whatever the card received, the Caller checks if it is already in their playing area:
- The Caller does not have the card in their play area. → They put it in their play area.
- The Caller has the card in their play area. → They discard it face up next to the deck and take 1 gold nugget as compensation.
Whether the card was placed in the Caller's play area or in the discard pile, everyone now performs one of the card's two actions, as explained on the next page.
Example: Joe asks Achilles to give him the Orange 2 (the trapper's mule). Achilles does not have it in his hand, but he does have the Green 2 (the banker's diligence), and the Orange 1 (the trapper's bear trap). He chooses to give the diligence to Joe. Joe already has the stagecoach in front of him, so he discards the one Achilles gives him and takes 1 gold nugget as compensation.
II. Actions
Each player chooses 1 of the 2 actions on the given card.
All players simultaneously choose one of the two actions on the given card. The action chosen by a player will often allow them to trigger other actions (such as playing other cards), from which only them will benefit. Thus, it is possible to link several actions together, independently of the other players.
Each player can do 1 action among the 2 available on the card given to the Caller.
Any other card played by a player benefits only them.
Example: The card received by the Caller gives the choice between these 2 actions. Each one chooses 1. Tom chooses the 1st action to take 1 nugget. Audrey chooses the 2nd action to play the pioneer from her hand by paying 3 nuggets. This card will allow Audrey, and her alone, to choose 1 of her 2 actions.
III. End of Turn
When all players have finished their actions, there are 3 things left to do:
A/ Discovery of a new region
For each complete suit (the 1, 2 and 3 of a color) placed in its play area, each player must proceed as follows:
- they discard these 3 cards then, on their Roadmap, they tick the flag (of any region adjacent) to a region of which flag is already marked.
- On the Reward Chart, they mark on their track (pickaxe, wagon wheel, horseshoe or barrel) the first empty box in the checked flag area on their track.
Note: 2 regions on either side of a mountain are not adjacent.
Example: A. Audrey succeeded to play the 3 blue cards (the pioneer, her cart and her fork). She discards these 3 cards and discovers 1 region.
B/ Minimum number of cards
Each player draws until they have at least 3 cards in hand. At any time, if the deck is empty, shuffle the discard pile to replenish it.
Example: B. Achilles has only 2 cards left in his hand, he completes his hand to 3 by drawing 1 card.
C/ End of game check
On the Reward Chart, we check if at least one player has scored points in the 7th medal of their track:
- If so, it's game over and points are scored. Go to the Endgame section.
- Otherwise, the Caller passes their token to the player on their left and a new turn starts.
Example: C. No one has scored any points in their 7th medal, Joe passes the Caller token to Audrey, sitting to his left.
The Cards
A suit is complete when you have played all 3 cards that compose it (e.g., the 1, the 2 and the 3 of a color).
The cards contain several pieces of information which are described below.
You can never have more than one copy of the same card in your play area.
Card suit — Each of the 6 suits can be identified by its symbol and its color:
- Red: the gold digger, her donkey, her pickaxe
- Green: the banker, his diligence, the key to his safe
- Grey: the cowgirl, her horse, her lasso
- Purple: the barman, his saloon wagon, his bottle
- Blue: the pioneer, her cart, her fork
- Orange: the trapper, his mule, his trap
Card value
- 3: the character
- 2: their means of transportation
- 1: their tool
Pair of actions — This icon sums up the 2 choices of actions offered by the card. All the cards of the same family always have the same action duo. These duos of actions are distributed as follows in the families:
- Red, Green: Nugget
- Grey, Purple: Card
- Blue, Orange: Check
Choice between the two actions
Each time a card is played (either by all players when it is given to the Caller, or by the player who just put it), one OR the other of the actions represented at the bottom of this card is performed. Each player chooses freely, and for themself only, the action they wish to perform. (List of actions opposite)
The Action Pairs of the Cards
The icons for Nugget, Card and Check are found primarily on the cards, but also on your Roadmap and on the Reward Chart. Whatever their location, each one gives you the choice between 2 actions:
Nugget
- Take 1 nugget from the reserve.
- OR Put down a card from your hand that is not already in your play area by paying 1 to 3 nuggets depending on its value (top left).
Card
- Draw the first 3 cards from the top of the deck and add them to your hand.
- OR Discard 2 cards of the same suit to place any card from your hand that is not already in your play area.
Check
- Check off a leg from a region on your Roadmap. It must be connected to a leg or flag already checked.
- OR Check a leg on your railroad that is related to a checked leg. At each junction choose a switch, making the other inaccessible.
Your Roadmap
Each region of your Roadmap is composed of flags, legs, and paths connecting them. When you check a leg, it must be connected to a leg or a flag already checked. Each time you check one leg containing an icon, you immediately benefit from its effect.
If it is a nugget or card icon, don't forget that they always give you the choice between 2 actions.
It is forbidden to check off any leg of a region before you have discovered it.
Discovering a region consists in checking the flag of a region adjacent to a region of which the flag is already checked (mountains are impassable).
You can discover a region in 2 ways:
- by discarding a complete suit at the end of a turn.
- by checking 1 Discovery icon (on your Roadmap railroad, or on the discovery track of the Reward Chart).
Each Track Sheet has a player icon: pickaxe, wagon wheel, horseshoe or barrel. Your icon to the left of each area of the Reward Chart identifies your track.
By using the right action of a Check card, you can check one of the railroads to benefit from its effect. Always check from left to right, choose wisely a junction at each switch because the other one will not be accessible anymore. When you reach the end, you get the points of the medal.
The mountain areas (in white), are always impassable. Two regions separated by a mountain are therefore not adjacent.
Your Roadmap is composed of a multitude of regions differentiated by their flag and color.
The Railroad offers actions that speed up your exploration to get out of tricky situations.
- Towns give you a different start to each game. Choose which red flag to check to start your game.
- Forests offer a good compromise between the value of their medal and the actions available in their leg.
- Deserts are often larger areas with high value medals.
- Lakes provide a lot of actions, but there are few points to be earned by completing these regions.
- Each time you complete all the boxes in a region (flag + leg), you earn the points of its medal. Mark them on your medal track on the Reward Chart.
The Icons of the Roadmap and the Reward Chart
Leg — Whenever you find this icon in the rules it refers to any step in your Roadmap:
- The empty legs in your Roadmap do not bring you any direct benefit but are necessary to complete certain regions.
- By checking a leg with a nugget or card icon, you can choose one of the two actions linked to these icons, as described on page 7 (see The Action Pairs of the Cards, above).
- Finally, by checking one containing any of the icons described below, benefit from its effect.
Play — Play for free 1 card from your hand that is not already in your play area. Don't forget to perform one of the 2 actions of the card you just put down.
Saloon — On the Reward Chart, check a box on your Saloon track. By checking the last box, you can possibly score some medal points.
Wanted — On the Reward Chart, check a box on your Wanted track and apply the effect of the icon above it, if applicable. By checking the last box, you can possibly score some medal points.
Tipi — On the Reward Chart, check a box on your Tipi track and apply the effect of the icon above it, if applicable.
The first box checked is always the center one. Afterwards, choose any box adjacent to a box you have already checked. By checking the boxes at each end you score medal points.
Discovery — Discover a region by checking its flag (red, blue, green or yellow), as described in the Your Roadmap section.
Remember that the most common way to discover a region is to discard the 3 cards of a suit at the end of the turn.
Medal — On the left side of each section of the Reward Chart, your track is indicated by your player icon (pickaxe, wagon wheel, horseshoe or barrel).
Each time you check a medal, score the corresponding points on your medal track on the Reward Chart. When a player scores points on his 7th medal, it triggers the end of the game. You can check off medals in two ways:
1/ On your Roadmap: By checking the last leg of a region, or the one furthest to the right of your railroad, you gain its medal points. Check off this medal and then score its points on your Reward Chart medal track.
2/ On the Reward Chart: By checking one of the two boxes at the ends of your Tipi track, the last of your Saloon or Wanted track, or from a flag area (red, blue, green or yellow), and if there is at least one medal left unchecked, earn the points for the highest value medal left unchecked, then check it.
A medal checked on the Reward Table is no longer accessible to anyone, unless another player can check it in the same turn.
If more than one player can mark the same medal in the same round, they all win the points. If all the medals on a track have been marked, there are no more points to be earned.
The Reward Chart
The Reward Chart is divided into zones with one track per player. When you check a box in one of your tracks, observe these points:
- use your player icon (pickaxe, wagon wheel, horseshoe, barrel) to locate your track.
- check from left to right (except on your Tipi track).
- apply the effect of the icon above the checked box, if any.
- don't forget to earn the possible medal points at the end of the track.
Each time you check a new flag on your Roadmap, also check a box on your track in the area of the checked flag (red, blue, green or yellow).
If you are the first to check the last box of a flag zone (blue, green or yellow), check the medal as well and earn its points. If more than one player can mark the same medal in the same turn, they all win the points.
Each time you earn the points of one medal, mark them on your medal track.
Each time you check a Tipi icon on your Roadmap, check a box on your Tipi track, starting from the center one. Note: don't forget the bonuses by checking the boxes on your Tipi track.
Each time you check a Saloon or Wanted icon on your Roadmap, check a box on the corresponding track. Note: don't forget the leg bonus by checking the 2nd box of your Wanted track.
If you check one of the two boxes at the end of the Tipi track, or the last one on the Saloon or Wanted track, score the highest available medal value, then check it.
Endgame
In phase III. C/, if a player has scored points in their 7th medal, the game ends. Instead of passing the Caller token, the points are counted.
Start by adding up the points shown at the top of the last checked box of each of your flag tracks.
Example: the pickaxe player scores 11 points (4+3+1+3), and the wagon wheel player scores 15 (0+10+4+1).
Continue with the sum of your medals, here.
Example: the pickaxe player scores 39 (7+6+4+8+9+2+3), and the wagon wheel player scores 34 (3+1+4+6+5+15).
Finally, add up the 2 previous results and write down the final scores here.
To continue our example, the pickaxe player scores 50 (11+39), and the wagon wheel player scores 49 (15+34).
The player with the highest point total wins the game. In case of a tie, the player with the most medals on their medal track wins. If there is still a tie, the player with the most gold nuggets wins, and if there is still a tie, it's time for another game to break the tie!
Example of a Game Turn
I. Call: Joe is the Caller and asks Tom to give him the Orange 2 (the trapper's mule). Tom doesn't have it in his hand, but he has the Green 2 (the banker's diligence), and the Orange 1 (the trapper's bear trap). He chooses to give the diligence. Joe already has the diligence in front of him, he discards the one Tom gives him and takes 1 gold nugget in compensation.
II. Actions: everyone, including Joe, chooses 1 action from the 2 on the given card. The diligence action duo gives the choice between the 2 actions reminded at the bottom of the card: take 1 nugget or pay the cost of a card in nuggets to play it.
- Joe decides to take 1 gold nugget.
- Tom pays 1 nugget to play his Orange 1. The check icon indicates that he can check 1 leg, in his regions or on his railroad. He chooses to check a Tipi icon. On the Reward Chart, he checks the last box on the right of his Tipi track and wins the 9 points of the medal. He checks it off and scores its points on his medal track.
- Audrey decides to pay 2 nuggets to play her Blue 2 (the pioneer's cart) in order to check 1 leg. She checks the last leg of the lake area to the west, a medal; as she does so, she checks off the medal, notes the 3 points on her track on the Reward Chart, and plays 1 card of her choice. She plays her Blue 3, to check off a leg again. She checks the Check icon on her railroad and chooses one of the 2 actions of this icon; she draws 3 cards.
III. End of Turn:
A. Audrey has managed to place the 3 blue cards (the pioneer, her cart and her fork). She discards them and among the accessible areas, she checks off the central desert (the forest to the north is inaccessible, being over a mountain), and the next space on her flag track on the Reward Chart.
B. Tom has only one card left in his hand, he draws 2 to complete his hand to 3.
C. Nobody having scored any points in his 7th medal, the game continues, so Joe passes the Caller token to Audrey who is sitting on his left.
Frequently Asked Questions
Is there a relationship between the colors of the cards and the colors of the regions? None. When you discover a new region, you don't need to match the color of the 3 discarded cards with the color of the new region.
I just discarded the card I received because it is already in my play area. Should we still choose one of its actions? Yes, all players choose 1 action. But before that, as the Caller, you get a gold nugget as compensation.
I would like to play a card already in my play area. Can I do this to benefit from one of its actions and discard it? Nice try, but no, you can't.
Can I discover a new region by discarding my three cards of a suit before doing my next action, for example to mark a leg in this new region? No, you should only discard the 3 cards that allow you to discover a new region at the end of your turn, during phase III.
Card Icons
Card — Draw 3 cards. OR Discard 2 cards of the same color to place a card (your choice).
Nugget — Take 1 nugget. OR Play a card from your hand by paying its value in nuggets.
Check — Check 1 leg of your regions. OR Check 1 leg of your railroad.
The Other Icons
Play — Play 1 card from your hand.
Wanted — Check 1 box of your Wanted track.
Discovery — Check the flag of any region adjacent to a discovered region. Also check off on your track the next box in the corresponding flag zone.
Tipi — Check 1 box of your Tipi track. The first one in the center, the others adjacent.
Saloon — Check 1 box of your Saloon track.
Medal — Each time you check off a medal, score it on your medal track on the Reward Chart.
Reminders
- At the end of each turn, draw until you have at least 3 cards in hand.
- When you receive a card that is already in your play area, discard it and earn a nugget as compensation. Everyone then chooses 1 of the 2 actions on the card.
- Perform the actions of all the cards you place in your play area.