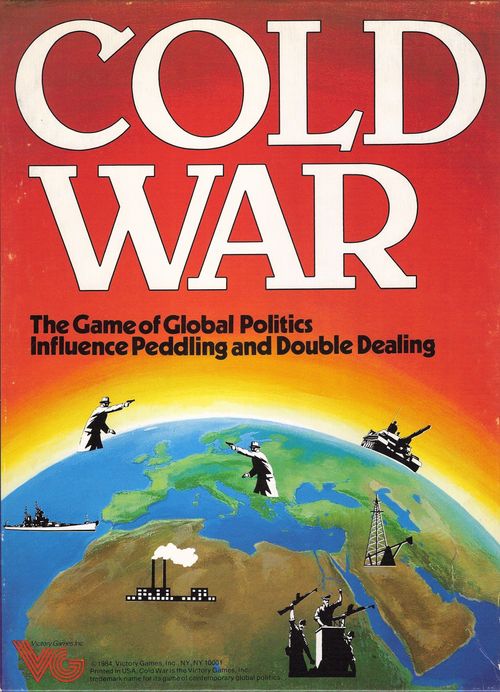
Cold War
Cold War Rulebook
Table of Contents
Table of Contents
- Game Components
- The Game Map
- Playing Pieces
- The Cards
- The Game Turn
- The Event Phase
- Purchase Phase
- Maneuver Phase
- Action Phase
- Joint Economic Growth Turn
- Ending and Winning the Game
- Setting Up
- Game Actions
- Diplomatic Links
- Degradation
- Power Vacuum
- Expropriation
- Summary Sheet: How to Perform Game Actions
- Summary of Game Activities
- Action Card Summary
Game Components
Your copy of Cold War contains the following components:
- One Rules Folder
- Four Identical Summary Sheets (one for each player)
- One Sheet of 130 Die-Cut Playing Pieces
- One 22" × 32" Mapsheet
- One Sheet of 50 Die-Cut Event Cards
- One Sheet of 72 Die-Cut Action Cards
- One Counter Storage Tray
We have also included a Feedback Card. We urge you to fill this card out and return it to Victory Games with your comments.
The first time you play the game, carefully separate the playing pieces and Event and Action Card Decks. Note that each player has a set of 31 counters, color-coded to the Home Countries on the map (North America, Soviet Union, China, Western Europe). When the playing pieces are not in use, the counter storage tray is a dandy place to keep them. Note that there are no dice in Cold War.
The Game Map
The world as depicted on the mapsheet is divided into four Home Countries, 27 Regions, and six Sea Zones. The primary use of Home Countries is to permit the establishment of Diplomatic Links among yourself and your opponents; your Home Country can also be used as a convenient place to keep any military forces you have purchased until you decide how to use them. Sea Zones are used to provide access to island Regions and coastal Regions; you can keep your military forces at sea — if you pay a maintenance charge to do so — to simulate the effects of naval strategy. The Regions are the prizes for which you and your opponents must compete. Note that each Region has a number associated with it. This number is the Strategic Point Value of the Region; the higher the number, the greater the Region's worth to you in the game.
The various tracks and boxes surrounding the map are used to record each player's accumulated Strategic Points, hold available playing pieces, and hold the Event and Action Card decks. The functions of these areas are detailed in the rules.
The Home Countries on the map are depicted in pleasing shades of green, red, yellow, and blue, corresponding to each player's set of playing pieces. The Regions are the 27 brown areas. Some Regions are islands; they are considered "adjacent" only to their Sea Zones (see below). The six Sea Zones are colored with three tints of blue to clearly show where one Sea Zone begins and ends. The Sea Zone Box is provided as a central location for any Military Presence markers that may occupy that Sea Zone; a Military Presence marker in a Sea Zone Box is considered to occupy the entire Sea Zone — which is an important point in terms of "adjacency."
Some Game Actions (notably, Insurgency) require you to be "adjacent" to a Region. You can be adjacent to a Region in either of two ways: you can occupy a Region or Home Country that shares a border with the Region (no matter how little border it shares — China, for instance, is adjacent to Afghanistan); or you can be in a Sea Zone that touches the coast of the Region. Note that some Regions have part of their coast on two Sea Zones (West Africa, for instance, is adjacent to the Mediterranean and North Atlantic). Regions separated by any water are not adjacent in game terms (thus, for instance, Egypt is not adjacent to the Middle East in the game).
Playing Pieces
Each player has 31 playing pieces, which should be carefully punched out the first time they are used, and sorted by color and type for easy access in the Counter Storage Tray when not in use.
Front side of the playing pieces:
- Diplomat
- Military Presence
- Faction
- Alliance
- Factory
- SP Marker
- Bidding Marker
- Vital Region Marker (Vital 4 Region)
Back side of the playing pieces:
- Agent
- Military Control
- Alliance
- Political Control
- Economic Control
- SP Marker: Turn Complete
- Vital Region Marker (Vital 6 Region)
In addition, there are two types of neutral markers:
- Game Turn
- No Income
Note that the number of playing pieces in the game is a limit — you cannot make up additional pieces. If, for instance, you run short of Political Control markers, you cannot establish Political Control in a new Region (unless and until one of your markers becomes available as a result of degradation).
Diplomats and Agents are the pieces that do most of the work in the game. At the beginning of the game, you can decide whether you will deploy these pieces as Agents or Diplomats, but your choice will affect your early strategy; you cannot turn Agents into Diplomats, and vice versa except during your Purchase Phase (page 4).
The Military Presence can be a powerful piece for either establishing Military Control over a Region, or threatening an opponent. The Military Presence is also the only piece that can enter a Sea Zone — but it can cost you Strategic Points to leave it there (fleets are notoriously expensive to operate).
The Faction is usually the first step on your way to Political Control of a Region, and the Alliance is your second step. Note that the Alliance appearing on the back of this counter, and the Alliance on the front of the following counter, are identical; they can be freely exchanged between the map and your Holding Area (although you cannot exchange markers between Regions).
The rewards of establishing Political Control over a Region are manifold, as you can see from looking at the Game Action Summary (on your Summary Sheet). Political Control represents the culmination of diplomatic (or sometimes military) effort in a Region.
Factories and Economic Control are the markers that will bring you the most immediate benefits: income in the form of Strategic Points. You will find it is often best to protect your investments in Regions by trying to establish further control (Political or Military).
This marker is simply placed on the Strategic Point Track to keep a running total of your Strategic Points — the key to winning the game. Advance the marker when you receive income, and lower it as you spend SP's. When you have completed your turn, you invert the marker to its Turn Complete side (see The Game Turn on page 3).
This marker is used when you are resolving Power Vacuums to record how much effort (and how many Strategic Points) you are willing to spend in an attempt to take control of a Region that has fallen into recent turmoil (see Power Vacuum, page 8).
Vital Regions are those Regions of special interest to individual players. A Vital Region marker changes the Region's normal SP Value to 4, and sometimes to 6. A player who allows an opponent to gain control of his Vital Region must pay a penalty, due at least in part to lost prestige in the world (see Joint Economic Growth Turn, page 5).
The Game Turn marker is advanced along the Game Turn Track on the map at the conclusion of each Game Turn. It has no other very exciting uses.
Occasionally, an Event Card will indicate that a No Income marker must be placed on a Region (provided the Region has a Factory or Economic Control marker in it). This Event represents some sort of economic or civil set-back in the Region, beyond the players' control, that upsets the worldwide cashflow (and worldwide investors).
The Cards
The Event and Action Cards are the heart of the game. They can help you or hurt you when you least expect it. A great deal of the challenge in Cold War lies not only in your overcoming your opponents, but also in making best use of the cards to strengthen your position in the world.
Event Cards are drawn by each of the four players during a turn. The messages on an Event Card generally reflect changing situations in the world over which you have little, if any, control.
Action Cards are held by each player. These cards represent your means of wielding political and economic clout, and your "dirty tricks," that allow you to oppose other players, instigate various covert operations, and defend yourself against the actions of the other players.
Action Cards and their uses are described on your Summary Sheet.
Event Cards and their many effects on the game are described in detail on page 3.
The Game Turn
Cold War is played in a series of Game Turns, and each Game Turn is always played in the following order:
- First Player Turn
- Second Player Turn
- Third Player Turn
- Fourth Player Turn
- Joint Economic Growth Turn
The order in which each player takes a turn is determined by the number of Strategic Points (SP's) each player has at the moment recorded on the Strategic Point Track. The player with the most SP's whose SP marker is not inverted to its Turn Complete side is the player whose turn is due to begin. When all players' SP markers are inverted to their Turn Complete side, the Joint Economic Growth Turn is taken by all players. At the end of the Joint Economic Growth Turn, everyone's SP marker is turned back to its SP side, and another turn begins.
If two or more players have the same number of SP's during a Game Turn, determine which of the tied players goes before the others as follows:
- North America goes before the Soviet Union, China, or Western Europe.
- The Soviet Union goes before China or Western Europe.
- China goes before Western Europe.
Each Player Turn of Cold War is always played in the following order:
- Event Phase
- Purchase Phase
- Maneuver Phase
- Action Phase
To repeat, the order in which activities are undertaken in Cold War is critical. Each player must complete his entire Player Turn, in order (even if he wishes to do nothing in some Phases; he cannot go back to those Phases after he has begun another). You will find that the Game Turn order will cause some problems for you if you are not careful. There is a simple solution: Be more careful!
Determining order is a little tricky. Read this paragraph literally. It may happen that a player who has not taken his turn yet will spend some Strategic Points before his turn comes, possibly knocking himself back in the turn order; he may even try to drop himself back on purpose (which is his right, as long as he actually spends the SP's or lends them); he cannot simply "lose" them.
When breaking ties in this manner, only the players who have the same total refer to this list of priorities. For instance, China has 48 SP's, North America and Western Europe each have 41, and the Soviet Union has 38. China goes first; at the end of the China player's turn, North America and Western Europe each still have 41 SP's. North America would therefore take the second Player Turn, followed by Western Europe and the Soviet Union (unless someone who has not had a turn spends enough SP's, as described above).
A player can never go back to an earlier Phase! If, for instance, a player begins his Maneuver Phase (by doing anything that can be done only during the Maneuver Phase), he cannot then purchase a Military Presence marker (done only during the Purchase Phase). He will have to wait until his next Player Turn.
The Event Phase
At the beginning of the Event Phase, the player whose turn is in progress draws an Event Card from the Event Card Deck and reads it aloud, one message at a time, from top to bottom. Most Event Cards have three messages on them: Action Cards; Instant Income or No Income or Vital Region SP Increase; and Power Vacuum. Each player affected by the messages does whatever the message requires before moving on to the next message.
When all actions called for by the Event Card are complete, discard the Event Card face-up in the Event Discard Box.
The printed booklet shows two sample Event Cards. The first has the messages: "Action Card: China"; "Instant Income: Australia, Scandinavia"; and "Power Vacuum: Turn 3,4,5, Taiwan." The second has the messages: "Action Card: Soviet Union, Western Europe"; "Vital Region SP Increase: Turn 3,6, Israel"; and "Power Vacuum: Turn 4,5,6, Korea."
- Action Card. Each player who has an Agent or Diplomat in the Home Country indicated can draw one new Action Card. If two Home Countries are indicated and you have an Agent or Diplomat in each, you can draw two new Action Cards.
- Instant Income. Each player with a Factory or an Economic Control marker in the indicated Region immediately adds SP's to his Strategic Point Track total, just as though it were the Joint Economic Growth Turn.
- No Income. Place a No Income marker in the indicated Region, only if a Region already has a Factory or Economic Control marker in it.
- Vital Region SP Increase. If the Region has a Vital Region marker in it, invert the marker to its 6-side. The Region has an SP Value of 6 for the remainder of the game.
- Power Vacuum. If the Game Turn currently in progress is one of the Game Turns listed, and at least one player has at least one piece of any kind in the Region (even if it is only a Vital Region marker), resolve a Power Vacuum.
Some Event Cards, rather than having the usual messages, indicate when the game will end. When one of these Game Ends Cards is turned up, the following rules apply.
- Game Ends. When a Game Ends Card is drawn, place it face up in the Game Ends Box, on top of any other Game Ends Cards that may already be in the Box. The game will end at the conclusion of the Joint Economic Growth Turn of the Game Turn indicated on the topmost Game Ends Card.
Having one Diplomat or all of your Diplomats in the right Home Country still only gives you the right to 1 Card. Also, you can never have more than 7 Action Cards in your hand at once, although you can discard and then draw, if you are eligible.
Instant Income has no effect on normal income during the Joint Economic Growth Turn; in effect, you can collect SP's for the Region twice in a Turn. There is no Instant Income for a Region that has a No Income marker on it.
You can establish a Factory or Economic Control in a Region with a No Income marker in it; you will simply receive no SP's the end of the current Game Turn.
If a Vital Region marker is already on its 6-side, disregard this message. Vital Region SP increase has no effect on penalties (page 6, Joint Economic Growth Turn).
The details on resolving Power Vacuums can be found on page 8. Note that, in some areas, Power Vacuums can be frequent, sometimes occurring more than once in a single Game Turn.
When you draw a Game Ends Card, none of the usual Events occur in that Player Turn; simply place the Game Ends Card in the Game Ends Box (reshuffle if necessary) and proceed to your Purchase Phase.
If, for instance, the Game Ends Turn 7 Card is turned up, and it is already Game Turn 8, the Player Turn in progress ends instantly! Conduct a final Joint Economic Growth Turn and determine a winner. The randomness of the game's end will deeply affect your play (see Ending and Winning the Game, page 5).
- Reshuffle Event Card Deck. When a Game Ends Card is drawn and the Game Turn currently in progress is one of the Game Turns listed, immediately reshuffle all Event Cards except the Game Ends Card just drawn (which is placed in the Game Ends Box). Include the cards still in the Event Card Deck Box, the Event Discard Box, and any other cards in the Game Ends Box. Place the reshuffled deck in the Event Deck Box and proceed.
This rule further randomizes the game ending. For instance, if the Game Ends Turn 8 Card is currently in the Game Ends Box, and you draw the Game Ends Turn 10 Card during Game Turn 9, you must reshuffle the Event Card Deck, including the Turn 8 Card. It is perfectly possible that the Game Ends Turn 8 Card will reappear, suddenly cutting the game short. These game ending rules are included simply to keep anyone from making a desperate, unrealistic, last-ditch attempt to destroy everything in sight.
Purchase Phase
During this Phase, only the player whose turn is in progress can perform any of the following activities, in any order he wishes.
- Purchase Agents, Diplomats, and Military Presence Markers. At a cost of 5 SP's each, you can purchase as many Agents, Diplomats, and Military Presence markers as you wish, that are in your Purchase Box. Move them to your Deploy Box.
- Military Presence Maintenance. You must spend 5 SP's to maintain each of your Military Presence markers that is either in a Sea Zone, or in a Region that does not contain one of your Faction, Alliance, Political Control, or Military Control markers.
- Convert Agents/Diplomats. You can invert any Agents in your Deploy Box to their Diplomat side, or any Diplomats in your Deploy Box to their Agent side. There is no cost to convert Agents/Diplomats.
Whenever you expend Strategic Points, move your marker to indicate the reduction. You cannot spend points you do not have, although other players can lend you points (only if you have a Diplomatic Link, page 7).
When you first set up (see page 5), Agents and Diplomats are free. If they are degraded (page 7), you will have to buy them back again in order to use them (or let them rot in your Purchase Box).
If you cannot (or will not) spend the 5 Strategic Points to keep a particular Military Presence, you lose it. Return it immediately to your Purchase Box.
This is the only point during a Game Turn during which you can turn Agents to Diplomats and vice versa. You can never do so on the map nor in your Purchase Box.
Maneuver Phase
During this Phase, only the player whose turn is in progress can perform any of the following activities, in any order he wishes:
- Move Diplomats. You can move your Diplomats that are currently in your Deploy Box or on the map to any Home Country or Region, or withdraw them to your Deploy Box. There is no SP cost to move Diplomats. There are three restrictions on Diplomat movement, however. First, you can never move your own Diplomat into your own Home Country. Second, you must have a player's permission to move your Diplomat into that player's Home Country. Third, you must have a player's permission to move your Diplomat into any Region under that player's Military Control or Political Control.
- Move Agents. You can move your Agents that are currently in your Deploy Box or on the map to any Home Country or Region, or withdraw them to your Deploy Box. There is no SP cost to move Agents. There is only one restriction on Agent movement. You can never move your own Agent into your own Home Country.
- Move Military Presence Markers. You can move your Military Presence markers that are currently in your Deploy Box or on the map to your own Home Country or to any Region or Sea Zone Box. There is a cost of 5 SP's to move a Military Presence marker. There are three restrictions on Military Presence movement. First, you can never move your Military Presence marker into an opponent's Home Country. Second, you can never move your Military Presence marker into a Region that does not contain your own Faction, Alliance, Political Control, or Military Control marker. Third, you must have a player's permission to move your Military Presence marker into a Region under that player's Military Control or Political Control.
- Voluntary Degradation. You can voluntarily degrade any of your Faction, Alliance, Political Control, Military Control, Factory, and Economic Control markers.
- Convert Military Control to Military Presence. As an alternative to voluntary degradation, you can invert any of your Military Control markers to their Military Presence side.
Moving Diplomats into opponents' Home Countries (with their permission) is a valuable function of those pieces. Only by having Diplomats in Home Countries can you form Diplomatic Links (page 7), and Diplomats (as well as Agents) in Home Countries allow you to collect Action Cards during the Event Phase. You can never move Diplomats into anyone else's Holding Area or into a Sea Zone. To move a Diplomat, simply pick it up and place it where you want it.
Agents are sneakier than Diplomats; they can go almost anywhere without permission. They cannot be used to form Diplomatic Links, but they can be used to assassinate Diplomats and other Agents in opponents' Home Countries, and they can allow you to collect Action Cards during the Event Phase. They also are capable of causing all kinds of trouble in the Regions. You can never move Agents into anyone else's Holding Area or Sea Zones. To move an Agent, simply pick it up and place it where you want it.
Although you must have a Faction, Alliance, Political Control, or Military Control in a Region in order to bring in a Military Presence marker, once in the Region the Military Presence marker can remain indefinitely (although you may have to pay maintenance). For instance, if you have an Alliance in Egypt and move a Military Presence marker there, and the Alliance is later removed, the Military Presence can stay; you must pay 5 SP's during each of your Purchase Phases, however, unless you re-establish a Faction, Alliance, Political or Military Control before your Purchase Phase (or you remove the Military Presence). To move a Military Presence marker, simply pick it up and place it where you want it.
See the Degradation rules (page 7). This rule is simply intended to allow you to remove pieces that you would like to have back in your Holding Area, possibly for use elsewhere.
When degraded normally, a Military Control marker is returned to the Purchase Box. This rule allows you to voluntarily reduce a Military Control marker partially.
Action Phase
Only the player whose turn is in progress can initiate Game Actions during the Action Phase, or undertake any of the other activities listed here. Note that other players can, however, support or oppose Game Actions initiated by the player whose turn is in progress.
- Perform Game Actions. You can undertake the Game Actions listed on the Game Action Summary. The detailed explanation of Game Actions appears later in these rules.
- Force Opposing Diplomats to Withdraw. You can forcibly remove opposing Diplomats from your Home Country and from Regions where you have Political or Military Control. Place forcibly withdrawn Diplomats in the opposing player's Deploy Box.
- Degrade Opposing Pieces. You can degrade opposing Factions, Alliances, Factories, and Economic Control markers in Regions where you have Political or Military Control.
- Expropriate Opposing Pieces. You can expropriate opposing Factories and Economic Control markers in Regions where you have Political or Military Control.
- Invert Your SP Marker to Its Turn Complete Side. Once you have done all you wish in your Action Phase, you must invert your SP marker.
Pieces that are forcibly withdrawn are not considered Degraded — they do not have to be purchased to be used again.
You can degrade a piece only one "step" at a time (see Degradation, page 7). For instance, if you degrade an opposing Economic Control marker, it becomes a Factory.
Expropriation allows you to remove opposing Factories and Economic Control pieces and replace them with your own. The advantage is that you need not conduct Game Actions, or spend SP's, to establish a Factory or Economic Control in this way (see page 8).
Joint Economic Growth Turn
[After the final Player Turn] of the Game Turn, all players participate in the Joint Economic Growth Turn. (The opening words of this sentence are partly obscured in the scan; the bracketed words are a reconstruction of the obscured text, and the rest is as printed.)
Unlike the Purchase, Maneuver, and Action Phases, the Joint Economic Growth Turn must be conducted in the order listed here.
Whenever the Action Card Deck runs out, take the Cards from the Action Discard Box and reshuffle them, replacing the Deck face-down in the Action Card Box. It is not unusual to run through the Action Card Deck two or three times in a game.
- New Action Cards. Each player can draw one or two new Action Cards. You can never have more than 7 Action Cards at one time, but you are allowed to discard one or two cards if you must before drawing one or two new cards.
- New Income. You receive the SP Value of each Region in which you have a Factory; you receive twice the SP Value of each Region in which you have an Economic Control marker. No one receives any SP's for Regions that have No Income markers on them.
- Penalties. You must pay 5 SP's to each player who has a Military Control, Political Control, or Economic Control marker in one of your Vital Regions. Every player must pay 5 SP's to any player who has a Military Control, Political Control, or Economic Control marker in the volatile Middle East Region.
- Remove No Income Markers. All No Income markers are now removed from the map.
- Invert SP Markers. Turn each player's SP marker from its Turn Complete to its SP side.
- Advance Game Turn Marker. Move the Game Turn marker one space on the Game Turn Track to signal the beginning of the next Game Turn.
- Determine the Winner. If the final Game Turn is now complete, determine the winner by counting each player's final SP total.
Note that you receive the number of SP's on a Vital Region marker (4 or 6) for Vital Regions, not the number listed on the map itself. Of course, you still need at least a Factory, even in a Vital Region, to draw any income from the Region.
If a player simply does not have the SP's on the Strategic Point Track to make a penalty payment, take whatever points he has and forget the remainder (this is a highly unlikely occurrence). Note the fantastic importance of the Middle East according to this rule. It will do no harm to warn you at this point that the Middle East is also very susceptible to Power Vacuums.
Note that the No Income markers are removed from the map only after income for other, unaffected Regions has been received.
The position of the SP markers will determine the Player Turn order for the next Game Turn.
If the Game Turn just completed is the turn listed on the topmost Game Ends Card, the game is over; determine the winner.
Should you find yourself in the enviable position of having more than 120 SP's to record on the Strategic Point Track, simply start your SP marker around the Track a second time.
The Game Ends Card, when it is the one in play, reads (in the booklet's illustration): "GAME ENDS, TURN 8 — The game ends at the conclusion of the Joint Economic Growth Turn of Game Turn 8." The same card design carries a second message: "RESHUFFLE EVENT DECK — Turn 3,7."
Ending and Winning the Game
There is no set number of Game Turns in Cold War. You can play between 7 and 12 turns, depending on how the Game Ends Event Cards fall. When a Game Ends Card is in the Game Ends Box, the game will end at the conclusion of the Game Turn indicated on that Card. Note that if, for instance, the Game Ends on Turn 7 Card is currently in the Game Ends Box and, during Turn 7 you turn up the Game Ends on Turn 10 Card, the game may suddenly become 3 Turns longer — an important possibility to keep in mind for your game strategy.
It is important to remember that the end of the game can be postponed or advanced almost any time a player draws an Event Card. To gamble by abandoning your controlled Regions for the sake of zapping your opponents can leave you out in the cold if the game suddenly becomes two turns longer. Strategic Points and Control markers are the only things taken into account for winning. Other pieces on the map, leftover Action Cards, pieces left in your Deploy Box, and anything else you can think of have no effect.
At the conclusion of the Joint Economic Growth Turn of the final Game Turn — after all new income, penalties, and so forth are accounted for — each player totals the number of SP's he has on the Strategic Point Track, plus the following values for any Control markers he has in a Region:
- 8 SP's for each Economic Control marker.
- 10 SP's for each Military Control marker.
- 12 SP's for each Political Control marker.
The player with the greatest Strategic Point total has won.
Setting Up
Once you have decided who will play which Home Country, have everyone sit around the table in front of their respective Holding Areas. Sort the playing pieces and pass them out to each player, and shuffle the Event and Action Card Decks. Place the Game Turn marker in the 1-space of the Game Turn Track, and put each player's SP marker (SP-side up) in the 40-space of the Strategic Point Track. Perform the following steps, in order.
Everyone begins the game with the same equipment: 31 playing pieces available, and 40 Strategic Points to spend. As you will discover below (particularly with Diplomat/Agent Set-Up and Initial Purchases), each player can begin to develop a different strategy before the game begins. Some may opt for military build-up, and others for factories, while another may hold onto his SP's as much as possible in order to take the first Player Turn.
Vital Regions
Each player passes out his 3 Vital Region markers, one to each opponent (so that each player ends up with one marker from each opponent, and none of his own). Beginning with the North America player and proceeding clockwise around the table three times, alternate placing one Vital Region marker at a time on the map (4-side up). There are 5 potential Vital Regions for each player, and you can place a marker in any appropriate Region that does not already have a marker in it. The potential Vital Regions for each player are indicated at the right.
When all the Vital Region markers are in place, each Region with a marker in it is considered a Vital Region. Potential Vital Regions that have no marker in them are considered normal Regions for the entire game, with no special attributes.
You can place the North American player's Vital Region markers in Egypt, Israel, Korea, Southwest Asia, and the West Indies. You can place the Soviet Union player's Vital Region markers in Afghanistan, the Congo, East Africa, the Horn of Africa, and India. You can place the China player's Vital Region markers in Indonesia, Japan, Southeast Asia, West Africa, and Taiwan. You can place the West European player's Vital Region markers in Argentina, Australia, Scandinavia, Turkey, and Yugoslavia.
By placing a Vital Region marker in a Region, you make that Region especially valuable, particularly to the player whose marker you place there. A player who allows an opponent to gain control of one of his Vital Regions must pay a penalty each Economic Growth Turn. Note, also, that the Middle East — although it is on no one's list of potential Vital Regions — is a sensitive area (see page 5, Joint Economic Growth Turn Penalties).
Action Cards
One player deals out 7 Action Cards to each player, and puts the remaining Action Card Deck face-down in the Action Card Box.
It is strongly advised that players not allow their opponents to see their Action Cards.
Diplomat/Agent Set-Up
Beginning with the North American player and proceeding clockwise around the table seven times, alternate placing one Diplomat/Agent at a time on the map (either side up). Once placed on the map as either an Agent or Diplomat, a piece cannot be turned to its other side (unless you withdraw a piece during your turn). You can place an Agent in any Home Country except your own, or in any Region; however, you must have a player's permission to place a Diplomat in his Home Country. There is no limit to the number of Agents and Diplomats in a given Region or Home Country.
More often than not, players will probably want to have more Diplomats than Agents on the map at the beginning of the game, since Diplomats allow you to build up Factions and Factories (see Action Summary on Summary Sheet). Placing Diplomats in opponents' Home Countries will allow players to form Diplomatic Links (page 7). Note that "embassies" of the appropriate colors are provided in each Home Country for the housing of Diplomats of each opposing nationality; these embassies serve no particular purpose other than to provide a quick visual reference for the players.
Initial Purchases
Each player can spend a maximum of 28 SP's to purchase the following types of pieces:
- Factions — 3 SP's
- Alliances — 7 SP's
- Factories — 3 SP's
- Military Presence Markers — 5 SP's
Beginning with the North America player and proceeding clockwise around the table as many times as necessary, alternate purchasing one piece at a time, deducting its SP cost from the Strategic Point Track, and placing the piece on the map. The following restrictions apply to your initial deployment:
- You can place only one Faction or Alliance in a given Region. Other players can also have a Faction or Alliance in the Region, but there can be no more than one from each player in a Region.
- You can place only one Factory in a given Region, and you must have already placed a Faction or Alliance in the Region. Each player can have a Factory in a given Region.
- You can place a Military Presence marker only in a Region where you have already placed a Faction or Alliance. Any number of Military Presence markers can be placed in the same Region, belonging to the same or different players. You can also place one or more Military Presence markers in your own Home Country, but never in an opponent's Home Country.
Each player begins the game with 40 SP's recorded on the Strategic Point Track. Each player alternately buys one piece at a time and immediately deploys it on the map, moving his SP marker down the Strategic Point Track to reflect the expenditure of points. If a player declines to purchase any more pieces, his SP marker is inverted to its Turn Complete side (although this is not, technically speaking, a turn); that player cannot purchase any further pieces before his first Player Turn. The other players can continue to alternate purchases until they reach a minimum of 12 SP's.
Factions and Alliances can never be placed in any Home Country.
Factories can never be placed in any Home Country.
Military Presence markers cannot be initially deployed in a Sea Zone Box, and they can never enter any opponent's Home Country.
When everyone's Initial Deployment is completed, no one can have fewer than 12 SP's remaining on the Strategic Point Track (although you can have more than 12 remaining). Turn everyone's Strategic Point marker from its Turn Complete side to its SP side and begin Game Turn 1 with the Event Phase of the first Player Turn, beginning with the player who has the most SP's on the Strategic Point Track.
Game Actions
During the Action Phase of your Player Turn, you can initiate any of the Game Actions listed on the Game Action Summary, with certain restrictions:
- You must meet the Requirements listed for the Action before you can initiate that Action.
- You can never initiate more than two Actions in a single Region in a single Action Phase. If you do initiate two Actions in a Region in a Phase, one must be from Column A, and one from Column B (in either order):
Column A:
- Establish Faction
- Establish Alliance
- Establish Political Control
- Establish Military Control
- Establish Factory
- Establish Economic Control
- Insurgency
Column B:
- Assassination
- Economic Warfare
- Destabilization
- Coup
- Insurgency
Note that Insurgency is the only Game Action that can be initiated twice in the same Region during the same Phase.
- No Action can be initiated in any player's Home Country except Assassination.
The Game Actions are the driving force of the game. For the most part (except Insurgency), the Actions in Column A are used to extend your influence and the Actions in Column B are used to stop, or at least make life difficult for, your opponents. Since the effects and interactions of the Game Actions are so important, the detailed rules and summaries are provided on each player's Summary Sheet.
The essence of any Game Action lies in the card play. When it is your Player Turn, you can initiate the Actions listed on the Summary Sheet by meeting the requirements listed for the Action. Once any Game Action is initiated, any player who has a playing piece of any kind (even if it is only a Vital Region marker) can participate in the card play that determines whether the Action is a success or a failure by playing Action Cards from his hand and paying the SP costs required. During the card play, the intention is to play an Action Card that opposes the last Action Card played. Most Action Cards (see Action Card Summary on your Summary Sheet) can be used only to initiate Actions (such as the Coup Card) or only to oppose other cards (such as the various Doublecross Cards). Some Action Cards can be used to initiate Actions or to oppose them.
- For example, the North America player initiates an Assassination attempt by playing an Assassination Card. The Soviet Union player (who has a playing piece in the same Region) plays another Assassination Card to oppose the Assassination attempt.
There are two Action Card Play Boxes on the map, one marked Success and the other marked Failure. The initial card played must go in the Success Box; the next card played (if any) must go in the Failure Box; the next card played (if any) must go in the Success Box. This alternating process continues until no one wishes to play any further cards. The last Box in which a card was played determines whether the Action succeeds or fails.
- In the preceding example, the North America player put his Assassination Card in the Success Box, and the Soviet player put his Assassination Card in the Failure Box. The North America player continues the struggle by placing yet another Assassination Card in the Success Box. No one plays any further cards, so the Assassination attempt is a success.
Some Game Actions are not initiated by Action Cards, such as Attempt to Establish a Factory. In these cases, the player initiating the Action simply states what he is attempting to do, and the first card played (if any) will be played by another player in the Failure Box.
Diplomatic Links
A Diplomatic Link exists between two players when each has a Diplomat in the other's Home Country.
- A player involved in a Diplomatic Link can provide SP's to another linked player, at any time, in either player's turn, for any purpose, regardless of other circumstances.
- A player involved in a Diplomatic Link can provide SP's to another linked player at any time during a Power Vacuum bidding war, regardless of whether or not the lending player is involved in the bidding.
To exchange SP's by virtue of a Diplomatic Link, either player in the link can deduct SP's from his own total and add them to the other player's, or one player can simply pay for whatever requires SP expenditure in place of the other player. Under no circumstances can one player ever give or trade Action Cards with another player, Diplomatic Links notwithstanding (although players can certainly play Action Cards in support of one another; see Summary Sheet).
Diplomatic Links can exist among more than two players; all that is required is that each player have a Diplomat in the others' Home Countries. Note that a player who has a Diplomatic Link is not obligated to provide SP's to others in the Link.
Degradation
The results of certain Game Actions call for you to degrade playing pieces. Different pieces are affected by Degradation in different ways. The following summary lists the effects of Degradation on all playing pieces.
| Playing Piece | Effect When Degraded |
|---|---|
| Faction | Return to your Establish Box. |
| Factory | Return to your Establish Box. |
| Military Presence | Return to your Purchase Box. |
| Diplomat | Return to your Purchase Box. |
| Agent | Return to your Purchase Box. |
| Military Control | Return to your Purchase Box as Military Presence marker. |
| Political Control | Invert to Alliance. |
| Economic Control | Invert to Factory. |
| Alliance | Invert to Faction, or replace with a Faction marker from your Establish Box. If the Alliance marker does not have "Faction" on its back, and there is no Faction marker available in your Establish Box, return the Alliance to your Establish Box. |
Determining what happens to a piece when it is degraded is simply a matter of referring to the table to the left. It is important to remember that each time you have an opportunity to degrade a piece, you can degrade it only one "step." For instance, you have Political Control over Indonesia, and another player has Economic Control. You exercise your option, during your Action Phase, to degrade the Economic Control marker; it is inverted to its Factory side. You cannot then immediately degrade the Factory (although you might be able to expropriate it, page 8). For another example (look at the Action Summary), you successfully conduct an Insurgency Action against India, where an opponent has Political Control. You immediately degrade the opponent's Political Control marker to an Alliance; you cannot then immediately degrade the Alliance. What you can do in this situation is (1) launch another Insurgency, and hope to succeed, allowing you to degrade the Alliance as the result of a new Action; or (2) attempt to establish Political Control yourself, allowing you to degrade the Alliance as a result of your new control. Cold War is a game of many options; as long as the rules do not prohibit what you are trying to do, you are free to creatively outmaneuver your opponents. Note that Vital Region markers are not subject to degradation.
Power Vacuum
When an Event Card calls for a Power Vacuum in a Region, if no one has a piece in the Region listed on the Event Card, disregard the message.
If you are the only player with one or more pieces in the Region (even if the only piece you have there is a Vital Region marker), you can immediately spend 20 SP's to "seize control" precisely as though you had won a bidding battle (including placing a Political Control marker; see below).
If two or more players each have one or more pieces in the Region, resolve the Power Vacuum as follows.
Show of Strength
Each player who has at least one piece in the Region (even if it is only a Vital Region marker), beginning with the player who drew the card and moving clockwise around the table, determines how much strength he has in the Region as follows:
| Piece | Bidding Strength | Piece | Bidding Strength |
|---|---|---|---|
| Diplomat | 1 | Military Presence | 5 |
| Agent | 1 | Military Control | 10 |
| Faction | 3 | Factory | 3 |
| Alliance | 7 | Economic Control | 8 |
| Political Control | 12 | Vital Region Marker | 1 |
Each player totals his Bidding Strength in the Region, and places his Bid marker in that number space of the Bidding Track.
Bidding
The player with the lowest number of points on the track bids or passes. To bid, the player must deduct a number of SP's from the SP Track and add that number to the Bidding Track, moving his SP and Bid markers accordingly. A bid must always be sufficient to beat the current highest total on the Bidding Track. When a player passes, he removes his Bid marker from the Bidding Track. The instant that only one player has a Bid marker on the Bidding Track, the bidding ends, and the remaining player has won control. All SP's that a player has deducted from his SP Track (but not the SP's represented by his initial Show of Strength) are lost, whether the player wins control or not. Note that the bidding need not end at 30 SP's, although that is as far as the Track goes; simply keep track of bids in excess of 30 on paper.
Seizing Control
If you win control, regardless of how many SP's you bid, you can immediately degrade all opposing Factions, Alliance, Political Control, and Military Control markers in the Region; force the withdrawal of any or all opposing Diplomats and Military Presence markers; degrade any or all Factory and Economic Control markers in the Region or expropriate.
If your Bid marker is in the 20-Space or higher at the end of the bidding, you can additionally assume Political Control of the Region, by taking an available Political Control marker from your Establish Box and placing it in the Region. If you have a Faction or Alliance in the Region already, remove it to your Establish Box; if you have a Military Control marker in the Region already, invert it to its Military Presence side.
The following example is given in the booklet. It is the Soviet's turn of Game Turn 5 when this Event Card is drawn: "Action Card: China; Vital Region SP Increase: Turn 1,5, India; Power Vacuum: Turn 5,6, Congo." The Soviet player has a Vital Region Marker, Alliance, and Factory in the Congo (worth 11). North America has an Agent there (worth 1); Western Europe has a Diplomat and a Faction (worth 4). China has nothing there, so he goes to the kitchen for a snack.
- The Soviet player puts his Bidding marker in the 11-space of the Bidding Track; the North America player puts his Bidding marker in the 1-space of the Track; and the Western Europe player puts his marker in the 4-space of the Track. Since the North America player has the lowest total showing on the Track, he must bid first.
- The North America player bids 12. He moves his SP marker down the Strategic Point Track 12 spaces, and advances his Bidding marker 12 spaces to the 13 space. The West Europe player must bid next; he passes, removing his Bidding marker from the Bidding Track. The Soviet Union player now has the lowest total, and he bids 5. He moves his SP marker down the Strategic Point Track 5 spaces, and advances his Bidding marker 5 spaces to the 16 space.
- The North America player must bid next. He really wants the Soviet Union out of the Congo, but he is getting low on Strategic Points. He has a Diplomatic Link, however, with both Western Europe and China. He asks the Western Europe player to donate 7 SP's; the Soviet Union player growls at the Western Europe player, however, and mentions something about Turkish vulnerability, and the Western Europe player declines to support North America. Meanwhile, the China player returns from the kitchen and asks if anyone wants anything as long as he is up; the North America player begs for 7 SP's, and the Chinese player grants them, moving the China marker 7 spaces down the Strategic Point Track. The North America player adds the 7 SP's to the Bidding Track, moving his Bidding marker to the 20 space.
- It is now the Soviet Union player's turn to bid, but he cannot afford it; he has, perhaps foolishly, established no Diplomatic Links, so he cannot try to borrow SP's from West Europe. He passes, removing his Bidding marker from the Bidding Track. The North America player has seized control in the Congo.
- The North America player immediately degrades the Soviet Alliance, which is inverted to a Faction. The North America player then expropriates the Soviet Factory, replacing it with one of his own. Being vindictive, he then forces the withdrawal of the West European Diplomat (who returns to the West European Deploy Box) and degrades the West European Factory (the North America player already has a Factory in the Region now, so he cannot expropriate another). Finally, the North America player plops a Political Control marker from the Holding Area into the Congo, which is his right since his Bidding marker ended up in the 20 space, and removes his Bid marker. The end result: a severe political shakeup in the Congo, and trouble for the Soviet Union, who has lost control of one of his Vital Regions. Note (see Degradation) that the North America player cannot degrade the Soviet Faction; he has already degraded the Alliance. During his own Action Phase, he can degrade the Faction if he still has Political Control in the Region.
Expropriation
Expropriation is a means by which you can replace another player's Factory or Economic Control marker in a Region. If you have Political or Military Control over a Region, you can expropriate any Factory or any other player's Economic Control marker in that Region. To expropriate another player's piece, simply remove it from the map and return it to the player's Establish Box. Replace the removed piece with your own piece. If you have removed a Factory, you can replace it with a Factory from your Establish Box, provided you do not already have a Factory in the Region. If you have removed an Economic Control marker, you can replace it with an Economic Control marker from your Establish Box (or invert your Factory marker in the Region, if you already had a Factory there).
Expropriation is useful in that it saves you the effort of trying to establish Factories and Economic Control through Game Actions and SP expenditure, but it is likely to make enemies if used with too free a hand. The threat of expropriation can sometimes be more expedient. These rules have not touched upon some of the under-the-table maneuvers in which players may indulge, but this is a good place to say that such activities are certainly permitted. For instance, take expropriation.... Say that someone has a good thing going with Economic Control in West Africa, and you just happen to have acquired Political Control. Perhaps you have a useful Diplomatic Link with this player and do not wish to endanger that source of possible support. But, you need more SP's. Perhaps you and he can work out a deal, where he will guarantee to support you in some particular Region, or even give you part of the take from West Africa. Work out whatever deals you wish, with the threat of expropriation or anything else. Be warned, however, that such negotiations can slow the game considerably. Before starting play, all players should agree whether or not such "extra-curricular" activities will be allowed.
Summary Sheet: How to Perform Game Actions
The following is the printed Summary Sheet (four pages, companion to the rules above), transcribed as an extra section.
The Game Actions are the heart of Cold War. The Actions allow players to extend their influence and to curtail the expansionist policies of their opponents. There are two convenient categories of Game Actions: Influence Actions; and Operations. Both types of Actions are performed in the same general way; the major difference between the two is that Operations are always initiated with an Action Card, and Influence Actions are initiated without an Action Card.
When You Can Initiate Actions
You can initiate Actions only during the Action Phase of your own Player Turn; no other player can ever initiate an Action during your Player Turn. During your Action Phase, you can perform as many Actions as you wish, provided you meet the requirements and pay the SP costs. (You can impose upon partners in Diplomatic Links to defray SP costs, but not to provide initiating Action Cards.) You can never initiate more than two Actions in a single Region in one Phase. If you do initiate two Actions in one Region, one must be from Column A, and the other from Column B, in either order:
Column A:
- Establish Faction
- Establish Alliance
- Establish Political Control
- Establish Military Control
- Establish Factory
- Establish Economic Control
- Insurgency
Column B:
- Assassination
- Economic Warfare
- Destabilization
- Coup
- Insurgency
Note that Insurgency is the only Action that can be initiated twice in the same Region in the same Phase.
Action Card Play
Any player who has at least one playing piece (even a Vital Region marker) in the Region (or, in the case of Assassination, possibly in the Home Country) where an Action is initiated is entitled to participate in the Card Play at any point. Once the Action is initiated — either by placing an Action Card in the Success Box for an Operation, or by merely announcing an Action for an Influence Action — any player with a piece in the Region can pay for and play an Action Card from his hand that opposes the Action being attempted.
Example: The North American player announces he will attempt to establish a Factory. China, who has a piece in the Region, pays to play from his hand an Economic Warfare (Type B; see Action Card Summary) which says "Opposes Factory, Economic Control."
One Card is played at a time, from any player with a piece in the Region, and the Cards are placed face up in the Success Box and Failure Box alternately. When no one wishes to play any more Cards, the success or failure of the Action is determined by which Box the last Card was played in. If the last Card was placed in the Success Box, the Action is successful; if the last Card was placed in the Failure Box, the Action is a failure. Once success or failure is determined, collect all Action Cards from the Success and Failure Boxes and place them in the Discard Box.
Despite the success or failure of an Action, only the player who initiated the Action, or the designated Target of the Action (in the case of some Operations) is affected by the outcome. Other players who may have participated in Card Play are never directly affected by the success or failure of an Action.
Example: A Chinese Agent is used to initiate an Assassination attempt against a Soviet Diplomat; the China player places an Assassination Card in the Success Box. The Soviet player places a Mole "Opposes any Card or Action by China" Card in the Failure Box. The Western Europe player, who also has a piece in the Region, places a Mole "Opposes any Card or Action by Soviet Union" in the Success Box. No one plays any further Cards. The Assassination attempt is successful, and the Soviet Diplomat is degraded; had the Soviet player, for instance, placed a Masterspy Card in the Failure Box, causing the attempt to fail, the Chinese Agent would have been degraded. Neither outcome could affect a Western Europe piece.
Influence Action Procedure
To perform any Influence Action (Establish Faction, Alliance, Political Control, Military Control, Factory, Economic Control), proceed as follows:
- Announce the Action and the Region in which it will be attempted. You must meet the requirements listed on the Game Action Summary before attempting the Action. No Action Card is needed to initiate an Influence Action.
- Conduct Card Play (if any), beginning with the first player to oppose the Action by placing an appropriate Card in the Failure Box and continuing to alternate until the success or failure of the Action is determined.
- If the Action is successful, all of the effects listed for the Action on the Game Action Summary are immediately in effect, and the player who initiated the Action can conduct the remainder of his Action Phase using his new marker as though it began the Phase in play.
- If the Action is a failure, no new marker is placed in the Region. There are no further penalties for failure in an Influence Action.
Operation Procedure
To perform any Operation (Assassination, Economic Warfare, Destabilization, Coup, Insurgency), proceed as follows:
- Announce the Action, the Region in which it will be attempted, the Acting pieces, and the Target. "Acting" pieces are those required by the Operation (for instance, the Agent needed for an Assassination). The Target need be specified only for Assassination or Economic Warfare, which are waged against a specific Diplomat/Agent or Factory/Economic Control marker, respectively. You must meet the requirements listed on the Game Action Summary before attempting the Action.
- Play and pay for the appropriate Action Card, and place it face-up in the Success Box.
- Conduct Card Play (if any), beginning with the first player to oppose the Action by placing an appropriate Card in the Failure Box and continuing to alternate until the success or failure of the Action is determined.
- If the Action is successful, immediately institute all of the effects listed for the successful Action on the Game Action Summary. Keep in mind which was the "Target" piece, where appropriate.
- If the Action is a failure, immediately institute all of the effects listed for a failed Action on the Game Action Summary. Keep in mind which were the "Acting" pieces.
The Action Cards
The Summary of Action Cards on page 4 of this Summary Sheet shows each type of Action Card. Note that there are several specialized varieties of some general Card types. Keep in mind the following notes about the Action Cards:
- Once Card Play is underway, your purpose is to beat the last Card played, regardless of what the original Action is. All that matters is where the last Card falls.
- You can never have more than 7 Action Cards in your hand at one time (although you can discard in order to draw new Cards when you have the opportunity).
- Some Cards can be used to either initiate or oppose, and there are often different SP costs associated with the two functions. Be sure you pay the appropriate cost.
- Always pay the Card's SP cost immediately upon playing the Card. Regardless of the outcome of the Action, those SP's are permanently spent.
- Note that Mole Cards cost no SP's to play, and that they will oppose any Card (except Masterspy) played by the player named on the Card.
Game Action Summary
Each entry lists the requirements, the effects and notes, as printed on the Game Action Summary.
Attempt to Establish Faction
Requirements: Diplomat in Region. Spend 3 SP's.
Effects and Notes: If successful, place a Faction marker from your Holding Area in the Region. In a Region where you have a Faction, you can do the following:
- Attempt to establish an Alliance.
- Attempt to establish a Factory.
- Place Military Presence markers.
You cannot attempt to establish a Faction in a Region where you currently have a Faction, Alliance, Political Control, or Military Control.
Attempt to Establish Alliance
Requirements: Faction in Region. Spend 4 SP's.
Effects and Notes: If successful, invert the Faction marker in the Region to its Alliance side. In a Region where you have an Alliance, you can do the following:
- Attempt to establish Political Control.
- Attempt to establish a Factory.
- Attempt to establish Economic Control (if you already have a Factory in the Region).
- Place Military Presence markers.
You cannot attempt to establish an Alliance in a Region where you currently have an Alliance, Political, or Military Control.
Attempt to Establish Military Control
Requirements: Military Presence in Region. Spend 5 SP's. In addition, there can be no opposing Military Presence, Military Control, or Political Control marker in the Region.
Effects and Notes: If successful, invert the Military Presence marker in the Region to its Military Control side. In a Region where you have Military Control, you can do the following:
- Attempt to establish Political Control.
- Attempt to establish a Factory.
- Attempt to establish Economic Control (if you already have a Factory in the Region).
- Degrade opposing Factions, Alliances, Factories, and Economic Control markers.
- Force opposing Diplomats to withdraw.
- Expropriate an opposing Factory or Economic Control marker.
- Grant or deny entry of opposing Diplomats.
You cannot attempt to establish Military Control in a Region where you currently have Political or Military Control.
Attempt to Establish Political Control
Requirements: Alliance or Military Control in Region. Spend 5 SP's. In addition, there can be no opposing Political or Military Control marker in the Region.
Effects and Notes: If successful, replace your Alliance marker in the Region with a Political Control marker from your Holding Area, or invert your Military Control marker to its Military Presence side and place a Political Control marker from your Holding Area in the Region. In a Region where you have Political Control, you can do the following:
- Attempt to establish a Factory.
- Attempt to establish Economic Control (if you already have a Factory in the Region).
- Degrade opposing Factions, Alliances, Factories, and Economic Control markers.
- Force opposing Diplomats to withdraw.
- Expropriate an opposing Factory or Economic Control marker.
- Grant or deny entry of opposing Diplomats.
You cannot attempt to establish Political Control in a Region where you currently have Political Control.
Attempt to Establish Factory
Requirements: Faction, Alliance, Political Control, or Military Control in Region. Spend 3 SP's.
Effects and Notes: If successful, place a Factory marker from your Holding Area in the Region. When you have a Factory in a Region, you receive the Region's SP Value in each Joint Economic Growth Turn and whenever an Event Card indicates Instant Income for the Region.
You cannot expropriate or attempt to establish a Factory in a Region where you currently have a Factory or Economic Control.
Attempt to Establish Economic Control
Requirements: Factory and an Alliance, Political Control, or Military Control in Region. Spend 5 SP's. In addition, there can be no opposing Economic Control marker in the Region.
Effects and Notes: If successful, invert your Factory marker in the Region to its Economic Control side. When you have Economic Control in a Region, you receive double the Region's SP Value in each Joint Economic Growth Turn and whenever an Event Card indicates Instant Income for the Region.
You cannot expropriate or attempt to establish Economic Control in a Region where you currently have Economic Control.
Attempt to Assassinate a Diplomat or Agent
Requirements: Agent in Region or Home Country. Pay for and play an Assassination Card.
Effects and Notes: If successful, the Target Diplomat or Agent is degraded. If the attempt fails, the Acting Agent is degraded. Note: If an Assassination is attempted in a Home Country, the player controlling that Home Country can participate in Card Play (though he cannot initiate the Action) even without a playing piece present.
Attempt to Wage Economic Warfare
Requirements: Agent in Region. Pay for and play an Economic Warfare Card.
Effects and Notes: If successful, the Target Factory or Economic Control marker is degraded. If the attempt fails, the Acting Agent is degraded.
Attempt to Destabilize a Region
Requirements: Agent in Region. Pay for and play a Destabilization Card.
Effects and Notes: If successful, each opposing Alliance, Faction, and Diplomat in Region is degraded. If the attempt fails, the Acting Agent is degraded.
Attempt to Stage a Coup
Requirements: Agent and Military Presence or Military Control in Region. Pay for and play a Coup Card.
Effects and Notes: If successful, each opposing piece in Region (except Agents, Factories, and Economic Control markers) is degraded. Place a No Income marker in the Region. If the attempt fails, the Acting Agent and each other piece belonging to the acting player in the Region (except Factories, Economic Control markers, and any additional Agents) is degraded.
Attempt to Stage an Insurgency
Requirements: Agent in Region and Military Presence or Military Control marker in:
- Same Region, or...
- Adjacent Region, or...
- Adjacent Home Country, or...
- Adjacent Sea Zone.
Pay for and play an Insurgency Card.
Effects and Notes: If successful, each opposing piece in Region (except Agents, Factories, and Economic Control markers) is degraded. Place a No Income marker in the Region. If the attempt fails, the Acting Agent, the Acting Military Presence or Military Control marker, and each other piece belonging to the acting player in the Region (except Factories, Economic Control markers) is degraded.
Summary of Game Activities
This summary lists all of the activities that can take place during a Turn, and the Phases during which they occur. An activity that is not listed under a particular Phase can never take place during that Phase. Refer to the Rules Booklet for details.
During the Event Phase
The player whose turn is in progress must turn up a new Event Card and read it aloud, one message at a time. Each player affected by the messages undertakes the following activities, as appropriate.
- Take new Action Cards, if you have Agents or Diplomats in the Home Countries listed.
- Receive Instant Income, if you have a Factory or Economic Control in the Regions listed.
- Place "No Income" markers, if there are Factories or Economic Control markers in the Regions listed.
- Increase Vital Region SP Values from 4 to 6, if there are Vital Region markers in the Regions listed.
- Resolve Power Vacuum, if there are any pieces in the Region listed.
- Determine when the game will end, if the Event Card drawn is a Game Ends Card.
- Reshuffle the Event Card Deck, if the Event Card drawn is a Game Ends Card and lists the current Turn.
During the Purchase Phase
Only the player whose turn is in progress can perform any of the following activities.
- Pay 5 SP's per piece to move Agent/Diplomat and Military Presence markers from the Purchase Box to the Deploy Box of your Holding Area.
- Pay 5 SP's for each of your Military Presence markers that is currently in a Sea Zone Box or unsupported in a Region.
- At no SP cost, you can invert Agents in your Deploy Box to their Diplomat side, or Diplomats in your Deploy Box to their Agent side.
During the Maneuver Phase
Only the player whose turn is in progress can perform any of the following activities.
- Move Agents, Diplomats, and Military Presence markers from place to place on the map, from your Deploy Box to the map, and withdraw them from the map to your Deploy Box.
- Voluntarily degrade your own pieces.
- Invert your Military Control markers to Military Presence.
During the Action Phase
Only the player whose turn is in progress can initiate Actions during the Action Phase, although any player with a piece in the appropriate Region can oppose or support the Actions.
- Initiate the Actions listed on the Game Action Summary.
- Force the withdrawal of opposing Diplomats from your Home Country and from Regions where you have Political or Military Control.
- Degrade opposing Factions, Alliances, Factories, and Economic Control markers in Regions where you have Political or Military Control.
- Expropriate a Factory or Economic Control marker in Regions where you have Political or Military Control.
During the Joint Economic Growth Turn
All players participate in this turn.
- Take new Action Cards.
- Receive new income from your Factories and Economic Control markers.
- Receive/pay penalty SP's.
- Remove all No Income markers from the map.
- Invert all SP markers from Turn Complete to SP sides.
- Advance the Game Turn marker one space.
- Determine the winner, if the final Game Turn is over.
Action Card Summary
There are nine basic types of Action Cards in Cold War, and there are several varieties of some of those types. The following Summary provides reference data on each type and variety. Note that the "Cost" to play the cards varies from card to card.
Economic Warfare
- Variety A — Initiates Economic Warfare. Cost: 2 SP. Opposes Economic Warfare Card. Cost: 4 SP.
- Variety B — Initiates Economic Warfare. Cost: 1 SP. Opposes Factory, Economic Control. Cost: 4 SP.
Number in Deck: 4 Variety A; 8 Variety B. Opposed By: Variety A Economic Warfare Card; Masterspy; Mole. Primary Uses: Stopping the economic growth of opponents. Represents: Bribery, sabotage, labor agitation, economic pressure.
Assassination
- Initiates Assassination. Cost: 1 SP.
- Opposes Assassination Card. Cost: 3 SP.
Number in Deck: 8. Opposed By: Assassination Card; Masterspy; Mole. Primary Uses: Degrading opposing Agents and Diplomats; useful for breaking Diplomatic Links. Represents: Not only eliminating individuals, but breaking diplomatic and espionage networks.
Destabilization
- Initiates Destabilization. Cost: 1 SP.
Number in Deck: 4. Opposed By: Variety A Security Card; Masterspy; Mole. Primary Uses: Upsetting low-level opponent influence in Regions. Represents: Propaganda, harassment, agitation among Region's inhabitants.
Coup
- Initiates Coup. Cost: 3 SP.
Number in Deck: 4. Opposed By: Variety B Security Card; Masterspy; Mole. Primary Uses: Upsetting higher level opponent influence in Regions, working from within. Represents: Backing local groups economically and militarily to revolt.
Insurgency
- Initiates Insurgency. Cost: 5 SP.
Number in Deck: 4. Opposed By: Variety C Security Card; Masterspy; Mole. Primary Uses: Upsetting higher level opponent influence in Regions, working from within and from outside the Region. Represents: Backing local and outside groups to overthrow the current regime.
Security
- Variety A — Opposes Destabilization Card. Cost: 2 SP. Free if player has Military Presence or Military Control in Region.
- Variety B — Opposes Coup Card. Cost: 3 SP. Free if player has Military Presence or Military Control in Region.
- Variety C — Opposes Insurgency Card. Cost: 3 SP. Free if player has Military Presence or Military Control in Region.
Number in Deck: 4 Variety A; 3 Variety B; 2 Variety C. Opposed By: Variety C Doublecross Card; Masterspy; Mole. Primary Uses: Defense against Destabilization, Coup, and Insurgency. Represents: Beefed-up and trained military and paramilitary forces in Region.
Doublecross
- Variety A — Opposes Doublecross Card. Cost: 5 SP.
- Variety B — Opposes Faction, Alliance, Political Control, Military Control. Cost: 2 SP.
- Variety C — Opposes Security Card. Cost: 3 SP.
Number in Deck: 6 Variety A; 8 Variety B; 4 Variety C. Opposed By: Variety A Doublecross Card; Masterspy; Mole. Primary Uses: Turning the tables on your opponents. Represents: Luck, security leaks, backstabbing, treachery.
Masterspy
- Opposes any Card or Action by any player. Cost: 10 SP.
Number in Deck: 1. Opposed By: Mole. Primary Uses: Foiling plots. Represents: A superlative intelligence effort.
Mole
- Opposes any Card or Action by North America. Cost: None.
- Opposes any Card or Action by Western Europe. Cost: None.
- Opposes any Card or Action by Soviet Union. Cost: None.
- Opposes any Card or Action by China. Cost: None.
Number in Deck: 12 (4 affecting each player). Opposed By: Mole; Masterspy. Primary Uses: Frustrating opponents. Represents: Friendly agents "buried" in enemy intelligence networks.