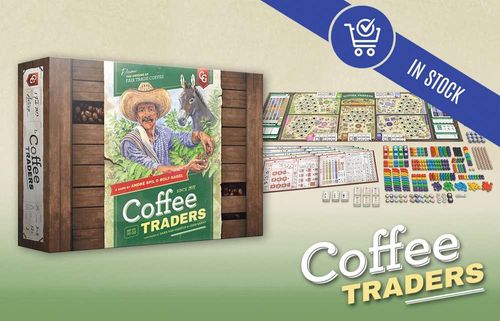
Coffee Traders
Coffee Traders Rulebook
Table of Contents
Table of Contents
- Components
- Overview
- Game Board Setup
- Player Board Setup
- André's Board (2-Player Game)
- General Concepts
- Phase 1: Work
- Phase 2: Assign Workers
- Phase 3: Trade & Build
- Phase 4: Harvest
- Phase 5: Sell
- Phase 6: Refresh
- End of Game
- André's Play Guide (2-Player Game)
- Milestones
- The Five Coffee Countries
- Symbols
Components
General: 1 game board, 2 Phase / Period markers, 55 coins, 60 workers, 30 contracts (labeled A–F), 2 trucks, 9 donkeys, 6 civets, 30 Arabica counters, 15 Animal counters, 7 Wild Animal counters, 18 Scoring markers, 6 Coffee cubes (1 in each coffee color), 15 Stock counters, 5 Wild Stock counters, 9 milestones (3×A, 3×B, 3×C), 11 plantations, 1 Trade counter, 14 buildings (1 hospital, 3 production stations, 3 fair trade posts, 2 farms, 5 warehouses), 6 −3VP tokens, 1 score pad, 1 André board (2-player game).
Per player (4× black, 1× player color): 1 player board, 5 Action markers, 6 traders / contractors, 6 Company discs.
Overview
In Coffee Traders, each player represents a trading company from Antwerp, Belgium. Your trading company's goal is to help coffee farmers from different parts of the world partner with local cooperatives, to hire contractors to construct buildings that will help improve their community, and to have traders in Antwerp import as much coffee as possible to meet the demand.
Coffee Traders is divided into 3 periods (1970, 1975, 1980). Each period consists of 6 phases:
- Phase 1: Work — Players perform actions.
- Phase 2: Assign Workers — Players send their workers to plantations.
- Phase 3: Trade & Build — Players trade with Antwerp and/or construct buildings.
- Phase 4: Harvest — Players harvest coffee from the cooperatives.
- Phase 5: Sell — Players fulfill contracts and deliver coffee to Coffee Bars.
- Phase 6: Refresh — Prepare for the next period.
At the end of each phase, move the Phase marker to the next space on the Phase track and continue playing. Do this until you complete the Refresh Phase, signaling the end of the period; after this, start the next period with Phase 1. After the third period, the game ends.
In a 2-player game, 2 humans play a 3-player game against André, an automaton. Use all of the 3-player rules that you encounter, as well as the special 2-player rules.
Game Board Setup
- Place the game board in the middle of the table.
- In a 2-player game, 2 humans play a 3-player game against André, an automaton. Use all of the 3-player rules that you encounter, as well as the special 2-player rules.
- Each player chooses a player color and takes everything indicated on the components page (André gets the wooden bits, but uses the André board).
Coffee Bars
- In a 4- or 5-player game: Place a number of Wild Stock tokens equal to the player count on the space at the top.
- Take 1 of each of the 5 types of Animal counters. At the bottom of each of the 5 leftmost Coffee Bars, place a random one of these face up on the 6 space.
- At the bottom of the rightmost Coffee Bar (Seoul), place 2 Wild Animal counters: 1 on the 3 space, 1 on the 4 space.
Milestones
- In the Milestones area, place a random A, B, and C milestone tile from left to right. Return the others to the box.
Cooperatives
The large areas occupying most of the board represent cooperatives, where you will grow and process coffee beans. Five cooperatives have spaces for plantations and buildings, and have a trading house depicted at the edge of the board. Sumatra is unique; when the rules refer to a "cooperative", they never mean Sumatra.
Perform steps 8–11 for each of the five cooperatives:
- In the trading house, stack the 3 Stock markers, that are the same color as the trading house, on their space below 1st.
- In the trading house, place 1 coin on the space matching the player count (e.g. in a 4-player game, on the 4th).
- In the town center, place 6 workers. Pile the remaining coins and workers near the game board to form the general supply.
- Place 1 Animal counter matching the cooperative's color, and 1 Wild Animal counter.
Sumatra
- Each player places 1 civet of their color in Sumatra.
Arabica Track
- Each player places 1 Company disc on the shape space at the start of each row.
- Each player places 1 trader at the top of column 2 on the Trader icon.
- Each player places 1 truck at the top of column 3 on the Truck icon.
Contract Bonus
- In each of the 6 Contract Bonus spaces, stack the number of random Arabica counters indicated in the space, face up (you're always allowed to look at them). Specifically, that's 3 on A–B, and 2 on C–F. In a 4-player game: Stack 1 more on each. In a 5-player game: Stack 2 more on each. Return the rest to the box.
Period & Phase
- In the Period & Phase area, place the Period marker on 1970, and the Phase marker on Phase I.
Turn Order
- Take 1 Company disc from each player, including André (in a 2-player game). In the top row of the Turn Order area, place them in a random order from left to right; however, André always goes last.
Player Board Setup
Player board setup is also depicted on your player board.
- Take 1 Animal counter of each type (except Wild), and give each player a random one of them. Return the rest to the box.
I. Work
- COMPANY MARKERS: Place 3 black Action markers here. In a 4-player game: Add 1 player-color Action marker; at other player counts, you do not use the Action marker of your color.
- COMPANY SUPPLY: Place 1 donkey + 3 coins here.
- BONUS SUPPLY: Place the following here: A. 1 black Action marker. B. 1 trader. C. 3 coins.
- ACTIONS: Nothing goes here until the game starts.
- PLANTATIONS: Fill each space with its plantation/farm (make sure to fill each plantation space with a plantation that has the same number as the space).
II. Assign Workers
- WORKER POOL: Place 2 workers here. In a 5-player game: You get only 1 worker.
III. Trade & Build
- TRADERS & CONTRACTORS: Place 3 traders here. In a 3-player game: Add 1 trader.
- Fill each building space with its warehouse / production station / fair trade post / hospital.
IV. Harvest: Warehouse
- Cover the 2:1 with your Trade counter, 4:1 side up.
- Place each of your Coffee cubes on 0 on its matching track.
- Stand the last warehouse on the shaded Warehouse space.
V. Sell
- CONTRACTS 1970–1980: For spaces A–E, place a random matching contract on the space, flipped to the side for your player count (see its lower-left corner). On F, place the F contract whose superscript number matches the superscript number on your E contract.
- Experienced players playing with new players: In a 4- or 5-player game, you can choose to use the 3-player side of 2 or 4 random contracts to make these contracts harder for you to fulfill.
- André gets a random F contract.
- Look at the top coffee, middle coffee, and bottom coffee depicted on your F contract:
- A. In IV. Harvest: WAREHOUSE, advance the coffee depicted at the top 2 spaces; the middle and bottom, 1 space.
- B. Place the 3 remaining level-1 plantations on the game board (do this for André, too!): I. Top coffee: The middle 1 space of the matching cooperative. II. Middle coffee: The rightmost 1 space of its cooperative. III. Bottom coffee: Leftmost 1 space of its cooperative.
- Experienced players: Instead, in turn order, place this last one (the bottom one of the F contract) on any empty 1 in any cooperative.
- For André: For each of the three (top/middle/bottom coffee), André places 1 production station in the 4-/5-player Production Station space of the cooperative. Discard André's F contract.
- In a 5-player game: On the game board's Arabica track, advance 1 space on the coffee row depicted at the top of your E contract.
- To the right of your CONTRACTS 1970–1980, place your random Animal counter (from Step 1 of Player Board Setup) and 1 civet. In a 4- or 5-player game: Place 1 trader there, as well.
- Keep the rest of your pieces nearby as your personal supply for later.
The Four Supplies
- Company Supply: These are the items (coins, donkeys, trucks) in COMPANY SUPPLY in I. Work on your player board. You can use these whenever you need them.
- Bonus Supply: These are the items (Action marker, trader, 3 coins) in BONUS SUPPLY in I. Work on your player board. You can use these to get you out of a tight spot.
- Personal Supply: These are the items of your color piled on the table beside your board. You cannot use these from here directly; generally, they must go through your COMPANY SUPPLY.
- General Supply: These are the coins and workers piled near the game board. Generally, nobody gets these directly.
André's Board (2-Player Game)
Set up André's board using the components of a third player color as follows:
- Stack 8 plantations (2 level-1, 4 level-2, 2 level-3 plantations) on their respective spaces to the right of Phase 1.
- Place all 3 fair trade posts on the bottom spaces of Phase 3.
- Place 3 traders on their spaces to the right of Phase 3.
- Place 6 scoring markers on their spaces in Phase 5.
- Give André a random A contract, B contract, and C contract. Stack his contracts 3-player side up, on their space in Phase 6, with the C contract on bottom, and the A contract on top.
- Place a set of 5 different Arabica counters face down randomly on their spaces in Phase 6.
André follows the steps depicted on his board. The iconography is explained in André's Play Guide.
General Concepts
Bonus Supply
This supply in I. Work provides three ways to get yourself out of trouble; however, at all times, at least one of the three must still be in the BONUS SUPPLY. You can use any of them at any time, but note that if you take the coins (Bonus C), you must move all 3 coins to your COMPANY SUPPLY, then you can spend the coins from there.
You may refill Bonus C with all 3 coins at any time, which would allow you to take the third bonus that you had left there previously, or simply take the same one again later. Also, if you receive a new trader, you may refill Bonus B with it for the same reasons. (Note: You can't refill Bonus A, because you use the Action marker in Phase 1: Work.)
During Phase 6: Refresh, you will refill your BONUS SUPPLY: The Action marker comes from those you spent during the period; the trader comes from those you placed in the trading houses in the cooperatives; the 3 coins come from your COMPANY SUPPLY, and if you don't have enough to refill the BONUS SUPPLY, you will be penalized (but the BONUS SUPPLY will still get its coins; the remainder come from the general supply).
Milestones
If you fulfill a milestone at any time, place a marker on the most valuable (i.e. topmost) empty space of that milestone. These points will be added at the end of the game.
Vicious 2-player variant: If you'd like to make the game a little more cutthroat, use only the topmost space on each milestone. That is to say that only one player can fulfill each milestone!
Counter Track
Each Arabica counter and each Animal counter you get goes onto or beside the Counter track at the right side of your player board. You fill the track from bottom to top, and each space must have either a unique single counter (different from all other single counters on the track), or a combination of any two same-color counters in it (a Wild Animal counter can be used as any color, and thus also can be used in any duo).
When you receive a duplicate counter, however, you cannot put it directly on the track. Instead, set it beside the track. Once you have two counters of the same color set aside this way, stack both of them on the next empty space of the track.
To apply these rules, perform the following steps:
- If you have received no other identical counters, place it on the bottommost empty space on your Counter track, and skip the rest of these steps.
- If the counter is a duplicate (you have received an identical counter), set it to the right of your player board.
- If you now have accumulated two counters of the same color (type doesn't matter) to the right of your board, stack the two of them, and place the stack on the bottommost empty space on your Counter track.
To reiterate:
- You cannot fill a space with a single counter if there is a previous space filled with an identical single counter.
- You can fill a space with two same-color counters, even if there is a previous space filled with an identical duo. The duo could even be a pair of two identical counters.
You can use a Wild Animal counter as any color, and even as its own [6th] type of single Animal counter. When you get your 2nd Wild Animal counter, you will set it beside your board, where it can combine with any counter to form a stack of two.
Each space of the Counter track contains a chevron to remind you that when you receive a counter, advance 1 space on the Arabica track matching the counter's color (if it's a Wild Animal counter, you choose which track). Do not advance again when you place counters on the Counter track.
Arabica Track
For every Arabica counter, Animal counter, or coffee symbol you get, advance 1 space on the corresponding Arabica track. If you get a Wild Animal counter, you can choose which track.
- The first time you reach at least the 2nd column on all 5 tracks, move your trader from this column to your III. Trade & Build: TRADERS & CONTRACTORS.
- The first time you reach at least the 3rd column on all 5 tracks, move your truck from this column to your I. Work: COMPANY SUPPLY.
- When you reach a space with a bonus printed in it, gain that bonus into your I. Work: COMPANY SUPPLY. Each player earns the coin in column 4, but only the 1st player to reach column 5 gets a donkey. You cannot move backward from the coin or donkey space!
- On each track, only 1 player can be in the 7th column. If you are unable to advance (whether past the 7th column, or from the 6th to an occupied space in the 7th), the advance goes to waste.
Phase 1: Work
In turn order, perform 1 of the 4 Cooperative actions on your turn. Alternatively, you may drop out, forgoing all of your actions for the remainder of this phase. This continues until all players have dropped out. To perform an action, you must place Action markers on one of the ACTIONS on your player board (some actions require more than 1 Action marker). A player may choose the same action multiple times during the same phase.
Action A: Add a Plantation to a Cooperative
Assign 1 Action marker here from I. Work: COMPANY MARKERS to add a plantation to a cooperative, as follows:
- Take the leftmost plantation from row A, B, or C of I. Work: PLANTATIONS.
- Pay the cost in coins (if any) depicted above its space in I. Work: PLANTATIONS.
- Place it on an empty plantation space of any cooperative, respecting the following rules:
- The plantation space must depict the level number of the plantation you are placing; specifically:
- A level-1 plantation must go on either a 1 or 1/2 (which means 1 or 2) space.
- A level-2 plantation must go on either the 1/2 or 2/3 (which means 2 or 3) space.
- A level-3 plantation must go on a 2/3 space.
- To place it on a 1/2 space, the space must connect via pathway to one of your plantations on a 1 space that is not already "supporting" another plantation on a 1/2 space, and the pathway cannot be occupied by an opponent's donkey. If the pathway does not already have a donkey of yours on it, you must move a donkey from your I. Work: COMPANY SUPPLY to the pathway. If you have no donkeys in your COMPANY SUPPLY, you cannot place the plantation here!
- To place it on a 2/3 space, you have two options:
- Connect by using donkeys: Connect the space via pathway to one of your plantations on a 1/2 space that is not already "supporting" another plantation on a 2/3 space; the pathway cannot be occupied by an opponent's donkey. If the pathway does not already have 2 donkeys of yours on it, you must move donkeys from your I. Work: COMPANY SUPPLY to the pathway until it does. If you have no donkeys in your COMPANY SUPPLY, the only way you can get the plantation here is by truck!
- Reach it by truck: The pathway to the space from a 1/2 space cannot be occupied by an opponent's donkey(s). You must move 1 truck from your I. Work: COMPANY SUPPLY to the truck space beside the plantation space.
- The plantation space must depict the level number of the plantation you are placing; specifically:
Notes:
- You must have at least one 1-row plantation for each 2/3-row plantation in this cooperative. Each 1-row plantation can support one 1/2-row plantation and one 2/3-row plantation.
- When you use a truck, the new plantation needs neither a "supporting" plantation in the 1/2 row, nor a pair of donkeys on the pathway from the 1/2 row. Using a truck allows you to skip the 1/2 row altogether; however, you must still respect the 2 rules above about the 1-row.
- If the only item remaining in the chosen row of I. Work: PLANTATIONS is a farm, immediately either pay the cost above it to place it in any Cooperative, or remove it from the game.
- If your I. Work: PLANTATIONS now has no more plantations, move a civet from your personal supply to Sumatra.
Action B: Send Workers to Plantations
Assign 1 Action marker here from I. Work: COMPANY MARKERS to send workers to plantations (to harvest in Phase 4: Harvest), as follows:
- Choose a cooperative.
- For each player with an empty plantation there, move 1 worker from the cooperative's town center to their unoccupied plantation in the lowest row (if there aren't enough workers, you choose whose plantations remain unoccupied).
- If the town center now has 0 workers, move 1 worker from the general supply to the town center.
- If you placed workers on at least 1 opponent's plantation, advance 1 column on that cooperative's row of the Arabica track.
Action C: Breed a Donkey
Assign 2 Action markers here from I. Work: COMPANY MARKERS to breed a donkey, as follows: Send a donkey from your personal supply to an empty pathway space between one of your plantations and the row above it.
Action D: Send Civet or Take Coins
Assign 1 Action marker here from I. Work: COMPANY MARKERS to do 1 of the following:
- Send a civet from your personal supply to Sumatra.
- Take 2 coins from the general supply; add them to your I. Work: COMPANY SUPPLY.
Note: Resources in your COMPANY SUPPLY, such as donkeys and trucks, are freely available to you without spending an action. For example, you may freely use these resources when adding a plantation; however, you can only use the resource in question if your chosen action enables you to do so.
Phase 2: Assign Workers
Everyone will send their workers to plantations. First, simultaneously staffing your own. Then, your excess work force can cover other players' labor shortages (of course you get rewarded for doing so). If you still come up shorthanded, you will have some penalties to pay!
- Simultaneously send workers from your II. Assign Workers: WORKER POOLS to your own unoccupied plantations. You must place a worker in the 1 row before you can place workers in higher rows. You are not required to use all of your workers on your own plantations; you may keep some or all for the next step.
- In turn order, until everyone drops out: Either move a worker from your WORKER POOL to an opponent's unoccupied plantation, or drop out. Bonus! — If you placed a worker on an opponent's plantation, advance 1 column on that cooperative's row of the Arabica track as a reward.
- After everyone has dropped out, you are penalized a certain amount for each of your unoccupied plantations. The penalty amount for each unoccupied plantation is determined by the current period: 1970: 1; 1975: 2; 1980: 3. There are two ways to pay your penalty. You can use one or both of the following methods, in any combination:
- Discard coins.
- Move back on an Arabica track (you can't move back from a coin/donkey bonus space).
- If you are unable to pay in full (using coins and/or Arabica steps), then after you pay all of what you can, you must remove your highest-placed (by row) unoccupied plantations, whose penalties you could not pay in full, from the game. If there is a tie between your highest-placed unoccupied plantations, you choose between them.
Phase 3: Trade & Build
In turn order, perform one of the following actions until everyone passes consecutively:
Action A: Place a Trader
- Pay 2 coins to send 1 of your traders in the 1st space of an unoccupied trading house.
- Take a Stock counter, and place it on the matching bottom space of IV. Harvest: WAREHOUSE.
- Piggyback: In wrapping turn order, each player after you may place a trader in the next empty space for free.
- If precisely 1 player opted out of placing a trader, that player takes the coin from below the next empty space. Otherwise, no one gets the coin.
- In a 2- or 3-player game, there are 3 spaces available for traders in each trading house, and thus all 3 players (including André) can place a trader.
- In a 4-player game, there are only 3 spaces available for traders in each trading house.
- In a 5-player game, there are only 4 spaces available for traders in each trading house.
Action B: Hire a Contractor
- Pay 2 coins to replace a topmost building from one of the columns in III. Trade & Build with a contractor.
- Note: The hospital is "unlocked" by clearing either of the columns above it. Alternatively, you can build it for free with the F Contract bonus, even if the hospital is not "unlocked".
- If you selected a warehouse, place it in IV. Harvest: WAREHOUSE, in either of the following locations:
- An empty space at the top of a track to increase your storage capacity for that type of coffee to 10.
- The topmost empty space to the right of all tracks to increase storage capacity of all types by 1.
- Otherwise, place the building on a matching empty space on the main board. If the space depicts a bonus, advance 1 column on the Arabica track matching this cooperative.
- Earn the bonuses indicated for that building in III. Trade & Build. The bonuses are as follows:
Warehouses (1st was built during setup):
- 2nd warehouse: Gain 1 coffee of any type (except kopi luwak). Flip your Trade counter in your IV. Harvest area to its 3:1 side. At the end of the game, gain 1 VP.
- 3rd warehouse: Gain 1 coffee of any type (except kopi luwak). Place a civet of your color in Sumatra. At the end of the game, gain 3 VP.
- 4th warehouse: Gain 1 coffee of any type (except kopi luwak). Exchange your Trade counter for 2:1. Receive 1 coin. At the end of the game, gain 5 VP.
- 5th warehouse: Gain 1 coffee of any type (except kopi luwak). At the end of the game, gain 6 VP.
Production stations:
- 1st (washing): Gain 2 coffee matching the cooperative where you built it. At the end of the game, gain 1 VP.
- 2nd (drying): Gain 2 coffee matching the cooperative where you built it. At the end of the game, gain 2 VP.
- 3rd (sorting): Gain 2 coffee matching the cooperative where you built it. At the end of the game, gain 3 VP.
Fair trade posts:
- 1st: At the end of the game, gain 1 VP.
- 2nd: Advance 1 column on an Arabica track of your choice. At the end of the game, gain 2 VP.
- 3rd: Advance 1 column on an Arabica track of your choice. At the end of the game, gain 3 VP.
Hospital: At the end of the game, gain 4 VP.
- Piggyback: In wrapping turn order, each player after you may pay you 1 coffee of their choice from their IV. Harvest: WAREHOUSE to your IV. Harvest: WAREHOUSE to then build a building in the same place you did (player board / cooperative) for free, replacing the topmost building of the column with their contractor, and earning their bonus, just like you did.
Action C: Remove a Trader
Pay 2 coins to remove one of your traders from the game, and then do the following twice: advance 1 column on any Arabica track.
Pass
Do none of the above actions, but you can still take turns later in the phase (i.e. you can still "jump back in"), and you can still piggyback others' actions; however, if everyone just passed consecutively, move on to the Harvest phase.
Buildings
In real life, each of these buildings has an ongoing effect to improve the production process and quality of life for the workers; however, in this game, except for the fair trade post, this effect is abstracted as a one-time benefit (and endgame VP). Each building on the board provides Quality Value (QV) to help you vie for the victory points in that cooperative. Warehouses, on the other hand, do have an ongoing effect in the game: They increase your coffee storage capacity.
- Farm: You must build this in a cooperative. QV = 1. It provides no other benefits. This building is in Rows A and C of your I. Work: PLANTATIONS, and the only way you can build it is as a bonus for placing all of the plantations from Row A/C.
- Warehouse: You must build this on your player board (thus it has no QV) to increase storage capacity for coffee. It also gives you the bonuses explained above.
- Production station: You must build this in a cooperative. QV = 1. It also gives you the bonuses explained above.
- Hospital: You must build this in a cooperative. QV = 2. It also gives you the bonuses explained above.
- Fair trade post: You must build this in a cooperative. QV = 1. It secures some of the coffee production in the cooperative for you each period. It also gives you the bonuses explained above.
Phase 4: Harvest
In this phase, the workers on all plantations harvest coffee and deliver it to fair trade posts and traders. Perform the following steps:
- Do this for each cooperative:
- A. Each staffed plantation produces coffee. In a 2- or 3-player game: Each staffed plantation produces 3 coffee. In a 4- or 5-player game: Each staffed plantation produces 2 coffee.
- B. Note the total coffee that this cooperative produces, then distribute it as follows (each player will update their IV. Harvest: WAREHOUSE accordingly):
- I. Each fair trade post takes 1 for its owner.
- II. The 1st trader in this cooperative's trading house takes 1 for its owner.
- III. Cycle through the following 5 times (or until there is no more coffee to distribute): Each trader in the trading house, in trader order (starting with and including the 1st trader), takes 1 for its owner.
- C. The remainder of the coffee that this cooperative produced goes to waste.
- If the leftmost 5 coffee types in your IV. Harvest: WAREHOUSE are greater than or equal to the threshold (In a 2- or 3-player game: 6 of each; in a 4- or 5-player game: 4 of each), place a civet of yours from your personal supply in Sumatra.
- Gain 1 kopi luwak for each civet you have in Sumatra.
- Return all civets to your personal supply.
Phase 5: Sell
In reverse turn order, perform one of the following actions, or drop out for the phase:
General Rules
- Kopi luwak is wild: You can spend it as any other coffee type.
- You can trade any type(s) of coffee using the current trade ratio in your IV. Harvest area, but you can't get kopi luwak this way.
- You can buy coffee (but not kopi luwak): Periods 1–2: 2 coins each; Period 3: 3 coins each.
- You can spend 5 different Stock counters for 2 warehouses, or 3 different for 1.
Action A: Fulfill a Contract
- Spend all of the coffee indicated on one of your contracts.
- Remove that contract from the game.
- Get the coins depicted beside its space.
- Get the bonus depicted below its space; if there is a slash (/), take either the bonuses left of the slash, or the bonuses right of the slash.
- Coins, donkeys, and trucks go to I. Work: COMPANY SUPPLY.
- Workers go to II. Assign Workers: WORKER POOL.
- The bonuses are as follows:
- Place a civet of your color in Sumatra.
- Move a worker from the general supply to your II. Assign Workers: WORKER POOL.
- Advance 1 column on an Arabica track of your choice.
- Move a donkey from your personal supply to your I. Work: COMPANY SUPPLY.
- Move a coin from the general supply to your I. Work: COMPANY SUPPLY.
- Build a topmost building from one of the columns in III. Trade & Build (which may be your hospital, if one of the columns above it on your player board is empty). You do not need to pay any coins, and you do not need to place a contractor. As usual, place the building on a matching empty space on the main board. If the space depicts a bonus (which is always an Arabica step), take that bonus.
- Move a truck from your personal supply to your I. Work: COMPANY SUPPLY.
- Build your hospital for free (and without placing a contractor), even if you have not cleared a column above it in your III. Trade & Build.
- If you just finished a contract row (A & B, C & D, or E & F), get one of the bonuses depicted to the right of the Contract spaces:
- 1 Animal counter onto the Counter track.
- 1 civet into Sumatra (Period 3: into your I. Work: COMPANY SUPPLY).
Action B: Deliver Twice to Coffee Bars
- For each of the 2 deliveries, do the following (or make 1 delivery, then drop out immediately):
- Choose any uncovered space in the Coffee Bars.
- Spend the coffee indicated by the space (the bottom space requires 6-of-a-kind of any type).
- Get the coin bonus depicted above the space.
- Get the Animal token bonus below the space (only true for the lowest spaces).
- Place a Scoring marker (coffee bean) on the space.
- In a 4- or 5-player game: If you have newly delivered to all 6 Coffee Bars (all 6 columns/cities), take a Wild Stock counter from the top of the Coffee Bars, and place it on any Stock Counter space at the bottom of IV. Harvest: WAREHOUSE.
Drop Out
Move your Turn Order marker to the leftmost empty space on the bottom row. If everyone has done this, move on to Phase 6: Refresh.
Phase 6: Refresh
- Return all traders/contractors to III. Trade & Build: TRADERS & CONTRACTORS.
- Return all Action markers to I. Work: COMPANY MARKERS (in a 4-player game: except the one in your color; if you used it, remove it from the game).
- Rearrange your warehouses, if you like. Reduce your coffee to your Warehouse Limit (a warehouse in a row allows 1 of each type; a warehouse in a column allows 10 of one type).
- Rearrange your Wild Stock counters however you like.
- For each Stock counter you have, gain 1 coffee of its type.
- Refill your I. Work: BONUS SUPPLY with an Action marker, a trader, and 3 coins from your I. Work: COMPANY SUPPLY. For each coin you lack, take it from the general supply and take a −3 VP token, which goes in your I. Work: COMPANY SUPPLY.
- Move the Turn Order markers to the top row without changing their order.
- In each trading house that doesn't already have one, place 1 coin on the space matching the player count.
End of Game
At the end of the 3rd period, the game ends and players add up their victory points (VP).
Game Board
- Coffee Bars:
- A. Deliveries: The VP below each Scoring marker (coffee bean).
- B. Bonus: In each column, 4 VP if you have the most coffee beans; 2 VP if 2nd. Tiebreaker: furthest down the banner.
- VP from fulfilled milestones.
- For each cooperative, award Cooperative Victory Points per Quality Value (QV) rank within the cooperative. Perform the following steps:
- A. Each plantation you have there is worth QV equal to the plantation's level (the number on it): Level-1 plantation: QV = 1. Level-2 plantation: QV = 2. Level-3 plantation: QV = 3.
- B. If (and only if) your plantation QV total in this cooperative is greater than 0 (in other words, you have at least one plantation there): If you have a hospital in this cooperative, its QV = 2. Other buildings you have in this cooperative each have QV = 1.
- C. Award the Cooperative Victory Points for this cooperative (as depicted in the lower-left corner of the game board): The player with the greatest total QV in this cooperative gets 16 VP. Second place gets 8 VP. In a 4- or 5-player game: Third place gets 4 VP.
- In the event of a tie, add and divide the VP rewards, rounding up.
- Arabica track (these are cumulative):
- A. 3 VP if you are ≥ 2nd column on all 6 rows.
- B. 7 more VP if you are ≥ 3rd column on all 6 rows.
- C. 6 more VP for each row on which you are ≥ 6th column.
- D. 4 more VP for each row on which you are = 7th column (on each row, only 1 player can be there).
Player Board
- I. Work:
- A. COMPANY SUPPLY: 1 VP for each donkey/civet (but not for coins). 3 VP for each truck. −3 VP for each −3 VP token.
- B. 4 VP if you built your level-3 plantation in Row B.
- II. Assign Workers: WORKER POOL: 1 VP for each worker here.
- III. Trade & Build: VP for each constructed building, as depicted to the left of its empty space.
- V. Sell: VP for each fulfilled contract, as depicted at the bottom of its empty space.
- VP for how high you filled your Counter track.
The player with the most VP wins. In the event of a tie, the tied player with the most money wins. If still tied, the tied players brew or buy each other a good cup of coffee; best cup of coffee wins.
André's Play Guide (2-Player Game)
Phase 1: Work
During this phase, over the course of 4 turns, André will perform 4 different actions.
Turn 1: Add a plantation in the cooperative matching the topmost cooperative depicted on his visible contract (in the 1st period, his visible contract will be his A contract; 2nd period, B contract; 3rd period, C contract).
- Even if this is André's 1st plantation in this cooperative, he does not add a worker from the general supply.
- André ignores the transport (donkey/truck) requirements.
- If possible, he places the new plantation so as not to cut off another player's plantation path.
- André always tries to improve his plantation in this cooperative. If he cannot, he starts with a new level-1 plantation there, if he can. Specifically:
- If he already has a level-3 plantation there, but not a 2nd level-1 plantation, he will add a 2nd level-1 plantation to start a new sequence. If he cannot, he adds no plantation, and passes his turn.
- If he has a level-2 plantation there, but no level-3 plantation, he will add a level-3 plantation. If he cannot, he adds another level-1 plantation. If he cannot, he adds no plantation, and passes his turn.
- If he has a level-1 plantation there, but no level-2 plantation, he will add a level-2 plantation. If he cannot, he adds another level-1 plantation. If he cannot, he adds no plantation, and passes his turn.
- If he has no plantations there yet, he adds a level-1 plantation. If he cannot, he places no plantation, and passes this turn.
Turn 2: Add a plantation in the cooperative matching the middle cooperative depicted on his visible contract, following the same rules as for Turn 1 above.
Turn 3: Place workers in the cooperative matching the topmost cooperative depicted on his visible contract, in turn order, except that André gets his last: For each player with an empty plantation there, move 1 worker from the cooperative's town center to their lowest unoccupied plantation (if there aren't enough workers, Player 1 chooses whose plantations remain unoccupied).
- He does not earn for placing a worker on someone else's plantation.
- If the town center now has 0 workers, move 1 worker from the general supply to the town center.
- If there are no unoccupied plantations there, he places no worker, and passes his turn.
Turn 4: Place workers in the cooperative matching the middle cooperative depicted on his visible contract, following the same rules as for Turn 3 above.
Phase 2: Assign Workers
After following the usual rules for this phase, fill each of André's unoccupied plantations with a worker from the cooperative's town center. If there aren't enough workers there, André takes workers from the general supply.
Phase 3: Trade & Build
- On André's turn, flip 1 Arabica counter on his board face up. He places a trader in the trading house matching that counter. If the trading house is already filled, flip another Arabica counter, and so on, until he can place a trader.
- Other players may piggyback.
- He only has the 3 traders on his board available to him.
- He does not take the Stock counter.
- André will always piggyback when a player places a trader in a trading house, but only for the 2nd position in the trading house. André never takes the coin.
- He never builds using a contractor, and never piggybacks building.
- After both human players pass and André places all his traders, André will build 1 fair trade post in the cooperative matching the bottommost cooperative depicted on his visible contract.
- He prefers to build it on the 4-/5-player space if possible.
- Failing that, he prefers the cooperative-color space with the Arabica step in it, but he doesn't get the step.
- Otherwise, he takes the space that offers no bonus.
Phase 4: Harvest
Follow the usual rules: Each plantation with a worker will harvest 3 coffee. André takes his share of coffee, thus depriving the other players, but then he just throws it away.
Phase 5: Sell
Follow the usual rules; however, on André's 1st turn, which will be 1st in this phase (because this phase is played in reverse turn order), he places a total of 2 Scoring markers in the Coffee Bars, as follows:
- He places the 1st on the lowest-numbered space (highest on the banner) matching the middle coffee type depicted on his visible contract.
- He places the 2nd on the lowest-numbered space (highest on the banner) matching the bottommost coffee type depicted on his visible contract.
Phase 6: Refresh
Follow the usual rules (yes, André gets his traders back), then do the following:
- Remove André's visible contract. If this is the 1st period, discard his A contract to expose his B contract; 2nd period, discard B contract to expose C; 3rd period, discard C contract, and the game is about to end.
- Flip all 5 of André's Arabica counters in Phase 6 on his board face down, and shuffle them.
Milestones
- Construct all 5 warehouses.
- Construct all 3 production stations and fair trade posts.
- Deliver all 6 contracts.
- Place a trader in all 5 trading houses.
- Have 10 coffees in 2 of your warehouses (20 in total). Note: Can be achieved through harvesting, trading, and/or buying.
- Make 1 delivery of value 2 or more to all 6 Coffee Bars.
- Add all 11 plantations.
- In 4 cooperatives, have at least one plantation on the "1/2" or "2/3" row and a building.
- In 2 cooperatives, have 8 or more (16 in total) Quality Value points (QV).
The Five Coffee Countries
- Guatemala: Produces some of the best coffee in the world. The plants grow on rich soil near the volcanoes at a level of 1300 meters or higher in the three main regions: Antigua, Huehuetenango, and Coban. The most common arabica plants grown here are Bourbon, Typica, Catuai, and Caturra. The animal counter for Guatemala is the Macaw (Scarlet Macaw).
- Colombia: Has a reputation of producing the world's best coffee for more than 50 years. Its mountains provide a perfect environment for high quality coffee, resulting in mild coffee with a well balanced acidity. The arabica plants are Typica, Bourbon, Catura, and Mangotype. The bird representing Colombia is a Turkey Vulture.
- Brazil: Produces one third of all coffee in the world, and exports 32 million bags of green coffee. Most farmers work near the Atlantic ocean in the southeastern states of Minas Gerais, São Paulo, and Parana. These beans are air dried (a natural process) and taste sweet and medium bodied with low acidity. The Brazilian representative is the Toucan.
- Ethiopia: Where coffee was discovered. Produces some of the finest coffee in Africa; the main regions are Sidamo, Harra, and Kaffa. Ethiopian beans are lightly roasted so they can maintain their full flavor, bright fruit notes, and rich complexity. The animal representing Ethiopia is the Zebu, a type of cattle.
- Indonesia: Coffee is not native to Indonesia; the Dutch East India Company brought Arabica coffee plants to the archipelago in the 17th century. Sumatra, Java, and Sulawesi are known throughout the world for their quality coffee. Indonesia's representative is the Swamp Buffalo, a working animal used to plow and harrow.
Kopi Luwak: Coffee beans digested by, fermented within, and then extracted by Asian Civet cats. Kopi is the Indonesian name for coffee and the Civet cat is known as Luak. In the game, kopi luwak is wild and can be spent as any other coffee type.
Symbols
- Game pieces: Worker, Action marker, Donkey, Coin, Truck, Warehouse, Trader & contractor, Production station, Civet, Fair trade post, Arabica counter, Hospital, Animal counter, Farm, Wild Animal counter, Milestone, Trade counter, Contract, Stock counter.
- Gameplay: Period, Cooperative, Coffee, Coffee level, 2 donkeys, Piggyback, Pass, Victory points, Advance on the Arabica track, Move back on the Arabica track, Advance on the Counter track.
- Phases: Phase 1 Work, Phase 2 Assign Workers, Phase 3 Trade & Build, Phase 4 Harvest, Phase 5 Sell, Phase 6 Refresh.