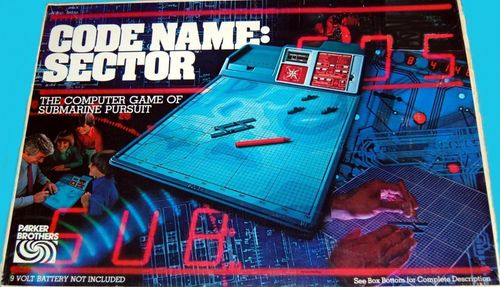
Code Name: Sector
Code Name: Sector Rulebook
Table of Contents
Table of Contents
The Challenge
You are the commander of a destroyer. Your mission: to seek and destroy an enemy submarine.
The Competition
You sail into enemy waters with a fleet of three other ships. To locate the sub, you share information with your fellow commanders. But only one commander can destroy the sub, and each wants the glory for himself. Therefore, to succeed in your mission, you must sink the sub before your allied commanders do.
The Computer
The chase is controlled through a computer. At any given moment, the computer knows everything about your ship, your allied ships, and the enemy sub. With this information, the computer acts as a double agent: while helping you and your allies to find the sub, it also controls the sub's movement.
Your First Mission
CODE NAME: SECTOR is an easy game to learn because the computer contains a "Teach Mode." Teach Mode is a practice game — a single chase in which four destroyers, in a total of nine moves, sink a submarine. You can find the TEACH MODE button at the lower right-hand corner of the COMBAT INFORMATION CENTER. By the end of the Teach Mode game, you'll know almost all of CODE NAME: SECTOR's basic skills.
Teach Mode: Combat Preparation
The ships' starting positions are numbered 1 through 4 at the lower left-hand corner of the CHART. The players will be known as Ship 1, Ship 2, Ship 3, and Ship 4. If you are playing alone, you command all four ships by yourself. If only two people are playing, it is suggested that one player command Ships 1 and 3, and that the other command Ships 2 and 4.
Ship 1 will move first, followed in order by Ships 2, 3, and 4. This same order will and must be maintained throughout the game. Assign each player a ship.
To plot his ship's movements on the chart, each player uses a different colored marking crayon. For this game, Ship 1 will be red, Ship 2 — green, Ship 3 — blue, and Ship 4 — black. Hand each player the appropriate crayon.
In a game with two or more players, it is suggested that one player read the following directions aloud, and that the others follow along. Select a player to read.
IMPORTANT: From this point on do only what the directions tell you to do. Do nothing else. While playing, if you discover that you've made an error, you must start Teach Mode again. Turn the game off, erase the chart with the cloth, and start again from here.
Turn the game on, press TEACH MODE, and man your battle stations.
(During the game, the display lights may go out and be replaced by two blinking dots. To prolong battery life, the display lights stay on for about 30 seconds. To recall display information, simply press RECALL.)
Teach Mode: Combat Procedures
Ship 1
When the chase begins, the digital DISPLAY will look like Figure 1. The numbers — which relate to the top line of words on the display — tell you that Ship 1 is standing still at its starting position of COORDINATES 35N (North), 25E (East). The COMPASS lights, North and East, tell you that Ship 1, unless you decide differently, will travel in a NE (Northeasterly) direction.
So far you know nothing about the sub; only the computer does. The computer has already programmed the sub's location, direction of movement, and depth. At this point in the game, Ship 1 can only determine the sub's RANGE — its exact distance away from Ship 1.
[FIGURE 1: the digital DISPLAY (reading SHIP 1 / SPEED 0 / NORTH 35 / EAST 25 / DEPTH / RANGE) and the COMPASS panel with N, NE, E, SE, S, SW, W, NW lights.]
Press RANGE. The number 10 appears on the display above the word RANGE. You now know that the sub is located exactly 10 points from Ship 1. A POINT is the intersection of any two lines on the chart.
PLOT the sub's range. Count 10 points away from Ship 1 in every direction — horizontally, vertically, and diagonally. Mark a small red dot at the 10th point in each direction. Then — using the game's parallel rule — draw a red line at this range by connecting your dots.
You have just established your RANGE LINE. Every point on this line is exactly the same distance from the sub. At one point on this line the sub is hiding. The sub is not located inside this line or beyond this line. It is somewhere on this line.
Your line probably looks like the one in Figure 2. But it shouldn't.
[FIGURE 2: a chart grid (25E–50E, 25N–50N) showing Ship 1 at 35N/25E with a range line drawn too far out; labelled LIMIT LINE (dotted red) along the top and right edges, and the ship positions 1–4 marked.]
Why? Because the computer will never allow the sub to travel outside the (dotted red) LIMIT LINE. With the cloth, or a piece of tissue, erase your line until it looks like that in Figure 3.
[FIGURE 3 (p. 5): the corrected range line of Ship 1, a square of points 10 away from Ship 1's starting position, bounded by the dotted red LIMIT LINE; labelled "RANGE of 10 points from Ship 1's starting position".]
By counting along your range line, you can see that it covers a total of 21 points. The sub lies on one of these points. It must, since each of these points is exactly 10 points away from Ship 1.
You should also know that the range line you've just created is actually a square. A ship's entire range line is always a complete square. With the ship at port, however — at the edge of the chart and close to the Limit Line — only a portion of Ship 1's entire range line actually shows on the chart.
[FIGURE 4 (p. 6): a chart (25E–50E, 25N–50N) showing a ship at 40N, 40E with its complete range line of 7 points, a square drawn through points marked 7 around the ship.]
Figure 4, for example, shows a ship's entire range line. Located at 40N, 40E, this ship has just learned that the sub is hiding at a RANGE of 7. Therefore, each point that lies exactly 7 points away from the ship becomes a part of its range line. When connected, these points form a square.
As you can see, drawing a range line requires point-counting. Figures 4 and 5 illustrate point-counting. They show that the distance from one point to the next equals a count of 1. They also show that you can count in these ways: a) in a straight line — horizontally, vertically or diagonally; b) in a diagonal/horizontal line; or c) in a diagonal/vertical line. You may not count points in a line that is both horizontal and vertical. And you should always try to count along the shortest possible route.
[FIGURE 5 (p. 7): a chart (25E–50E, 25N–50N) showing Ship 1 at 35N, 25E with a point-counted range square of 10 and the ship's new position at 35N, 30E.]
Having established its range line, Ship 1 must now prepare to make its move. You must choose a DIRECTION and a SPEED. You may move in any compass direction (N, NE, E, SE, S, SW, W, NW). The speed you choose is simply the number of points that you want your ship to travel. On a single turn you may travel up to a speed of 9 (9 points in any compass direction). Being cautious, you decide to move E (East) at a speed of 5.
Press RIGHT once, so that only the E light is on.
Press FASTER five times. A speed of 5 will show on the display.
Press MOVE SHIP. The display and compass will show that Ship 1, travelling E at a speed of 5, is now located at coordinates 35N, 30E.
PLOT your course. Find your new location on the chart and mark the spot in red. Then — using the parallel rule — connect it with a red line to your previous location.
REMEMBER: Plotting is only a convenience and a reminder; it does not affect a ship's movement. A ship's position is affected only by pressing buttons. By plotting, you can see on the chart what is actually taking place inside the computer.
Press RANGE. A number 5 appears on the display. This tells you that the sub is now only 5 points away from your new position.
This new range information can help you to limit the area in which the sub can be found. To do this, locate all the points on your original range line which are now 5 points away from your new position. (Figure 6)
[FIGURE 6 (p. 8): a chart showing Ship 1's new position at 35N, 30E, with the eliminated part of the original range line marked and the remaining points that are 5 points from the new position marked; labelled "RANGE of 5 points from Ship 1's new position".]
As you can see, you've just cut the sub's possible locations in half. Instead of being on 1 of 21 points, the sub now must be on 1 of only 11 points.
Press NEXT SHIP. The display shows Ship 2's speed (0) and location (30N, 25E); the compass shows your heading (NE). But there's something the computer is not telling you: the sub has just moved 1 point in an unknown direction.
The sub always moves 1 point whenever NEXT SHIP is pressed.
[FIGURE 7 (p. 9): a chart showing Ship 1's final range line and Ship 2's position at 30N, 25E, with the 36 points the sub could occupy.]
At this moment, the sub could be on any one of the 36 points shown in Figure 7. It might still be on Ship 1's final range line; or it might have moved 1 point away from that line. Right now you have no idea of the sub's direction. You only know that the sub has moved 1 point from where it was during Ship 1's turn.
Press RANGE. You see that the sub is exactly 11 points away from Ship 2. Using the green crayon, PLOT your range line. Count 11 points in all directions from your starting position, then connect these points. Your range line should look like the one in Figure 8.
[FIGURE 8 (p. 10): a chart showing Ship 2's 11-point range line from its starting position at 30N, 25E.]
However, your range line need not be this long. Erase it until it looks like the one in Figure 9.
Why? Because the purpose of drawing range lines is to limit the sub's possible locations as much as you can. Ship 1 has already limited the sub's possible locations to a line that covers only 11 points. And you can see that the sub has just moved 1 point away from that line. Therefore, you need sketch in only the parts of your range line that fall within 1 point of Ship 1's final range line. By plotting in this way, you can limit the sub's possible locations even before you move.
[FIGURE 9 (p. 11): a chart showing the reduced range line for Ship 2, drawn only for the points within 1 point of Ship 1's range line.]
You must now plan your direction and speed. Notice that you should not sail to the Northeast, as presently indicated on the compass. To do so would result in a COLLISION with Ship 1. So you choose to sail East and get as close to the sub as you can.
Press RIGHT until only the E light is on.
Press FASTER until a speed of 9 shows on the display.
Press MOVE SHIP. The display shows your new speed (9) and location (30N, 34E); the compass shows your new course (E). With the green crayon,
PLOT your new position and course on the chart.
Press RANGE. You see that you're now only 6 points away from the sub.
But in determining your new range, you've learned something important: you can now pinpoint the sub's exact location. How? First, the sub has not yet moved again and is therefore still somewhere on your range line. Second, the computer has just told you that the sub is exactly 6 points away from your new position. Therefore, look for the points on your range line which are exactly 6 points away from your new position. Count carefully, along the shortest possible route, and you'll find only one point on your range line that is exactly 6 points away from your new position. This point is 36N, 36E. With your green crayon, mark this point on the chart. (Figure 10)
[FIGURE 10 (p. 12): a chart showing Ship 2's new position, the range of 6 points from Ship 2's new position, and the single point at 36N, 36E marked on the range line.]
In this game you're lucky: it has taken only two moves to find the sub. In some games it takes longer.
Ship 3
Press NEXT SHIP. The display and compass show Ship 3's starting information. You know that the sub has just moved 1 point. You also know that its general direction is East, since the sub's position on the newest range line (Figure 10 — green line) is one point to the East of the previous range line. Its exact direction — Northeast, East, or Southeast — still remains a mystery.
Press RANGE. You see that the sub is exactly 12 points from Ship 3. With the blue crayon,
PLOT your range line. Your whole range line — covering 20 points — looks like the one in Figure 11.
[FIGURE 11 (p. 13): a chart showing Ship 3's 12-point range line from its starting position, covering 20 points.]
You already know, however, that you need not draw the whole line.
Your range line should show only those points that lie 1 point from the exact sub location found by Ship 2. (Figure 12)
[FIGURE 12 (p. 14): a chart showing the 12-point range of Ship 3 limited to the points within 1 point of the sub's previous location.]
As you can see, your range line covers three points. Let's look at each of them:
-
One of these points lies directly on Ship 1's (red) range line. But the sub cannot be there. Why? Because the sub maintains a steady course throughout the chase; the sub will not change its direction of movement. You already know that the sub travelled generally Eastward of this (red) line. Therefore, it cannot now travel backwards toward the West.
-
A second point lies directly on Ship 2's (green) range line. But, for the same reason, the sub cannot be on this point either. You know that the sub was on this (green) range line during Ship 2's turn. You also know that the sub has just moved 1 point from where it was. To be on this (green) range line now would mean that the sub has just moved either directly N (North) or directly S (South). Either direction is impossible, as the sub is moving on a generally Eastward course.
-
The only remaining point on your range line is 37N, 37E — the sub's new exact location. With the blue crayon, mark this point on the chart.
This point also reveals the sub's exact direction of movement. When you compare the sub's new location to its previously known position, it becomes clear that the sub is moving to the Northeast.
As shown in Figure 13, you can now predict the sub's entire course.
[FIGURE 13 (p. 15): a chart showing the sub's course marked from its previous location to its new location at 37N, 37E, continuing to the Northeast, labelled "Sub's course".]
You want to move as close to the sub as you can. So you decide to travel NE at maximum speed.
You are already headed in the desired direction.
Press FASTER until you've reached a speed of 9.
Press MOVE SHIP. The display shows your new speed and location; the compass shows your course. With the blue crayon,
PLOT your course and new location on the chart.
Press RANGE. You see that you're now only 3 points from the sub. If one of your allied ships does not sink it first, perhaps you can sink the sub on your next move.
Ship 4
Press NEXT SHIP. The display and compass show Ship 4's starting information.
Press RANGE. The display places Ship 4 exactly 13 points from the sub. But at this moment, even before Ship 4 moves, you know exactly where the sub is. It has just moved to 38N, 38E — 1 point to the NE of its previously known position. Mark this point in black.
Ship 4 decides to move NE at a speed of 7. Why not maximum speed? After all, the sub is 13 points away. Because Ship 4 is playing it smart. You know that four moves from now — on your next turn — the sub will be located at 42N, 42E. (Figure 14)
If you move to 32N, 42E, you will then be located 10 points directly South of the sub's future position. This situation would place you within FIRING RANGE during your next turn. Whenever a ship is located 2 points or less from the sub, and in one of the eight compass directions, the display flashes the letter F, indicating permission to fire.
You are already headed in the desired direction.
Press FASTER until you've reached a speed of 7.
[FIGURE 14 (p. 17): a chart showing the sub's present position at 38N, 38E, the sub's position at Ship 4's next move (marked X), and two diagonal courses drawn on the chart.]
Press MOVE SHIP. The display shows your speed and new location; the compass shows your course. With the black crayon,
PLOT your course and new location on the chart.
Press RANGE. You are now exactly 6 points away from the sub.
Ship 1
Press NEXT SHIP. As you can see from the display and compass, the computer has remembered Ship 1's previous position, speed, and course. It has you located at 35N, 30E, travelling E at a speed of 5.
Press RANGE. You are now 9 points from the sub. You know that the sub has just moved 1 point to the NE and is now located at 39N, 39E. With the red crayon, mark this point on the chart.
You look over the situation and can come to only one conclusion: no matter where you move you will not come within firing range. So, like Ship 4 just before you, you plan ahead.
In four moves — on your next turn — you know the sub will be located at 43N, 43E. So you decide to move NE at a speed of 8. This will place you at 43N, 38E — 5 points directly West of the sub's future position. On your next move — if the sub hasn't already been sunk by another ship — you would be able to position yourself directly over the sub, and fire.
Press LEFT until both the N and E lights are on.
Press FASTER until you've reached a speed of 8.
Press MOVE SHIP. The display and compass show your new speed, location and course. With the red crayon,
PLOT your new position and course on the chart.
Press RANGE. The display shows you to be exactly 4 points from the sub.
Press NEXT SHIP. The display and compass show your previous speed, position, and course.
Press RANGE. You are now exactly 10 points from the sub. You know the sub has just moved 1 point to the Northeast and is now located at 40N, 40E. With the green crayon, mark the sub's new position on the chart.
You decide to travel NE at a speed of 8. This will place you at 38N, 42E — 2 points directly Southeast of the sub — within firing range.
Press LEFT until both the N and E lights are on.
Press SLOWER until you're at a speed of 8.
Press MOVE SHIP. The display and compass show you to be at 38N, 42E, travelling NE. With the green crayon,
PLOT your new position and course on the chart. You can see from the chart that the sub is now 2 points directly Northwest of you.
Press RANGE. The display shows a range of F2. You are indeed within firing range, 2 points away.
Before you can fire, you first have to aim. You know that the sub lies to the Northwest.
Press AIM. You see that the N light is blinking. Repeatedly press AIM until both the N and W lights are blinking.
If you aim incorrectly, just continue to press AIM until you arrive at the correct aiming direction.
At this moment the compass is showing only your aiming direction; it is not affecting your ship's direction of travel.
Notice, too, that the display now shows your ship number and the sequential flashing of the sub's possible depths — 1, 2, 3.
The computer is asking you to choose a FIRING DEPTH. Is the sub at Depth 1, Depth 2, or Depth 3? You have no idea of the sub's actual depth, and so must take a guess. You guess that the sub lies at Depth 2. (Figure 15) (If the display lights go out, simply re-AIM.)
[FIGURE 15 (p. 19): the digital DISPLAY showing ship number 2, speed 2, with the compass set to the aiming direction.]
You conceal the display from the other commanders, wait until the number 2 flashes on the display, then
Press FIRE. The display announces that you are OFF 1. (Figure 16)
[FIGURE 16 (p. 19): the digital DISPLAY showing "OFF 1" with the compass set to the aiming direction.]
OFF 1 tells you that the sub lies either at Depth 1 or Depth 3.
The sub's depth always remains the same throughout a game. You'd like to guess its depth again and fire once more, but you can't. The computer won't let you. No player is ever allowed to fire more than once during a turn.
Ship 3
Press NEXT SHIP. The display and compass show your previous speed, location, and course.
Press RANGE. You are now exactly 7 points from the sub. You know the sub has just moved 1 point to the Northeast and is now located at 41N, 41E. With the blue crayon, mark the sub's new location on the chart.
In planning your move, you see that the sub does not lie in a direct path from your ship. So you decide to travel straight N at a speed of 7. This will place you within firing range — 2 points due West of the sub.
Press LEFT until only the N light is on.
Press SLOWER until you're at a speed of 7.
Press MOVE SHIP. The display and compass show you now at 41N, 39E, travelling N. With the blue crayon,
PLOT your new position and course on the chart.
Press RANGE. F2 appears. Yes, you are within firing range, 2 points away. On the chart you can see that the sub lies directly East of you. This is the chance you've been waiting for.
Press AIM. You intend to aim E. But in the heat of combat, under tremendous pressure, you make a mistake. You don't notice it, but you continue to press until only the W light is on.
You have now aimed (incorrectly) and must next choose a depth at which to fire. When Ship 2 fired, he covered the display with his hand, not allowing his competitors to see which depth he chose. So you, too, guess that the sub lies at Depth 2. You also cover the display with your hand and, when the number 2 flashes on the display, you
Press FIRE. The display flashes SOS...SOS! (Figure 17)
[FIGURE 17 (p. 21): the digital DISPLAY showing ship number 3, speed 2, and "SOS" flashing.]
Now you know you've made a serious mistake. You've fired in the wrong direction and have alerted the sub to your position. In retaliation, the sub fires back, knocking you off course, to a new position. Your speed will remain as it was when you fired. Your new position and course have been randomly selected by the computer. To find out where you are and where you're going,
Press RECALL. The display reveals your new location and previous speed of 7; the compass indicates your new course. In blue,
PLOT your new position and course on the chart.
Figure 18 shows only one possible new position and course. Your actual position and course may be very different, depending on the random selection of the computer.
[FIGURE 18 (p. 21): a chart showing one possible new position and course for Ship 3 after the sub's retaliation, with the sub's possible course drawn as a diagonal line toward the upper right.]
Ship 4
Press NEXT SHIP. The display and compass show your previous speed, position, and course.
Press RANGE. You are now exactly 10 points from the sub. You know that the sub has just moved 1 point to the Northeast and is now located at 42N, 42E. With the black crayon, mark the sub's new location on the chart.
On the chart you see that the sub lies directly North of you. You decide to head N at maximum speed; this will place you within firing range, only 1 point from the sub.
Press LEFT until only the N light is on.
Press FASTER until you've reached a speed of 9.
Press MOVE SHIP. Something has happened! The display is flashing COLL...COLL. You've caused a collision! You check the chart and discover that you've incorrectly steered your ship directly into Ship 2.
To punish you for this carelessness (which does not affect Ship 2 in any way), the computer has already knocked you off course, to a new position. To find out where you are and where you're going,
Press RECALL. The display reveals your new position and previous speed of 9; the compass indicates your new course. In black,
PLOT your new position and course on the chart.
Figure 19 shows only one possible new position and course. Your actual position and course may be very different, depending on the random selection of the computer.
[FIGURE 19 (p. 23): a chart showing one possible new position and course for Ship 4 after the collision, drawn as a dashed course line.]
Ship 1
Press NEXT SHIP. The display and compass show your previous speed, location, and course.
Press RANGE. You are now exactly 5 points from the sub. You know that the sub has just moved 1 point to the Northeast and is now located at 43N, 43E, directly East of you. With the red crayon, mark the sub's new position on the chart.
You decide to head E at a speed of 5. This will place you directly over the sub — within firing range.
Press RIGHT until only the E light is on.
Press SLOWER until you're at a speed of 5.
Press MOVE SHIP. The display and compass show you now at 43N, 43E, travelling E. With the red crayon,
PLOT your new position and course.
According to the chart, you're directly over the sub.
Press RANGE. FO appears, confirming the chart's information. FO means that you're within firing range, directly above the sub.
When this happens, you may aim in any direction.
Although any aiming direction applies, you must hazard a guess at the sub's depth. To keep their opponents guessing, the commanders of Ships 2 and 3 both covered the display when they chose a firing depth.
Which, you wonder, is the smartest move to make? Should you take the middle road and fire at Depth 2? Suppose you misfire at that Depth? It would only tell you that you are OFF 1, and would therefore still leave you guessing. OFF 1 would mean that the sub lies either at Depth 1 or Depth 3; you'd still have to guess again if you got another chance to fire.
But you realize that a misfire at Depth 1 or Depth 3 would provide you with much more accurate information. A misfire at either depth would tell you exactly how deep the sub really is. If you misfire at Depth 1, the display will announce either OFF 1 or OFF 2. OFF 1 would tell you that the sub is at Depth 2; OFF 2 would mean that the sub is at Depth 3. If you guess Depth 3, and are wrong, you'll learn just as much. Which to guess? Depth 1 or Depth 3? You don't really know.
Based on nothing more than instinct, you guess that the sub is lurking at Depth 1.
Press AIM. Cover the display with your hand. When the number 1 flashes...
Press FIRE. You've guessed correctly! The display flashes SUB...SUB...SUB, announcing that you've sunk the sub and won the game! (Figure 20)
[FIGURE 20 (p. 25): a chart showing the sub's final position at 43N, 43E, with Ship 1 directly over it marked "SUB".]
A New Game
To start a new game do one of two things. Either press RANGE, to start a new game from your current positions; or — as is recommended for beginners — turn the switch off, then on again, to start a new game from port. In either case, the computer will randomly program a sub at a brand-new position, at perhaps a different depth, and travelling in an unknown direction.
Before putting away the game, remember to turn OFF the computer.
Additional Combat Information
Firing Restrictions
You remember that a ship can fire in any one of the eight compass directions, up to a range of 2 points. At a distance of 1 or 0 points the computer will always display an F preceding the range number.
Sometimes, however, the sub will be 2 points away from your ship, but not in one of the eight compass directions. When this happens, the computer will not display an F. If you do fire without a reading of F2, the display will register SOS, and the sub will fire back, knocking you off course, to a new position.
In Figure 21 the numbers show the sub at positions where firing is allowed; the red dots show the sub at ranges of 2 where firing is not allowed.
[FIGURE 21 (p. 26): a grid centred on "Your ship" showing the eight compass directions (NW, N, NE, E, SE, S, SW, W) and the sub positions around the ship marked with dots; the numbers 1 and 2 show the range at each permitted firing position.]
Remember, if the chart shows you to be only 2 points from the sub, but the computer does not give its permission to fire, do not assume that you've plotted your position incorrectly. You simply are unable to fire in one of the eight compass directions.
The Limit Line
You've already learned that the sub can never travel outside the red LIMIT LINE. Sometimes, however, the sub will reach the limit line and remain there during one ship's turn. If you don't sink it before this happens, when NEXT SHIP is pressed the sub will change direction and head back into the combat area, forcing you to relocate its position and redetermine its course.
The sub will travel only 1 point off the limit line and will assume a new course. Its new course will be in one of three directions and will relate to the limit line as shown in Figure 22.
[FIGURE 22 (p. 27): a chart showing the LIMIT LINE (dotted red) and the three possible new courses of the sub, labelled "Sub's course" and "3 Possible new courses".]
Evasive Sub
Earlier you were told that the sub could never change its direction during a game. This statement was only a half-truth. The sub can change its direction, but only if you tell it to.
On the Combat Information Center you see the words EVASIVE SUB. The Evasive Sub mode is designed only for seasoned combat veterans who seek an additional, and very challenging, dimension to the game.
If you press EVASIVE SUB with a ball point pen, the sub will take evasive action. When fired upon unsuccessfully, the sub may change its course. Each unsuccessful firing — OFF 1, OFF 2, or SOS — will cause the sub either to turn left or right by 45° or to maintain its present course.
You may start the EVASIVE SUB mode at any time during a game. If you've been playing a game in this mode, but want to start the next game without it, turn the game off, then on again.
Remember: EVASIVE SUB affects only the sub's course, not its depth or speed.
Sub Finder
At any time during any game you may press SUB FINDER, and the computer will display the sub's exact location, depth, and compass heading.
As you can imagine, SUB FINDER reduces the game's challenge. So it should be employed only if the sub has tried the patience and sapped the strength of you and your fellow commanders.
Off Chart
As you know, an SOS or COLL will knock you off course, to a new position. If your ship is ever knocked to a new position that's off the chart, don't panic. You can rejoin the fleet on your next move. Simply direct yourself, at the appropriate speed, back into the combat area.
Single-Person Play
As mentioned before, one person playing alone may command the entire fleet of four ships. Sometimes, however, a solo player may prefer to command only one, two, or three ships.
Let's say that you're playing alone and wish to command only Ships 1 and 4. After Ship 1 has made its move, you must bypass Ships 2 and 3. To do this, first press NEXT SHIP: Ship 2 appears. Press MOVE SHIP, then press NEXT SHIP. Then do the same thing again: press MOVE SHIP, then press NEXT SHIP. Ship 4's starting information will now appear on the display and compass. Remember, the sub still moves 1 point each time NEXT SHIP is pressed.
Scoring
Included with the game are eight replica subs which may be used as scoring trophies. If a commander sinks a sub, he is awarded a trophy. The one who sinks the most subs is the winner. The winning number is up to the players and should be determined prior to the start of the game.
Some players, though, may prefer to score on a point system:
- SUB — a direct hit, which sinks the sub — is worth 10 points.
- OFF 1 — a very close shot, which does severe damage — is worth 5 points.
- OFF 2 — a close shot, which does minor damage — is worth 3 points.
The winning point total is up to the players and might logically relate to their experience. Beginners, for instance, may feel that 15 points is worth a victory, while veterans may wish to play for 35 points or more.
HAPPY HUNTING!
Important
Before playing, please read this section. It will answer some important questions that may arise as you play.
A. Battery
-
Alkaline. We strongly recommend the use of a 9-volt alkaline battery for this game. Its life span is much longer than that of a regular carbon transistor battery. A carbon battery of poor quality may last under an hour.
-
Contact. When you install the battery, be sure to create good contact between the battery and the clips. A loose connection will result in either a loss of power or a sudden switch to a new game. To ensure close contact, secure the battery to the clips with a rubber band.
-
Replacement. One or all of the following signs may indicate the need for a new battery:
a) dashes (– – –) on the display;
b) a steady dot between the display's numbers;
c) at the start of a game, a change in the display's reading from 1 0 35 25 to 10 38.85; or
d) display readings that appear to be "haywire."
Should any of these signs appear, try a new (alkaline) battery. And remember: When installing or detaching a battery, be sure to handle the clips and wires gently.
B. Battery Eliminator
You may replace the battery with a 9-volt Battery Eliminator. With this device you can run the game on house current, thus playing without any battery at all.
As a battery eliminator, use RADIO SHACK's #270-1552. Connect the clip on the battery eliminator to the clip on the playing unit.
Do not connect a battery eliminator without adult supervision.
C. Crayons
As replacements for worn out crayons, we recommend either BLAISDELL china markers or BLAISDELL cellophane pencils. Other brands may damage the playing surface.
D. Liquid
Do not use liquid of any kind to erase the playing surface or to clean any other part of the unit. Use only a soft cloth or piece of tissue.
The printed index (p. 31) and the warranty and contact boilerplate (p. 31–32) are not transcribed.