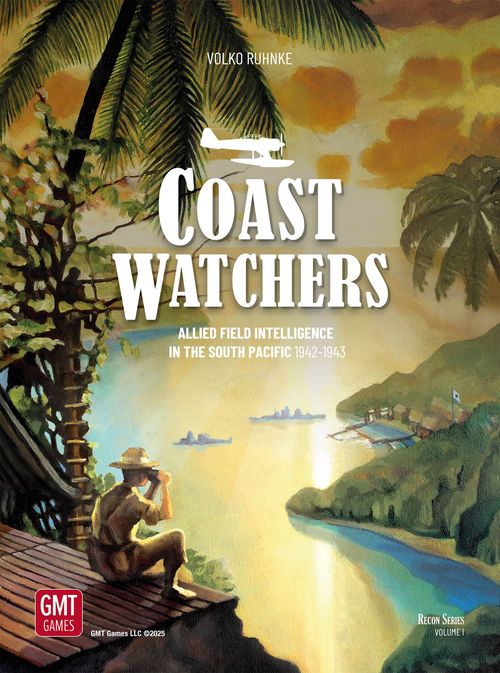
Coast Watchers: Allied Field Intelligence in the South Pacific, 1942-1943
Coast Watchers: Allied Field Intelligence in the South Pacific, 1942-1943 Rulebook
Table of Contents
Table of Contents
- 1. Introduction - History & Game
- 2. Players & Course of Play
- 3. Components - Board
- 4. Components - Blocks, Pawns, Markers
- 5. Components - Markers (Control & Reports)
- 6. Components - Chits & Cups
- 7. Components - Cards
- 8. Hidden Information - Glossary & Record Markers
- 9. Hidden Information - Acting Secretly & Planning Map
- 10. Hidden Information - Scatter (Hidden Refugees & Crew Setup)
- 11. Setting Up - Situations & Table Layout
- 12. Table Layout
- 13. Turn Sequence - Check Setup & Start Turn
- 14. Japanese Actions - Preparations (Build Up, Ready, Augment)
- 15. Japanese Actions - Countermeasures (Recall, Search, Deploy)
- 16. Japanese Actions - Countermeasures (Search & Deploy)
- 17. Japanese Actions - Patrol Cup
- 18. Japanese Actions - Example
- 19. Allied Actions - Deliver (Resupply, Rescue, Insert, Retrieve)
- 20. Allied Actions - Delivery Cup
- 21. Allied Actions - Delivery Cup (Draw)
- 22. Delivery & Air/Sea Patrol Assets
- 23. Allied Actions - Deliver (Resupply & Rescue)
- 24. Allied Actions - Deliver (Insert & Retrieve)
- 25. Range
- 26. Allied Actions - Deliver Example
- 27. Allied Actions - Deliver Example - Retrieve
- 28. Allied Actions - Deliver Example - Rescue (continued)
- 29. Allied Actions - Operate (Observe, Recruit, Resist)
- 30. Allied Actions - Operate (Observe Example, Recruit & Resist)
- 31. Allied Actions - Operate Example (Recruit, Resist, Observe)
- 32. Allied Actions - Evade & Train
- 33. Japanese Operations - Launch
- 34. Japanese Operations - Turn, Buildups, Targets
- 35. Japanese Operations Example
- 36. Japanese Operations - Paths
- 37-38. Japanese Operations - Paths Example
- 39. Victory - Score Operations & Warning
- 40. Victory - Score Other VP & Compare
- 41. Victory - Debrief Sheet & Scoring Example
- 43. Index
1. Introduction - History & Game
The game
Coast Watchers takes you into this struggle between Allied intelligence teams and Japanese hunters. Standup blocks hide coastwatching stations, guerrillas, refugees, and stranded Allied crew. Facedown markers hide the buildup of Japanese forces that the coastwatchers seek to observe and report to headquarters. Other markers show Japanese patrols searching for spies.
Each side has Mission cards. Allied Missions assign side tasks to the coastwatchers. Japanese Missions lay out secret military objectives for victory points, including air and sea operations against which the coastwatchers are to warn Allied forces. By hunting coastwatchers while building up military readiness and guiding operations, the Japanese player seeks to slip through the enemy intelligence net.
Players also draw Asset cards: special abilities to augment actions and perhaps add victory points.
Coast Watchers offers 15 standalone 2-player "Situations", plus campaigns in the Playbook to tie them together. The Situations span the early-1942 Japanese incursion into the South Pacific to the neutralization of their great base at Rabaul by the end of 1943. Almost all can also be played solitaire.
Learning to play
To focus on the game's core actions, try the "Lonely Vigil" Training Situation. It sticks to running Allied coastwatchers to report on enemy activity and searching with Japanese patrols to take coastwatchers captive.
Situation A "Invasion!" offers a mini-game that samples affairs related to that intelligence tug of war - Allied rescue of refugees and Japanese buildup and launch of operations by air and sea.
Or go straight to the main Situations B to N that span the Japanese expansion in early 1942 through the late-1943 Allied drive on Rabaul. The later the Situation that you select, the more your leeway in setup and strategy.
To play solo, first learn the rules in this booklet, then add those from the solitaire instructions.
2. Players & Course of Play
What are the player roles?
One player in Coast Watchers runs Allied operatives in the South Pacific. A second player takes charge of Japanese forces in the area. The game uses hidden information to recreate the battle of wits between intelligence and counterintelligence. Added instructions and Operation cards guide solitaire play for either side.
What are we doing when we play?
You and your opponent will first choose and set up a Situation to provide the historical environment for your intelligence work - the ebb and flow of military campaigns in New Guinea and the Solomons in 1942 and 1943. The Situation assigns you:
- Secret Missions
- Assets
- Hidden Allied Coastwatchers
- Japanese Patrols hunting them
After setting up, you will play from two to five turns to complete a game - depending on the Situation and whether and when the Japanese player Launches any Operations (ending play). Each turn follows a Turn Sequence summarized in a box on the player aid foldouts.
Turn Sequence (player aid summary)
- JAPANESE PREPARATIONS - UP TO 2: Build Up, Ready Patrols, Augment Assets
- ALLIED ACTIVITIES - UP TO 5:
- A. Deliver to/from Hidden blocks
- B. Operate at Hidden Coastwatchers
- C. Evade to Hide Revealed blocks
- D. Train to add Coastwatchers to Ready
- JAPANESE COUNTERMEASURES - UP TO 5:
- A. Recall Patrols from map/cup to Ready
- B. Search (maximum 1 per Patrol Station)
- C. Deploy Ready Patrols to map/cup
- ALLIED ACTIVITIES - UP TO 5: Deliver, Operate, Evade, Train (as above)
- JAPANESE OPERATIONS? - as desired: Launch Operations (skip on Turn I) OR
- JAPANESE COUNTERMEASURES - UP TO 5: Recall, Search, Deploy (as above)
After final Turn (or after any Operations): SCORE.
- Japanese Preparations: Each turn, the Japanese first can "Build Up" their military presence (switch out facedown markers) to achieve their Missions, "Ready" more Patrols (add markers to a Ready box), or "Augment" their Assets (randomly draw more cards).
- Allied Activities: Twice per turn, the Allies can Deliver supplies or personnel, then Operate their network, finally Evade at exposed Stations or Train new Coastwatchers.
- "Deliver" uses Delivery Asset cards to Resupply Stations (add Evasion chits to the Patrol cup) and to Insert, Retrieve, or Rescue personnel (exchange blocks on the board).
- "Operate" seeks to Observe enemy Buildups (peek at markers) and Report on them - the network's main purpose. It may also Recruit or Resist with Guerrillas (attacking enemy Patrols). Each such action risks discovery (a Japanese draw from the Patrol cup).
- "Evade" Hides (stands up) Revealed blocks.
- "Train" adds Coastwatcher blocks to a Ready box.
- Japanese Countermeasures: Twice per turn, the Japanese will "Search" for enemies (at Patrol markers, drawing from the Patrol cup) and perhaps "Recall" Patrols to Ready them for later reassignment or "Deploy" Ready Patrols to Stations or the Patrol cup to grow their Search ability.
- Japanese Operations: In between, the Japanese may Launch one or more "Operations" (certain Mission cards) for which they have Built Up (placed markers). Operations earn victory points (VP) but forego further Countermeasures and instead end the game. They are military sorties against which Coastwatchers can Warn - the Japanese trace Operations Paths from Buildups to Targets, and Coastwatchers along or near those Paths earn Warning VP.
- Scoring: With or without Operations, sides at game end add VP for other cards, the Japanese for Taking captives, and the Allies for Reports, Rescues, and survival behind enemy lines. The larger VP total wins.
Scoring summary (player aid)
Track score on the Debrief sheet. Compare victory points (VP) after Operations or final Turn.
- A. Find Operations +VP and Warning -VP:
- Japanese Operations: +? for each Operation Launched (VP as on Mission card).
- Allied Warning (score each block once for each Operation card):
- -3 per Coastwatcher on Path, 3+ spaces from Target
- -2 per Coastwatcher on Path, 0-2 spaces from Target
- -1 per Coastwatcher adjacent to Path (if by No Sea, Aircraft only)
- B. Add those to all other VP:
- Other Cards: + / - VP as listed on Missions and Assets.
- Taken by Japanese: +3 per Coastwatcher, Crew, Refugees, and Guerrillas icon among Taken blocks.
- Allied Network: -5 per Report of Buildup*; -2 per Report of Clear Base*; -2 per Crew and Refugees Rescued; -1/2 per Coastwatcher in Japanese-Held. (* Must be up to date)
3. Components - Board
The game board features a map, time track, and several holding boxes.
- Markers track turns and phases along the Time Track. (See 4, 13.)
- Station Spaces: Circles are spaces for adjacency, Range, and Paths only. (See 25, 36.)
- Control: a Station with no marker = Allied-Held. Station: no block = Deactivated. Patrol?: no Patrol. Station Status: palms = Inactive.
- Control marker: Japanese Base.
- Report Boxes: "Report" markers set up in boxes naming Stations. Boxes cluster by Region. Markers correspond to Japanese Bases (gold) or Japanese Sites (gray). They record enemy Buildups that the Coastwatchers have Observed for VP. (See 5, 29, 40.)
- Region: the Central Solomons is a group of Stations: a Region. Dashed lines are adjacent only as labeled.
- No Sea: Adjacent except for BOATS, PT SQUADRONS, Retrieve, and Operations with Warships or Transports. (See 24, 25, 36.)
- Note: "Lunga" and "Tulagi" are each shorthand for the Lunga-Tulagi space.
- Holding boxes: Patrols go from a holding mat to Ready then to map or cup. (See 14, 16.) Blocks Taken by the Japanese go here for VP. (See 17, 40.)
- Ready and Rescued: Coastwatchers Ready (Situations A and C: see 11). Crew and Refugees Rescued for VP go into these holding boxes. The special spaces "Guam" and "Truk" or "Coral Sea," respectively, are designated for insertion into the South Pacific as open to the Japanese (only). (See 23.)
4. Components - Blocks, Pawns, Markers
Blocks mark the status of Coastwatching Stations
There are 64 embossed wood blocks (set extras aside; extras are provided in case of defects):
- 32x Inactive Station ("Palms")
- 16x Coastwatcher alone ("CW")
- 4x Coastwatcher with Guerrillas ("CW-Guerrillas")
- 3x Coastwatcher with Crew ("CW-Crew")
- 3x Coastwatcher with Refugees ("CW-Refugees")
- 3x Crew alone
- 3x Refugees alone
Why blocks? Each Station space holds up to 1 block, stood up facing the Allied player. Each block's back side is blank. The Japanese player will not know at first where Coastwatchers lurk. Japanese Search can Reveal or Take (capture) blocks, Deactivating Stations. (See 16.) A single block with a Coastwatcher and other Personnel icon counts as both.
Examples: A CW-Guerrillas block counts as both a Coastwatcher and Guerrillas but not as a "Coastwatcher alone". CW-Crew when "Taken" earn Japanese victory points for Coastwatcher plus for Crew.
Pawns track actions and Operations
What do I do with all the pawns? As helpful to count up 5 actions and mark Patrols or Assets as used within a phase, place pawns of a single color (aqua for Allies, dark or bright red for Japanese) on the board or on cards. For secret actions not using a card (example: Observe), put the pawn anywhere on the board. When the Japanese Launch Operations, use the 15 pawns to mark Targets and Paths. (See 34, 36.)
Markers track turns and phases
How do I use the time markers? Situations run up to either three or five turns. Put that side of the Turn marker ("I-III" or "I-V") face up on the board's time track. Flip the phase marker between "Japanese" and "Allied" as you advance it along the phase boxes to emphasize who is acting. (See 13.)
Cups: You will need to supply two opaque containers from which to blindly draw chits. (See 6, 17, 20.)
Components list
- Game board: 17"x22" (3)
- Two 11"x17" double-sided main player aid foldouts
- One 11"x17" double-sided solitaire aid foldout
- One 8.5"x11" Training Situation/planning map sheet
- Seven 8.5"x11" double-sided Situation sheets (11)
- One 8.5"x11" pad of Debrief scoring sheets (41)
- 64 embossed wood blocks (set extras aside)
- 15 wood pawns (for actions and Operations)
- Two sheets of counters (6)
- Two mats to hold spare chits for the draw cups
- Six playing card decks (7)
- Rulebook, Playbook, Solitaire booklet
5. Components - Markers (Control & Reports)
Control markers show who holds each space and hide Japanese Buildups
What do the Japanese Rising Sun and Allied star markers mean? Each Situation shows where to place Japanese Base and Japanese Site Control markers. Any space with these is "Japanese-Held". Allied Base and Enemy Objective Control markers and no Control marker - revealing a white star printed on the map - mean "Allied-Held". Control status is permanent.
To set up Japanese Control, use the "Rising Sun" markers showing little flags on the back: "Quiet". Place them either Rising Sun or Quiet face up, as shown on that Situation's sheet. (See 11.)
Japanese-Held Control markers (front "Rising Sun"): 24x Japanese Base, 26x Japanese Site. Allied-Held Control markers: front Allied Base; back (Allied-Held Enemy Objective) 12x.
Buildups (backs of Japanese Control markers):
- At Base: 8x Quiet; 2x Troops, 2x Construction, 2x Supplies, 4x Aircraft, 4x Warships, 2x Transports (red border = for Operations; see 33).
- At Site: 20x Quiet; 2x Troops, 4x Construction.
Later Japanese Build Up actions can Secretly replace the faceup Rising Sun markers (only!) with the same type (Base or Site), hiding facedown "Buildups" on the back. (See 14.)
Why do the Allies have markers with Buildups on the back? Outside solitaire, Buildups do not start on map. Countermix limits Build Up, and Japanese Mission cards show which Buildups earn points.
Report markers track Allied Observation of Japanese Buildups
Set up Report markers in boxes as shown on the Situation sheet and sometimes as "Special Reports" on the sheet itself. (See 11.) Set up all "?" backs, gold-trim markers for Japanese Bases. When Coastwatchers Observe a Buildup or Quiet, the Allied player replaces "?" Reports with a matching symbol. (See 29.)
Allied Report markers (front "Report", gold trim for Bases; back "?" = not yet Observed): 4x Troops, 6x Construction, 2x Supplies, 4x Aircraft, 4x Warships, 2x Transports, 7x Clear Base, 12x Clear Site.
Countermix limits how many Reports you can place and score.
6. Components - Chits & Cups
Chits and Cups resolve certain actions
What is the difference between "markers" and "chits"? Coast Watchers uses chit pulls from cups instead of dice. The game calls counters that go on the board "markers" and those that go in the cups "chits". (One type of counter - Patrols - can end up either on the board or in a cup.)
You will need to supply two opaque containers as cups. Put one near the Japanese player as the "Patrol cup" and the other near the Allied player as the "Delivery cup" (as shown on page 12). Situation sheets list "Patrol" and "Evasion" chits to start in a Patrol cup. (See 11.) Each side's actions will later remove some or add more. Both Japanese and Allied actions can cause the Japanese player to draw from the Patrol cup, potentially exposing Coastwatchers. (See 16, 29.)
Chits for the Patrol cup (17)
- 24x Patrol chits (Army and Police; Patrol counters also go on the game board as markers, into the Ready box, and from there to the map.)
- 18x Evasion chits
Pages 17 and 20 as well as the foldout player aid explain how to resolve chit draws from each cup.
Patrol cup (do not reset): Allies: if Operate, declare Patrol. Japanese: blindly draw 1-3 chits (No Patrol = 1 chit; Army Patrol = 2 chits; Police Patrol = 3 chits). Result by number of Sightings drawn - see Search (page 16) and Operate (page 29).
Scoring VP / chits for the Delivery cup (20)
"Sighting" and "Nothing Sighted" counters go into a Delivery cup. Allied Deliver actions in Japanese-Held spaces call for the Allied player to draw from the Delivery cup for success, potentially Revealing Coastwatchers and perhaps even getting them Taken by the Japanese. (See 20.)
- 4x Sighting chits. The various silhouettes provide historical interest only. As the cup will get at most three Sighting chits, the fourth is a spare.
- 12x Nothing Sighted chits.
Keep all spare chits - those not in a cup or on the map - on a chits mat near each cup to help show what's in each cup and what's left to add.
7. Components - Cards
Card decks assign Missions, provide helpful Assets, and guide solitaire play
What do the playing cards bring to the table? Each side has Mission, Asset, and Solitaire card decks. Mission cards set tasks to earn victory points (VP). Asset cards aid actions and scoring. Solitaire cards guide solo play only - see the Solitaire Instructions booklet.
Tip: When in doubt about how to use a card, check its note in the Playbook.
How do we get our cards? Situation setup (11) specifies cards to discard, draw, randomly draw, or select. A lettered circle symbol means any Japanese Mission card with that Situation's symbol. "ALL", "ANY", "1942", and "1943" on cards similarly relate to setup. Players may inspect any discarded cards at any time. (See 8.)
Shuffle all Japanese Asset cards that setup neither discarded nor drew into a draw deck. Later Japanese Augment actions will draw randomly from the Japanese Asset draw deck. (See 14.)
When can we use Mission and Asset cards? Most Asset cards of each side and many Allied Mission cards include bold text specifying when you can use the card. If not, Show and use the card whenever it applies and you so wish.
Example: SUBMARINE says "Show if Hidden during Allied phase:" and then says "Discard SUBMARINE:". These phrases mean that the Allied player can only Show this Asset card to use it when still Hidden during an Allied phase (19) and that - to use it again - will have to discard it.
Important: Always Show cards face up as you use them. They stay Showing until discarded. You can only "Show" cards that are Hidden. (See 8.) Some cards' effects occur as you Show them.
Example: Use SUBMARINE as you first Show it, then use it a 2nd time as you discard it.
Japanese Mission cards are different. They instead list required Buildup markers and VP scored at the end of play. See "Japanese Operations" beginning on page 33 and Scoring "Local Missions" on page 40.
How do we use Mission and Asset cards? Like Japanese Missions, many Allied Missions and some Assets earn VP at game end. Most Assets and some Allied Missions also enable you to break certain rules during play to your advantage, as stated on the card.
Important: Follow all rules when using cards - except as card text alters.
Example: "Search" with FLOATPLANES happens at the usual time in the Sequence for Search actions and has all the usual requirements (16) but treats a draw of just 1 Patrol chit as "Trapped".
Later pages explain other types of Mission and Asset cards.
- Allied ESCAPE and DOWNED FLIERS Mission cards set up Allied Personnel blocks in secret locations about the map for later Allied Rescue or Japanese capture. See "Scatter", page 10.
- Allied "Delivery Assets" and Japanese "Air Patrol" and "Sea Patrol" Assets, respectively, enable and hinder Allied Deliver actions. See pages 19 to 28.
- Allied RESISTANCE and KENNEDY'S ARMY cards enable Allied Resist actions, page 30.
8. Hidden Information - Glossary & Record Markers
Hidden information is key to the game's simulation of intelligence activities
How does gameplay handle hidden information? Coast Watchers uses one-sided standup blocks, facedown markers, and playing cards to enable players to keep a variety of information from their opponents. These game components belong to one player or the other, and a player may look at the other player's items only as rules explicitly allow.
Hidden Information Glossary
- Hidden: Allied blocks stood up, Japanese Control and Allied Reports markers with icons face down, all cards until Shown. You may look at your opponent's Hidden items only as game rules allow. Coastwatchers must be Hidden to take most actions. (See 19, 29.) Evade actions Hide Revealed blocks. (See 32.)
- Reveal: Lay blocks flat, symbol up. Revealed blocks are not Hidden. Example: Cup draws and card effects can Reveal Hidden blocks. Revealing a Revealed block has no added effect.
- Show: Display your Hidden card face up to enable its use or as directed. Showing cards are no longer Hidden.
- Inspect: Peek at an opponent's Hidden marker or block, either Secretly or Openly.
- Declare: State action types underway (example: "Observe"), (13) Assets used, (7) and any aspects of play affecting "inspectable" items listed below (example: chits added to cups). Players must declare accurately and stick to what they declare - even when the opponent responds by Showing Assets.
- Report: Allied marker Secretly or Openly placed face down in a Reports box to correspond to a Japanese Buildup or Quiet marker when Observed by a Coastwatcher to earn VP. (See 29.)
- Secretly: Carry out a procedure without revealing Hidden information - such as where - to the opponent.
- Openly: Opposite of Secretly, carry out a procedure while revealing the items and locations involved.
- Scatter: An Allied setup procedure to place Crew or Refugee blocks on the map randomly and Secretly. (See 10.)
What items are Hidden?
Several of each side's items begin Hidden, others are open to both players.
Unless Revealed or Shown, these items are Hidden:
- Blocks at Stations or in Ready, Rescued, or pool.
- Buildups (Japanese Control marker backs, including pool).
- Reports (marker backs, including the pool).
- Cards in hand (Hidden, not yet Shown) or not yet drawn.
These items are open to inspection:
- Blocks in the Japanese Taken box.
- Patrols, Chits, Cups (including chits inside).
- Records (even if tucked under Patrols).
- Cards that are Showing or discarded.
Record markers help the Japanese player remember blocks
How do I remember Revealed blocks that Hide again? As the Japanese, put Record markers at Revealed Coastwatchers, Refugees, and so on, duplicating that block type. You can place them next to or tuck them under that space's Patrol marker. Records do not affect play; they are just a memory aid.
9. Hidden Information - Acting Secretly & Planning Map
Secret setup and actions by your opponent can require you to look away
How do I act secretly without my opponent seeing where I did it? Procedure: When you act at a Secret location on the board, ask your opponent briefly to close their eyes or look away, then let them know when you are done. Do the same when your opponent asks it of you.
Courtesy: Plan out your Secret action, ask your opponent to look away, then announce it's done with a phrase like "all set". Don't keep them waiting!
Secret location cases
When will I have to ask my opponent to look away?
- Allied Setup of blocks (including Scatter - see next page). (11)
- Japanese Build Up actions (switching Control markers to place Buildups). (14)
- Allied Deliver, Observe, and Recruit actions if the blocks involved stayed Hidden. (19, 29, 30)
- Japanese inspection of blocks using the EAVESDROPPING Asset card. (7)
Watch for key terms on the player aid and cards. "Hidden", "Secretly", "Reveal", "Show", and so on can drive effects.
Planning map
What if I want to check the map's geography? As helpful during play, check the planning map (on the reverse of the "Lonely Vigil" Training Situation sheet) to study spaces and connections close up, clear of pieces, and so that your opponent cannot tell where you are looking.
10. Hidden Information - Scatter (Hidden Refugees & Crew Setup)
Scatter Crew and Refugees during setup
What is "Scatter"? Allied ESCAPE and DOWNED FLIERS Missions plus a few Situations instruct the Allied player to Scatter Refugees or Crew among certain types of Stations during setup.
Procedure: To Scatter one or more blocks, the Allied player Shows any Missions involved, declares "Scatter", and shuffles all 22 Allied Asset cards. For each Scatter Mission in the order drawn, draw one Asset card at a time and secretly look at the Region and Station listed at the card's bottom right. Secretly exchange blocks at the first Station listed that meets both the setup and any Mission card text. Example: DOWNED FLIERS Allied Mission cards Scatter to "Rising Sun" spaces only. (5)
- Replace an Inactive block with Crew or Refugees alone.
- Replace a Coastwatcher or CW-Guerrillas block with CW-Crew or CW-Refugees. Guerrillas are lost.
- Redraw any card with a location that already has either Crew, Refugees, CW-Crew, or CW-Refugees.
Then return all drawn Allied Assets cards to their deck.
Follow the Allied setup order as listed on the Situation sheet: place listed blocks onto the map, then draw Missions - which may Scatter Refugees or Crew - and finally draw Assets.
Important: Complete Scatter after drawing Mission cards and before drawing Asset cards, so that Missions can cause Scatter and Scatter locations can draw from the entire Assets deck.
Note: DOWNED FLIERS Missions Scatter Crew only among "Rising Sun" spaces. ESCAPE Missions can Scatter Refugees among any type of Station in play. The Japanese player will know what Allies Scatter but not where.
Scatter Examples
- Allied Setup calls for Scatter of "3x Refugees". The player shuffles Allied Assets and flips cards (without showing them to the Japanese player) until three cards list Stations that have blocks. Each of the three Stations drawn turn out to be Inactive, so the player Secretly replaces them with Refugees blocks. Had any Stations with Coastwatchers come up, the player would put CW-Refugees blocks there instead.
- Playing Situation B, the Allies draw an ESCAPE Mission, causing a Scatter. The first Station flipped lists Gasmata, which has no Crew or Refugees but does host a Coastwatcher, so a CW-Refugees block Secretly replaces it.
11. Setting Up - Situations & Table Layout
Choose a historical Situation and set it up
How do we get started? Find the seven sheets with lettered Situations on each side plus an eighth sheet with a Training Situation on one side and a planning map (9) on the other.
Tip: Situations A through N feature "INTELLIGENCE BRIEF" pages in the Playbook to support your strategic decisions - such as by showing what Japanese Buildups could earn victory points.
Procedure: Pick a Situation to play - it is a complete game. The Situation sheet summarizes the history and guides you through setup. Follow setup instructions in the order of the gray numbers below and in the order listed within each box on the sheet. You will already make key choices during block and marker placement! Then begin the Turn Sequence with Turn I, as detailed beginning at page 13.
- At start, put a Block with palm trees ("Inactive Station") facing the Allied player at each Station in play (typically, all 32).
The Situation sheet (illustrated with Situation A, "Invasion! - Training Game")
- Game Board Setup (1.): Boxes illustrate block and marker setup as listed in "Allied Setup" and "Japanese Setup" sections. The Allied player will replace some palm blocks with those shown. "Reports" all start as "?" on back. Use gold-trimmed Reports for Japanese Bases. (See 5.)
- Description: Circled letter relates to Japanese Mission cards.
- Markers (2.): Place Control markers as listed and shown. Always use Japanese "Rising Sun" markers with "Quiet" (flags) on back. (See 5.) Those placed Quiet side up mean no Japanese Build Up there. (See 14.)
- Special Rules: Each Situation lasts up to either 3 or 5 turns and might feature a few rules exceptions.
- Special Reports: Rarely, boxes here hold Report markers and supplement the main boxes on the board. (See 3, 29.)
- Allies (3.): The Allied player places Reports ("?" on back) (5), adds Ready Coastwatchers, Secretly switches Coastwatchers with Inactive Stations (4), might randomly Scatter blocks (10), and draws cards. (7)
- Japanese (4.): The Japanese player then draws cards (7), places Patrols, and prepares a Patrol cup with chits. (6)
Sheet entries use these headings: JAPANESE BASES, ALLIED BASES, ENEMY OBJECTIVES, JAPANESE SITES (Rising Sun / Quiet), SPECIAL RULES, then ALLIED SETUP - FIRST and JAPANESE SETUP - SECOND, each listing Reports, Missions, Ready, Replace Blocks, Scatter, Patrol Cup, Place on Map and Assets as applicable.
Situation A "Invasion!" example (Training Game, January-February 1942, 2 players)
Reports from northern stations of enemy patrol aircraft presage Japanese Operation R, a full-scale offensive against Australia's Rabaul base. Coastwatchers, originally intended as a mere tripwire, now scramble to evacuate civilians - and sometimes themselves.
- Japanese Bases: Guam, Truk.
- Allied Bases: Rabaul, Buka.
- Enemy Objectives: Emirau, Kavieng, Tabar, Namatanai, Feni, Talasea, Gasmata, Pondo, Orford.
- Special Rules (Turns I-III):
- "OUTER FENCE" - Set up blocks in New Britain, Bismarcks, and Bougainville Regions only (12 Stations).
- PANIC - Allies place Coastwatchers then Scatter 3 Refugees among blocks in play (Secretly). (10)
- FAR BASES - Japanese use Guam and Truk. (3)
- INCURSION - Use reduced Turn Sequence (13): Japanese Preparations - up to 2 actions (14); Allied Activities (1 phase) - up to 3 actions (19); Japanese Operations option (Turn II or III) (33).
- PROBES - All Deliver uses the Delivery Cup. (20)
- Allied Setup - First: Reports: None. Missions: Draw SHORE RAID. Then, from AERIAL RECON, AIR RAID, and ARRIVAL (3 cards), randomly and Secretly draw 1 more card. (No other Missions are in play.) Ready: None (the Allied player can add them with "Train" actions, 32). Replace Blocks: Anywhere among New Britain, Bismarcks, Bougainville Regions: 6x Coastwatchers. Scatter: 3x Refugees among the 12 Stations that have blocks (only), see page 10. Assets: Draw BOATS, THE HARRIS NAVY, and 1 PHOTO RECCE (3 cards). (No other Allied Assets are in play.)
- Japanese Setup - Second: Reports: None. Missions: Draw 2 EXTRACTION cards. (No other Allied Missions are in play.) Ready: None. Patrol Cup: Not used. Assets: Find FLYING BOATS, ZEROS, DESTROYERS, NEWS BROADCASTS, MIKAWA, and KUSAKA (6 cards). Discard all the others. Those 6 listed Asset cards (only) are available for random draw by Augment action. (14)
12. Table Layout
After selecting a Situation to play out, set up your table to look something like this.
- The Allied player sits at one board edge, the Japanese player at the other. For solitaire, sit at your side's board edge and add Solitaire materials and deck.
- Keep Allied drawn cards, 5 aqua pawns, spare blocks, and Reports markers near the Allied player. Put the Delivery cup, chits, and mat near the Allied player. (6, 20)
- Keep Japanese drawn cards, 5 red pawns, and Buildup markers near the Japanese player. Put the Patrol cup, chits, and mat near the Japanese player. (6, 17)
- The Japanese can add Asset cards, so keep undrawn cards handy. (14)
- If the Situation has "SPECIAL REPORTS" marker boxes, you can tuck the sheet under the board by the other Reports.
What might we have missed?
Before starting the first Turn, double-check the setup. Here is a checklist to ensure that the setup per the Situation sheet is complete. (11)
- Japanese Base and Site Control "Rising Sun" and flag ("Quiet") markers match the map illustration.
- Allied Base and Enemy Objective markers match the map illustration.
- The Turn marker is on the appropriate Turn I-III or Turn I-V side and the Phase marker is on Preparations.
- The Allies have placed Report markers per the map illustration, replaced palm blocks with Personnel, drawn Mission and Asset cards, and set out a Delivery cup, chits, mat, and 5 aqua pawns nearby.
- The Japanese have drawn Mission and Asset cards, prepared a Patrol cup and mat, placed Patrol markers on the board, and have Buildup (Rising Sun) and Record markers and 5 red pawns nearby.
- Japanese Asset cards left over from the draw (and not discarded) remain nearby for Augment. (14) Note: If the Japanese have YAMAMOTO or the Allies have FELDT, they may need other cards as well.
- Situation Special Rules are understood and accounted for in the setup.
- The Playbook is open to the Intelligence Brief facing pages for this Situation.
- A Debrief sheet and pen or pencil are at hand for the conclusion of play.
13. Turn Sequence - Check Setup & Start Turn
Each turn proceeds through six phases
How do phases proceed? During a turn, players alternate carrying out specific steps. Complete one phase after another, proceeding down the list in the "Turn Sequence" section on the player aid foldouts. Advance the Phase and Turn markers as you go.
- JAPANESE PREPARATIONS - UP TO 2: Build Up, Ready Patrols, Augment Assets
- ALLIED ACTIVITIES - UP TO 5: A. Deliver to/from Hidden blocks; B. Operate at Hidden Coastwatchers; C. Evade to Hide Revealed blocks; D. Train to add Coastwatchers to Ready
- JAPANESE COUNTERMEASURES - UP TO 5: A. Recall Patrols from map/cup to Ready; B. Search (maximum 1 per Patrol Station); C. Deploy Ready Patrols to map/cup
- ALLIED ACTIVITIES - UP TO 5: Deliver, Operate, Evade, Train (as above)
- JAPANESE OPERATIONS? - as desired: Launch Operations (skip on Turn I) OR
- JAPANESE COUNTERMEASURES - UP TO 5: Recall, Search, Deploy (as above)
After final Turn (or after any Operations): SCORE.
First, the Japanese run Preparations to support later actions and Operations. Players then alternate Allied Activities and Japanese Countermeasures actions, twice each per turn. The Japanese may opt to Launch Operations to end the game.
Each phase, a side may take a certain number of actions. Which actions are up to the player. Players may take fewer actions and end their phase. Panels on the player aid foldout summarize each side's menu of actions. (14, 19)
Before conducting any individual action, players declare the action's type. Examples: "Build Up", "Rescue", "Observe". Declare even Secret actions, just not where! (8) Players need not pre-declare multiple actions.
Important: Phases with steps "A. B. C. D." must proceed in that order - A then B then C then D. Example: Allies must complete any "Observe" before any "Evade" within a phase.
Japanese Operations can end play
When does the game end? In practice, play will skip either the 5th or 6th phase. This is because phase (5) "Operations" asks if the Japanese want to Launch any Operations. If they don't, they go straight to phase (6), their 2nd Countermeasures. If they do Launch, that ends the turn and the game. (33) If the Japanese never Launch any Operations, end play and Score after the Situation's final Turn, either III or V. (39)
14. Japanese Actions - Preparations (Build Up, Ready, Augment)
Preparations start off each turn
What are the Japanese preparing? Procedure: During each Preparations phase (once per turn) the Japanese player may declare and take up to 2 actions among the following in any order, including two of the same action.
- Build Up - Secretly replace 1 Control marker.
- Ready - add up to 2 Patrols to the Ready box.
- Augment - randomly draw 1 Asset card.
Exceptions: On Turn I, each single Build Up action may replace either 1 marker or 2 markers. After Turn I, you may take at most 1 Build Up action per phase.
Build Up
Build Up replaces a Japanese Control marker on the map with another from the unused markers pool.
- Build up only at faceup "Rising Sun" markers.
Select a new marker to show a Buildup type (Troops, Construction, Supplies, Aircraft, Warships, Transports) or flag ("Quiet" - nothing to report) on back. (5) The new marker must show the same Control status for that space - either Japanese Base or Japanese Site. Exchange markers Secretly, with the Allied player looking away, keeping the Buildup or flag face down. (9)
Important: On Turn I only, each Build Up action replaces 1 or 2 markers (up to 4 markers total). Declare the Build Up action but not how many markers replaced. Each turn after Turn I, declare and take no more than 1 Build Up action (to replace just 1 marker) per Preparations phase.
Note: The countermix limits the Buildups that you may select. Players typically place Buildups shown on their Mission cards to score victory points, but that is not required. (34, 39, 40) Switch out facedown Buildups or flags as you like - for example, to deny the Allies Reports VP - as long as Rising Sun type stays the same (Base or Site).
Ready
Ready adds 1 or 2 Patrol markers from the Patrol mat to the Japanese Ready box on the board.
Note: The counters that come in the game limit how many Patrols you may add. Keep spares on the Patrol mat. (6) When you Ready Patrols, put the counters "Army" face up in the Ready box, as they will go either onto the map as "Army" or as a chit into the Patrol cup. (17)
Augment
Augment randomly draws a Japanese Asset card from the draw deck (not "discarded" cards). You do not need to Show it to the Allied player until you want to use it. (7, 11) Draw 1 Asset card face down.
15. Japanese Actions - Countermeasures (Recall, Search, Deploy)
Countermeasures hunt Coastwatchers
How do Japanese Countermeasures work? Procedure: Each Countermeasures phase (twice per turn), the Japanese player declares up to 5 actions, first any A, then any B, then C.
- A. Recall - remove 1 or 2 Patrols from map or cup to Ready.
- B. Search - attempt to Reveal and/or Take 1 block.
- C. Deploy - move 1 Ready Patrol to map or 1 or 2 to cup.
A. Recall
Recall brings deployed Patrols back to Ready, so that they can later Deploy elsewhere. For 1 action, return 1 or 2 counters total to the Ready box - Patrols from the map and/or Patrol chits from the Patrol cup.
Note: Recalled "Police" will Deploy again as "Army", not Police (see Deploy, next page). You probably won't use Recall often, but it can be useful when you run out of Ready Patrols and want to shift between map and cup, or when you don't need a Patrol at a Station because it's Deactivated or unlikely to host a Coastwatcher.
16. Japanese Actions - Countermeasures (Search & Deploy)
B. Search
Search is how Japanese forces try to root out Coastwatchers. For 1 action, Search at a Station where you have a Patrol (either "Army" or "Police") and that has a block (not "Deactivated").
Important: Search at any given Patrol Station only once per Countermeasures phase (so, up to twice per turn). Exception: free Exploit Searches (see below). Tip: Mark each Patrol with a pawn as it Searches.
Procedure: The Japanese player declares a "Search" action with a Patrol at any block (not at a "Deactivated" Station), declares the name of that Target (example: "Buin"), draws Patrol cup chits (see next page), and applies any results to that Station's block.
- "Reveal" lays a Hidden (standing) block flat, face up (with no effect on a Revealed block).
- "Take" removes the Target block to the Taken box, Deactivating the Station (typically, for good). If a Search Takes a Coastwatcher, Exploit immediately after returning chits to the Patrol cup.
Note: "Police" Patrols Search more effectively than do "Army" (because the policemen are indigenous pro-Japanese). "Reveal" has no effect on already Revealed blocks, but already Revealed blocks are easier to Take. Revealing Coastwatchers delays their ability to act. (19, 29) Taking a block Deactivates the Station and - if anyone was there - earns Japanese victory points. (40) Allied actions can yield Search and Exploit. (21, 29)
Exploit: Whenever Taking a Coastwatcher (including CW-Guerrillas, CW-Crew, or CW-Refugees), immediately after returning Patrol cup chits, the Japanese at any adjacent Patrol (even over "No Sea") may EITHER flip Army to Police OR Search again for free. This free Search costs no action, does not count as the one Search per Patrol per phase, and can yield further Exploit.
C. Deploy
Deploy shifts Patrols from the Ready box to the map or Patrol cup. For 1 action, either:
- Place 1 Ready marker on the map as an Army Patrol at a Japanese-Held Station (Base or Site) that does not already have a Patrol. Place the marker "Army" side up next to the block, opposite from the Control marker.
OR
- Add 1 or 2 Ready markers to the Patrol cup as Patrol chits.
Note: Deploy never places "Police", only "Army" Patrols. Deploying to a Station enables later Search there. Deploying to the cup helps all Searches.
17. Japanese Actions - Patrol Cup
Patrol cup draws resolve both Japanese "Searches" and Allied "Operate" actions
How do we draw from the Patrol cup? Draw Procedure: In the case of an Allied action calling for a Patrol cup draw (29), the Allied player declares whether an Army or Police Patrol or neither is at the Target Station (without naming the Station). In all cases, the Japanese player then blindly draws a number of chits from the cup - from whatever chits are already in it - as follows.
- No Patrol there: 1 chit.
- At Army Patrol: 2 chits.
- At Police Patrol: 3 chits.
Note: For a Search, an Army or Police Patrol has to be there.
Result: A draw will yield some number of "Evasion" and "Patrol" chits. Zero to three of them will be Patrols. Total Patrol chits drawn determines the outcome as follows. Implement the outcome in the order written.
Result by number of Patrol chits drawn (Hidden block / Revealed block):
| Patrol chits drawn | Search: Hidden | Search: Revealed | Operate (Allied) |
|---|---|---|---|
| 0: No Contact | no effect | no effect | Success |
| 1: Closing In | Reveal | no effect | Success/Reveal |
| 2: Trapped | Reveal | Taken | Failure/Reveal |
| 3: Captured | Taken | Taken | Failure/Taken |
- No Contact: Japanese: Search leaves the block as is. Allied: Operate Succeeds. (29)
- 1: Closing In: Japanese: Reveal the block; no effect on an already Revealed block. Allied: Reveal the block; Operate Succeeds.
- 2: Trapped: Japanese: Search Takes an already Revealed Block; Reveal a Hidden block (do not Take it). Allied: Reveal the block (if Hidden); Operate fails.
- 3: Captured: Japanese: Reveal the block (if Hidden); the Japanese Take the block. Allied: Reveal the block (if Hidden); the Japanese Take the block; Operate fails.
Order of resolution: A. Allies: if Operate, declare Patrol. B. Japanese: blindly draw 1-3 chits. C. Return all Patrol and just 1 Evasion to Patrol cup; other drawn Evasion chits stay out, on their mat. D. If Coastwatcher Taken: Exploit. (16)
Important: Before any other action, return all Patrol chits drawn and exactly 1 Evasion chit drawn (if any) to the Patrol cup. Keep any other Evasion chits drawn out, on their Patrol mat.
Note: The removal of Evasion chits from the Patrol cup tends to make Japanese Searches slightly more effective over the course of a phase. Also, the gradual removal of Evasion chits means that the Allies will need to Resupply their Coastwatchers repeatedly to help keep them Hidden. (23)
Taken: When a Patrol cup draw "Takes" a block, remove that block from its Station to the Taken box, whatever its type (for later VP, unless "Inactive"). The Station is now Deactivated. (4) Note: Taking a block Deactivates the Station (leaves it without a block) usually for the rest of the game. When the Japanese Take a Coastwatcher, they get to Exploit! (16)
18. Japanese Actions - Example
Search and Patrol Cup Example
- 1st Countermeasures, Japanese declare Search at Buin, drawing 2 Evasion chits: No Contact, but 1 chit stays out of the Patrol cup.
- Next action Searches Buka for 1 Evasion and 1 Patrol: Closing In Reveals a Coastwatcher! Both chits return to the Patrol cup.
- Japanese decline to Search again this phase: Rabaul is Deactivated; Vella Lavella is less critical. They go on to Deploy. (16)
- Allied Activities next focus elsewhere, leaving the Buka Coastwatcher Revealed!
- 2nd Countermeasures, Search at Buka, 2 Patrol chits: Trapped Takes Revealed Coastwatcher, Station Deactivated, Exploit! (40)
- Exploit could free Search Buin, but Japanese choose instead to flip Army at Buin to Police.
19. Allied Actions - Deliver (Resupply, Rescue, Insert, Retrieve)
Allied Activities operate, sustain, protect, and build the Coastwatching network
What does the Allied player get to do? Procedure: Each Allied Intelligence Activities phase (twice per turn), Allies may declare and take up to 5 actions among the following, always any A, then any B, then C, then D.
- A. Deliver - Resupply your Coastwatchers or move personnel (Rescue, Insert, or Retrieve them).
- B. Operate - Observe to spot and Report enemy Buildups or Recruit and Resist with Guerrillas. (29)
- C. Evade - Hide Revealed blocks. (32)
- D. Train - Add Coastwatchers to Ready. (32)
A. Deliver to move personnel and supplies
What are the Allies delivering? The Allies conduct Deliver actions at Hidden blocks (only), in any order or combination, to:
- Resupply Coastwatchers with provisions to help them evade enemy Patrols. (At Hidden Coastwatcher in Japanese-Held, any that the Delivery Asset used can reach. If Success: 3 Evasion chits into Patrol cup. See 23.)
- Rescue Refugees or Crew from a Coastwatcher's Station to the "Rescued" box for VP or Coastwatchers to the "Ready" box. (Success: adjust blocks to send Coastwatcher or CW-Guerrillas from map to Ready; or do so with Refugees or Crew from Coastwatcher. See 23.)
- Insert a Coastwatcher and/or Guerrillas from the "Ready" box to a Station to fill out the intelligence network. (Success: adjust blocks to send Coastwatcher from Ready to map, where none yet, not at Deactivated. See 24.)
- Retrieve isolated and vulnerable Refugees or Crew to an adjacent Coastwatcher. (By BOATS or THE HARRIS NAVY at Refugees/Crew adjacent to CW/CW-Guerrillas - not by No Sea. Success: adjust blocks to move Refugees or Crew to adjacent Coastwatcher or CW-Guerrillas. See 24.)
Each option above uses 1 action plus 1 Delivery Asset card.
"Delivering" in enemy territory uses the Delivery cup
What is the risk if Delivering behind enemy lines? Delivery at a Japanese-Held Station (only) calls for a Delivery cup draw - see next page. Success is automatic in Allied-Held spaces.
Note: The draw may or may not Succeed to allow the Delivery to go forward. It may Reveal blocks or even Take the block by enemy Search! Deliveries to or from only Allied-Held Stations do not draw from the cup - they always Succeed.
Delivery Procedure
How do we resolve Deliver actions? The Allied player:
- A. Secretly selects a Target Station. The Target must have a Hidden block (not Revealed or Deactivated). (4)
- B. Declares Delivery type (example: "Insert") and whether or not at any Japanese-Held Station (but not where).
- C. Declares (and Shows) a Delivery Asset that can reach the Secret Target. A "Delivery Asset" is an Allied card with a blue "Delivery" cup icon and "Sighting" and "Nothing Sighted" chits. (7, 22)
- D. Draws from the Delivery cup if any Japanese-Held Stations are involved. (20) Enemy Search may result!
- E. If Successful, completes Delivery, switching any blocks Secretly or Openly, (11) as the draw directs.
Important: Deliver only at Hidden blocks.
20. Allied Actions - Delivery Cup
Delivery cup draws resolve Allied "Deliver" actions in Japanese-Held
How do we draw from the Delivery cup? Draw Procedure: Each Allied Delivery action involving any Japanese-Held Station (Japanese Base or Site) calls for a Delivery cup draw. (19) The Allied player declares (and Shows if not yet Showing) the Delivery Asset being used, prepares the cup, adjusts for Japanese Air/Sea Patrol, and draws two chits.
Prepare cup: The Allied player prepares the cup with the numbers of "Sighting" and "Nothing Sighted" chits depicted on the Delivery Asset card. (6, 22)
Note: Unlike use of the Patrol cup, reset the Delivery cup with chits anew for each draw.
Delivery type: If using CATALINA, be sure to prepare chits as shown, depending on whether you are running Resupply (2 Sighting chits and 9 Nothing Sighted) or an Insert or Rescue Delivery (3 Sighting chits and 9 Nothing Sighted).
Note: BOATS (for most Delivery types) and PT SQUADRONS are limited to short Ranges (25), traced without crossing "No Sea". THE HARRIS NAVY is limited to certain Regions. CATALINA and SUBMARINE can reach anywhere. (22)
Air & Sea Patrol: Next, remove from the cup a total number of "Nothing Sighted" chits indicated by all Japanese Air Patrol and Sea Patrol Asset cards Showing. Allied Assets may block Japanese Air/Sea Patrols. The Allied player must declare which Allied and Japanese Assets apply to what effect.
Note: A few special cases -
- BARGES remove 1 or 2 chits depending on whether there is a Patrol marker at the Target, so the Allies must declare whether there is one.
- FLYING BOATS remove 2 chits, or 3 chits if the Allies are using SUBMARINE.
- Allied FIGHTER COVER when Showing can block Air Patrol from ZEROS, FLOATPLANES, and FLYING BOATS. PT SQUADRONS can block BARGES.
Either player can Show Assets that might affect the cup at any time before the draw. The Allies may not call off a Delivery once declared. Be careful - removal of "Nothing Sighted" chits by multiple Japanese Assets adds up!
21. Allied Actions - Delivery Cup (Draw)
The Delivery cup holds 4 Sighting chits and 12 Nothing Sighted chits in total (spares kept on the chits mat). Tip: Organize your Delivery chits on the mat to see at a glance what is in the cup. Example: the cup has 3 "Sighting" and 8 "Nothing Sighted" chits in it.
Draw chits: The Allied player then blindly draws 2 chits from the cup.
Note: Unlike Patrol cup draws, always draw exactly 2 chits from the Delivery cup.
Result: The draw chits will yield zero, one, or two Sightings. (6) The number of Sighting chits drawn determines the outcome, as follows. Implement the outcome in the order written.
- 0 Sighting chits means "Unseen": Deliver action Succeeds; blocks stay Hidden; switch any blocks Secretly. (9)
- 1 Sighting chit means "Spotted": Deliver Succeeds; Reveal map blocks involved; switch any blocks Openly; then Japanese may Search at Target if Patrol there. (16)
- 2 Sighting chits means "Wrecked": Deliver fails; Reveal map blocks involved; Japanese may Search at Target if Patrol there.
Note: If Success, the Allies must follow through on their declared action even though Revealed.
Search: Upon a "Spotted" or "Wrecked" result at a Target Station that has a Patrol, the Japanese may (after any block switch) immediately Search at that now Revealed block for no action (for Retrieve, where the Refugees or Crew began). (24) The Search may lead to Exploit! (16)
Note: This Search can be particularly dangerous because the block there will already be Revealed!
22. Delivery & Air/Sea Patrol Assets
How do I obtain and select Assets to make Deliveries or to stop them? Setup provides Allied Delivery Assets and Japanese Air/Sea Patrols, and the Japanese Augment to add more. (11, 14) To use your Asset, Show the card at any applicable time, or declare its use if already Showing. (8)
Example: Allies declare use of BOATS to Retrieve. Japanese immediately Show DESTROYERS and FLYING BOATS to remove "Nothing Sighted" chits from the Delivery cup.
Delivery Assets (Allied)
Chits: "Sighting" / "Nothing Sighted" counts prepared in the Delivery cup.
| Cards | Title | Chits | Other strengths | Other weaknesses |
|---|---|---|---|---|
| 1x ALL | CATALINA | Resupply: 2 Sighting, 9 Nothing Sighted. Rescue/Insert: 3 Sighting, 9 Nothing Sighted | No Retrieve | |
| 1x | SUBMARINE | 2 Sighting, 12 Nothing Sighted | 1-2 Resupply, Rescue, or Insert in the same phase | No Retrieve; discard upon 2nd time used |
| 1x ALL | BOATS | 2 Sighting, 8 Nothing Sighted | Retrieve at any Range | Other Deliver only Range 2 of Allied-Held |
| 1x 1942 | THE HARRIS NAVY | 2 Sighting, 8 Nothing Sighted | Any Deliver, including Retrieve | New Guinea or New Britain only |
| 1x 1943 | PT SQUADRONS |
Air/Sea Patrol Assets (Japanese)
| Cards | Title | Removes Nothing Sighted chits | Other strengths | Other weaknesses |
|---|---|---|---|---|
| 1x | BARGES | -1 chit OR -2 chits at Patrol (Army/Police marker) | Show if Hidden for 1 extra Troops or Supplies Buildup | PT SQUADRONS block within Range 2 of Allied-Held spaces |
| 1x | DESTROYERS | -1 | If Hidden (unused), add Warships Operation VP | |
| 1x | ZEROS | -1 | Can block PHOTO RECCE or add Aircraft Operation VP | FIGHTER COVER blocks within Range 2 of Allied Bases |
| 1x | FLYING BOATS | -2 OR -3 if SUBMARINE | FIGHTER COVER blocks within Range 2 of Allied Bases | |
| 1x | FLOATPLANES |
23. Allied Actions - Deliver (Resupply & Rescue)
Resupply
Resupply provides Coastwatchers the food, clothing, and equipment needed to stay Hidden.
Procedure: Follow the Delivery Procedure starting page 19 to declare a "Resupply" action. Resupply must Target a Hidden Coastwatcher at a Japanese-Held Station.
- "Success" adds 3 Evasion chits into the Patrol cup (up to the 18 provided).
Note: Just as for any Deliver action, the Delivery Asset used must reach the target. BOATS and PT SQUADRONS reach within limited Ranges. Page 25 explains "Range". CATALINA and SUBMARINE ignore Range - they can Resupply Hidden Coastwatchers at any distance. THE HARRIS NAVY reaches Hidden Coastwatchers in Japanese-Held New Guinea or New Britain.
Note: Though risking exposure of just one Coastwatcher, Resupply helps all Stations.
Important: CATALINA uses different counts of Delivery cup chits for Resupply and for Insert or Rescue. (22)
Rescue
Rescue brings Coastwatchers, Guerrillas, Refugees, and/or Crew to safety in the Ready or Rescued box.
Procedure: The Allies follow the Delivery Procedure (19) to declare a "Rescue" action. The Target Station can have any Hidden Coastwatcher, alone or with Guerrillas, Refugees, or Crew. (4) "Success" adjusts blocks among map, Ready, Rescued, and pool to EITHER -
- Send the Coastwatcher (with any Guerrillas) to Ready and leave behind an Inactive block, OR
- Send the Refugees or Crew to Rescued alone, leaving the Coastwatcher behind alone.
Note: The Japanese will see by blocks added to Ready or Rescued boxes which above type of Rescue occurred.
Note: Rescue protects personnel from being Taken. Rescue of Refugees and Crew will earn VP. (40) In the rare case that no Coastwatcher-alone blocks remain in the pool, you cannot Rescue Crew or Refugees.
See example on page 28.
24. Allied Actions - Deliver (Insert & Retrieve)
Insert
Insert sends Ready personnel to field Stations.
Procedure: The Allies follow the Delivery Procedure (19) to declare an "Insert" action. The Target Station must have a Hidden Inactive, Refugees alone, or Crew alone block.
If "Success", adjust blocks -
- Move a Coastwatcher, alone or with Guerrillas, from the Ready box to replace the Target block if Inactive. If the Target is Refugees or Crew, instead join them as a CW-Refugees or CW-Crew block. Switch with blocks in the pool as needed.
Note: Sending Ready CW-Guerrillas to Refugees or Crew gives up the Guerrillas.
Retrieve
Retrieve gathers Refugees and Crew who are alone to nearby Coastwatchers for later Rescue.
Procedure: The Allies follow the Delivery Procedure (19) to declare a "Retrieve" action. The Target Station must have Refugees alone or Crew alone. It also must have a Hidden Coastwatcher - alone or with Guerrillas - adjacent to it, not by "No Sea". (3) The Delivery Asset used must reach both Stations. Both Stations must be Hidden.
If "Success", adjust blocks -
- Move Refugees or Crew to join the adjacent Coastwatcher as a CW-Refugees or CW-Crew block, leaving behind an Inactive block. (If the Coastwatcher had Guerrillas, the Refugees or Crew replace them.) Blocks replaced from the map go into the pool.
See example on page 27.
Note: You cannot Retrieve from a Coastwatcher with Refugees or Crew - use Rescue (previous page). Assets must be in Range of both Stations involved (25) to affect Delivery cup chits. (20)
Example (of a complicated case): For FIGHTER COVER to block Air Patrol by FLYING BOATS, both Retrieve Stations must be within Range 2 of Allied Bases.
Important: Retrieve must use BOATS or THE HARRIS NAVY.
Note: THE HARRIS NAVY Retrieves between 2 adjacent Stations (not by "No Sea") in New Guinea, New Britain, or one in each. (3)
25. Range
Range counts outward by adjacent spaces from specific origins
What is "Range"? BOATS and PT SQUADRONS Delivery Assets and a few other cards refer to Range from friendly spaces. Range equals the fewest possible adjacent spaces (3) from the origin, in a chain out to the destination.
Examples: The first adjacent space is at Range 1; Port Moresby to Lae is Range 2; Milne Bay to Gasmata is Range 3.
Important: Circle spaces affect adjacency and so add to Range. BOATS and PT SQUADRONS may not trace Range over "No Sea". Range may trace via Coral Sea only for Japanese Operations Paths in Situation C. (3, 36)
FIGHTER COVER and ZEROS examples
- FIGHTER COVER blocks ZEROS within Range 2 of Allied Bases.
- ZEROS block PHOTO RECCE at Japanese Bases (only) - if outside FIGHTER COVER Range.
- Example: PHOTO RECCE can inspect Salamaua and Lae even with ZEROS showing because those Japanese Bases lie within FIGHTER COVER Range of Port Moresby.
26. Allied Actions - Deliver Example
Resupply Target and Range Example
The Allies declare a "Resupply" action to add Evasion chits to the Patrol cup. They must declare a Delivery Asset and silently pick a Target, then draw from the Delivery cup. Among the Coastwatchers in the field, they may not Target Buka because it is Revealed, nor Tataba because it is not Japanese-Held. They could use, if Showing and still unused this phase:
- CATALINA or SUBMARINE to Salamaua, Finschhafen, Feni, or Buin.
- THE HARRIS NAVY to Finschhafen or Salamaua, in New Guinea.
- BOATS or PT SQUADRONS from Buna to Salamaua or Finschhafen, within Range from Allied-Held.
- PT SQUADRONS from Tataba to Buin.
27. Allied Actions - Deliver Example - Retrieve
- Allies declare "Retrieve" to bring Crew at Buin to a Coastwatcher. They silently select the CW-Guerrillas at Vella Lavella as adjacent CW. BOATS and PT SQUADRONS are Showing, but PT SQUADRONS cannot Retrieve, so Allies declare use of BOATS. Delivery cup gets: 2 Sighting, 8 Nothing Sighted.
- Japanese already have DESTROYERS showing and now show BARGES. Allies declare that at least one Station involved (Buin) is beyond Range 2 of Allied-Held spaces (so PT SQUADRONS cannot block BARGES) and that a Patrol is present (BARGES thus remove 2 chits). Before the draw, Sea Patrols remove 3 "Nothing Sighted" chits total out of the cup.
- Cup draw is 2 Nothing (Unseen = Success). Allied player Secretly switches Buin Crew with Inactive block from pool. Vella Lavella CW-Guerrillas switch to CW-Crew.
What if the Delivery did run into trouble?
- 1 Sighting + 1 Nothing instead would Reveal both blocks but still bring Crew to join Coastwatcher at Vella Lavella (Spotted = Success).
- 2 Sightings would Reveal both blocks in place (Wrecked = failure).
Either case, Japanese Army Patrol at Buin could then Search to try to Take that block (which was the Retrieve Target).
28. Allied Actions - Deliver Example - Rescue (continued)
- From the previous example, Allies next declare "Rescue" to bring Crew now with a Coastwatcher at Vella Lavella out safe. Vella Lavella is the Target. The action cannot use the BOATS used this phase. PT SQUADRONS are Showing, but Allies have the more secure SUBMARINE and want also to Resupply this phase. The player Shows SUBMARINE and resets the Delivery cup with: 2 Sighting, 12 Nothing Sighted.
- DESTROYERS and BARGES are showing. Allies declare that the Target is within Range 2 of an Allied-Held space - PT SQUADRONS block BARGES. Japanese decline to Show any other Air or Sea Patrols. Destroyers remove 1 "Nothing Sighted" chit out of the cup.
- Draw is again 2 Nothing (Unseen = Success). Allies Secretly shift Vella Lavella CW-Crew to pool, Coastwatcher from pool to Vella Lavella, and Crew from pool to Rescued for later VP. (40)
- The SUBMARINE could next carry out another Deliver action this phase (such as Resupply).
29. Allied Actions - Operate (Observe, Recruit, Resist)
B. Operate to spy on or attack the enemy
What can Coastwatchers achieve on Station? Hidden Coastwatchers at Japanese-Held Stations (only) can do one or more of the following, in any order or combination, for 1 action each:
- Observe and Report Japanese Buildup markers to earn victory points (VP) at game end.
- Recruit Guerrillas to Coastwatchers on the map.
- Resist with Guerrillas to remove Japanese Patrols - if Allied cards so allow.
Important: Operate only at Hidden Coastwatchers in Japanese-Held Stations.
"Operate" actions draw from the Patrol cup
What is the risk behind enemy lines? Procedure: Each Allied Observe, Recruit, or Resist action causes a Patrol cup draw - just like a Japanese Search! The Allied player silently selects a Target Coastwatcher and declares the type of action and whether an Army or Police Patrol or neither is there. The Japanese player then draws from the cup. (17) Only a "Success" outcome yields the sought-after Allied effect.
Note: Just like Search (16), this Patrol cup draw can remove Evasion and Reveal or even Take the Coastwatcher and add a free Japanese Exploit! If Success when blocks are Revealed, the Allies still must follow through on the action.
Observe
Observe is how Coastwatchers discover hidden Japanese Buildups and Report them for VP.
Procedure: The Allied player declares an "Observe" action and silently selects a Target Rising Sun Control marker at a Hidden Coastwatcher. Resolve a Patrol cup draw. (17) If "Success", the player inspects the marker's facedown side - Secretly if the Coastwatcher remains Hidden (9) - otherwise Openly.
Find the Reports box with the Target's placename in the gameboard's "REPORTS" area (boxes are grouped by Region) (3), or occasionally in the Situation sheet's "SPECIAL REPORTS" area. (11)
- If the Target Control marker shows a Buildup, replace that Report marker with one from the pool bearing the same Buildup symbol on the back, facedown, to earn victory points. (5)
- If it shows a flag ("Quiet" - nothing to report), replace the "?" Report with a flag for "Clear" (with a gold trim if at a Base) for possible VP and as a reminder that you found no Buildup there.
The Allied player switches the Report markers Secretly or Openly, whichever way the player inspected the Japanese Control marker. In either case, put the new Report marker face down.
30. Allied Actions - Operate (Observe Example, Recruit & Resist)
Observe Example - Report markers
The Allied player has used facedown markers in the gameboard's REPORTS area to record successful Observation of Buildup of Transports at Rabaul and Aircraft at Kavieng. A "Clear Base" flag marker for the Japanese Base at Buka shows that a Coastwatcher Observed a flag there ("Quiet" - nothing to report). The other boxes still hold "?" markers (not yet Observed) as originally set up, as shown here for Buin and Rekata Bay.
Note: Very rarely, there will not be the proper Report marker left in the pool; if so, do not place a Report.
Reports of Buildups will earn Allied VP at the end of the game - if those Buildups are still there! Reports of "Clear" yield victory points only at Japanese Bases or with the BEACH RECON Allied Mission card. (40)
Recruit
Recruit reinforces a Coastwatcher with Guerrillas from the pool. (Guerrillas can enable Resist actions, below.)
Procedure: Declare a "Recruit" action at a (silently selected) Hidden Coastwatcher alone (not at any Refugees or Crew) at a Japanese-Held Station. Resolve a Patrol cup draw. (17) If Success, the Allied player (Secretly or Openly, whatever the Patrol cup result) switches the Coastwatcher alone with a Coastwatcher with Guerrillas (CW-Guerrillas) from the pool of spare blocks.
Note: The game provides 4x CW-Guerrillas blocks, limiting the number that the Allies can have. The Allies cannot Recruit if there are no CW-Guerrillas blocks currently in the pool. (4)
Resist
Resist actions use Showing RESISTANCE or KENNEDY'S ARMY cards to remove Patrols.
Procedure: With RESISTANCE or KENNEDY'S ARMY Showing, declare a "Resist" action at a Secretly selected Coastwatcher with Guerrillas Hidden at a Japanese-Held Station. With KENNEDY'S ARMY, the Guerrillas must be in the Central Solomons. Resolve a Patrol cup draw. (17) If Success, consult the card:
- With RESISTANCE, the Allied player removes 1 Army or Police Patrol at or adjacent to the Guerrillas (even over "No Sea") to its mat. If Resist Revealed the Guerrillas or removed an adjacent Patrol, discard the RESISTANCE card.
- KENNEDY'S ARMY instead removes 2 Central Solomons Patrols and discards BARGES.
You must use the Guerrillas selected regardless of the draw.
Card text: RESISTANCE (Allied Mission, 1943): "Any Resist action at Guerrillas: Success removes 1 Patrol at OR adjacent to the Guerrillas. If Guerrillas Revealed or adjacent Patrol removed, discard this card." KENNEDY'S ARMY (Allied Asset 20, Central Solomons: Segi): "A coastwatcher's private war. All Resist actions with Central Solomons Guerrillas: Success removes any 2 Patrols from Central Solomons and discards BARGES if Showing."
31. Allied Actions - Operate Example (Recruit, Resist, Observe)
- Allies declare "Recruit at Army" (Buin). Draw is 2 Evasion (1 back into cup). CW-Guerrillas Secretly replace the Coastwatcher alone, staying Hidden. (No Contact = Success)
- Allies declare "Resist at Army" (Buin again, with Guerrillas there) and show RESISTANCE card. Draw is 2 Evasion again (No Contact = Success). Allies pick Police adjacent at Buka to remove and discard the card.
- Allies declare "Observe, no Patrol" (could do Buin again but pick safer Vella Lavella). Draw is 1 chit: Patrol! That Reveals the block (Closing In: Reveal, Success). Open peek finds Quiet for Clear Report.
- With Coastwatchers exposed, Allies go on to Evade. (32)
32. Allied Actions - Evade & Train
C. Evade to Hide any Revealed blocks
How do I protect Coastwatchers who have been Revealed? After completing any Deliver and Operate actions within a phase, the Allies may declare "Evade" to Hide any Revealed blocks (stand them back up) for 1 action per block.
Note: Hiding Revealed blocks both helps protect Stations against enemy Search (16) and prepares for Deliver and Operate actions there in an upcoming phase, as those actions require Hidden blocks. (19, 29) You can Evade with any block (not just Coastwatchers). No cup draw occurs - Success is automatic.
D. Train to add Coastwatcher blocks to Ready
What if I need more Coastwatchers? After completing all other actions within a phase, the Allies may Train new Coastwatchers for 1 action each. Declare "Train". Success is automatic. Place a Coastwatcher-alone block (4) from the pool into the Allied Ready box, (3) Hidden (standing up).
Note: The Allies cannot Train normally if there are no Coastwatcher-alone blocks left in the pool. They cannot Train Guerrillas with the INSERTION Mission when there are no CW-Guerrillas blocks in the pool. (4)
33. Japanese Operations - Launch
Launch of any Operation ends the game
What is an "Operation"? Operations are a type of Japanese Mission card. (7) Each Japanese "Operations" phase gives the Japanese player an option to Launch one or more Operations - if eligible for Launch that turn and the required Buildups are on the map. (14, 34) The player need not Launch any. If any Operations Launch, players resolve all of them and then score other victory points to find out who won the game. (39)
Launch Operations in the Operations phase
How do we resolve Operations? Procedure: If the Japanese want to Launch any Operations during a turn's Operations phase, follow these steps. If not, skip to the next phase (2nd Countermeasures). (13)
- A. LAUNCH - The Japanese player may select and Show any or all Operations Mission cards in hand for which the total required Buildups are on the map. (34) For each Operation Launched, the Japanese player:
- Declares and flips face up the Buildup markers dedicated to that Operation. (5, 34)
- Puts a pawn at each Target.
- Claims victory points (VP) for each Launched Operation, as shown on the card. (39)
- B. EXECUTE - The Japanese player then declares Paths from each Operation's Buildups to its Targets, until all Buildups connect to a Target and all Targets connect to a Buildup. Page 36 tells how to declare Paths.
- C. WARN - The players next lay face up all Hidden Coastwatchers on or adjacent to any Path. Coastwatchers on or adjacent to Paths can score Warning VP. See page 39.
- D. SCORE - The players count and total up all other VP to find a final net score and who has won. (40)
Sample Operation card (1942 BOMBING, Japanese Mission 8): "Operation: Launch Turn III. Required: Aircraft at Rabaul and/or Kavieng. Targets: 1 Allied Base per Buildup (also Lunga-Tulagi (Guadalcanal)). +10 VP / Target. Bonus: +4 Lunga." Card callouts: the Mission is an "Operation"; Launch only in turns as listed; Buildups Required (on this card, per Target); Paths go to these Targets; victory point awards for Launching.
34. Japanese Operations - Turn, Buildups, Targets
A. Operations Launch by the Show of cards, Buildups, and Targets
Which Operations items do the Japanese Show? Procedure: If Launching any Operations, the Japanese player declares and Shows -
- Mission cards of all the Operations being Launched (only). Discard all other Operation cards. Keep other Mission cards that are not Operations face down for now, for later VP. (40)
- Buildup markers used for that Operation (flip them Buildup symbol up). (5)
- Targets (put a pawn at each, perhaps a different color for each Operation, however helpful).
To Launch an Operation, you must be playing a certain turn. How do I know which turns an Operation might Launch? Each Operations Mission card shows which turns (between "II" and "V") the Japanese may Launch that Operation (if its required Buildups are placed).
Examples: "Operation: Launch Turn II" means Launch that Operation on Turn II only. "Operation: Launch Turns III-IV" means Launch on Turn III or IV (in a "Turns I-V" Situation).
To Launch an Operation, you must have placed the required Buildups on the map. How do I know that an Operation meets its Buildup requirement? Each Operations Mission card also states what type of Buildup markers must be where on the map, in order to Launch that Operation. Some Missions allow Buildups beyond the minimum required, to score added victory points.
Sample card: AERIAL RECON (Japanese Mission 7, 1942) - "Operation: Launch Turn II. Required: Aircraft at 1 Base. Targets: 1-2 Allied Bases and/or Objectives, each at Range 3+ from the Aircraft. +4 VP / Target."
Important: Each Buildup marker can support and earn VP from only 1 Mission card - 1 Operation or 1 Local Mission.
Examples: If 2 Operations each required "Warships at Rabaul", the Japanese could Launch only 1 of them. "Required: Warships at Rabaul and Kavieng" means both of these named spaces must have exactly that type of Buildup marker, which cannot participate in any other Operation. "Required: Aircraft at Rabaul and/or Kavieng" means that only 1 of these 2 spaces must have that Buildup marker; the 2nd Buildup would add Targets and/or VP to that Operation.
Note: Often, the purpose of placing Buildups during Japanese Preparations (14) is to later Launch an Operation. Multiple Operations can share the same Targets, but each Buildup can support only a single Operation.
How do I select Targets?
For each Operation that you Launch, you must select one or more Targets. Each Operations Mission card lists Targets, either named spaces (example: "Lunga-Tulagi") or a choice among a category of spaces. The Japanese player must select Targets as specified on the card. Place a pawn at each.
Examples: "Targets: 1 Allied Base per Buildup" (as on BOMBING, previous page) means that the player must select a number of Allied Bases equal to the number of Buildups that the Operation is using. "Targets: 2 Allied Bases or Objectives per Buildup, Range 3+ from all Buildups used" requires two Targets for each Buildup used, that each such Target have either an Allied Base or Objective marker (5), and that no Target is closer to any Buildup used than Range 3.
35. Japanese Operations Example
Operation Turn, Buildups, and Targets Example
It is Turn III of Situation C, "CORAL SEA". During setup, Japanese drew AIR RAID along with CONQUEST (among other cards). (11) Japanese have Secretly Built Up: (14)
- Warships at Buin.
- Transports at Rabaul.
- Aircraft at Lae.
- Warships at Kavieng.
- Japanese in the Operations phase lay AIR RAID and CONQUEST cards face up and declare Launch of those Operations. Both can Launch on this turn, Turn III.
- AIR RAID (Japanese Mission 4): Operation: Launch Turn III. Required: Aircraft at 1-2 Bases. Targets: 1 Allied Base per Buildup (also Lunga-Tulagi (Guadalcanal)). +6 VP / Target.
- CONQUEST (Japanese Mission 13): Operation: Launch Turn III. Required: Transports at Rabaul; Warships at Kavieng and Buin. Targets: Tulagi and Port Moresby. +22 VP.
- The player flips 4 Japanese Base markers to show Buildups: Lae Aircraft for AIR RAID; Rabaul Transports, Kavieng and Buin Warships for CONQUEST.
- AIR RAID Targets 1 Allied Base (for 1 Buildup) - the Japanese player chooses Port Moresby. CONQUEST must Target Port Moresby and Lunga-Tulagi. The player puts pawns at these Targets.
36. Japanese Operations - Paths
B. Execute each Operation by tracing Paths from Buildups to Targets
How do we execute Operations once declared? Procedure: To execute Operations -
- Declare all Operations' Paths, marking them with pawns as helpful.
- Lay all blocks along Paths face up and score their Warning. (39)
- Reveal any Coastwatchers Hidden adjacent to add Warning VP.
Begin Scoring Japanese Operation cards and Allied Warning now. See page 39.
Trace Paths to connect Buildups and Targets
How many Paths do I trace? The Japanese player traces Paths from Buildups used for Operations to Targets of that Operation.
- Each Path must lead from exactly one such Buildup to exactly one such Target. A single Buildup or a single Target may be part of multiple Paths.
- Trace any number of Paths, until each Operation Launched has all its Buildups linked to at least one of its Targets and all its Targets linked to at least one of its Buildups.
Note: Many Operations will have just one Path - one Buildup to one Target total - but some can have Paths among several Buildups or Targets.
Operation Path: A Path is 1 Buildup, 1 Target, and a chain of adjacent spaces linking them.
Trace Paths by adjacent spaces, Buildup to Target
How do I trace Paths? The Japanese player, in any order desired, traces (that is, declares) each Path space by space from Buildup to Target by any chain of adjacent locations desired.
- Mark spaces along all Paths with pawns.
- Then lay all blocks on any Paths face up (if not already lying flat).
Dashed lines are only adjacent as stated on the map: "No Sea" only for Paths from Aircraft Buildups, not from Warships or Transports; Coral Sea special space only if playing Situation C. (11)
Note: Tracing Paths (unlike determining Range, 25) need not follow the shortest route. Paths may overlap with one another - which can help reduce Allied Warning VP. (39)
Reveal any Coastwatchers that remain Hidden adjacent to any Path
What about Coastwatchers that are near but not on a Path? Once the Japanese have traced all Paths, the Allied player flips any Hidden Coastwatchers (alone or otherwise) that are adjacent to any Paths face up. Stations across "No Sea" lines are adjacent only for Paths from Aircraft ("Air" Operations, not "Sea" Operations from Warships or Transports). (3)
All Coastwatchers along Operations Paths plus those adjacent to Paths can now Score Warning victory points.
37-38. Japanese Operations - Paths Example
Paths Example - part I
- Continuing the example, the Japanese decide to start with the AIR RAID Operation. It has one Buildup, Aircraft at Lae, and one Target, Port Moresby. To trace a Path linking those spaces, the Japanese player adds a pawn at Salamaua to reach from Lae to Port Moresby. (Air Operations may use No Sea.) Note: Buka Station here is Deactivated, the block Taken earlier by the Japanese.
- AIR RAID Path done, the Japanese go on to CONQUEST, first Rabaul to Port Moresby:
- The player marks onward from the Rabaul Transports with a pawn at the adjacent circle, then Buka, through the faceup Buildup at Buin to Vella Lavella.
- The player next marks Coral Sea, as allowed in Situation C.
- Last, pawns at Milne Bay and Hood Point reach Port Moresby.
Note: Pawn colors here do not matter.
Paths Example - part II
- The Buin Warships are already on a Path to a Target. But the Japanese must reach the other CONQUEST Target, Tulagi. They do so by repeating the trace from Buin via Coral Sea to Lavoro then Tulagi.
- The only Path remaining is to link the Kavieng Warships to a CONQUEST Target. Kavieng to Rabaul and then along either already declared CONQUEST Path does so.
- The players now lay all blocks along any Path - at declared Buildups or at pawns - face up flat.
- Allies next lay faceup any Coastwatchers that are Hidden and adjacent to any Path. The player does so at Aola, Buna, and Tabar.
39. Victory - Score Operations & Warning
Score victory points at game end
How do we figure out who won the game? Once the Japanese Launch one or more Operations - or after they complete their 2nd Countermeasures phase of the Situation's final turn - score each side's victory points (VP) to find a winner.
Tip: Check off Missions and Assets and fill in VP earned on a "DEBRIEF" worksheet. See sample on page 41.
Note: The Japanese earn positive VP. The Allies earn negative VP.
Scoring has two steps: A) Score any Operations and Warning; B) add those to all other VP (page 40).
A) Score any Operations and Warning
How do we score Operations and Warning? If the Japanese Launched any Operations, they earn positive VP for the Operations and the Allies negative VP for Warning by Coastwatchers nearby.
Procedure: First, total positive Japanese points (+VP) as listed in colored icons on the card for each Launched Operation. Log the VP on the "Debrief" sheet.
- Some Operations earn a flat number of VP. Others earn VP per Buildup or Target or by specific listed Target.
- Special: A SHORE RAID Operation (Situation A or B only) instead Takes blocks at its Targets for VP in a later Scoring step. (40) Sample card: SHORE RAID (Japanese Mission 10): "Operation: Launch Turn II. Required: Warships at 1-2 Bases. Targets: 2 Objectives per Buildup. Special: Take Target blocks (before Warning)."
Next, find the negative Allied VP total for Warning against the Operations Launched. Any Coastwatchers on or adjacent to a Path (36) earn VP as listed here:
Allied Warning Victory Points
Each Coastwatcher block can score once per Operation card:
- -3 on a Path, 3+ spaces from that Target
- -2 on a Path, 0-2 spaces from the Target
- -1 adjacent to Path (by No Sea: Aircraft only)
Note: Several Japanese and Allied Asset cards can affect Allied Warning VP.
- Count the distance from each Coastwatcher on a Path along that Path to its Target, noting whether that distance is 3 or more spaces for -3 VP or 2 spaces or fewer for -2 VP. If on multiple Paths of the same Operation card, score once, whichever the better score. Coastwatchers on Paths from several Operations earn either -3 or -2 Warning victory points for each Operation involved.
- Score Coastwatchers adjacent to but not on any Path for that Operation card for -1 VP. Count adjacent across "No Sea" for Paths from Aircraft Buildups only (not from Warships or Transports).
Important: When the Japanese Launch 2 or more Operations, score Warning VP separately and cumulatively for each Coastwatcher block against each Operation card involved. Score blocks only once each within a single Operation - even where several Paths overlap.
Example: A Coastwatcher on Paths of 2 Operation cards could earn -3 or -2 VP from each.
40. Victory - Score Other VP & Compare
B) Score all other Japanese and Allied VP
What else earns VP for each side? Regardless of any Operations, both sides now earn victory points for other successful activities. Other cards might earn points. The Japanese get VP for having Taken blocks. The Allies get VP for the performance of their intelligence "Network" - for up-to-date Reports, for Rescues, and for surviving behind Japanese lines to continue intelligence work.
Procedure: Players now Show any relevant Hidden cards. Flip all blocks face up. Flip all Japanese Rising Sun and Allied Report markers on the board to reveal their backs. Earn VP as listed below, additional to any for Operations or Warning, and log all on the Debrief worksheet.
Other Cards. Check all your Mission and Asset cards Showing and in hand (not those discarded or undrawn). They list possible VP in colored icons.
Examples:
- Japanese non-Operation Local Missions earn VP mostly by any Buildups placed among those listed - you do not need to have placed all. (14) (Example: FORTIFICATION, Japanese Mission 24, 1943: "For VP: Construction at up to 4 Sites within Range 2 of Allied-Held (even by No Sea but not Coral Sea) and at up to 2 Bases. +5 / +2 VP per Buildup.") SECURITY instead earns VP for Taking Personnel blocks and Deactivating Stations. (16)
- Japanese ZEROS and DESTROYERS Asset cards earn VP only if they have stayed Hidden until now (not been used for their effects such as Air/Sea Patrol).
- Many cards earn no VP.
Taken. The Japanese gain +3 VP for each Coastwatcher, Guerrillas, Crew, and Refugees icon among blocks in the Taken box. Example: A single Taken CW-Guerrillas block earns +6 VP.
Network. Up-to-date Reports, Rescued Crew and Refugees, and Coastwatchers in Japanese-Held spaces earn Allied VP as follows (VP for Allied Intelligence Network):
- -5 per Report of Buildup*
- -2 per Report of Clear Base*
- -2 per Crew and Refugees Rescued
- -1/2 per Coastwatcher in Japanese-Held
(* Must be up to date.)
Important: Reports of "Clear" (flag) earn VP only for Japanese Bases or with the BEACH RECON Mission.
C) Compare each side's VP total to find a winner
Who wins? Whoever scored the most victory points wins. Total Japanese VP, then Allied (negative) VP. Find a net total. A positive net total is a Japanese victory. A negative net total is an Allied victory. If net zero, the game is a draw.
41. Victory - Debrief Sheet & Scoring Example
The Debrief sheet lists, for each side, checkboxes and VP lines: Japanese - Operations Launched (each Operation card), Warning (On Path 3+ out x -3 VP; On Path 0-2 out x -2 VP; Adjacent to Paths x -1 VP; each scored once for each Operation card; modifiers: TANAKA fewer VP on Path; MIKAWA/KUSAKA ignore adjacent; READ & MASON bonus at Buka or Buin), Japanese Local Missions, Assets, Taken (Coastwatchers, Guerrillas, Crew, Refugees x +3 VP each); Allied - Missions (for example BEACH RECON bonus for Reports, GUIDE bonus for Coastwatchers, INSERTION bonus for Guerrillas, NETWORK DEVELOPMENT for CWs, and so on), Assets, Network (Buildups Reported x -5 VP; Bases Cleared x -2 VP; Rescues of Crew and Refugees x -2 VP; Coastwatchers in Japanese-Held x -1/2 VP). Note: Discarded cards earn no VP. Note: Some Asset cards can modify Warning, Taken, or Reports VP.
Scoring Example (Situation C, ending Turn III)
- Japanese Launched CONQUEST and AIR RAID - the latter against just 1 Target.
- Warning by CWs on Paths or adjacent add up to -17 VP.
- Japanese also drew STOCKPILING: 1 Supplies Built Up at Salamaua with any Operations adds +4 VP. They kept DESTROYERS Hidden to add to CONQUEST Warships for +3 VP.
- Allies are holding no Missions that add points but have a CACHES Asset card Showing for -2 VP.
- Patrols have Taken a Coastwatcher from Buka for +3 VP.
- Up-to-date Buildup Reports for Buin and Lae earn -5 VP each. A Rescue and Coastwatchers in enemy areas earn a few more VP.
Totals: Japanese total +38; Allied total -33 1/2; final net VP +4 1/2 - Japanese victory.
Note: The Port Moresby Coastwatcher at top right - on Paths of both CONQUEST and AIR RAID - earns Warning VP twice. (39) The Buna Coastwatcher earns VP for AIR RAID but not CONQUEST because adjacent by No Sea counts only for Paths from Aircraft.
To find the winner, players sum up Japanese minus Allied VP for a net score. If positive, the Japanese win, if negative, the Allies win. (That is, whoever scores more points wins.) Here, the Japanese win, with +4 1/2 net VP.
43. Index
The printed Index (Key Terms List) cross-references terms to rulebook page numbers; for example Exploit and Search - 16; Patrol Cup - 17; Deliver - 19; Delivery Cup - 20; Range - 25; Operate - 29; Evade and Train - 32; Launch - 33; Path - 36; Warning - 39; Scatter - 10; Setup - 11.