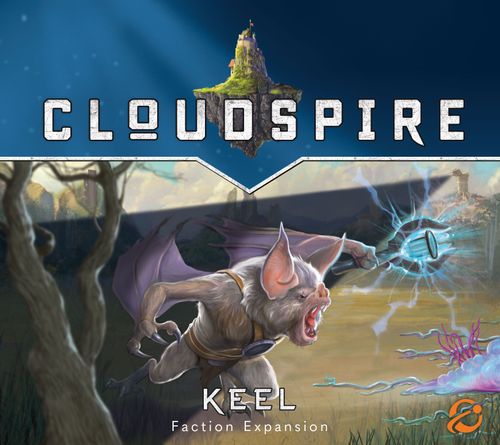
Cloudspire: Keel – Faction Expansion
Cloudspire: Keel – Faction Expansion Rulebook
Table of Contents
Table of Contents
Minion Promotion
Keel minions are promoted through their spires. While a keel minion is on a hex group that has one or more keel spires on it, it is promoted. However, if a promoted minion is no longer occupying a hex group with a keel spire, it demotes back to its basic side. When keel minions demote, they lose all health in excess of their new max, but do not lose any upgrade chips they have.
Minion promotion and demotion interrupts any other effect, with the exception of movement. When moving, keel minions finish their full movement and then assess whether to promote or demote.
Spires
The keel start with access to all four of their spire types.
Chips from this expansion have the expansion's chip symbol on them so that you can easily separate them.
Faction Cards
Gateport
1 – Calcification. After a merc unit you control is defeated, add [brown shield chip] to the bottom of the keel spire closest to where the merc was defeated, ignoring upgrade capacity.
2 – Improved Calcification. When Calcification triggers, you may add [brown shield chip] to the spire instead and may choose to add it to the top instead of the bottom.
3 – Ossification. Merc units you control gain the talent Armored while on a hex group with a keel spire.
Armored: When this unit is attacked, reduce damage by 1.
Void Turbine
1 – Arsenates. Place any three upgrade chips of your choice in your fortress. When constructing a spire, you may add any one upgrade chip from here to that spire as an additional starting upgrade.
2 – Terraformation. After refreshing the offerings in the Market Phase, if the top earthscape has a mountain hex on it, you may gain it for free. This does not count as your market purchase.
3 – Carbide Defenses. When this advancement is purchased, add 1 [brown shield chip] to the bottom of each keel spire, ignoring upgrade capacity.
4 – Void Rifles. When a keel minion demotes, if it does not have a [range upgrade chip] upgrade, it gains one, ignoring upgrade capacity. While keel minions have a [range upgrade chip] upgrade, they also have the talent 1 Range.
Seismic Harvester
1 – Mulcher. After a landmark chip is defeated or otherwise removed or otherwise removed by any faction, you may gain 1 Source.
Transcriber's note: the printed text repeats "or otherwise removed" in this sentence. It is transcribed as printed.
2 – Vampirism. After a keel spire defeats an opposing unit, you may gain +2 Source.
Void Armory
1 – Turrets. Gain the armory die.
Armory Die: After a [crossed-swords chip] on one of your spires is removed by an opposing unit, even if the spire is defeated, roll this die and apply its result.
- [three burst icons] – Deal the opposing unit 1 damage.
- [two blue disc icons] – Deal the opposing unit 1 damage and gain 1 Source.
- [one red-orange icon] – Deal the opposing unit 1 damage for each upgrade on this spire.
2 – Armament Shields. [crossed-swords chip] on keel spires require 2 damage to be removed instead of 1.
Amplification Plant
1 – Echolocation. You have spire influence over all hex groups occupied by a keel unit.
2 – Magnetoreception. After you defeat or otherwise remove a landmark chip, if it is on a Source well, you may immediately construct a spire on its hex, paying its Source cost. This does not use a limited build option.
3 – Thermoregulation. When an opponent would remove an upgrade from one of your spires, you may instead remove any one upgrade from two of your other spires.
Demolitions Plant
1 – Long Range Specialists. Gain the gunnery die and set it to 0.
Gunnery Die: Treat this die as a counter. At the start of the Prep Phase, you may spend either 2 or 4 CP to upgrade the gunnery die to 2 or 3, respectively. Keel spires with no [range upgrade chip] upgrades may now target opposing units up to a number of hexes away equal to the value on this die. Reset this die to 0 at the end of each wave.
2 – Winning Cause. After refreshing the offerings in the Market Phase, you may freely gain one merc unit from the offerings with a Source cost equal to or less than the number of keel spires in play. This does not count as your market purchase this wave.
Spire Cards
Outpost
Resupply. After a keel minion ends its movement on the same hex group as this spire, you may remove an upgrade from this spire to add 2 health to that unit, which may exceed the unit's health stat. This cannot be used on a minion that is already above max health.
Replicator
Replication. This spire counts as two keel spires for the purposes of minion promotion, the Winning Cause fortress advancement, and the talents Conscription and Empowered.
Air Defense. This unit or spire can attack units with Flying.
Source Grinder
Imbue: Pollinate. While a keel minion is occupying the same hex group as this spire, that minion gains the talent Pollinate.
Artillery
Imbue: Flying. While a keel minion is occupying the same hex group as this spire, that minion gains the talent Flying.
Units
Chira
# Range. This unit attacks and retaliates from up to # hexes away.
Flying – Ungrouped only. This unit can only be attacked by units or spires with Air Defense or Flying. Other units may displace this unit.
Conscription. At the start of the Prep Phase, you may spend up to 1 Source for each keel spire that is on the same hex group as this unit. Gain 1 CP for each Source spent.
Flitter
# Range. This unit attacks and retaliates from up to # hexes away.
Poise. When moving keel minions, you may increase or decrease their movement stat by 1 for that turn (to a minimum of 1).
General Eko
Air Defense. This unit or spire can attack units with Flying.
Voidsoul. This hero counts as a keel spire for the purposes of minion promotion, the Winning Cause fortress advancement, and the talents Conscription and Empowered.
Echo Scout
Biosonar. During exploration, you may explore one landmark that is not adjacent to one of your minions, so long as it is on the same hex group as this unit.
Neutralize. After this unit's movement, you may remove an adjacent landmark chip from play (do not gain any rewards for that chip).
Air Defense. This unit or spire can attack units with Flying.
Colony. When this unit would flip to its basic side, you may instead place it beside your barracks. This unit must be deployed again in the next wave (for 0 CP).
Clutch
Flying – Ungrouped only. This unit can only be attacked by units or spires with Air Defense or Flying. Other units may displace this unit.
Retrograde. After this unit is defeated, remove one limited build action peg from your fortress, if able.
Sky Fox
Survey. After this unit is defeated, you may immediately construct a free outpost or source grinder spire on the closest available Source well to where this unit was defeated, ignoring influence restrictions.
Protect. When another unit on the same hex group takes damage, this unit may choose to take any amount of that damage instead.
Bulwark. After another keel minion is promoted on the same hex group as this one, the promoting minion gains [brown shield chip], ignoring upgrade capacity.
Line-Runner
Air Defense. This unit or spire can attack units with Flying.
Pollinate. After this unit is defeated, you may spend 2 Source to add an upgrade of your choice to the bottom of the nearest keel spire to where this unit was defeated, ignoring upgrade capacity.
Static Return. This unit retaliates at unlimited range and retaliates every time it is attacked.
Shadow Magistrate
Pollinate. After this unit is defeated, you may spend 2 Source to add an upgrade of your choice to the bottom of the nearest keel spire to where this unit was defeated, ignoring upgrade capacity.
Diurnal. This unit does not demote.
Demolitionist
Incinerate. After this unit defeats an opposing faction unit, you may forgo the Source reward to remove the defeated unit chip from the game.
Empowered. After this unit promotes, if the number of keel spires in play is equal to or greater than this unit's current health, if this unit does not already have one, it gains a [crossed-swords chip], ignoring upgrade capacity.
Keel Scenario Book
The scenario book below is transcribed from the official "Keel Scenario Book v1.0" (Chip Theory Games). Its story passages are omitted; the scenario rules, set-up, and scoring are transcribed as printed. Map graphics are not reproduced as text.
Ankarian Renown
This expansion contains four solo scenarios and two co-op scenarios featuring your new Cloudspire faction. When choosing either kind of scenario, play them in the order that they appear in this book, as some circumstances in one scenario may carry over to the next. You can keep track of the renown you earn in these scenarios and add it to your overall campaign score (see the following page for more on scoring).
Your solo scenarios also feature rewards you can purchase with the renown you earn throughout your play. See the base game solo scenario book for more information on how to purchase and use renown rewards.
Keel Advantages
| Advantage | Effect | Renown Cost |
|---|---|---|
| Piercing Ping | One time use. At the start of your turn during the Onslaught Phase, remove 1 unrevealed landmark chip from play and gain its reward as if defeated. | 1 |
| Targeted Tremors | One time use. At the start of your turn during the Build Phase, remove any 1 upgrade from up to 3 opposing spires. | 2 |
| Heavy Ammunition | Ongoing—entire scenario. When the armory die would deal damage to an opposing unit, deal 1 additional damage to that unit. | 2 |
| Resourceful | One time use. When you gain the Void Turbine 1 – Arsenates fortress advancement, you may place 6 upgrade chips in your fortress instead of 3. | 3 |
| Augmentation Research | Ongoing—entire scenario. The upgrade capacity of all spires and heroes you control is increased by 1. | 4 |
| Well-Earned Scars | Ongoing—entire scenario. Keel heroes deploy on their promoted side. |
Keel Renown Tracker
| Scenario | Renown Spent | Renown Earned | Renown Carryover |
|---|---|---|---|
| 1 | – | ||
| 2 | |||
| 3 | |||
| 4 | – |
Total Renown Earned: ______
Final Score (total of all renown earned): ______
Solo Campaign Rank
The Cloudspire solo scenarios are best enjoyed in order so you can appreciate the story of The Joining War. As you play, challenge yourself to play your best possible game by tallying your renown and keeping track of your score. Renown spent on advantages does not reduce your score for the purposes of finding your Solo Campaign Rank. Reference the chart below for how you did!
All purchasable faction expansions for Cloudspire come with a set of 4 additional solo scenarios to play. Other gameplay expansions may include additional sets of solo scenarios, as well. For each such set of solo scenarios that you play, you can add your score from them to your score for the base game to continue to measure your success. The chart below gives you the rankings going up to 4 expansions.
| Prestigious Title | Base Game | Base Game +1 Expansion | Base Game +2 Expansions | Base Game +3 Expansions | Base Game +4 Expansions |
|---|---|---|---|---|---|
| Burnout | 16-23 | 20-29 | 24-35 | 28-41 | 32-47 |
| Nomad | 24-31 | 30-39 | 36-47 | 42-55 | 48-63 |
| Elite Duelist | 32-39 | 40-49 | 48-59 | 56-69 | 64-79 |
| Hero of Ankar | 40-47 | 50-59 | 60-71 | 70-83 | 80-95 |
Co-op Campaign Rank
The co-op scenarios are meant to be played as pairs. Those pairs can be played in any order. Just as with solo mode, you can play through them all and use the chart below to see how well you did.
| Prestigious Title | Base Game | Base Game +1 Expansion | Base Game +2 Expansions | Base Game +3 Expansions | Base Game +4 Expansions |
|---|---|---|---|---|---|
| Burnout | 8-11 | 10-14 | 12-17 | 14-20 | 16-23 |
| Nomad | 12-15 | 15-19 | 18-23 | 21-27 | 24-31 |
| Elite Duelist | 16-19 | 20-24 | 24-29 | 28-34 | 32-39 |
| Hero of Ankar | 20-23 | 25-29 | 30-35 | 35-41 | 40-47 |
Solo Chapter 1: Artificial Nocturne
Waves: 4. Opponent: Brawnen.
The map for this scenario is a graphic and is not reproduced as text; the set-up, objectives, rules, and tables are transcribed.
Set-Up
- Before setting up landmarks, remove all non-minion landmarks from the game.
Objectives
Complete at least one objective to achieve victory. Gain 1 renown for each objective you complete.
- Defeat six landmark minions.
- Defeat Drang.
- All brawnen spires are defeated at the end of Wave 4.
Loss
- Flitter is defeated.
Scenario Rules
- Flitter is the only keel hero the keel can have in play (though you can still deploy merc heroes). Her CP cost to deploy is 0, and she must be deployed Wave 1.
- While Flitter is the brawnen mark, she must always end any movement or displacement on or adjacent to a path hex that leads to the brawnen fortress gate.
- Before the keel fortress gate is attached, keel units deploy from any of the D hexes as if they were the fortress gate hex.
- Before the keel fortress gate is attached, the keel cannot gain Source or purchase fortress advancements.
- At the end of the first turn in which Isle 3, 4, 5, or 6 is cleared of landmarks, attach the keel fortress gate to that isle with its fortress gate in the relevant Position D.
AI Rules
- After Drang defeats a landmark minion, she gains a [crossed-swords chip], ignoring upgrade capacity.
- For this scenario, the talent Builder (found on architects) triggers if the unit ends its movement adjacent to a brawnen spire, adding a [grey chip] to the spire.
- After the keel fortress gate is attached, the brawnen immediately change their mark to the keel fortress gate.
Marks
- Keel: Brawnen fortress gate
- Brawnen: Keel fortress gate > Flitter
- Drang: Closest revealed landmark minion > Flitter > opposing fortress gate > opposing hero
- Attack Priority: Landmark minion with the lowest health > Flitter > opposing fortress gate > opposing hero > opposing spire > opposing faction minion
- Leveling: [crossed-swords chip], ignoring upgrade capacity
Event Die Results
- 1–3: Drang gains 1 health, even if not yet in play. This may exceed her health stat.
- 4–5: Drang gains a [crossed-swords chip], even if not yet in play, ignoring upgrade capacity.
- 6: The brawnen construct a lance launcher spire – [icons] on the closest available Source well to the brawnen fortress gate. If there are no Source wells available, reroll the event die.
Waves
| Wave | Event Phase | Income Phase | Market Phase | Build Phase | Prep Phase |
|---|---|---|---|---|---|
| 1 • Keel | Roll the event die. | 0 Source | Skip | Skip | Player: 5 CP. Brawnen: [Dispatch, Battleborn], Architect*, Architect*. |
| 2 • Brawnen | Roll the event die. Reveal the unrevealed landmark furthest from the brawnen fortress gate. | 3 Source | As normal | As normal | Player: 7 CP. Brawnen: [Dispatch, Battleborn*], Battleborn*, Architect*. |
| 3 • Keel | Roll the event die. Reveal the unrevealed landmark furthest from the brawnen fortress gate. | 3 Source | As normal | As normal | Player: 9 CP. Brawnen: [Dispatch, Battleborn*], [Dispatch, Battleborn*], Architect*, Drang*. |
| 4 • Brawnen | Roll the event die. Reveal the unrevealed landmark furthest from the brawnen fortress gate. |
Wrap-up: Take note of where the keel fortress is attached in this scenario, as it will be attached in the same position in Scenario 2.
Solo Chapter 2: Twilight Imperative
Waves: 4. Opponent: Brawnen.
The map for this scenario is a graphic and is not reproduced as text; the set-up, objectives, rules, and tables are transcribed.
Carryover
- Attach the keel fortress in the same spot as it was attached in the previous scenario.
Set-Up
- Before setting up landmarks, remove all non-minion landmarks from the game.
- Roll the D6 and make the following modifications:
- 1–2: Awsh gains a [brown shield chip], ignoring upgrade capacity.
- 3–4: Awsh gains a [range upgrade chip], ignoring upgrade capacity.
- 5–6: Awsh gains 4 health. This may exceed his health stat.
Objectives
Complete at least one objective to achieve victory. Gain 1 renown for each objective you complete.
- Defeat Awsh.
- Have at least 4 active keel spires with a [brown shield chip] at the end of the scenario.
- Defeat the brawnen fortress gate.
- Outcome: Scenario ends immediately.
Loss
- Awsh is undefeated at the end of the scenario.
AI Rules
- Awsh cannot lose his last health chip. When an adjacent opposing unit attacks Awsh, you may move Awsh up to a number of hexes equal to the amount of damage ignored due to this rule (he still retaliates as if he was in his original position). If Awsh is at 1 health when this movement occurs, you may move him off of the mat. Doing so immediately defeats him, and he does not retaliate.
- If Awsh has a [range upgrade chip], he also gains the talent 1 Range (which is then increased by the upgrade).
- If Awsh returns to the brawnen fortress gate, he recovers health up to his starting amount of 6 and removes all upgrades. At the start of the next wave, roll the D6 from set-up again, and add Awsh to the bottom of the brawnen deployment stack that wave.
- Awsh remains in his fortress and is considered out of play until he deploys.
Marks
- Keel: Brawnen fortress gate
- Brawnen: Keel fortress gate > Flitter
- Awsh (while at 5 health or more): Closest opposing hero > opposing fortress gate
- Awsh (while at 4 health or less): Brawnen fortress gate
- Attack Priority: Closest opposing hero > opposing fortress gate > opposing spire > opposing faction minion
- Leveling: [brown shield chip], ignoring upgrade capacity
Event Die Results
- 1–2: Awsh gains 1 health, even if not yet in play. This may exceed his health stat.
- 3–4: Brawnen fortress gate gains 1 health (to a max of 15).
- 5–6: Place 1 spire attack die on the brawnen spire closest to the keel fortress gate. The next time that spire attacks, this die is rolled along with the rest of its attack dice.
Waves
| Wave | Event Phase | Income Phase | Market Phase | Build Phase | Prep Phase |
|---|---|---|---|---|---|
| 1 • Keel | Roll the event die. | 6 Source | As normal | As normal | Player: 7 CP. Brawnen: Aegis, Dispatch, Battleborn, Awsh*. |
| 2 • Brawnen | Roll the event die. | 4 Source | As normal | As normal | Player: 9 CP. Brawnen: Aegis, Dispatch, [Dispatch, Battleborn]. |
| 3 • Keel | Roll the event die. | 4 Source | As normal | As normal | Player: 9 CP. Brawnen: Aegis, Dispatch, [Dispatch, Battleborn*], Forsaken*. |
| 4 • Brawnen | Roll the event die twice. | 4 Source |
Solo Chapter 3: Darkness Forever
Waves: 4. Opponent: Heirs, Narora.
The map for this scenario is a graphic and is not reproduced as text; the set-up, objectives, rules, and tables are transcribed.
Set-Up
- Roll the D6. Place the keel fortress in the corresponding set-up position.
- 1–2: As pictured.
- 3–4: Position F.
- 5–6: Position G.
- Start with the Recruitment Center 2 – Winning Cause fortress advancement purchased.
Transcriber's note: the printed set-up names "Recruitment Center 2 – Winning Cause". The reference sheet lists the Winning Cause advancement under the Demolitions Plant. The name is transcribed as printed.
Objectives
Complete at least one objective to achieve victory. Gain 1 renown for each objective you complete.
- Both replicator fortress spires survive until the end of Wave 4.
- Defeat Keem.
- Have 5 or more fortress gate health at the end of Wave 4.
Scenario Rules
- You cannot construct fortress spires, but you may upgrade them as normal.
- At the start of the Build Phase, if General Eko is deployed, you may spend 7 Source to move your fortress to one of the other two starting positions. Any spires in your fortress move with it.
- Anytime your fortress gate would take 2 or more damage from a single attack, you may instead apply that damage to a fortress spire of your choice.
AI Rules
- Keem's forces deploy from the regal lookout spire on Hex A. If the regal lookout is defeated, Keem's forces no longer deploy. Though Keem's forces deploy separately, they are still considered to be heir units and take their turn at the same time as the heirs.
- Keem has the talent Range 1 (which is then increased to Range 2 due to his starting upgrade).
Marks
- Keel: Naroran fortress gate OR heir fortress gate OR the regal lookout spire
- Heirs/Narora: Keel fortress gate
- Keem (if the regal outlook spire is undefeated): Closest opposing unit occupying Isle 6 > unoccupied hex adjacent to the regal outlook
- Keem (if the regal outlook spire is defeated): Closest opposing hero > closest opposing fortress gate
- Attack Priority: Closest opposing hero > opposing fortress gate > opposing spire > opposing faction minion
- Leveling: [brown shield chip], ignoring upgrade capacity
Transcriber's note: the printed marks text spells the spire "regal outlook" in two places and "regal lookout" elsewhere. Both are transcribed as printed.
Event Die Results
- 1–2: The keel recover 1 fortress gate health (cannot exceed max).
- 3–4: Look at one unrevealed landmark in play. You may then choose to discard it.
- 5–6: Add a [range upgrade chip] to the bottom of any keel spire in play, ignoring upgrade capacity.
Waves
| Wave | Event Phase | Income Phase | Market Phase | Build Phase | Prep Phase |
|---|---|---|---|---|---|
| 1 • Keel, Heirs, Narora | Roll the event die. | 3 Source | As normal | The narora purchase Forgotten Graves 3 – Source Loop. | Player: 6 CP. Heirs: Joust. Keem's Forces: [Harrier, Harrier]. Narora: Medium, Arcbright. |
| 2 • Keel, Heirs, Narora | Roll the event die. | 3 Source | As normal | As normal | Player: 6 CP. Heirs: Humminger, Joust, Harrier. Keem's Forces: Royal Talon. Narora: [Arclight, Arcbright]. |
| 3 • Keel, Heirs, Narora | Roll the event die. | 3 Source | As normal | As normal | Player: 6 CP. Heirs: [Windrush, Harrier*, Harrier*, Harrier*], Joust. Keem's Forces: Royal Talon*. Narora: [Arcbright, Arcbright], Bishop. |
Solo Chapter 4: Endless Night
Waves: 5. Opponent: Grovetenders.
The map for this scenario is a graphic and is not reproduced as text; the set-up, objectives, rules, and tables are transcribed.
Set-Up
- Place an ogregrowth* grouped underneath the shrubbery spire (above its upgrades). Then, shuffle two war briars*, a grizzled oak*, and a vineherald*, and place a random one grouped under each of the four muskeg spires (above their upgrades).
Objectives
Complete at least one objective to achieve victory. Gain 1 renown for each objective you complete.
- Defeat the ogregrowth.
- Defeat all grovetender spires.
- Have all 3 keel heroes returned to the fortress at the end of Wave 5.
Scenario Rules
- The grovetender minion chips grouped under the grovetender spires are not considered upgrades. When the last upgrade is removed from a grovetender spire, the unit grouped under the spire activates on the hex where the spire was defeated. It gains a [brown shield chip], activates with exactly 8 health, and has [terrain allowance icon] terrain allowance. It is considered a Graft hero (you may wish to place an unused chip from another faction under it to distinguish it as such).
- The CP cost of all keel heroes is reduced to 0, and you may deploy any hero Wave 1. You cannot deploy more than 1 hero each wave. You may have a total of 3 heroes in play.
AI Rules
- Graft heroes are opposing to all factions. When a Graft hero is defeated, its chip is returned to the grovetender barracks.
Marks
- Keel: Grovetender fortress gate
- Grovetenders: Keel fortress gate
- The Graft Heroes: Closest keel hero > closest keel unit > closest opposing unit or spire
- Attack Priority: Closest opposing hero > opposing fortress gate > opposing spire > opposing faction minion
- Leveling: [brown shield chip], ignoring upgrade capacity
Waves
| Wave | Event Phase | Income Phase | Market Phase | Build Phase | Prep Phase |
|---|---|---|---|---|---|
| 1 • Keel, Grovetenders, The Graft | Remove the bottom upgrade from the muskeg spire with the fewest upgrades. | 5 Source | As normal | As normal | Player: 5 CP. Grovetenders: [Treed, Taproot], War Briar. Summon: Vineherald. |
| 2 • Keel, Grovetenders, The Graft | Remove the bottom upgrade from the muskeg spire with the fewest upgrades. | 5 Source | Search the market stack for the first merc minion, and add it to the bottom of the grovetender deployment stack this wave. | As normal | Player: 6 CP. Grovetenders: [Treed*, Taproot], War Briar*. Summon: Vineherald. |
| 3 • Keel, Grovetenders, The Graft | Remove the bottom upgrade from the muskeg spire with the fewest upgrades. | 5 Source | As normal |
Co-op Chapter 1: Greenhouse Effects
Waves: 3. Opponent: Brawnen, Heirs. Co-op: Keel / Grovetenders.
The map for this scenario is a graphic and is not reproduced as text; the set-up, objectives, rules, and tables are transcribed.
Set-Up
- After setting up the map, randomly place 6 earthscapes facedown as shown. Remove any remaining earthscapes from the game.
Objectives
Complete at least one objective to achieve victory. Gain 1 renown for each objective you complete.
- Defeat all opposing heroes.
- Defeat all opposing spires.
- At the end of Wave 3, have at least 3 canopy tiles in play.
Scenario Rules
- Each facedown earthscape is a canopy, with each canopy consisting of 3 canopy hexes. Canopy hexes are treated as path hexes.
- Earthscapes are purchased from the market as normal, but remain facedown as canopies. Canopy placement follows the same rules as earthscape placement.
- Canopy hexes promote keel minions in the same way that a hex group with a spire does.
- The keel and grovetenders cannot pick the same mark.
- If a keel unit is preventing a grovetender minion from making progress, or if a grovetender unit is preventing a keel minion from making progress, it is displaced by the moving minion.
AI Rules
- Drang does not move on her turn. The effects of Drang's upgraded talent Spire Shot are applied while Drang occupies the same hex as a spire, causing Drang to gain +1 Range and the spire to be inactive.
- If Drang is defeated while on her basic side, immediately construct a siege tower spire – [crossed-swords chip] [range upgrade chip] [range upgrade chip] on that hex.
- Darb and Keem remain in the heir fortress and are considered out of play until they are deployed. After the minaret spire on Hex A is defeated, deploy Darb to that hex. After the minaret on Hex B is defeated, deploy Keem to that hex.
Marks
- Keel/Grovetenders: Heir fortress gate OR brawnen fortress gate
- Heirs: The fortress gate of the faction that selected the brawnen fortress gate as its mark
- Brawnen: The fortress gate of the faction that selected the heir fortress gate as its mark
- AI Heroes: Closest opposing hero
Event Die Results
- 1–2: If Drang is on her basic side, promote her and construct a siege tower spire – [crossed-swords chip] [range upgrade chip] [range upgrade chip] under her. If Drang is already promoted, she gains a [crossed-swords chip], ignoring upgrade capacity. If Drang is defeated, add a [brown shield chip] to the bottom of the siege tower on Hex C, if there is one.
- 3–4: Add a [crossed-swords chip] to the bottom of the minaret spire on Hex A. If this spire is defeated, Darb instead gains a [crossed-swords chip], ignoring upgrade capacity.
- 5–6: Add a [brown shield chip] to the bottom of the minaret spire on Hex B. If this spire is defeated, Keem instead gains a [brown shield chip], ignoring upgrade capacity.
Waves
| Wave | Event Phase | Income Phase | Market Phase | Build Phase | Prep Phase |
|---|---|---|---|---|---|
| 1 • Keel, Heirs, Grovetenders, Brawnen | Roll the event die. Assign a different number between 1 and 6 to each canopy. Roll the D6. If a canopy is associated with the number rolled, add that canopy to the market offerings. | 4 Source | As normal | As normal | Players: 4 CP. Heirs: [Joust, Harrier]. Brawnen: Battleborn, Dispatch. |
| 2 • Keel, Heirs, Grovetenders, Brawnen | Roll the event die twice. Assign a different number between 1 and 6 to each canopy. Roll the D6 twice. For each roll, if a canopy is associated with the number rolled, add that canopy to the market offerings. | 0 Source | As normal | As normal | Players: 7 CP. Heirs: [Humminger, Harrier, Joust], [Humminger, Harrier, Joust]. Brawnen: [Aegis, Aegis], [Dispatch, Dispatch], [Battleborn, Battleborn]. |
| 3 • Keel, Heirs, Grovetenders, Brawnen | Roll the event die three times. Assign a different number between 1 and 6 to each canopy. Roll the D6 three times. For each roll, if a canopy is associated with the number rolled, add that canopy to the market offerings. | 0 Source |
Wrap-up: Take note of the keel fortress gate health at the end of this scenario, as the keel start with the same amount of fortress gate health in Scenario 2.
Co-op Chapter 2: Shadow and Light
Waves: 3. Opponent: Narora. Co-op: Keel / Mercs.
The map for this scenario is a graphic and is not reproduced as text; the set-up, objectives, rules, and tables are transcribed.
Carryover
- The keel fortress gate starts this scenario with the same amount of health it ended Scenario 1 with.
Set-Up
- Do not place Source tracker chips in any of the fortresses.
- When setting up the market, remove all expansion chips. Place all market chips into a barracks tray. This forms the merc faction's barracks.
- The narora start with the Power Rings 1 – Portal Ring, Azure Temple 3 – Reaction Chamber, Forgotten Graves 3 – Source Loop, and Fanatic Tower – 1 Observatory fortress advancements purchased.
Objectives
Complete at least one objective to achieve victory. Gain 1 renown for each objective you complete.
- Keel fortress gate does not take damage during Wave 1.
- Keel fortress gate does not take damage during Wave 2.
- Keel fortress gate does not take damage during Wave 3.
Loss
- General Eko is defeated.
- Naroran fortress gate is not defeated by the end of Wave 3.
Scenario Rules
- For the purposes of Stone-Shaper fortress advancements, merc units are considered to be under the keel's control. For all other purposes, they are considered their own faction.
- Keel spires cannot be constructed. However, for the purposes of keel minion promotion and for all keel talents and fortress advancements, merc spires are considered to be keel spires.
- After a keel or merc unit or spire is defeated, it is removed from the game.
- The CP cost of all units is reduced to 0. During each Prep Phase, the keel can only select up to 1 hero and 3 minions for deployment. The keel can have 2 heroes in play in Wave 1 (including General Eko).
- During the Prep Phase, the merc faction can select up to 4 chips to use for the wave. This includes any units they wish to deploy, equipment they wish to equip to deploying heroes, or spires they wish to construct during the wave's limited build actions. Create a deployment stack next to the play area. At the end of the wave, any selected spires that were not constructed are returned to the merc barracks. The merc faction is not restricted to a "starting hero" for Wave 1.
- When merc units deploy, they deploy from either gateport as if it were the fortress gate.
- Source is not tracked. Any effect that requires Source may be resolved for 0 Source.
- Ignore influence restrictions.
- After any hero is defeated, the keel may immediately purchase one fortress advancement.
AI Rules
- After the naroran fortress gate is dealt damage, the narora gain the A.R.C. die and set it to [icon]. On their turn, the narora resolve this die result if possible, following AI spire attack priority. After it is resolved, the die is removed. The A.R.C. die may be gained and used multiple times per wave.
- Though some naroran units deploy from the Power Rings, they are still considered to be naroran units and take their turn at the same time as the rest of the narora. When deploying, naroran units on the Power Rings deploy before units in the naroran deployment stack.
Mark
- Keel/Mercs: Naroran fortress gate
- Narora: Keel fortress gate
- Naroran Heroes: Closest opposing hero > closest opposing spire > keel fortress gate
Event Die Results
- 1–2: Add a [crossed-swords chip] to the bottom of each refractor spire.
- 3–4: Add a [crossed-swords chip] to the bottom of each portal spire.
- 5–6: Add a [brown shield chip] to the bottom of each portal spire.
Waves
| Wave | Event Phase | Income Phase | Market Phase | Build Phase | Prep Phase |
|---|---|---|---|---|---|
| 1 • Keel, Mercs, Narora | Set the fanatic die to 4. | Skip | Skip | Skip | Keel: 1 hero, 3 minions. Mercs: 4 chips. Narora: [Drift, Burnout, Lightrous], Anvasse* [icon]. Power Rings: Arclight. |
| 2 • Keel, Mercs, Narora | Construct a portal spire – [icons] on each Hex D and a refractor spire – [icons] on each Hex E, if possible. Roll the event die. | Skip | Skip | Skip | Keel: 1 hero, 3 minions. Mercs: 4 chips. Narora: [Drift, Burnout, Nightrous], Anjebin* [icons]. Power Rings: Arclight. |
| 3 • Keel, Mercs, Narora | Construct a portal spire – [icons] on each Hex D and a refractor spire – [icons] on each Hex E, if possible. Roll the event die. |