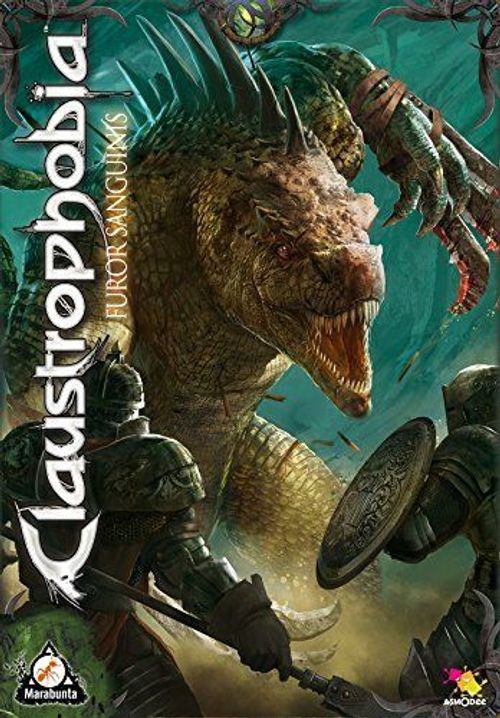
Claustrophobia: Furor Sanguinis
Claustrophobia: Furor Sanguinis Rulebook
Table of Contents
Table of Contents
Components
- 1 Kartikeya miniature
- 1 Squamata board
- 5 Squamata dice
- 1 rules and scenario booklet
- 13 wound tokens
- 16 deadly destiny tokens
- 10 event tokens
- 3 troglodyte nest tokens
- 7 Squamata tiles
Instinct Phase
The squamata player will determine Kartikeya's stats. To do that, the player rolls 4 squamata dice and places them on the spaces of their choice on the squamata board. The placement of these dice will determine Kartikeya's stats until the beginning of the next instinct phase. One restriction: a destroyed part of the body can no longer receive any dice (see below).
Damage and Wounds
Over the course of the game, Kartikeya will suffer damage like any other warrior. For each hit suffered, you'll have to place a wound token on the space of your choice on the squamata board.
A part of the body that has as many wounds as its resistance score is considered to be destroyed and can no longer be healed (and can no longer receive wound tokens).
A destroyed part of the body can receive no dice during the instinct phase.
A squamata tile located on a destroyed part of the body can no longer be used.
If all parts of Kartikeya's body are destroyed, he dies.
Advantage Cards
During a game against Kartikeya, the human player will have to remove from the advantage cards deck the following cards: Oil For Your Lamp (x2), Our Faith Will Protect Us (x2).
Event Cards
During a game with Kartikeya, the demon player can draw no event cards.
Deadly Destiny
Instead of drawing event cards from that space of the destiny board, the demon player gains 1 point of Deadly Destiny, which they can use on the table specific to the scenario played. The demon player cannot trigger more than one event per turn. Each event can only be used once per game (see also the "Sacrificial Altar" tile).
Flip the event tokens face-down when they are used to remember that a specific event has already been triggered.
Unless otherwise indicated, these events are triggered during the threat phase.
Trapped Corridor
Kartikeya is affected normally by the Trapped Corridor tile.
Trap Space on the Destiny Board
In a scenario in which Kartikeya is present, use the following text: An enemy warrior of your choice suffers a hit. The squamata player chooses where the wound is placed if Kartikeya is targeted.
Action Phase of the Squamata Player
- Kartikeya will move, explore the tunnels, and face his opponents, whether they are human or demonic.
- The monster moves and acts like any other warrior, by using the values and talents chosen during the instinct phase.
- He can explore just like the human player's warriors.
- There exists one important difference when compared to Claustrophobia's other warriors.
Multiple Combats: Kartikeya can choose to split his attacks between multiple opponents and/or multiple times during his movement. Set aside as many dice as the CBT value of the squamata in order to keep track of the available attacks. Before, during, and/or after his movement, Kartikeya can choose to initiate combat against one or more foes. Each die that was set aside can be used only once.
Kartikeya is a warrior but he is not human, or a troglodyte, or a demon.
Squamata Board
The squamata board is divided into a Head, a Torso, an Arms section and a Legs section. Each section has a row of spaces where dice can be placed and a row of resistance spaces.
Head
- Torpor (place two dice in this space): Roll an extra squamata die during the next instinct phase.
- War Fury (place two even dice in this space): Kartikeya is frantic until the beginning of the next instinct phase.
- Blocking (place an odd die in this space): Kartikeya is impressive until the beginning of the next instinct phase.
- Resistance spaces (three spaces under the Head).
Torso
- Regeneration (place a die of value 1 or 2 in this space): Remove a wound token from a part of Kartikeya's body which has not yet been destroyed.
- Feint (the total value of all dice placed in this space must be equal to 9): Kartikeya is elusive until the beginning of the next instinct phase.
- Resistance spaces (four spaces under the Torso).
Arms
- To Battle! (place at least one die in this space): The value of the first die placed in this space modifies Kartikeya's stats until the beginning of the next instinct phase.
- Value 1 or 2: DEF 3+, CBT 5.
- Value 3 or 4: DEF 4+, CBT 3.
- Value 5 or 6: DEF 5+, CBT 1.
- Each extra die placed in this space grants him +1 CBT until the beginning of the next instinct phase.
- Resistance spaces.
Legs
- Runner (place a die in this space): Kartikeya gains +1 MVT until the beginning of the next instinct phase.
- Resistance spaces.
Basic Characteristics
The Kartikeya panel on the squamata board shows his basic characteristics as printed: 1, 0 and 2, marked with the boot, hammer and shield icons respectively.
Scenarios
The Scent of Prey
Squamata Player's Forces: The Squamata player has Kartikeya equipped with the Steel Blades, Reptilian Reflexes, and Reptilian Resistance Squamata tiles.
Demon Player's Forces: The Demon player begins the game with 4 TP. During the scenario, they can bring no demons into play (however, see "The Demon's Lair").
Scenario Setup: Set aside the following tiles: Exit and Pentacle Room. The other tiles are shuffled and form a draw pile. The Exit tile is placed in the middle of the table. Kartikeya is placed on it.
Victory Conditions: The Squamata player wins the game if they kill the Crushing Demon. Any other result is a victory for the Demon player.
Special Rules:
- The Smell of Fear: Kartikeya seeks and often finds its prey thanks to its extremely well developed sense of smell. This works the same way as the Breath of Fresh Air rule from the "The Survivors" scenario (see p.16 from the base set's rules) with one difference: when the 10 side is up, the next tile isn't the Exit tile, but the Pentacle Room.
- The Demon's Lair: Place the Crushing Demon on the Pentacle Room when it is revealed.
Crushing Demon: MVT 0, CBT 2, DEF 4, Health 10. Any troglodyte on the same tile as the Crushing Demon becomes Frantic.
Deadly Destiny Event Table
- Slippery Soil (2): Kartikeya suffers a -2 MVT penalty during its next action phase.
- Sprained Ankle (2): Kartikeya immediately suffers a wound to the legs and suffers a -1 MVT penalty during its next action phase.
- Monstrous Claws (3): The Crushing Demon gains a +2 CBT bonus until the end of the game.
- Poisoned Bite (5): Until the end of the game, the Crushing Demon causes 2 Wounds whenever it lands a hit.
- Impressive Girth (3): The Crushing Demon gains a +5 bonus to its Health statistic until the end of the game.
- Thick Skin (5): The Crushing Demon gains a +1 DEF bonus until the end of the game.
- Not Dead Yet (2): The Crushing Demon heals 5 health points. This cannot bring the Demon's current total above its health statistic.
- Still Not Dead Yet (2): The Crushing Demon heals 5 health points. This cannot bring the Demon's current total above its health statistic.
The Faithful Slave Must Learn to Love His Leash
Squamata Player's Forces: The Squamata player has the following models: Kartikeya (equipped with the Reptilian Reflexes and Reptilian Resistance Squamata tiles), and two human slaves (used the Condemned Blade-For-Hire models).
Demon Player's Forces: The Demon player begins the game with 4 TP. During the game, they will be able to bring into play up to 2 Demons of Combat (but never at the same time).
Scenario Setup: Set aside the Exit and the Pentacle Room tiles. Form a face-down stack composed of 10 randomly-drawn tiles. Make a second face-down stack composed of 3 randomly-drawn tiles and the Exit tile (shuffle these 4 tiles).
Place the first stack atop the second one. The final result will be a deck of 14 tiles, with the Exit tile being among the last 4. The Pentacle Room tile is placed in the middle of the table. All Squamata warriors are placed on it.
Then, the Demon player adds under each stack one of the following tiles: 2 Dead-End tiles, and 1 Sacrificial Altar tile.
Finally, create the board shown below by placing the 3 stacks of 4 face-down tiles in the indicated spaces.
Victory Conditions: The Squamata player wins the game if they manage to get Kartikeya onto the Exit tile. The Demon player wins with any other result.
Special Rules:
- The Human Slaves: Each human slave has the following characteristics: MVT 2, CBT 1, DEF 4, Health 3. These warriors activate during the Squamata player's action phase. Kartikeya has them bound with long chains. If, at the end of the Squamata player's action phase, a human slave is more than one tile away from Kartikeya, the chain breaks and the slave escapes (it is removed from the game).
- A Few Resources: The Cache tiles represent the remains of past human expeditions. Place a threat token on each tile of that type. Any slave ending their activation on such a tile can discard that token to heal 1 health point.
Deadly Destiny Event Table
- Slippery Soil (2): Kartikeya suffers a -2 MVT penalty during its next action phase.
- Sprained Ankle (2): Kartikeya immediately suffers a wound on its legs and suffers a -1 MVT penalty during its next action phase.
- Terrified (2): The Demon player moves a slave to an adjacent tile linked by an exit without taking into account the blocking rule.
- Ferocious (2): During your next action phase, troglodytes gain a +1 CBT bonus.
- Crawling Worms (2): Each slave suffers 1 point of damage.
Maternal Instinct
Squamata Player's Forces: The Squamata player has the following models: Kartikeya, equipped with the Berserk, Reptilian Reflexes, and Reptilian Resistance Squamata tiles.
Demon Player's Forces: The Demon player begins the game with 4 TP. During the scenario they can bring into play one Birthing Demon by following the scenario's special conditions (see Protective Instinct).
Scenario Setup: Before the beginning of the game, the Demon player randomly forms 3 stacks of 3 tiles each with the 9 tiles listed below. (The nine tiles are shown as images on the printed page.)
Then, the Demon player adds under each stack one of the following tiles: 2 Dead-End tiles, and 1 Sacrificial Altar tile.
Finally, create the board shown below by placing the 3 stacks of 4 face-down tiles in the indicated spaces. (The board layout is shown as an image on the printed page.)
Kartikeya begins the game on the Pentacle Room tile.
Victory Conditions: The Demon player wins by killing Kartikeya. The Squamata player wins by killing the Birthing Demon.
Special Rules:
-
Dead In Ovum: The 2 Dead-End tiles placed in the 3 stacks of tiles each shelter a troglodyte nest. A troglodyte nest is represented by a token with an "intact" side and a "destroyed" side, and has the following characteristics: DEF 3, Health 4.
A troglodyte nest can be attacked. For combat, it's considered to be both an opponent and a target. However, the troglodyte nest doesn't count as a warrior belonging to the Demon player when it comes to applying the blocking and corridor size rules.
If at least one troglodyte was placed this way, the Birthing Demon suffers a -1 DEF penalty until the beginning of the next threat phase.
-
Raving Mad: By reaching the Sacrificial Altar tile, Kartikeya realizes that it went down the wrong path and that its instinct betrayed it. It then becomes raving mad, and the Berserk tile now works as follows: Kartikeya gains a +1 CBT bonus for each part of its body with at least 1 wound.
-
Protective Instinct: When Kartikeya destroys the last troglodyte nest, a Birthing Demon, drunk with vengeance, comes out of its lair to flay the squamata alive. As soon as the second troglodyte nest is destroyed, immediately place the Birthing Demon on the Lair tile. From that moment on, the Demon player can no longer use the Deadly Destiny Event Table.
Birthing Demon: MVT 1, CBT 3, DEF 4, Health 6. At the beginning of the Birthing Demon's activation, the Demon player can place up to 2 troglodytes for free on its tile (while following the corridor size rule).
Deadly Destiny Event Table
- Surprise Attack (2): During this Threat Phase, you benefit from the Burrowing Monsters and The Taste of Blood skills.
- Ferocious (2): For your next action phase, troglodytes gain a +1 CBT bonus.
- Plant Growth (3): Choose a tile. For the Demon player's next action phase, consider this tile to have the Hungry Tunnels effects.
- Revenge (2): For the Squamata player's next action phase, each troglodyte eliminated by Kartikeya makes an attack against it before being removed from the game.
- Fatigue (3): The Demon player chooses one of Kartikeya's tiles (except for Berserk) and removes it from the game.
- Déjà vu (3): The Demon player turns a Deadly Destiny token face-up.
- Deep Wound (2): Kartikeya will not be able to use its Regeneration ability on its next turn.
- Pernicious Attack (2): Kartikeya suffers a -1 DEF penalty until the beginning of its next activation.
- The Calm Before the Storm (2): During the next Threat Phase, the Demon player rolls two extra dice.
- Shockwave (1): The Demon player moves Kartikeya to an adjacent tile linked by an exit, without taking into account the blocking rule.
Cooperation
Squamata Player's Forces: The Squamata player has the following warriors: Kartikeya equipped with the War Cry, Reptilian Reflexes, and Reptilian Resistance Squamata tiles; two Condemned Blades-for-Hire each equipped with a Blunderbuss; The Redeemer (with the gifts Aura of Courage and Aura of Healing). The Squamata player secretly chooses one of the following two advantage cards: Grenade or Bottle of Schnapps. This card can only be played by a human warrior.
Demon Player's Forces: The Demon player begins the game with 4 TP. They will only be able to bring one demon into play, following the Demon Generator rules (see below).
Scenario Setup: Create the board shown below. Place the four troglodyte nests in the indicated spaces. (The board layout is shown as an image on the printed page.) Kartikeya and the human warriors are placed on the Exit tile. One troglodyte is placed on each tile bearing a troglodyte nest token (intact side up).
Victory Conditions: The Squamata player wins if they kill the Demon. The Demon player wins if they kill all human warriors and Kartikeya.
Special Rules:
-
Game Overview: The turns are divided as follows:
- Instinct Phase
- Kartikeya's Action Phase (Squamata Player)
- Initiative Phase
- Humans' Action Phase (Squamata Player)
- Threat Phase
- Demon Player's Action Phase
If Kartikeya is eliminated, remove the Instinct and Action phase of the Squamata player. If all human warriors are eliminated, remove the Initiative and Action phase of the humans.
-
Cordial Alliance: The War Cry doesn't effect human warriors. Moreover, humans and the squamata belong to the same side for the application of the blocking and corridor size rules.
-
Immunity: The troglodytes are immune to the effects of the Devouring Pit.
-
Troglodyte Nests: A troglodyte nest is represented by a token with an "intact" and a "destroyed" side, and has the following characteristics: DEF 3, Health 5. During the game, the Demon player can only bring troglodytes into play from an intact troglodyte nest token. The Demon player can always bring troglodytes into play on a tile containing an intact troglodyte nest. A troglodyte nest can be attacked by a human or squamata warrior. For combat or the use of an item, a troglodyte nest is considered both as an opponent and a target. However, the troglodyte nest doesn't count as a Demon player's warrior when applying the blocking and corridor size rules. When a troglodyte nest loses its last health point, flip the troglodyte nest token to its "destroyed" side. If, at any point in the game, all troglodyte nests are destroyed, the Demon appears.
Demons
| Demon | MVT | CBT | DEF | Health | Soul gauge |
|---|---|---|---|---|---|
| Lesser Demon | 1 | 3 | 3 | 3 | 0 to 2 |
| Minor Demon | 2 | 5 | 4 | 5 | 3 to 5 |
| Major Demon | 2 | 5 | 5 | 5 | 6 to 7 |
| Archdemon | 2 | 5 | 5 | 6 | 8+ (Frantic) |
Deadly Destiny Event Table (Cooperation)
- Full Speed (3): During their next action phase, troglodytes gain a +1 MVT bonus.
- Ferocious (2): During their next action phase, troglodytes gain a +1 CBT bonus.
- Robust Nests (2): During your next action phase, the troglodyte nests gain a +1 DEF bonus.
- The Calm Before the Storm (2): During the next threat phase, the Demon player rolls 2 extra dice.
- Supercharge (2): The soul gauge increases by 1 point.
- New Nests (3): Flip two destroyed nests to their "intact" side.
- Flee (2): During your next action phase, troglodytes are elusive.
- Invasion (2): Place up to 4 troglodytes into play (for free) on one or more tiles containing an intact troglodyte nest.
- Mutation (3): Choose a troglodyte in play. It now has the following characteristics: MVT 2, CBT 3, DEF 4, Health 4.
- Extra Supercharge (2): Each demonic mechanism tile which contains at least one troglodyte increases the soul gauge by 1 point.
Shared Destinies
Squamata Player's Forces: The Squamata player has the following warriors: Kartikeya, equipped with the War Cry, Consumption, Reptilian Reflexes, and Reptilian Resistance Squamata tiles. Moreover, during the game, Kartikeya will have the chance to gain the Steel Blades tile.
Human Player's Forces: The Human player will have the following warriors:
- The Redeemer equipped with the Scepter of Command (with the gifts Smite the Evil Ones and Aura of Courage);
- Two Condemned Brutes, one of which is equipped with a Steel Shield;
- One Condemned Blade-for-Hire, equipped with a Blunderbuss.
Scenario Setup: Place the five starting tiles as shown below. Remove the following tiles: the Exit, the three Dead-Ends containing a cache, as well as all the Narrow Corridor tiles (the latter will not be used in this scenario). Also set aside the Glowing Mushrooms and Devouring Pit tiles (the Sacrificial Altar will not be used).
Create the first face-down stack containing the Exit tile and three randomly drawn tiles. Shuffle this stack.
Create a second face-down stack containing two Dead-End tiles with cache, as well as three randomly drawn tiles. Shuffle this stack and then place it on the first stack.
Create a third face-down stack containing the remaining Dead-End tile with cache, the Glowing Mushrooms, and the Devouring Pit tiles, as well as four randomly drawn tiles. Shuffle this stack and place it on top of the others.
The deck will contain sixteen tiles, with the Exit tile being among the last four.
The Human models begin the game on the Pentacle Room tile.
Kartikeya begins the game on the lair tile which is the furthest away from the Pentacle Room tile.
Kartikeya will play first in this scenario.
Victory Conditions: The Human player wins if, after having recovered the three bodies, they manage to get at least two warriors out (see the "We're Awaiting Orders" special rule) before Kartikeya leaves the board.
The Squamata player wins if, after having recovered the Steel Blades, they manage to get Kartikeya out. To do so, it must be on the Exit tile at the end of its activation before the Humans recover three bodies and two warriors leave the board.
Special Rules:
- Exploration: The models from both sides have the chance to explore according to the normal rules. When a player draws a new tile due to an exploration, it's their opponent who chooses its orientation.
- Disoriented: Kartikeya can make no attacks on the game's first turn.
- They're Mine!: Kartikeya recovers the Steel Blades and becomes equipped with the corresponding tile if it ends its activation on the Glowing Mushrooms tile. The Human models ignore the Steel Blades.
- Honor Our Dead: When a Human model enters a Dead-End with a cache tile for the first time, place a threat token on that tile to indicate that the body which was on it has been recovered. Kartikeya ignores the bodies.
- Let's Not Let Anything Go To Waste: Each time a Human warrior enters a Dead-End with cache tile for the first time (including the one which doesn't contain a body), the Human player can draw an advantage card.
- We're Awaiting Orders: A Human warrior which is on the Exit tile can decide to leave the board at the end of its activation. It is counted towards the victory conditions only if the Human player has already recovered the three bodies.
Survival Instinct
Squamata Player's Forces: The Squamata player has the following models: Kartikeya, equipped with the Heavy Armor, Steel Blades, Reptilian Reflexes, and Reptilian Resistance Squamata tiles.
Demon Player's Forces: The Demon player begins the game with 4 TP. During the game, they will be able to bring into play up to 2 Demons of Combat (but never at the same time).
Scenario Setup: Set aside the following tiles: Exit, Pentacle Room (printed as "Petacle Room" in the source booklet), and the Narrow Corridor tile.
Place the Pentacle Room tile in the middle of the play area.
Create one first face-down stack of tiles containing the Narrow Corridor and three randomly chosen tiles. Shuffle this stack.
Create a second face-down stack of tiles containing the Glowing Mushrooms, Devouring Pit, and the Sacrificial Altar, as well as nine randomly drawn tiles. Shuffle this stack and then place it on the first.
The deck thus made will contain sixteen tiles, the Narrow Corridor tile being among the last four.
Kartikeya begins the game on the Pentacle Room tile.
Kartikeya plays first in this scenario.
Victory Conditions: The Squamata player wins if Kartikeya manages to reach the Narrow Corridor tile. The Demon player wins if they manage to eliminate Kartikeya.
Deadly Destiny Event Table
- Skilled Warrior (2): The Demon player chooses the location of the hits made against Kartikeya on an attack roll. This event is triggered after the attack dice have been rolled.
- Slippery Soil (2): Kartikeya suffers a -2 MVT penalty on its next action phase.
- Corrosion (4): One of Kartikeya's equipment tiles is destroyed (Heavy Armor or Steel Blades, at the Demon player's choice). Remove the corresponding Squamata tile from the game.
- Poisoned Claws (1): Kartikeya will not be able to use its Regeneration skill on its next turn.
- Sprained Ankle (2): Kartikeya suffers a wound to the legs and suffers a -1 MVT penalty for its next action phase.
- Demonic Inspiration (2): During its next action phase, one Demon in play will gain both a +1 CBT bonus and the Frantic skill.
- Enraged Troglodyte (1): During its next action phase, one troglodyte in play will gain both a +1 CBT bonus and the Frantic skill (the specific troglodyte will be chosen during the Demon player's action phase).
Squamata Tiles
Some scenarios allow Kartikeya to equip gear and special talents. A squamata tile linked to a part of the body can no longer be used if that body part is destroyed.
- War Cry (linked to the head): During the instinct phase, you can place 1 die on this tile. If you do so, immediately move an opposing warrior (other than a demon or the redeemer) to an adjacent tile linked by an exit without taking into account the blocking rule.
- Consumption (linked to the head): Each time Kartikeya kills an opponent, remove a wound token from a part of his body that has not yet been destroyed.
- Berserk (linked to the head): Kartikeya gains +1 CBT for each part of his body containing at least 2 wounds.
- Steel Blades (linked to the arms): Kartikeya gains +2 CBT.
- Heavy Armor: You can place up to 3 wound tokens on this card. When this card has received 3 wound tokens, it is removed from the game.
- Reptilian Reflexes: Trigger this ability during an instinct phase. Once during the game, Kartikeya can decide to have a MVT of 3 (this value cannot be increased, but it can potentially be reduced) during the following action phase. Remove this tile from the game after it has been used.
- Reptilian Resistance: Trigger this ability during an instinct phase. Once during the game, Kartikeya can decide to have a DEF of 6 until the beginning of the next instinct phase. Remove this tile from the game after it's been used.
New Room Tiles
One of each:
- Phosphorescent Mushrooms: The DEF of any warrior on this tile can never be higher than 3.
- Devouring Pit: This tile can hold 5 warriors per side instead of 3. Roll a die for each warrior on this tile at the beginning of the threat, initiative, and instinct phases. On a result of 4 or greater, that warrior suffers a hit.
- Sacrificial Altar: The first time a demon player's warrior reaches this tile, the demon player flips one of their event tokens face-up.