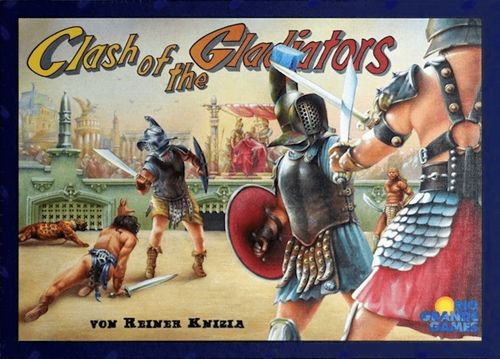
Clash of the Gladiators
Clash of the Gladiators Rulebook
Table of Contents
Table of Contents
Components
- 60 Gladiators:
- 8 Spear Throwers
- 8 Net Throwers
- 28 Swordfighters
- 8 Trident Bearers
- 8 Shield Bearers
- 20 plastic Gladiator Carriers, in 5 colors
- 5 special dice
- 12 wooden stars ("Hits")
- 12 Animal cards
- 1 wooden disc ("Combat" marker)
- 1 game board
Setup
Place the game board on the table. Sort the gladiators by their 5 groups and lay them out in face-up stacks next to the board. Shuffle the Animal cards and place them as a face-down stack next to the board. Place the "Hit" wooden stars and the "Combat" disc, along with the 5 dice, next to the board.
Depending on the number of players, each player receives a set number of Gladiator Carriers in one color:
| 2 players | 3 players | 4 players | 5 players |
|---|---|---|---|
| 4 | 4 | 3 | 3 |
Objective
Players send their gladiator teams into combat and try to stay in the competition as long as possible while defeating as many of their fellow players' gladiators and animals as they can. The game ends when only one player still has gladiators on the board. At the end of the game, each defeated gladiator is worth 1 point and each defeated animal is worth 2 points.
Entering the Arena
The oldest player begins. They take one of their Gladiator Carriers and place it on a free space of their choice in the arena. Then they take a gladiator of their choice from one of the stacks and place it on their Gladiator Carrier. The other players follow in clockwise order and do the same.
From the second round on, players choose whether to add a gladiator to a team already on the board or to send a new team into the arena. When a new Gladiator Carrier is placed, it may not be placed directly adjacent to one of that player's own already-placed Gladiator Carriers, as long as other free spaces are still available.
Entering the arena ends as soon as all players have fully occupied all of their Gladiator Carriers with 4 gladiators each. Any remaining gladiators are returned to the box. The remaining free spaces are now filled with animals. Beginning with the oldest player, each player in turn draws an animal from the face-down stack and places it face up on a free space, until all spaces on the board are occupied. Any animals left over are then laid out face up next to the board.
The oldest player now begins the Clash of the Gladiators.
Let's Begin!
The player whose turn it is must choose one of their teams and use it to challenge a fellow player's gladiator team or a wild animal. To do so, they name a directly adjacent team or a directly adjacent animal. In some cases, the player is allowed to move their chosen team on the board before naming an adjacent animal or team. To do so, one or both of the following conditions must be met:
- Their team has no direct neighbor.
- Their team has only 3 or fewer gladiators left.
In either case, they may move any distance across free spaces. They may not jump over any other team or animal while doing so.
The player takes the Combat disc and places it between their team and the named team or animal. The tip of the sword points toward the named space. The duel can begin.
The Duel
Every duel is fought with dice and consists of one die roll by the challenging player and one die roll by the named opponent.
The 6 die faces show 3 different results:
- 1 face shows a Critical Hit — 2 red stars
- 2 faces show a Single Hit — 1 yellow star
- 3 faces show a Miss — a blank face
There are five different types of gladiators who can be involved in combat:
- Spear Throwers determine which team rolls first.
- Net Throwers knock out enemy gladiators before combat begins.
- For each Swordfighter, the player may take 1 die.
- Trident Bearers indicate which player may re-roll their dice.
- Shield Bearers block single hits (critical hits can never be blocked).
So how does a duel play out?
Gladiators vs. Gladiators
- To begin, the two players fighting the duel determine who rolls first. The player with more Spear Throwers on their team always rolls first. This player becomes the attacker. In case of a tie, the player who placed the Combat disc becomes the attacker.
- Next, the Net Throwers come into play. If the attacker has Net Throwers on their team, they knock out enemy gladiators before rolling. For each of their Net Throwers, they take one gladiator of their choice from the opponent's Gladiator Carrier and place it beside it. These gladiators are not active and may not take part in the coming duel. Immediately afterward, the opponent does the same if they also have Net Throwers that were not just knocked out themselves. Gladiators who have not been knocked out are referred to below as active gladiators.
- Now the dice are rolled. The attacker takes a certain number of dice in hand. This number is determined as follows: every team gets 1 die in every duel, regardless of whether it still has active gladiators or not, and regardless of how it is composed. To this one die, the player adds as many dice as they have active Swordfighters on their team. They roll this number of dice once.
- If the attacker has more active Trident Bearers than their opponent, they may roll again if they wish. If they decide to re-roll, they must roll all the dice again and accept the second result.
- After the roll, the opponent's Shield Bearers come into play. Each of the opponent's Shield Bearers blocks one single hit (yellow star). The corresponding die or dice are set aside. A critical hit (red stars) can never be blocked.
Quick Reference: The 5 Gladiators
| Gladiator | Effect |
|---|---|
| Spear Thrower | Whoever has the majority of Spear Throwers on their team rolls first. In case of a tie, the player who placed the Combat disc rolls first. |
| Net Thrower | Each active Net Thrower knocks out 1 enemy gladiator. The knocked-out gladiators are not active in this duel. |
| Swordfighter | For each active Swordfighter, the player rolls 1 die. |
| Trident Bearer | Whoever has the majority of active Trident Bearers on their team may re-roll their dice once. They must then roll with all dice and accept the second result. |
| Shield Bearer | Each active Shield Bearer blocks 1 single hit. Against a critical hit, it is powerless. |
Now the remaining hits are counted. For each single hit, the attacker places 1 Hit marker (yellow wooden star) on the opponent's space. If only 1 Hit marker is on the space, nothing happens; the marker simply stays there. If 2 or more Hit markers are on the space, the opponent must immediately choose 1 gladiator from their team and give it to the attacker for every 2 Hit markers. The two Hit markers are then removed from the space and placed back next to the board.
For each critical hit, the opponent must immediately choose a gladiator from their team and give it to the attacker. The attacker places the gladiators they have defeated in front of themselves at their play area. Note: the opponent may also give the attacker a gladiator that is not active!
Afterward, the opponent — that is, the player who rolled second — becomes the attacker and makes their counter-attack. They take the number of dice they are allowed to roll with and proceed point by point exactly as the player who rolled first did. Note: Spear Throwers and Net Throwers no longer play a role now, since they have already done their job. At the end of the duel, all inactive gladiators are placed back on their Gladiator Carriers.
Example: Red Challenges Yellow
Although Red issues the challenge, Yellow rolls first (majority of Spear Throwers). Before rolling, however, the Net Throwers still take action. Red has one and decides to knock out one of Yellow's Swordfighters. Then the dice are rolled.
Yellow takes 2 dice and rolls: a single hit and a miss. As the result of their roll, they place 1 Hit marker on Red's space.
Now Red rolls back with 3 dice: a single hit, a single hit, and a miss. They may roll a second time, since they have the majority of Trident Bearers. They try again and roll: a single hit, a single hit, and a single hit. Even if the second roll had been worse than the first, Red would have had to accept it.
The result of their roll: 1 die is set aside, since Yellow's Shield Bearer blocks a single hit. For the two remaining hits, 2 Hit markers are placed on Yellow's space. Yellow immediately loses 1 gladiator of their choice for the two hits. They give Red the Spear Thrower and place the two Hit markers back in the supply. The duel is over. Yellow places their knocked-out Swordfighter back on their Gladiator Carrier.
The player who placed the Combat disc passes it to the player on their left. That player now chooses one of their teams and challenges an opponent to a duel. It does not matter whether these teams were involved in a duel immediately beforehand or not.
If all of a team's gladiators are defeated in a duel, that duel ends immediately (without any counter-attack being carried out). Any Hit marker still on that space is then returned to the supply and the Gladiator Carrier is removed from the game.
Gladiators vs. a Wild Animal
Instead of an opposing team, a player may also challenge an animal to a duel. An animal is comparable to a gladiator team.
The duel proceeds exactly like a duel against a gladiator team. However, there are 4 exceptions:
- Animals have no net symbols.
- Net Throwers may not be used against animals.
- Animals do not get an extra die; they only get one die per sword symbol.
- Against animals, 1 critical hit counts as 2 single hits. For 1 critical hit, 2 Hit markers are always placed on the animal's space. As a reminder: a shield is of no help against a critical hit!
Otherwise, everything is determined exactly the same way: who rolls first (the player names a fellow player who acts on the animal's behalf), how many dice each side gets to use, and so on.
The number shown in the animal's frame indicates after how many hits the animal is defeated. Once an animal is defeated, the player who defeated it may place the animal alongside their defeated gladiators in front of themselves. Gladiators defeated by an animal are removed from the game.
Example: Red Challenges the Lion
The red team has no Spear Thrower, and the lion has no spear symbol. Red rolls first, since they placed the Combat disc. They may not use their Net Thrower against an animal. They take 3 dice and roll: a critical hit, a single hit, and a miss.
The result of their roll: for the critical hit, they place 2 Hit markers on the lion's space. The lion's shield cannot block a critical hit. Since the lion is defeated after 2 hits, Red sets it aside in front of themselves. The two Hit markers go back to the supply, and the duel is over.
The Same Example with a Different Roll
Suppose Red had rolled instead: a single hit, a single hit, and a miss.
The result of their roll: the lion has a shield, meaning one die with a single hit is set aside. For the second hit, 1 Hit marker is placed on the lion's space.
Since the lion is only defeated after 2 hits, it now rolls back with 1 die against the red team (note that an animal only ever has as many dice as it has sword symbols printed on it). Red gives the die to, for example, their right-hand neighbor, so that they roll on the lion's behalf.
They roll a miss. Since the lion has one more Trident symbol than the team, it may re-roll once. The right-hand neighbor decides to do so. On the second roll, they roll a critical hit.
Red immediately loses one of their gladiators. They choose the Trident Bearer and place it back in the box (the right-hand neighbor does not receive it, since they only rolled on the lion's behalf as a stand-in). The duel is over.
A Player Has No Gladiators Left
If a player loses their last gladiator in play, they keep playing anyway. When it is their turn, they choose any animal on the board and challenge with it, as if it were their own gladiator team. Before doing so, they may move the animal on the board if they wish. They may also choose an animal that is laid out face up next to the board and place it on any free space of the board in order to immediately challenge with it. Any gladiators this player defeats with the animal are taken for themselves and placed in front of them.
(Note: The chosen animal does not belong to the player. Another player without gladiators may choose the very same animal to challenge with. If a player without a gladiator is at their turn again, they may choose any animal they wish.)
Game End
The game ends immediately as soon as only one player still has gladiators on the board. That player then takes their remaining gladiators off the board and adds them to their defeated gladiators. The game also ends immediately if all 12 animals have been defeated. In that case, all players who still have gladiators in the arena add them to their defeated gladiators as well.
Now all players count their points. Every gladiator a player has in front of them is worth 1 point, and every animal a player has in front of them is worth 2 points.
The player with the most points wins.