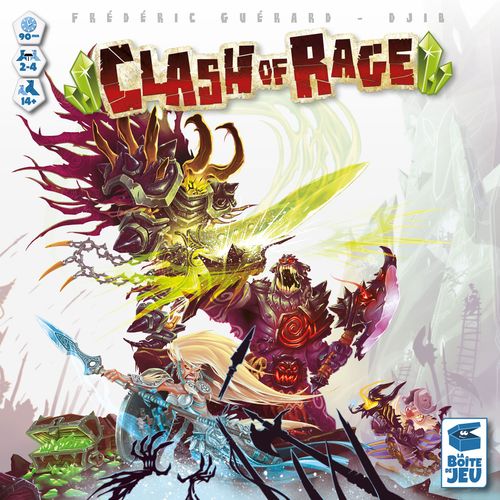
Clash of Rage
Clash of Rage Rulebook
Table of Contents
Table of Contents
Prototype Contents
- 4 Clan cards
- 4 Stronghold tiles
- 28 Tactics cards (7 cards per clan)
- 31 Level I unit tokens
- 23 Level II unit tokens
- 14 Level III unit tokens
- 4 Hero cards and their token
- 1 Elf clan card
- 15 tokens with Shining Guard Elf on the front / Crystals on the back
- 15 tokens with High Elder Elf on the front / Crystals on the back
- 15 tokens with Templar Elf on the front / Crystals on the back
- 57 Equipment cards: 34 weapon and 23 armor
- 9 Legendary Equipment cards: 5 weapon and 4 armor
- 5 Region tiles printed on both sides
- 25 Gold coins worth 1 and 25 Gold coins worth 5
- 8 Rage tokens
- 10 dice (each die has 4 wound sides and 2 blank sides)
- 1 booklet of rules
Goal of the Game
You dream of becoming a legend. In order to do so, conquer the Cities of the Elves and forge Legendary Weapons.
Whenever you eliminate an Elf or plunder a controlled City you gain Elven Crystals, a very powerful and precious resource from which Legendary Equipment is forged.
Each Elven City you control as well as each Legendary Equipment you forge earns you 1 Victory point. Elven Cities can be taken from you, in which case you immediately lose the Victory point their control gives. On the other hand, Victory points earned through Legendary Equipment always remain yours.
You immediately win the game if you have 4 Victory points during your second Action of the turn.
Setup
-
Take as many Region tiles as players. Assemble the board by placing the Region tiles as you wish.
-
Put the Elf Unit tokens face up as follows:
- 4 Elf tokens in Territories that have an Elven City.
- 2 Elf tokens in Territories that have a Forge.
Tip: Put the Elf tokens randomly, or increase the difficulty by putting at least one of each type (Shining Guard, High Elder, Templar) in each Elven City.
Put the unused Elf unit tokens to be used as Crystal tokens in a reserve close to the board on their Crystal face. Put the Elves clan card close to them.
-
Choose the clan you want to lead and take its Clan card, Stronghold tile, 7 Tactics cards and Unit tokens. Put all these in front of you in what is your Reserve.
Option: Clans can be randomly assigned by shuffling the Clan cards and dealing them face down.
-
Shuffle the Equipment cards into a face down draw pile. Constitute a Black Market by drawing Equipment cards until you have 6 different pieces of Equipment. Identical pieces of Equipment are stacked.
-
Shuffle the Legendary Equipment into a face down draw pile.
-
Put the 4 heroes face-up and their token close to the Black Market.
-
Put the Gold coins, the Rage tokens and the dice in a common area within reach of all.
Tiles Description
- Reinforcement Stone. Depending on their color they provide Reinforcement between the 2 Action phase.
- Forge. You need Forge to craft Legendary equipment. Forges are protected by Elves at the beginning of the game.
- Rocky Ranges. Rocky range are impassable. A unit can't move through a mountain unless it has the Flying ability.
- Elven city. They are one of the way to win the game. Elven cities provide 3 Crystals at the beginning of your turn. Each Elf city under your control also give you 1 Victory Point.
Clan Description
Each Clan card shows the name of the clan, and three Units — Level I, Level II and Level III — each with its Strength, Movement capacity of the unit, Life, and the maximum number of that Unit you can recruit. Some Units have Unit Special Abilities shown on their card.
Tactic Card Description
A Tactics card shows:
- Turn order: it is the order in which the players resolve their Actions in increasing order, i.e. the player who played the lowest number starts.
- Reinforcements: Add these Units from your Reserve to your armies.
- Income: Gain as much Gold as indicated.
Game Turn
A Turn is a succession of 5 phases:
- Improving the Elves
- Playing a Tactics card (simultaneous)
- Playing the First Action (following game order)
- Activiting the Reinforcement Stones (simultaneous)
- Playing the Second Action (following game order)
Phase 1 - Improving the Elves
Note: Skip this phase during the first turn.
Draw one Equipment card for each type of Elf that has Units in play following the order indicated on the Elf card (Shining Guard>High Elder>Templar).
- If an Elf type does not have an Equipment (Weapon or Armor) of this type yet, immediately assign the card by placing it in the appropriate slot of the Elf card.
- If it already has an Equipment on this slot and its cost is lower than the Equipment you just drew, replace it. Otherwise, the Elf keeps the previous Equipment.
Note: there is no point in equipping a type of Elf of which there are no more Units on the board.
Discarded Equipment cards are put at the bottom of the Black Market draw pile.
Improving the Elves example: In the second turn, the Elves get a Crossbow, a Massive Armor and a Plate Armor. In the third turn: the Sparkling Guard gets a Rock Breaker, more expensive than the Crossbow so you replace it. The High Dean gets a Blunderbuss on the arm Slot which was free. The Templar get a Shaman's Coat but its cost is lower than the Massive Armor so you discard the Shaman's Coat.
Phase 2 - Choosing a Tactics Card
All players choose simultaneously one of the three Tactics card they have in hand and put that card face down in front of them. When all players have done so, they reveal the cards and put them face up on their discard pile. A Tactics card indicates a player's turn order, reinforcements and income.
1st turn only: On the first turn, by following the turn order, all players take turns placing their Stronghold tiles. Stronghold tiles must be adjacent to at least one Territory on the Board and cannot be adjacent to another Stronghold.
Income
Receive as many Gold coins as indicated on your Tactics card.
Elven City bonus: Receive +3 Crystals for each Elven City you control.
Reinforcements
Following turn order, the players take the Reinforcements indicated on their Tactics card from their Reserve and assign them freely in their Stronghold and/or any Territory in which they have at least one Unit.
Note: you can always place your Reinforcements on your Stronghold even if you have no Units there. On turn 1, you have no other choice but to place your Reinforcements on your Stronghold.
Note: If you do not have enough Units in your Reserve, Units that cannot be drawn are lost! You may not move Unit tokens that are already on the Board as Reinforcements.
All players draw a Tactics card and bring their hands back up to three cards.
If the draw pile is empty, shuffle the discard pile into a new draw pile.
1st turn only: Shuffle your 7 Tactic cards into a face down draw pile and draw 3 cards.
Phase 3 - First Action
Following the turn order, all the players execute any one of the following Actions:
- Moving their armies.
- Equipping their armies.
Note: you may choose to play no Action, in which case the turn goes to the next player.
Moving Your Armies
You can move all or some of your units within the limits of their movement capacity. A Unit moves from one Territory to another connected one at the cost of 1 movement point. A Unit cannot cross Rocky Ranges and must end its move when it enters a Region controlled by enemy Units (Elven or another player's).
Flanking: if you have already sent as many Units in a Territory as there are enemy Units there, then any other Unit you send through this Territory does not have to end its move. It may cross this Territory freely. This is called "Flanking".
Hero: a Hero does not count as a Unit for flanking purposes.
Flight: Units that have the Flight ability can cross Rocky Ranges and ignore enemy Units during moves.
Note: you cannot move Units onto another player's Stronghold.
Once you have completed all your moves, you must resolve all the Battles in all the Territories in which your Units are with enemy Units. You chose the order in which the Battles are resolved (see Chapter "Resolving a Battle", p.11).
Moving example: The Bohorg Horde wants to reach the Stone. The Goldleif Clan's Rocky Range blocks the passage on the south; there are Elves on the North. There is only 2 Elves in the city and the Horde decides to flank both the Elf City and the Berserker.
Equipping Your Armies
You can play one, some or all of the following actions: purchasing Equipment on the Black Market, forging ONE (and only one) Legendary Equipment, reorganising all the Equipment on your Clan card, and recruiting one (and only one) Hero.
Note: Gold coins and Crystals that you spend during this Action are put back into the common reserve.
Purchasing Equipment on the Black Market
You can purchase one or more piece of Equipment by paying its cost. Pieces of Equipment are purchased separately one after the other.
The Market must always be stocked with 6 different pieces of Equipment. After each purchase, if the offer is less than 6, immediately draw and reveal a new Equipment. If the Equipment is already stocked, stack it face up on top of the one already there and draw another one.
Forging a Legendary Equipment
If you control at least one Forge, you can spend Crystals to forge a Legendary Equipment (once per Action). The cost in Crystals depends on the number of Forges you control:
- 0 Forge > No forging possible
- 1 Forge > Cost 6 Crystals
- 2 Forges or more > Cost 4 Crystals
When you forge a Legendary Equipment, draw 1 Legendary Equipment +1 per Forge you control. Choose 1 Legendary Equipment and shuffle the others back into the draw pile.
Organising Your Equipment
Attach the purchased and/or Legendary Equipment to your Units by placing it in the appropriate slot. If the Unit already has an Equipment in that slot, you can move the previous Equipment to another Unit or remove it and put it next to your Clan card.
Note: removed Equipment can be later placed back on a Unit during a reorganisation.
Equipment Description
Each Equipment card shows its Name and Cost. Slot: Location on your Clan card. Colors also indicate the slot — purple Equipment are placed on the arms slot and green Equipment are placed on the Body slot. Each card also shows a Bonus.
Legendary Equipment Description
Each Legendary Equipment card shows its Name, Slot (location on your Clan card) and a Bonus.
Recruiting a Hero
You can recruit a Hero by paying its cost (only once per Action). Take the Hero's card and its token.
Put the Hero card next to your Clan card and its token on your Stronghold or in a Territory where you have at least one Unit.
A Hero never dies: if the last Unit in the Hero's army is eliminated, move the Hero to your Stronghold.
A Hero does not desert: you cannot get rid of a Hero. Once you buy a Hero, it stays with you until the end of the game.
A Hero is never alone: a Hero must always end its move in a Territory in which you have at least one Unit.
Hero Description
Each Hero card shows its Name, Cost, Token, Bonus, Movement, and its Effect (Special Ability), described on the card.
Phase 4 - Reinforcement Stones
All players who control Territories in which there are Reinforcement Stones receive one Unit of the type indicated by the Stone in that Territory, provided there is such a Unit in their Reserve.
The Reinforcement Stones indicate:
- Level 1 Unit
- Level 2 Unit
- Level 3 Unit
Phase 5 - Second Action
Following the turn order, all the players execute any one of the following Actions:
- Moving their armies.
- Equipping their armies.
Victory and End of the Game
You get 1 Victory point per Elven City you control.
You get 1 Victory point per Legendary Equipment you have forged.
A player who has 4 Victory points during his/her second Action immediately wins the game.
Long game: Play for 5 Victory points.
Resolving a Battle
When?
At the end of an action during which you moved your armies.
Where?
In every territory where there are both one or more of your Units and one or more enemy Units (another player's or the Elves').
How?
In any order you choose.
You must complete a battle before moving on to the next.
The player whose turn it is to play is the Attacker. The other player or the Elves is the Defender.
A Battle is resolved in successive Assaults. The Elves are played by the player to the right of the Attacker: that player rolls the dice and decides how to assign the damages. That player chooses whether to listen to the advice from other players.
Who Strikes First?
Determine the speed of the army: the players count the number of Speed symbols that are on their participating Units and their Equipment.
The Army that has the lowest number of Speed symbols is the quickest and has the initiative. If there is a tie, the Defender has the initiative.
Note: The number of Units doesn't matter. Only the type of Unit who are participating in the battle.
Launching an Assault
The number of Units of the same type participating in an Assault has no effect on the Assault.
Roll the dice: When it is your turn to launch an Assault, roll as many dice as the strongest participating Unit. Do not forget to add Equipment bonuses to the Unit's Strength when determining its Strength.
Rerolls: Calculate the total number of Reroll symbols on your participating Units. Each Reroll symbol allows you to reroll any number of dice.
Note: The Elves have to reroll all their failed die rolls when they have Rerolls.
Example: The strongest Unit in the Battle has a Strength of 9. 6 from the Unit and 3 as a Bonus from the its equipement. The player rolls 9 dice while he still have at least one Unit of this type in the Battle.
Calculating Wounds
- +1 Wound for each Wound symbol rolled.
- +1 Wound for each Bonus symbol your participating Units have.
- +1 Wound for each Rage token you have.
- -1 Wound for each Bonus (Shield) symbol enemy participating Units have.
Eliminating Units
Assign Wounds as you wish among enemy Units. All the Wounds must be assigned.
A Unit is eliminated when you deal it as many Wounds as its Unit type has Life.
If you no longer have enough Wounds to eliminate a Unit, remaining Wounds are lost.
Eliminated Units are returned to their owner's reserve.
Eliminated Elves are collected by the player who eliminated them and turned into Crystals. Put Crystal side up in that player's reserve.
Heros: you cannot eliminate a Hero.
Receiving a Rage Token
If you do not eliminate any Unit during an Assault, take a Rage token and keep it until the end of that Battle. Discard all your Rage tokens at the end of the Battle.
Fleeing
When it is your turn to roll, you may choose to flee instead. Reposition any surviving Units as well as any Hero onto your Stronghold.
Note: Fleeing is more often used by the Defender rather than by the Attacker so as not to lose Units. However, keep in mind that you need available Units for Reinforcements. Taking the risk of losing Units in order to deal damage to the other army is not always a bad idea when you know the lost Units will be back as Reinforcements on the following turn.
End of Battle
All the players take turns launching Assaults until all enemy Units are eliminated or one of the players decides to flee. The Elves fight to the death and may not flee.
Heros: the Hero of a defeated army returns to the Stronghold.
Attacking Example
Example: The Bohorg Tribe army has a Speed of 2 since there are only Krag riders and an Executionner on the Battlefield.
The Army has a strength of 8 as the Executioner is the strongest Unit (6+2). The player rolls 8 dice while he still have at least the Executioner on the Battle.
He adds +1 Wound for the Krag rider Bonus but not the 2 from the Pummeler as there are none inolved in the Battle.
He also has one reroll if needed thanks to the Shaman's Staff.
Heros
Heros use the same rules as Units when moving. However, Heros are not counted as Units, and are therefore not included in the Flanking count, even though they may benefit from Flanking if other Units are already present.
Also, in Battle, Heros do not count as Units when resolving effects. They have a Special Ability whose effect is described on their card and they usually provide a bonus (automatic hit, reroll or shield). If a Hero ends up facing enemy Units (Elves or player) alone (with no Unit at its side), the Hero automatically flees from Battle and returns to its owner's Stronghold.