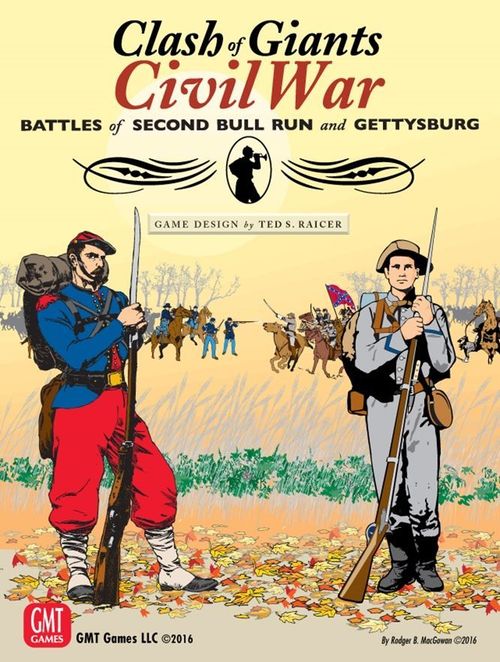
Clash of Giants: Civil War
Clash of Giants: Civil War Rulebook
Table of Contents
Table of Contents
- 3.0 Game Components
- 4.0 Game Setup
- 5.0 How to Win
- 6.0 Sequence of Play
- 7.0 Stacking
- 8.0 Zones of Control
- 9.0 Reinforcements/Replacements
- 10.0 Command
- 11.0 Operational Movement
- 12.0 Combat
- 12.1 In General
- 12.2 Combat Action and SCM Activation Combats
- 12.3 Who May Attack
- 12.4 Indivisibility of Units
- 12.5 Combined Attacks
- 12.6 Mandatory Attacks
- 12.7 Order of Attacks
- 12.8 Combat Strengths and Tactical Efficiency Ratings [TERs]
- 12.9 Combat Procedures
- 12.10 Retreats
- 12.11 Terrain Effects on Combat
- 12.12 Flank Attack
- 13.0 Artillery
- 14.0 Cavalry
- 15.0 Night Turns
- 16.0 Design Notes
3.0 Game Components
The components to a complete game of Clash of Giants III: The Civil War include:
- This rulebook (containing the CoG series basic rule set)
- One Battle Book (containing the exclusive rule set for each battle)
- Two map sheets
- Two copies of the player aid card
- One Confederate Movement card (Gettysburg)
- One Union Movement card (Gettysburg)
- Two sheets of counters
- Two six-sided dice
3.1 The Game Map
The maps depict the battlefields over which the Union and Confederate forces fought in August 1862 and July 1863. A hexagonal (hex) grid has been printed over the maps to regulate the placement and movement of units. Each hex contains natural and/or man-made terrain features that can affect both the movement of units and combat between units. Each hex has a unique four-digit identification number. These hex numbers are used when setting up a game.
Note that the compass rose on the map has been adjusted slightly from magnetic north to align directions with the four map edges for ease of reference. Whenever a compass direction is given in the rules, use the directions as they are printed on the compass rose.
Each map also contains a Retreat Compass that indicates in which direction units of each side normally retreat. The charts and tracks printed on the maps are used to record and resolve various game functions. Their uses are explained in the appropriate rules sections below.
3.2 The Counters
The counters included in the game represent combat formations (also called "units"), or are provided as informational markers and memory aids. Every combat unit counter displays several pieces of information: nationality, historical identification, unit type, combat/step strength, Tactical Efficiency Rating (TER), turn of entry or setup code or hex number. All units are brigades unless otherwise indicated.
3.2.1 Sample Combat Unit
The unit above is Armistead's brigade of Pickett's Division of the Army of Northern Virginia's I Corps. It is a two-step infantry unit, has a Tactical Efficiency Rating of 4, and enters the game as a reinforcement on game turn 9.
3.2.2 Nationality
A unit's nationality is indicated by the background color of the unit counters, which varies per battle:
- Gettysburg: USA = Light Blue, CSA = Tan
- 2nd Bull Run: USA = Medium Blue, CSA = Light Gray
Design Note: We opted to vary the background colors of the units as an aid in differentiating which units are associated with which battle.
3.2.3 Command Designation and Historical ID
Each combat unit is identified by its historical brigade name and/or an abbreviation of its name (see the Battle Book for details). Superior command designations identify groups of units operating together under a single commander (represented by a Command marker). Superior command designations have an effect on stacking and define groups of units that will move at the same time.
Design Note: The Union army used numbers rather than names for brigades and divisions, but for flavor, I've instead chosen to follow the Confederate style for both armies and use names.
A Formation can be identified by either a colored background behind the Superior command designation (2nd Bull Run) or a colored symbol on the counter (Gettysburg). All on-board units sharing a common colored background or symbol constitute a Formation. During the Mutual Reinforcement Phase, all units sharing a common colored background or symbol that are scheduled to arrive in a single turn are considered to be a single separate Formation until they are actually placed in an Entry Hex.
3.2.4 Unit Types
The pictures in the center of the counters indicate unit type. The unit types are: CSA Infantry, USA Infantry, USA Cavalry (Gettysburg); CSA Infantry, CSA Cavalry, USA Infantry, USA Cavalry (Second Bull Run).
3.2.5 Movement Allowance
This is a measure of a unit's ability to move across the hex grid printed on the map. Units pay various movement point costs from their Movement Allowance to enter different hexes, based on the terrain in the hexes and along the hexsides around them. The Movement Allowance for all units is determined on a Formation by Formation basis by the use of the Command Table (see 10.0 and 11.0) (Exception: Cavalry units have a printed Movement Allowance that they use at all times).
3.2.6 Combat/Step Strength
In Clash of Giants III: The Civil War a unit's combat strength is equal to its current step value. All units have either one step, two steps, or three steps. Two or three step units may be reduced by combat. Units which have lost their last step are eliminated.
3.2.7 Tactical Efficiency Rating
Every combat unit has a Tactical Efficiency Rating (hereafter TER) representing the unit's level of training, the skill of its officers, and its general morale. The higher the number, the better the unit. A unit's TER may never be modified below one.
3.2.8 Markers
-
Artillery Marker (AM): Used to mark that friendly units engaged in combat are receiving offensive or defensive artillery support.
-
Combat Action marker: Used to indicate that a player has performed his single Combat Action that turn.
-
Command Marker (CM): Used on the Command Track to record the current Movement Allowance of all units in the indicated Formation; also used to determine the order in which Formations are activated.
Note: A duplicate set of Command Markers has been provided once the originals start to look "worse for wear" (as these markers see a lot of use).
-
Control marker: Marks a hex as controlled by one side or the other.
-
Delay VP markers: Used to track the current number of VPs awarded for delays to units/formations.
-
VP markers: Used to track the current number of VPs earned by both sides due to unit casualties and control of Geographic objectives (see scenario-specific rules).
-
Out of Command (OOC) marker: Marks a unit that is outside the Formation Command Range (FCR; see section 10.4) of its currently Active Formation. Such units may not attack or move adjacent to an enemy unit.
-
Special Command Marker (SCM): Command markers with unique characteristics noted in the specific section of the Battle Book for each scenario.
4.0 Game Setup
Choose which side (USA/Union or CSA/Rebel) each player will command. For each scenario, players should set up according to the instructions found in the Battle Book.
5.0 How to Win
5.1 Game Victory
Victory is determined by the control of certain hexes, the exiting of units off the map, and the elimination of enemy steps, as explained in the Battle Book. In general, victory is determined at the end of the final turn of the scenario being played, though in some cases an earlier Automatic Victory is possible.
5.2 Hex Control
This is important when determining victory. Hex control markers are used to help keep track of which player controls a victory hex. A side gains control of a hex at the instant one of its units enters that hex. Control of a hex may switch any number of times during play. The Battle Book details which hex is controlled by which player's side at the start of the game.
6.0 Sequence of Play
6.1 The Turn Sequence
Each game turn is divided into "phases," during which players conduct specified actions. Every action taken by a player must be carried out in accordance with the sequence given below. Once a player finishes his activities for a given phase, he may not go back to perform some forgotten action, or redo a poorly-executed action unless his opponent graciously permits it.
6.2 The Sequence of Play
I. Mutual Reinforcement Phase (CSA acts first in all cases) A. Early Entry Reinforcement Attempts B. Reinforcement Delay Determination (Battle-dependent) C. Reinforcement Arrivals
II. Artillery / Special Command Marker Phase
III. Operational Phase A. 1st Command Activation i. Movement/Combat B. 2nd Command Activation etc. i. Movement/Combat, etc.
IV. Retreat Phase
V. Night Phase (Night Turns only) A. Simultaneous Surrender B. CSA Replacement C. USA Replacement
VI. Game Turn End Phase
6.3 Phases and Procedures
6.3.1 Mutual Reinforcement Phase
The CSA player may now attempt Early Entry (9.3) for any eligible Formations. After he has completed all such attempts, the Union player may attempt Early Entry. When the Union player has completed his attempts, the CSA player then checks for Reinforcements (9.2) or Variable Reinforcements (9.4). When he has completed these steps, the Union player repeats those same steps for his side. Both players then place all Formations that have been determined to arrive this turn in their appropriate Entry Hexes. Place any newly arriving Artillery Markers (AM), Command Markers (CM), or Special Command Markers (SCM) with your currently available markers. Most will go into an opaque cup in the Operational Phase.
6.3.2 Artillery/Special Command Marker Phase
Both players place all their currently available AMs in an opaque cup, keeping count of the total number of AMs placed. Players then randomly draw ½ (rounded down) of the number of AMs placed in the cup, returning to each player the AMs drawn belonging to his side. These represent the artillery available to each side this turn. The remaining AMs in the cup are set aside — they will not be used this turn. Note that in some cases some AMs may not be placed in the cup, but are automatically available for use (see Battle Book for details).
Both players then set out any SCMs they have available this turn. Note that in some cases a die must be rolled to determine whether a particular SCM is available that turn (see Battle Book for details).
Optional Rule (Greater Artillery Realism). As one draws the chits from the cup one puts the chits face down (the unit backs are color-coded) in front of the appropriate player. That player may examine and use his chit as required — but his opponent does not see which artillery chit it is until it is used, at which point it must be revealed.
6.3.3 Operational Phase
Both players place all CMs into an opaque cup, unless instructed otherwise (see the Battle Book, and below, for details). Exceptions: CMs and SCMs (if any) of entirely destroyed Formations should be removed from the game.
On the turn that a unit's CM arrives, the player must choose how to treat the CM at the beginning of the turn. He can either immediately place the CM into the cup with all of the other markers, in which case it will be drawn normally (see below). Alternatively, he may set it aside. After all other CMs have been drawn for the turn, any CMs that have been set aside are put in the cup and are then drawn normally.
Design Note: This allows players to ensure that newly arriving units will be activated later in the turn, when roads may be less congested.
During Night Turns (only) a player may choose to withhold a single CM from the cup. SCMs are never used on Night Turns.
Players should alternate each turn to randomly draw markers from the cup. The player whose CM has been drawn or whose SCM is being used then rolls a die and locates the result on the selected Formation's Command Track to determine the current Movement Allowance for all units of that Formation. (Note that some SCMs may modify the die roll. See the Battle Book for details.) Place the CM/SCM on the appropriate Command Track space as a reminder. The owning player may then move units of the currently active Formation up to the limits of their current Movement Allowance.
At the end of all movement of that Formation the owning player may declare that side's one Combat Action for that Operational Phase (see 12.0 Combat below). This may only be done for each side once per turn. Additionally, an SCM draw allows the just-activated units (only) to attack (see 12.6. Also see Battle Book for details). However, a player may not combine his map-wide Combat Action and SCM attacks during the same activation.
Play Commentary: An SCM that is played in addition to (rather than in place of) one or more CMs will allow affected units to activate twice in a turn for both movement and combat. On the first turn in Gettysburg, units from the Union I Corps can be activated both by Reynolds and the I Corps CM. Units activated by an SCM that replaces a CM (such as Howard) will only activate once for movement, though they could still participate in a side's single declared combat action as well as the combat allowed by the SCM.
When a player declares his Combat Action, place his Combat Action marker on the Turn Record Track as a reminder that he may not declare it again that turn.
Players continue drawing CM/SCM chits and performing Operations until the cup is empty, upon which the Operational Phase is complete.
6.3.4 Retreat Phase
At the end of the Operational Phase all friendly units in clear terrain adjacent to an enemy unit in clear terrain at a higher elevation must immediately retreat 4 hexes, following the restrictions in 12.10.2 - 12.10.4 (Exceptions: If another friendly unit is adjacent to the enemy unit and is at the same or higher elevation; or if friendly units are separated from the enemy units by a Steep Slope or River hexside — then no retreat is necessary). These retreats are conducted simultaneously for both sides. If for some reason the unit can't retreat the full 4 hexes it remains in place and suffers a step loss.
6.3.5 Night Phase (Night Turns Only)
At the end of a Night Turn (only) both players simultaneously check to see if their surrounded units (if any) surrender. Next, first the CSA player and then the USA player may be able to use replacements to bring reduced units back up to full strength or bring eliminated units back onto the map at reduced strength. See 9.6 and 15.3 for details.
6.3.6 Game Turn End Phase
Both players check for Automatic Victory. If either (or both) side(s) has (have) achieved an Automatic Victory, play ends (see Battle Book for details).
If no Automatic Victory is achieved, and it is not the last turn of the game, remove all CM/SCMs from their Command Tracks. Advance the Game Turn marker and begin a new game turn with the Mutual Reinforcement Phase.
At the end of the final game turn, determine victory according to the rules in the game being played (see Battle Book for details).
7.0 Stacking
7.1 In General
Stacking is the placement of more than one unit into a single hex at the same time. Stacking limits are only enforced at the end of each Formation's activation, including any Combat Action. Units using Reinforcement March Movement and Road Movement both have special stacking restrictions throughout their movement. Units found to be stacked in excess of the stacking limits at these times are eliminated by their owning player. As long as applicable stacking limits are observed in every hex at the appropriate points during a Formation's activation, there is no limit to the number of units that may enter or pass through a given hex during a player's Operational Phase.
7.2 Stacking Limits
There are no stacking limits in lettered Reinforcement Entry hexes. Otherwise, a player may stack up to two units in the same hex. Units may only stack if they contain the same divisional designation (Exception: If no other units of the parent division are in play because they have been eliminated, or if the unit has only a corps designation, it may stack with any unit of the same corps).
Informational markers never count against this numerical limit.
7.3 Cavalry Stacking
A cavalry unit may not stack with an infantry unit. A cavalry unit may stack with any one other cavalry unit of his side.
8.0 Zones of Control
8.1 In General
All combat units (cavalry and infantry), regardless of their size, type, or current combat strength, have a Zone of Control (hereafter ZOC) that extends into the six hexes adjacent to the hex occupied by the unit.
8.2 ZOC Effects
Units must halt movement when they enter an enemy ZOC. Units which begin movement by exiting an enemy ZOC may not reenter an enemy ZOC that activation. (Exceptions: Advance after Combat (12.9.7) and Emergency Withdrawal (11.5)). Units may not trace a Formation Command Range (FCR; see 10.4) or retreat through an enemy ZOC. Enemy ZOC are negated by the presence of a friendly unit for purposes of FCR range, retreat, surrender, and Emergency Withdrawal only. Units in different hexes wishing to combine to attack a single hex may do so provided that all enemy units in their ZOC will be attacked, or have already been attacked, by other friendly units during that activation (also see section 12.4).
8.3 Terrain Effects on ZOC
Check the Terrain Effects Chart (TEC) to see if a unit's ZOC extends into a given terrain hex or across a hexside (also see note of 11.5 for effects of terrain on ZOC and Emergency Withdrawal).
9.0 Reinforcements/Replacements
9.1 In General
Reinforcements are new units entering play for the first time. Replacements are previously scattered troops who return to their units at night, and are used to rebuild existing units that have taken combat losses. In all such cases, the CSA player acts before the Union player.
9.2 Reinforcements
Reinforcements enter the game on the turn indicated on the unit and according to the Battle Book. Initially, each player decides if they wish to attempt early entry of any reinforcements due to arrive next turn (see Early Entry; section 9.3) and resolves those attempts. Next, resolve (if applicable to the Battle and if any) variable reinforcements (see section 9.4). Note that a player may never voluntarily delay their reinforcements to a later turn. Also note that all SCM counters are never entered early, nor ever delayed.
If a Formation's entry has not been advanced or delayed, roll to see if it arrives at a different location. On a roll of 1-4, place the reinforcing units in the lettered Entry Hex listed on the counter. On a roll of 5 or 6, the units are placed in the alternate Entry Hex indicated by the small die symbols on the Entry Hex.
It is possible for Union and CSA units to both end up at the same entry location at the same time. In that case the CSA Formation has precedence; move the Union Formation(s) to the nearest lower lettered Entry Hex that does not contain a CSA Formation.
Optional Rule. Players who wish may ignore all Early Entry (9.3) and Variable Entry (9.4) rules and just bring in units on the listed Turn and location. This will be more historical in one sense, but allows both players greater use of hindsight.
9.3 Early Entry
Except for units entering on the first turn of the game, units may attempt to enter a turn early. During the Reinforcement Phase of the turn before their scheduled turn of entry roll one die for each Formation you wish to enter early. On a roll of 1-3 it enters this turn. On a roll of 4-5 it enters one turn after the arrival turn printed on the counter. On a roll of 6 it enters two turns after the arrival turn printed on the counter. Do not roll for further delay or alternate location regardless of the result. Players may wait to see the results of a given Early Entry roll to decide if they wish to attempt another for units of a different Formation. Note that if a Formation's units enter early then so does that Formation's CM (if not already available), and possibly AMs, if the AM(s) were scheduled to arrive on the same original turn as any of units in question.
Note: A corps CM available for Early Entry enters when any Formation of the corps enters. However, SCMs always arrive on their scheduled turns.
9.4 Variable Reinforcements (Battle-Dependent)
Roll one die for each Formation scheduled to arrive this turn to determine if there is a delay. This roll is made for newly arriving units even if other units from the division or corps are already on the board. On a roll of 1-4 the Formation enters this turn. On a roll of 5 it enters next turn. On a roll of 6 it enters in two turns. If the Formation has been delayed, it will arrive at its original location (i.e., it will not roll again for further delay or alternate location). Note that any delayed Formations' CMs and AMs scheduled to enter this turn are also delayed.
9.5 Reinforcement Entry Hexes
Reinforcements are placed in an Entry Hex using the procedure in 9.2. There are no stacking restrictions in Entry Hexes, and ZOC do not extend in or out of those hexes. Units may not attack into or out of an Entry Hex, nor may any unit enter such a hex once it has left. All units must leave their Entry Hex the turn they enter. If they are blocked from doing so by enemy units or stacking restrictions, they enter at the nearest board edge hex that is not in an enemy zone of control.
9.6 Replacements
If no units from a Formation activate during a Night Turn (because the player withheld its CM from the cup) one reduced unit of that Formation that is not adjacent to an enemy unit may increase its Step/Combat strength by 1. Alternatively, an eliminated unit with two or three Steps may return to play with a Step/Combat strength of one stacked with a unit of that Formation not adjacent to an enemy unit. Note that units with only a single Step strength may never return to play once eliminated. Subtract Enemy VPs as required.
10.0 Command
10.1 In General
Each turn, players randomly draw CMs from an opaque cup to determine which Formation(s) are now active. The owner of the marker must then roll on the Command Track (located on the 2nd Bull Run map, and on a separate Play Aid for Gettysburg) for each such Formation to determine the current Movement Allowance for that Formation's combat units. Generally a separate roll is made every turn for each Formation in play, and every unit of that Formation has the same Movement Allowance that turn. A player will roll for and move each Formation individually, finishing all movement for one Formation before drawing a new CM to determine the next active Formation. Command Track rolls affect movement only, not combat.
10.2 Command Tracks
Each Formation has its own Command Track. If a track contains two different die roll ranges (one at the top of the track and one at the bottom) the Battle Book rules indicate which to use.
10.3 Command Roll Exceptions
Exceptions to the above are found in the rules in the Battle Book, which take priority over these rules.
10.4 Formation Command Range (FCR)
To be activated as part of a Formation, pick any one unit of that Formation and trace an FCR of no more than four hexes (three intervening hexes) from that hex, not through impassible hexsides, un-negated enemy ZOC, or enemy units (but note terrain exceptions on the TEC to the effects of enemy ZOCs). Units of that Formation that fall within that FCR (inclusive) are considered In Command, and may therefore be activated normally; units that start outside the FCR should have an Out of Command marker (OOC) placed on them until the end of that activation. (Exception: Reinforcements entering the map that turn are automatically considered In Command, and may therefore be activated as part of their Formation). OOC units activate normally but may not move adjacent to an enemy unit nor attack even if already adjacent (Exception: Units OOC during an SCM activation remain inactive).
11.0 Operational Movement
11.1 In General
A unit's Movement Allowance is determined by the Command Track die roll for its Formation, and may change from turn to turn. The resulting number is the number of Movement Points (MPs) available to the unit for movement during its Operational Phase. A player may move all, some, or none of his activated units in each of his Operational Phases. Units move from hex to adjacent hex, paying varied MP costs depending upon the terrain in the hex being entered and/or hexsides crossed. These costs are detailed on the TEC.
11.2 Limits
- Movement Points may not be accumulated from turn to turn, nor lent from one unit to another.
- Moving units need not expend all available points before stopping.
- The movement of each unit must be completed before that of another is begun.
- Once a move is done, a player may change it only if his opponent allows it.
- No unit may move more than once per activation.
- Advances and retreats performed during the Combat Phase are not considered movement for the purpose of this rule.
- Units which begin movement in an enemy ZOC may not enter another enemy ZOC during that activation (Exception: Emergency Withdrawal; see section 11.5).
11.3 Movement Terrain Effects
See specific terrain effect details below, in the Battle Book, and on the TEC for the cost (if any) in MPs to enter a hex and/or cross a hexside and other effects (if any). Individual buildings have no effect on play.
11.3.1 Entry Hex
No stacking limits. Units must exit on turn of entry and may not re-enter.
11.3.2 Road
Two road hexes are connected if the road depiction crosses the hexside that separates them. See sections 11.6 and 11.7. Where roads cross rivers, additional Bridge/Ford hexside movement costs apply (see the TEC). No such additional costs apply when crossing a creek hexside via road.
11.3.3 Woods
Cavalry may never enter or exit a woods hex unless doing so between connected road hexes. Woods may allow for Emergency Withdrawal (see section 11.5).
11.3.4 Higher Elevations
It costs one extra MP to enter a hex from a lower elevation unless using Reinforcement March Movement (11.6) or Road Movement (11.7). Higher elevation hexes may allow Emergency Withdrawal (11.5).
11.4 Minimum Movement
An active unit may spend its entire Movement Allowance for the activation to move one hex, regardless of the actual movement cost to do so. It may not enter or cross prohibited terrain while doing so, nor may it ignore ZOC restrictions. Units that are out of command during an SCM activation are not active (10.4) and may not use this ability.
11.5 Emergency Withdrawal
A unit that has not yet moved that activation may negate, for movement purposes, any enemy ZOC extending into its hex for any friendly units that begin their movement adjacent to it provided those units move only in a direction allowed by the Retreat Compass, and do not end their move adjacent to any enemy unit. The unit negating the enemy ZOC ("holding the door open") for the withdrawing unit(s) may move normally after such a withdrawal is completed.
Important Note: An empty woods hex may take the place of a friendly unit for the purpose of this rule. A hex that is at an elevation higher than all enemy units adjacent to it may also take the place of a friendly unit for the purpose of this rule.
Design Note: In the case of Emergency Withdrawal, the woods or higher elevation hex takes the place of a friendly unit "holding the door open."
11.6 Reinforcement March Movement
Only on their turn of entry (and only on their initial activation), reinforcing units may opt to move along roads at the rate of ¼ MP per hex, plus any Bridge/Ford crossing costs. Such units may not stack, or at any point move adjacent to an enemy unit OR a friendly unit on the same road (Exceptions: The adjacency restriction for friendly units does not include other friendly units in the entry hex; Town hexes behave slightly differently, see below). They may only move along roads through connected road hexsides. All roads in Town hexes connect. Units may pass through Town hexes adjacent to other friendly units. They still may not move into or through Town hexes containing friendly units. They may not move adjacent to enemy units. A unit using this movement may not use any other type of movement that activation.
11.7 Road Movement
All units (including entering Reinforcements if they choose) may make use of connected road hexes to move at 1 MP per hex, plus any Bridge/Ford costs. Road movement may not be used to enter a hex containing another unit or to enter an enemy zone of control (units can still move into such hexes along the path of the road, but must pay regular terrain costs). During an activation, units may use regular movement after they use road movement, but may not use road movement after using regular movement. Note that cavalry may only move into (and leave) woods hexes when using connected road hexes.
12.0 Combat
12.1 In General
During a player's one allowable Combat Action during an operational phase, or during an SCM-activated Formation's combat, they can attack all enemy units across playable hexsides that are adjacent to eligible friendly units. The active player is always considered "the attacker", and the other player is "the defender", no matter the overall situation on the map. Attacking is usually voluntary, but when conducted follows the procedures below.
12.2 Combat Action and SCM Activation Combats
There are only two methods by which a player may conduct Combat each turn.
i) A player may choose a single Combat Action each Turn after moving all currently active units; the Combat Action allows attacks by all friendly eligible units, not just those currently activated. A Combat Action may involve Mandatory Attacks.
ii) Units activated by an SCM may attack after all units of the activated Formation(s) have moved. In this case only the currently activated units may attack, and there are no Mandatory attacks. Rules for Combined Attacks are still in effect.
Note: Combat Actions may not be declared during SCM activations.
12.3 Who May Attack
An enemy-occupied hex may be attacked in one battle by as many units as can be bought to bear from the surrounding hexes. A single defending hex may thus potentially be attacked by up to six surrounding enemy stacks. However no single attack may have as its objective more than one hex (i.e., multiple defending hex combats are not allowed).
All units in a defending hex must defend together. All units in an attacking hex do not have to attack together. Some attacking units could attack a different hex, or not attack at all. Units with their Combat/Step Strength number in parentheses ( ) may never attack. No attacking unit may attack more than once per Combat Action or SCM Activation, and no defending unit may be attacked more than once per Combat Action or SCM Activation. Cavalry units may never attack infantry units.
12.4 Indivisibility of Units
No single attacking unit may have its combat value divided and applied to more than one battle. Likewise, no defending unit may have part of its defense factor attacked by one or more attackers while another part is attacked by others.
12.5 Combined Attacks
Units in different hexes may combine to attack a single hex only if all other enemy units in each attacker's ZOC will be (or have already been) attacked by other friendly units during that Combat Action or SCM Activation. Should a conflict arise between choosing a Mandatory attack (see below) or attacking all enemy units the Combined Attack requirement takes precedence. Cavalry and infantry may never combine together in an attack.
12.6 Mandatory Attacks
During the Combat Action (not an SCM Activation), friendly units adjacent to enemy units must attack those units if:
a. They themselves are infantry (only) in clear hexes; b. The enemy units are in clear hexes at a higher elevation; and, c. They are not separated from the enemy units by a Steep, Railway Embankment, Railroad Cut, or River hexside.
(Exception: If any friendly units are adjacent to — and at equal or higher elevation than — the enemy's hex, then no friendly unit is required to attack the units in that enemy hex. Such friendly units need not attack — simply their presence is sufficient to remove the obligation of any units to attack.)
Non-woods Roads, Railroads, Unfinished Railroads, and VP hexes are considered clear hexes for the purposes of this rule. Note that if a single friendly unit is adjacent to multiple enemy units under these conditions, it is only allowed to, and only has to, attack one of them (attacking player's choice).
Even a unit that is Out of Command is required to make a Mandatory Attack.
All enemy units creating a Mandatory Attack situation must be attacked by friendly units if possible. This may force two units in a stack to separately attack two enemy-occupied hexes (attacker's choice if there are more than two hexes that qualify).
Note: See the Battle Book for an illustrated example of 12.5 and 12.6.
12.7 Order of Attacks
Aside from the restrictions described above, there is no limit on the number of attacks each player may initiate during each combat phase. The attacker need not declare all attacks beforehand, and the attacks may be resolved in any desired order, as long as the resolution of one is completed before the next is begun.
12.8 Combat Strengths and Tactical Efficiency Ratings [TERs]
A unit's combat strength is the same as its current step value (basically a measure of the unit's size). Combat strengths are used to determine the odds of a particular combat and the resulting die roll modifiers (DRMs) for the Combat Resolution Step. Combat strength may be modified by terrain as shown on the TEC. Step losses are inflicted as a result of combat. A unit's TER may only be affected by a Flank Attack.
Design Note: Tactical Efficiency Rating, or TER, is a measure of the unit's ability in combat, including its training, leadership and weaponry.
12.9 Combat Procedures
If the attacker's force does not contain any cavalry units and the defender's force does, then the defender may initiate a Cavalry Retreat from Combat (see section 14.3). Otherwise, the attacker designates all attacking units and the defending hex (all enemy units in the hex must defend together). The attacker — followed by the defender — may then commit artillery (if available) to the attack (see section 13). The players calculate the combat odds as explained below, and check the Combat Chart to determine the die roll modifiers (DRMs), if any, for combat resolution. The DRM used on attacking units is to the left of the slash, the DRM used on defending units is to the right. An N means that side's units cannot be affected by that particular combat. To resolve combat, each player rolls for his own units (defender first) using the DRMs (if any) obtained from calculating the combat odds.
12.9.1 Combat Odds
The attacking player should strive to have more attack factors involved in a given battle than the defender has defense factors. Such battles are called "high odds attacks." The attacking player calculates the "odds." Add the attack factors of all the attacking units involved in the battle; then add up the defense factors of the units defending in the battle. Divide that defender total into the attacker's total and round any remainder in the defender's favor.
12.9.2 Attacker Loss Limit
The chart also lists the maximum number of attacking units (Attacker Loss Limit) that may be affected (must conduct combat rolls) in that combat. When the attacker has more units involved than are required to be involved in the combat result, that player may choose which units will participate.
EXAMPLE 1: At 2-1 odds the table lists "–1/+1," which indicates all attacking units will subtract one from their combat resolution rolls, while all defending units will add one to their combat resolution rolls. The attacker loss limit is 4, so if five or more units were involved in that attack, the attacker would only have to roll to resolve combat on four of them (attacker's choice).
EXAMPLE 2: In a 4-1 odds attack involving four attacking units against defenders in a clear hex, the attacker would choose two of the four units (the Attacker Loss Limit at those odds) for the combat resolution roll. At 4-1 odds those units would subtract three from each die roll.
12.9.3 DRM Limit
Die rolls may never be modified above 6 or below 1.
12.9.4 Unmodified Rolls
Natural rolls of 1 and 6 are never modified by DRMs. A roll of 1 is always No Effect, while a die roll of 6 is always a Step Loss.
12.9.5 Defender Rolls
The defender must roll one die for each defending unit. If the modified die roll is less than or equal to the unit's TER, there is no effect. If the modified die roll is greater than that unit's TER, the defending unit loses a step and must immediately retreat a number of hexes equal to the difference between the modified die roll and its TER (to a maximum of three hexes). Retreat only each unit in the stack that takes a step loss. Each unaffected defending unit remains in place. A defending unit's TER may be affected by a Flank Attack (12.12).
12.9.6 Attacker Rolls
After the defender has resolved combat for all his units, the attacker must roll the die once for each attacking unit (but he need not roll for more units than his Attacker Loss Limit). If the attacking unit's modified die roll is greater than that unit's TER, that unit takes a step loss. Attacking units never retreat.
12.9.7 Advance after Combat
If all defending units were forced to retreat or were eliminated (or were cavalry that retreated before combat; see section 14.3), the attacker may advance some or all of the surviving attacking units into the defender's hex (regardless of enemy ZOCs) up to the stacking limit. The decision to advance must be made immediately, before any other battles are resolved. The defender never advances after combat.
12.10 Retreats
12.10.1 Retreat Distance
A defending unit forced to take a step loss must retreat a number of hexes equal to the difference between its modified combat resolution die roll and its TER, to a maximum of three hexes. (Exception: Units defending in Town hexes must always retreat at least three hexes on any retreat. They must also end their retreat in a non-Town hex). The retreating unit must end its retreat the number of retreat hexes distant from all attacking enemy units in the battle (even if that means retreating more hexes than indicated by the differential or more than three hexes). If the retreating units cannot retreat the required number of hexes they are eliminated.
12.10.2 Retreat Direction
If possible, each hex of a unit's retreat must be in a direction indicated by that side's retreat compass. They may retreat in any other direction only to avoid elimination due to enemy ZOCs and impassable hexes or hexsides (including the edge of the map). Units are retreated by their owning player. Units which are unable to retreat the full distance required by the roll or that are forced to retreat off the board are also eliminated.
12.10.3 Stacking During Retreats
Retreat only the unit(s) in a stack required to retreat (do not retreat those not sustaining step losses). Stacking limits must be observed at the end of a unit's retreat — if the only hex into which a unit can retreat would cause it to overstack, retreat that unit additional hexes to reach a hex where it is within the stacking limits. If no such hex exists it is eliminated.
12.10.4 Enemy ZOCs
Units may not retreat into or through any enemy ZOC, but the presence of friendly units negates enemy ZOCs for the purposes of retreat.
12.10.5 Retreat and Additional Combat
If a unit retreats into a hex which is then attacked in that Combat Phase it adds nothing to the defense and is automatically eliminated if the defender takes any losses.
12.11 Terrain Effects on Combat
12.11.1 Defense Factors
All combat effects and restrictions caused by terrain are based on the defender's hex.
See the TEC for the additional defense factors added to — or removed from — each defending stack (not each unit).
All effects are cumulative (e.g., a stack defending at a higher elevation being attacked across a Steep Slope would add a total of two defense factors to the combined defensive combat strength of its units).
12.11.2 Prohibited Terrain
See the TEC for hexes into which combat is prohibited and hexsides across which combat is prohibited. Hexsides that prohibit movement or hexes into which movement is prohibited also prohibit advance or retreat after combat.
12.11.3 Clear
Infantry units in clear terrain may be required to perform a Mandatory Attack (see 12.6).
12.11.4 Hill
Darker hills represent a higher elevation than lighter ones. Hills add +1 to defense total of the stack when attacked entirely from lower elevations.
12.11.5 Town
Units defending in town hexes have their combined Combat Strength reduced by one (but never below 1). If obligated to retreat, units defending in Town hexes must always retreat three hexes and must end their retreat in a non-Town hex or be eliminated. ZOCs do not extend into town hexes.
12.11.6 Woods
Cavalry may never move, attack, advance, or retreat into (or out of) a woods hex — unless performing the action between two hexes connected by a road.
12.12 Flank Attack
A unit attacked by enemy units from four or more hexes; or three hexes each of which is not adjacent; or the exact opposite sides of the defending hex (other attackers may participate) is considered flanked: subtract two from the defender's TER (but never below 1). (Exception: Defending units on a higher elevation than all attacking hexes are not flanked and do not subtract from their TER.)
13.0 Artillery
13.1 In General
If available this turn, an AM may add 1 factor to the combat strength in a single combat in which at least one unit of its Formation is participating. Each AM may only be used once per Turn. The attacker and the defender may each use a maximum of one AM in a given combat, regardless of how many different Formations either may have involved in that combat. AMs never suffer any combat results. Each battle has additional special artillery rules (see Battle Book).
13.2 Artillery Markers (AM)
Not all in-play artillery are available each turn. Instead, players use the procedure in 6.3.2 to determine which AMs are available this turn.
13.3 Declaring Artillery
The attacker must always declare any artillery marker he is using in a combat before the defender.
13.4 Terrain and Artillery
See the TEC for effects on artillery which indicate where it may not be used in attack or defense (and may similarly be prohibited across hexsides which wholly separate all attackers from all defenders). All restrictions refer to the hex of the unit being fired upon.
14.0 Cavalry
14.1 Movement Restrictions
- Neither Infantry nor cavalry units are permitted to end their movement stacked with the other type of unit.
- Cavalry may only enter or exit woods by using road hexsides.
14.2 Restrictions on Combat
- Cavalry units may never attack infantry units.
- Cavalry and infantry units may never combine in an attack.
- Cavalry may retreat before combat [14.3].
14.3 Cavalry Retreat Before Combat
The defending units in a hex containing only cavalry units may Retreat Before Combat when attacked by a force containing no cavalry. The decision to retreat must be made before the combat resolution die roll is made. To do so, the defender must roll the die once for each cavalry unit which wishes to retreat. If the die roll is equal to or less than the unit's current TER the unit may retreat: immediately retreat the units three hexes under the same restrictions as combat retreats, except that each hex of Cavalry Retreat Before Combat must be in a direction allowed by the retreat compass for that side (otherwise the unit may not retreat). Units stacked together may retreat to different hexes. The attacker may advance into the vacated hex. Such advancing units may not make another attack during that Combat Action.
15.0 Night Turns
15.1 Operations at Night
CM markers are drawn normally during Night Turns (as per non-Night Turns). SCMs and AMs are not used during Night Turns. A player may withhold a single CM from the cup during a Night Turn in order to take Replacements (see section 9.6).
15.2 Combat at Night
No combat is allowed during Night Turns. Units may not move adjacent to enemy units during Night Turns, but units already adjacent to enemy units may remain (Exception: See section 6.3.4).
15.3 Night Phase Surrender (Night Turns only)
At the end of a Night Turn, all friendly units that cannot trace a path of hexes through non-prohibited terrain, free of enemy units or non-negated ZOC, to any Friendly Reinforcement hex on the designated side(s) of the map (see the Battle Book for details) are considered surrounded. Friendly units that are surrounded and adjacent to an enemy unit surrender and are eliminated. Surrender is simultaneous for both sides.
16.0 Design Notes
Clash of Giants III: The Civil War (or CoG III as some have called it) takes a system designed for one era, WWI, and uses it to simulate a different era, the American Civil War. This is hardly unprecedented: SPI used Napoleon at Waterloo as the basis for all its Quad games, from the Civil War to NATO, and Avalon Hill famously used the same basic rules and CRT for all its early designs. And I used the Paths of Glory system, considerably modified, for WWII: Barbarossa to Berlin. Still, if this use of one system for different eras isn't unusual, in this case it was unexpected.
Clash of Giants II contained my design on the First Ypres campaign, and it played out as a meeting engagement at the end of the 1914 Race to the Sea. Only a few units of each side started on the map, with forces for both sides arriving somewhat haphazardly over the course of the game. To give people with little knowledge of First Ypres a feel for the game, and because it was a meeting engagement, I took to calling it "the Gettysburg of the First World War." After months of saying that, I began to wonder if the CoG system, properly modified, might work for the "Gettysburg of Gettysburg," and thus CoG: Civil War arrived in my to-do box as unexpectedly as the two armies at that Pennsylvania town.
Once the idea took hold I realized that there were indeed similarities in WWI and Civil War combat, even before one arrived at the trenches of 1864. Through most of the Civil War and in the opening months (at least) of WWI, generals used the campaigns of Napoleon as an operational model, trying to win the war by bringing the enemy forces to a decisive battle. And in both cases they mostly failed, though sometimes more narrowly than we credit today. And because armies in both wars were organized on Napoleonic lines, with infantry corps, divisions, brigades and regiments, supported by artillery and with separate cavalry formations, command and control presented similar problems (albeit on a much larger scale in 1914). Since command and control were basic elements of Clash of Giants, with its chit draws and variable movement allowance die rolls (representing various forms of command "friction"), the basic framework was easily ported from one design and era to the other.
At the level of combat there were similarities as well: in both wars similarly-equipped armies, consisting largely of rifle-armed infantry, faced each other on the battlefield. In both wars, concerns about vulnerable flanks dominated (until the establishment of trench lines on the West Front in WWI made flank attacks impossible). Both training and morale varied (as expressed in the TER), though in WWI the differences were more between than within national armies. The greater range and destructiveness of First World War weapons, as well as the larger size of the armies, could be easily handled by changes in map and time scales.
Of course, there were significant differences "at the sharp end." The biggest was the far greater effectiveness of artillery in 1914-18 than in the 1860s. In WWI artillery was so important that I simply factored it directly into the combat strength of the units. But given the map scales it would have been normal to include artillery units in CoG: Civil War, despite their more limited impact. So why Artillery Chits instead of artillery units?
Two reasons. The first, again, was the limited effectiveness of Civil War artillery. Including them as actual units would either have made them more a focus of player's actions than they were in real life, or if they were kept historically weak, added a lot of units to move around the map to little purpose. The other reason was my dislike of Line of Sight rules, which at best I find clumsy, and at worst have spoiled (for me) otherwise enjoyable designs. Using artillery chits allowed me to limit artillery's importance to historical levels, and avoid the whole LoS issue. Basically, artillery was either supporting an attack or defense, or going after other artillery. The artillery vs. artillery duels are abstractly handled by the availability of chits: the player with more artillery in the cup is more likely to have superiority at that point in the battle. This gives the CSA a small edge until the Union reserve artillery arrives, at which point the guns will favor the Union. The unusual CSA massed bombardment on the third day of Gettysburg required its own rule, but — as was the case historically — is unlikely to do much more than deplete Rebel ammunition.
Finally, why Gettysburg and Second Bull Run? As I wrote above, Gettysburg gave me the idea for the design, and provided a battle I knew well enough to test the system against. Second Bull Run was not an obvious second choice, but the Union command problems seemed to call for the chit pulls and variable movement rates of the CoG system. In the end, it was a much harder battle to simulate, since Pope never understood the situation he faced at any point during the battle. But I believe we have come up with an effective compromise between forcing the Union player to make Pope's mistakes and giving him an ahistorical free hand.