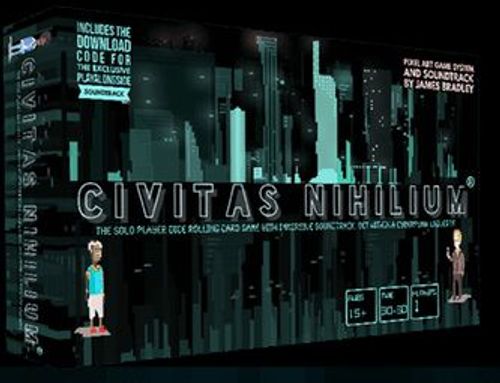
Civitas Nihilium
Civitas Nihilium Rulebook
Table of Contents
Table of Contents
The Basics
In a Nutshell
You draw Cards into pools, bring them into play, pick target numbers to get, roll dice to try and get them, add modifiers, add tokens, remove tokens, flip Cards, roll on those flipped Cards, and repeat.
Along the way you may add bonuses to dice rolls using numbers called Skill Modifiers. You may also modify your results and slightly bend the rules of the game by adding and using upgrades, and/or special abilities.
If you succeed to hit the target (or above) on a Card in play you win things. These could be extra Cards to bring into play, extra resources, and so on. Your main Resources are represented by translucent six-sided dice and numbered tokens known as Evidence.
If you fail to hit the target on a Card, you lose stuff. This could be resource loss, your health, or the forcing of chaotic Encounter Cards into immediate play.
All of the resources you are trying to win are important, but the ultimate resource is Evidence. At the beginning a certain number of Evidence is displayed using numbers on tokens. These are placed on the top of a Card that is initially drawn face down.
Only when you have succeeded on enough dice rolls and collected all of the Evidence on top of that flipped Card may you turn it over and roll toward the three target numbers on the underside of that final Card.
Repeat this entire process three times without losing all of your Reputation or Health Resources and you win the game.
Colour Coding of Numbers
- Numbers in teal are either starting Resources on Character Cards, or they are targets you are trying to hit (or get above) with your rolls on other Cards.
- Numbers in green are what you win if you hit or exceed the teal target number requested on a Card, or they are simply what you get in other circumstances.
- Numbers in red are what you must lose if you miss a target on a roll, or what you spend if you buy or charge something for an upgrade.
Character Cards
Starting the Game
At the start of the game you draw 3 Main Character Cards and 3 Rookies. You pick one of each. The rest go into the discard pile.
Your two main Cards are a Main Character and a Rookie. The two Cards you choose at the start of the game, whose stats you use to better position yourself to win trials (rolls), buy Cards (upgrades), Qualify (enable certain Cards) and ultimately collect enough Evidence to win the game.
- Main Characters have a teal border. The box contains 13 Main Characters.
- Rookies have a white border. The box contains 12 Rookies.
Reading a Character Card
Your Main Character and your Rookie Card both have similar card faces. These card faces show:
- Three starting Resources for each Character. These are the first three numbers found on the right-hand side of each Main Character and Rookie card.
- Three starting Skills (Skill Modifiers) for each Character. These are the second group of three numbers on the right-hand side. They are not represented by dice.
- Starting HP, which is also the Character's HP maximum. This is the final number on the right-hand side.
- A Special Ability in the box at the bottom of the card. Each Special Ability is unique to every Main Character and Rookie.
Resources
Resources are the points you use to help you Qualify Cards, buy upgrades, or add points to rolls on certain Final Encounter Cards. There are three Resources:
- Reputation helps you to Qualify certain Cards, and sometimes modify rolls on certain Final Encounter Cards. Reputation is featured as a Qualifier on certain Witness and Location Cards, and is shown by the teal number on the Character Card (the Rosette symbol). It is represented by blue dice for tracking purposes. Lose it and you're dead. Gain it and you can manipulate, interrogate and arrest anyone in Civitas Nihilium.
- Ether helps you to buy certain upgrade Cards, bribe or exchange, and sometimes modify rolls on certain Final Encounter Cards. It is shown by the teal number on the Character Card (the Ether symbol) and is represented by green dice for tracking purposes. It is featured on upgrade Cards as the main fee for the Card. Get to places, re-use upgrades, and use it to influence certain factions.
- IonCharges help you to Qualify certain Cards, charge certain upgrades so you may repeatedly use them, and sometimes modify rolls on certain Final Encounter Cards. They are shown by the teal number on the Card (the IonCharge symbol) and are represented by purple dice for tracking purposes. They are featured on Cards as Qualifiers, and on Cards as fees known as charges for repeated use of upgrades. Buy the best upgrades and bribe people.
Resource+ symbols: when you flip a final Encounter Card, look out for these symbols. They help you to spend Resources 1 for 1 in exchange for additional points on your dice rolls, but only on Final Encounter Cards. They are not found anywhere else. See the section on Final Encounter Cards below.
Tracking Resources With Dice
The coloured D6s simply represent your Resource score from the beginning and as it changes in-game. All three Resources have a maximum cap of 18 per Character. Resources can be shared between both Characters (see below).
- IMPORTANT: One die should always be used to track a Resource score all the way to 6 before adding a new D6 for every Resource. For example, 9 Rep is shown as one die on 6 and one die on 3.
- IMPORTANT: It is the same principle when losing Resources: you must work down from 6 on each die. A total of 5 + 4 + 3 (12 in total) is not allowed; instead there should only be two dice with 6 and 6 on their faces, not three showing 5, 4 and 3.
- Tokens are not coins. Tokens are markers that make up numbers. What has five on the front might have 3 or 1 on the back, so tokens are left with their correct values facing up. You only flip them over when you want to reduce your total number by a certain amount.
Each Resource is capped at three dice to a line, making the total Reputation, Ether or IonCharges any Character can hold a maximum of 18.
Skills (Skill Modifiers)
Skills are the numbers you add to modify your dice rolls on most Cards. They are also known as modifiers and Skill Modifiers. Each Character has three Skills, and the Skill number is set on the Character Card.
- Charisma. The number is added to a roll when it is in the chosen or forced path on a Card trial. Charisma may be interpreted on certain Cards as "Question" and sometimes as "Manipulate". Normally Charisma is linked to gaining and losing Reputation. If you win with Charisma you get Reputation, and if you lose with Charisma you lose Reputation.
- Engagement. The number is added to a roll when it is in the chosen or forced path on a Card trial. Engagement tends to be interpreted on Cards as "Arrest". Normally Engagement is linked to gaining Ether, and if a loss occurs it results in the taking of wounds.
- Analysis. The number is added to a roll when it is in the chosen or forced path on a Card trial. Analysis may be interpreted on certain Cards as "Interrogate", "Search", "Search the Scene" and sometimes as "Hack". Normally Analysis is linked to collecting Evidence, but that isn't always the case; if a loss occurs, negative effects could result in the loss of any Resource, including the addition of more Evidence.
Dice Rolling and Trials
Rolls are made with the FateD10 (also called the fateD10 or D10). A roll is basing the result on the added Skills of whichever Character you choose or are forced to roll for.
Example of a basic trial: you need to get a total of 18 or above using the skill called Engagement to win this trial, claim the 8 Ether, or fail to hit 18 or above and take 5 wounds. The Main Character has a +3 Engagement and the Rookie has a +1 Engagement. The Main Character rolls first and gets an 8, which becomes 11 with the +3. The Rookie rolls a 7, which becomes 8 with the +1. The total is 19, which beats the 18 target, so you win 8 Ether and do not take the 5 wounds.
Symbols at the front of a trial bar tell you which Character to use for the target number:
- A symbol that tells you that you roll twice: once for your Main Character plus their Skill Modifier, then again for your Rookie plus their Skill Modifier.
- A symbol that tells you that you roll once, only for your Main Character plus their Skill Modifier.
- A symbol that tells you that you roll once, only for your Rookie plus their Skill Modifier.
- A symbol that tells you that you choose: either you roll for your Main Character plus their Skill Modifier, or for your Rookie plus their Skill Modifier.
The symbols always sit at the front of the trial bar. They help you to know what to do with the FateD10 and the result(s). Examples from the source:
- Both Characters roll (combined result). Your Main Character and your Rookie both roll, each adding their Engagement Skill Modifier to the result, hoping to get an 18 or above with the combined result. If they pass, they get 8 Ether. If they fail, they take a total of 5 wounds and do not take the 8 Ether.
- Main Character only, Charisma. Only your Main Character rolls a d10, hoping to get a 5 or above with the result, using their Charisma Skill Modifier. If they pass, they collect 3 Evidence AND 2 Reputation. If they fail, they lose 2 Ether AND 3 Reputation.
- Rookie only, Charisma. Only your Rookie does this trial, hoping to get a 6 or above with the result, using their Charisma Skill Modifier. If they pass, they collect 2 Evidence AND 3 Reputation. If they fail, they lose 2 Reputation AND must draw and play immediately 1 Encounter Card.
- Either Character, Analysis. Your Main Character OR your Rookie rolls, adding their Analysis Skill Modifier, hoping to get a 9 or above with the result. If they pass, they collect 4 Evidence. If they fail, they lose 8 Reputation.
Points to note about trials:
- Shared rewards and losses. When you win something in green on any Card trial, regardless of who rolled it, it may be shared between your two Characters. If you win 5 Reputation using only your Main Character, you may choose to give 3 to your Main Character and pass the remaining 2 over to your Rookie.
- Shared losses. The same rule applies when you lose a Resource due to a failed trial: it may be spread out between the two Characters. It also counts when spending for upgrades and when charging them with IonCharges to use them. The only time this rule is not enforced is when taking wounds via individual trials made by Characters. Example of a split trial: the Investigation trial is set to Arrest (Engagement), and both Characters roll the d10 and add their Engagement modifiers. Two rolls of 1 gave a grand total of 11 (because the Main Character's special ability also gave the Rookie an extra 2 on the Engagement trial), which is short of 18. The team fails and takes 5 wounds, shared between the Characters (3 to the Main Character and 2 to the Rookie). The team does not take the 8 Ether.
IMPORTANT: If only your Main Character OR Rookie rolls and takes wounds, those wounds cannot be shared. They have to go to the Character who rolled.
Health (HP) and Wounds
HP is reduced when you take wounds. You take wounds by adding wound tokens to your respective Character Cards. A Character's HP can never exceed the number displayed on its Character Card, which is its total HP maximum.
- Normally, the main Cards to gain back your HP tend to be Locations, such as med centres, food outlets, backstreet clinics, and the occasional jail. Normally you have to pay Ether for care, but in some circumstances Cards allow you to gain full HP for nothing.
- In the terminology, the word Swap means pay or exchange, and the word Remove means take away a Wound, thus adding HP point(s) back to your total HP.
If you run out of HP, that Character dies.
Reputation Loss and Losing the Game
- If your Main Character runs out of Reputation, they are removed from the game. Rookies can have zero Reputation.
- If both Characters have zero Reputation, the game ends.
Resources, Skills and HP are the backbone to surviving Civitas Nihilium. You track Resources using your D6s, and you add your Skills to your D10 (FateD10) rolls on trials. Special Character abilities, upgrades and certain Encounter Cards can manipulate those numbers.
Crimes
Setting Up a Crime
- Find the larger-sized Cards labelled Crime on the back. Separate them into their piles of Green, Yellow and Red. Green is easy, Yellow is medium, and Red is hard.
- Shuffle the Green Crime deck. Draw one Green Crime Card and look at it. This is the name of the Crime (for example, "The Hackers of Civitas Nihilium").
- Find the matching, similarly sized Final Encounter card (also referred to as an FEC) with the same name from the Final Encounter deck. Try not to look at it in any great detail. Set that card face down in the position marked Final Encounter on the layout.
- Go back to the initial Crime Card. Look at your pile of Evidence tokens and add this amount to the top of the flipped FEC. Remember, tokens are not coins.
The Evidence amount on the top of the FEC is the target you need to collect from this Crime. For example, if the Crime starts with 20 Evidence, 20 is the target. Each Evidence you collect from a trial reduces that number; if you collect 3 Evidence, the target goes from 20 to 17.
The first aim of all Crimes is to collect all of the Evidence that is set on the initial Crime Card and laid on top of that Crime's Final Encounter.
Building the Investigation
The Crime Card may first tell you which side to set up from. For example, a Crime may ask you to roll a single FateD10 (no Skill Modifier). A roll of 7 means you look at side B, which covers rolls between 6 and 10.
Key to the acronyms used in Civitas Nihilium:
- WC - Witness Card
- LC - Location Card
- FRC - First Responder Card
- EC - Encounter Card
- FEC - Final Encounter Card
The Crime Card's trial section tells you what to draw into your Investigation. For example: draw 1 First Responder, 1 Witness and 3 Locations into your Investigation.
- The First Responder is drawn from its own deck, face down. FRCs do not flip until you move on to them.
- Witnesses and Locations are drawn from their Reveal Pools (see below).
- Where the Crime Card says to add a Resource, you may add 1 Resource of any type to a Character. For example, a Rookie who starts with 0 Reputation may be given 1 Reputation.
The Cards you draw are arranged into your Investigation Timeline (also called the investigation deck), which is the order in which you will deal with them. You may change the order of these Cards at any point.
Reveal Pools
The Reveal Pool is the set of three spaces to the right of the Witness and Location decks, and the three spaces to the left of the Upgrade deck, on the layout.
- Witnesses and Locations stay in their Reveal Pool until they are pulled into play when requested via other Card effects.
- Upgrades are pulled into play usually when they are purchased.
- Witness and Location Reveal Pools have locked slots for a potential 4th and 5th card. The Upgrade Reveal Pool has a 4th locked slot.
- When you unlock a slot within any of your Reveal Pools, you open the boundaries of possibility towards the success of your investigation.
- To unlock a slot, you take a Card into your investigation when a Witness or Location is requested: the slot stipulated is then unlocked. No trial is needed, sometimes a Qualifier applies, but it always unlocks.
Qualifiers
Qualifiers turn up on Witnesses or Locations. A Qualifier is a required amount of one or more Resources (Reputation, Ether, IonCharges). Qualifiers on Locations are shown with yellow borders in the example.
- You cannot attempt a trial on a Card unless your combined Resources (across both Characters) match the Qualifiers listed on the Card.
- Remember: you do not spend Qualifiers; you only have to have them.
- If you do not Qualify for a Card, it can still be in your Investigation Timeline. Position the Card you cannot access near the end of the Investigation Timeline, which gives you time to build Resources to Qualify, or to collect enough Evidence before you need to attempt it.
- IMPORTANT: If you get to a Card in an investigation that has a Qualifier you cannot meet, you must immediately draw an Encounter Card and resolve it before anything else.
- If the Encounters you face this way do not raise your Resources enough to Qualify, you keep drawing Encounters until one of the following happens:
- both your Characters lose all HP, and you die;
- both your Characters lose all of their Reputation, and you die;
- you collect all of the required Evidence via those Encounter Cards (this can happen);
- you draw new Cards into your investigation via those Encounter Cards (this can also happen).
- To prevent this, select Cards from the Reveal Pools that you can eventually reach, and position your Investigation Timeline in Qualifying order, starting with the zero or lowest Qualifiers and going from there. This is happening throughout the game as new Cards are pulled in and your Resources change.
The Upgrade Phase
Buying Upgrades is also known as Taking Upgrades. The Upgrade Phase takes place directly after the Cards detailed on the Crime are pulled into the investigation, and just before the Investigation Timeline's First Responder Card is flipped.
When choosing Upgrades, consider:
- Whether they are affordable without affecting your Qualifiers negatively.
- Whether they will help you to boost your Reputation.
- Whether they let you get rid of Cards you do not want (maybe in exchange for things you do want).
- Whether they increase your chances of collecting more Evidence.
- Whether they increase your chances of pulling more Cards into the investigation to trial.
Always read exactly what each Upgrade does. An Upgrade:
- Costs the Ether amount shown in the top right of the Card to buy.
- Has a continuing IonCharge fee, shown by the number of IonCharges, to use it again and again. First usage on all Upgrades that require IonCharges still uses them to activate. To use it, you buy it with the Ether amount stated, then reduce your IonCharges by the number shown. As soon as you spend the IonCharge, the Upgrade works.
- May have a Reputation, IonCharge or Ether symbol on it. This symbol is just a guide or prompt should you decide to place the Upgrade under a Character Card.
Examples from the source:
- An Upgrade costing 1 Ether to buy and 1 IonCharge to use again and again, allowing a Reputation Qualifier on a Witness to be bypassed (but not a Qualifier on a Location).
- An Upgrade costing 5 Ether to buy and 0 IonCharges to use, after which all other Upgrades attached to the Character in possession of it no longer need to spend IonCharges to activate.
- An Upgrade costing 10 Ether to buy and 3 IonCharges to use again and again. It allows an Encounter to be removed: after an Encounter Card is flipped, you may choose whether or not to use this Upgrade to remove that Encounter, paying the IonCharge fee. A removed Encounter is placed to the bottom of the Encounter Deck. The Resources spent to activate this Upgrade can be shared.
Halving
When something in this game is halved, it is rounded down, but never to zero. So a 1 halved stays 1. For example, with 3 Ether and a halved cost of 5 (rounded down to 2), buying the PWR MAX-MICRO Station leaves 1 Ether, enough to buy the Comms Module. There is no such thing as a free upgrade.
The Transhuman Main Character's Special Ability halves upgrade costs in the example playthrough.
Purchasing Limits and Replenishing Slots
- You may purchase a maximum of 3 Upgrades at any one Upgrade Phase, or whenever you are told you may take Upgrades, unless a Card rule says otherwise, or unless the 4th additional Upgrade slot in the Reveal Pool has been unlocked.
- Ether and IonCharges may come from both Characters, or from different Characters, to pay for any Upgrade, including the IonCharge costs.
- Once an Upgrade is purchased, it is attached to your chosen Character, where it must stay and only affect the game from that position for the rest of the game (for example, Character dice rolls). Upgrades may not be swapped between Characters.
- Empty Upgrade slots must be filled when, and only when, you are finished purchasing. You cannot fill a gap and then purchase that Upgrade; you must wait until the game next allows it. This is when you are instructed to "Take Upgrades", "Purchase Upgrades", "Visit the Upgrade Store" or "Start an Upgrade Phase".
- Taking Upgrades does not mean stealing them. You always have to pay for any Upgrades you take.
- When you can Purchase Upgrades:
- directly after drawing the last Card into your Investigation from a Green, Yellow or Red Crime Card;
- when a Card tells you to do so, such as an upgrade Location Card, a Witness, or a Black Market Encounter.
- When you buy an Upgrade, the empty slot is refilled from the Upgrade deck. This signals that the Upgrade Store is closed until it reopens, either at the same point on the next Crime setup or when a Card you play tells you to do so.
Reuse of Upgrades
Provided you have the IonCharges, you may use an Upgrade as many times as you like, but you must always spend that IonCharge cost each time.
Upgrades are not Qualifiers. The Resources you spend to buy or use them must leave your Character's stash.
First Responders
First Responders are always the first Cards you deal with after the initial Crime Card trial. They are the first officials to the scene, and like most Cards in this game they can be dealt with in a number of different ways, depending on your team's strengths and what you want or need from the investigation. Each First Responder Card (FRC) offers choices.
- First Responder trials are always dealt with first.
- Once you have completed a trial on a First Responder, it must be placed to the bottom of the First Responder Deck.
- First Responders are never discarded.
Example FRC choices from the source:
- Question. Your Main Character only rolls a d10 and adds their Charisma Skill Modifier. The target is 7. If the roll plus Charisma is 7 or above, they collect 3 Evidence from the FEC and get 3 Reputation. If the roll fails to get 7 or above, you lose 4 Reputation.
- Search the Scene. Your Main Character and Rookie both roll a d10 and add their Analysis Skill Modifiers to the result. The target is 10. If their rolls plus their Analysis Modifiers total 10 or above, they collect 4 Evidence from the FEC and get 1 Location Card. If the roll fails to get 10 or above, you lose 4 Reputation and draw an Encounter Card.
- Exchange. You can bribe the Officer for information in the form of an exchange: Ether for Evidence. For every 1 Ether you give, you get 1 Evidence back. No trial is required. Exchanges are default 1 for 1, unless stated otherwise on Cards.
Trial Bars and the Special Abilities in Play
Symbols at the front of a trial tell you which Character(s) roll (see Dice Rolling and Trials above).
Special Abilities can change who rolls. Example: the Rookie's Special Ability allows the Rookie to be brought into a solo trial by the Main Character. Spending any one Resource lets the Rookie roll their d10 and add their own Skill Modifier. The combined result of the two Characters' rolls is compared to the target.
- Spend before you roll. Before the FateD10 is ever rolled, you must spend whatever you have to spend in order to allow any abilities to be involved in the trial. You cannot wait to see what happens after the first roll. Once the Rookie has been committed, that Resource is spent even if the Main Character's roll already wins the trial.
- Resources spent this way may be taken from either Character. In the example, 1 IonCharge spent for the Rookie's Special Ability is taken from the Main Character's IonCharges, reducing the purple die from 6 to 5.
- Resources can be shared in most situations. The only time they are not shared is when a Character receives wounds.
When you beat a target, you take the green results on that trial bar. In the example, a Charisma trial with a target of 7 won 3 Evidence and 3 Reputation. The 3 Evidence reduced the 20 Evidence target to 17, and the 3 Reputation was added to the Main Character, giving a Reputation total of 4 and an overall Reputation of 5.
Reputation is more valuable to a Main Character than to a Rookie. Rookies may survive without it, but if a Main Character loses theirs, they are out of the game.
Choosing the Route Through the Investigation
Once the Cards are in your Investigation Timeline, look at each Card individually and work out the best possible route through them.
- Study the Characters' abilities as you plan. A Rookie with a +1 on Charisma, +2 on Engagement and +1 on Analysis, who can come into solo trials with the Main Character for one of any Resource, is a different proposition from a Main Character whose skills are all zero but who can bypass all Witness Qualifiers.
- Witness and Location Cards offer several trial bars. You choose which one to attempt.
Example Witness trial options:
- A Main Character or Rookie on a Charisma roll with a target of 6 for 3 Reputation, with a fail loss of 2 Reputation.
- A Main Character or Rookie on an Analysis trial where the target is 8. If they get that or over, you collect 1 Evidence; if they miss it, you lose 5 Reputation.
- Both Characters roll Engagement for a target of 15. If they get 15 or above, you win 5 Ether. If they get below 15, you take 5 wounds.
Some Location Cards work differently and simply tell you to receive or do things. For example, a Location with a qualifier of 6 IonCharges may say: "DRAW 2 WC" (draw two Witnesses into your investigation, immediately), and then "Swap Ether for Reputation - no limit" (you may exchange your Ether for Reputation).
Some trials show a band of results. For example, when both Characters roll and use either their Analysis or Charisma Modifiers (the Characters must always roll on the same Skill): a total of 1-6 gives nothing, 7-9 gives 1 Evidence, 10-14 gives 2 Evidence and 3 Witnesses, and 15 or above gives 3 Evidence and 3 Witnesses.
Some trials can also remove Resources on failure, such as a trial where 1-6 wins nothing and loses 5 Reputation, 7-9 brings 2 Witnesses into the investigation and loses 1 Reputation, 10-16 collects 4 Evidence and loses 1 Reputation, and 17 or above wins 5 Evidence and loses nothing.
Drawing Cards and Drawing Blind
- When you are asked to draw a Witness or Location and the Reveal Pool is empty, you take the top card off the top of the relevant deck and place it into your Investigation Timeline. This is called drawing blind. The same rule applies to Witnesses if you are asked to draw those.
- When a Witness or Location leaves the Reveal Pool, the empty slot is refilled from its deck (see Replenishing Into Reveal Pools below).
- Evidence collected is put back into your bank or stash; it does not go anywhere else.
Witnesses and Locations Leaving the Investigation
- Witnesses that you have trialed are not discarded. After a trial, a Witness is moved to the Final Encounter Card as a Key Witness nominee (see Key Witnesses below). All Witnesses are moved this way after trialing with them or resolving their effects, and they are not discarded or placed to the bottom of their deck unless a rule on a Card says so.
- A Location that has been resolved goes to the bottom of the Location Deck.
- Some Witness options let you remove any number of Cards from the investigation deck in exchange for Evidence (for example, removing a Witness and other Cards from the Investigation Timeline and collecting 3 Evidence from the target).
Forcing Encounters
Sometimes it may make sense to force an Encounter. This is a strategic move where the player is completely out of options, so they do this in the hope of getting something better from the situation. Encounters are chaotic by nature. They can end the game immediately, but they can also make things very interesting and sometimes help the entire investigation.
Encounter Cards
- An Encounter is resolved immediately, as it is an Encounter Card. Your Main Character and Rookie roll their FateD10s and apply their Analysis modifiers. If they get the required number (11 or above in the example), they may choose one of the options listed on the Encounter.
- Example Encounter options: (1) discard this Encounter and win 1 Reputation; (2) discard this Encounter and gain 1 IonCharge; (3) discard this Encounter and add 1 Ether; (4) draw 2 Locations into the investigation, blind if the Location Reveal Pool is empty.
- Once an Encounter has been dealt with, it is only discarded if the Card says so. If not, it is shuffled back into the Encounter Deck.
- Replenishing: When an Encounter Card is resolved, regardless of outcome, all of the empty and unlocked Witness and Location Reveal Pool slots are replenished. Six new Cards are drawn into the three Reveal Pool slots for each Card type.
- After an Encounter is resolved, the point before you move on to another part of your investigation is the window in which some Special Abilities trigger. Check your Characters' abilities at this point, and see whether you want any upgrades.
Key Witnesses
The Key Witness pile is a list of nominees made up of every Witness you have had in your investigation that you have attempted to resolve, regardless of a win or a loss.
A Key Witness is usually one Card you keep with the FEC as a form of insurance, which you may use to go back to if a Crime falls into Unsolved (Evidence remains on a Crime but no more Cards remain), or if additional Evidence penalties are added while you attempt trials on the FEC.
There are two main instances when a Key Witness may be attached to your FEC from your Key Witness pile:
- When a Crime goes Unsolved. This is when the investigation runs out of Cards: no more Cards in the Investigation Timeline, but Evidence still remains to be collected.
- When you have collected all of the Evidence from the back of the FEC and it is about to be flipped.
The player must observe the Key Witness pile and choose only one as their Key Witness to attach to the FEC. The others are discarded to the discard pile.
When can you activate a Key Witness? There are three moments when your chosen Key Witness may be used with the hope of removing the remaining Evidence to flip the FEC and complete or solve the Crime:
- At the moment of choosing your Key Witness, you may choose to attempt a trial or take effects from that Key Witness card.
- After an Encounter Card is resolved. If you are on a new Crime but have unsolved Crime(s) left to collect Evidence from, this is when you may go back to the unsolved Crime and attempt a trial or take effects using its Key Witness. If you have multiple unsolved Crimes, you get one round with each Key Witness this way. You may only attempt it once per resolved Encounter Card, and then wait until the next opportunity.
- After you have completed another Crime and taken the bonuses for that separate Crime. You may at this point return for one round with your Key Witnesses and their unsolved Crimes.
Unsolved Crimes. Regardless of the outcome, if Evidence still remains to be collected from the back of the FEC, the Crime remains Unsolved. You must then begin a new Crime (if there are any left in your game mode), or lose the game.
- If your Key Witness calls for you to draw Cards into your investigation, do it as if you were creating a new Investigation Timeline.
- If you have a new Investigation Timeline connected to an unsolved Crime, you may attach new Key Witness Nominees as you would for normal investigations, and restart the Key Witness selection process if the unsolved Crime still remains unsolved.
- If a Key Witness brings in new Cards, you deal with these as you would any other Crime investigation. This includes adding the same Key Witness (or another) and re-attempting rule 1 above.
- Key Witnesses do not get attached to your final Crime.
Key Witness strategy. Always play your investigations looking to bring in as many Cards as possible. The more Key Witness nominees you have, the greater your options will be later for success, especially if things get tricky. Look for Cards that allow two Key Witnesses to be added, such as members of cults and other factions. Also try to attach a Key Witness that enables you to do one or both of the following:
- Get rid of as much Evidence as possible.
- Bring in new Cards to form a fresh Investigation on the Unsolved Crime, especially Locations, as they tend to have the fewest negative effects.
Key Witnesses are mainly needed on the high Green and Yellow Crimes. Sometimes during an FEC, Evidence will be added when you fail one of its trials. When that happens, you are permitted to immediately activate your nominated or attached Key Witness for that Crime for one round. If you fail in this instance to remove the 2 Evidence using your Key Witness, the Final Encounter Card is flipped and the Crime moves into Unsolved, where the Key Witness may only be activated again using rules 2 or 3 above.
Completing the Evidence and Flipping the Final Encounter Card
Once all of the Evidence has been collected through your investigation (through trials, exchanges, and removing Cards), you move on to the final stages of the Crime. Before you flip the FEC, look at your Key Witness nominees and choose one to attach (see Key Witnesses above). Then flip the Final Encounter Card and attempt its unique trials.
The Final Encounter Card (FEC). On every FEC, both of the Characters roll. The FEC has three trials, taken one after another from left to right. Unless a Card states otherwise, each trial is determined by two dice rolls: one from your Main Character plus their Skill Modifier, and then one from your Rookie. Each box gives a target number to reach to move on to the next trial. The final box on the right is the final trial. The numbers and symbols in red are what happens if you fail that trial.
The three trials on the example FEC ("The Final Encounter!" slide), taken from left to right:
- Final Analysis of Evidence. Your Main Character and Rookie roll for Analysis, aiming to get a grand total of 9 or more. If they fail, you add 1 Evidence to this Crime, lose 3 Reputation, and you must go to your Key Witness to resolve it or it will go Unsolved.
- Engage & Arrest Suspect(s). Your Main Character and Rookie roll for Engagement, aiming to get a grand total of 9 or more. If they fail, they take 2 wounds and lose 3 Reputation between them. Win or fail, you still move over to the next trial.
- Testify at Nihilium Secret Tribunal. Your Main Character and Rookie roll for Charisma, aiming to get a grand total of 10 or more. If it fails, you add 2 Evidence to this Crime, lose 3 Reputation, and you must go to your Key Witness to resolve it or it will go Unsolved.
The Card's Resource+ symbol shows which Resource you can spend to increase the total on your FateD10 rolls when tackling this Card. In the example it is IonCharges, at 1 IonCharge for one point on a roll.
The rewards for completing the three trials are shown on the side of the Card. In the example, 3 Reputation, 4 Ether and 2 IonCharges. These Crime bonuses are shared between both Characters in whatever way you wish.
Resource+. When you flip a Final Encounter Card, look out for the Resource+ symbols. They help you to spend Resources 1 for 1 in exchange for additional points on your dice rolls, but only on Final Encounter Cards. They are not found anywhere else. Resource+ bump-ups may be added after you get your totals; they do not require commitment before you roll.
Example FEC run from the source: on the first trial the Main Character rolled a 10 and the trial was passed straight away. On the second trial (Engagement), the Main Character rolled an 8 and the Rookie a 2 (plus skills), so that trial was passed. On the final trial (Charisma), the Main Character rolled a 3 and the Rookie a 3 (plus skills), a total of 6. The team spent 4 IonCharges using Resource+ to bump the total to 10, leaving 10 IonCharges. The Crime was won, and the bonuses were taken: 3 Reputation, 4 Ether and 2 IonCharges, giving a combined total of 14 Reputation, 4 Ether and 12 IonCharges.
Ending a Crime and Starting the Next
- Take a new Crime, but do not look at it just yet.
- Discard any remaining Witnesses in the Reveal Pool, and redraw into the 3 slots and any others that are unlocked.
- Shuffle any Location Cards left in the Location Reveal Pool back into the Locations deck, and replenish the 3 empty slots and any unlocked ones.
- Upgrades do not move. They stay where they are until they are purchased, and are replenished as described above.
- Go back to the Crime setup to set up the next investigation.
Levels of Difficulty
There are currently five levels of difficulty, all self-explanatory. Career mode is still a work in progress; please check the publisher's website for future updates.
Advanced Rules
The following advanced rules are part of the "Rules 2.0 with added Advanced Rules" document: Glee, Victims / Victims-TM, and Character Combat. The separate "Some Advanced Rules" document (advanced-rules.pdf) covers the same three topics.
Glee
When you resolve certain Witness or Encounter Cards, they might tell you to collect something called Glee. Each Glee token is worth 1 Unit.
- Collect Glee just as you would collect Wounds: place the tokens onto your Main Character. It does not matter where they go, so long as you know how many you have and how many you need.
- Some Cards explain what happens when you collect three Units. When you collect 3 Units by resolving certain Cards that state to add one, you may flip the FEC early, getting a head start on it.
- Getting 3 Glee lets you flip the FEC early, so you can see exactly what lies ahead. This is ideal for planning for Resource+ and getting a head start on the Final Encounter trials.
Victims and Victims-TM
Occasionally, on Crime trials, you will be asked to add something called Victims or Victims-TM to either a Location or a series of Locations.
- Draw from the Witness Deck (not the Reveal Pool) the specified number of Witnesses, and lay them sideways on the Locations. These are the Victims.
- Before getting or attempting to resolve the Location the Victim is on, you must roll for Analysis with both Characters, aiming to beat the Reputation Qualifier on the Victim.
- Beat the Qualifier number with your combined roll plus Analysis Modifiers to collect the Evidence stated in the Crime setup (in the example, 4 Evidence). If you lose, you lose Reputation equal to the whole Qualifier number. Sometimes the Card says to lose Reputation equal to the Half-Qualifier: the Reputation Qualifier on the Card halved and rounded down.
- If there are several Victims on one Location, stack them. The first Victim in the example has a Reputation Qualifier of 15, so you must get 15 or more to gain the 4 Evidence.
- Always resolve each Victim via the Analysis versus Reputation Qualifier before attempting the Location it is on.
- You cannot switch the order between Victims and Locations once they are set in your Investigation Timeline. A Victim and its Location are "glued together": they may move around the Timeline, but they must always move together as a pair.
Victims-TM follows the same rule with one exception: the Victims have to be Transhumans from the Transhuman faction. Draw from the Witness deck as normal, except that when you draw a normal Witness, you discard it straight to the discard pile, and when you draw a Transhuman, you add it to your Investigation as a Victim. In the example, 5 Transhumans are added to 5 of the 6 Locations drawn. Succeeding on the combined Analysis versus the Victim's Reputation Qualifier takes 2 Evidence and 2 IonCharges from the dead Transhuman; failing it loses 1 Reputation. Transhumans are identified by their names, and each Transhuman changes its name into a code it prefers as it upgrades its body to "becoming one with the machine". They are usually fairly high Reputation Qualifiers, which makes them difficult to perform Analysis on when they become a Victim.
Character Combat
On the rare occasion that you must engage a Character in combat, you must do what the Crime Setup states. In the example, you draw a Main Character from the discard pile at random and place it face down, without looking at it, onto the FEC. You then deal with that Card straight after running out of Cards in your Investigation Timeline and/or before flipping the FEC. Combat is initiated when all Card trials have been resolved, and combat must always be resolved, even if you reach zero Evidence.
Combat order in the example:
- In this example the Rookie went first, because it had more Resources than the Main Character it fought. Its roll was a 7; with an Engagement Skill Modifier of 0, it dealt 7 damage, leaving the opponent with 1 HP from its starting 8 HP. These wounds are added to the opponent to keep track.
- The opponent then takes its turn. It rolled a 3 with an Engagement Skill Modifier of 1, for 4 wounds to the Rookie. These wounds remain for the rest of the game unless healed.
- The Rookie replies with a 2 and a 0 Engagement Modifier, enough to take the opponent down. The Character you defeat is sent back to the discard pile.
- Defeating the opponent wins the Crime bonus stated on the Crime Setup: in the example, 5 Evidence and 5 Reputation.
Losing and Winning
- If your Main Character loses all of their Reputation, you must do what you can to divide or share Reputation from your Rookie. If that is not possible, the following applies:
- If your Rookie is also on zero Reputation, the game ends.
- If your Rookie is on 1 Reputation, the game continues with the Rookie now as the Main Character.
- If your Rookie dies, you lose 12 Reputation immediately. You cannot add a new Rookie, and you must complete the game with just your Main Character.
- If your Main Character dies, or has zero Reputation and your Rookie is still alive, you continue to play with your Rookie. If you reach the next Upgrade Phase, or are instructed by a Card to take Upgrades, you may assign another Rookie from the discard to your team; you may choose any Rookie you want. Your original Rookie then becomes the Main Character, and from that point you must complete five Crimes to complete the game.
- If you lose all of your Reputation, the game ends.
- If your Main Character and Rookie both die, the game ends.
- If you get an Unsolved Crime on a Red Crime investigation, the game ends.
Winning: Complete three Crimes while keeping your Character alive and not losing all of your Reputation. The game cannot be won with any unsolved Crimes left to be solved.