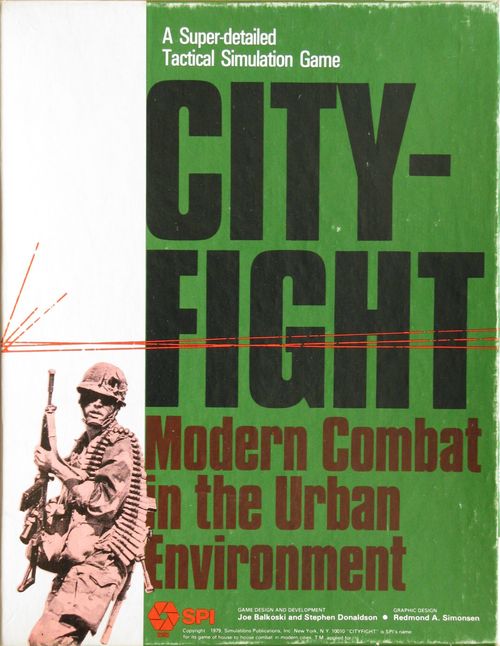
Cityfight: Modern Combat in the Urban Environment
Cityfight: Modern Combat in the Urban Environment Rulebook
Table of Contents
Table of Contents
- Read This First
- 1.0 INTRODUCTION
- 2.0 HOW TO PLAY THE GAME
- 3.0 GAME EQUIPMENT
- THE BASIC GAME
- 4.0 SEQUENCE OF PLAY
- 5.0 COMMANDS
- 6.0 LEADERS AND COMMAND CONTROL
- 7.0 THE MAP
- 8.0 MOVEMENT
- 9.0 STACKING (More Than One Counter In a Hex)
- 10.0 MEGAHEX OBSERVATION (SIGHTING) AND IMMEDIATE FIRE
- 11.0 FIRE COMBAT
- 12.0 PASSING
- 13.0 CLOSE ASSAULT
- 14.0 AMMUNITION DEPLETION
- 15.0 SUPPRESSION
- 16.0 ADVANTAGE
- 17.0 PRESERVATION LEVELS
- THE INTERMEDIATE GAME
- 18.0 VEHICLES
- 19.0 MECHANIZED INFANTRY COMBAT VEHICLES (MICV) AND OTHER VEHICLES
- 20.0 ANTI-TANK WEAPONS
- 21.0 DESTRUCTION OF BUILDINGS
- 22.0 FLAMETHROWERS AND INCENDIARY ROCKETS
- 23.0 GRENADE LAUNCHERS
- 24.0 NIGHT
- 25.0 SNIPERS
- 26.0 INDEPENDENT-COMMAND AND LEADERS
- 27.0 DECLARED SIGHTING AND DECLARED POSITION
- 28.0 WEATHER
- 29.0 AMPHIBIOUS MOVEMENT
- 30.0 SMOKE
- ADVANCED GAME
- 31.0 HEIGHT
- 31.1 HEIGHT LEVELS AND FLOOR LEVELS
- 31.2 HEIGHT AND MOVEMENT
- 31.3 FLOOR LEVELS AND STACKING LIMITS
- 31.4 HEIGHT AND OBSERVATION
- 31.5 VERTICAL LINE OF SIGHT
- 31.6 EMBANKMENTS, BRIDGES AND WOODS
- 31.7 ROOFS AND CELLARS
- 31.8 DAMAGED, DESTROYED, DEMOLISHED AND BURNING BUILDINGS
- 31.9 HEIGHT OF SMOKE, THE TELEPHONE OFFICE, AND OBSERVATION
- 32.0 HEIGHT AND COMBAT
- 33.0 INDIRECT FIRE UNITS
- 33.1 DESIGNATING INDIRECT FIRE UNITS FOR DIRECT FIRE ROLES
- 33.2 FIRE PLOTS
- 33.3 COMPUTING DELAY
- 33.4 SCATTER AND REGISTRATION FIRE
- 33.5 CONTINUITY OF FIRE
- 33.6 FIRE FOR EFFECT RESOLUTION
- 33.7 INDIRECT FIRE OBSERVATION AND ADJUSTMENT
- 33.8 ROCKETS, SMOKE AND STARSHELL
- 33.9 ARTILLERY AMMUNITION DEPLETION
- ADVANCED OPTIONAL RULES
- 34.0 ENGINEERS
- 35.0 BOOBY TRAPS
- 36.0 BREACHING WALLS
- 37.0 OBSTACLES
- 38.0 MINES
- 39.0 CRATERS AND DITCHES
- 40.0 FIRING PORTS
- 41.0 RULES OF ENGAGEMENT
- 42.0 CONFLAGRATIONS
- 43.0 AMMUNITION STORES
- 44.0 CIVIL STRIFE
- 45.0 DEFILADE
- 46.0 PREPARED POSITIONS
- 47.0 DRIVE-INS
- 48.0 MULTI-PLAYER GAME
- 49.0 USING AN UMPIRE
- 50.0 SCENARIO DESIGN GUIDE
- 51.0 SCENARIO DESIGN NOTES
- SCENARIOS
- 52.0 ENCOUNTER ON THE STAUFFENBERGALLEE (Basic Game Training Scenario)
- 53.0 BREAKOUT! (Basic Game)
- 54.0 NICOSIA, CYPRUS (Basic Game)
- 55.0 BANGLADESH (Basic Game)
- 56.0 TANK BATTLE AT METALWAREN (Intermediate Game Training Scenario)
- 57.0 TAKE THE MONEY AND RUN (Gerlafingen)
- 58.0 THE BRIDGES AT GERLAFINGEN (Intermediate Game)
- 59.0 REVOLT IN HUNGARY (Esztergom, October, 1956) (Intermediate Game)
- 60.0 ASSAULT ON DOSHAN TAPPEH AIR BASE (intermediate or Advanced Game)
- 61.0 BEIRUT (Advanced Game Training Scenario)
- 62.0 ASSAULT ON GERLAFINGEN (Advanced Game)
- 63.0 THROUGH FRIENDSHIP PASS, Dong Dang, Vietnam. (Advanced Game)
- 64.0 BAADER-MEINHOF (Advanced Game)
- 65.0 LONDON’S BURNING (Advanced)
- 66.0 GYOR, HUNGARY (Advanced Game)
- 67.0 ESTELI, NICARAGUA: SANDINISTA GUERRILLAS vs. SOMOZA’S ARMY (Advanced Game)
- 68.0 FALL OF LONG SON, VIETNAM (Advanced Game)
- 69.0 BERLIN-LICHTERFELDE (Advanced)
- 70.0 TACHING, Heilongjiang, Manchuria, China (Advanced)
- PLAYER’S NOTES
- DESIGNER’S NOTES
- WELCOME TO GERLAFINGEN!
- CHARTS AND TABLES
- [6.23] ACTION POINT LOSS MATRIX
- [18.8] HARD COMBAT RESULTS TABLE (Intermediate Game)
- [10.39] SEARCH RATING MODIFICATIONS CHART
- [15.49] SUPPRESSION RECOVERY MODIFICATIONS CHART
- [11.8] SOFT COMBAT RESULTS TABLE
- [22.4] FLAMETHROWER TABLE (Intermediate Game)
- [27.25] DECLARED SIGHTING CHART (Intermediate Game)
- [32.25] GUN ELEVATION CHART (Advanced Game)
- [32.66] DAMAGED BUILDING PROTECTION TABLE (Advanced Game)
- [42.34] CONFLAGRATION TABLE (Advanced Game)
Read This First
The rules of this SPI simulation game are organized in a format known as the Case System. This system of organization divides the rules into Major Sections (each of which deals with an important aspect of play). These Sections are numbered sequentially as well as being named. Each of these Major Sections is introduced by a General Rule, which briefly describes the subject of the Section. Many times this General Rule is followed by a Procedure which describes the basic action the Player will take when using the rules in that Section. Finally, the bulk of each Major Section consists of Cases. These are the specific, detailed rules that actually regulate play. Each of these Cases is also numbered. The numbering follows a logical system based upon the number of the Major Section of which the Cases are a part. A Case with the number 6.5, for example, is the fifth Primary Case of the sixth Major Section of the rules. Many times these Primary Cases are further subdivided into Secondary Cases. A Secondary Case is recognizable by the fact that it has two digits to the right of its decimal point. Each Major Section can have as many as nine Primary Cases and each Primary Case can have as many as nine Secondary Cases. The numbering system is meant as an organizational aid. Using it, Players can always easily tell where a Case is located in the rules. As a further aid, an outline of the Major Sections and Primary Cases is given at the beginning of the rules.
How the Section and Case Numbers Work
For example, the case number [6.53] has the Major Section Number 6, the Primary Case Number 5 and the Secondary Case Number 3. The preceding example would be the number of the third Secondary Case of the fifth Primary Case of the sixth Major Section of the Rules.
How to Learn to Play the Game
Familiarize yourself with all of the components. Read all of the General Rules and Procedures and read the titles of the Primary Cases. Set up the game for play (after reading the pertinent Section) and play a trial game against yourself referring to the rules only when you have a question. This procedure may take you a few hours, but it is the fastest and most entertaining way to learn the rules short of having a friend teach them to you. You should not attempt to learn the rules word-for-word. Memorizing all that detail is a task of which few of us are capable. SPI rules are written to be as complete as possible — they’re not designed to be memorized. The Case numbering system makes it easy to look up rules when you are in doubt. Absorbing the rules in this manner (as you play) is a much better approach to game mastery than attempting to study them as if cramming for a test.
1.0 INTRODUCTION
“Many areas of the world, especially Western Europe, have experienced a massive growth in built-up areas and man-made changes to the natural landscape. These changes significantly affect potential’ future battlefields. Avoidance of built-up areas is no longer possible. Rather, military operations in built-up areas are an integral part of combat operation and present special opportunities and challenges to the commander.”
U.S. Army Field Manual 71-2,
The Tank and Infantry Battalion Task Force
Cityfight is a tactical simulation of contemporary and post World-War II combat in the urban environment. Placed in the role of platoon, company, or battalion commander, the Player is faced with a wide variety of offensive or defensive missions to be carried out in a built-up area: In so doing, the Player comes to learn how to use such specialized units as sappers, snipers, spotters, flamethrowers and military police. Very limited intelligence with respect to the Enemy is a key characteristic of urban warfare, and is an equally important foundation of the Cityfight game system. As a result, Cityfight assumes complete integrity on the part of all Players; adherence to the rules is largely a matter of personal honesty.
If there is sufficient interest, SPI hopes to update Cityfight from time to time by incorporating the latest military developments in weaponry, doctrine, and organization in inexpensive kits. In order to make this updating process as accurate as possible, we welcome unclassified information sent in by Players regarding the various aspects of the military situations presented in the game. Weapons performances and TO&Es are particularly important. Players are encouraged to forward suggestions relevant to the rules of play, ideas for the update, and reports on games played. We are particularly interested in details on scenarios played (especially good ones may be included in the future or printed in MOVES Magazine) and advice to Players. Please do not write these reports on the same page as a rules question. Send reports to:
2.0 HOW TO PLAY THE GAME
Cityfight is played in Game-Turns, each of which is divided into a number of Stages. The focus of each Game-Turn is on the Action Stage, when Players move and attack (fire) with their units. This is done by moving the individual units through the hex grid and by using their various weapons systems. Play in the Action Stage alternates back and forth between Players. Various other functions, such as issuing commands, and recovery from ammunition depletion or suppression, are performed during other Stages of the Game-Turn. Victory in each game is awarded on the basis of accumulated Victory Points for various acts and achievements.
Cityfight is presented in a series of three levels of complexity. The Basic Game (Sections 1 through 17) introduces the standard game-system, featuring infantry combat. It is a “Player’s Game,” can be learned quickly, and is relatively simple and abstract.
The Intermediate Game (Sections 18 through 30) builds on the Basic Game by introducing vehicles, anti-tank weapons, building destruction, smoke, snipers, new sighting rules, combat in special environments, and various special weapons. It takes longer to learn and play than the Basic Game, and is more realistic.
The Advanced Game (Sections 31 through 47) builds on the Intermediate Game. Standard features of the Advanced Game are height levels and artillery. In addition there are many more optional advanced rules covering sappers (combat engineers), rubble, mines, etc. When these optional rules are included, the game is a realistic simulation of urban warfare. The price for this heightened realism is a high level of complexity anda lengthy playing time.
Not everyone will want to play Cityfight at the Intermediate or Advanced levels, but for those who do, it is strongly recommended that you first master the Intermediate Game before proceeding to tackle the Advanced Game.
Sections 48 through 70 provide rules for multi-Player gaming, use of an umpire (which is not required), a guide to constructing “home-made” scenarios, and our own scenarios to start off with.
Modern warfare is a complex subject, and the rules to Cityfight are thus also complex, especially when compared to much simpler games (such as Monopoly, for example). We have tried to keep the rules as short as possible while ensuring their clarity and thoroughness. Basically, the rules are written within a special and highly organized system:
-
Each separate topic is presented as an individual Major Section, numbered consecutively from 1.0. Further divisions within the Sections are made by Primary Cases, which contain rules clarifying one aspect of a Section as a whole (e.g., 5.2, Movement Commands); and by Secondary Cases, which are the individual rules themselves (e.g., 5.21).
-
Most rules are presented with an accompanying General Rule and Procedure which describe the general subject and concept of the rules that will follow. (Further information can also be found in the Commentary paragraphs.)
-
Terminology: The rules use a specific jargon — gamespeak. If confusion arises from unfamiliar terms, Players should consult the Definition of Terms (Case 3.5).
-
Asa last note, Players should not be frightened off or be ill at ease with the “Legalistic” wording of the rules. Players should not feel compelled to let the rules “Play the game for them.” After all, Cityfight is designed to provide a simulation of modern urban combat in an enjoyable game format, not as an exercise in law. Players are free to make modifications they feel will improve the game (and are mutually acceptable to each Player).
3.0 GAME EQUIPMENT
CASES:
3.1 THE GAME MAP
There are two identical 17” x 22” map sheets, one for each Player, depicting the typical, if imaginary, small town of Gerlafingen in West Germany. Each Player uses one of the two identical maps; his opponent’s map remains hidden from him at all times. The same maps are used for all Cityfight scenarios, including those set outside Germany. A hexagonal grid is superimposed on the maps in order to regularize movement and positioning of the playing pieces. The regular (small) hexagons (henceforth called hexes) are grouped into patterns of seven hexes called - Megahexes. Each megahex has a distinct code: number, printed on the map, consisting of a number and a letter, e.g. 7K. Each hex is numbered in accordance with its position within the megahex, starting with 1 at the top and proceeding clockwise around the center hex of the megahex, with the center hex given the number 7. Thus, a single hex may be referred to as ‘*7K2”. See the following example:
Megahex with Hex Numbers Shown
3.2 GAME CHARTS AND TABLES
Various visual aids are provided to simplify and illustrate certain game functions. These aids include the Action Tracks, Combat Results Tables, Unit Status Sheets, Unit Data Tables, and other charts and tables.. The Unit Status Sheet will be written on and should be photocopied for use as needed; other visual aids do not require duplication. Use of a pencil for the Unit Status Sheet is recommended, since changes are often made in the course of play.
3.3 THE PLAYING PIECES
[3.31] Counters and Markers
There are 1400 playing pieces, or counters, in each 2 game of Cityfight. Of these, 833 are Informational Markers, or chits. Among the markers included are Command chits, Suppression indicators, Outof-Ammo indicators, markers indicating the’ physical status of areas on the map, and many more. All of these. markers indicate the current status of a given unit or hex or megahex. The actual units in the game — the fireteams, tanks, leaders, etc. — are represented by Organizational Counters, which may denote anything from a single man or vehicle to a full 12-man squad.
[3.32] Organizational Counters
The Soviet counters, representing: a fixed organization, have more information printed on them than do the NATO counters, which must be easily adaptable to a wide range of organizations and equipment. Each Organizational Counter, however, bears an identification number and an indicator of the type of unit it represents. Many additional values for each unit are provided in the Unit Data Tables; others, which may vary from time to time within a single game, are noted on the Unit Status Sheets, or are listed in scenario instructions. The Soviet counters may also be used to represent the forces of Vietnam and other Soviet allies. The NATO counters may be used to represent the forces of the United States, United Kingdom, West Germany, France, China, Canada, and the Netherlands.
[3.33] How to Read the Units
Regular Leader (front): the counter shows the Type of Leader (e.g., "Platoon Ldr"), the leader's Name (e.g., "Jones"), the Leader Rating (a large number, e.g., 6) and the Lieutenant's Bar.
New Leader (back): the counter shows the Type of Leader (e.g., "Co Cdr"), the Name, the Leader Rating (e.g., 7) and the Lieutenant's Bar.
Combat Unit (front only): the counter shows the Unit ID Number (e.g., 424/324), a Profile of the vehicle, the Type of Vehicle (e.g., T62), the Hard Strength (left side, e.g., V) and the Soft Strength (right side, e.g., 4 and 7).
[3.34] How to Read Unit Identification Numbers
Unit Identification Numbers consist of three digits. For Soviet and Vietnamese units, and for the U.S. Army mech-heavy task force and its constituent elements, each digit indicates a level of organization. The first digit is the number of the company the unit is attached to; "0" indicates battalion-level attachments. The second digit is the number of the platoon the unit is attached to; "0" indicates a company-level attachment. The last digit is the number of the unit within the platoon or other organization to which it is attached. The third digit is separated by a hyphen from the second digit whenever its value exceeds "9"; e.g., 41-12: 4th company, 1st platoon, 12th unit.
In the case of Soviet or Vietnamese tank counters, there are two identification numbers printed. The 4XX number is used when the tanks are organized into pure tank units. The 1XX, 2XX, or 3XX number is used when the tanks are attached to motor rifle units.
When using NATO counters for organizations other than the U.S. Army mech-heavy task force and its constituents, the identification numbers do not necessarily indicate the unit's organizational attachments. Players must consult the standard or scenario Tables of Organization and Equipment (TO&Es) for the organization of these units, and must note the platoon and company affiliation of each unit on the Unit Status Sheet.
[3.35] Particular Features of Soviet Counters
Soviet BMP counters may also be used to represent BTR armored personnel carriers; where this is the case, use BTR values instead of the BMP values printed on the counter.
If there is no strength indicator on the left side of the counter, the unit concerned has no hard Attack Strength. If there is no strength indicator on the right side of the counter, the unit concerned has no soft Attack Strength (see 3.38).
A "G" on the left side of the counter indicates that the unit concerned has grenade-launcher capability (see Section 23.0). A "V" in any position indicates a variable strength; consult the Unit Data Tables for the type of unit (and, in the Intermediate or Advanced Games, the range concerned). On the tank and BRDM counters, there are two soft Attack Strengths printed, e.g., "7 + 4." This indicates that the unit concerned has two separate machine guns, which are treated as separate weapon systems (see the Unit Data Tables).
[3.36] Sample Units
Organizational Counters (each is shown front and back in the original; the illustrations are described here by their printed captions).
NATO: Tripod Machinegun (218); Bipod Machinegun (415); Fireteam with Machinegun (023); Jeep (105); Scout Vehicle (819, Luchs); Truck (005); Fireteam without Machinegun (01-14); Tank (325, M60); Self-Propelled Gun (811, M109); Bridgelayer (004, AVLB); Armored Personnel Carrier/Mechanized Infantry Combat Vehicle (01-10, M113); Anti-Tank Guided Missile Vehicle (024, M150); Sapper (732); Ad hoc Sniper (607); Bulldozer (740, Dozer); Combat Engineer Vehicle (742, M728 CEV); Anti-Tank Gun (815).
Soviet: BMP Mechanized Infantry Combat Vehicle/BTR-60 Armored Personnel Carrier (212, BMP, strength 4); Squad with Machinegun (231); Tank, T62 (422/234, strengths 4 and 7); Sniper (125, strength 15); Fireteam without Machinegun (513, strength 7); BRDM 2 Scout Vehicle (522, strengths 4 and 7); Sapper (611, strength 4); Forward Observer (Spotter) (302); SP74 Self-Propelled Gun, 122mm (207); ASU57 Assault Gun (204, strength 8); ASU85 Assault Gun (012, strengths 10 and 4); SP73 Self-Propelled Gun, 152mm (013); T-12 (206, strength 11); Tripod Machinegun (021); Ad hoc Sniper (035, strength 6); Flamethrower Tank (607, FTT); Bridgelayer (601, MTU55).
Markers and Leaders (front / back): Platoon Action Track Marker "Platoon 8" / "Dmrlzd Platoon 8"; Command Markers "Cautious" / "Bold" and "Fire" / "Search/Work"; "Suppressed" / "Out of Ammunition"; "Damaged" (Building Damaged) / "Destryd" (Building Destroyed); "Incomp Breach" (Incomplete Breach) / Obstacle; New Starshell / Old Starshell; "Megahx Searchd" / "Megahx Empty" (Player's Aids); Real Mine / Obstacle; "No Fire" / "No Movement" (Vehicle Damage); Crater/Ditch / Obstacle; Platoon Sergeant / New Platoon Leader; Platoon Leader (Lt.) / New Company Commander; Company Commander (Capt.; NATO) / Utility Marker; Indirect Fire Unit "Fire for Effect" / "Register Fire" (Registration Fire); Observation Post / Bridge Destroyed ("Bridge Down"); Observation Post / Train; Burning / Fire Spreading; Smoke Hex / Game-Turn/Stage; Smoke Hex / Player Aid ("Known Enemy"); Smoke Hex / Smoke Megahex; Smoke Hex / Smoking Wreck; Breach / Obstacle.
3.4 GAME SCALE
Each hex represents 16.67 meters; each megahex 50 meters; each Game-Turn 20 seconds. In the Advanced Game, each height level represents 1.5 meters; each floor level 3 meters.
3.5 DEFINITION OF TERMS
Numbers in parentheses refer the reader to that Case number for a primary definition.
Accessable Hexside. One or more hexsides of each building hex is marked as “accessable” on the map. Building hexes may only be entered or exited by movement through these hexsides (7.31, 7.34, 36.0)
Action. An action is a specific deed by a unit which alters its position on the map, attempts to gather information on Enemy units, or attempts to inflict loss on the Enemy. There are five types of actions: movement (cautious and bold), sighting, fire, and work. (5.3, 5.4, 5.5, 34.2)
Action Point. The limits on a platoon’s ability to effectively coordinate the actions of its soldiers in furtherance of the platoon’s mission are measured in units called Action Points. Each platoon starts out each Action Stage with a variable number of Action Points. As the units of the platoon perform actions, the platoon’s store of Action Points is reduced. When all of the platoon’s Action Points have been used up, the units of that platoon are prevented from performing any further actions until the next Game-Turn. (5.6)
Blocked. In some cases, that part of a hexside which divides buildings in adjacent hexes is “blocked” on the map. When this is the case, units may not move through the blocked hexside, and line of sight for the firing of weapons may not pass through the blocked portion of the hexside. (7.44, 11.27)
Command. The coordination of friendly units requires a certain amount of advance planning, usually by a platoon leader and his assistants. In the game, this planning is represented by commands, which are issued to each unit at the beginning of each Game-Turn and set limits on the types of actions which may be performed by units. Without a command, no action may be performed. There are five types of commands: cautious and bold movement, fire, search, and work. Each command allows a different set of actions to be performed by the unit it is issued to. (5.0, 34.2)
Hard. Weapons are classified as either soft or hard, and so are their targets. Most vehicles are armored and are therefore hard targets; these vehicles can only be damaged by hard weapons. Fire attacks by such weapons are resolved using the Hard Combat Results Table. The classification of each vehicle and: weapon is listed on the unit data charts. (18.53, 18.58)
Leader. A leader is a commissioned officer (company commanders are usually captains, platoon leaders are normally lieutenants) or a noncommissioned officer (platoon sergeants). These men are important in providing combat organizations with goals and objectives, and thus play a key role in determining how many Action Points (q.v.) a platoon has. They are also authority figures, capable of motivating soldiers to overcome the fear of personal harm in favor of attaining the organization’s objective; thus they have a crucial role in removing suppression. (6.0, 15.4, 18.2)
Megahex. A megahex is a cluster of seven smaller, regular hexagons (called hexes in the rules); it represents an area 50 meters across. (7.1)
Soft. Weapons are classified as either soft or hard, and so are their targets. All personnel units and some vehicles are soft targets; they are particularly vulnerable to soft weapons such as rifles and machineguns. Fire attacks by such weapons are resolved using the Soft Combat Results Table. The classification of each vehicle and weapon is listed on the unit data charts. In the Basic Game, only soft targets and weapons are used. (11.8)
Spotted. A unit is spotted by an Enemy unit when it is precisely located by that Enemy unit through sight, hearing, or other means. In Cityfight, units are spotted through specific procedures by which the Enemy units attempt to locate them. Once spotted, a unit is subject to well-aimed and therefore often deadly Enemy fire. Sometimes information on the location of a unit is given to the Enemy player through the operation of other rules, but a unit is only spotted when located through the specific procedures listed in the rules to spot units: megahex sighting, automatic spotting, declared sight, declared position. All spotting is performed by specific units, so that a spotted unit is only spotted with respect to a unit which has located it. A distinction is made between Search, which is a command (q.v.); sighting, which is an action in the form of an attempt to locate Enemy units; and spotting, which is the outcome of a successful sighting attempt. (5.5, 10.0, 11.4, 18.4, 24.1, 27.0)
3.6 PARTS INVENTORY
A complete game of Cityfight contains:
Two rules booklets
Two identical 17” x 22” maps 1400 counters
Two large and two small plastic dice One game box assembly If any of these parts are missing or damaged, fill out the Complaint Card enclosed in the game and return it to SPI with the appropriate items checked on the card. Note: The process used in the manufacturing of the die-cut counters used in SPI games sometimes results in colors from one counter overlapping the color of a neighboring counter, or in the slightly off-center printing of the letters and/or numbers on a counter. SPI cannot replace counters displaying these minor manufacturing inaccuracies. Only counters that are illegible can be replaced by SPI.
THE BASIC GAME
The following sections present the standard game system of Cityfight. It is suggested that Players master the Basic Game before proceeding to the more complex Intermediate and Advanced Games.
4.0 SEQUENCE OF PLAY
GENERAL RULE:
Cityfight is played in Game-Turns, each of which represents 20 seconds of real time. Each Game-Turn is composed of seven Stages, during which both players will perform the actions explained in the body of the rules.
CASES:
4.1 GAME-TURN SEQUENCE OUTLINE
The following Game-Turn sequence outlines the progression of each Game-Turn. It is an explanation of the flow of play, and novice readers may be slightly confused upon completion of the first reading. All of the concepts covered in this outline are explained in detail later in the body of the rules. Therefore, it is recommended that the Players only glance through this outline before going on to the rest of the rules. Once actual play has commenced, however, Players will find this Section an invaluable reference guide to the questions that will occur. Follow this outline Stage by Stage until the flow of play has been mastered.
Note: If questions of rules interpretation arise, the relevant rules case governs, not the sequence outline.
A. COMMAND DECISION STAGE
After a scenario has been chosen and units have been deployed on the map (for the first Game-Turn) or reinforcement units have been placed on the map (for subsequent Game-Turns), each Player must issue a Command to each of his units. Simply place the appropriate Command chit on each unit deployed on the map. All of this is done secretly.
B. COMMAND-CONTROL STAGE
- Initial Action Point Determination Phase
Both Players determine the initial number of Action Points each platoon has. Each Player indicates the number of initial Action Points for each of his platoons on his respective Action Point Track. The number of initial Action Points is equal to twice the number of units issued commands.
- Action Point Total Adjustment Phase
The Player having Advantage (as designated in the scenario) rolls one die for each of his platoons. For each platoon, if the die roll result is higher than that platoon’s leader’s rating, the owning Player must consult the Action Point Loss Matrix to determine how many Action Points (if any) are subtracted from the initial number of Action Points for that platoon. If the dice roll result is less than or equal to the leader’s rating, then nothing further is done. The Player without the advantage does the same, except he rolls two dice for each leader. All of this is done secretly.
C. ACTION STAGE
This Stage is the heart of the Game-Turn, and consists of an alternating sequence of actions. The Player who has advantage goes first. He must choose one of the three actions listed or pass. Unless the action is performed by a leader or a spotter, or the Player passes, he adjusts his Action Point Track to reflect the expenditure of one Action Point; then he performs the action. Unless a Fire action or Sighting action is announced, the Player, when he is finished, simply tells his opponent “Done” or “Your turn.” Unless one of his units which has been issued a fire command has successfully spotted an Enemy unit (see Sighting action), the next action is performed by the opposing player. In turn, this Player must choose one of the following three actions or pass. Similarly, he adjusts his Action Points Track to reflect the expenditure of one Action Point. If a Player controls more than one platoon, the action-taking is rotated among the platoons each time it is his turn to perform an action. Platoons without Action Points left do not participate in the rotation. A pass is not counted against any particular platoon except when the Player is the one without advantage.
When the Player with advantage has exhausted his available Action Points (Action Point Track to “0” for all platoons) he continues to say “Done,” etc., as if he were moving units. When the Player without advantage has exhausted his available Action Points, he announces the fact; the Action Stage is thereby completed. The three actions which may be chosen by each Player Are:
-
Movement Action: The owning Player may move any unit that was issued a Movement command one hex. If the unit was issued a Cautious Movement command, it may not move any further for the remainder of the Game-Turn. If the unit was issued a Bold Movement command, it may move a second hex at some later point in the Action Stage. However, note that if a unit enters a building or woods hex, it may never move any further, regardless of any Movement command, for the remainder of the Game-Turn.
-
Sighting Action. Each unit on the map is allowed to perform a certain number of Sighting Actions depending on the command it was issued in the Command Decision Stage. To have a unit perform a Sighting action, the owning Player flips over that unit’s counter, indicating that it may not attempt to sight again for the remainder of the Game-Turn (Exception: Case 5.4). He then calls out the number of a megahex which the unit occupies or which is adjacent to or no more than 2 megahexes away from the megahex occupied by the sighting unit. Next, the opposing Player must state if any of his units occupy any open hexes in the designated megahex, and if so, their hex numbers. Additionally, if the megahex contains woods or building hexes, the sighting Player rolls two dice and his opponent cross-references the dice roll with the Search rating of the megahex, while both Players make any necessary adjustments to the Search rating. If the result is equal to or greater than the Adjusted Search rating of the megahex being sighted, the Enemy Player must state the locations of his units occupying building or woods hexes in this megahex. Otherwise, the Enemy Player remains silent in regard to his units occupying these hex-types. If a sighting attempt was unsuccessful or a successful spotting was achieved by a unit with a Cautious Movement or Search command, play immediately proceeds to the opposing Player. However, if a unit that just successfully completed a Sighting action possesses an uncompleted Fire command, that unit may perform a Fire action regardless of the normal alternating action sequence (see Case 10.6). After this immediate Fire Phase has been resolved, it is the opposing Player’s turn to perform an action.
-
Fire Action: The owning Player may only declare a fire action for those units which have been issued a Fire command. If a Fire action is declared, the owning Player immediately states the hex number he is firing at, the hex number he is firing from, and the type of fire. Both Players then verify that a line of sight exists between the two hexes. The owning Player determines the firing unit’s Fire Strength. He rolls two dice and consults the appropriate Combat Results Table, making sure to take any modifiers to the result into account, such as the terrain occupied by the target, or the target’s Movement command. The result, if any, is immediately applied. The firing unit removes its Fire command to indicate that it may not fire again during the Action Stage.
Remember that for every action performed by a combat unit (not a leader or spotter), including an immediate Fire action, the owning Player must expend one Action Point out of that platoon’s available Action Points. A Player may pass instead of performing an action, but, if he does not have advantage, he must still expend one Action Point to do so; if he does have advantage, he may pass without expending an Action Point.
When the player without advantage has expended all his Action Points for all of his platoons, the Action Stage is completed, even if the Player with advantage still has Action Points remaining on his Action Point Track. , If both Players are with or both are without advantage, the Action Stage ends as soon as one Player or the other has expended all his Action Points for all of his platoons. .
D. ENGAGEMENT DETERMINATION STAGE
Players determine which hexes require Engaged markers and place them on the hexes, in accordance with Case 13.3.
E. AMMUNITION STAGE
All units out of ammunition (marked with Out of Ammo markers) that did not run out in the current Game-Turn may attempt to recover from this condition. For each unit out of ammo, the owning Player rolls a single die once and refers to the scenario instructions concerning his Ammunition rating. On a die roll equal to or less than this rating, the Player may remove the Out of Ammo marker. On a die roll greater than this rating, the unit must remain out of ammo until the next Ammunition Stage, when the Player may roll again. Of course, units that are out of ammo may not fire.
F. SUPPRESSION RECOVERY STAGE
Players may attempt to have units recover from suppression either with or without using leaders, in accordance with Cases 15.3 and 15.4.
G. GAME-TURN RECORD STAGE
When the Suppression Recovery Stage has been completed, the Game-Turn is over. Advance the Game-Turn markers on the Action Point Tracks by one.
Then play proceeds to Stage A (Command Decision Stage). Play continues in this manner until the indicated length-of-game is reached, or one Player has achieved a victory before this time. Note that in the Advanced Game, this sequence of play will be elaborated on and added to.
4.2 SKIPPING GAME-TURNS
In urban warfare, there are frequent lulls in the battle. By mutual agreement, entire Game-Turns may be skipped. In other Game-Turns, both sides may be passing (see Section 12.0) most of the time, waiting for artillery, leader replacement, reinforcements, etc.
4.3 TIMING OF MOVES (OPTIONAL RULE)
In order to speed up play, Players may agree to limit the time spent deciding what to do during the current Friendly Action Phase to7 seconds per action or some other time limit per action. If this is done, the “clock starts running” as soon as the opposing Player indicates “Done,” etc. Once the Phasing Player has decided what he wants to do, the clock stops and he may take as much time as is necessary to complete the action. Should he fail to make up his mind in the required period, or should be find that the action he has decided to take is impossible or illegal, he must pass (see Section 12.0) instead. Players may also agree to limit the amount of time spent in the Command Decision Stage (7 seconds per command decision is suggested). In both cases, the resultant hasty decision-making is a part of the simulation of urban fighting on the Cityfight time-scale.
5.0 COMMANDS
GENERAL RULE:
Commands are necessary in order for a Player to have his units perform actions. Commands include Fire, Search, and Bold and Cautious Move. At the beginning of each Game-Turn, the Players secretly issue a command to each of their eligible units. During the course of the Game-Turn, the Players may have their units perform actions in accordance with the commands they have been issued. A unit for which a Player issues no command may not undertake any actions (Exception: Leaders, see Case 6.3).
Search] Work
PROCEDURE:
During the Command Decision Stage, each Player issues commands to each of his units, by placing the appropriate Command marker (depending on which command is chosen) on top of the unit counter. During the course of the Game-Turn, these markers will be removed as actions are performed.
CASES:
5.1 WHICH UNITS RECEIVE COMMANDS
Friendly, unsuppressed units may be issued commands (Exceptions: see Cases 5.33, 19.1, 29.23) during the Command Decision Stage of each Game-Turn. Note that the fact that a unit is issued a command in no way obligates that unit to eventually perform an action; if the unit does perform an action, however, it must be in accordance with that command.
5.2 MOVEMENT COMMANDS
If a Player decides to give a unit a Movement command, he must designate one of two types of movement: Cautious or Bold.
[5.21] If a Player wishes to issue a unit a Cautious command, he places a Cautious Command chit directly on top of this unit, face up. A Cautious command indicates that the unit may move a maximum of one hex during the current Game-Turn. In addition, this unit may perform one Sighting action during the same Stage (see Case 5.4). A personnel unit with a Cautious command is less vulnerable to fire than a unit with a Bold command (see Case 8.1).
[5.22] If a Player wishes to issue a Bold command to a unit, he places a Bold command chit directly on top of this unit, face up. A Bold command indicates that the unit may move a maximum of two hexes in the current Game-Turn, subject to all movement restrictions. Such a unit may not perform a Sighting action in the same Game-Turn (see case 5.4).
[5.23] Tripod-mounted machinegun units may not be issued Bold commands (the machineguns are too heavy to run with).
5.3 FIRE COMMANDS
[5.31] If a Player wishes to issue a Fire command to a unit, he simply places a Fire command chit on this unit, face up. Such a unit also may perform one Sighting action during the current Action Stage, although it may not move. Of course, the unit may also perform a single Fire action.
[5.32] Spotters and leaders may not receive Fire commands. .
[5.33] Tripod machinegun units may not be issued a Fire command unless they received either a Fire command or, no command at all during the previous Game-Turn (this simulates set-up time).
5.4 SEARCH COMMANDS
If a Player wishes to issue a Search command to a unit, he simply places a Search command chit on this unit, face up. Such a unit may perform two sighting actions during the current Action Stage, although it may neither fire nor move.
5.5 SIGHTING ACTIONS
Players do not issue specific Sighting commands to units. Instead, each type of command given to a unit automatically enables the unit to perform a certain number of Sighting actions (see Cases 5.3 and 5.4). A unit with a Bold command may not perform any Sighting actions. (Flip the actual combat unit over to indicate this status.)
5.6 THE ACTION POINT TRACK
Each combat unit in the Basic Game belongs to a specific platoon (see Case 3.34). A number of functions in the game, including command control and the sequence of play in the Action Stage, are based on the platoons to which units belong. These functions are regulated by means of Action Points. Performance of any action by a combat unit requires the expenditure of one Action Point. The number of Action Points which may be expended by all the combat units of any one platoon in each Game-Turn is limited, and is recorded and kept track of on that Player’s Action Point Track.
A marker is placed on the Action Point Track for each platoon in play. The marker’s position on the Action Point Track indicates the number of Action Points that may be expended by units of that platoon. The platoon markers are numbered consecutively; when a Player sets up a platoon or brings units of a new platoon into play as reinforcements, he must choose a platoon Action Point Track marker for that platoon and indicate on the Unit Status Sheet the number of the platoon marker on the Action Point Track corresponding to that platoon.
[5.61] After all commands have been issued by both Players to their combat units, each Player must determine the initial Action Point total that each platoon possesses. For each combat unit that is issued a command, that unit’s platoon has two initial Action Points. Therefore, simply multiply the number of combat units in the platoon issued commands by two and indicate this number on the owning Player’s Action Point Track by placing the platoon marker on that number. A platoon gets no ce Action Points for units which do not receive commands (Exception: in the Intermediate Game, see © Case 19.12).
[5.62] After the initial Action Point total for each platoon has been determined, the markers on the Action Point Track are further adjusted under the provisions of Case 6.2 to arrive at the number of Action Points available to each platoon at the beginning of the upcoming Action Stage.
[5.63] Each action performed by a combat unit during the Action Stage costs one Action Point. For each action performed, the marker corresponding to that unit’s platoon on the Action Point track is moved downward (toward zero) by one.
[5.64] When any platoon’s marker on the Action Point Track has reached zero Action Points, units of that platoon may perform no more actions for the remainder of the Game-Turn, nor may they perform close assault or do anything else requiring the expenditure of Action Points. Such units may be suppressed or killed, however.
[5.65] . Movement or other actions by non-combat units (leaders and spotters) cost no Action Points. Spotters and leaders are not counted in determining the initial Action Point total available per platoon, and when they perform an action, no markers on the Action Point track are moved.
6.0 LEADERS AND COMMAND CONTROL
COMMENTARY:
In urban warfare, small unit leadership is an even more critical factor than it is in the countryside, for coordination of large numbers of men is very difficult, and morale is harder to maintain. Also, the difficulty of maintaining good radio communications in a built-up area forces platoons to rely on their own initiative more than they would if communications with higher commanders were assured.
GENERAL RULE:
During the Command Control Stage of each Game-Turn, each Player must determine if any of his platoons are going to suffer from an impairment of command control. Such an impairment is reflected by lessening the number of Action Points a platoon has.
PROCEDURE:
The impairment (if any) of a platoon’s command control is determined by rolling a die (or two dice for the side not having advantage) for that platoon’s leader. The die roll is compared to the leader’s rating to determine if and to what extent the platoon’s command control is impaired during the current Game-Turn. As soon as the command decision stage has been completed, the Player without advantage determines the initial number of Action Points each of his platoons has (see Case 5.6) and places the platoon marker on the Action Point Track. Then he must roll two dice for each of his platoon leaders. If the result is equal to or less than that leader’s rating, nothing further is done. If the result is greater than that platoon leader’s rating, the difference is immediately determined; this difference is called the initial Action Point loss. .
Having determined the initial Action Point Loss for a platoon, the Player cross-references this number with the number of initial Action Points for the platoon, using the Command Control Loss Matrix (Case 6.23). The resultant number of Action Points is immediately subtracted from that platoon’s Action Point total by adjusting the platoon’s marker on the Action Point Track downward accordingly. At the same time, the Player with advantage determines his command control status in the same way, except that this Player rolls only one die for each platoon leader.
Example: The Soviet Player, who does not have advantage, has a platoon leader with a rating of 6. He has 6 units and therefore 12 initial Action Points indicated for the platoon on his Action Point Track. He rolls 2 dice, obtaining a result of 10. This is 4 more than the leader’s rating, so 12 (the number of initial actions) is cross-referenced with 4 (the initial action loss) on the Command Control Loss Matrix. The resultant number is 3, so that platoon’s marker on the Action Point Track is moved down from 12 to 9, The U.S. Player (having advantage) has a platoon leader on the map with a rating of 5. His platoon has 10 initial Action Points. The U.S. Player rolls one die, obtaining a 2. As a result, he does not suffer from command control impairment and loses and no Action Points on his track.
Co Cdr Lanskoy
Platoon Ldr Platoon Sgt Zimmer f Headon
5...
6.1 LEADER UNITS
CASES:
[6.11] There are three types of leaders: company commanders, platoon leaders, and platoon sergeants. Leaders are non-combat personnel units.
[6.12] Each leader is rated from 1 (worst) to 12 (best), as printed on the leader counter. This rating is a vital determinant of command control and recovery from suppression (see Section 13.0).
[6.13] Each scenario indicates the number and type of leaders available to each Player. Leaders are chosen at random by the owning Player from one of three pools containing all available and eligible Friendly leader units of the appropriate type (company commander, platoon leader, or platoon sergeant) included among the counters provided. The scenario may specify minimum and maximum ratings for leader pools; only leaders with ratings at or above the minimum and at or below the maximum are eligible for inclusion in the pool. If no such limits are set by the scenario instructions, all leader counters of the appropriate type of included in the pool.
[6.14] The owning Player must list on the Unit Status Sheet the rating of each of his leaders, its type, and platoon or company affiliation.
[6.15] Unless specifically stated otherwise, a platoon leader or platoon sergeant’s rating is used to resolve command control determination and/or suppression recovery attempts for his own platoon only, and a company commander’s rating is used to resolve suppression removal attempts for units in his own company only.
[6.16] Company commander ratings do not affect command control in the Basic Game, but may be used by the Players in attempts to remove suppression from units in that commander’s company, and perform miscellaneous other functions, see Case 17.12; in the Intermediate Game Section 26.0; in the Advanced Game, Cases 33.5 (Artillery Observation) and 48.3 (Communications Between Allied Players in multi-Player Games).
[6.17] Platoon leader ratings are used to determine command control and in attempts to recover from suppression by units in that leader’s platoon.
[6.18] Platoon sergeant ratings do not affect command control, but may be used in suppression recovery attempts for units in that platoon. If a platoon leader is killed, the platoon sergeant is used to replace him.
Player’s Note: Player’s who wish to add to the available leader counters by mutual agreement should feel free to do so; a Player may, for example, desire a leader with his own name. The Players should take care not to unbalance the mix of leader ratings in the leader selection pools by such addition, unless the scenario clearly provides for a leader pool weighted at one end or the other. When using a leader counter with a Player’s name, it is advisable to first pick a leader counter from the leader pool, and then replace that counter with the counter bearing the Player’s name, but retaining the leader rating of the counter originally picked from the leader pool.
6.2 COMMAND CONTROL
Each platoon’s current command control status is indicated on the Action Point Track by the marker for that platoon.
[6.21] When determining command control for suppressed platoon leaders, subtract 2 from the leader rating. However, no leader rating may ever drop below 1.
[6.22] When determining command control for platoons.without platoon leaders, see Case 6.55.
[6.23] Action Point Loss Matrix (see charts and tables)
Bold
6.3 LEADER MOVEMENT
[6.31] Leaders and spotters receive commands like normal units, although they may not receive Fire commands.
[6.32] If a leader is stacked with a Friendly combat unit, that leader may be moved with that combat unit during the Action Stage as part of the same individual action.
[6.33] A leader may move individually during the Action Stage.
[6.34] A leader may be moved individually and while stacked with another unit as separate actions during the same Action Stage.
[6.35] Leaders may be moved at no cost in Action Points but they must be moved no more than one hex at a time and no more than twice during any Game-Turn. When a leader is moved, play passes back to the opposing Player.
6.4 LEADER SUPPRESSION
A leader may become suppressed only voluntarily or as a result of being fired on; he is not suppressed by fire at other hexes in the same megahex (see Case 15.12). Suppressed leaders may not move.
6.5 LEADER REPLACEMENT
[6.51] If a platoon sergeant is killed, he is removed from the game and not replaced.
[6.52] If a platoon leader is killed, he is removed from the game. The owning Player then designates that platoon’s platoon sergeant, if there is one, as the new platoon leader. When the “promotion” takes effect, the platoon sergeant counter is flipped over to the New Platoon Leader side. If the platoon has more than one platoon sergeant, the sergeant with the highest rating is promoted. If there is more than one sergeant with the highest rating, the owning Player may promote the sergeant of his choice. A promoted platoon sergeant is considered a platoon leader for all purposes. Exception: 6.54.
[6.53] If a platoon leader is killed and there is no platoon sergeant, the owning Player randomly chooses a replacement platoon leader from among the unused counters. The replacement platoon leader, however, has the minimum rating specified by the scenario for platoon leaders, regardless of what is printed on the counter. If there is no minimum rating specified, the new leader is automatically rated a “2.” The new leader may be placed with any combat unit of his platoon.
[6.54] If a company commander is killed, the owning Player designates the highest-rated platoon leader of that company (new platoon leaders excepted — a sergeant cannot become company commander as long as there is a lieutenant left in” the company) as company commander. If there is more than one platoon leader with the highest rating, the owning Player may promote the one of his choice. When the promotion takes effect, the leader counter is flipped over to the new company commander side. The platoon which loses its platoon leader in this fashion then replaces the platoon leader as described in Cases 6.52 and 6.53.
[6.55] In the Basic Game, leader replacement takes effect at the beginning of the fifth Game-Turn following the one in which the original leader is killed. This is superceded by Case 26.6 in the Intermediate Game.
[6.56] Platoons which are temporarily without platoon leaders use their platoon sergeants to determine command control. If there is more than, one platoon sergeant, use the highest-rated one. If there is no platoon sergeant, the platoon receives 2 initial Action Points.
7.0 THE MAP
COMMENTARY:
The type of town represented with this map was chosen because it is the most common type of “city” that would be fought over in Europe should a new war arise. Towns of the size represented in this game will be critical to commanders because of the control of the road or railroad network that they offer (witness the importance of Bastogne during the Ardennes Offensive in 1944), or because they contain critical bridges, depots, or other objectives. Although they may be bypassed by initial attacking waves, later echelons will receive the task of securing towns such as that represented in this game. Actually, our map represents something between the U.S. Army classifications of “small village” (1000 or less people) and “towns and small cities” (less than 10,000 people).
Cityfight is best played by two or more people (perhaps with a third person playing the role of umpire). The crux of any urban fighting is that it is very difficult to tell where the Enemy is hiding or moving. For this reason, the concept of limited intelligence is critical. A dividing screen between the players or a back-to-back seating allows for this . limited intelligence game-system to work effectively. At the start of the game, each Player knows little more about the Enemy than his counterpart in reality.
GENERAL RULE:
Both Players are provided with identical maps. When a scenario has been chosen for play, each Player obtains his starting forces and deploys them on the map. Before the deployment, however, a dividing screen must be placed between the Players or the Players should sit back-to-back so that their actions during the course of the game will remain hidden from their opponent. It is strictly forbidden to observe the opponent’s map. Finally, as terrain plays a critical role in the resolution of combat in built-up areas, the map includes a relatively intense rendering of the significant terrain features; Players should familiarize themselves with these features before the start of play.
CASES:
7.1 MEGAHEXES
There are two types of hexes in Cityfight: regular hexes (each identified by a megahex code followed by a one digit number) and megahexes (each identified by a number-letter-code). A megahex is one large hex comprising seven smaller hexes (see 3.1). The megahex serves several critical game functions, most specifically those having to do with sighting Enemy units. Each megahex is 50 meters in diameter.
7.2 OPEN HEXES
Regular hexes are divided into three types: open, woods, and building. Each regular hex is 16.67 meters in diameter.
[7.21] An open hex is any regular hex that does not contain a building or woods feature.
[7.22] An open hex may or may not contain a street feature. Regardless of whether it does or not, it is still an open hex.
7.3 BUILDING AND WOODS HEXES
[7.31] Any regular hex that contains a building feature is a building hex. Note that each building hex contains one or more accessable hexsides. The only way a unit may enter or leave a building hex is through these accessable hexsides (accessability does not affect fire). If a unit enters a building hex in an Action Stage, it may not move any further during that Action Stage.
[7.32] Any regular hex that contains a woods feature is a woods hex. Woods hexes may be entered from any adjacent hex. However, if a unit enters a woods hex in an Action Stage, it may not move any further during that Action Stage.
[7.33] Note that building hexes are differentiated as to general type: either wood, stone (includes brick), or concrete. Combat results applied in hexes with different types of buildings may vary (see Case 11.5).
[7.34] When a building feature extends across a hexside (no intervening empty space) and such hexside is not blocked (see Case 7.44), the hexside is accessible, even though not marked so on the map.
7.4 OTHER MAP FEATURES
[7.41] Railroad tracks have no effect, on play, unless noted in the scenario.
[7.42] Height levels and streets have no effect in the Basic Game.
[7.43] River hexsides may or may not be impassable in the Basic Game, depending on the scenario; intact bridge hexsides are always passable.
[7.44] Blocked hexsides may not be traversed and the blocked part of the hexside may,not be fired through in the Basic Game.
[7.45] Hex 3L3 (the Schneider Farm’s pond) cannot be moved into (except, in the Intermediate Game, via amphibious movement). But it may be fired through. The railroad bridge may be used like any other bridge. The fountain in the village square has no effect on play.
7.5 MAP TRANSLATION
German: English
Buildings:
| German | English |
|---|---|
| Altersheim | Old Folks’ Home |
| Altes Rathaus | Old Town Hall |
| Arndt-Schule | Arndt School |
| Bahnhof | Railroad Station |
| Bierhalle | Beer Hall |
| Bundeswehr | Armory/Reserve Training Center |
| Das Neue Einkaufszentrum | New Shopping Center |
| Dorfmuhle | Village Mill |
| Dorfschule | Village School |
| Feuerwehr | Fire Department |
| Guterlager | Warehouse |
| Kommerzbank |
Bridges:
| German | English |
|---|---|
| Adenauerbrucke | Adenauer Bridge |
| Freiherrnbrucke | Baron’s Bridge |
| Fussgangerbrucke | Footbridge |
| Kaiser-Wilhelm-Brucke | Kaiser Wilhelm Bridge |
| Neubrucke | New Bridge |
Woods and Parks:
| German | English |
|---|---|
| Burschenhain | Boy’s Grove |
| Dorfpark | Village Park |
| Dunkelwald | Dark Woods |
| Eichgeholz | Oak Woods |
| Herrenpark | Manor Park |
| Neugeholz | New Forestation |
| Nordwald | North Woods |
| Pilzwald | Mushroom Forest |
| Schneiderteich | Schneider Pond |
Areas:
| German | English |
|---|---|
| Bauernhof d. Fam. | Farm of the Family |
| Dorfsfriedhof | Village Cemetery |
| Freiherrnwiese | Baron’s Mall |
| Fussball Spielplatz | Soccer Field |
| Kriegsdenkmal | War Memorial |
| Schulhof | Schoolyard |
| Schuttabladestelle | Dump |
7.6 THE OLD VILLAGE
The “Old Village’ is the more densely-built up heart of Gerlafingen, the majority of the buildings of which date back to before World War II; in the game it functions to limit the range of megahex search (see Case 10.2) and is often given particular significance in scenario instructions.
8.0 MOVEMENT
GENERAL RULE:
In order for a Player to move a unit other than a leader, he must have issued a Movement Command to that unit. After a Movement action is performed, play passes on to the opposing Player. Movement is always voluntary — a Player is never obligated to move a unit.
PROCEDURE:
If the owning Player chooses a Movement action, he may move any unit to which he has issued a Cautious or Bold command one hex. If a unit with a Cautious command chit is moved, at the conclusion of this movement, the Cautious command chit is removed to indicate that this unit may move no further for the remainder of the Action Stage. If a unit with a Bold command chit on top of it is moved, at the conclusion of this movement, the Bold command chit is placed under the unit counter, indicating that this unit may be moved one more hex in the current Action Stage. If a unit with a Bold command chit beneath it makes its second hex of movement, the command chit is removed, indicating that the unit in question may be moved no further in the current Action Stage.
CASES:
8.1 FIRE AT A UNIT ISSUED A BOLD COMMAND
If any personnel unit that was issued a Bold command in the current Game-Turn is fired upon by the Enemy Player, this fact must be announced by the owning Player. The firing unit has its Fire Strength doubled against the unit(s) with the Bold command. This may require separate resolutions of the attack against different units which are stacked together, as an exception to Case 11.52.
8.2 MOVEMENT RESTRICTIONS
[8.21] In the Basic Game a unit may enter or leave a building hex only through an accessible hexside.
[8.22] If a unit enters a building or woods hex in an Action Stage, it may not move again for the remainder of that Action Stage.
[8.23] Unless specified in the scenario instructions, a unit may never move off the map.
[8.24] A unit may move only to one of the six adjacent hexes (subject to movement restrictions). Megahexes have no effect on movement.
[8.25] A suppressed unit (see Section 15.0) may not move.
8.3 EXPENDING ACTION POINTS
Before carrying out each Movement action by a combat unit, the owning Player reduces the number of Action Points indicated for that unit’s platoon on his Action Point Track by one.
9.0 STACKING (More Than One Counter In a Hex)
GENERAL RULE:
Each unit counter represents a certain number of men. (This number is noted in the Unit Data Tables). In the Basic and Intermediate Games, the maximum number of Friendly men that may end any Game-Turn stacked together in the same hex — regardless of how many counters are in the hex — is 13 for the Chinese and 11 for all other nationalities. Informational counters (e.g., command chits) do not count against stacking restrictions. There is no movement cost to stack or unstack.
CASES:
9.1 LEADER STACKING
[9.11] A leader who is stacked with a unit of his platoon may move with that unit.
[9.12] When a leader is stacked with a unit which becomes suppressed, the leader is suppressed and may not move further during the current Game-Turn; see Section 15.0.
[9.13] When a leader is stacked with a Friendly combat unit which is killed, the owning Player rolls one die. On a 1-3, the leader is also killed. On a 4-6, the leader is not killed, but is suppressed.
[9.14] If only non-combat units are stacked together with a leader, a K result eliminates all of them.
[9.15] A leader counts as one man for stacking purposes,
9.2 EFFECTS OF STACKING ON ACTIONS
[9.21] If units of the same platoon are stacked together at the beginning of the Game-Turn and receive identical command chits, the stack may, by taking identical actions:
-
Move together;
-
Sight together, in which case the units may gain a favorable adjustment to the Search Rating of the megahex they are attempting to sight (see Case 10.33);
-
Fire together, using a single weapon type at a common target, in which case the Fire Strength is the sum of the Fire Strengths of the units in the stack having that type of weapon. Fireteams with and without machineguns, and machinegun units, may also fire together, in any combination, if in the same platoon.
-
Perform these joint actions without play passing to the opposing Player until all the units performing actions together have completed their actions.
[9.22] The performance of an action by a unit which is acting together (see Case 9.21) with another unit still requires the expenditure of an Action Point (i.e., if two units of the same platoon are moved together, two Action Points would be expended by that platoon).
Example: Two German three-man fireteams of the same platoon, one with and one without machinegun, are stacked together in hex 8D1. During the Command Decision Stage, the German Player issued Fire commands to both units. Now, during the Action Stage, the German Player announces an attempt to sight megahex 9E. He does this by having both fireteams perform a joint action, and flips the counter of each one over to indicate the completion of a Sighting action. He also subtracts two Action Points from his Action Point Track for that platoon by moving the platoon marker on the track. He rolls a 34 for the megahex sighting, but adjusts this by + 10 under Case 10.33 to reflect the total of six men in the sighting units, making the roll 44. Since the Search Rating of the megahex is 4], the adjusted sighting dice roll is successful, The opposing Player announces the presence of a Soviet squad in hex 9E4. The German Player now decides to take an “immediate Fire action” jointly, since it is obvious that the line of sight is clear. The Attack Strength of the fireteam without machinegun is 5, while the other fireteam has an Attack Strength of 9. He adds these two figures to obtain a joint Attack Strength of 14, and reads the results on the 14-19 column of the Soft CRT. He removes the Fire chits from both units and subtracts an additional 2 Action Points from his Action Point Track for that platoon. Following the resolution of the attack, play passes to the Soviet Player.
[9.23] Units stacked together are never obligated to perform actions together.
[9.24] Combat results achieved against a hex containing a stack of units are applied to all units in the stack. Exception: Case 9.13.
9.3 ORGANIZATIONAL RESTRICTIONS ON STACKING
Units of different platoons may not be stacked together. Company commanders may not be stacked with a unit attached toa different company.
10.0 MEGAHEX OBSERVATION (SIGHTING) AND IMMEDIATE FIRE
COMMENTARY:
The megahex observation procedure is a highly abstract way of representing search and observation without revealing the observing/searching unit’s presence.
GENERAL RULE:
A Player may have a unit attempt to observe enemy units by performing a Sighting action, but only if that unit has been issued a Fire, Search, or Cautious Movement command. Each unit must observe for itself (Exception: Case 9.21). If the owning Player chooses a Sighting action, his unit may attempt to “observe” the Enemy in the megahex occupied by the observing unit or any one adjacent megahex. Outside the Old Village, the observing unit may alternatively attempt to observe a megahex two megahexes away.
Sighting is always voluntary; a unit is never obligated to perform a Sighting action. A unit that performs a successful Sighting action has “spotted” one or more Enemy units. Under certain circumstances, a unit which spots an Enemy unit may perform an immediate Fire action against that Enemy unit.
PROCEDURE:
During an Action Stage, if a Player decides to have a unit perform a Sighting action, he calls out loud the code number of the megahex he wishes to observe. As he calls out the code number, he flips over his own observing unit to indicate that it may not perform another Sighting action for the remainder of the Game-Turn (Exception, Case 5.4). He must also expend one Action Point, adjusting the appropriate platoon’s Action Point Track marker, unless the observing unit is a spotter or leader. The Sighting action is then resolved (see Case 10.3).
Player’s Note: Players may wish to use the military alphabet in calling out megahex codes. The military alphabet is as follows: Alpha, Bravo, Charlie, Delta, Echo, Foxtrot, Golf, Hotel, India, Juliet, Kilo, Lima, Mike, November, Oscar, Papa, Quebec, Romeo, Sierra, Tango, Uniform, Victor, Whiskey, X-ray, Yankee, Zulu.
CASES:
10.1 WHICH UNITS MAY PERFORM SIGHTING ACTIONS
Each command enables the unit to which the command is issued to perform a number of Sighting actions between zero and two. For a description of how many Sighting actions each command allows, see Case 5.5. A unit that is suppressed may not perform a Sighting action.
10.2 RESTRICTIONS ON SIGHTING ACTIONS
[10.21] A Player resolving a Sighting action may call only one megahex per sighting action (i.e., after the attempt to observe Enemy units in that megahex is resolved, the opposing Player may then have a unit perform an action).
[10.22] In order for a unit outside the Old Village to attempt a Sighting action into a megahex two hexes away, the owning Player must be able to trace a line of sight from any part of the hex his unit occupies to the center of any hex in the megahex being observed. See Case 11.22 for the definition of a line of sight. No hex through which this line of sight passes may be within the Old Village. There are no other situations when a line of sight must be traced.
[10.23] (Optional Rule) Players may alternatively agree before play to require a valid line of sight (determined by the sighting player) as a prerequisite for all Sighting actions. The line, of sight is determined from any part of the hex containing the unit performing the sighting action to the center of any hex in the megahex being observed. If so, then this requirement supercedes Case 10.22. See Case 11.22. ;
10.3 SIGHTING RESOLUTION PROCEDURE
After the Player attempting to observe has called out the code number of a megahex, the opposing Player must determine if the Sighting action is successful or unsuccessful.
[10.31] If the opposing Player has one or more units in any open hexes (see Case 7.21) of the megahex being observed, he immediately states the regular hex number(s) of the hexes occupied by these units. These units are spotted. It is not necessary to state how many men actually occupy the hex (or state their weapons); the Player whose unit(s) are sighted is simply obligated to state the numbers of the open hex(es) in which they are, whether they are suppressed, and whether a combat unit is in each hex. A successful observation may lead to a special change in the alternating actions of the two Players (see Case 10.6). Otherwise, the opposing Player may have a unit perform an action.
[10.32] Sighting Procedure
-
If a megahex being observed contains any woods and/or building hexes or if foul weather or night (Intermediate Game) is in effect, the sighting Player must roll one large and one small die after calling out the number of the megahex in question (see Case 10.21). The result of this dice roll is announced (see step 2), though it may be modified first; see Cases 10.33-10.35, and in the Intermediate and Advanced Games, 18.42 and 27.17; if the dice roll result is modified by the sighting Player, only the modified number is announced (all modifications are made secretly by the sighting Player; the dice roll result is simply announced — it is not seen by the Enemy player). Furthermore, the sighting Player may at his option announce a dice roll result lower than he is entitled to. (This may be useful to conceal strength or location). After the sighting Player has announced the megahex and the dice roll result, the opposing Player must state whether or not he has any units in open hexes in this megahex (see Case 10.31).
-
The dice roll is read as a two-digit figure, with the larger die giving the first digit and the smaller die giving the second digit. Thus, if the larger die is a “3” and the smaller a “5,” then the result is read asa“35.”
-
If the result as adjusted by both Players is equal to or greater than the search rating of the megahex being sighted, the sighting attempt is successful and the opposing Player must immediately state the hex number(s) of the building and or woods hexes in which he has units. These units are spotted. He need not announce how many units there are, what type they are, whether suppressed, etc. If he has no units in these hex-types in the megahex, he states this fact to the sighting Player. A successful observation may allow the sighting unit an Immediate Fire action (see Case 10.6).
-
If the adjusted dice roll is less than the Search rating of the megahex, the attempt at sighting units in woods or building hexes is unsuccessful and the opposing Player remains silent, whether or not he has units present in such hexes. Play then passes on to the opposing Player.
[10.33] If a unit of one or two men is performing the sighting, 20 is subtracted from the sighting dice roll. If there are 6 or 7 men in the unit(s) performing the Sighting action, the sighting dice roll is increased by 10; if there are eight or more men in the units performing the Sighting action, the sighting dice roll is increased by 20.
[10.34] If a unit is sighting the megahex it is currently located in, the sighting dice roll is increased by 20. Moreover, if a unit or stack of 4 or more men is attempting to sight its own megahex (the megahex currently occupied), the Search rating of the megahex for that sighting attempt may never exceed 64, regardless of other modifications (such as weather) which would otherwise raise it higher.
[10.35] If a unit is sighting a megahex two megahexes away (possible only outside the Old Village), the sighting dice roll is reduced by 20.
[10.36] The Player whose unit is being observed adds 20 to the announced sighting dice roll result when applying it to units which have performed a Fire action in the current Game-Turn and have not been moved since. (Players must keep track of which of their units have fired), Other units which may be in the same megahex, but would not be spotted ordinarily, remain unspotted.
Example: The Search rating of a megahex is 55. The announced sighting dice roll result is 43. Since this is less than the Search rating of that megahex, units in buildings or woods hexes which have not fired remain undisclosed and are not spotted. A unit which has fired in that Game-Turn, however, is spotted as the dice roll result must be adjusted to 63 (43 + 20 = 63) as applied to them and thus is successful. The owning Player must now announce the location of the unit which had fired in that same Game-Turn, even though he does not announce the presence of other units in the hex. If more than one unit had fired in that Game-Turn, the location of each such unit which had fired must be announced.
[10.37] (Optional in Basic Game; Standard in Intermediate Game) The opposing Player adds 10 to the announced sighting dice roll result when applying it to units which have already been spotted in the current Game-Turn by a Friendly unit and which have not been moved since. Other units which may be in the same megahex, but would not ° be spotted ordinarily, remain unspotted. If the Friendly side does not have use of a telephone center (10.8), this modification may only be used if the Friendly unit which did the previous spotting is in the same or an adjacent megahex as the unit taking the current Sighting action; this fact must be announced by the sighting Player if he wishes to benefit from this modification, but he is not obligated to do so, if he is willing to forego the advantage.
[10.38] The Player whose unit is being observed subtracts 20 from the announced sighting dice roll when applying it to units which are suppressed in a woods or building hex.
Example: In the example cited in Case 10.36, the observing Player has another unit perform a Sighting action and rolls a 62. An unsuppressed unit in a building hex is successfully spotted. A suppressed unit in a building hex, however, is not spotted, as the dice roll is adjusted to 42 (62 — 20 = 42) for that unit.
[10.39] Search Rating Modification Chart (see charts and tables)
10.4 AUTOMATIC SPOTTING AND OBSERVATION POSTS
[10.41] Engaged units (see Case 13.3) are automatically spotted by each other; if a unit moves out of the close assault hex, the opposing Player must be so informed; however, the direction is not announced since withdrawal cancels automatic spotting.
[10.42] An unspotted Enemy unit that opens fire from a hex which is currently occupied by a Friendly unit is automatically spotted by that Friendly unit; but if the Friendly unit does not open fire, the Friendly unit is not automatically spotted by the Enemy unit.
[10.43] In some scenarios, certain hexes or buildings may be designated observation posts (OP) for one Player or the other. Observation posts are effective as long as the Friendly Player controls the telephone office (see Case 10.8). The location of all OPs must be revealed to the opposing Player at the start of play.
[10.44] The first time that a unit enters an Enemy observation post hex, the Player controlling that unit must immediately inform his opponent of that fact; the unit moving in is automatically spotted and may be fired on by any Friendly unit able to do so in the subsequent Friendly Action Phase. If the unit is not killed in that action, however, and is not close assaulted, it is no longer automatically spotted but must be spotted using normal procedures. Once an observation post has been occupied by an Enemy unit, the observation post marker is removed from the map and the hex no longer functions as an observation post.
10.5 SPOTTERS
[10.51] Spotters are 2-man non-combat personnel units assigned by the scenario to one or both Players. Spotters may be given search or movement commands only. Actions by spotters do not cost Action Points.
[10.52] After a spotter performs an action, play passes to the opposing Player. Spotters may be suppressed or killed just as other units. Killed spotters, however, do not count for Victory Points. (Exception: In the Advanced Game, killed forward observers do count for Victory Points.)
[10.53] Spotters do not count in determining preservation levels (see Section 17.0).
[10.54] Spotters function: normally if the telephone center is in Friendly hands and functioning (see Case 10.81). If the telephone center is no longer functioning, or has been in Enemy control from the start, a spotter may be issued a command only if it is in the same megahex as a combat unit or a leader; otherwise the spotter remains where it is and does not move or attempt to sight. (Exception: In the Advanced Game, forward observers.)
[10.55] Spotters suffer combat results in the same manner as combat units.
10.6 IMMEDIATE FIRE ACTION
[10.61] A unit or stack of units which successfully sights an Enemy unit may be permitted an Immediate Fire action under certain circumstances — disregarding the normal, alternating sequence of actions between Players. This Immediate Fire action may be performed only under the following conditions:
-
The unit which has just successfully spotted must have been issued a Fire command and not yet performed a Fire action, and
-
The sighting Player must be able to trace a clear line of sight (see Case 11.3) from the sighting unit to one of the Enemy units just observed.
[10.62] The decision to perform an Immediate Fire action must be made immediately upon completion of the successful observation. If the Immediate Fire action is. chosen, the owning Player must
expend two Action Points (one for the Sighting action and one for the Fire action), flip over the firing unit — indicating that it may not sight again for the remainder of the Action Stage — and remove the Fire command chit.
[10.63] If a stack of units that have been issued Fire commands jointly sights Enemy units, each of the units in the stack is entitled to an Immediate Fire action. They may fire individually in an order chosen by the owning Player, or may fire in combination (with a single Fire Strength) at a common target (see Case 9.12-3).
10.7 SPECIAL SIGHTING SITUATIONS
[10.71] Hex 4H7 (the courtyard) is not considered an open hex for sighting purposes. only. Exception: If the sighting unit is in megahex 4H, he may announce this fact and sight hex 4H7 as an open hex.
[10.72] A unit which is surrounded by adjacent woods and/or building hexes may only attempt to sight the megahex it is in. See also Case 10.23.
10.8 TELEPHONE OFFICES
[10.81] There is a telephone office in hex 5E5 (Advanced Game: on the 3rd floor). A scenario may, however, designate an alternate location for the telephone office, or give each side a telephone office. Control of a telephone office at the start of play is designated in the scenario.
[10.82] As soon as an Enemy combat unit occupies the hex containing a telephone office,
————— even if eliminated while performing close assault on the hex, the telephone ceases to function. It may not be restored to a functioning status.
11.0 FIRE COMBAT
GENERAL RULE:
A Player may choose to perform a Fire action with any of his units to which he has issued a Fire command. If the owning Player chooses a Fire action, he may fire at any hex on the map to which the firing unit may trace a line of sight (LOS). A unit, however, may only fire at the hex it occupies through close assault (Section 13.0). This fire is of two types: against spotted hexes and against unspotted hexes. Fire is always voluntary — units with a Fire command are never obligated to fire.
PROCEDURE:
If a Player decides to perform a Fire action, he declares, ‘I am firing against hex ‘X’ with a unit in hex ‘Y.” Both Players then verify that the LOS is clear, and if so, the fire attack is resolved. After a Fire action is conducted, play passes on to the opposing Player. Remember that fire may be initiated due to an Immediate Fire action (see Case 10.6).
CASES:
11.1 WHICH UNITS MAY FIRE
Any combat unit that has been issued a Fire command which has not been performed may be chosen by the owning Player to carry out a Fire action. However, any unit that is out of ammunition (see Section 14.0) or is suppressed (see Section 15.0) may not fire. For close assault fire, see Section 13.0.
11.2 HORIZONTAL - LINE OF SIGHT
[11.21] A unit may only fire at a hex to which a line of sight (LOS) may be traced. If an LOS is blocked, fire may not take place. In the Basic and Intermediate Games, Players are only concerned with the horizontal line of sight.
[11.22] A LOS is defined as an imaginary straight line connecting:
-
If the hex occupied by the firing unit and the target hex are both open hexes: any part of the hex. containing the firing unit to the center of the target hex;
-
If both hexes are building or woods hexes:, any part of the building or woods feature occupied by the firing unit to the center of the building or woods feature of the target hex;
-
If the firing unit is in a building or woods hex and the target hex is open: any part of the building or woods feature occupied by the firing unit to the center of the target hex;
-
If the firing unit is in an open hex and the target hex is a building or woods hex: any part of the hex occupied by the firing unit to the center of the building or woods feature of the target hex.
An LOS is considered “clear” if this straight line may be traced such that it does not pass through an actual outline of a building, woods, or embankment feature, except any in the hex fired from and the target hex. (Exception: Case 11.27). If the LOS does pass through any of these three features other than in the hex fired from or the target hex, it is considered Blocked. Any type of straight edge should be used by the players to determine a LOS.
Player’s Note: A line of sight is not necessarily reciprocal; a unit may be fired upon from a hex to which it cannot return fire. This simulates the practice, for example, of firing from just around the corner of a building and then ducking out of sight. The only way of countering this tactic is through use of overwatching units with different lines of sight to the Enemy.
Example: There is a line of sight from the northeast corner of the building in hex 7I6 to the center of the building in hex 4F7, but there is no line of sight from any part of the building in hex 4F7 to the center of the building in hex 7I6. A unit in 7I6 can fire on 4F7, but not vice versa.
[11.23] If an LOS passes directly along the edge of a building or woods or embankment boundary, that LOS is not blocked.
Player’s Note: If a serious and unresolvable disagreement should arise, Players should resort toa die roll to resolve the question.
[11.24] During close assault, a personnel unit may fire only at the hex it occupies. This line of sight may never be blocked. (See Section 13.0, Close Assault).
[11.25] Friendly or Enemy units never block LOS.
[11.26] Whether a building hexside is “accessable” or not has no bearing on line of sight; one can fire into or out of any building so long as the hexside fired through is not blocked.
[11.27] A building outline which is blocked (representing the separation of adjoining buildings) blocks line of sight even if it is a hexside of the target hex or the hex fired from, so long as it crosses the line of sight.
11.3 FIRE ACTION RESOLUTION PROCEDURE
[11.31] If a Fire action is declared, the owning Player immediately states the hex number he is firing at and the hex number occupied by his firing unit. Next, the opposing Player should verify that a clear LOS exists between the two hexes (see Case 11.2). (Player’s Note: Any severe disagreements should be resolved by a die roll). The firing Player rolls two dice and consults the appropriate Combat Results Table for the type of weapon or unit firing (in the Basic Game, always the Soft CRT, Case 11.8), making sure to apply any modifiers to the result. He announces the result, which is immediately applied (see Case 11.5).
[11.32] Before a unit has completed a fire action, the owning Player removes the Fire command chit, indicating that this unit may not fire again for the remainder of the Action Stage. Similarly, the owning Player reduces the number of Action Points remaining to the firing unit’s platoon on his Action Point Track by one.
(Figure legend: blocked hexside; Point of Reference from which LOS is measured.)
[11.33] The firing Player must announce whether the fire is rifle (fireteam without machine gun), machinegun (machinegun units), or mixed (fireteam with machinegun; or units stacked and firing together with both rifle and machinegun fire). In the Intermediate Game, the following additional categories are added: main gun, the various types of anti-tank weapons (recoilless rifle, ATGM, or LAW), sniper fire, grenade, flamethrower, demolition rocket, M202 FLASH. The number of men or units firing is not announced.
11.4 SPOTTED AND UNSPOTTED TARGET HEXES
Fire is always performed against hexes, not units. It is not necessary for a target hex to be occupied by Enemy units (in fact, the firing Player will often have no idea whether it is or not). Fire is of two types:
-
Against “spotted targets.’
-
Against “unspotted targets.”
[11.41] A spotted target is defined as any hex being fired on by a Player utilizing an Immediate Fire action (see Case 10.6), close assault, or in which an Enemy unit is automatically spotted (see Case 10.4). All other targets are considered unspotted. Thus, a spotted target hex must be one that was the successful object of an immediately preceding Sighting action, or a hex which has been automatically spotted.
[11.42] Fire against unspotted targets is reduced in effectiveness (see Case 11.54).
11.5 FIRE COMBAT RESULTS
[11.51] Soft combat results mean the following:
A “—” indicates “No Effect.” Nothing further is done, and no units on the map have been affected.
An ‘“8” indicates that all Enemy units in the target hex are suppressed (see Section 15.0). If the target was an open hex, then all Enemy units occupying open hexes in the entire megahex are also immediately suppressed. However, if the target was a building or woods hex, then only the Enemy units: in that specific building or woods hex are suppressed. A Suppression marker is placed on each unit or stack which is suppressed due to this fire. In addition, for every unit suffering suppression and attached to a platoon, the owning Player immediately reduces the number of Action Points on his Action Point Track by one for that platoon. Any unit that suffers a suppressed result when already suppressed is not affected.
A “K” result means that all Enemy units in the target hex are killed and removed from play (Exception: see Case 11.54). In addition, all Enemy units occupying open hexes other than the target hex in that megahex are immediately suppressed. For every unit suffering a “K” result and attached to a platoon, the owning Player immediately reduces the number of Action Points on his Action Point Track by two for that platoon. A unit that is suppressed and suffers a “K” result is eliminated from play.
[11.52] The opposing Player is not obligated to state how many of his units have been affected in any way by Enemy fire (including those which are suppressed in other open hexes of the megahex). Exception: In close assault, see Case 13.24.
[11.53] Note that the effects of terrain are integrated into the CRT. Certain dice roll results achieved by the firing Player may have no effect against a building or woods target hex.
[11.54] If a target hex is unspotted (see Case 11.4), all “K” results achieved by the firing player on the Soft CRT are read as “S” results.
[11.55] If a target hex about to be fired upon contains any personnel units that were issued a Bold Movement command, whether or not it has been performed, the owning Player must state this fact aloud to the firing player. As a result, the Fire Strength of the firing unit is doubled when resolving this attack; see Case 8.23.
[11.56] If all of the units in a spotted target hex are already suppressed, the Fire Strength of each firing unit on the Soft CRT may be reduced by one half (fractions rounded up) when resolving this attack. This reduction does not apply to close assault combat. For this reduction to apply, the owning Player must declare the fact that his units are suppressed; he may at his option choose not to declare this information (for units in building or woods hexes) and thus not benefit from this provision.
[11.57] There is no range attenuation in the Basic Game: use the highest attack strength listed for the unit on the unit Data Tables, and the maximum range listed. If no maximum is listed, the range is unlimited.
11.6 MACHINEGUN UNITS
Bipod and tripod mounted machinegun units are combat personnel units which possess special properties with regard to fire combat. Note: This case does not apply to fireteams with machineguns, only to machinegun units.
[11.61] When a bipod or tripod mounted machine’ gun unit is chosen to perform a Fire Action, it may make three separate, individual attacks against any three contiguous hexes as long as an LOS can be traced to each of them (see Case 11.2). These separate attacks must be completed before the opposing Player may perform an action in turn. The owning Player is not obligated to make three attacks, however; he may make only one, or two if he wishes. The firing Player may attack the same hex more than once, as long as no more than three attacks are made by each unit. Only one Action Point is subtracted from the platoon’s available action points regardless of whether one, two or three hexes are attacked.
[11.62] The target hex(es) fired at by machinegun units must be chosen and stated aloud by the owning Player before the first attack dice roll is made.
[11.63] Bipod and tripod mounted machine gun units are more vulnerable than normal units to running out of ammunition (see Case 14.14).
Example: There is a British tripod machinegun unit in hex 4H6, which had been issued a Fire command. Earlier in the Action Stage, the unit had performed a sighting action with respect to megahex 4G but had not spotted any Enemy units there. Now, play having returned to the British side, the British Player decides to undertake suppression fire (so-called because under Case 11.54, all K results against unspotted hexes are converted to S) along Friedrichstrasse. He has the machinegun unit perform a fire action, removes the Fire command chit, and reduces the Action Points remaining to the machinegun unit’s platoon by 1. He decides to fire at hexes 3G3, 3G4, and 2H2, and announces all three hex numbers, together with the location of the firing unit and the type of fire (“machinegun,” though this is obvious from the fact that three target hexes were announced). He announces fire resolution for hex 3G3. His attack strength is 7, and he rolls a 2. The K result is converted to S, but the ammunition depletion result does not apply under case 14.14. He then attacks hex 3G4, rolls a 6, and obtains an S result. Finally he attacks hex 2H2, rolls an 8, which produces an S result; this time the ammunition depletion is effective since it is the last fire attack of that Fire action.
[11.64] Tripod machinegun units may not be issued Bold commands.
[11.65] Tripod machinegun units may not be issued a Fire command unless they were issued either a Fire command or no command at all during the previous Game-Turn. (This simulates setting-up time.)
[11.66] Whenever a Soviet or North Vietnamese Player has advantage, before beginning play he may break down one squad per company into two bipod machinegun units and one 4-man fireteam without machinegun.
[11.67] A bipod machinegun unit or a fireteam produced as a result of squad breakdown may recover from suppression (see Section 15.0), or close assault on a Movement command, only if a leader is stacked with it.
11.7 AUTOMATIC RIFLES
Use of this rule is optional in the Basic Game and Standard in the Intermediate Game.
Any unit that is indicated as possessing automatic fire capability in the Unit Data Section may be fired “automatically” at the discretion of the owning Player.
[11.71] If the owning Player wishes to make an automatic fire attack with a unit to which he has issued a Fire command, he must state this fact before he rolls the dice in order to resolve the combat.
[11.72] A unit making an automatic fire attack may make two separate, individual attacks against contiguous hexes to which it can trace an LOS (see Case 11.2). These attacks are subject to the same restrictions as described in Case 11.61.
[11.73] The target hexes fired at due to an automatic fire attack must be chosen by the owning Player before the first dice roll is made.
[11.74] Units making an automatic fire attack are more vulnerable to ammunition depletion than other units.
[11.75] The fire strength of units making an automatic fire attack is reduced to two-thirds, fractions rounded up, for that attack.
11.8 SOFT COMBAT RESULTS TABLE (see charts and tables)
12.0 PASSING
GENERAL RULE:
A Player may pass rather than perform an action during the Action Stage. To do so, the Player simply does nothing and tells his opponent that he is done, “your turn,” etc. However, to take a pass still obligates the Player, if he does not have advantage, to expend one Action Point. This expenditure is counted against the platoon which would have taken an action if the Player had not chosen to pass, and advances the platoon rotation (see Case 4.1, 2c). The Player with advantage may pass without expending an Action Point or advancing the platoon rotation, if he chooses.
13.0 CLOSE ASSAULT
COMMENTARY:
Close assault represents the actions of troops in close proximity to the Enemy. Hand grenades are the primary weapons used in this type of combat.
GENERAL RULE:
Close Assault is a special form of combat. Close assault affects only Enemy units in the same hex as the unit performing the assault.
PROCEDURE:
There are two ways of initiating a close assault. A Player may declare a close assault at the end of a unit’s Movement action, be it on a Cautious or Bold command. Of course, only the units which just completed this movement may perform the assault. Alternatively, close assault may be declared as a Fire action by a unit which was issued a Fire command, affecting the hex which the unit issued the Fire command occupies. Close assault is considered to-be fire combat (with certain critical modifications), even if it is resolved as a consequence of Movement action.
CASES:
13.1 WHICH UNITS MAY CLOSE ASSAULT
[13.11] A close assault may be conducted in any hex type.
[13.12] In the Basic Game, only units or stacks containing three or more men may conduct a close assault as part of a Movement action; in the Advanced Game, sapper units may also do so. Tripod machinegun units may not fire as part of a Movement action even if involved in a close assault (see Case 9.21).
[13.13] Any combat unit or stack may conduct close assault on a fire command.
[13.14] Spotters may never close assault; leaders may close assault only when stacked with a combat unit that does so.
[13.15] More than one unit may participate in a single close assault if they have identical commands.
13.2 CLOSE ASSAULT RESOLUTION PROCEDURE
[13.21] As with fire combat, close assaults are not made against Enemy units per se; rather, they are made against hexes. After completing a movement into a hex for a unit which had been issued a Movement command, or without moving for a unit with a Fire command, a Player may state to his opponent that he is making a close assault (of course, he must state this fact before the other Player performs the next action). The moving Player states the hex number the assault is being made against. He subtracts an additional Action Point (for the close assault fire) from that platoon’s Action Points.
Note: Close assault as a result of movement is not a separate action, but it does consume an Action Point.
[13.22] The owning Player rolls two dice and consults the Soft CRT (Case 11.8). The result is read as described in Case 11.51, except:
-
The terrain in the hex assaulted is always considered to be open.
-
All S results are read as “No Effect” insofar as the Enemy is concerned; the firing unit may still run out of ammunition.
-
Case 11.54 does not apply.
[13.23] Unlike normal fire combat, the unit performing a close assault may suffer an immediate adverse result. If the assaulting player rolls a 1 or a 2 on the large die, the unit or stack performing the close assault is eliminated — but .only if the assaulted hex contained any Enemy combat units (see Case 13.24). This adverse result occurs regardless of any result suffered by the assaulted unit; leaders are also killed (Case 9.13 does not apply). If the close assaulting unit was issued a Bold Movement command, the assaulting unit is eliminated if the assaulting player rolls a 1-3 on the large die.
[13.24] If a “No Effect’ results due to a close assault, the assaulted Player is under no immediate obligation to state whether or not he has units in the assaulted hex. If a K result is achieved, the assaulted Player must immediately state if any of his units are killed in the assault and show his opponent the killed units (this is an exception to Case 11.53; however, see also Case 13.25).
If any units are eliminated, he must reduce the number of Action Points on his Action Point Track for the allied unit’s platoon by two for each unit so destroyed. If the assaulting Player rolls a result which would eliminate his own unit (see Case 13.23), he may ask his opponent if the assaulted hex was empty of combat units. If the hex was in fact empty of combat units, the opposing Player must say so; the assaulting unit then suffers no adverse effects, other than ammunition depletion.
[13.25] If the assaulting unit is killed as a result of the large die roll, the defending Player need not give out any information about the defending unit(s).
[13.26] Machinegun units and automatic weapons may only perform one fire attack per close assault.
| U.S. Unit A (Fire Strength of 8) having been issued a Cautious Movement command, performs its movement action by entering hex 5K7. The U.S. Player announces “I am close assaulting hex 5K7.” He rolls two dice and achieves a result of “4” (A 2” and a ‘'2”). The result is K — even though Soviet unit B is in a woods hex. The Soviet Player notes that one unit has been destroyed by the assault and reduces his available Action Points by two for that platoon. However, the U.S. unit is also destroyed due to the ‘*2” result obtained on the large die. The U.S. Player expends one Action Point for the movement, one for the close assault, and two for the elimination of his unit; he is not told about the Soviet unit which was eliminated.
13.3 ENGAGED UNITS
[13.31] When Friendly and Enemy units in the same hex are involved ira close assault which does not eliminate one side or the other, those units are considered to be engaged from the end of that Action Stage on. Both Players should place an Engaged marker on the hex during the Engagement Determination Stage.
[13.32] As soon as only one Player’s units, or no units at all, remain in the hex, whether due to elimination of units or movement out of the hex, the Engaged marker is removed from the hex.
[13.33] Units in an engaged hex are automatically spotted by each other.
[13.34] An engaged unit with a Movement command may leave the hex, thus terminating its Engaged status. In this case, the fact of the unit’s exit must be announced, but not the direction of exit.
[13.35] Engaged units may not be fired upon by units outside of the engaged hex.
[13.36] Engaged units may not perform Sighting actions while still engaged, nor may they perform a Fire action against any hex other than the one they are in.
[13.37] A unit which is engaged at the start of the Game-Turn must be given a Fire command if it is to fire while remaining engaged. In other words, once a unit has become engaged it may not continue to close assault that same hex under a Movement command. An engaged unit with a Movement command may, however, move out of the engaged hex and close-assault the hex it moves into, as long as this is not the same hex in which it started the Game-Turn.
[13.38] Units may move into an engaged hex.
13.4 EFFECTS OF CLOSE ASSAULT ON MOVEMENT COMMANDS
[13.41] A unit may not move after performing a close assault until the next Game-Turn.
[13.42] A unit with a Cautious Movement command may never attempt a Sighting action from the hex a close assault was conducted in during that Game-Turn. Note: Engaged markers are not placed until the Engagement Determination Stage.
14.0 AMMUNITION DEPLETION
COMMENTARY:
Ammunition depletion for most weapons (all Basic Game weapons) represents weapons exhausting their ammunition belts, etc. Ammunition recovery is from local stocks presumably carried by the unit itself.
GENERAL RULE:
After performing a Fire action, a unit may run out of ammunition. Units which are out of ammunition may not fire, although they may recover due to a successful die roll during the Ammunition Stage. Ammunition status is not announced.
CASES:
14.1 HOW UNITS RUN OUT OF AMMUNITION
[14.11] Any unit performing a Fire action or a close assault may run out of ammunition.. Various combat results on the Soft CRT (11.8) indicate that the firing unit has run out of ammo. Any unit that runs out of ammunition has an Out-of-Ammo marker placed on it immediately.
[14.12] Note that the likelihood of various weapons running out of ammunition is different. For example, a unit firing automatically has the greatest chance of running out of ammunition, then a machine gun, then a fireteam or squad with machinegun, then a fireteam without machinegun.
[14.13] Ammunition depletion takes effect at the end of the Fire action.
[14.14] A machinegun unit may only suffer ammunition depletion on its second target hex dice roll (if two attacks are chosen) or on its third target hex dice roll (if three attacks are chosen). If only one attack is chosen, the machinegun suffers ammunition depletion normally (see CRT, 11.8).
[14.15] A unit which performs an automatic fire attack may only suffer ammunition depletion on its second target hex dice roll (see CRT, 11.8).
14.2 EFFECTS OF BEING OUT OF AMMUNITION
Any unit that is out of ammunition may not perform a fire action. Exception: Such units may close assault at half normal attack strength, rounded down.
14.3 RECOVERY FROM BEING OUT OF AMMUNITION
[14.31] Players may attempt to remove their unit’s Out-of-Ammo markers in an Ammunition Stage of any Game-Turn other than the Game-Turn in which the Out-of-Ammo marker was placed on the map.
[14.32] For each eligible, out-of-ammo unit, the owning Player rolls a single die. He compares each die roll result to that platoon’s ammunition rating as provided by the scenario instructions. On a die roll result equal to or less than this rating, the Player may remove the unit’s Out-of-Ammo marker. On a die roll result greater than this rating, the unit must remain out of ammunition until (at least) the next Ammunition Stage.
15.0 SUPPRESSION
COMMENTARY:
Suppressed units have taken maximum available cover, either by hitting the ground, or by staying out of sight in buildings.
GENERAL RULE:
Due to Enemy fire combat or at the option of the owning Player, a unit may become suppressed. Suppressed units may not be issued commands or perform actions. Units may recover from suppression either by themselves or through the use of Friendly leader units.
CASES:
15.1 HOW UNITS BECOME SUPPRESSED
[15.11] A unit becomes suppressed when a result of S on the Soft CRT (11.8) is obtained against the hex it occupies.
[15.12] A unit may be suppressed if it is in the same megahex as a hex which an S or K result (see Case 11.52) has been obtained against.
[15.13] Units may be voluntarily suppressed by the owning Player during the Command Decision Stage.
[15.14] Place a Suppressed marker on each unit on the map that becomes suppressed.
15.2 EFFECTS OF SUPPRESSION
[15.21] A suppressed unit may not be issued a command and may perform no actions.
[15.22] For every combat unit (except snipers; Intermediate Game) or leader that is suppressed during the Action Stage, the owning Player must subtract one Action Point from the suppressed unit’s platoon. .
[15.23] Suppressed units benefit from a reduction in the Attack Strength of Enemy fire (see Cases 11.56, 32.36, 33.69).
[15.24] Suppressed units are more difficult to observe, see Case 10.38.
15.3 RECOVERY FROM SUPPRESSION WITHOUT LEADERS
[15.31] All odd-numbered fireteams and all squads may recover from suppression without the help of a leader during the Suppression Recovery Stage. The owning Player simply rolls one die for the unit concerned. If a “1” results, the unit recovers from suppression; otherwise it remains suppressed. (This Case simulates the effect of squad leaders).
[15.32] (Optional) A unit which has been voluntarily suppressed may recover from suppression during the Suppression Recovery Stage at the owning Player’s option. Involuntary suppression cancels voluntary suppression. When playing this rule, Players must keep track of which units have been voluntarily suppressed.
15.4 RECOVERY FROM SUPPRESSION WITH LEADERS
[15.41] All units may recover from suppression with the help of a leader during the Suppression Recovery Stage, provided that the leader is attached to the same platoon as the suppressed unit or is a company commander of the company to which the suppressed unit is attached directly or indirectly, and that the leader is in the same megahex as the suppressed unit or in an adjacent megahex. A Player may utilize the leader rating of a leader to have that leader recover from suppression.
[15.42] In attempting to have a unit recover from suppression with the help of a leader, the owning Player simply rolls one die. This die roll may be modified as noted in Cases 15.44 through 15.46. If the modified die roll result is equal to or less than the leader’s rating, the unit has successfully recovered from suppression and the marker on it is removed. If the modified die roll result is greater than the leader’s rating, the unit remains suppressed and the marker is not removed.
[15.43] A Player may only attempt to have a unit recover from suppression once in each Game-
Turn. A leader’s rating may be used twice in each Game-Turn, in suppression recovery attempts by two different units from that leader’s platoon (or company for company commanders).
[15.44] For the Player with advantage, the Suppression Recovery rating specified in the scenario is subtracted from any suppression die roll results.
[15.45] If the leader being used is stacked with the unit for which suppression recovery is being attempted, 3 is subtracted from the suppression die roll result.
[15.46] If the leader being used is not in the same megahex as the unit for which the suppression recovery attempt is being made, 4 is added to the suppression die roll result, unless a telephone center is operative and in Friendly hands, in which case only 3 is added to the suppression die roll result. If there is a clear line of sight from the leader to the unit for which the suppression recovery attempt is being made, if they are in separate hexes, subtract 1 from the suppression die roll result. (Determine LOS as if the leader were firing on the suppressed unit.)
[15.47] If the suppressed unit is in a smoke hex, 2 is subtracted from the suppression die roll result.
[15.48] All additions and subtractions involving suppression die roll results are cumulative.
[15.49] Suppression Recovery Modification Schedule (see charts and tables)
15.5 SUPPRESSION AND SPOTTERS
[15.51] A Player may have his suppressed spotters attempt to recover from suppression without the help of a leader during the Suppression Recovery Stage, simply by rolling one die.. If the result is equal to or less than the Suppression Recovery rating specified in the scenario, the spotter unit concerned is considered to have recovered; otherwise it remains suppressed.
Note: This is the only case in which the Player without advantage uses his Suppression Recovery rating.
[15.52] Suppressed spotters may also recover from suppression using leaders in the same manner as a combat unit, provided that no suppression recovery attempt for such a spotter has been made (as per Case 15.51) during the current Game-Turn. Spotters may use any Friendly leader for this purpose.
15.6 LEADERS AND SUPPRESSION
[15.61] A Player may use the leader rating of a suppressed leader when he attempts to have that same leader recover from suppression, just as with other suppressed units (see Case 15.4).
[15.62] A Player may use the rating of a platoon leader in attempts to have a platoon sergeant (of the same platoon) recover from suppression. He may utilize the leader rating of a company commander when attempting to have a platoon leader recover from suppression (as long as the leader is in that company). Only the company commander’s own leader rating may be used when a Player attempts to have that company commander recover from suppression.
[15.63] Attempts to have suppressed leaders recover from suppression are resolved prior to all other suppression recovery attempts in each Suppression Recovery Stage, beginning with company commanders and proceeding in order of rank to platoon sergeants.
[15.64] A suppressed leader’s rating may not be used for suppression recovery attempts by any other unit; it may only be used in attempts to have the leader himself recover. However, should a Player succeed in having a leader recover from suppression, he may use that leader’s rating for suppression recovery attempts for up to two other units, as per Case 15.43, during that same Suppression Recovery Stage.
16.0 ADVANTAGE
COMMENTARY:
The defender of a town which is familiar to him or whose populace is Friendly has many advantages over the attacker.
GENERAL RULE:
In most scenarios, one side (usually the defender) possesses advantage; in some scenarios neither side or both may have advantage. Advantage gives the owning Player several benefits in sighting, suppression recovery, and command-control.
CASES:
16.1 HOW ADVANTAGE IS DETERMINED
The scenario instructions will state which Player has advantage. Advantage remains with the Player who possesses it for every Game-Turn of the scenario — it may never be lost.
16.2 EFFECTS OF ADVANTAGE
[16.21] The Player who has advantage may always perform the first action during the Action
Stage. If neither Player or both has advantage, the right to first action is determined by the roll of a die.
[16.22] If the Player who has advantage possesses any units that are suppressed, these units benefit from a die roll modification in suppression recovery attempts (see Case 15.44); this modification is given in the scenario instructions.
[16.23] When a Player who has advantage is determining command-control, he is. only obligated to roll one die for each platoon leader on the map. Die rolls greater than the leader Command rating will result in the loss of Action Points (see Case 6.22).
[16.24] A Player with advantage may Pass without expending an Action Point, see Section 12.0.
17.0 PRESERVATION LEVELS
GENERAL RULE:
In every scenario, each organization (platoon, company, or battalion) controlled by a player has a Preservation Level, which is a certain number of Preservation Points. At the beginning of a scenario, each organization starts with zero Preservation Points. Each time a Player’s organization incurs casualties, that organization accrues Preservation Points. The number of Preservation Points accrued by a organization is an abstract indicator of that organization’s morale — if that number equals or exceeds its Preservation Level, the organization is demoralized — the soldiers of the organization become more concerned with self-preservation than with carrying out a mission. In game terms, the organization is critically hindered in certain vital game functions. The number of Preservation Points accrued by an organization at any point in time is not revealed to the opposing Player unless stated otherwise in the scenario instructions. ;
PROCEDURE:
Preservation Points are kept track of, individually, for each platoon, company, and battalion. The Preservation Level for each unit used in a given scenario is listed in the instructions for that scenario. For each soldier or leader killed, Preservation Points are accrued by every unit to which that soldier or leader belongs. Players must record the number of Preservation Points accrued by each of their units. If the number of Preservation Points accrued by a unit reaches or exceeds its Preservation Level, the owning Player flips over the marker of each affected platoon on the Action Points Track to indicate that that platoon is demoralized.
CASES:
17.1 HOW UNITS ARE DEMORALIZED
[17.11] Each time a soldier or leader is killed, the platoon that that soldier or leader belongs to, the company (if any) that that soldier or leader belongs to, and the battalion (if any) that that soldier or leader belongs to accrues a certain number of Preservation Points.
[17.12] If a soldier is killed, any units to which he belongs each accrue one Preservation Point. A platoon sergeant’s demise causes three Preservation Points to accrue. A platoon leader (including any sergeant acting as a platoon leader) is worth five Preservation Points. A company commander is worth ten Preservation Points.
[17.13] Whenever a platoon accrues a number of Preservation Points equal to or greater than its Preservation Level (as specified in the scenario), that platoon is demoralized.
[17.14] When a company has accrued a number of Preservation Points equal to its Preservation Level (as specified in the scenario), all platoons in the company are demoralized.
[17.15] Whenever a battalion accrues a number of Preservation Points equal to or greater than its Preservation Level, all platoons in that battalion are demoralized.
17.2 EFFECTS OF DEMORALIZATION
[17.21] Whenever a platoon is demoralized, the platoon leader’s rating is considered to be lowered by two for all purposes, and (if any) the platoon sergeant’s rating is reduced by one. However, no leader rating may ever be reduced below “1.”
[17.22] If all of a Player’s platoons are demoralized, any spotters possessed by him are immediately removed. (Exception: In the Advanced Game, forward observers.)
[17.23] Units of a demoralized platoon may not perform any close assaults when issued a Movement command for the remainder of the game; such units may close assault when issued a Fire command.
[17.24] The Ammunition rating of a demoralized platoon is decreased by “1.” It may never be decreased below “1.”
[17.25] Units belonging to demoralized platoons may not utilize the provisions of Cases 15.31 and 15.44,
[17.26] Units of demoralized platoons may not enter a megahex in which an Enemy unit was spotted during the current Game-Turn, unless the scenario specifies otherwise (breakout attempts).
[17.27] Whenever a combat unit of a demoralized platoon performs a Fire action, two Action Points are subtracted from the Action Points Track for that platoon, not one.
Note: It is possible for all platoons on both sides to have become demoralized and for the game to continue in many instances.
STOP!
It is now possible to play the Basic Game scenarios for Cityfight (see Sections 50.0-55.0). It is highly recommended that players familiarize themselves with the game-system before proceeding with Intermediate Game rules.
THE INTERMEDIATE GAME
The following Sections present additional rules that may be used in conjunction with the Basic Game rules. It is suggested that Players consider Sections 18.0, 19.0, and 20.0 as a unit, and either use all three of them or none of them. Otherwise, it is feasible to employ any of the Intermediate Game rule Sections independently with the Basic Game rules. In general, the Intermediate Game rules make the flow of the game somewhat more complex and time-consuming, while increasing its realism.
18.0 VEHICLES
GENERAL RULE:
In Intermediate Game scenarios, either Player or both may be provided with vehicles. These are combat units and are treated as such, but possess certain special characteristics in terms of command, movement, sighting, and fire combat. Unless specifically contradicted by the rules of the Intermediate or Advanced game, vehicles are subject to all the restrictions of the Basic Game. Each vehicle unit represents one vehicle.
CASES:
18.1 COMMANDS
[18.11] Commands are issued to vehicles by the owning Player. Thus, each vehicle may be given a Cautious or Bold Movement command, a Search, or a Fire command. As with personnel combat units, each command issued to a vehicle may allow one or two Sighting actions.
[18.12] Each command issued to a vehicle indicates that it may perform three actions in the upcoming Action Stage:
-
If the vehicle was issued a Cautious command, it may perform one Movement, one Sighting, and one Fire action.
-
If the vehicle was issued a Bold command, it may perform two Movement actions and one Fire action,
-
If the vehicle was issued a Fire command, it may perform one or two Fire actions (see Case 18.52) and one Sighting action.
-
If the vehicle was issued a Search command, it may perform one Movement and two Sighting actions.
Thus, in the Command Control Stage, when Players are determining the total number of Action Points available to each of their platoons, for each personnel unit issued a command, two initial Action Points are credited to that platoon and for each vehicle issued a command, three initial Action Points are accrued by that platoon (see Case 5.6). Note that in order to properly keep track of the actions appropriate to its command, each vehicle will generally be stacked with more than one command chit — sometimes two of one type.
A vehicle issued a Cautious command has one Cautious and one Fire chit placed on top of the counter.
A vehicle issued a Bold command has one Bold and one Fire chit placed on top of the vehicle counter.
A vehicle issued a Fire command has two Fire chits placed on top of the vehicle counter.
A vehicle issued a Search command has one Search and one Cautious chit placed on top of the vehicle counter.
Example: A platoon has one tank which is issued a Cautious command and one issued a Fire command. The first tank has a Cautious chit and a Fire chit placed on top of it. The second has two Fire chits placed on it. This same platoon has three ground units issued commands. At a glance, the owning Player may determine that his platoon has a total of 12 initial Action Points.
[18.13] When tanks are provided in a scenario, it will be specified whether the tanks are organized in tank platoons and companies or are attached to infantry platoons and companies. If the tanks are attached to infantry platoons, the tank’s three action points are added to the infantry platoon’s Action Points on the Action Point Track, and when the tank performs an action, an Action Point is subtracted from the infantry platoon’s Action Points on the Action Point Track.
[18.14] Vehicles without weapon systems (see Unit Data Charts) may not be issued Fire commands or perform Fire actions.
18.2 COMMAND CONTROL AND TANK LEADERS
[18.21] Any Player possessing tank platoons determines command control precisely as described in Section 6.0.
[18.22] Platoon leaders and platoon sergeants attached to tank platoons, and company commanders attached to tank companies, are tank leaders. Tank leaders are normally attached (placed directly.on top of) an individual tank, and move with the tank. A tank leader may leave a tank only if the tank suffers a KM result due to combat.
[18.23] A tank platoon leader who is not attached to a tank is considered to rate as a “1” when determining command.
[18.24] Tank leaders may not be used to aid suppression recovery attempts by non-tank units.
[18.25] A tank leader is eliminated if the tank he is being transported in suffers a K result or a KF result. Also ‘see Case 20.5 (Anti-Personnel Fire Against Open Vehicles).
[18.26] Only one tank leader may be attached (see Case 18.22) to any single tank.
18.3 STACKING AND MOVEMENT
[18.31] A maximum of two Friendly vehicles may be stacked in the same open hex. A maximum of one Friendly vehicle may be placed in any building or woods hex containing a street (see Case 18.33). However, vehicles may be stacked with personnel units (see Section 9.0) — vehicles and personnel units follow stacking restrictions independently. Stacking limits apply at all times. Personnel units in or on vehicles do not count against the stacking limits on personnel units. Vehicles may perform as personnel units with regard to Case 9.3 (Joint Actions).
[18.32] A maximum of six men (other than tank leaders, who are considered to be “in” the tank) may “ride on” a tank. The procedure for picking up and dropping off these men is the same as given in Case 19.1. These men, however, are subject to fire as if they were dismounted (see Case 18.38). A tank transporting such men may not be issued a Bold command.
[18.33] In the Intermediate game, a vehicle may not enter or leave buildings or woods hexes, unless it enters or leaves through a hexside through which a street passes. Such a vehicle is considered to be in an open hex for all but stacking purposes, however, and is exempt from Cases 8.21 and 8.22 (Movement Restrictions in Building and Woods Hexes).
[18.34] A vehicle that has been issued a Cautious Movement command may be chosen for a Movement action by the owning Player during the Action Stage. A vehicle with such a command may be moved two hexes by the owning Player (although he may choose to move it only one hex). Before moving the vehicle, the Cautious command chit is removed to indicate that this vehicle may move no further during the Action Stage — while the owning Player reduces his action Points available to that platoon by one.
[18.35] A vehicle that has been issued a Bold Movement command may perform up to two Movement actions during the Action Stage. The first Movement action is performed exactly as described in Case 18.34 — that is, the vehicle may be moved one or two hexes — after which the Bold
Movement command is flipped over. However, this reverse counter-side indicates that the vehicle may perform a second identical Movement action in the same Stage. Just before this second Movement action, the command chit is removed, indicating that the vehicle may not move again for the remainder of the Game-Turn.
[18.36] If a vehicle that has been issued a Bold Movement command moves from one street hex to another adjacent, connected street hex, that movement is only considered to constitute one-half of a hex. Thus, a tank performing a Movement action directly along a street may move up to four hexes in one action if it had been issued a Bold command.
[18.37] If two known vehicles are stacked together in a hex and a combat result is obtained against that hex, the attacking Player determines which vehicle suffers the combat result. If either vehicle is forced to button up, however, the other vehicle is also forced to button up immediately. In the Advanced Game, however, indirect fire affects all vehicles in the hex.
[18.38] Any personnel unit which is stacked with a vehicle unit in an open hex is considered to be in a woods hex for sighting and fire resolution (but not line of sight) purposes.
[18.39] A vehicle which has been issued a Bold Movement command may not enter any hex of the Old Village (see Case 7.6) during that Game-Turn.
18.4 OBSERVATION (SIGHTING) LINE OF SIGHT, AND POSTURE
[18.41] Vehicles perform Sighting actions (see Case 18.12) like personnel units (with certain critical exceptions). That is, if a vehicle performs a Sighting action, having been issued a Cautious, or Fire command), the vehicle’s counter is flipped over after the resolution of this action, indicating that it may not perform another Sighting action for the remainder of the Game-Turn. If the vehicle has been issued a Search command, the Search chit is removed when the vehicle performs the first Sighting action of the Game-Turn; the vehicle counter is flipped over when the vehicle performs the second Sighting action of the Game-Turn. The Cautious chit is removed when the vehicle performs a Movement action.
[18.42] At the option of the owning Player (unless a vehicle has been fired on) vehicles may operate in one of two Postures: buttoned up or open. This is noted on the Unit Status Sheet, or Players may improvise markers to denote vehicle posture. Some vehicles may not button up; this is noted on the Unit Data Chart.
[18.43] The owning Player may only change the posture of his vehicles from open to buttoned up during the Command Decision Stage; such changes at other times are involuntary. He may change the posture of his vehicles from buttoned up to open during the Suppression Recovery Stage (see Case 18.58).
[18.44] An open vehicle may attempt to perform Sighting actions exactly as described in Cases 10.2 and 10.3. However, a Player may only have a vehicle that is buttoned up attempt a Sighting action for the megahex it occupies (i.e., he is not permitted to call any adjacent megahex), and only units in open hexes can be spotted. (The sighting Player must be sure to call out a search dice roll result low enough to be sure he will fail to sight anything in a hex containing any buildings or woods.) Buttoned-up vehicles may use declared sighting, see Case 27.13.
[18.45] If a vehicle is spotted by the opposing Player, the owning Player must state its location as per Case 10.3. He also must state what type (e.g., T-62) of vehicle it is, and whether or not it has a KF or KM marker on it. Finally, he must state its posture (open or buttoned up). He need not state if the vehicle has attached leader units, and if the vehicle is buttoned up, he need not state if it carries personnel. If the vehicle is open and transporting personnel units other than leaders, the owning player announces “personnel”; if there are topside riders, ‘Topside riders’ is announced. (see Case 18.32).
[18.46] Line of sight to or from a vehicle in an open hex is always drawn to or from the center of the hex. If the vehicle is in a building hex containing a street (in the Advanced Game: and the vehicle is also not in the building), line of sight is drawn to or from the center of that portion of the street which lies in that hex.
[18.47] If a Friendly vehicle fires on a given hex, any Enemy unit in the target hex or any hex traversed by the Friendly vehicle’s line of sight or continuation thereof is considered to have a return line of sight for the remainder of the Game-Turn to the hex from which the Friendly vehicle fired.
[18.48] Like personnel units, vehicles may perform Immediate Fire actions (see.Case 10.6) as a result of successful spotting, and their fire against spotted hexes is more effective than fire against unspotted hexes (see Case 18.53F).
18.5 FIRE ACTION RESOLUTION PROCEDURE
[18.51] If a vehicle possesses a Cautious, Bold or Fire command, the owning Player may declare a Fire action for this vehicle during the Action Stage (see Section 11.0). If a vehicle has been issued a Fire command in the preceding Command Decision Stage, the vehicle may perform two Fire actions in the same Action Stage.
[18.52] Vehicles usually possess more than one weapon type (see Unit Data Sheets)? The owning Player must obey the following restrictions with regard to vehicle weapons during the Action Stage:
-
No single weapon may be fired more than once in a Game-Turn. Exceptions: Main guns only of ASU-57, PT-76, T-12, BMP, BMD, AMX-30, AMX-10, Leopard 2, Marder, XM-2, XM-3, XM1, T-80, Fox, Luchs, Sp-73, Sp-74, and Chieftain may be fired twice per Game-Turn (when issued a Fire command). These exceptions are also noted on the Units’ Data Charts.
-
A co-axial machine gun may not be fired in the same stage as a vehicle’s main gun (and vice versa).
-
A vehicle’s turret machine gun or anti-tank guided missile may only be used if the vehicle is open (see Case 18.42). Exception: see Data Charts.
[18.53] If a Player is taking a Fire action with a vehicle, he must state the weapon-type that he is employing to undertake that Fire action (see Case 11.33). All attacks made by a vehicle’s main gun are resolved on the Hard CRT (18.9). The following adjustments are made in a vehicle’s firing strength:
-
When resolving fire against personnel in a woods or wood building hex, the Hard Fire Strength of a vehicle is reduced by 2;
-
When firing against personnel in a concrete hex, the Hard Fire Strength of a vehicle is reduced by 3;
-
When firing against personnel in a stone building hex, the Hard Fire Strength of the vehicle is reduced by 4;
-
If the personnel unit is suppressed (see Case 11.57), in a stone or concrete building hex, the reduction in clauses 2 and 3 is doubled;
-
(Optional) When a hard weapon is fired twice or more in the same or consecutive Game-Turns at the same spotted target hex, the Fire Strength of the second and following consecutive rounds is increased by 4. (This simulates range adjustment by fire.) In order for this case to apply, the hex must have been spotted once in that Game-Turn by the firing unit.
-
When a hard weapon is fired against an unspotted hex, its Attack Strength is halved (fractions dropped). This does not apply, however, in resolving second round fire (clause 5) against hexes which were spotted earlier in the Game-Turn by the firing unit.
A weapon’s Fire strength may never be reduced below 1.
To determine the order in which adjustments to Fire Strength are made, see Case 19.26. None of the adjustment in this case apply in resolving building damage.
All attacks made by a vehicle’s machineguns are resolved on the Soft CRT (11.8).
Regardless of the CRT employed, the owning Player must remove one of the vehicle’s Fire command chits upon completion of the action.
[18.54] Tank machineguns function as per Case 11.6 (Non-Tank Machineguns).
[18.55] A vehicle may never perform a close assault, but it may fire at Enemy units in the same hex with its turret machineguns only.
[18.56] The fire of a vehicle’s main gun or ATGM against a building hex may affect that building (see Case 21.1).
[18.57] In the Intermediate (and Advanced) Game variations in Attack Strength due to range, which are noted on the Unit Data Tables, must be taken into account, whether personnel or vehicle.
[18.58] Most vehicles are hard targets and may, if buttoned up, only be attacked by weapons with hard Fire Strengths or by indirect fire. If Open, a hard vehicle may be attacked utilizing the Soft CRT, but a K result will only kill personnel, including leaders (but see Case 9.13), stacked with the vehicle; all attacks on the Soft CRT will force the vehicle to button up immediately. The button-up posture of the vehicle is treated as a suppression result in that the owning Player must, in order to have it open up again, use the same procedure as suppression recovery during the Suppression Recovery Stage. Further, this can only be done if the vehicle is in the same megahex as a leader of its platoon or its company commander. If a vehicle is a soft target this is listed on the Unit Data Chart. Soft targets may be attacked by either weapons with Soft Fire Strengths (on the Soft CRT) or Hard Fire Strengths (on the Hard CRT).
[18.59] Vehicles do not incur a penalty. for Bold Movement when fired on; the attacker’s Fire Strength is not doubled due to bold movement.
18.6 AMMUNITION
[18.61] A vehicle may run out of ammunition due to a Fire action as per Case 14.1. However, only the actual weapon fired during that action is affected. For example, if a turret machinegun runs out of ammunition, the vehicle’s co-axial machinegun and main gun are not affected.
[18.62] A weapon that is out of ammunition may not perform a Fire action.
[18.63] A vehicle-mounted main gun that runs out of ammunition is permanently ammo depleted.
[18.64] Vehicle mounted machineguns run out of ammunition and recover from ammo depletion in the same manner as other machineguns (see Case 11.63 and 14.3).
18.7 TANKS AND PRESERVATION
An organization is demoralized if it has accrued a certain number of Preservation Points (see Section 17.0). Each tank is worth five Preservation Points in the calculation of Preservation Levels. Whenever a tank is eliminated from play, the tank’s unit(s) accrue(s) five Preservation Points; whenever a tank has a KF marker placed on it, the tank’s unit(s) accrue(s) three Preservation Points; whenever a tank has a KM marker placed on it, the tank’s unit(s) accrue(s) two Preservation Points. These losses are not cumulative; i.e., the loss of a single tank can never result in the accrual of more than five Preservation Points for that tank. If the loss of a tank also causes the elimination of personnel, these are counted separately.
Example: A Player’s platoon consists of 16 men and 2 tanks. His total force, therefore, is worth 26 Preservation Points. The platoon is demoralized if it accrues 13 Preservation Points. If the two tanks and four men were eliminated on the first Game-Turn, this platoon would have reached its Preservation Level (see Case 17.1).
18.8 SELF-PROPELLED GUNS
Some vehicle are designated as Self-Propelled Guns. SP guns function as tanks except when they perform a Fire action with their main gun. In this circumstance, any SP gun that performs a Fire action against an open or woods hex has its fire strength halved (round fractions up).
18.9 HARD COMBAT RESULTS TABLE (see charts and tables)
19.0 MECHANIZED INFANTRY COMBAT VEHICLES (MICV) AND OTHER VEHICLES
GENERAL RULE:
MICVs are almost identical to tanks, although they possess certain different characteristics with regard to command, fire and movement.
MICVs are always attached to infantry platoons. MICVs are issued commands and perform actions exactly like tanks.
CASES:
19.1 TRANSPORTING PERSONNEL WITH MICVs
An MICV may be used to transport (carry) personnel. The counters representing any personnel being transported by an MICV are placed under the MICV counter. (If an MICV is in a hex containing personnel it is not transporting, place the MICV counter under them.) The transport capacities of MICV’s are listed on the Unit Data Charts.
[19.11] In order to transport personnel units, an MICV must pick up (load) those units. The loading process is carried out as follows: any per‘ personnel unit a Player wishes to pick up with an MICV must begin an Action Stage in a hex either stacked with, or adjacent to that of, the MICV. Such personnel unit may not have been issued a command during the immediately preceding Command Decision Stage. The MICV must be issued a Fire command; it may not move in that Action Stage. If, at the end of this Action Stage, neither the personnel unit nor the MICV has suffered any adverse combat results (i.e., a K, KF, KM or an S), the personnel unit may be placed underneath the MICV. It is now considered to be loaded in and may be transported by that MICV during subsequent Game-Turns. This process is never affected by the command control status of either unit. If the hex containing the personnel being picked up is subjected to fire during this process, the personnel are considered to be outside the vehicle for purposes of resolving the fire. MICVs may begin a scenario already loaded.
[19.12] During any Game-Turn(s) in which a personnel unit is being transported by a buttoned up MICV (or is picked up or dropped off — see Case 19.13), it may not be issued commands; such a personnel unit would, however, be counted in calculating its platoon’s initial Action Points on the Action Point Track in the Command Control Stage.
[19.13] A unit being transported by an MICV may be dropped off and resume independent move-
ment. This process is the reverse of that described in Case 19.11. That is, the transported unit may not be issued a command in the preceding Command Decision Stage; it may not perform any actions in the ensuing Action Stage. The MICV must be issued a Fire command; it may not move during the Action Stage. If, at the end of this Stage, neither has incurred any adverse combat results, the transported personnel unit may be placed on top of the MICV (indicated it is now outside) or — if this violates stacking restrictions — in any adjacent hex. Both the MICV and the personnel unit may be issued independent commands in the ensuing Game-Turns. If the hex is subjected to fire during this process, the personnel being dropped off are considered to be outside the vehicle for purposes of resolving the fire (see Case 18.38).
[19.14] MICV’s may pick up or drop off units only in an open posture. Personnel units in any open MICV are subject to attack on the Soft CRT, but are treated as if they were in a concrete hex when resolving fire on the Soft CRT. Personnel units in a buttoned-up MICV are not subject to separate fire on the Soft CRT.
[19.15] A personnel unit transported by an open vehicle (other than trucks and ASU-57s) may be issued a Fire command. See Cases 19.23 and 19.24, If it is issued no command, it still contributes two Action Points to its platoon’s initial Action Points as per Case 19.13.
[19.16] If a vehicle transporting personnel units is killed, (incurs a K result) all personnel units transported by that vehicle are also killed.
19.2 FIRE
[19.21] Note that, unlike tanks, MICVs and scouts may carry out a maximum of one Fire action per Action Stage—even if they possess more -than one weapon with which to carry this out. Exceptions: Soviet BMD, BMP, German Marder, Luchs; French AMX10, American XM2, XM3, British Fox. This is also noted on the Unit’s Data Charts.
[19.22] Certain MICV and scout main guns may be treated as automatic weapons, as per Case 11.7. This is noted on the Unit Data Charts.
[19.23] Personnel units in an open vehicle (other than a truck or ASU57) that are issued Fire commands may fire normally if the vehicle has also been issued a Fire command, except such units may not fire MAWS.
[19.24] Personnel units in an open vehicle (other than a truck or ASU-57) may not fire special weapons (anti-tank weapons and flamethrowers) or grenades (including smoke and starshell) if the vehicle has been issued a command other than Fire. When utilizing the Soft CRT, the owning Player must reduce his Attack Strength to ‘one-third, fractions rounded down, in this situation.
[19.25] Personnel units in trucks and ASU57s may not receive Fire commands.
[19.26] In applying different modifications to firing strengths of any weapons in the Intermediate and Advanced Games, first apply all absolute modifications (e.g., “+4”), and then all proportional modifications (e.g., two-thirds).
19.3 PRESERVATION LEVELS FOR MICVs, APCs, SCOUTS
[19.31] The elimination of an MICV causes any units to which that MICV belonged to accrue 4 Preservation Points. An MICV that gets a KF marker causes 2 Preservation Points to be accrued; an MICV that gets a KM marker causes 2 Preservation Points to be accrued. However, no more than 4 Preservation Points may ever be accrued due to the loss of a single MICV (these accruals are not cumulative). If the loss of an MICV also causes the elimination of personnel, these are counted separately,
[19.32] The elimination of an APC causes any units to which that APC belonged to accrue 3 Preservation Points. An APC that gets a KF marker causes 2 Preservation Points to be accrued; an APC that gets a KM marker causes 2 Preservation Points to be accrued. However, no more than 3 Preservation Points may ever be accrued due to the loss of a single APC +(these accruals are not cumulative). If the loss of an APC also causes the elimination of personnel, these are counted separately.
[19.33] The Preservation Points accrued by the elimination or KM or KF results to other vehicles are noted on the Unit Data Charts for those vehicles.
19.4 ARMORED PERSONNEL CARRIERS (APCs)
Armored personnel carriers (APCs) are treated like mechanized infantry combat vehicles, unless otherwise noted. An APC, unlike a MICV, has no main gun and its fire is never resolved using the Hard CRT.
19.5 SCOUTS
Scout vehicles are treated like MICVs, unless otherwise stated.
19.6 SOFT VEHICLES
[19.61] Trucks, jeeps, cars and dozers (other than the LVTE7 and CEV) are considered Soft vehicles; these have no Fire Strength and may be attacked using either the Soft or Hard CRT. When attacked using the Soft CRT, they are treated like personnel units; when attacked using the Hard CRT, they are treated like vehicles.
[19.62] Jeeps may enter any hex without regard to streets and accessable hexsides (Note:They are not in the building). They are still obstructed by obstacles, conflagration, etc.
[19.63] Soft vehicles are always open.
[19.64] Dozers receive work commands rather than search commands (see the Advanced rules).
[19.65] An S result attained on the Soft CRT against a soft vehicle is treated as a KM for the vehicle, and suppresses any transported personnel units, which are immediately dropped off in that hex or in any adjacent hex by the owning Player. A KF against a soft vehicle is treated asa KM.
20.0 ANTI-TANK WEAPONS
GENERAL RULE:
Anti-tank weapons are considered special weapons and are available to the Players as per the scenario instructions or Standard Tables of Organization & Equipment (TO&E). Being special weapons, anti-tank weapons (ATW) must: be issued to specific combat personnel units by the owning Player. ATW give these units the capability to destroy Enemy vehicles, although there are extensive restrictions on their use. Each type of ATW possesses its own characteristic Fire Strength (see Special Weapon Data Sheet); they are generally divided into LAWs (Light Anti-tank Weapons) and MAWs (Medium Anti-tank Weapons).
Note: The game’s MAW category includes weapons classified as Heavy Anti-tank Weapons (HAWS) by the U.S. Army; the game’s LAW category includes the RPG-7, which is classified as a MAW by the Army.
CASES:
20.1 HOW ANTI-TANK WEAPONS ARE ISSUED
[20.11] A combat personnel unit may only be issued half as many MAWs as there are men in that unit (fractions rounded down). A combat personnel unit may be issued up to as many LAWs (or twice as many M72 or Viper LAWs) as there are men in the unit.
[20.12] The number and type of MAWs or LAWs issued to each unit is noted in pencil in the appropriate box corresponding to the unit on the Unit Status Sheet. Players may also use improvised markers to keep track of ATW.
[20.13] Once ATW have been assigned to a combat unit they must remain with that unit for the remainder of the game. They may not be switched to another unit. If the unit transporting the ATW is destroyed, the ATW are destroyed also. If the unit is dissolved into separate components (see Case 25.2), the ATW must be assigned among those components also.
[20.14] ATW may be assigned to units that possess Other special weapons, although they may not be assigned to vehicle units. Exception: see Case 20.17.
[20.15] ATW may not be assigned to non-combat units (spotters and leaders) or snipers. Exception: LAWs other than RPG-7 may be assigned to snipers. *
[20.16] MAWs may not be assigned to machinegun units.
[20.17] MAWs which are attached to vehicles (M150 and its TOWs, FV438 and its Swingfires, Raketes and their HOTs, any Soviet vehicle equipped with AT-4 or AT-5 ATGM according to scenario instructions) may not be separated from its carrier vehicle and assigned to another unit either before or during play. These MAWS are treated as vehicle weapons.
20.2 HOW ANTI-TANK WEAPONS ARE USED
[20.21] If a unit possesses ATW, the owning Player may utilize either the ATW’s Hard Fire Strength or the fireteam’s normal Soft Fire Strength when the unit is performing a Fire Action. However, it may not utilize both strengths in the same action. In order to use ATW, the owning Player must state this fact, along with the type of ATW (e.g., M72) and resolve the attack as described in the following cases.
[20.22] All ATW attacks are resolved on the Hard CRT (18.9). Fire and line-of-sight are traced normally (see Cases 11.3, 11.4, and 11.5). Note that ATW may be used for other purposes than destroying vehicles; they may be used against buildings and Enemy personnel as well.
[20.23] A combat unit may attack with more than one ATW against one target hex in a single Fire action. Before resolving the first ATW attack, the owning: Player must announce exactly how many ATW attacks will be made. This number of dice rolls must then be made during the Fire action. For example a 12-man Chinese squad could perform— theoretically — 6 MAW attacks in one action.
[20.24] A MAW of the recoilless rifle, Dragon, or Milan type is subject to ammunition depletion in the same manner as a main gun. Once ammo is depleted, the MAW is struck from the box corresponding to the unit on the Unit Status Sheet.
[20.25] MAWs of the TOW, Swingfire, HOT, AT4, or ATS type are distributed at the beginning of the game and expended with each attack in units of one. The number of MAWs of this type assigned to each unit are noted in the box corresponding to the unit on the Unit Status Sheet. Each time an attack is made, the number of MAWs assigned is reduced by one.
[20.26] A LAW of the M202, RPG7, SARPAC, Armbrust, or Panzerfaust variety is subject to ammunition depletion in the same manner as a main gun. Once ammo depleted, the LAW is struck from the box corresponding to the unit on the Unit Status Sheet.
[20.27] The M72 and Viper LAWs are distributed and expended in pairs. Thus a pair of M72 or Viper LAWS are automatically used up in each attack. A pair may not be divided among separate target hexes under Case 20.23. Each time a pair of M72 or Viper LAWs is expended, the number of M72 or Viper LAWs in the box corresponding to the unit to which it was assigned on the Unit Status Sheet is reduced by two.
20.3 RESTRICTIONS ON ATW
[20.31] ATW may always be fired from open hexes and woods hexes. (In the Advanced Game, also from roof level).
[20.32] A LAW may be fired from building hexes only under the following conditions:
- The building hex is either stone or concrete and has at least two accessible hexsides or the building hex is wood and has at least 3 accessible hexsides. 2. The building hex is destroyed or demolished.
[20.33] A MAW may be fired from building hexes only under the following circumstances:
-
The building hex is concrete and has at least two accessible hexsides.
-
The building is stone and has at least one accessible hexside.
-
The building hex is destroyed or demolished.
[20.34] Units transporting a recoilless rifle MAW may not be given Bold commands and, for the use of the recoilless rifle only, are subject to Case 11.65 (set-up time).
20.4 CLOSE ASSAULTS AGAINST VEHICLES
[20.41] Any personnel unit that is eligible to make a close assault (see Case 13.1) may perform an anti-vehicular close assault. A Player simply states this fact, and the ensuing close assault is resolved on the Hard CRT (18.9) instead of the Soft CRT. It is not required that such a unit possess ATW; handgrenades (Molotov Cocktails for irregulars) are here the weapon of choice.
[20.42] All units making anti-vehicular close assaults have constant Fire Strengths:
- Four against buttoned up vehicles 2. Six against open vehicles [20.43] Results on the Hard CRT are read normally, except that all K results against buttoned up vehicles are read as KM.
[20.44] Anti-vehicular close assault is not affected by ammunition status.
20.5 ANTI-PERSONNEL FIRE AGAINST OPEN VEHICLES
Any vehicle that is open (see Case 18.42) in a spotted hex may be fired upon by the Enemy Player as if it were a personnel unit (using the Soft Attack Strength) in a concrete building hex. All K results apply only to personnel, including leaders. Whatever the result on the CRT, the vehicle must immediately button up. For soft vehicles, see Case 19.5.
20.6 MULTIPLE TARGETS
[20.61] A unit which has been assigned more than one MAW, more than one LAW other than the M72 or Viper, or more than one pair of M72 or Viper LAWs, may, as part of a single Fire action, fire these anti-tank weapons at different targets. All such fires must be declared before any of them are resolved. Only one Action Point is expended. Thus, a Chinese squad with 3RPG-7 LAWs, having spotted two Enemy vehicles in a Sighting action, may perform an immediate Fire action (see Case 10.6) consisting of two RPG-7 attacks on one vehicle and one RPG-7 attack on the other Enemy vehicle. The Chinese Player must expend one Action Point from those available for the squad’s platoon, and proceeds to resolve all three attacks. Then it is the opposing Player’s turn.
[20.62] A Player causing two or more ATW (treating two M72 or Viper LAWs as a single unit) of the same type (Carl Gustav recoilless rifle, for example), to be fired in a single Fire action by a unit against a common target under Case 20.23, may at his option combine their Attack Strengths, using the sum of their individual Attack Strengths in a single CRT resolution. Out-of-ammo results apply to all participating weapons.
21.0 DESTRUCTION OF BUILDINGS
COMMENTARY:
Often the best way to defeat an Enemy unit in a building is to destroy the building. Building destruction can, however, be a two-edged sword, and can be the cause of regret for the attacker.
GENERAL RULE:
Buildings may be destroyed due to the fire of a vehicle’s main gun or an ATW. Destroyed building hexes affect movement as well as fire combat. Note: In the Advanced Game, there are substantial modifications to the cases below.
PROCEDURE:
The same dice roil is used to obtain results against personnel in a building hex and against the building itself. Sometimes the results, however, are read from different Attack Strength columns, due to adjustments required under Case 18.53, which are not applied to building damage resolution.
CASES:
21.1 HOW BUILDINGS ARE DAMAGED, DESTROYED AND DEMOLISHED
[21.11] Vehicle main gun and ATW fire Actions against building hexes are always resolved on the
Hard CRT. Due to this combat resolution, the building hex may be damaged, destroyed, or demolished. Each status is indicated by placement of an appropriate marker (damaged, destroyed, or demolished).
[21.12] Any building hex that suffers a damage result when already damaged is considered destroyed — flip over the Damaged Building marker to the Destroyed Building side.
[21.13] Once destroyed, a building hex may be ; further damaged by placing a Damaged marker on it, but under the Destroyed marker. Such damage has no effect. Still further damage, or destruction to a building which has a Destroyed marker on it, i results in the building being demolished — replace all Damaged and Destroyed markers with a i Demolished marker.
[21.14] MICV, scout and assault gun main guns i may not produce damage against stone and concrete building hexes, though personnel in those hexes may be killed.
[21.15] All results against buildings are made known to both Players and marked on both maps.
21.2 EFFECTS OF DAMAGED AND DESTROYED BUILDINGS
[21.21] Personnel units may enter a destroyed building hex from any adjacent hex (as if it were a woods hex); blocked hexsides become unblocked.
[21.22] A destroyed building hex is still considered to be a building hex when a Player is taking a Sighting action or determining line of sight (see Case 10.33)..(The line of sight provision is superceded by Section 31.0 in the Advanced Game).
[21.23] A damaged building hex retains all the characteristics of normal building hexes.
[21.24] A destroyed building hex negates any streets in that hex. (This Case is superceded by Section 37.0 in the Advanced Game.)
[21.25] If personnel are in a building hex at the time it is damaged, the owning Player rolls one die for each such unit. On a 1, the unit is eliminated; on a 2-6 it survives. This die roll is also made if the unit has survived direct fire which also produces building damage.
[21.26] If personnel are in a building hex at the time it is destroyed or demolished, the owning Player rolls one die for each such unit. On a 1-4, the unit is eliminated; on a 5-6 it survives. This die roll is also made if the unit has survived direct fire which produces building destruction or demolition.
[21.27] (Optional in Intermediate Game; Standard in Advanced Game) The search rating of a megahex is permanently reduced by 1 for each height level (see terrain key) of a destroyed building hex; but may never be permanently reduced below half (rounding fractions down).
21.3 EFFECTS OF DEMOLISHED BUILDINGS
Demolished building hexes have all the effects of destroyed building hexes except they block vehicle movement into or out of any adjacent hexes and "i they do not block line of sight (this Case is’ superceded by Sections 31.0 and 37.0 in the Advanced Game).
21.4 FIRES CAUSED BY DESTRUCTION
When a building is damaged, there is a chance that it will catch fire. The Player making an attack against a building that results in it being damaged or destroyed immediately rolls one die. On a 1, the building catches fire (see Case 22.31). On a 2-6, nothing happens. Further attacks on a destroyed building do not cause fires.
22.0 FLAMETHROWERS AND INCENDIARY ROCKETS
GENERAL RULE:
Flamethrowers and incendiary rockets are considered to be special weapons and are assigned to particular combat units by the owning Player.
CASES:
22.1 HOW FLAMETHROWERS AND INCENDIARY ROCKET LAUNCHERS ARE ISSUED
[22.11] Flamethrowers and M202s (FLASH) are available to the Players as per specific scenario instructions or for some units in accordance with their standard TO&E. If a Player is to receive flamethrowers or M202s, he must distribute them among the forces at his disposal, noting their presence on the Unit Status Sheet by placing a dot in the flamethrower/M202 box across from the unit. Players may also use improvised markers to indicate these special weapons.
[22.12] A maximum of one flamethrower or M202 may be assigned to a unit. Only fireteams, squads, and sappers may be assigned a flamethrower or incendiary rocket launcher.
[22.13] Once a flamethrower or M202 has been assigned to a unit, it must remain with that unit for the remainder of the game. It may not be switched to another unit. If the unit transporting the flamethrower or M202 is destroyed, the flamethrower or M202 is also considered destroyed.
[22.14] A flamethrower or M202 may be assigned to units that possess ATW (see Case 20.1) or other special weapons, although a flamethrower may not be issued to a tank or APC unit. Note, however, that flamethrower tanks have built-in flamethrowers.
22.2 HOW FLAMETHROWERS AND INCENDIARY ROCKET LAUNCHERS ARE USED
[22.21] If a flamethrower (FT) or M202 performs a fire action, that unit assigned the FT or M202 may not fire any other weapon in the same Game-Turn. In order to use FT or M202, the owning Player must state it is being used and resolve the attack as described in the following cases.
[22.22] If an FT attack is declared, the maximum range from the firing hex (exclusive) to the target hex (inclusive) is two hexes for personnel FT, and four hexes for FT tanks. Line of sight is traced normally (see Cases 11.3, 11.4, and 11.5).
[22.23] All FT attacks are resolved on the Soft CRT.
[22.24] An FT may only be used twice per game. After the first fire action performed by a FT, a mark is placed in the flamethrower box corresponding to the unit. After the second fire action, the box is filled in; the unit may no longer use the flamethrower. Exception: FT tanks run out of ammo like automatic weapons.
[22.25] All M202/Flash attacks are resolved on the Hard CRT. ;
[22.26] M202s run out of ammo like main guns.
[22.27] M202s have a minimum range of 2 hexes (they may not be fired against the hex they occupy or adjacent hexes); a maximum range of 6 hexes against open or concrete or stone building hexes with an Attack Strength of 9 in the 2-4 hex range and 7 in the 5-6 hex range; and a maximum range of 12 hexes against woods or wood building hexes with an Attack Strength of 9 in the 2-6 hex range and 4 in the 7-12 hex range. In resolving Flash attacks against buttoned-up vehicles, the owning
Player of the vehicle rolls only one die but still uses the Hard CRT, whereby a 1 is “button up.”
[22.28] The firing of an M202 does not reveal the position of the firing unit; the unit, however, is still subject to the provisions of Case 10.36 (making it easier to be spotted in megahex search).
[22.29] M202/Flash may not be used against vehicles in unspotted hexes.
22.3 BURNING BUILDINGS AND WOODS
[22.31] After an FT or M202/Flash Fire action against a building or woods hex has been resolved, the owning Player must roll a single die and consult the Flamethrower Table (22.4). As a result of this die roll, the hex may catch fire (see Case 22.32). Demolished stone or concrete building hexes may not catch fire.
[22.32] Any building or woods hex that catches fire has a Burning marker placed on it immediately. At the beginning of the next Game-Turn evenly divisible by 20 (in the Advanced Game: by 10), this marker is flipped over to indicate fire spreading status.
[22.33] No unit may ever enter a building or woods hex with a Fire Spreading marker on it. Any unit which occupies a building or woods hex with a Fire Spreading marker on it at the end of an Action Stage is eliminated.
[22.34] A fire may not be put out during the course of the game. In the Intermediate Game a fire may not spread to any adjacent hexes.
[22.35] A hex with a Fire Spreading marker on it is considered to be a smoke hex (see Section 30.0) for all sighting and line of sight purposes. It is also considered destroyed (see Case 21.1). (In the Advanced Game, the hex is destroyed only when all floors other than the cellar are aflame.)
[22.36] A suppressed unit in a hex with a Burning marker on it automatically recovers during the Suppression Recovery Stage.
[22.37] The line of sight of a Sagger, AT4, ATS, TOW, Dragon, or Milan may not pass through (or, in the Advanced Game, over) a Fire Spreading hex.
[22.38] All references to Burning hexes in the following Sections apply equally to hexes with Burning and with Fire Spreading markers on them.
22.4 FLAMETHROWER TABLE (see charts and tables)
23.0 GRENADE LAUNCHERS
GENERAL RULE:
Some combat units may be indicated as possessing grenade launchers on the Unit Data Chart. Grenade launchers are hard weapons and are somewhat similar to ATW. They may be used to destroy vehicles or personnel and fire on buildings or woods.
CASES:
23.1 WHICH UNITS POSSESS GRENADE LAUNCHERS
Each combat personnel unit with a “G” (grenade launcher) capability (as noted on the Unit Data Tables) is considered to have grenade launchers.
23.2 HOW GRENADE LAUNCHERS WORK
[23.21] A unit that fires a grenade launcher (GL) in performing a Fire action may not fire any other weapon that it possesses in the same Game-Turn. In order to use GL, the owning Player must state it is being used and resolve the attack as described in the following cases.
[23.22] The maximum range for a grenade launcher is 20 hexes; the minimum range is 2 hexes. Line of sight is traced normally (see Cases 11.3, 11.4, and 11.5).
[23.23] All GL attacks are resolved using the Hard CRT (18.8). GL Attack Strength is always 5 versus vehicles, and 6 versus personnel (ignore modifications of Case 18.53).
[23.24] There is one exception to the results printed on the Hard CRT when using GL. When firing against a building hex, ignore the effects against that building listed on the CRT. Instead, a wooden building is damaged if a “2” or ‘*12” has been rolled; a concrete building is damaged if a “2” has been rolled; stone buildings may not be damaged by GL.
[23.25] When firing GL against a hex in which no Enemy units are spotted, vehicles and buildings are not attacked; all KM and KF results against personnel are treated as S results.
[23.26] If a unit is capable of firing GL, it may run out of ammunition for this weapon after the resolution of a fire action. The owning Player rolls a single die. On a die roll equal to or above that Player’s ammunition rating for the scenario, that unit may not fire GL for the rest of the game (Intermediate Game). It is permanently out of GL ammo. Place a check mark in the GL Deplete box corresponding to that unit on the Unit Status Sheet. It may still fire starshell or smoke.
[23.27] A GL may fire a starshell (see Case 24.4). This will affect visibility in scenarios that take place at night.
[23.28] The firing of a GL does not reveal the position of the firing unit. The firing Player is only obligated to state the target hex.
24.0 NIGHT
GENERAL RULE:
Some scenarios take place at night. The decreased visibility experienced at night has considerable effect on Sight and Fire. All rules for sighting and fire are considered to be in effect in night scenarios, except as modified by this Section.
CASES:
24.1 OBSERVATION DURING NIGHT SCENARIOS
Observation during night scenarios is performed in the same manner as in daytime scenarios with the following exceptions:
[24.11] All unilluminated megahex Search Ratings are increased by 20; all illuminated megahex Search Ratings are increased by 10.
[24.12] Enemy units in open hexes are not automatically spotted in the megahex searched unless the megahex is illuminated by starshell (Case 24.15). Instead, such units are spotted only if the sighting dice roll rule is 21 or higher. (This requires a dice roll for attempts to sight megahexes containing only open hexes; see Case 10.32).
[24.13] The search modification for a unit which has fired from an unilluminated megahex in that Game-Turn is — 40, not — 20 (see Case 10.36).
[24.14] If the sighting unit is STANO-equipped (see Case 24.3), 10 is added to the sighting dice roll result for any attempt by that unit to sight an unilluminated megahex.
[24.15] A unit may not attempt to sight a megahex 2 megahexes away unless that megahex is illuminated by a starshell.
[24.16] A unit in a hex which is illuminated by starshell may not attempt to sight a megahex which is not illuminated by starshell.
24.2 FIRE COMBAT AT NIGHT
All units’ Fire Strengths are reduced by one-third (fractions eliminated) during night scenarios. This reduction applies to all direct fire weapons, be they ATW, grenade launchers, flamethrowers, machineguns, fireteams, tank guns, etc. The reduction also applies to units making close assaults. Weapons firing at illuminated open hexes are not affected. See also Case 24.3.
24.3 STANO (SURVEILLANCE, TARGET ACQUISITION, NIGHT OBSERVATION)
In night scenarios, a player’s force may be designated STANO-equipped. If so, 10 is added to the sighting dice roll for attempts to sight unilluminated megahexes by units so equipped, and the nighttime reduction of Fire Strength is reduced by one-quarter (fractions eliminated) instead of one-third (Case 24.2), when firing into unilluminated open hexes and all illuminated building and woods hexes. The Fire Strength is still reduced by one-third for fire into unilluminated building and woods hexes.
24.4 STARSHELL
[24.41] If a combat unit possesses grenade launcher capability (see Case 23.1), and that unit performs a Fire action, the owning Player may declare that it is firing starshell. This task is considered to be a complete Fire action.
[24.42] If a unit is firing starshell, the owning Player must choose any megahex within 6 megahexes of the firing unit; no line of sight is required. He states the code number of the megahex to be illuminated and a starshell marker is placed in the center of the megahex chosen, “new” side up, on both maps.
[24.43] Starshell affects the megahex it occupies as well as all adjacent megahexes and all megahexes which are two megahexes away, fora total illuminated area of 19 megahexes. The Search Rating of any megahex lighted by a starshell is reduced by 10 from its unilluminated nighttime rating (see Case 24.11).
[24.44] At the beginning of the Action Stage following the one in which a starshell counter was placed on the map, that starshell counter is flipped over to its “old” side. In this state, it may remain on the map throughout the Action Stage. At the beginning of the next Action Stage, all “old” starshell counters are removed from play entirely.
[24.45] A unit which fires starshell may permanently run out of ammunition (see Case 23.26). If this occurs, the owning Player may not fire starshell with this unit again, although the unit may use its grenade launcher capability in other ways. Place a check mark in the starshell deplete box corresponding to that unit on the Unit Status Sheet.
[24.46] The illuminating effects of each starshell are the same for both players.
24.5 SUPPRESSION RECOVERY AT NIGHT
Units in megahexes which are not illuminated by starshell benefit from a -1 modification in their suppression recovery die rolls.
24.6 ILLUMINATION FROM BURNING BUILDINGS/WOODS (Optional Rule)
If a line of sight can be traced from the center of a building or woods feature of a burning hex (one with a Burning or Fire Spreading marker on it) to the center of an open hex which is no more than 3 hexes away, that open hex is considered illuminated.
25.0 SNIPERS
GENERAL RULE:
Players may be provided with snipers as per scenario instructions, TO&E, or by breaking units down ad hoc to form snipers. These are combat personnel units, although they possess certain special properties with regard to combat; each sniper is one man, except for the Chinese, British and U.S. Marines, who use 2-man sniper teams. Being combat units, snipers are issued commands, perform actions, contribute and consume Action Points. Snipers may not be assigned MAWSs or other special weapons, though they may be assigned LAWS other than RPG-7.
CASES:
25.1 HOW SNIPERS OPERATE
[25.11] Any sniper issued a Fire command while in an undemolished building or woods hex may perform a Fire action slightly differently than normal units. When a Fire action is declared for a sniper in an undemolished building or woods hex, the owning Player simply states the target hex. He is not obliged to state the firing hex, although he still must check line of sight normally. The fire combat is then resolved normally. At the conclusion of the combat, regardless of its outcome, the owning Player rolls a single die. If the die roll is an even number, the firing Player must state the megahex (not hex) from which this fire originated. If the die roll is an odd number, the firing Player is not required to give any information in regard to where the fire originated from.
[25.12] All K results achieved by snipers against personnel units of 3.or more men are read as S results. (Exception: For Chinese, British and U.S. Marine sniper teams, this rule applies against 5 or more men.) Sniper fire eliminates any leaders, spotters, other snipers, and bipod machinegun units in a hex whenever a K result is obtained, whether they are alone in the hex or stacked with other units (which are then suppressed). (In the Advanced Game, this includes sappers,;.see Case 34.16). This is an exception to Case 9.13. Note: Snipers, like other soft weapon firing units, cannot achieve a K result against an unspotted hex (see Case 11.4).
[25.13] Snipers do not run out of ammunition, except for LAWs.
[25.14] Snipers have no effect on close assault; units performing close assault against snipers which are unaccompanied by other Enemy combat units may not suffer adverse results (Case 13.23) from the Close assault.
[25.15] Snipers recover from suppression in the same manner as spotters (see Cases 15.51 and 15.52). When using leaders for suppression recovery, however, only leaders of the sniper’s platoon and company may be used. In all cases, snipers benefit from a ~—2 die modification on suppression recovery die rolls.
[25.16] When a sniper is suppressed or killed as a result of combat, no Action Points are subtracted from the sniper’s platoon. This is an exception to Case 11.51.
25.2 AD HOC FORMATION OF SNIPERS
Ad hoc snipers are riflemen armed with standard ; weapons who are temporarily assigned to sniper duties. They are represented by ad hoc Sniper counters and have Attack Strengths which are different from those of regular snipers.
i 25.21] Either Player may, at the beginning of the Command Decision Stage, replace any fireteam without machinegun with a number of ad hoc snipers equal to the number of men in the team (keeping in mind that British and Chinese form 2-man ad hoc sniper teams). The ad hoc snipers remain part of the platoon the fireteam was attached to. No platoon may dissolve more than one fireteam in this fashion.
[25.22] Ad hoc snipers of the same platoon, brought into play through dissolution of a fireteam without machinegun (see Case 25.21), may, if stacked together in the same hex at the beginning of a Command Decision Phase, be replaced with the original fireteam without MG unit. This may only be done if none of the ad hoc snipers formed under Case 25.21 from that fireteam have been killed.
[25.23] The number of snipers which may be formed through dissolving fireteams is limited by the available counters.
[25.24] A Soviet or North Vietnamese squad may be dissolved as per Case 25.21 into one tripod machinegun unit and five AKM (ad hoc) snipers, or into one tripod MG unit, one 4-man fireteam without MG, and one ad hoc sniper, but this may only be done for Soviets if the player has advantage.
[25.25] A Chinese squad (12 men) may be dissolved under Case 25.21 into one tripod MG unit, one 4-man fireteam without MG, and two ad hoc sniper teams. Advantage is not required.
26.0 INDEPENDENT-COMMAND AND LEADERS
GENERAL RULE:
As indicated in the scenario instructions or standard TO&E, some units are not attached to platoons. These units are known as independent-command units. Such units may be either attached to companies, or completely independent.
CASES:
26.1 ACTIONS BY INDEPENDENT-COMMAND UNITS
[26.11] Independent-command units receive commands like all other units, but actions by such units do not require the expenditure of Action Points. Upon completion of such an action, play passes to the opposing player.
[26.12] An independent-command unit which is attached to a company may become ineligible to undertake any Action Points if (1) the company commander is suppressed; (2) he is absent (killed and not replaced); (3) there is no Friendly working telephone center and the company commander does not have line-of-sight to the unit. If any of these conditions applies, a die is rolled during the Command Control Stage for each such unit. If the result is 1 or 2, the command chit is removed and the unit may not undertake any action but a close assault fire (as if it had a Fire command). If the result is 3-6, the unit is not affected.
[26.13] During the Command Decision Stage, the owning Player rolls one die for each independent-command unit not attached to a company. A die roll of “1” for the Player with advantage, or a die roll of “1” or “2” for the Player without, prohibits him from issuing any commands to (and hence, performing any actions with) that unit during the current Game-Turn; on any other die roll, he may issue a command normally.
26.2 STACKING OF INDEPENDENT-COMMAND UNITS
Independent-command units attached to a company may be stacked with any other unit attached to that company or its platoons. Independent-command units not attached to a company may not be stacked with any unit attacked to that company or its platoons.
26.3 SUPPRESSION OF INDEPENDENT-COMMAND UNITS —
[26.31] A Player may utilize a company commander’s leader rating to aid suppression removal attempts for suppressed independent command units attached to the unit (see Case 15.4), no matter how far the unit is from the company commander. The suppression recovery die roll result however, is modified by +5 if the company commander is more than one megahex away from the suppressed unit, and there is no Friendly working telephone center. All other modifications apply as stated in Cases 15.44—15.48. Such units may also attempt suppression recovery without using a leader. A company commander may be used in suppression recovery attempts by any number of ° independent-command units attached directly to his company (Exception to Case 15.43).
[26.32] A Player may attempt to have suppressed independent command units not attached to companies recover from suppression without the help of a leader by rolling one die in the Suppression Recovery Stage. If the modified die roll is 5 or 6, the unit remains suppressed; if it is 1-4, the suppression is removed. All modifications not involving leaders apply to this die roll.
26.4 PRESERVATION AND INDEPENDENT-COMMAND UNITS
[26.41] Independent command units attached to companies are counted in determining company Preservation Levels (see Section 17.0) and are considered to have become demoralized if the company has been demoralized.
[26.42] Independent command units which are attached to battalions are counted in determining battalion preservation levels, and are considered to have become demoralized if the battalion has become demoralized.
26.5 LEADER REASSIGNMENT
If the only surviving units of a platoon are leaders, and their company commander is on the map, these leaders may be reassigned to a new platoon. To be reassigned, the leader must be stacked with the company commander at the beginning of the Game-Turn. A platoon leader may only be reassigned to another platoon if that platoon’s original platoon leader has been killed; when this occurs, the replacement platoon leader’s promotion is rescinded and he reverts to his status prior to the elimination of the old platoon leader {i.e., a promoted platoon sergeant reverts to his role as platoon sergeant; a new leader picked from the pool returns to the pool). A platoon sergeant may be reassigned to another platoon, in the same manner as a platoon leader is reassigned, whether or not there is already a platoon sergeant in his new platoon. Reassignment of a platoon sergeant has no effect on the platoon leader of the sergeant’s new platoon.
26.6 LEADER REPLACEMENT
If the replacement leader is in the same hex as the killed leader, the replacement takes effect immediately; if not and if the telephone center is in Friendly hands and is still functioning or the replacement leader is in the same megahex as the killed leader, the replacement takes effect at the beginning of the third Game-Turn following the one in which the leader is killed. In other circumstances, the owning Player rolls two dice; the result is the number of Game-Turns (including the one in which the leader was killed) which must elapse before the leader replacement takes effect. The replacement then takes effect at the beginning of the Game-Turn.
26.7 PLATOON SERGEANT ASSISTANCE
If, in any given platoon, the platoon sergeant has a rating equal to or higher than the platoon leader, the owning Player may add half the platoon sergeant’s rating (fractional points rounded down) to the platoon leader’s rating as long as the two leaders are stacked together. If this is done, the platoon sergeant may not have any other effect on play until after he has been separated from the platoon leader for three full Game-Turns, or the platoon leader has been killed.
27.0 DECLARED SIGHTING AND DECLARED POSITION
GENERAL RULE:
As alternatives to megahex observation procedures, a unit may either undertake declared sighting or a unit with a Search or Fire command may undertake declared position.
CASES:
27.1 DECLARED SIGHTING PROCEDURE
[27.11] The declared sighting procedure is an alternative to the megahex sighting procedure (see Section 10.0). A Player may not have a unit utilize both procedures in performing the same Sighting action, but the choice between procedures is made by the owning Player at the time the Sighting action is performed.
[27.12] In declared sighting, the Player whose turn it is declares the location of the sighting unit; he does not declare what type of unit it is. Following this declaration, the opposing Player surveys his map and determines what units in open hexes, vehicles in building or woods hexes containing streets, and units which have fired in that Game-Turn are within the sighting unit’s line of sight. (In declared sighting, however, line of sight is measured only from the center of the hex occupied by the sighting unit to the center of the hex occupied by the unit being sighted.) These units are spotted. Units in buildings or woods are not spotted-through declared sighting unless they have fired in the current Game-Turn and have not been moved since firing or occupy the same hex as the sighting unit.
[27.13] If the sighting unit consists of only a leader, buttoned up vehicle, or sniper, the owning Player must state that it is a 1-man unit in his sighting declaration. Such a unit may only observe Enemy units in an arc formed by hex rows radiating from two contiguous hexes adjacent to the sighting unit (see diagram). The owning Player must declare the sighting arc from such a unit.
[27.14] If the sighting unit(s) consists of two or three men, or an open vehicle (a spotter is considered to be two men), the owning Player must state that it is a 2-man unit in his sighting declaration. Such a unit may only observe Enemy units in an arc formed by hex rows radiating from three contiguous hexes adjacent to the sighting unit (see diagram). The owning Player must declare the sighting arc for such a unit.
[27.15] If the sighting unit(s) consists of 4 or 5 men, the owning Player must state that it is a 4—man unit in his sighting declaration. Such a unit may only observe Enemy units in an arc formed by hex rows radiating from four contiguous hexes adjacent to the sighting unit (see diagram). The owning Player must declare the sighting arc for such a unit.
[27.16] If the sighting unit(s) consists of more than 5 men, the owning Player must state that it is a 6-man unit in his sighting declaration. Such a unit observes without any restrictions with regard toanarc.
[27.17] The Player declaring a Sighting action may not declare a unit of more men than are actually performing the Sighting action. He may, however, declare fewer men in order to deceive his opponent.
[27.18] A unit which spots an Enemy unit through declared sighting may perform an Immediate Fire action (see Case 10.6) against the spotted hex.
[27.19] Declared Sighting Arc Diagram (below).
Declared Sighting all hexes are in 6-man arc
27.2 RESTRICTIONS ON DECLARED SIGHTING
[27.21] During daylight and good weather, there is no maximum range for declared sighting.
[27.22] During nighttime or foul weather, a unit performing declared sighting with a line of sight to an Enemy unit may nevertheless be out of range. The maximum visible range is noted in the Declared Sighting Chart, Case 27.25.
[27.23] A unit which is in an illuminated hex is sighted by declared sighting as if it were daytime; thus, in good weather there would be no maximum range for sighting such a unit.
[27.24] If the sighting unit is STANO-equipped in a nighttime scenario, the maximum sighting range is doubled.
[27.25] Declared Sighting Chart (see charts and tables)
[27.26] If the sighting unit is in an area illuminated by a starshell, it may only spot units in hexes also illuminated by a starshell.
[27.27] For the effects of smoke on declared sighting, see Cases 30.45 and 30.46.
[27.28] The number of hexes which may be spotted in a single declared Sighting action is limited to the number of men declared (as per Cases 27.14, 27.15 and 27.16) to be in the sighting unit(s). The opposing Player is required to announce the hexes closest to the sighting unit, up to the limit specified in this Case; if hexes are equidistant, the choice is his. Vertical distance (in the Advanced Game) is not a factor. If the same unit or stack, having a Search command, performs declared sighting a second time in a single Game-Turn, previously spotted hexes do not count against the limit specified in this Case, although they must be announced if still occupied.
27.3 DECLARED POSITIONS
[27.31] The declared position procedure is an alternative to performing Sighting actions per se. It is in effect a passive Sighting action. No unit may be assigned a declared sighting position and perform a megahex or declared Sighting action in the same Game-Turn.
[27.32] Only a unit issued a Search or Fire command may be assigned by a Player to a declared position.
[27.33] Units assigned to a declared position may not subsequently be moved in that Game-Turn.
[27.34] Buttoned-up vehicles and suppressed personnel units may not be assigned to a declared position.
27.4 DECLARED POSITION PROCEDURE
[27.41] When it is his turn to have a unit perform an action, a Player may declare the position of a unit to the opposing Player. The unit’s counter is not flipped over, and a (second) Search chit should be placed on top of the unit at the time its position is declared.
[27.42] The opposing Player must then inform the declaring Player of any Enemy units which are in open hexes (or vehicles in streets) which are in the line of sight of the Friendly unit, are not affected by smoke, foul weather, or night, and are within 6 hexes of the Friendly unit. He must also inform the sighting Player of any Enemy units which are in open hexes (or vehicles in streets) which are in line of sight and within 2 hexes of the Friendly unit, even if smoke, foul weather or night are present. He must also inform the sighting Player of any unsuppressed Enemy units which are in building or woods hexes which are adjacent to the hex occupied by the Friendly unit.
[27.43] Finally, he must inform the sighting Player of any Enemy unit whatsoever which occupies the same hex as the Friendly unit. In this case, if the sighting unit is a spotter, the spotter is immediately eliminated. If the sighting unit is a combat unit, and the Enemy unit is a personnel unit, the Enemy unit is eliminated. If the sighting unit is a combat unit and the Enemy unit is a vehicle, the Enemy vehicle is immediately attacked by any weapons available to the sighting unit, including anti-vehicle close assault (see 20.4), regardless of command, and even if the sighting unit’s platoon has no action points remaining; if the Enemy vehicle does not thereby suffer a K or F result, both units remain in the same hex.
[27.44] Once declared position has been initiated, it remains in effect for the remainder of the Game-Turn. Any Enemy unit coming within the area prescribed above is spotted as soon as it enters that area, and remains spotted (by the declared position unit) for as long as it is in that area and the declared-position unit is alive.
27.5 DECLARED POSITION DIAGRAM (see diagram at right)
28.0 WEATHER
GENERAL RULE:
Foul weather has important effects on observation, movement, and use of flamethrowers.
CASES:
28.1 CLEAR WEATHER
Clear weather is considered to be the normal state of affairs; all other rules Sections apply during clear weather unless stated otherwise.
28.2 RAIN/MUD
Rain restricts the range of a unit undertaking declared sighting; see Case 27.25. In designing a scenario, one may consider the effects of a heavy rain on the Eiche River. A scenario may also assume heavy mud; in such a case units may not move more than one hex per Game-Turn unless through street hexsides; movement along streets is normal. In heavy rain, vehicle movement is halved; personnel units may not move more than one hex per Game-Turn.
28.3 SNOW
Snow restricts the range of a unit undertaking declared sighting; see Case 27.25. In designing a scenario, one may consider the effects of ice on the Eiche River. If the scenario assumes ground or falling snow, personnel units may not move more than one hex per Game-Turn; vehicles may not move more than one hex per Movement action, if any of their movement is off of streets, and not more than two hexes per Movement action if all of I their movement is on streets.
28.4 FOG
Fog restricts the range of a unit undertaking declared sighting; see Case 27.25. Under fog conditions, a unit may not search a megahex two megahexes away from the megahex in which it is located; vehicle movement is:halved.
28.5 FLAMETHROWERS
When using the Flamethrower Table (Case 22.4) under conditions of rain, snow, or mud, die rolls of 1, 4, and 5 are converted to No Effect.
28.6 EMBANKMENTS
Hexes containing embankments may be entered normally by all units via street hexsides. Under mud or snow conditions, vehicles may not otherwise enter an embankment hex. A non-vehicle unit which enters an embankment hex other than via a street hexside must do so on a Cautious Movement command.
Declared Position Building A — Friendly Observer Unit B — Spotted Ene
28.7 WINTER FOLIAGE
In the winter, trees which are not laden with snow are bare and do not present a great obstacle to sight. If the-scenario prescribes winter without snow conditions, woods block line of sight only if the entire hex is filled with woods (e.g., 6J7); consider the hexside of such a hex to be the woods boundary for natural line of sight. When firing at woods hexes in the winter, whether there is snow or not, only dice rolls of 2 and 3 on the Soft CRT are converted to No Effect.
28.8 NIGHT AND FOUL WEATHER
Starshell may not be used in rain, falling snow, or fog.
28.9 MEGAHEX SEARCH AND FOUL WEATHER
In foul weather, Enemy units in open hexes are not automatically spotted in megahex search. Instead, such units are spotted only if the sighting dice roll is 21 or higher. (This requires a dice roll for attempts to sight megahexes containing only open hexes; see Case 10.32).
29.0 AMPHIBIOUS MOVEMENT
GENERAL RULE:
Each scenario will designate whether the Eiche River is fordable or not. If fordable, any unit issued a Cautious command may cross the river. The Cases in this Section are ignored. If not, the river may be crossed only by amphibious vehicles or via bridges.
LOS my Unit C — Unspotted Enemy Unit
CASES:
29.1 BRIDGES
[29.11] Any unit may cross the river via a bridged hexside which has not been destroyed: an exception is the footbridge (5C4 to 5D6), which may not be used by vehicles.
[29.12] In the Intermediate Game, bridges, other than the footbridge, may not be destroyed. The scenario may, however, provide that some or all bridges have been destroyed prior to the beginning of the scenario.
[29.13] Destroyed bridges may not be used for any purpose.
[29.14] The footbridge may be destroyed in hex 5C4 or 5D6 in the same manner.as a concrete building. If destroyed in either hex, the footbridge may not be used.
29.2 AMPHIBIOUS VEHICLES
[29.21] The following vehicles are considered amphibious: BMP, BTR-60, BRDM, Luchs, Scorpion, Scimitar, FV432, Lynx, PT-76, AML90, AMX10, Volkswagen, SP74, BMD, Abbot, CET. The M113 is amphibious only where so designated by the scenario, indicating slow, placid current in the Eiche River.
[29.22] Amphibious vehicles may only cross the river amphibiously when issued a Bold command. This also applies to crossings into or inside the Old Village.
[29.23] In order to cross the river amphibiously, an amphibious vehicle must begin the Game-Turn in a hex with a river hexside. During the Action Stage, the vehicle is moved across the river hexside into the adjacent hex. The vehicle must remain in that hex for the remainder of the Game-Turn and may not receive a command for the Game-Turn following its crossing; such a crossing vehicle (that is not issued a command) does not count in determining the number of available Action Points for its platoon.
[29.24] Amphibious units may also cross hex 3L3 by amphibious movement.
[29.25] Transported units may cross amphibiously if transported by amphibious vehicles.
29.3 SNORKELED UNITS
[29.31] The following vehicles may be snorkeled: T62, T72, T59, XMI, Leopard, Chieftain, AMX30, T80, Marder.
[29.32] Vehicles which are prepared for snorkeling must be set up at the beginning of play or enter the map in that condition. Place a check mark in the snorkel box corresponding to the unit.
[29.33] Once the snorkel designation is removed, it may never again be given to that vehicle. A snorkel designation may be removed voluntarily during any Command Phase.
[29.34] A snorkel designation must be removed if a vehicle suffers a KM or KF result in combat.
[29.35] Snorkeled units are considered amphibious.
[29.36] Snorkeled units may not receive Fire commands and may not fire under any circumstances.
[29.37] Snorkeled units are considered buttoned up for all purposes.
29.4 BRIDGELAYERS
[29.41] A bridgelayer may lay a bridge across the river by spending nine Game-Turns on one side of the river--without being issued any commands. Each bridgelayer may lay one bridge only. Place a Work chit. under the bridgelayer to indicate a completed bridge. The bridgelayer may reclaim the bridge in another nine Game-Turns, provided that it and the bridge are intact. Bridgelayers are inert while their bridge is down.
[29.42] Bridgelayer bridges may also be used to bridge craters and ditches of one hex width and to replace one destroyed hex of a bridge, whether over the river or not.
30.0 SMOKE
COMMENTARY:
Smoke is a critical element of urban warfare, especially to the attacker.
GENERAL RULE:
Smoke hexes block line-of-sight, slow movement, obscure observation, and affect fire.
CASES:
30.1 GRENADE-LAUNCHED SMOKE
[30.11] Units with grenade launchers may perform a Fire action by firing smoke grenades. This act is declared and is considered to be a complete Fire action.
[30.12] The target hex of asmoke grenade must be at least two hexes away from the firing unit. A smoke grenade may, however, be fired over a building or woods hex which is adjacent to the hex containing the firing unit. Apart from this exception, normal line of sight rules apply.
[30.13] There is a 9-hex maximum range for smoke grenades.
[30.14] The target hex of a smoke grenade and two immediately adjacent hexes chosen by the firing Player so as to form a triangular pattern immediately become smoke hexes. Place a Smoke Hex marker at the junction of the three hexes. In addition, any personnel units in open hexes in the triangular pattern are attacked with a strength of 8 (unsuppressed) or 5 (suppressed) on the Soft CRT at the time the smoke grenade is placed.
[30.15] A unit which fires smoke grenades may permanently run out of ammunition (see Case 23.26). If this occurs, the owning Player may not fire smoke grenades with this unit again, although the unit may use its grenade launcher capability in other ways. Place a check mark in the Smoke Grenade Deplete box corresponding to the unit on the Unit Status Sheet.
[30.16] If the target hex (not the adjacent hexes) of a.smoke grenade is a woods hex or a wood building hex, the firing Player must roll two dice and consult the Flamethrower Table (Case 22.4), applying the indicated results. (7-12 = no effect).
30.2 VEHICLE SMOKE
[30.21] The following vehicles are smoke-equipped: T62, T59, T72, BMP, M60A2, XM1, Leopard, Kanone, Luchs, Lynx, Chieftain, Scorpion, Scimitar, AMX-VCI, Fox, AMX 30, AMX 10, T80, FV438, M60A3.
[30.22] A smoke equipped vehicle: may deposit smoke in any hex it leaves while performing a Movement action, except when snorkeled. The moving Player must announce which hexes have been covered in this manner. This may be performed for a maximum of 10 Game-Turns per vehicle. Players may keep track of the number of Game-Turns in which smoke has been produced by each vehicle on the Unit Data Sheet. A scenario may also assume prior-use of vehicle smoke, and may therefore limit the number of Game-Turns in which vehicles (or particular vehicles) may produce smoke.
[30.23] Any hex in which a vehicle deposits smoke becomes a smoke hex immediately; place a Smoke Hex marker on the hex.
30.3 SMOKE DISPERSAL
[30.31] The amount of time it takes smoke grenade and artillery smoke to disperse depends on the wind strength, and will therefore vary. Sée the Scenario Guide.
[30.32] Vehicle smoke will disperse in half the number of Game-Turns (fractions rounded up) listed for other smoke dispersion.
[30.33] Each time smoke is placed in a hex, Players should write down the hex number and Game-Turn when it is due for dispersal. During the Suppression Recovery Stage of the indicated Game-Turn, all Smoke markers due for dispersal are removed. .
30.4 SMOKE AND OBSERVATION
[30.41] Units in smoke hexes may undertake megahex search only for the megahex they are located in, and then only if the owning Player obtains a 1, 2, or 3 result with one die. Ona result of 4-6, they may not undertake any Sighting action in that Game-Turn. Even when megahex search is allowed for such a unit, the searching Player must call out a dice roll low enough to get an unsuccessful result with regard to building and woods hexes.
[30.42] Units in smoke hexes may undertake declared sight, but only into adjacent hexes.
[30.43] Units in smoke hexes may always be spotted via automatic spotting (see Case 10.4).
[30.44] When a unit is the object of Enemy megahex search, and is in open hex (or, for a vehicle, in a street hex outside of a building) which is also a smoke hex, the owning Player rolls one die to determine whether it is spotted or not. Ona roll of 1, the unit is spotted. Ona roll of 2, a vehicle is spotted unless the entire megahex is smoked up, in which case it is not spotted; personnel units are not spotted ona roll of 2. Ona roll of 3 through 6, the unit is not spotted.
[30.45] When a unit is the object of Enemy declared search, and is in an open hex (or, for a vehicle, in a street hex outside of a building) which is asmoke hex, and there are no other smoke hexes between that unit and the searching unit, the Player who own the target unit rolls one die. On 1-2, the unit is sighted; on 3-6, the unit is not sighted. If the target unit is in a smoke hex, and there is only one other smoke hex between the target unit and the sighting unit, the Player who owns the target unit rolls one die, and on a 1 only, the unit is sighted; on a 2-6, the unit is not sighted.
[30.46] When a unit is the object of Enemy declared search, is in a smoke hex, and is not covered by Cases 30.44 and 30.45, the unit is not spotted.
[30.47] In conditions (such as night and foul weather) when the sighting of units in open smokeless hexes is not automatic under megahex search procedures, the die roll is only necessary if the unit would have been spotted had there been no smoke present.
[30.48] Smoke hexes may not be illuminated by starshell.
[30.49] Smoke does not affect the sighting of units within 2 hexes of a declared position (Case 27.4).
30.5 SMOKE AND COMBAT
[30.51] A unit in a smoke hex which is successfully observed under Case 30.4 may be fired upon in an
Immediate Fire action as through it were in a smokeless hex.
[30.52] In all other cases, line of sight may be traced through, into, or out of a smoke hex, but all K results from fire on the soft CRT are considered to be §, if the line of sight passes through, into, or out of a smoke hex. On the Hard CRT, if the line of sight passes through a smoke hex, against personnel all K, KM, and KF results are treated as Suppression; against soft vehicles all K and KF results are treated as KM; against hard vehicles, all K results are considered to be button up, but have no other effect; against buildings all attacks are undertaken at half strength, fractions rounded down.
30.6 SMOKE AND MOVEMENT
Units may move into a smoke hex only on a Cautious command.
30.7 SMOKE AND FIRE
Whenever there is a Burning or Fire Spreading marker on a hex, that marker also doubles as a smoke hex marker. In other words, where there’s fire, there’s smoke.
30.8 SMOKE AND SUPPRESSION RECOVERY
Two is subtracted from any suppression recovery die roll result for a unit which is in a smoke hex.
STOP!
It is now possible to play Intermediate Game scenarios for Cityfight (see Cases 50.4-50.5 and 56.0-60.0). It is recommended that Players experiment with these scenarios before proceding with the Advanced Game.
ADVANCED GAME
The Advanced Game is intended for experienced gamers who place a high value on realism. Play in the Advanced Game is more realistic, but is also more time-consuming. In order to cover all possible questions arising from the optional rules in the Advanced Game, a thick book would be required. Thus, there are no rules to cover vehicles upon which tanks fall after being pushed off of embankments by dozers. Such rare situations should be resolved by the Players in a spirit of good will and common sense. Players are advised to integrate the Advanced rules in digestible chunks, having mastered the Intermediate Game; thus, one might first incorporate. the height rules, then the indirect fire rules, then additional Advanced rules. Players may use any combination of Advanced Game rules that they wish; Intermediate Game rules are fully in effect unless contravened by Advanced Game rules being used.
31.0 HEIGHT
COMMENTARY:
In the Advanced Game, Players add a new dimension to play. Playing with height levels involves more record-keeping, and slows down play, since the height line-of-sight display or algorithm must be resorted to frequently until players are familiar with them. On the other hand, height is an element which is essential to a real simulation of urban combat.
GENERAL RULE:
In the Advanced Game, Players attend to the location of all units in the vertical dimension as well as in a particular hex. The different elevations are represented by height levels, each of which ap{ proximates 1.5 meters. Two height levels (3 meters) constitutes a floor level. All references to Hexes in Sections 4.0 through 30.0 apply to individual floor levels within a hex in the Advanced Game, unless specifically stated otherwise. The term /location in this and the following Sections refers to a specific floor level in a building or woods hex, or to the ground floor level of a specific open hex. Height has important effects on ; movement, observation (including LOS determination), and stacking. Heights are represented on the map by color.
Vehicles are considered to be at height level 1 (1 level above street level) for purposes of observation and fire. Personnel units may be located at any height level from -2 (cellar or basement) on up. A suppressed personnel unit, or a bipod or tripod machinegun unit is always at the lower height level of the floor level which it is on, unless it is on the roof. (Cityfight utilizes the European system; thus the first floor is one flight up.) An unsuppressed personnel unit is always at the higher level height level of the floor it is on; therefore an unsuppressed personnel unit in an open hex as at height level 1, on the second floor is at height level 5, etc.
PROCEDURE:
In order to change the floor level of a personnel or machinegun unit, the unit must be moved from one floor level to the next highest or lowest within a single hex. In general, Players keep track of the floor level of their units, rather than the specific height level of each, as the latter is always determinable depending upon the class and suppression status of the unit, if the floor level is known.
CASES:
31.1 HEIGHT LEVELS AND FLOOR LEVELS
[31.11] Height levels are measured from street level, which is height level 0. All units in the cellar or basement level are at height level -2. All vehicles are considered to be at height level 1, unless on bridges or embankments (see Cases 31.16 and 31.17).
[31.12] Each floor level consists of two height levels. The ground floor is height levels 0 and 1; the first floor is height levels 2 and 3; the second floor is at height levels 4 and 5; the third floor is at height i levels 6 and 7; the fourth floor is at height levels 8 and 9; the fifth floor is at height levels 10 and 11; the sixth floor is at height levels 12 and 13, etc.
[31.13] A suppressed personnel unit or a bipod or tripod machinegun unit is always at the lower height level of the floor level it is on (this height level number if always even or “0”).
[31.14] An unsuppressed personnel unit is always at the higher height level of the floor level it is located on; this is always an odd-numbered height level.
[31.15] Units on the roof level of a building hex are considered to be one floor level higher than the highest floor level of the building. Exception: see Case 31.72.
[31.16] Units in an open hex containing an embankment are raised in floor level by the number of floor levels of the embankment. Thus a tank on an embankment which is 1 floor level high is considered to be at height level’3; if the embankment is
2 floor levels high the tank is considered to be at height level 5.
[31.17] Units in bridge hexes and on the bridge (not under it) are considered to be at the floor level of the embankments on either side of the bridge. To be on a bridge, a unit must have entered the bridge hex by way of a street hexside.
[31.18] On the Unit Status Sheet there is a box for each unit in which the current floor level of the unit is noted. A unit at ground floor level (height level 0 or 1) need not have this fact noted on the Unit Status Sheet. Whenever a personnel unit climbs or descends to a different floor level, the new floor level must be noted on the Unit Status Sheet; when a personnel unit climbs to or descends to ground floor level, the previous floor level notation should be erased or replaced with a G.
[31.19] Whenever a unit is spotted by an opposing Player, its floor level must be announced.
31.2 HEIGHT AND MOVEMENT
[31.21] Unless specifically stated otherwise, a unit may change floor levels only by moving within a single hex.
[31.22] When moving along street hexsides which contain embankments, a unit is automatically raised or lowered in accordance with the height of the embankment.
[31.23] A unit must be at ground floor level in order to move from one hex to another, unless:
-
The unit is in an embankment or bridge hex
-
The unit is moved within a single building feature and does not cross a blocked hexside; that is, the building feature extends across the hexside without intervening space, or blocked hexsides.
-
The unit moves at roof level within a single building feature which extends across the hexside without intervening space. The difference between (2) and (3) is that at roof level, blocked hexsides are ignored.
[31.24] Personnel units may be moved from one floor level to another when issued either a Bold Movement command or a Cautious Movement command, in the same manner as moving from hex to hex. A unit issued a Cautious Movement command may move up or down one floor level (2 height levels) in one Movement action. A unit issued a Bold Movement command may move up or down one floor level (2 height levels) in one Movement action, and move in the same fashion for its second Movement action of the Game-Turn. A unit issued a Bold Movement command may also move to ground level with one Movement action and exit the building hex with its second Movement action, but the reverse procedure is not possible. Case 8.32 therefore applies only to hexes, not to floor levels, except as noted in Case 31.25.
[31.25] A unit which enters a building hex in any way other than from another hex of the same building feature may not move up or down within the building hex entered during the Game-Turn of entry. This is an application of height to Case 8.3. When a unit enters a hex via the roof level, it may not be moved down within the building hex entered during the Game-Turn of entry.
[31.26] Accessability of hexsides noted on the map applies at ground floor level on/y. Breaches (Section 36.0) are usually made at ground floor level also. Breaches at other than ground floor level may only be made through blocked hexsides.
31.3 FLOOR LEVELS AND STACKING LIMITS
[31.31] In the Advanced Game, up to 30 men may be stacked at any floor level of a building hex, other than the roof level. The stacking limit at the roof level is 6 men. Exception: Squad units may be moved to roof level, This is a modification to Case 19.23,
[31.32] (Optional) No more than 8 Friendly men may be moved from a given floor level to either adjacent floor level in the same hex in the same Game-Turn. Exception: Chinese squads. The owning Player must keep track of this if he has a large number of men moving within any single building hex. . (31.33] No more than two units, or one squad, at any given floor level of the same building hex may be issued Fire or Search commands.
31.4 HEIGHT AND OBSERVATION
[31.41] Units at cellar level (height level -2) may not be spotted through sighting procedures; such units may only be discovered by performing a close assault.
[31.42] Units at roof level are considered to be in building hexes for purposes of observation, provided they have not fired in that Game-Turn, and may not be spotted via declared sighting or position if the height difference (in floor levels) between them and the sighting units is greater than the horizontal distance (in hexes).
[31.43] Vertical line of sight (see Case 31.5) must be taken into consideration in declared sighting of units to determine whether they are visible or not. Vertical line of sight does not affect Cases 27.25 and 27.28 (distance from sighting unit).
[31.44] Unsuppressed units in building hexes which are not at cellar level may be sighted through Declared Sighting procedure in the Advanced Game; this is a modification to Case 27.12. For each such unit which is within range (at night or during foul weather) and has a clear line of sight to the Enemy unit performing the declared sighting, the owning Player roils one die. If the die roll is a 1 or 2, the unit in question is sighted; if the die roll is a3 through 6, the unit remains unsighted.
31.5 VERTICAL LINE OF SIGHT
[31.51] In the Basic and Intermediate Games, a line of sight is. blocked by any building or woods feature. In the Advanced Game, however, a line of sight is blocked only if it is blocked both horizontally (this is the aspect of line of sight which is measured in the Basic and Intermediate Games) and vertically. Thus, a building which would have blocked line of sight in the Basic or Intermediate Game may fail to block line of sight in the vertical dimension; if this happens, line of sight is not blocked in the Advanced Game.
[31.52] Vertical line of sight need only be measured if horizontal blockage of line of sight is first established using the procedures in Case 11.2.
[31.53] In order to determine how high a building feature extends in determining line of sight, add 1 (for the roof) to the number of floors in the building (see Terrain Key) and then multiply the sum by two to obtain the result in height levels. Thus, a building feature which has 3 floors extends to height level 8 (Exception: see Case 31.72).
[31.54] Players may determine the vertical line of sight by using the Vertical Line of Sight Gauge (Case 31.57) or they may use the basic algorithm (a mathematical expression of the line of sight). Players may find themselves using the algorithm only to check an occasional close call on the gauge.
[31.55] Unlike horizontal line of sight determination, in Cityfight vertical line of sight is not natural, but somewhat rationalized, being measured from center of hex to center of hex, with standard heights for all vehicles and men. (Note: Players who wish to may design their own vertical natural line of sight procedures, taking the horizontal line of sight as a guide. Basically, all you need is a homemade Cityfight Ruler demarcating fractions of a hex and mutual agreement on how high weapons systems and targets are).
[31.56] To use the Vertical Line of Sight Gauge, follow this procedure: On the zero distance line, locate the height of the higher position, in height levels. Measuring from this point (horizontally, in hexes) locate the range to the lower position, and then at that range line locate the height of the lower position. Connect these two points with a straight edge. Now locate the height and distance of any suspected obstacle. Remember that in Cityfight, buildings have roofs, and thus the blocking height of a building is determined by adding 1 to the number of floors in the building (see Terrain Key) and then multiply the sum by two to obtain the result in height levels. If the obstacle is higher than the line of sight at the point of intersection, then the line of sight is blocked. If the line of sight is tangential to the obstacle, or passes over it, then the line of sight is not blocked. If there is any doubt, Players should resort to the algorithm (Case 31.58).
[31.57] Vertical Line of Sight Gauge-————-—» (31.58] The algorithm procedure is as follows: a clear line of sight exists only if...
H/D is equal to or greater than H*/D* whereby:
H = Height (in height levels) of the higher position minus the height of the lower position.
D= Distance (in hexes) from higher position to lower position.
H* = height (in height levels) of potential obstacle minus height of lower position.
D* = Distance (in hexes) from potential obstacle to lower position.
31.6 EMBANKMENTS, BRIDGES AND WOODS
An embankment is any street above ground (zero) floor level (see Terrain key).
[31.61] All units may enter embankment hexes via street hexsides. A vehicle unit cannot enter an embankment hex via a non-street hexside, although it may leave one through such a hexside; a personnel unit can enter or leave an embankment hex via a non-street hexside only when issued a Cautious Movement command. Tripod machinegun units may enter embankment hexes of floor level 2 or 3 only via a street hexside. In mud and snow conditions, all units are prohibited from entering or leaving embankment hexes other than via street hexsides. This Case supercedes Case 28.6.
[31.62] An embankment blocks vertical line of sight. In determining how high an embankment is, multiply the number of floor levels of the street (see Terrain Key) by two; the result is the height of the embankment in height levels.
[31.63] Units in a bridge hex may be either on the bridge or under it; Players will have to remember at which level the unit is located, or note it on the Unit Status Sheet.
[31.64] The height of a bridge is equal to the height of the two embankments leading to the bridge on either side. Any unit on a bridge uses the height of the bridge as its base in determining its own height. A unit under a bridge is considered to be at ground level.
[31.65] In considering whether a bridge blocks line of sight, the bridge is considered to extend 1 height level above and below the height of the bridge. Example: The Freiherrnbruecke is at height level 4. For line of sight purposes, the bridge is considered to extend from height level 3 to height level 5.
[31.66] A unit may be moved onto or off of a bridge only from or to an embankment hex.
Vertical Line of Sight Gauge
FLOOR HEIGHT (Meters)
ba SN 8th 16
15 7th
6th: Sth w 4th s 3rd « 2nd 4
1st
HEXES> 0 1 2 3 4 5 67 8 39 Wn 2 13
[31.67] The footbridge (5C4-5D6) never blocks line of sight; it is considered to be 2 height levels high. The railroad bridge (5C1-5B4) does not block line of sight; it is considered to be 2 height levels high, and is exempted from Case 31.66. The bridge at 4C2 is considered to be 3 height levels high.
[31.68] The height of woods is given in floor levels on the map (see Terrain Key); to translate this into height levels simply multiply by two.
[31.69] A spotter or sniper may climb trees, and may thus move from height level 0 or 1 to the maximum height level of the woods concerned, using Cautious Movement to climb 1 height level (starting at 1) per Game-Turn. A unit at the top height level can see, be seen, fire, and be fired upon from the same or a higher level, and is not subject to Case 10.72.
31.7 ROOFS AND CELLARS
[31.71] All buildings are considered to possess roofs. The roofs of the towers in hexes 4G2 (St. Annen Kirche) and 7J7 (The Schloss) may not be entered; all other roofs may be entered from the top floor of their building.
[31.72] The roofs of the Fabrik (3K etc.), the Volkstheater (7M etc.), the Arndt Schule (6D etc.) and the Einkaufszentrum (8D2-9G1 and 9E1-9E4) are all considered to be flat, and thus do not extend 2 height levels above the height level of the highest floor; these roofs only extend 1 height level above the highest floor. Example: The factory has 4 floors. The factory roof is on height level 9 (4xX2=8+1=9).
[31.73] All stone and concrete buildings, and all wood buildings of 2 floors or more, are considered to have cellars (height level — 2).
[31.74] Units in cellars are protected from Enemy search; see Case 31.41. Units in cellars, however, may not perform Sighting actions.
[31.75] When a building is destroyed, personnel in the cellar have a chance of surviving and being able to exit. For each such unit, the owning Player rolls one die; on a 1-4,the unit. survives; on a 5-6, the unit is eliminated. Units not in the cellar are always killed when a building is destroyed.
31.8 DAMAGED, DESTROYED, DEMOLISHED AND BURNING BUILDINGS
[31.81] Damaged, destroyed, and demolished status always applies to all floors of a building.
415 16 17 18 19 20 21 2 23 2 25 2% 27 28 29 30
[31.82] When a building is damaged by direct or indirect fire other than GL, units on the floor level which is the target of the fire on/y may be affected. The owning Player rolls one die. On a 1-2, the unit is eliminated; on a 3-6, the unit is not affected. This is in addition to any effects of the fire on the units per se. Units on other floors are not affected, and no units are affected per se by damage due to GL attack.
[31.83] A destroyed building does not have a roof for determining whether line of sight is blocked; however, it continues to block line of sight for its floor height (the walls of the building remain even though the floors have collapsed). Units may not enter any level but the ground floor and cellar.
[31.84] A demolished building of 1 floor (not counting the cellar) is reduced to 1 height level. A demolished building of 2 or more floors is reduced to 2 height levels. Demolished buildings have no cellars.
[31.85] A Burning or Fire Spreading marker in a building hex only affects the floor level it is applied to; in a woods hex it applies to all floor levels containing woods.
[31.86] In determining the floor at which conflagrations in buildings due to indirect fire originate, roll one die. On a 1 or 2; the conflagration is on the roof; on a 3 or 4, it is on the top floor; ona five it is 2 floors down (ground floor on a one floor building); on a 6 it is 3 floors down (ground floor in a one or two floor building).
31.9 HEIGHT OF SMOKE, THE TELEPHONE OFFICE, AND OBSERVATION
[31.91] Vehicle, and wreck, smoke extends from height level 0 to height level 3, inclusive. Grenade-launched smoke extends from height level 0 to height level 8, inclusive. All other smoke (megahex smoke markers and fire-produced smoke) extends indefinitely upward.
[31.92] Unless otherwise designated in the scenario, the telephone office is located on the third floor of the building in hex 5E5.
[31.93] Observation Posts are always placed on a specific floor; ground floor unless otherwise noted.
[31.94] Case 10.72 (sighting while surrounded by woods or buildings) applies only to units at ground floor level.
32.0 HEIGHT AND COMBAT
GENERAL RULE:
The height level at which a unit is located, or to which or from which it is moving, has important effects on combat. In the Advanced Game, direct fire is aimed at a specific location (hex and floor level); close assault is resolved for each location rather than for the hex as a whole. Note: As per the general rule of Section 31.0, the firing Player announces the complete location of the firing unit.
PROCEDURE:
Before announcing a fire action or close assault, a Player must check both the vertical line of sight and the effects of height differences on the weapon concerned, In announcing a fire action, the location being fired on must be announced.
CASES:
32.1 DIRECT FIRE
[32.11] Direct fire affects,an entire floor level (2 height levels) but does not per se affect other floor levels of the same hex.
[32.12] In announcing direct fire, the firing Player must announce which floor level is receiving the fire. This fire may not be split between height levels of different floor levels.
[32.13] In order to fire on a location, there must be an unblocked vertical line of sight (see Case 31.5) to both height levels of the floor level concerned.
[32.14] The portion of a hexside between two buildings of different heights which is blocked if any), blocks line of sight between the higher building and the lower building from street level up to the lower level of the lower building’s roof. Thus it is possible to fire onto or beyond the roof of the lower building from the higher building.
[32.15] A unit on the roof level of a building hex may direct fire against the roof level of another building hex on which it would otherwise be barred from firing as per Case 11.28.
[32.16] Machinegun units and automatic weapons may not fire at different floor levels in the same fire action; i.e., multiple-target fire by these weapons must be distributed horizontally rather than vertically.
[32.17] A unit firing from roof level has its attack strength increased by one-third (rounded down).
32.2 FIRING UP
[32.21] Flamethrowers may not fire at any location more than 3 floor levels higher than the firing unit. ,
[32.22] The Attack Strength of all soft weapons and ATW is reduced to 2/3 (rounding fractions down) when the weapon is fired upward at an angle of 20 degrees or more. To determine whether the angle is 20 degrees or more consult the Gun Elevation Table, Case 32.24. If the difference in height levels between the firing unit and the target location is greater than the number given for the range at 20 degrees for the lower height level of the floor level being fired upon, the penalty in this case applies. For bipod MG units on/y, the penalty is 12 degrees. (This Case simulates difficulties in vertical range estimation, for which soldiers are not usually trained.)
[32.23] [Optional Rule] Certain guns have an angle of fire so limited that, at close ranges, upper height levels may be immune from fire. When using this rule, consult the Gun Elevation Table, Case 32.24, to determine whether the weapon in question is subject to elevation restrictions. Note that coaxial machineguns are subject to the same restrictions on elevation as apply to the main guns of the same vehicle. If a weapon’s angle of elevation is not listed on the Unit Data Chart, it is not restricted by this Case.
[32.24] Gun Elevation Chart (see charts and tables)
32.3 FIRING DOWN
[32.31] Flamethrowers may not fire at any location more than three floor levels lower than the firing unit.
[32.32] LAWs and MAWs may always be fired from rooftop level. This is an exception to Case 20.3. However, see Case 32.34.
[32.33] The Attack Strength of soft weapons is reduced by 1 when the weapon is fired downward at an angle of 20 degrees or more. To determine whether the angle is 20 degrees or more, consult the Gun Elevation Table, Case 32.24. If the difference in height levels between the firing unit and the target location is greater than the number given for the range at 20 degrees for the higher height level of the floor level being fired upon, the penalty in this Case applies. For a machinegun unit, the penalty point is 12 degrees. Snipers are not affected by this Case.
[32.34] When a vehicle is being fired upon by an ATW at an angle of 12 degrees or more, the Attack Strength is increased by 2 and all KM results are converted to K. When a vehicle is fired upon by an ATW at an angle of 20 degrees or more, the Attack Strength is increased by 4 and all KM and KF results are converted to K. This does not apply to the M202, which is not an ATW. Also, the Dragon MAW may not be fired down at an angle of 20 degrees or more. This Case also covers GL.
[32.35] Any unit capable of performing close assault may undertake a special anti-vehicular close assault (see Case 20.4) against an open vehicle in the same or any adjacent hex, provided that the assaulting unit is at least two floor levels above the vehicle. The assault strength is 8 from the same hex and 5 from an adjacent hex. All KM results are converted to K results. This procedure is an alternative to regular anti-vehicular close assault against open vehicles.
[32.36] Case 11.56 (protection due to suppressed status) does not apply to attacks made from an angle of 12 degrees or more downward.
[32.37] Personnel units in an open vehicle coming under attack use the Soft CRT (see Case 20.5) from an angle of 20 degrees or more are not considered to be in a concrete building when resolving the attack on the CRT; instead, the results are read normally. All K results still apply only to personnel.
32.4 CLOSE ASSAULT
[32.41] Close assault is always resolved location by location.
[32.42] Case 13.22(2) is modified so that an S result on the soft target CRT is read as a K result if the assaulting unit is moving down or is assaulting ona fire command; if the assaulting unit is moving up an S result is read as No Effect.
[32.43] In an assault on a Fire command, the assaulting unit is only eliminated if a “1” is rolled on the large die; in an assault moving up, the assaulting unit is eliminated if a “1,” “2,” or ‘°3’” is rolled on the large die (exceptions to Case 13.23).
[32.44] Units may not move into an engaged location (exception to Case 13.38).
[32.45] If a Friendly unit has entered a location without close assaulting it, and while the unit remains at that location the owning Player discovers an Enemy unit at the same location, the Friendly unit is automatically eliminated; this fact must be announced, and the eliminated counter shown to the opposing Player. Case 27.43 supercedes this Case where applicable.
[32.46] In the case of upward close assaults in hexes 4G2, 7J7 and 6D5, beginning with assaults on the 1st floor, Case 13.24 is modified so that a 1-3 on the large die eliminates the assaulting unit even if there is no Enemy unit at the assaulted floor level, provided that there is an Enemy unit at a higher floor level. (This simulates the ease with which winding staircases can be defended.)
32.5 FIRE FROM CELLARS
Units at cellar level may not fire at any other location; they may fire only in close assault.
33.0 INDIRECT FIRE UNITS
COMMENTARY:
Due to the difficulties of communication, short distances between opposing forces, and other factors, it is not expected that indirect (off-map) artillery fire will play a prominent destructive role during the course of an urban battle. Artillery preparation prior to combat, however, serves to demolish Enemy strongpoints or buildings which would serve as footholds for an invading Enemy force. Furthermore, artillery is expected to have a prominent role in delivering smoke and illumination. The Soviets also plan on using as much as 50% of their artillery tubes in a direct fire (on-map) role. Doctrine on both sides emphasizes that it is preferable to destroy a building than to assault it; if Players want to avoid an artillery-dominated game they must be careful in drawing up scenarios.
GENERAL RULE:
Indirect fire units (artillery, mortars, and rockets) may be available to one or both Players as per the scenario instruction. Indirect fire units are generally kept off-map; the only way off-map units affect the game is by delivering indirect fire. Some units that are available to a Player for indirect fire may instead be used in a direct fire role, in which case they are represented by counters on the map. In order to use his allotted indirect fire, the owning Player must call down this fire onto a specific part of the map. As this procedure involves delays, it must be planned in advance. Indirect fire affects all targets, including buildings, in its impact area, whether Friendly or Enemy.
PROCEDURE:
If the scenario provides for indirect fire, an additional Stage is added to the standard sequence of play (see Section 4.0). This Stage is called the Indirect Fire Stage and it takes place at each Game-Turn, immediately after the Command Decision Stage. It proceeds as follows:
A. INDIRECT FIRE STAGE
- Plotting Phase:
Each Player plans for future indirect fire, determines the delay before impact, and secretly writes down on the Artillery Plot Sheet the target megahex, the type of munitions being fired, the caliber of the firing unit, and the ID number of the indirect fire marker being used for this mission.
- Impact Phase:
All indirect fire which is scheduled to arrive during the current Game-Turn is announced and its actual impact hex determined.
- Resolution Phase:
All combat results caused by indirect fire which impacts during the current Game-Turn is resolved.
If the scenario provides for an opening artillery barrage, the Indirect Fire Stage may be repeated for as many times (equivalent to Game-Turns) as the scenario specifies before play proceeds to the command decision stage of Game-Turn 1.
When a scenario provides for indirect fire, the scenario will indicate how many indirect fire units and what type and caliber of unit are available to each Player. The scenario may also designate indirect fire units as being dedicated or in general support (attached to a larger unit of which only part is on the map).
CASES:
33.1 DESIGNATING INDIRECT FIRE UNITS FOR DIRECT FIRE ROLES
[33.11] Prior to the start of play, each Player may designate some of his dedicated indirect fire units for direct fire roles; these are then subtracted from his available dedicated indirect fire units. In order to be used in a direct fire role, the unit’s type must be listed on the Unit Data Tables. The unit is represented by a number of counters (which may be improvised).
[33.12] A NATO Player may not designate more than one third (fractions rounded down) of his dedicated indirect fire guns of any given caliber for direct fire roles. A North Vietnamese, Chinese, or Soviet Player may not designate more than half of his dedicated indirect fire guns of any given caliber for direct fire roles. See Case 52.5 to determine the number of guns in each unit.
[33.13] Indirect fire units which are designated for direct fire roles may be attached to platoons or companies or left unattached. Attachment is done before beginning play and may not be changed during the course of play. An attached unit counts as a tank for purposes of Preservation Levels, command control, etc. See Case 18.8.
[33.14] If an indirect fire unit is utilized in a direct fire role, it must be broken down into individual guns. Each gun in that unit eligible for a direct fire role is represented by a counter on the map. Any guns which cannot be so designated (as per Case 33.12) have no effect on play (i.e., they are lost if the unit is broken up).
[33.15] Indirect fire units which are designated for direct fire roles are considered part of the owning Player’s forces (as attached under Case 33.14) in determining when and where they are set-up or are brought onto the.map.
33.2 FIRE PLOTS
[33.21] Before beginning play, each Player with indirect fire units available (subtracting those designated for direct fire roles) lists these units on the Indirect Fire Plot Sheet and removes the correspondingly-numbered indirect fire markers from the countermix.
[33.22] Indirect fire missions may be plotted before beginning play, unless the scenario prohibits it. Once play has begun, plotting is performed in the Plotting Phase of the Indirect Fire Stage. In this phase, all indirect fire units may be assigned a new mission (see Case 33.23).
[33.23] In order to plot an indirect fire mission, the owning Player notes the code of the target megahex, the type of munitions being fired, the caliber of the indirect fire unit, and the ID number of the Indirect Fire marker being used for this mission. In addition, if suppression fire (see Case 33.34) is plotted, this must be noted.
[33.24] After an indirect fire mission has been plotted, the firing Player must determine delay according to the provisions of Case 33.3.
[33.25] Prior to the beginning of play, each Player may assign up to four on-call target megahex codes to each indirect fire unit; these are also noted on the Indirect Fire Plot Sheet in the space provided. On-call target megahexes may not be changed during play, and may only be applied (see Case 33.33) to the indirect fire unit to which they are assigned. ,
[33.26] If the scenario provides a player with dedicated indirect fire units, the owning Player may assign one priority target megahex code to each dedicated indirect fire unit. This priority target megahex must be chosen from among the four on-call target megahexes (see Case 33.25); this must also be noted on the Indirect Fire Plot Sheet. (This sheet is not provided in Cityfight. Each Player must draw up his own on a piece of scrap paper according to Case 33.23.)
[33.49] Scatter Diagram
33.3 COMPUTING DELAY
[33.31] After plotting a new mission for an indirect fire unit, it is necessary for the owning Player to compute the number of Game-Turns the indirect fire mission is delayed before impacting on the map. For a standard fire mission (opportunity fire), one die is rolled, any adjustments are then made to the die roll, and the modified die roll is multiplied by the delay factor for that unit. The resultant number is the number of Game-Turns the mission is delayed before impacting on the map. Having determined this number, the owning Player takes that indirect fire unit’s marker and places it on the Action Point Track corresponding to the Game-Turn of scheduled impact. Delay factors are listed on the Indirect Fire Data Charts.
[33.32] If the target megahex is one of the on-call target megahexes of the fire unit, the die roll is not adjusted before multiplying by the delay factor.
[33.33] If the target megahex is a priority target megahex, 2 is subtracted from the die roll before multiplying by the delay factor; the die roll, however, may never be reduced below 1.
[33.34] A Player may plot a fire mission as suppression fire, which is more responsive but not as deadly as an ordinary fire mission. Suppression fire may only be ordered from mortars or dedicated batteries. If suppressive fire is plotted, the delay factor itself is the number of Game-Turns of delay.
[33.35] If the target megahex is not covered by Cases 33.32-33.34, 2 is added to the die roll before multiplying by the delay factor.
[33.36] If the indirect fire unit is designated by the Scenario as in general support, two dice are rolled under Case 33.31.
33.4 SCATTER AND REGISTRATION FIRE
A major problem with artillery is the lack of accuracy of its fire. Rather than landing on the chosen target, artillery shells tend-to scatter. The usual way of correcting scatter is to fire a round of registration fire as the first salvo. The purpose of this registration fire is not to harm the Enemy (since it probably landed in the wrong spot anyway), but to allow a Friendly forward observer to see the fire and report back to the artillery unit where it landed. In this way the artillery commander can adjust his weapons so as to compensate for the initial scatter. The subsequent rounds, having benefited by this adjustment, are usually more accurate. Registration fire begins a new fire mission by a gun or mortar unit, while scatter is a feature of each salvo, though it is most unpredictable before the fire has been adjusted on the basis of an observation report.
[33.41] A fire mission’s first Game-Turn of impact on the map is called registration fire. Exceptions are Suppression Fire (see Case 33.46) and the fire of rockets (see Case 33.48). Registration fire procedures take place only in the Impact Phase; there is nothing to be done in the Resolution Phase with regard to registration fire. Registration fire never has effects on units or physical features; its only purpose is to provide information to the artillery commander.
[33.42] Beginning with the Game-Turn following the one in which registration fire was delivered, the fire is called fire for effect or effective fire. Unless a fire mission is terminated or suspended (see Cases 33.54 and 33.59), fire for effect must follow registration fire, one Game-Turn later. There is only one Game-Turn of registration fire per indirect fire mission; all subsequent fire of that mission is fire for effect. In any Game-Turn in which fire for effect is delivered to the map during the Impact Phase, a Resolution Phase follows in which the Players determine the results of that fire (see Case 33.6).
[33.43] Regardless of the type of indirect fire being delivered, the firing Player must each Game-Turn determine the scatter of all indirect fire scheduled to impact on the map in that Game-Turn. This is done in the Impact Phase.
[33.44] When determining scatter for registration fire (see Case 33.41), the firing Player first removes the Indirect Fire Marker representing the indirect fire unit from the Action Point Track (it should be in the same box as the Game-Turn Marker). He then rolls two dice.
-
If doubles are rolled, the registration fire impacts in the target megahex specified in the Indirect Fire Plot for that mission;
-
If the larger die result is greater than the smaller die result, the registration fire is scattered one megahex. The firing Player now rolls a single die and consults the Scatter Diagram (Case 33.49) in order to determine the direction of this < one-megahex scatter;
-
If the result shown on the large die is less than the result shown on the small die, the registration fire is scattered two megahexes (Exception: see Case 33.45). The firing Player now rolls a single die and consults the Scatter Diagram (Case 33.49) in order to determine the direction of this two-megahex scatter.
Having determined the megahex of impact of registration fire in this manner, the firing Player takes the Indirect Fire marker and places it with its Registration side face up in the center hex (hex 7) of that megahex. He then informs the opposing Player that “registration fire has arrived” in that megahex, and notes the megahex on the indirect fire plot sheet for later reference.
[33.45] If the indirect fire is either on call or priority fire (see Cases 33.32 and 33.33), registration fire will scatter two megahexes only if the result on the small die is greater than the result on the large die by 2 (e.g., 5 to 3) or more. If the difference is only 1, the fire is only scattered one megahex. Direction of scatter is determined as in Case 33.44.
[33.46] If the indirect fire is suppression fire (see Case 33.34), there is no registration fire; the first salvo of suppression fire is fire for effect. Suppression fire scatter is determined using two dice.
-
If doubles are rolled, fire impacts in the target megahex specified in the Indirect Fire Plot for that mission;
-
If the. result on the large die is greater than the result on the small die by a factor of 3 or more (e.g., 4 to 1), the fire scatters one megahex (direction of scatter is determined as in Case 33.44);
-
In any other dice result, the fire scatters two megahexes. Direction of scatter is determined as in Case 33.44.
Once scatter has been determined, the firing Player takes the Indirect Fire marker representing the indirect fire unit performing the suppression fire mission and places it with its Effective side face up in the center hex (hex 7) of that megahex. He then informs the opposing Player that “suppression fire has arrived’ in that megahex, and tells him the type (gun or mortar) and caliber of the fire.
[33.47] If the indirect fire is effective fire, is not suppression fire, and is not rocket fire, scatter is determined using one die. The megahex from which the scatter is measured is the impact megahex of the registration fire of that fire mission (but see Cases 33.74-33.77). If an even number is rolled, the fire scatters one megahex. The direction of the scatter is determined as per Case 33.44, and the firing Player shifts his Indirect Fire marker on the map appropriately while informing his opponent.of the shift. Future ‘scatter determination for that mission continues to be measured from the impact megahex of that mission’s registration fire. If an odd number is rolled, the fire does not scatter at all, but impacts in the registration fire’s impact megahex. If scatter is being determined for the second Game-Turn’s fire of that mission, the Indirect Fire marker is flipped over from its Registration side to its Effective side.
[33.48] Rocket fire does not have registration fire, but is always fire for effect. Rocket fire scatters as per Case 33.71(2).
[33.49] Indirect Fire Scatter Diagram
33.5 CONTINUITY OF FIRE
[33.51] Artillery and mortar (not rocket) fire for effect continues to impact Game-Turn after consecutive Game-Turn unless the fire mission is terminated or suspended.
[33.52] Each rocket fire mission is limited to a single Game-Turn. Moreover, a new rocket fire mission may not be plotted to impact on the map until a number of Game-Turns after the previous fire mission from that rocket unit has impacted. This minimum interval between rocket fires is listed on the Indirect Fire Unit Data Chart for that type of rocket.
[33.53] The type of munitions to be delivered by a fire mission (HE or high explosive, smoke, or starshell) may be changed without terminating the mission. This is done during the Plotting Phase. Such a change, however, automatically suspends the fire mission for three Game-Turns, beginning with the Game-Turn following the one in which the mission is changed. During the period of suspension, the indirect fire unit is inactive. Follow.ing the period of suspension, the mission resumes with the changed type of munitions.
[33.54] Fire missions may be terminated by the owning Player. The order to terminate a fire mission is given during any Plotting Phase. If the fire of this mission is observed (see Case 33.72), the termination goes into effect with the next Game-Turn. If not observed, the termination goes into effect 10 Game-Turns later. Whether the fire is observed or not is determined during the Plotting Phase. If the fire is not observed at the time the termination order is given, the owning Player may in any subsequent Plotting Phase determine whether the fire is observed or not. If in a subsequent Plotting Phase, the fire is observed, the termination goes into effect with the following Game-Turn. Players must keep track of termination orders and the Game-Turns in which they take effect on the Indirect Fire Plot Sheet. Note: rocket fire missions can only last one Game-Turn and thus are automatically terminated.
[33.55] A termination order may be included in the original fire plot (see Case 33.2). Such termination orders always take effect with the Game-Turn specified in the original order. A fire mission with an original termination order may, however, be terminated earlier as per Case 33.54.
[33.56] Any unit entering any hex within the burst radius of effective fire (see Case 33.68) in the course of an Action Stage is immediately attacked by the indirect fire in the same manner as units attacked during the Resolution Phase. This also applies to units leaving buildings or climbing to roof level.
- [33.57] During the Plotting Phase of the Game-Turn in which a termination order takes effect, the Indirect Fire marker representing that unit is removed from the map or Action Point Track. During the Plotting Phase of the following Game-Turn, a new fire mission for this unit may be plotted as per the procedures outlined in Case 33.2.
[33.58] A termination order which is given prior to the Game-Turn in which registration fire is scheduled to impact on the map for that fire mission takes effect five Game-Turns later.
[33.59] During the Plotting Phase of any Game-Turn in which fire for effect is observable (see Case 33.72) the owning Player may order a suspension of the fire mission for the subsequent Game-Turn, providing the firing unit is dedicated (see Case 33.26). During the Game-Turn of suspension, the indirect fire unit is inactive. The suspension may be continued from Game-Turn to Game-Turn; the indirect fire marker remains immobile on the firing Player’s map and continues to be used in determining observation. If the site of the last pre-suspension fire for effect (as indicated by the Indirect Fire marker) is no longer observed during any Plotting Phase, the suspension ends with the next Game-Turn and fire for effect is resumed.
33.6 FIRE FOR EFFECT RESOLUTION
[33.61] During the Resolution Phase, the Players consider each Fire for Effect marker on the map, in any order. At the beginning of this Phase, the markers should all be in the center hexes of the megahex they are in. The first procedure of the Resolution Phase for each effective fire marker under consideration is the determination of which regular (small) hex in the impact megahex is the actual impact hex. First, the firing Player rolls two dice. If a / is rolled on the large die, the indirect fire marker remains in Hex #7. If a 2-6 is rolled on the large die, the firing Player looks at the small die. The number rolled on the small die is the regular hex number to which the indirect fire marker should be shifted immediately.
[33.62] The opposing Player is informed of the location of the impact hex and reminded of the type and caliber of the mission.
[33.63] If the munitions being fired in this mission are high explosive (HE), the firing Player rolls two dice and announces the result. Both Players consult the Indirect Fire Combat Results Table (see Case 33.69).
[33.64] After the indirect fire result is determined, both Players check the burst effectiveness range of the weapon being fired in this mission (see Indirect Fire Burst Effectiveness Range Chart, Case 33.68). This chart indicates the range around the regular impact hex in which the combat result applies. Note that this range of effectiveness varies, as does the Indirect Fire Combat Results Table, according to the categories listed. Also note that indirect fire is non-discriminatory — that is, it affects units of both the firing Player and the opposing Player which happen to be within burst effectiveness range.
[33.65] After the burst effectiveness has been determined, both Players apply the appropriate combat result (see Case 33.63) to all units within the burst effectiveness range for the category into which the unit falls. All losses inflicted by indirect fire remain secret.
[33.66] If the regular impact hex of an indirect fire mission is a building hex, the Indirect Fire Combat Results Table may indicate damage or destruction of the building in that hex. However, suppression fire never affects buildings. A bridge is attacked as if it were a stone building. If the building is damaged, personnel on the roof or top floor level may be affected as per Case 31.92. If the building is destroyed, personnel units above the cellar level are killed; for personnel in the cellar, see Case 31.75.
[33.67] If the regular impact hex of an indirect fire mission is a building or woods hex, the combat result may indicate that a fire has been started, see Case 22.32. If the fire starts in a building hex, it always begins on the top floor and on the roof.
[33.68] Indirect Fire Burst Effectiveness Range Chart (see charts and tables)
[33.69] Indirect Fire Combat Results Table (see charts and tables)
33.7 INDIRECT FIRE OBSERVATION AND ADJUSTMENT
[33.71] When playing a scenario with indirect fire, Forward Observer (FO) units provided in the Standard TO&Es or scenario instructions are included. These FOs are a type of Spotter unit and are subject to all rules governing Spotters (see Case 10.5). FOs are two-man units. Any unsuppressed Friendly FO or company commander which has been issued a Search command may perform indirect fire observation.
[33.72] Registration fire is observed if a line of sight can be drawn from (A) any part of an open hex containing an indirect fire observer (see Case 33.71), or from any part of a building or woods feature in a building or woods location containing an indirect fire observer, to (B) the center of any open hex at street level or the center of any woods hex at the highest height level of the woods or the center of any building hex at the lower height level of the roof location, provided that the hex is within the impact megahex of the registration fire. Fire for effect is observed if the line of sight can be drawn as defined above to the regular impact Hex or any adjacent regular hex.
[33.73] Indirect fire observation is not an action and does not consume Action Points. It is always measured during the Indirect Fire Stage.
[33.74] If registration fire is observed (see Case 33.72), after its scatter has been determined, the firing Player may in that same Impact Phase shift the Indirect Fire marker to any adjacent megahex. He does not announce this shift to the opposing Player. In resolving scatter for the subsequent fire for effect (see Case 33.46), the megahex to which the Indirect Fire marker has been shifted is considered to be the registration fire’s megahex; the shift is also noted on the fire plot.
[33.75] If fire for effect is observed (see Case 33.72), at the end of the Resolution Phase the owning Player may shift the Indirect Fire marker to the center hex of any megahex adjacent to the megahex containing the impact hex. He does not announce this shift to the opposing Player. In resolving scatter for the subsequent fire for effect (see Case 33.47), the megahex currently containing the Indirect Fire marker is considered to be the registration fire’s megahex; the shift is also noted on the fire plot.
[33.76] Once an Indirect Fire marker has been shifted under Case 33.74, or fire for effect has been observed and either shifted or not shifted, the original megahex of registration ceases to have any significance, even if the fire ceases to be observable. In the absence of continued observation, scatter is determined from the megahex containing the Indirect Fire marker on the firing Player’s map.
[33.77] If registration fire scatters off-map, the scatter remains valid, but cannot be observed. Players then determine the scatter of subsequent fire for effect from the hypothetical off-map megahex to which the registration fire has scattered, continuing the megahex pattern as if it extended off-map. Thus fire for effect may scatter back onto the map, or it may remain off-map (in which case it has no effect on the game other than ammunition depletion).
[33.78] Observed fire may not be shifted to off-map.
[33.79] Additional effects of indirect fire observation are noted in Cases 33.54 and 33.59.
33.8 ROCKETS, SMOKE AND STARSHELL
[33.81] Some indirect fire units are labeled rocket units. Rocket units possess all the characteristics of other indirect fire units except in the following respects:
-
They do not undertake registration fire. Instead, delay is computed normally (see Case 33.3), and fire for effect arrives on the first Game-Turn of impact.
-
The scatter of rocket fire is more drastic than normal indirect fire. To determine scatter, the firing Player should roll both dice. If the larger die is greater than the smaller die by a factor of 4, 5, or 6 the fire scatters four megahexes. If the larger die is greater than the smaller die by a factor of 1, 2, or 3, the fire scatters three megahexes. If the result on the smaller die is greater than the result on the larger die by a factor of 4, 5, or 6, the fire scatters two megahexes. If the smaller die is greater than the larger die by a factor of 1, 2, or3, the fire scatters one megahex. If the two dice show equal results, the fire does not scatter at all. In order to determine the direction of scatter, the firing Player should roll a single die and consult the scatter diagram (33.49). Note that when the megahex scatter of rocket fire has been resolved, the actual regular impact hex must be determined according to the provisions of Case 33.61.
-
Rocket artillery fire may not impact Game-Turn after Game-Turn after an initial fire for effect attack (see Case 33.52).
-
Rocket artillery fire may not be “shifted’” (see Case 33.75).
-
If the firing unit is a SCUD rocket, the Indirect Fire Combat Results Table is applied a second time to any units or map features (buildings, woods, uncratered open hexes) which have not been eliminated, demolished, or cratered in the first resolution.
[33.82] -If smoke is the type of munitions delivered by an indirect fire mission, place a Megahex Smoke marker in the center hex (hex #7) of the impact megahex (as determined after scatter) of both Players’ maps. Megahex scatter for smoke missions is determined normally (see Cases 33.44 and 33.47). Smoke missions employ the Indirect Fire Combat Results Table only to determine ammunition depletion (see Case 33.9).
[33.83] It is unnecessary to determine the actual regular impact hex of a smoke mission (see Case 33.62). Instead a/l smoke missions impact in the center hex of their impact megahex.
[33.84] Megahex Smoke covers each one of the seven hexes of its impact megahex, but not adjacent megahexes. Artillery delivered smoke extends indefinitely upward in terms of height level and line of sight purposes. Megahex Smoke markers are removed in the same manner as Hex Smoke markers.
[33.85] If an artillery mission is delivering starshell, place a Starshell marker on the map-edge of both maps. This type of starshell functions in the same way as grenade-delivered starshell (see Case 24.4), but it affects the entire map area. If is unnecessary to resolve scatter of starshell missions. Such missions employ the Indirect Fire Combat Results Table only to determine ammunition depletion (see Case 33.9).
[33.86] Smoke missions’ fire for effect is observed by any indirect fire observer (see Case 33.71) with a line of sight from a position as per Case 33.72(A) to any height level of a hex of the megahex containing the smoke. Thus, the only thing that can block observation of megahex smoke is other megahex smoke.
33.9 ARTILLERY AMMUNITION DEPLETION
[33.91] An indirect fire unit may run out of ammunition when resolving a fire for effect attack (see Case 33.69). If the firing Player rolls doubles (i.e., 1 and 1, 6 and 6, etc.) when consulting the Indirect Fire Combat Results Table, there is a possibility that the firing indirect fire unit has run out of ammunition for the type of munitions being fired. A single die should be immediately rolled in this case. If the indirect fire unit is a mortar or rocket, or is firing smoke or starshell, a die roll of 1,2, 3 or 4 indicates that it may not fire that type of munitions again for the remainder of the game. If the indirect fire unit is a gun firing high explosive a die roll of 1 or 2 indicates that it may not fire that type of munitions again for the remainder of the game. This Case may be modified by scenario instructions.
[33.92] An indirect fire unit that has run out of a certain type of munitions may continue to fire missions with other types of munitions (Exception: see Case 33.93).
[33.93] When Megahex Smoke or Starshell counters are exhausted, smoke or starshell missions may not be fired by any indirect fire unit on the map.
ADVANCED OPTIONAL RULES
34.0 ENGINEERS
COMMENTARY:
Engineers (sappers) are more important in urban combat than in rural fighting: they have a wide variety of missions.
GENERAL RULE:
Combat engineers are represented in Cityfight by various vehicles and by 2-man sapper units. These sappers are used in demolition, minelaying and clearing, the creation and removal of obstacles, setting and removing boobytraps, and other functions. Sappers perform engineering functions through Work actions.
Sappers are provided as per scenario instructions - or standard TO&E. They are organized into engineer squads, platoons, and companies.
CASES:
34.1 SAPPERS
[34.11] Sappers are 2-man combat personnel units, organized into engineer platoons or squads. All references to other combat personnel units apply also to sappers unless specified otherwise.
[34.12] Engineer platoons may include combat engineer vehicles, trucks, bridgelayers, dozers, tanks, and troop carriers. These vehicles are treated in the same manner as vehicles attached to infantry platoons.
[34.13] Engineer squads are treated like platoons.
[34.14] Engineer units may be stacked with units of other platoons, subject to the stacking restrictions (Section 9.0, General Rule).
[34.15] Sappers may recover from suppression without the help of a leader during the Suppression Recovery Stage. The owning Player simply rolls one die for the unit concerned. If a 1, 2, or 3 is rolled, the sapper recovers from suppression; otherwise, the sapper remains suppressed. Sappers may also recover from suppression with the help of a leader; see Case 15.4
[34.16] Sappers are subject to K results from sniper fire.
[34.17] A dozer-equipped tank may perform all functions of a normal dozer. Such a tank may not be issued a Search command.
34.2 WORK COMMANDS
[34.21] Sappers may not be issued Search commands. A sapper may, however, be issued a Work command, using a Search/Work command chit. When issued a Work command, sappers may perform one Work action only, and no other actions, in the course of the Action Stage of a Game-Turn.
[34.22] Consecutive Work actions may be spread over more than one Game-Turn. Work actions are consecutive as long as no intervening Fire or Movement command is given to the unit.
[34.23] When a Work command is performed, two (if by a personnel unit) or three (if by a vehicle unit) Action Points are expended by that unit’s platoon.
[34.24] Sappers are amphibious and may cross the river by performing a Work action, provided this is done by no more than two units per engineer platoon per Game-Turn (this simulates the use of inflatable rafts).
[34.25] The Work actions required for various events may be performed by different sapper units stacked together only in the case of preparing for demolition (Case 34.32), minesweeping (38.2), and blasting craters (39.22).
34.3 SAPPER D DEMOLITION
[34.31] Bridges, buildings, and open hexes may be designated in a scenario as prepared for demolition by one side or the other. The Player must list such prepared sites on a separate piece of paper before play begins.
[34.32] Alternatively, a sapper unit may prepare a site for demolition by expending a certain number of consecutive Work actions in the hex concerned. This number is 15 for obstacles and open hexes, 30 for wooden buildings, and 40 for other buildings.
[34.33] A sapper which has been issued a Work command and is in a hex adjacent to or two hexes away from any part of a bridge or building which is prepared for demolition, may attempt to destroy or demolish the structure by performing a Work action. This action is performed as follows:
The owning Player rolls one die. If the die roll result is a 1-5, the demolition succeeds; if the die roll is a 6, the demolition fails and in order to achieve a demolition, the owning Player must begin the entire process again as per 34.32. The required number of work action is halved (disregard fractions). Only successful demolition is announced,
[34.34] A bridge, any hex of which has been demolished by sappers, ceases to have any function in the game, other than to block line of sight in undestroyed bridge hexes, if any.
[34.35] Place a Destroyed marker on any building which has been destroyed by sappers.
[34.36] A building which has been demolished by sappers is a demolished building; place a Demolished marker on it.
[34.37] A sapper unit may defuse a hex prepared for demolition by performing three consecutive Work actions in that hex. When this is.done, the hex is no longer prepared for demolition.
35.0 BOOBY TRAPS
GENERAL RULE:
‘Boobytraps may be established as per scenario instructions, or they may be constructed by sappers, at specific locations in building, woods, or obstacle hexes.
PROCEDURE:
When an Enemy unit has conducted a close assault against a location, if that location has been boobytrapped, the assaulting unit may be killed by the boobytrap.
CASES:
35.1 ESTABLISHING BOOBYTRAPS
[35.11] If a scenario provides that a Player with advantage may designate a certain number of loca-
} tions as being boobytrapped, that Player must
2 secretly list the boobytrapped locations on a separate piece of paper.
[35.12] A sapper establishes a boobytrap at a location by performing a certain number of consecutive Work actions in that location.
[35.13] The number of Work actions required to establish a boobytrap is determined at the outset of the first Work action by the owning Player, who rolls two dice. This is the number of Work actions required.
[35.14] The owning Player must keep track of the number of Work actions required, and the number completed, toward establishment of a boobytrap in each location in which this is attempted; completion takes effect at the end of the Action Stage.
35.2 EFFECTS OF BOOBYTRAPS
[35.21] Boobytraps affect Enemy units and Friendly units not accompanied by Friendly sappers.
[35.22] When an Enemy unit which has been issued a Movement command conducts a close assault against a boobytrapped location, and the Enemy unit is not killed as a result of close assault resolution, the Player who placed the boobytrap announces that the location is boobytrapped. The assaulting Player then rolls one die. On a 1-3, the assaulting unit or stack is eliminated. On a 4-6, the boobytrap fizzles. If the assaulting unit or stack includes sappers, the boobytrap also fizzles when a 3 is rolled.
[35.23] When an Enemy unit is discovered in a boobytrapped location which has not been close assaulted, the Friendly Player may announce the boobytrap;'the Enemy Player then rolls one die and applies the results as per Case 35.22.
[35.24] Once announced, a boobytrap ceases to exist; it may not be used a second time.
35.3 DEFUSING BOOBYTRAPS
A Player may defuse Enemy boobytraps by moving a sapper into a location and announcing its presence. The opposing Player must then state whether the location is boobytrapped or not. If the location is boobytrapped, the sapper may remove the boobytrap by performing a Work action in the boobytrapped location. The defusing of a boobytrap takes effect at the end of the Action Stage.
36.0 BREACHING WALLS
COMMENTARY:
In attempting to seize an Enemy-held building, attacking forces often find it more convenient to create their own door than to walk through the reception lobby.
GENERAL RULE:
Through use of direct fire weapons or sappers, Players may convert inaccessible or blocked building hexsides into breached (accessible) hexsides. A demolished building hexside may not be breached.
Breach
PROCEDURE:
When an entrance has been forcibly made through an inaccessible or blocked building hexside, place a Breached marker on an adjacent hex with its arrow pointing toward the breached hexside. The hexside is then accessible. Breaches are announced to the opposing Player (Exception: Case 47.32). If the breach is not at ground level, the Player must note the floor level of the breach.
CASES:
36.1 DIRECT FIRE BREACHING
[36.11] Prior to resolving a direct fire attack against a building location, the attacking Player may announce that the attack is a breach attempt.
[36.12] In a breach attempt, all destroyed results against the location are converted to breached results. All damaged results against the location are treated as incomplete breach results. An additional damage result against a hexside with an Incomplete Breach marker on it results in a completed breach. These results have no effect on the building per se.
[36.13] A breach attempt by a direct fire weapon may only be made against an inaccessible or blocked hexside, and then only if a line of sight can be traced from the firing unit through the hexside to be breached to any part of the building feature(s) inside the target hex. The firing Player must announce which hexside he is attempting to breach.
[36.14] If successful, a Breached marker is placed on one of the hexes adjacent to the breached hexside, with the arrow on the marker pointing toward the breached hexside on both maps.
36.2 SAPPER CHARGES
[36.21] A sapper issued a Work command may move, as part of a Work action, from any adjacent ground-floor location into a building hex via an inaccessable hexside only. The sapper does not close assault the building hex, and is considered to be in the open for sighting and fire purposes. On the following Game-Turn, the sapper exits the building hex by the same route, again as a Work action, moving only one hex. As part of the same action, the owning Player notes that a charge has been placed on that hexside, but he need not announce this.
[36.22] Once a sapper charge has been successfully placed, it may be detonated during any subsequent Action Stage simply by announcing its detonation, at no cost in Action Points. Upon detonation, a Breached marker is placed as per Case 36.14; the detonating Player may then have a unit perform an action, and immediately exploit the breach.
[36.23] A sapper charge may also be placed by a sapper who has entered a building hex normally, as a Work action on a Work command, without moving. (Such charges are usually used in order to escape from buildings rather than enter them, but any breach may be used in either direction.)
[36.24] If the building hex into which the sapper moves (Case 36.21) or in which the sapper is located (Case 36.23) is a concrete building hex, the first detonation of a charge is not sufficient to breach the hexside. Instead, an Incomplete Breach marker is placed, and the charge placing procedure must be performed 3 times before a Breached marker is placed as per Case 36.14. (This simulates the presence of reinforcing steel rods in the walls.)
37.0 OBSTACLES
COMMENTARY:
Obstacles, whether roadblocks, wrecks, rubble, or other devices, help the defender by delaying the attacker and channeling his attack into exposed kill zones.
GENERAL RULE:
Obstacles may be created in various ways. All obstacles block movement by units; they also provide cover and protection.
PROCEDURE:
When an obstacle is created, place an Obstacle marker on the obstructed hex. When the obstacle is cleared, remove the marker. The placement and removal of obstacles is announced.
CASES:
37.1 SCENARIO-DESIGNATED OBSTACLES
The scenario instructions may provide a Player with advantage with a certain number of obstacles, and may limit the areas in which they are to be placed.
37.2 WRECKS
[37.21] A wreck is a destroyed vehicle. Wrecks may be created by Enemy action (K results), or through self-destruction. Any vehicle may be turned into a wreck through the performance of a Fire action on itself; this is always successful.
[37.32] Place a Wreck marker on any open hex in which a wreck is created. {37.33] Place an Obstacle marker and a Hex
Smoke marker on any building hex (containing a street) in which a wreck is created.
[37.24] If a second wreck is added to a hex which already has a Wreck marker on it, replace the Wreck marker with an Obstacle marker and a Hex Smoke marker.
[37.25] Wrecks count against vehicle stacking limits.
[37.26] Wrecks may be moved by combat engineer vehicles or dozers performing a Cautious Movement command at the rate of one hex per Game-Turn. In this case, the wreck is stacked with the mover vehicle and is moved with it until such time as the owning Player decides to drop the wreck in a hex.
[37.27] Wreck markers also function as Hex Smoke markers.
37.3 RUBBLE
Rubble is another form of obstacle; it may be created specially or as a result of various actions.
[37.31] When a building hex is demolished, Obstacle markers are placed in adjacent hexes. The number of markers placed is the same as the number of floors in the building which was demolished, subtracting one. For each Obstacle marker, roll one die, and place the Obstacle marker in the hex which is in the same direction from the demolished building hex as the hex with the number rolled is from hex number 7 in any megahex. Obstacle markers from rubble may be accumulated in a single hex.
[37.32] Whenever a building hex is destroyed, one die is rolled. If the result is equal to or less than the number of floors of the building, one Obstacle marker is placed in accordance with the Procedure given in Case 37.31.
[37.33] A sapper unit may create rubble by destroying or demolishing any building as per Case 34.3; in such a case, however, the owning Player determines which adjacent hexes receive the rubble, rather than having it determined randomly.
[37.34] Any personnel unit or soft vehicle which is in an open or woods hex when rubble is placed in the hex (other than by movement, Case 37.5) is eliminated. For any other vehicle, one die is rolled by the owning Player. If the result is 1-4, the vehicle is eliminated. If the result is 5, a KM marker is placed on the vehicle. If the result is 6, the vehicle. is undamaged and may leave the hex. If the vehicle is open when attacked by rubble, any personnel units are eliminated. If the vehicle is buttoned up when attacked by rubble, personnel units being transported are not affected, unless the vehicle is destroyed.
37.4 MOVING OBSTACLES
Obstacle markers may be moved, one at a time, by combat engineer vehicles or dozers performing a Cautious Movement Command, using the Procedure outlined in Case 37.26. Obstacle markers may be stacked as a result of movement.
37.5 REMOVING OBSTACLES
A sapper unit may remove an Obstacle marker by performing sapper demolition (see Case 34.3). A CEV may remove an obstacle marker by performing nine consecutive Work actions in a hex adjacent to the obstacle hex. A dozer may remove an obstacle by performing 15 consecutive Work actions in a hex adjacent to the obstacle hex.
37.6 EFFECTS OF OBSTACLES ON MOVEMENT
[37.61] Vehicles may not enter a hex containing an Obstacle marker.
[37.62] Personnel units may enter locations containing obstacles only when issued a Cautious Movement command. However, such units are subjected to being attacked at double Fire Strength as if they were performing Bold movement. Exception: Vertical movement in building hexes containing obstacles is not affected by this Case.
37.7 EFFECTS OF OBSTACLES ON LINE OF SIGHT
[37.71] Obstacle markers cover the entire hex for purposes of determining horizontal line of sight.
[37.72] Each Obstacle marker extends 1 height level up in determining vertical line of sight; personnel units in obstacle hexes are considered to be at the upper height level of the obstacle, whether suppressed or not.
37.8 OTHER EFFECTS OF OBSTACLES
[37.81] A personnel unit in an obstacle location is considered to be in a concrete building hex when fired upon and when sighting is resolved.
[37.82] Obstacles themselves are not affected by direct or indirect fire.
[37.83] The stacking limit in an obstacle hex other than a building hex is 7 men. Exception: One squad and up to one leader may be stacked together in such an obstacle hex.
[37.84] If the obstacle hex is also a building hex, the building may not be entered from another hex at the location of the obstacle(s); it may be entered at the next highest floor level. Vertical movement within the building is not affected.
[37.85] Close assault into a location containing an obstacle is treated the same as close assault moving upward (Case 32.4).
[37.86] Units in obstacle locations benefit from a die roll modification of —2 when engaged in suppression recovery attempts.
[37.87] Obstacles do not burn, but a building in the same hex as an obstacle may burn.
[37.88] The Fire Strength of ATW is reduced by 3 against personnel units in obstacle locations.
38.0 MINES
GENERAL RULE:
Mines are effective against vehicles and personnel. CASES:
38.1 MINELAYING
[38.11] The scenario instructions may allow a Player to mine a given number of locations, and may place restrictions on the location of the mines. Only ground-floor locations may be mined.
[38.12] The mined locations and dummy-mined locations must be written down on a separate sheet of paper before play begins, and both mined and dummy-mined locations are announced to the opposing Player as mined locations prior to the start of play; Mined markers are placed on real mined hexes on the owning Player’s map and on all announced mined hexes on the opposing Player’s map.
38.2 MINESWEEPING
A combat engineer vehicle, or mine-plough-equipped vehicle may cause a real Mine marker to be removed by performing two consecutive Work actions in the mined hex. A sapper may cause a real Mined marker to be removed by performing 15 consecutive Work actions in the mined hex.
38.3 EFFECTS OF MINES
[38.31] Personnel units entering a real mined location are subject to attack by the minefield with a Strength Rating of 8 on the Soft CRT. Units performing mine removal are attacked with a rating of 4 the first time they enter the hex; if they do not complete’ the mine removal, they are attacked again with a rating of 8 as soon as they perform an action other than mine removal.
[38.32] Vehicles entering a real mined hex are subject to attack by the minefield with a Strength Rating of 9 on the Hard CRT, whereby all KF results are changed to KM. Units performing mine removal are attacked in the same manner and with the same strengths as noted in Case 38.31.
[38.33] Friendly units entering a minefield established by the owning Player are attacked at half strength, fractions rounded down.
[38.34] Minefields can be removed only by minesweeping (Exception: Case 39.43). They are never affected or removed because of units moving through the hex.
[38.35] Upon entering a mined hex, the opposing Player inquires if the hex is really mined or dummy-mined. If it is only dummy-mined, the marker is immediately removed, and the unit is not attacked.
39.0 CRATERS AND DITCHES
GENERAL RULE:
Craters and ditches are barriers to movement.
CASES:
39.1 DITCHES
The number of street or open hexes containing ditches is given in the scenario instructions to each Player; these may be placed at the owning Player’s option, subject to scenario restrictions.
39.2 CRATERS
[39.21] Craters are formed in open hexes according to the results achieved in the Crater Formation column of the Indirect Fire CRT (Case 33.69).
[39.22] A sapper unit may create a crater through demolition (Case 34.3) in open hexes or building hexes.
39.3 CREATING AND REMOVING CRATERS AND DITCHES
[39.31] A Crater marker is placed on both maps to mark all ditches and craters.
[39.32] If an Obstacle marker is placed in a hex containing a Crater marker, both are removed. A Crater marker is never placed in a hex containing an Obstacle marker.
[39.33] A CEV or dozer may remove a Crater marker by performing 8 consecutive Work actions in an adjacent hex.
39.4 EFFECTS OF CRATERS AND DITCHES
[39.41] Vehicle units may not enter hexes containing Crater markers. Exception: Combat engineer vehicles or dozers moving an obstacle into the hex.
[39.42] Personnel units may only enter or exit hexes containing Crater markers under a Cautious command.
[39.43] Placement of a Crater marker removes all mines in the hex.
[39.44] A personnel unit in a crater hex is at height level —2 if suppressed, — 1 if unsuppressed. Such units are considered to be in buildings for sighting purposes; in the open when subject to indirect fire in the impact hex (not adjacent hexes, where they are unaffected) of that fire.
40.0 FIRING PORTS
GENERAL RULE:
Fireteams in MICV (Not APC) vehicles may be given fire commands, and may fire even though the MICV is buttoned up. These fireteams may not, however, perform Sighting actions from a buttoned up vehicle; thus, all of their fire is against unspotted hexes. Special weapons may not be fired from buttoned up vehicles.
PROCEDURE:
If the MICV has a fire command, the attack is made at two-thirds strength (fractions rounded down). If the MICV has any other command, the attack is made at one-third strength (fractions rounded down).
41.0 RULES OF ENGAGEMENT
COMMENTARY:
While they may be annoying to some gamers, Rules of Engagement or restrictions on weapons or targets due to political, cultural, economic, historical or other considerations are a very real part of the problem of urban warfare. Not only does the defender wish to avoid destroying the place he is defending, but the attacker, too, may have need of certain facilities or have other reasons to be limited by his own rules of engagement. Some rules of engagement are built into Cityfight — there are no nuclear or chemical weapons — others are left to the scenario. GENERAL RULE:
The scenario instructions may establish Rules of Engagement which restrict one or both Players in their choice of weapons or targets or include other restrictions. These rules may be absolute, or they may merely establish Victory Point penalties.
Player’s Note: A good way to keep artillery from dominating a game is to impose strict Rules of Engagement.
42.0 CONFLAGRATIONS
COMMENTARY:
In high-intensity urban warfare, with water lines cut and fire departments immobilized or evacuated, the risk of a spreading, uncontrollable conflagration is always present.
GENERAL RULE:
A fire, once started, may spread. Fire may spread from any location containing a Fire Spreading marker (see Case 22.32). Locations to which a fire spreads are marked with Fire Spreading Markers.
42.1 CONFLAGRATIONS WITHIN BUILDINGS
[42.11] When playing with this Section, rules contained herein supercede Case 31.85.
[42.12] Players will have to keep track of the locations where fire is present, and time intervals noted in this Section on a separate sheet of paper. All fires and their locations are known to both Players.
[42.13] Demolished stone or concrete buildings do not burn.
[42.14] In buildings, fire spreads one floor level downward every 150th Game-Turn; one level upward every 50th Game-Turn. Fire spreads during the Record Stage.
[42.15] Fire spreads horizontally from one location to another adjacent location of the same building feature (not separated by an impassable hexside) each Record Stage of every Game-Turn evenly divisible by ten.
42.2 CONFLAGRATIONS IN WOODS HEXES
Unless the scenario specifies rain, snow, or mud, a fire in a woods hex automatically covers all height levels and will spread to all adjacent woods hexes each Record Stage of every Game-Turn evenly divisible by five.
42.3 SPREADING CONFLAGRATIONS
[42.31] Fire may spread from one building or woods hex to an adjacent building or woods hex across open space. If, during the Record Stage of any Game-Turn evenly divisible by 50, two or more floors of a building or woods hex are burning, one of the Players must roll two dice and consult the Conflagration Table (42.34) for each adjacent building or woods héx. If the adjacent hex catches fire, this fire begins at the floor nearest in height to the topmost burning floor of the previously burning building.
[42.32] In scenarios with winds of 20 mph or more fires may jump over open hexes in the general direction of the wind. When playing with this case, the scenario will specify the wind direction. In this situation Case 42.31 is applied to building or woods hexes separated only by an open hex from any part of a burning hex.
[42.33] Once spread to a new hex, the fire may continue to spread vertically in that hex.
[42.34] Conflagration Table (see charts and tables)
[42.35] The results on the Conflagration Tables are read as follows:
STOPPED = fire does not spread to the hex concerned
SPREAD = fire spreads to the hex concerned
[42.36] Dice rolls on the Conflagration Table are cumulatively modified as follows:
• “Dry weather” (established by scenario): +2
• Rain, snow, mud (established by scenario): –3
• Hexes separated by blocked hexside feature: –4
• Crossing river: –3
• Jumping open hex: –3
• Prepared position: –3
42.4 ADDED EFFECTS OF CONFLAGRATIONS
When playing with this Section, several additional effects are added to the effects of fires listed in other Sections.
[42.41] No unit may enter an open hex which is adjacent to a spreading fire at ground level or first floor level, unless exiting the hex containing the fire; such exiting units must leave the adjacent hex as soon as possible.
[42.42] If, at any time, a circle can be drawn from any point, within whose circumference there are 40 or more burning hexes and no more than 40% of these hexes (including open hexes) are not burning, a firestorm has been created, and the game automatically ends.
43.0 AMMUNITION STORES
COMMENTARY:
Due to very high rates of ammunition expenditure, units are expected to establish ammunition stores in the urban area being fought over.
GENERAL RULE:
In the Advanced Game, any unit may permanently run out of ammunition. These units may be resupplied with ammunition by utilizing an ammunition storage site. Such ammo stores are also liable to capture or fiery destruction, The locations of ammo stores are not revealed unless they are captured or explode.
PROCEDURE:
Whenever a unit temporarily runs out of ammunition (Section 14.0), a check mark is made in the appropriate box on the Unit Status Sheet. The third time this happens, the unit may no longer recover from ammunition depletion under the provisions of Section 14.0. Such a unit remains out of ammo until it spends a certain number of Game-Turns in or adjacent to a location which has been designated as an ammunition store, according to the scenario instructions.
CASES:
43.1 ESTABLISHING AN AMMO STORE
[43.11] The number of ammo stores which may be established by either Player is determined in the scenario instructions, as well as any limitations on the areas where they may be placed.
[43.12] The location of ammo stores is noted on a separate piece of paper before beginning play.
[43.13] Ammo stores may only be placed at ground or cellar level of building hexes.
[43.14] Ammo stores may not be moved.
43.2 DESTRUCTION OF AMMO STORES
[43.21] Ammo stores may be voluntarily destroyed by a Friendly sapper performing a Work action three or more Game-Turns after the same sapper has performed a Work action in theammo store location.
[43.22] Ammo stores are destroyed if the location containing the store is successfully attacked. This means that a unit in the store location is eliminated or suffers a KF or KM result from any type of fire other than sniper fire; or the building containing the store is destroyed, or the building containing the store is damaged and a die roll is made for the ground floor under Case 31.82 resulting in @kill result at the location of the store. (This is done even if there are not units in the store location.)
[43.23] Whenever an ammo store on the ground floor is destroyed, there is an explosion, which is announced by the owning Player. The effects of the explosion of an ammo store are as follows:
1, Vehicle units in the store hex or in adjacent hexes are eliminated; vehicle units two hexes away from the store hex are attacked with a strength of 8 on the Hard CRT; vehicle units three hexes away are attacked with a Fire Strength of 4 on the Hard CRT;
-
Personnel units in open hexes within two hexes are eliminated; if three hexes away are attacked with a strength of 8 on the Soft CRT; if four hexes away are attacked with a strength of 5 on the Soft CRT; if five hexes away are attacked with a strength of 3 on the Soft CRT; ~
-
Personnel units in building or woods hexes are attacked as follows: (a) If units are in the store hex, the result is automatic elimination; (b) If units are adjacent to the store hex and not suppressed, the result is automatic elimination (suppressed units in stone buildings always survive), units in concrete buildings survive on a single die roll of 1-4; in woods and wood buildings survive on a single die roll of 1-2; (c) If units are two hexes away, they are attacked with a strength of 12 on the Soft CRT, having the usual protection of buildings or woods on the Soft CRT; (d) If units are three hexes away, they are attacked with a strength of 6 on the Soft CRT; (e) If units are four hexes away, they are attacked with a strength of 3 on the Soft CRT;
4, Personnel units in cellar floors are not attacked by an explosion unless they are in the store hex. Personnel units in floors higher than the second floor in building hexes which are two or three hexes away from the store hex subtract 1 from the Attack Strength on the Soft CRT for each floor level which intervenes between the unit and the ground floor level.
-
Buildings.are attacked as follows: (a) The store hex is demolished; (b) Adjacent building hexes are attacked with a strength of 15 on the Hard CRT; (c) Building hexes which are 2 hexes away are attacked with a strength of 10 on the Hard CRT; (d) Building hexes which are 3 hexes away are attacked with a strength of 5 on the Hard CRT.
-
All mines within four hexes of the stores hex are detonated;
-
All boobytraps within 3 hexes of the stores hex are removed;
-
All Smoke markers within 10 hexes are removed; smoke resulting from fires remains.
43.3 ‘““PERMANENT’” AMMUNITION DEPLETION
[43.31] In the Basic and Intermediate Games, most weapons systems do not run out of ammunition permanently, but may attempt to recover from ammunition depletion in the Game-Turn following the one in which they run out of ammo. In the Advanced Game, however, when using this Section, the third time a unit runs out of ammo, it may no longer recover from ammo depletion under the provisions of Section 14.0. The Out of Ammo marker remains on that unit, and its permanent ammo depletion is noted on the Unit Status Sheet.
Note: Those weapons (all of which are introduced in the Intermediate Game) which are not eligible for recovery from ammo depletion in the Intermediate Game are permanently out of ammo whenever their ammo is depleted.
[43.32] Units in a building feature which is a prepared position (see Section 46.0), may attempt ammunition recovery under the provisions of Section 14.0 any number of times; they do not permanently ammo deplete on the third time.
43.4 RECOVERY FROM “PERMANENT AMMO DEPLETION
[43.41] Ammo stores are Friendly only to the forces of the Player who established the ammo store, unless scenario instructions state otherwise.
[43.42] Any unit which has suffered permanent ammo depletion (see Case 43.3) may recover from this state by meeting all of the following conditions:
-
It spends X Game-Turns in an ammo store location (or, for vehicles, in a hex which is adjacent to a hex containing an ammo store) Friendly to it;
-
It receives no commands and undertakes no actions during the X Game-Turns;
-
It is unsuppressed (and, for vehicles, open) throughout the X Game-Turns;
-
It meets any organizational restrictions imposed by the scenario instructions.
The number of Game-Turns represented by X is 3 for all soft weapons, 15 for all main guns (including SP guns, demolition guns) 3 for LAWs, 6 for MAWs and demolition rockets, 3 for M202.
The owning Player must keep track of the number of Game-Turns spent by units in fulfillment of these conditions.
[43.43] When a unit has recovered from permanent ammo depletion, all out of ammo check marks are erased from the appropriate boxes on the unit status sheet and the Out of Ammo marker is removed.
[43.44] The cycle of permanent ammo depletion and recovery may be performed any number of times.
[43.45] ATW which are expended with each use (see Case 20.2) may be gained by a unit up to the maximum allowable for that unit (see Case 20.12) through the procedure in Case 43,42.
[43.45] Special weapons available to a Player through the scenario instructions or TO&E may, instead of being allocated to a specific unit from the start, be allocated to a specific ammo store. If this is the case, the owning Player must keep track of thése stored weapons on a separate piece of paper. They may then be gained by any eligible unit through the procedure in Case 43.42; such distributed weapons must immediately be subtracted from the stockpile in that ammo store.
44.0 CIVIL STRIFE
GENERAL RULE:
Scenarios dealing with civil strife may feature units representing police, urban guerillas, or other nonmilitary units. Police units are organized according to TO&Es or scenario instructions; various special rules pertain to other irregular units. Many of these are to be found in scenario instructions.
CASES:
44.1 POLICE
[44.11] Police units always begin the game with use of the telephone center (see Case 10.81); such use may continue as long as the telephone center is not destroyed by the irregular Player.
[44.12] Police units may not close assault a location unless an Enemy unit has been discovered in that location during the current or a previous Game-Turn.
[44.13] Police Players may not attempt to destroy or demolish buildings, and may not-use indirect fire, mines, or ditches.
44.2 IRREGULARS
[44.21] Irregular units also have use of the telephone center (see Case 10.8), unless destroyed by the Irregular Player.
[44.22] Irregular units can never be demoralized.
[44.23] Irregular units may not execute indirect fire; they may, however, execute the mayor.
44.3 CARS (AUTOMOBILES)
Cars may never leave street hexes, other than by exiting the map in scenarios providing for map exit. Cars may not move unless transporting one or more personnel units. Cars are always open. Cars may not perform sighting actions or Fire actions; they may only perform Movement actions.
45.0 DEFILADE
COMMENTARY:
Vehicles in defensive positions are well-advised to place themselves such that the main body of the vehicle is protected from Enemy fire, while the vehicle’s weapons system is still able to function normally. Such a position is called defilade or hull down.
[GENERAL RULE:
Vehicles in defilade have additional protection against direct fire.
PROCEDURE:
It is up to the Player who controls the target vehicle to make a claim of defilade. If such a claim is raised, the line of sight is analyzed in accordance with this Section, and the claim is determined to be valid or invalid. In the case of a valid claim, the results on the CRT are adjusted accordingly.
CASES:
45.1 DETERMINING DEFILADE
A Friendly vehicle is in defilade with respect to an Enemy unit if all of the following conditions are met: (1) Both units are at the same floor level; (2) There is a hex adjacent to the friendly vehicle containing a single Obstacle marker or a demolished one-floor building; (3) The line of sight from the Enemy unit to the Friendly vehicle crosses the hex containing the Obstacle marker or the hex containing the demolished one-floor building.
45.2 EFFECT OF DEFILADE
When resolving a direct fire assault against a vehicle which is in defilade, all KM results on the Hard CRT are converted to No Effect, and all K results ona dice roll of 7 or higher are converted to KF.
46.0 PREPARED POSITIONS
COMMENTARY:
If there is sufficient time, engineers will seek to reinforce the ceilings of cellars so as to support collapsing buildings, remove flammable materials, and fortify strongpoint positions with sandbags and other material.
GENERAL RULE:
The scenario instructions may allow a Player with advantage to designate certain building locations as prepared positions; these locations must be noted on a separate sheet of paper. Prepared positions provide additional protection against collapsing buildings, conflagration, direct fire, and close assault.
CASES:
46.1 DESIGNATING PREPARED POSITIONS
If the scenario being played allows a Player to designate a certain number of building locations as prepared positions, the player with advantage may write down a number of building locations equal to the number allotted by the scenario on a separate sheet of paper. This is done before beginning play.
46.2 DURATION OF PREPARED POSITIONS
A prepared position remains so throughout the game, whether in Friendly or Enemy hands, unless destroyed or demolished. Cases 46.34 and 46.37 apply even to destroyed prepared positions.
46.3 EFFECTS OF PREPARED POSITIONS
[46.31] A prepared position in a concrete building is equivalent to a stone building for all purposes; a prepared position in a wood building is equivalent toa concrete building for all purposes.
[46.32] In performing close assault against a Player’s prepared position, Cases 13.23 and 32.43 are modified so that an assaulting unit of the other Player is eliminated on a 1-4 on the large die if the close assault is performed on a Bold or Cautious upward movement. See also Case 43.32.
[46.33] Units of the Player with advantage subtract 1 from the ammunition recovery die rolls under the provisions of Case 14.32, as long as they are in a prepared position. See also 43.32.
[46.34] The Player with advantage may move units from a cellar level which is a prepared position to the cellar level of any adjacent building hex, or to the ground floor of any adjacent open hex, by performing a Movement action on a Cautious Movement command. This also may be done in the reverse direction. If the unit thus moved is spotted and fired upon with a valid line of sight in the same Game-Turn in which it was moved, it is automatically eliminated.
[46.35] When the Enemy, Player performs megahex search against a megahex containing a prepared position, the Friendly Player subtracts 20 from the sighting dice roll when applying it to units in the prepared position.
[46.36] Cases 21.4 (Fires Caused by Building Destruction) and 22.27 (Flamethrower Conflagration) are modified for prepared positions so that two dice, not one, are rolled: on a 2 or 12, the building catches fire; on any other result, nothing happens. Note: For buildings containing a prepared position, it is first determined where a fire would start (see Case 31.85); then the die or dice is rolled to determine whether there is fire at all. A prepared position also gains a favorable modification on the Conflagration Tables (see Case 42.37).
[46.37] Case 31.75 (Cellar Survival) is modified for prepared positions so that the unit survives on a die roll of 1-5; on a 6, the unit is eliminated.
[46.38] Extra demolition charges are required to breach all prepared positions, as per Case 36.24.
[46.39] When setting up a prepared position prior to the start of play, the owning Player may adjust the accessibility and blocked or unblocked status of the hexsides to suit himself. Thus, a hexside which is marked accessible may be made non-accessible, and vice versa. This must be written down on a separate piece of paper or noted with Breached markers. When a prepared position is made known (see Case 46.4), these adjustments are declared to the opposing Player.
46.4 MAKING PREPARED POSITIONS KNOWN
The Player who has designated prepared positions may declare that they are prepared at any point in the game; he must declare this fact as soon as he becomes aware that an Enemy unit has occupied Or is close assaulting a prepared position.
47.0 DRIVE-INS
COMMENTARY:
According to army doctrine, the lighter vehicles are expected to drive directly into wooden buildings in order to use them for concealment and protected loading/unloading of personnel.
GENERAL RULE:
Vehicles may be moved into wooden buildings under certain circumstances; this provides protection and concealment for the vehicle as well as breaching the building concerned.
PROCEDURE:
When a vehicle is moved into a wooden building hex which also contains a street, the owning Player must note whether the vehicle is in the street or in the building. Place a Breached marker on the hexside of entry or exit.
CASES:
47.1 DRIVING INTO A BUILDING
[47.11] Cases in this section supercede the provisions of Case 18.33.
[47.12] Vehicles may only enter or exit buildings on a Cautious Movement command, and while buttoned up.
[47.13] Buildings may be entered or exited through any hexside by a vehicle, regardless of accessibility or blocked status.
[47.14] Only one vehicle may be in a building hex at any given time.
[47.15] Only undemolished wooden buildings may be entered by vehicles.
[47.16] Before any vehicle may enter a building, the building hex must first have been occupied by a Friendly personnel unit.
[47.17] A tank, SP gun, Bridgelayer, Marder, Kanone, Luchs, may not enter multi-story buildings (i.e., buildings with cellars).
[47.18] Soft vehicles may not enter buildings at all.
[47.19] For other vehicles, these may enter multistory buildings only if the building hex has first been occupied by a Friendly sapper unit.
47.2 EFFECTS OF PLACEMENT IN BUILDINGS
[47.21] A vehicle in a building is treated as a personnel unit for the purpose of resolving megahex observation attempts. Such a vehicle may be sighted through declared sighting procedure only if a breached hexside is in the line of sight.
[47.22] A vehicle in a building may only fire through a breached hexside or in close assault.
[47.23] A vehicle in a building may not undertake Sighting actions.
[47.24] A vehicle in a building which is destroyed, demolished, or whose ground floor catches fire, is completely eliminated,
[47.25] A vehicle in an undestroyed building may not be the target of Enemy fire unless the line-of-sight goes through a breached hexside.
47.3 MISCELLANEOUS
[47.31] No vehicle may enter a building until the first Enemy unit has been sighted or revealed in the game.
[47.32] As an exception to Section 36.0, breaches caused by vehicle travel need not be immediately announced to the other Player. If the Player causing the breach believes it likely that the breach is within observation of the Enemy, he should announce it immediately. The Enemy Player may at any time demand to know all such breaches which are within sight of a declared Enemy unit, or which are in the same megahex as an Enemy unit (in making a demand for all such breaches in a megahex, the Enemy Player need not, of course, state the exact location of his unit; only calling out the megahex concerned.)
[47.33] If two vehicles should at any time find themselves in the same building hex in the building, both are destroyed.
[47.34] To resolve all disputes over discovered breaches and simultaneous occupation by hostile vehicles, an umpire is required.
48.0 MULTI-PLAYER GAME
COMMENTARY:
Because of. the fragmented, decentralized nature of urban combat, Cityfight lends itself to multi-player gaming.
GENERAL RULE:
In multi-player gaming, the Players are divided into two teams representing the opposing forces. Within a team, individual players may be chosen to play particular platoons or companies, together with attached units, depending on the size of the forces involved. A single player may wear more than one hat.
PROCEDURE:
The sequence of play is handled by teams, rather than by individual Players, in multi-player gaming. During the Command Decision, Command Control, Engagement Determination, Ammunition, and Suppression Recovery Stages, all the players on a team act simultaneously. In the Action Stage, however, play alternates between teams. Each time the play initiative returns to a team, it must be determined which player acts for the team, based on a rotation within the team.
CASES:
48.1 PLAYER RESPONSIBILITY
[48.11] In multi-player gaming, the Players represent either platoon leaders or company commanders. If the Players represent platoon leaders, each Player is solely responsible for the actions of the units of his platoon(s) and no others. If the Players represent company commanders and there are no players representing platoon leaders, each player is solely responsible for the actions of all the units coming under his company and no others.
[48.12] If different Players represent both company commanders and platoon leaders, the company commander Player is responsible for the actions of the company commander :unit and all units attached at company level, rather than at platoon level, to his company. He may affect units in platoons only by using the company commander unit as described in the rules. He may give orders to the Players representing platoons under his company, but the execution of the orders is solely up to the platoon leaders.
[48.13] If there is a Player representing a battalion commander, he should be represented by an on-map counter. He interacts with the company commanders only, not the platoon leaders, and also has responsibility for independent command units not attached to companies or to platoons, as well as all off-map units.
[48.14] Independent command units not attached to Players under the preceding Cases must be allocated to Players before beginning play. These units are considered to be operationally under the control of the Players, but not attached to their platoons or companies.
[48.15] Player assignments may or may not be affected by elimination of specific leaders, depending on agreement reached before starting play.
3/7
48.2 PLAYER ROTATION
[48.21] During the Action Stage, play alternates back and forth between the two teams. The opportunity to take an action on behalf of a team is rotated among the different platoons.
[48.22] The order of rotation for platoons is determined by team agreement before beginning play. The rotation scheme must also provide for any company-level and unattached independent command units. The rotation scheme, once established, may not be altered except as provided in this Case.
[48.23] Once a platoon has reached zero actions remaining on the Action Track, that platoon is passed over in the rotation for the remainder of the Action Stage.
[48.24] Any Player whose platoon is due to take an action may instead take a pass.
[48.25] Once a platoon has been entirely eliminated, it is dropped from the rotation scheme.
48.3 PLAYER COMMUNICATION
[48.31] As long as the telephone center is in operation and in Friendly hands, Players representing leaders may communicate with other Friendly leaders without restriction other than time. In other circumstances, Cases 48.33 and 48.34 apply.
[48.32] Once play begins, conversations between Players on strategy, tactics, and other military planning should be limited to 20 seconds per Game-Turn. Conversations on game mechanics, of course, are not limited, but should not be used to circumvent the 20-second rule.
[48.33] In the absence of telephone communications, leaders may communicate directly only if there is a line of sight between the leader counters on the map.
[48.34] Leaders may also communicate by writing down messages (no more than 20 seconds’ writing!), assigning the message to a specific counter, and moving the counter to the point of communication, at which time the message may be delivered.
48.4 MULTIPLE MAPS
When more than one set of Cityfight is available, it is possible for different Players on a team to use different maps. Where this is the case, only the units controlled by or spotted by the units of the particular Player are automatically placed on his map. The Player may, of course, place additional counters based on information received under Case 48.3. All Players are entitled to physical information (building damage, obstacles, etc.), which must be made available to the “opposing Player’ under the preceding Sections. Enemy units are not automatically located for all members of a team, but only for the Friendly Player who units are interacting with the Enemy unit concerned (by being engaged, being fired upon, being sighted under declared sighting, performing successful observation, etc.). Observation posts, in this Case, must be assigned to specific Players. The location of spotted Enemy units may, of course, be communicated under Case 48.3.
48.5 OTHER EFFECTS
Case 10.37 may be applied only if the unit which performed the earlier successful observation is controlled by the same Player or is in communication (see Case 48.3) with the unit attempting the later observation.
49.0 USING AN UMPIRE
GENERAL RULE:
Cityfight is designed for use without an umpire, but if an umpire is available, Players may use one. The umpire is given wide latitude and authority, not only in interpreting and enforcing the rules, but also in making exceptions to them in the interests of realism or playability. Ideally, the umpire ought to have a third map, but this is not strictly necessary. It is also advisable, if not using one of the game scenarios, for the umpire to draw up the scenario and only tell each Player what he needs to know about his own forces, objectives, and the physical environment.
What follows is a list of suggested umpire changes to various rules. The Case number cited is the reference Case.
4.3 The umpire enforces time limits in all Stages.
[6.13] The umpire may assign specific leaders rather than have the Players pick them at random.
6.2 The umpire may conduct the Command Control Stage while the Players are finishing up the Command Decision Stage.
10.0 The umpire supervises megahex sighting, or he may take complete control of sighting procedures, in which case he does not inform the opposing Player of the results obtained by the searching Player. He ought to in any case insure that units in plain sight (in an open hex or a vehicle in a street hex) are seen by the opposing Player.
10.4 The umpire monitors automatic sighting.
11.2 The umpire resolves disagreements over line of sight.
13.0 If a unit moves into a hex containing an Enemy combat unit without close assaulting the hex, the umpire declares the moving unit dead.
[13.24] The umpire is in charge of nullifying kill results on the large die due to hexes which are close assaulted but contain no Enemy combat units.
17.0 The umpire keeps track of Preservation Levels and their effects.
20.0 The umpire can keep track of ATW, thus saving time for Players.
27.0 If using a third map, the umpire handles all declared sighting; without a third map, he chooses the units to be spotted in accordance with Case 27.29. If he is able to inform the sighting Player of units spotted without informing the opposing Player which of his units have been spotted, then he should do all declared sighting, using the correct number of men performing the Sighting action.
30.0 When one Player produces smoke, the umpire only informs the other Player of the smoke when the smoke comes within line of sight of the other Player.
30.3 The umpire keeps track of smoke dispersion.
35.2 The umpire announces the triggering of all boobytraps whenever appropriate.
[36.23] Such breaches are kept from the other Player until the umpire determines that they would be visible to him.
37.0 Obstacles are not placed on the opposing Player’s map until the umpire determines that he can see them.
[38.13] Mines in woods and obstacle hexes are never announced prior to a minefield attack. All such attacks are announced by the umpire.
42.3 The umpire keeps track of spreading fires.
43.0 The umpire announces the capture of any ammo store.
44.0 The umpire has a free hand in regulating the presence and effects of uninvolved civilians, traffic, etc.
47.0 See Case 47.34
50.0 SCENARIO DESIGN GUIDE
Cityfight is set up so that Players may design their own scenarios and thus experiment with the wide range of variables which the game provides. This Section therefore outlines what may be varied within a scenario; it may be likened to a list of ingredients available and general cooking directions. Following this Guide are complete scenarios, much like sample recipes. Players are encouraged to become familiar with these scenarios before designing their own. The scenarios provided may, of course, be used in designing new ones simply by varying the key ingredients.
CASES:
50.1 THE BASIC GAME
[50.11] General Introduction
Here, the basic type of situation is outlined. This may bea meeting engagement, reconnaissance sortie, ambush, vital target raid, mopping-up operation, airborne landing, river crossing, breakout attempt, penetration, a battle in progress, etc. What is the strategic and operational background? What are the Players’ general objectives?
[50.12] Map .
Here, any restrictions on the area of the map in the scenario are noted. If off-map movement is allowed, this is covered here. Map changes (other than buildings) are noted here.
[50.13] Time Here the number of Game-Turns to be played or other conditions for ending the game are noted.
[50.14] Orders of Battle
Here are listed the set-up forces available to each Player, together with any restrictions on the area or condition in which they are set up. In most cases, the organizations listed in the Standard Tables of Organization and Equipment (TO&Es, Case 52.5) should be used. If the units are supposed to be understrength or reinforced, this should be noted, with specific details. When designing the scenario, variables within the TO&Es must be resolved; e.g., is the Soviet Motor Rifle Company equipped with BMPs or BTR-60s?
[50.15] Advantage
If either Player has advantage, this will be noted here. Advantage usually goes to the defender, if he is presumed to be familiar with the area.
[50.16] Leaders
Any restrictions on the ratings of leaders eligible for placement in the Leader Pool must be noted here. A unit which has been through considerable combat is more likely to have good leadéts. Airborne and Marine leaders are likely to be better than regular leaders. Rated higher than the American leaders are the British, Germans, and Chinese. Rated higher than the Soviets are the Vietnamese. Leadership ratings for the Dutch are considered lower than average. Note that the average of Soviet leader ratings is somewhat lower than the average of NATO leader ratings, as printed on the counters (of course, a veteran Soviet airborne unit is likely to rate higher than an American National Guard rifle company.) Average leader ratings are raised by keeping the lowest-rated leaders out of the Leader Pool; average leader ratings are lowered by keeping the highest-rated leaders out of the Leader Pool. If the Players add new leader counters to the leader counters provided with the game, the new leader counters, when included in the Leader Pool, will affect the average leader rating drawn from that Pool.
[50.17] Ammunition Recovery Ratings
1 is very poor; 6 is very good. Apart from other considerations, the French probably rate one number higher than their NATO allies. Generally speaking, ammo ratings should reflect the general situation and background described in 50.11.
[50.18] Suppression Recovery Rating
1 is worst; 6 is best. This rating rises with the morale and dedication of the unit concerned; a home-defense unit protecting its own families would rate the highest, an attacking ally whose soldiers don’t believe in their mission would have the lowest.
[50.19] Preservation Levels
The preservation level is an indication of morale and dedication; the higher the level, the more likely a unit is to continue with its mission despite casualties. Platoons, companies, and battalions all have preservation levels. Exceptions to Case 17.26, primarily involving breakout scenarios, will be noted here.
There follows a chart listing suggested “base” Preservation Levels, which should be altered according to the situation unique to the scenario. These are given in percentages. To translate a percentage to the number of Preservation Points for that unit, consult the TO&E of that unit, as provided in the scenario under consideration, and add up the number of men and vehicles in that unit, excluding leaders and spotters, and counting vehicles as the number of preservation points which would accumulate in the event of their elimination. Apply the percentage to the resultant sum, and you have the preservation level for that organization. Remember that leaders, though not counted in determining what the preservation level is, still cause preservation points to accrue in the event of their elimination from the game.
| Organization | Offense | Defense |
|---|---|---|
| USA | 40% | 50% |
| USSR | 50% | 60% |
| West Germany | 40% | 70% |
| United Kingdom | 35% | 40% |
| France | 40% | 50% (in Germany); 60% (in France) |
| Canada | 35% | 40% |
| Netherlands | 20% | 35% (in Germany); 70% (in Holland) |
| Vietnam | 50% | 80% |
| China |
50.2 BASIC GAME (continued)
[50.21] River Fordability Is the Eiche River fordable or not? The answer is given here.
[50.22] Bridge Status If any bridges are already destroyed, this is noted here.
[50.23] Observation Posts (Player with advantage only) The number of observation posts, if any, and restrictions on their placement will be noted here. If not otherwise specified, may be anywhere in setup area.
[50.24] Telephone Who, if anyone, controls the telephone center, and where is it located? This is noted here.
[50.25] Reinforcements
Here are listed any reinforcements together with any applicable information, and their Game-Turn(s) and areas of arrival on the map. All reinforcement units are placed on the map during the Command Decision Stage. If more units are to enter the map at a single hex than stacking limits will allow, the extra units are presumed to have been “staged back.” These units must first be deployed off the map, with the lead unit positioned adjacent to the desired entry hex, etc. Such units may never to attacked or fired upon until they are on the map. Once staged back, the relative position of reinforcement units may not be altered until they arrive on the map.
Players may choose to withhold some or all of their scheduled reinforcements, unless a scenario specifies mandatory arrival. Such units are available to enter the map during any subsequent Command Decision Stage, but under the same conditions of arrival location.
[50.26] Victory Conditions
Victory conditions reflect the nature of the situation (in a vital target raid, for example, losses are irrelevant and the only question is whether the objective is attained or not), the forces given to both sides, the time factor, and other special circumstances. Scenarios need not be “balanced,” especially if they can be played twice with the Players changing sides.
Common ways of awarding Victory Points are:
-
Exiting organizations (platoons, companies, battalion) which have not reached their preservation level off of particular map edges.
-
Occupying particular hexes, features, or areas. 3. Demoralizing enemy units. 4. Killing enemy leaders.
-
Clearing routes through the town such that no enemy units are in position to fire on the cleared streets.
-
Doing any of the above by a certain Game-Turn.
Players may also choose to award Victory Points for killing particular enemy units, but this generally involves more record keeping, and is most appropriate for scenarios in which the defender is expected to fight desperately even after becoming Demoralized. In assigning relative Victory Point values for objectives (occupation of points, map exiting, or route-clearing) and losses, consider that the Soviets expect to lose units heavily in order to gain their objectives speedily. NATO Players, however, would be expected to be more cautious in jeopardizing their forces, with the West Germans less likely than the other NATO allies to give ground in order to preserve units. Unless otherwise stated, the Player with the most Victory Points wins the game.
[50.27] Structural Changes
If the scenario provides for different structures than are printed on the map, this must be noted here. Thus, it may be noted in a scenario that all the concrete buildings on the map are treated as wooden buildings, or that there are no buildings at all outside the Old Village, etc.
Scenarios set in cities which were devastated by World War IJ are likelier to have a heavier proportion of concrete buildings built since the war, and fewer wood or stone buildings, than our Gerlafingen. Buildings in the cities of Manchuria (the site of Soviet-Chinese scenarios) are not dissimilar in construction to our European cities, having been built to a large extent by the Japanese; villages would have less concrete and more wood, Vietnamese towns would have less concrete and stone, and more wood.
Woods may be eliminated or reduced in Manchurian scenarios, being replaced with open hexes.
50.3 INTERMEDIATE GAME
[50.31] Anti-tank weapons
If there are deviations from the ATW allocations noted in the standard TO&Es, these must be noted here, along with such matters as: which type of LAW does a German unit possess? The Viper LAW and ITOW MAW are new American ATW expected to be deployed in the early 1980s. At the same time, the Soviet Union is expected to introduce the ATS ATGM on its BMPs, BMDs, and many of the BRDMs; the man-portable AT4 ATGM is expected to appear at about the same time at the level of 2 or more per battalion. Chinese units are likely to have the HOT beginning in 1981 and may have other NATO-produced ATW by the mid-1980s.
[50.32] Tank organization
How are tanks organized: are they in tank platoons/companies or attached to infantry organizations? Soviets will usually attach tank platoons to motor rifle companies or break down the platoons and attach the individual tanks to motor rifle platoons for prepared urban operations. Americans are unlikely to break up a tank platoon, but may well break up a tank company by incorporating one or more tank platoons in a company-sized Team. British armour troops are not usually broken down. The West Germans will break down panzer companies when they feel it is advantageous to do so; panzer platoons are less likely to be broken down, but not immune. Canadian, Dutch, Chinese and Vietnamese practice is not known to SPI.
[51.33] Flame Weapons
If there. are flame weapons (flamethrowers, M202 FLASH, or flamethrower tanks) other than those provided for in standard TO&Es, that will be noted here. American units prepared for urban operations may be provided with additional M202 FLASH weapons, but other flame weapons are not likely to be provided outside the Marine Corps. Flamethrower tanks are much scarcer than man-portable flame weapons in all armies. Soviet units are expected to have many flamethrowers for prepared urban operations.
[50.34] Independent command
Any independent command units which are to be attached to companies or platoons will be noted here. The scenario may also allow the player to do this on his own prior to start of play. For multi-player games, see Case 48.1.
[50.35] Snipers
Any special provisions for snipers, whether regular or “ad hoc,” must be noted here. Regular snipers are trained and specially equipped for the sniper role; “ad hoc” snipers are ordinary riflemen given sniper missions on the spur of the moment. The U.S. Army does not currently train regular snipers, nor provide sniper rifles to units in the field, but this may change in the course of a war or the policy may change in the years ahead. The U.S. Marine Corps provides more sniper training, but still less than the Soviets, who provide one professional sniper to every motor rifle platoon. The French, Germans, and Chinese apparently do have sniper training, but do not have fixed TO&E positions for trained snipers in their units, so the number of trained snipers which may be available to them would vary from none to perhaps two (for the Chinese, one sniper team) per platoon. The Chinese are not reported to have special sniper weapons, hence all Chinese sniper teams are considered “ad hoc.”
[50.36] Vehicle Smoke Depletion
The amount of smoke remaining for vehicles (see Case 30.22), is noted here, unless at maximum. This may vary from one organization to another, or even from one vehicle to another.
50.4 INTERMEDIATE GAME PHYSICAL ENVIRONMENT
[50.41] Night
If the scenario takes place at night, this will be noted here, along with STANO-equipped units. Virtually all modern armies’ first-line tanks and infantry platoons are STANO-equipped, but the equipment probably would not cover all units until well into a war. Chinese are unlikely to be STANO-equipped.
Nighttime attacks are often preferred by the Chinese, and somewhat favored by the Soviets. Doctrine for all armies suggests that attacks into strongly defended urban areas should take advantage of every cover, including that of nighttime conditions, and emphasize the need for continuous nighttime fighting (at least at the level of reconnaissanceé sorties) as long as the urban area is being contested.
[50.42] Weather
The following may be listed for weather conditions: Clear, rain, mud, snow, ground snow, fog. If the Eiche River is iced over, that would be noted here, together with its effects. Is it winter (see Case 28.7)?
In Germany, there is often rain; fog is common in the morning.
If the Eiche is iced up, this could make it fordable by personnel units. Ice is likely in a winter scenario involving Soviet and Chinese units.
The number of Game-Turns for smoke dispersion will be noted here, see Case 30.22.
In scenarios involving the M113 APC, it should be noted here whether the river is placid enough to permit amphibious movement by the M113; if there is much current, the M113 can’t swim.
[50.42] Building Damage If any buildings are already damaged, destroyed or demolished, this is noted here.
[50.44] Conflagrations
If there are any hexes which are on fire, these must be noted here. Are they “burning” or “fire spreading”
50.5 ADVANCED GAME
[50.51] Wind Direction
Wind direction is specified if Section 42.0 (Conflagrations) is being used and winds are 20 Km/Hr or more, simply by assigning a number from 1 to 6; wind moves from hex 7 to that numbered hex, following the same pattern all over the map. Winds from west to east are most likely to occur.
[50.52] Dozer Tanks and Mine-Clearing Plows
If any vehicles not specified in the standard TO&E, as dozer vehicles are equipped with dozer blades in this scenario (most likely: Soviet vehicles; one or two per company), thus enabling them to double as dozers, this will be noted here. The presence of any mine-clearing plows will also be noted (one per company of any type is the expected average).
[50.53] Height Levels
If the scenario changes the height of any of the buildings or woods, this will be noted here. Buildings tend to be lower in Asia, higher in European inner cities. In some scenarios there may be true high-rise buildings or even skyscrapers.
50.6 INDIRECT FIRE UNITS
[50.61] Pre-Piotting If indirect fire may not be pre-plotted (see Case 33.22), this is stated here.
[50.62] Opening Barrage
If the Players are allowed opening indirect fire barrages (see Section 33.0, Procedure), this is noted here. Such barrages are time-consuming and cause great physical devastation. Soviet doctrine suggests that-pre-assault barrages be limited to 20 or 30 minutes’ worth (that’s 60 to 90 Indirect Fire Stages, of course).
[50.63] Forward Observers FOs not provided in the Standard TO&E’s may be provided here.
[50.64] Dedicated Batteries
Indirect fire units must be noted as “Dedicated” or “in general support,” see Case 33.11. Mortar units listed in Standard TO&E’s are always Dedicated unless specified otherwise.
If indirect fire reference schedules (Case 50.65) show that a maneuver battalion is expected to have its own artillery, and the whole battalion is in the scenario, then all of that artillery will be dedicated, of course. If an assault or defense has been planned in advance, more of the artillery is likely to be dedicated. In a meeting engagement, most of it will be in general support.
[50.65] Indirect Fire Reference Data
An organization’s artillery support from higher commands depends generally on the situation, missions of the lower organization, conflicting demands for the assets, whether the guns have to be moved or are already in place, and how well planned the mission is. Guns of the 130, 175, and 180mm caliber will often be used for counterbattery fire, and thus not available to units in the game. Players are cautioned that indirect fire is time-consuming, and that providing even a réalistic level of indirect fire support can make the game an artillery contest.
USSR
A battery is equal to two platoons; an artillery battalion is equal to three batteries or six platoons.
In dividing indirect fire support among maneuver elements, remember that there are 3 or 4 companies per maneuver battalion, 3 or 4 battalions per maneuver regiment, 3 or 4 regiments per maneuver division (3 if tank organizations are distributed among lower motor rifle organizations or are not attached at all, 4 if tanks are kept separate and are attached at the next higher level of organization.) One or two of each level of organization will probably be in the “second echelon’ and thus not draw upon indirect fire assets. For a planned assault, assets from Front and Army may be detached all the way down to the level of a Regimental Artillery Group.
Each motor rifle regiment has one to three batteries of SP74 122mm guns of its own, Each motor rifle division has two battalions of 122mm guns, one battalion of 152mm guns (which may be SP73), one battalion of BM-21 122mm multiple rocket launchers (airborne divisions have the RPU-14 140mm MRL instead), and four FROG launchers. Apart from the RPU-14, an airborne division only has one battalion of 122mm guns; its regiments have none.
Soviet -guns of 130mm and 180mm, mortars of 240mm, and SCUD rockets are held at Army or Front level, and can be expected to show up only in a vital planned operation.
Second echelon organizations will often use their organic assets in support of the first echelon, so that a scenario may provide a first-echelon battalion with not only its own mortars, but also mortars from a second-echelon battalion; not only support from its own regimental SP74s but also support from a second-echelon regiment, etc. Second-echelon assets should always be designated as “general support.”
A Regimental Artillery Group, which is formed by the division to support a specific regiment, is normally composed of two to four artillery battalions. RAG assets are expected to be placed in general support of first-echelon maneuver battalions.
In addition to general support, a first-echelon maneuver battalion may expect up to three dedicated batteries, coming from assets which are organic to the regiment or division. These dedicated batteries may be attached to lead companies by the maneuver battalion. In open terrain, batteries attached to companies would be in general support of the company. In urban warfare, however, these batteries may be dedicated to the company. Whether attached to battalion or company, these dedicated batteries may also be used in direct-fire roles.
NATO
Note: If it is desired to provide fewer tubes of a given caliber than are included in the indirect fire unit listed in the unit data charts, simply adjust the rate of fire. Thus, the US 175mm gun is listed as available as a battery of 6 tubes; as such it impacts every game-turn. The scenario, however, may provide a section of 2 tubes by allowing the fire to only impact every third Game-Turn, or it may provide a platoon of 3 tubes by allowing the fire to impact every second Game-Turn, etc.
USA
A 155mm battery is equal to six tubes; this is translated in game terms into two “platoons.” A battalion has three batteries.
U.S. brigades have no organic artillery. The U.S. division has one battalion of 8” guns and three battalions of 155mm guns. Under the proposed organization for the 1980s, the 155mm battalion will be increased to five batteries. A U.S. Corps has two batteries of 175mm guns and three battalions of 8” guns. This must be divided among four divisions, each of which would have, on the average, eleven maneuver battalions (under the 1980’s reorganization, sixteen maneuver battalions). An armored cavalry squadron (battalion) has one battery of 155mm guns and four sections of 4.2” mortars, to divide among its four Troops (companies).
A defending U.S. Task Force will normally have an artillery battalion in general support; sometimes a battery of that battalion will be dedicated. The Task Force’s 4.2” mortars will be in general support if the entire Task Force is not present in the scenario. :
UK
A British maneuver battalion has six tubes of 81mm mortar, -to be divided among four companies or Teams. A Field Force has six sections of 105mm guns to divide among its four maneuver, battalions. A division has six sections of 105mm guns, three sections of 155mm guns, and one-half battery of 8” guns, to divide among five battalions. A Corps has two batteries of 175mm guns to divide among its four divisions.
West Germany
Artillery is organized along U.S. lines. A Panzergrenadier Brigade has a battalion of 155mm guns. A Luftlande Battalion has eight sections of 120mm mortars, to be divided among nine companies. The division has one and a half batteries of 175mm guns, one battery of 8” guns, four platoons of 110mm Multiple Rocket Launchers to be divided among three brigades. A’Corps has one battalion of 155mm guns and two battalions of 105mm guns divided among three or four divisions.
Canada A battalion has eight tubes of 60mm mortars, to be divided among four companies. The Lahr Brigade (formerly the 4th Canadian Mechanized Battle Group), the only Canadian unit in Germany, has one battalion of 155mm howitzers, divided among three maneuver battalions.
Netherlands
Each brigade has six platoons of AMX 105A 105mm guns and six platoons of 155mm guns.
China
A Chinese regiment has four sections of 82mm mortars to divide among three battalions. A division has six sections of 120mm mortars, four platoons of 122mm guns, six platoons of 100mm guns and six platoons of 107mm MRL divided among three regiments. An Army has three platoons of 122mm, three platoons of 130mm, three platoons of 152mm, six platoons of RPU-14 140mm MRL, divided among three divisions.
Vietnam
Vietnamese artillery is presumed to be organized along Soviet lines, though quite possibly not as plentiful.
France
We have no information on French artillery organization.
50.7 ENGINEERS AND RELATED ITEMS
[50.71] Engineer Units
If engineer units are not provided by Standard TOE, and are to be included in the scenario, they must be noted here. Sapper units are always two-man teams. A NATO company is more likely to be augmented with a sapper squad than with a full platoon; Soviets are more likely to be provide a full platoon.
[50.72] Boobytraps
If the Player with advantage may set-up boobytraps, this is noted here, together with the number of locations to be boobytrapped and any restrictions on their placement, other than the previously noted set-up area. Assume a sapper squad can emplace ten boobytraps per hour.
[50.73] Breaches
If any hexsides have been breached before play begins, this will be noted here. Assume a sapper squad can breach ten hexsides/hour.
[50.74] Obstacles
If the Player with advantage may set-up obstacles, his is noted here, together with a maximum number and any restrictions on their placement, other, than set-up area previously noted. Roadblock obstacles are most likely to utilize overturned streetcars. If there has been heavy building damage prior to the start of the scenario, rubble is available for roadblock construction. Otherwise materials must be hauled to the scene, which takes ime. Assume a sapper squad can emplace a roadblock obstacle in two hours.
[50.75] Mines
If either Player may set-up mines, this is noted here, together with restrictions on number and location. In most cases, only the Player with advantage would have mines, but if the scenario envisions the forces without advantage having occupied an area for at least several hours, those forces could also have placed mines. Assume a sapper squad or infantry platoon can emplace hree real mined hexes/hour.
[50.76] Ditches and Craters
If either Player may set up ditches, this is noted here, together with restrictions on number and location. Assume a dozer or sapper squad can dig one ditch/hour. Any pre-existing craters (from artillery or air bombardment) will be noted here.
[50.77] Demolition
If any bridges, buildings, or open hexes are prepared for demolition, this will be noted here. Assume a sapper squad may wire a bridge in two hours, a building in one hour, an open hex in one-half hour.
50.8 OTHER ADVANCED GAME INFORMATION
[50.81] Building Status
If any buildings have already been damaged, destroyed or devastated, prior to the beginning of the scenario, the rubble procedure (Case 37.3) must be executed to determine where the rubble is before units are set up.
[50.82] Ammo Stores
If ammo stores are to be set up, this i is noted here. There should not be more than one ammo store per company. Any limitations on organizations which can use the stores should be noted. For example, if there are two companies on one side and each has a store, the two companies may be restricted to their own stores unless either store or company is destroyed.or captured.
[50.83] Prepared Positions
If the Player with advantage is allowed prepared positions, the number of these and any restrictions on their location is noted here. If not otherwise noted, they must be located in set-up areas. Assume a sapper squad can prepare a wood building floor in five hours, a concrete building floor in three hours, a stone building floor in four hours.
[50.84] Rules of Engagement
Rules of engagement are noted in accordance with Section 41.0. These rules are very important. They may be absolute (e.g., the player may not do such-and-such) or costly (the player loses Victory Points for such-and-such).
The most common rules of engagement prohibit indirect fire (other than smoke or starshell) in certain areas or all over the map; prohibit a player from firing hard- (building-damaging) weapons (see Case 21.14 for exceptions) against building hexes either specifically or in general, usually with an exception for hexes in which an enemy unit has been spotted. Any provisions relating to civilians should be noted here. Also noted will be restrictions on drive-ins, demolitions, etc.
Forces defending their own or allied countries are usually strictest about rules of engagement. They are also applied frequently to attackers for specific purposes such as maintaining unblocked roads and railroads; preserving useful factories, government offices, etc.; preserving housing for future troop billets; political/propaganda considerations.
Facilities such as the Krankenhaus (Medical Clinic; 7F3), Altersheim (Old Folks Home; 9D1), Feuerwehr (Fire Department; 8C7), and historic sites like the Schloss or St. Anne’s Church may be placed off-limits for both sides in order to preserve them from destruction.
50.9 SPECIAL RULES
Any special Scenario rules should be noted here. Where a scenario depicts forces not represented on the unit data tables provided with the game, their weapons system values should be noted here, if not under 50.14.
51.0 SCENARIO DESIGN NOTES
CASES:
51.1 FORCES USED
[51.11] USA
The Army’s “rifle” units (as distinguished from “mech rifle’ units) are found chiefly in Berlin, Reserve and National Guard units, and possibly in infantry battalions which are part of some divisions in West Germany. Also, all airborne and airmobile units are “rifle.”
Army armored cavalry units are essentially recon elements, but also perform screening and delaying missions.
The Marines are most likely to be found in Norway, Iceland, Denmark, Greece, Turkey, the Middle East, or northern Germany, and may be assigned missions seizing or protecting ports in northern Germany.
[51.12] UK
“Recce” is the British term for “reconnaissance.” A British Battlegroup is divided into four “Teams’” of which the Third Team and Fourth Team are most likely to be found in an urban environment. The Royal Marines are only 9,000 strong in peacetime; they may be given missions guarding ports, staging raids, or operating in Denmark, Norway or Iceland. There is also a British Berlin Brigade.
[51.13] West Germany
Jaeger divisions are found in the Kassel area near the East German border and in southern Bavaria; there is one battalion of Jaegers in each Panzergrenadier brigade; and Jaegers are found in reserve and home defense units throughout Germany. When a brigade commander preplans a town defense, he will probably entrust it to the Jaegers.
[51.14] Canada
The Canadian Lahr Brigade is expected to fight in southern Germany.
[51.15] USSR
Currently, one of the three motor rifle regiments of each motor rifle division is equipped with the BMP, the other two with the BTR-60; western intelligence is divided over the question whether the Soviets intend to convert the remaining BTR-60 regiments stationed in Germany (the first strategic echelon) to the BMP. Most Warsaw Pact ally units should be played with the BTR-60. All tank units in the Standard TOE are assumed to be from motor rifle divisions rather than tank divisions. Motor rifle organizations in tank divisions all have the BMP. Tank platoons from tank division have only 3 tanks each. The battalion’s three BRDMs are likely to be equipped with the AT5 ATGM MAW in the 1980s; see also 50.31.
Meeting engagements would be fought with the standard units. For pre-planned assaults against built-up areas, Assault Groups and Assault Detachments will usually be formed.
The USSR has eleven airborne divisions available for use in Europe or Asia.
Of the Warsaw Pact allies, the Czechs have one airborne brigade (the 22nd) and the Poles have one airborne division (the 6th).
Soviet tanks will be T-72s in some companies, T-62s in most, with the T-80 showing up in the mid1980s.
Equipment is similar in the Soviet divisions facing China.
[51.16] France
French troops, if involved in combat east of the Rhine, are most likely to be found in southern Germany or in the Frankfurt area. There is also a French Berlin Brigade.
[51.17] Netherlands
Dutch troops are positioned in northern Germany not far from the border.
[51.18] China
Tanks and transport trucks are likely to be relatively scarce in Manchuria and Vietnam, somewhat more available in Xinjiang. The equipment of militia-type units (including Border Divisions, etc. of the regular army) varies, but no such platoon is likely to have more than three RPG7s and most of them only one; they may have some 57mm recoilless rifles, but not 82mm RR’s.
The People’s Liberation Army is huge, and will probably operate in urban areas with an even higher unit density than NATO and Warsaw Pact armies are accustomed to.
51.2 QUANTITY OF FORCES
According to all of the urban warfare doctrine available to us, the forces attacking or defending a town are expected to be very dense in comparison with the countryside, with correspondingly small frontages. A prepared Soviet attack on a defended town of the size of Gerlafingen should require at least one Assault Detachment, if not more, to give an example. To use forces that large, however, will extend playing time to a length that will be unacceptable to many, if not most, Players. Therefore, Players should construct scenarios with small forces, emphasizing unplanned operations, for quick play. Those who wish to settle down for a long game are welcome to use the full set of counters, and can even stipulate more forces than a battalion by withdrawing beat-up (Demoralized) units and bringing the counters in again as fresh troops.
As a rough average in the Basic Game, a 3:1 superiority in force is required to conduct an attack with a good chance of success. This ratio tends to increase as one moves into the Intermediate and Advanced Games, since most of the new rules favor the defender. Published sources indicate that an attack against a fully dug-in, prepared and determined defender may require odds as high as seven or eight to one.
51.3 SET-UP LOCATIONS AND ENTRY AREAS
Specific hexes as set-up locations should generally be avoided; rather, it is preferable to outline a general area and give the player freedom to deploy as he wishes within that area.
The attacking forces should be given a foothold of one or two megahexes, or dense smoke as a cover for entry; otherwise the attacker’s entire force may be slaughtered trying to get onto the map.
Entry areas should be broadly defined. Frequently, an attacking force will first have encircled and cut off the defenders, so that it would be able to attack from any and all directions.
It is generally unwise to specify exit along a single street, since streets are very easy to block.
51.4 FOG OF WAR
Since so much of the Cityfight game system revolves around the problems of limited intelligence, Players should find the following Fog of War suggestions to be very much in keeping with the spirit of the game; they introduce as much surprise, suspense, uncertainty and realism in the Fog-of-War context as possible. The price for these gains is that these provisions are likely to upset pre-planned Victory Conditions. But for Players who prefer a rip-roaring game and aren’t too concerned about who comes out ahead on points, full speed ahead!
In order to take advantage of these Fog-of-War provisions, Players will need one or more decks of common playing cards and a number of envelopes. When picking cards, all cards are placed face down. The face of the chosen card is seen only by the Player picking it; this Player places it in an envelope marked as to the specific type of random event symbolized by the card (e.g., “reinforcements”). The card is not shown until the game has ended.
Players should agree beforehand if they intend to make use of any of the Fog-of-War provisions, and spell out which ones are to be used.
[51.41] List several set-up Orders of Battle, then match these with card suits or numbers for random selection,
[51.42] List reinforcement schedules as in 51.41. Here, however, there are additional variables: entry areas and times.
[51.43] Leadership rating ranges may be varied.
[51.44] Ammunition recovery ratings may be varied.
[51.45] Preservation Levels may be varied.
[51.46] The number of boobytraps allowed to the player with advantage may be varied.
[51.47] The number of Prepared Positions may be varied.
[51.48] The Rules of Engagement may be varied.
[51.49] Give the Players a variety of Victory Condition alternatives keyed to a variety of alternate objectives, chosen by matching them with cards. Take care, however, that the objectives do not mismatch. Some good combinations follow the Key to Objectives for the Defending Player. A = hold onto specified area or particular buildings (this itself can be varied)
2 = prevent enemy from moving through specified area
3 = destroy enemy forces
4 = delay and withdraw with minimal losses (low Preservation Levels)
5 = ambush enemy
6 = counterattack
7 = hold at all costs (high preservation levels)
cards 8-10, J, Q, K can all be used for variations on A.
| Attacking Player Objectives | Defending Player Objectives |
|---|---|
| Exit specified area with minimal losses (low preservation levels) | all |
| Exit specified area with heavy loss acceptable (high preservation levels) | all |
| Destroy the enemy forces | all |
| Seize a given objective | all, but care should be taken so that defending options “A,” “2” are concerned with the same areas as the enemy objective |
| Clear a route | all but 4, and see above |
| Recon in force | 2, 3, 5, 6, 7 |
51.5 STANDARD TABLES OF ORGANIZATION & EQUIPMENT (see charts and tables)
51.6 SCENARIOS INCLUDED
“WITH THE GAME
The “historical” scenarios are intended to convey the feel and flavor of the historical conflict of which they depict a representative part; they are not to be understood as literal simulations in which the details of Order of Battle, time, map, etc. are all known. In the case of Hungary, the cities in which the battles were fought may have gone by other names; the story was the same.
Fewer scenario examples have been provided for the Basic Game, since these are relatively easy to make up. We have also concentrated on historical scenarios, which are difficult to design without access to information beyond what is extracted in this Scenario Design Guide.
Players may also design scenarios derived from the play of Red Star/White Star (1979) (with each Town hex equivalent to a Cityfight area of 4x4 megahexes) or other modern tactical games.
SCENARIOS
52.0 ENCOUNTER ON THE STAUFFENBERGALLEE (Basic Game Training Scenario)
52.1 THE BASIC GAME
[52.11] General Information
This scenario depicts a meeting engagement between two reconnaissance patrols. The main battle is elsewhere — Gerlafingen being a quiet suburb which, so far, has escaped the ravages of war.
The Soviet objective is to exit from megahex 8N. The American objective is to exit from megahex 8I.
[52.12] Map
Only part of the map is in use: that which lies to the east of the Eiche River and south of megahex row G.
[52.13] Time
Scenario length is 20 Game-Turns.
[52.14] Set-Up Forces
The Soviet Player sets up a recon platoon (see Standard Tables of ‘Organization & Equipment 51.5, ignoring vehicles and anti-tank weapons as this is a Basic Game Scenario; thus all recon platoons in the Soviet forces consist of three 4-man fireteams without machineguns) in the open hexes of megahex 8J.
The American Player sets up a depleted scout platoon of three 4-man fireteams without machineguns in the open hexes of megahex 8M. Note that both Players’ platoons possess a platoon leader and a platoon sergeant.
[52.15] Advantage
Neither Player has advantage in this scenario. {52.16] Leader Rating Ranges
U.S.
Co. Cdr: Not applicable
Plt Ldr: No change
Plt Sgt: No change
U.S.S.R.
Co. Cdr: Not applicable
Plt Ldr: No change
Plt Sgt: No change
[52.17] Ammunition Recovery Ratings
U.S.:3
U.S.S.R.:3
[52.18] Suppression Recovery Ratings
U.S.:2
U.S.S.R.:2
[52.19] Preservation Levels
When two of a Player’s fireteams have been killed that recon/scout platoon is demoralized.
52.2 BASIC GAME (Continued)
[52.21] River Fordability and
[52.22] Bridge Status
Not applicable
[52.23] Observation Posts/Spotters
USS.
Spotters: 1
Observation Posts: None *
U.S.S.R.
Spotters: 1
Observation Posts: None
[52.24] Telephone and
[52.25] Reinforcements
Not applicable
[52.26] Victory Conditions
Each Player receives one Victory Point for each Enemy fireteam killed. The Soviet Player receives one Victory Point for each fireteam exited off the map from megahex 8N. The American Player receives one Victory Point for each fireteam exited off the map from megahex 8I.
53.0 BREAKOUT! (Basic Game)
CASES:
53.1 THE BASIC GAME
[53.11] General Information
Two Soviet platoons, cut off and low on ammunition, are attempting to break out from their encirclement in the Old Village. A reinforced American company is trying to prevent this.
[53.12] Map
No change
[53.13] Time
The scenario ends with the completion of the 30th Game-Turn or when all Soviet squads have been exited and/or killed.
[53.14] Set-Up Forces
The Soviet Player sets up two motor rifle platoons in the Old Village of Gerlafingen. The American Player sets up a rifle company with a fourth rifle platoon in any megahex outside the Old Village.
[53.15] Advantage
U.S.S.R. Player has the advantage.
[53.16] Leader Rating Ranges
U.S.
Co. Cdr: Not applicable
Plt Ldr: No change
Plt Sgt: No change
U.S.S.R.
Co. Cdr: No change
Plt Ldr: No change
Plt Sgt: No change
[53.17] Ammunition Recovery Ratings
U.S. 4
U.S.S.R.: 2
[53.18] Suppression Recovery Ratings
U.S.:3
U.S.S.R.: 4
[53.19] Preservation Levels
U.S.S.R.: 24
U.S.: 80 (co); 18 (plt)
53.2 BASIC GAME (Continued)
[53.21] River Fordability and
[53.22] Bridge Status
Not applicable
[53.23] Observation Posts/Spotters
U.S.
Spotters: 5
Observation Posts: None
U.S.S.R.
Spotters: 1
Observation Posts: None
[53.24] Telephone and
[53.25] Reinforcements
Not applicable
[53.26] Victory Conditions
The Soviet Player receives 10 Victory Points for each squad which exits the map (anywhere). The American Player receives 10 Victory Points for each Soviet squad killed.
Note: Players may wish to design and play additional small-scale Basic Game scenarios before proceeding to the following large-scale battles.
54.0 NICOSIA, CYPRUS (Basic Game)
CASES:
54.1 THE BASIC GAME
[54.11] General Information
Cyprus, a large island in the Mediterranean Sea, has long been divided between two ethnic groups: Greeks and Turks. Civil war erupted in 1963, and continued sporadically until July 15, 1974, when Greek officers staged a coup, ousted the Cypriot government, and began intensive warfare against the Turkish community. Turkey responded by landing her regular army on July 20th. By August 16th, when a cease-fire took effect, the Turks had clearly emerged victorious.
This scenario depicts some of the fighting in Nicosia, the capital of Cyprus, in late July, 1974.
The Turkish objective is to eliminate Greek Cypriot forces; the Greek Cypriot objective is to maintain control of this area of Nicosia.
[54.12] Map
The map for this scenario is limited to the megahexes of the Old Village plus 6I, 7I, 3C, 4C and 5C. There is no river; the woods in 2E are ignored (treat the woods hexes as open hexes); the embankment on the street from 6G6 through 6F2 is ignored.
[54.13] Time
The scenario ends with the completion of Game-Turn 60.
[54.14] Set-Up Forces
The Greek Player, using the Soviet forces countermix, sets up a company of three platoons, each platoon consisting of a platoon leader, platoon sergeant, nine 3-man fireteams without machineguns (use the squad counters), and one bipod machinegun. The machinegun has a strength of 4, the fireteams also have a strength of 4 and are rated A,G. In addition the Greek Player receives a company commander and a heavy weapons platoon with a platoon leader and four tripod machineguns with an attack strength of 6. Greek units may be set-up in any megahex except 6F, 5C, 4C or 3C.
The Turkish Player, using the NATO forces countermix, sets up or brings in as reinforcements a battalion consisting of three companies. Each company has a company commander and three platoons. Each platoon has a platoon leader, a platoon sergeant, a tripod machinegun with an attack strength of 7, five 4-man fireteams with machineguns with an attack strength of 10 and five 4-man fireteams without MG with an attack strength of 6. One of the companies is short by one platoon. Turkish units may be set-up in megahexes 6F, 5C, 4C and 3C. If brought in as reinforcements, they may enter in hexes 1, 2 or 6 of those megahexes.
[54.15] Advantage
Greek Cypriot Player has the advantage [54.16] Leader Rating Ranges
Greek Cypriot
Co. Cdr: No change
Plt Ldr: No change
Plt Sgt: No change
Turkish
Co. Cdr: No change
Plt Ldr: No change*
Plt Sgt: No change
*The two-platoon company’s Platoon Léaders may not rate higher than 4.
[54.17] Ammunition Recovery Ratings
Greek Cypriot: 2
Turkish: 3
[54.18] Suppression Recovery Ratings
Greek Cypriot: 4
Turkish: Not applicable
[54.19] Preservation Levels
Greek Cypriot: 70 (co); 18 (plt); 9 (wpns plt)
Turkish: 200 (bn); 65 (co)*; 20 (plt)
The two-platoon company has a Preservation Level of 30.
54.2 BASIC GAME (Continued)
[54.21] River Fordability and
[54.22] Bridge Status
Not applicable
[54.23] Observation Posts/Spotters
Greek Cypriot:
Spotters: 15 (also use FO counters as Spotters)
Observation Posts: 10
Turkish
Spotters: None
Observation Posts: None
[54.24] Telephone
Greek Cypriot control in 5E5,
[54.25] Reinforcements
Not applicable
[54.26] Victory Conditions
The Turkish Player receives 100 Victory Points for Demoralizing all of the Greek platoons and an additional 100 Victory Points for eliminating all Greek combat units. The Greek Player receives 10 Victory Points for each Turkish platoon Demoralized and additional Victory Points for occupying certain hexes at the end of the game, as follows:
| Location | Victory Point Value |
|---|---|
| 5E5 | 20 |
| 5F4 | 10 |
| 5F6 | 6 |
| 2F7 | 10 |
| 2D2 | 20 |
| 2D3 | 20 |
| 5H2 | 10 |
| 4G2 | 20 |
| 4G1 | 5 |
| 4F4 | 10 |
| 3D2 | 10 |
55.0 BANGLADESH (Basic Game)
CASES:
55.1 THE BASIC GAME
[55.11] General Information
On March 25, 1971, President Yahya Khan of Pakistan ordered the Pakistani Army to crush a separatist movement in Bangladesh (East Pakistan). The East Bengal Regiment promptly defected, and guerrilla warfare began. On December 4, India joined the war against Pakistan, which ended on December 16 with Pakistan’s surrender and the independence of Bangladesh under the rule of Sheik Mujibur Rahman.
This scenario depicts the Indian attack at Jessore, a town ata key road and railroad junction in western Bangladesh, 40 km by road from the Indian border, on December 6, 1971. The Indian objective is to seize a corridor through which follow-up troops may pass in the general direction of Dacca, the capital. The Pakistani objective is to block this road.
[55.12] Map
Megahexrows I through N are not included in this scenario and are considered off the map.
[55.13] Time
Scenario length is 60 or fewer Game-Turns.
[55.14] Set-Up Forces.
Using the NATO countermix, the Pakistani Player sets up an infantry company consisting of three platoons. The Pakistani Army is organized and equipped along British lines; so all British weapon strengths are used unless noted otherwise. Each platoon consists of five 3-man fireteams with machineguns, five 3-man fireteams without machineguns, a platoon leader and a platoon sergeant. Pakistani units are set-up in any megahex except 1A-1H, 2C, 2G or 2H.
Using the Soviet countermix, the Indian Player sets up most of an infantry battalion. The battalion consists of three companies each of a company commander and three platoons. Each platoon has three 8-man squads (strength of 12), one Bren LMG bipod machinegun unit (US values), one platoon leader and a platoon sergeant. Indian units are set up in megahexes 1A-1H or come in as reinforcements in any map-edge hexes of megahexes 1A-1H.
[55.15] Advantage
Pakistan Player has the advantage
[55.16] Leader Rating Ranges
Pakistan
Co Cdr: 6...9
Plt Ldr: 2...5
Plt Sgt: No change india
Co Cdr: 8...10
Plt Ldr: 4...9
Plt Sgt: 2...5
[55.17] Ammunition Recovery Ratings
Pakistan: 3
India: 5
[55.18] Suppression Recovery Ratings
Pakistan: 1
India: 4
[55.19] Preservation Levels
Pakistan: 25 (co); 9 (plt)
India: 140 (bn); 40 (co); 10 (plt)
55.2 BASIC GAME (continued)
[55.21] River Fordability and
[55.22] Bridge Status
Not applicable
[55.23] Observation Posts/Spotters
Pakistan:
Spotters: 5
Observation Posts: 5
India
Spotters: 15 (also use FO counters as Spotters)
Observation Posts: None
[55.24] Telephone
Pakistan control in 5E5.
[55.25] Reinforcements
Not applicable
[55.26] Victory Conditions
The Indian Player gains 100 Victory Points if, at the end of the game, no Pakistani combat units are in megahex rows through 8; 10 Victory Points for each Indian platoon which has not been Demoralized and which has exited the map from megahex 6A or 7A; and 10 Victory Points for each enemy platoon that is demoralized.
The Pakistani Player gains 10 Victory Points for each Enemy platoon Demoralized and 50 Victory Points if no undemoralized Indian platoon has exited from the map from megahexes 6A or 7A.
[55.27] Structural Changes
All stone buildings on the map are treated as wood buildings.
Note: Players may wish to design and play additional Basic Game scenarios before proceeding to the Intermediate Game.
56.0 TANK BATTLE AT METALWAREN (Intermediate Game Training Scenario)
CASES:
56.1 THE BASIC GAME
[56.11] General Information
This scenario depicts a meeting engagement between two combined-arms detachments. The Soviet objective is to exit from megahex 4N. The American objective is to exit from 1H.
[56.12] Map
The map is limited to megahex rows 1-5 and H-N.
[56.13] Time
Scenario length is 20 Game-Turns.
[56.14] Set-Up Forces
The Soviet Player deploys two tank platoons of 3xT62 each and a motor rifle platoon (with BMPs) in open hexes of megahexes 1H and 2H. The American Player deploys a tank platoon (M60A Is) and a mech rifle platoon in open hexes of megahexes 4N, 4M and 5M.
[56.15] Advantage
Neither Player has advantage.
[56.16] Leader Rating Ranges
U.S.
Co Cdr: Not applicable
Plt Ldr: No change
Plt Sgt: No change
U.S.S.R.
Co Cdr: Not applicable
Plt Ldr: No change
Plt Sgt: No change
[56.17] Ammunition Recovery Ratings
U.S.:3
U.S.S.R:3
[56.18] Suppression Recovery Ratings
U.S.:3
U.S.S.R.:3
[56.19] Preservation Levels
U.S.: 13 (tank plt); 12 (mech plt)
U.S.S.R.: 8 (tank plt); 17 (motor rifle plt) [56.2] BASIC GAME (continued)
[56.21] River Fordability and
[56.22] Bridge Status
Not applicable
[56.23] Observation Posts/Spotters
U.S.:
Spotters: 2
Observation Posts: None
U,S.S.R.
Spotters: 2
Observation Posts: None
[56.24] Telephone and
[56.25] Reinforcements
Not applicable
[56.26] Victory Conditions
Each player receives 20 Victory Points for each demoralized Enemy platoon, and 20 Victory Points for each Friendly undemoralized platoon exited off the map from an eligible exit point. The Soviet Player’s exit points are any hexes of megahex 4N. The American Player’s exit points are any hexes of megahex 1H.
56.3 INTERMEDIATE GAME
[56.31] Anti-Tank Weapons
Not applicable
[56.32] Tanks are organized in their own platoons.
[56.33] Flame Weapons and
[56.34] Independent Command
Not applicable .
[56.35] Snipers
The US Player has one ad hoc sniper, attached to the mech platoon.
56.4 INTERMEDIATE GAME PHYSICAL ENVIRONMENT
[56.41] Day/Night
The scenario takes place in the day.
[56.42] Weather
Good. Smoke Dispersion, 5 Game-Turns.
57.0 TAKE THE MONEY AND RUN (Gerlafingen)
[intermediate Game)
CASES:
57.1 THE BASIC GAME
[57.11] General Information
This scenario depicts an attempt to escape after a bank robbery. The main objective of the robbers is to exit the map. The objective of the police is to prevent this.
[57.12] Map
Hexes 8F2, 6F1, 5I5, 4D1 and 3F1 all contain banks.
[57.13] Time
The scenario ends when all of the robbers have exited the map, been killed or surrendered.
[57.14] Set-Up Forces
The Robber Player (if he is Freiherr Johann v. Gerlafingen, he is a robber baron) sets up six units from the NATO countermix in any one of the banks listed in Case 57.12 above. He also sets up two cars (use Jeep counters), one of which must be at least one hex away from the bank; the other must be at least two hexes away from the bank.
The Cop Player (using the Soviet countermix) sets up one 3-man fireteam with MG (use West German values) and a platoon leader in hex 2D2 (the police station). Also set-up in 2D2 are three 4-man fireteams without MG, with a strength equal to the West German army 3-man fireteam without MG. Using BMP counters, set-up two (unoccupied) police cars in 2D7 and two in 2D3. Set up one police car and one 2-man police team in each of megahexes 5G, 5K, 8M and 9F. Set up a platoon sergeant with any one of the police cars (including any of the cars in 2D7 and 2D3). Set up 2-man police teams at 9D, 7J, 5F, 4E, 4C and 1D. Each 2-man police team (use sapper counters) has a fire strength of 8 in close assault, 7 at 1 hex, 6 at 2 hexes, 4at 3 hexes, 2 at 4 hexes.
[57.15] Advantage
Robbers have the advantage.
[57.16] Leader Rating Ranges
Robbers:
Co Cdr: Not applicable
Plt Ldr: No change
Plt Sgt: No change
Police
Co Cdr: Not applicable
Plt Ldr: No change
Plt Sgt: No change (57.17] Ammunition Recovery Ratings
Police MG teams have an Ammo Recovery Rating of 2. For the robbers and other police teams, ammo recovery is 5.
[57.18] Suppression Recovery Ratings
Robbers: 4
Police: Not applicable
[57.19] Preservation Levels
Robbers: 3
Police: 6
57.2 BASIC GAME (continued)
[57.21] River Fordability
No
[57.22] Bridge Status
Not applicable
[57.23] Observation Posts/Spotters
Robbers:
Spotters: None
Observation Posts: None
Police
Spotters: None
Observation Posts: None
[57.24] Telephone
The police have use of the telephone at all times. The robbers do not have use of the telephone [57.25] Reinforcements
Not applicable
[57.26] Victory Conditions
The Robber Player receives 10 Victory Points for each robber who successfully escapes (i.e., exits from any hex). The Police Player receives 20 Victory Points for each robber killed or surrendered (see Case 57.93).
57.3 INTERMEDIATE GAME
Not applicable
57.4 INTERMEDIATE GAME PHYSICAL ENVIRONMENT
[57.41] Day/Night
The scenario takes place in the day.
[57.42] Weather
Good.
[57.43] Building Damage
Not applicable
[57.44] Conflagrations
Not applicable
57.5 ADVANCED GAME through
57.8 OTHER ADVANCED GAME INFORMATION
Not applicable
57.9 SPECIAL RULES
[57.91] The six robbers are designated by the
Robber Player as follows: One is platoon leader, one is platoon sergeant, one is sniper with rifle (use the West German ad hoc sniper rating), the remaining three are rank-and-file robbers. Each robber other than the sniper is equipped with a pistol giving a fire strength of 7 in close assault, 6 at one hex, 4 at 2 hexes, 2 at 3 hexes, 1 at 4 hexes. Note that Case 25.21 applies to all robbers.
[57.92] Units may change cars so long as both cars are in the same hex by spending one Game-Turn in that hex with no command.
[57.93] The robber “platoon”is demoralized when three are dead. If the “platoon” is demoralized, a robber surrenders as soon as he is spotted.
[57.94] Neither Players’ units may fire at a building hex unless an opposing unit has been spotted in that hex in that Game-Turn. Only a hex containing a spotted Enemy unit may be close assaulted.
[57.95] At the beginning of Game-Turn 3, the Robber Player must inform the Police Player which bank (hex) was robbed (i.e., where the robbers were set up).
58.0 THE BRIDGES AT GERLAFINGEN (Intermediate Game)
CASES:
58.1 THE BASIC GAME
[58.11] General Information
The atmosphere was exuberant at the Soviet 8th Guards Tank Army’s temporary headquarters in Lohr, as staff members scurried about with messages and continued to move pieces on the big plastic map of the Frankfurt-Wurzburg area. The 8th GTA had at last succeeded in crossing the Main during the day, and reports coming in at 8 PM indicated that the bridgehead at Worth was secure. General of the Army Boris Shchevchenko looked up from the map and beckoned to his Chief of Staff.
“Worth is not the best place for a crossing, as I have often told you,” the General stated. “But the Americans must have come to the same conclusion, so we have caught them by surprise. Now, if we can but take this little town’ — his finger pointed to Gerlafingen on the map — “before they recover from the shock of our crossing, we will be in a position to fan out to the west, toward Darmstadt, to the south, toward Mannheim, or to the north — Frankfurt. This one town controls the road network, and has the only bridges across the Eiche for ten kilometers in each direction. Make sure we have the...” — the General paused and scrutinized the map carefully — “...117th Guards Tank there by dawn, with as much air defense as we can spare.”
As teletypewriters hammered away in Lohr, the American Military Police lieutenant stationed at the Dorfplatz in Gerlafingen was trying to unsnarl a massive traffic jam. Trucks were trying to bring ammunition up to the front, while ambulances came streaming back from the Main valley full of wounded for the hospital at Gerlafingen. Seeing a major in a command car inching his way over the Kaiser-Wilhelm-Bruecke, the MP walked over and anxiously asked the situation. “Yes, they crossed at Worth,” the major replied, “but they are moving downstream toward Obernburg. I wouldn’t worry about it, if I were you, though you can expect some heavy traffic through here in a few hours; Corps will be sending reserves.”
By 10 p.m. traffic from the Main valley had virtually ceased; a single Armored Cav platoon from Michelstadt was stopped to refuel and rest, before moving east. “No news is good news,” thought the lieutenant. It was then that he heard the choppers on their way to the front. The choppers, however, were Mi8 HIPs, and the front was Gerlafingen...
The Soviet objective is to seize the bridges over the Eiche and hold them for the arrival of the tank division. The American objective is to defend the bridges.
[58.12] Map
No change
[58.13] Time
The scenario ends with the completion of Game-Turn 50.
[58.14] Set-Up Forces
The American Player sets up a Military Police
Security platoon as follows: the platoon leader, two jeeps and one fireteam in megahex 5G; the platoon sergeant, one fireteam and two jeeps in 3F2; one fireteam and one jeep at each of the following locations: 7B2, 4B3, 1F5, 9G3, 5K3 and 9I7. In addition, the American Player sets up an Armored Cavalry platoon (M60A2) in megahexes 6D, 7D, 7E and 8E.
The Soviet Player sets up a Parachute company as follows: one platoon in 3H, one platoon in 2G and the third platoon in 2J. The company commander and a sniper are in 3H5. The company has been augmented with the following (which may be freely divided among the platoons): Two 82mm RR MAW and two tripod MG from battalion; two SPG9 MAW from regiment. Also set up is a BMD platoon in or divided among megahexes 3H, 2G and 2J. Spotters are set up in 3H, 2Gand 2J.
[58.15] Advantage
U.S. Player has the advantage
[58.16] Leader Rating Ranges
USS.
Co Cdr: No change
Plt Ldr: No change
Plt Sgt: No change
U.S.S.R.:
Co Cdr: *
Plt Ldr: 5...9
Plt Sgt: 4...5
*The Soviet parachute company commander is Shernov; ROD co cdr, no change.
[58.17] Ammunition Recovery Ratings
U.S.:5 (MP plt); 3 (Armored Cav plt)
U.S.S.R: 3 (Airborne); 2 (other)
[58.18] Suppression Recovery Ratings
US.:
U.S. Suppression Recovery Rating varies:
| Game-Turn | 1...6 | 7...9 | 10...12 | 13...15 | 16...60 |
|---|---|---|---|---|---|
| Rating | 0 | 1 | 2 | 3 | 4 |
U.S.S.R.: 3
[58.19] Preservation Levels
U.S.: 22 (MP plt); 20 (Armored Cav plt)
U.S.S.R.: 15 (Parachute plt); 58 (Parachute co); 12 (BMD plt); 10 (T-72 plt); 15 (Motor Rifle plt); 10 (Engineer plt): 35 (ROD)
58.2 BASIC GAME (continued)
[58.21] River Fordability
No
[58.22] Bridge Status
No change
[58.23] Observation Posts/Spotters
U.S.:
Spotters: 12 (also use FO counters as Spotters).
Observation Posts: All named buildings are U.S. observation posts.
U.S.S.R.:
Spotters: 3
Observation Posts: None
[58.24] Telephone
U.S. control in 5E5.
[58.25] Reinforcements
Game-Turn 10: The Soviet parachute company receives two ASU 85’s and three ASU 57’s at any megahex with a printed search rating of 0 or 21.
Game-Turn 15: The U.S. Player receives a second Armored Cav platoon at 4N or 1M (but not both), plus a jeep and a company commander for the Armored Cav Troop.
Game-Turn 25: U.S. Player receives a third Armored Cav platoon plus two M113s at either 4N or 1M (not both). Soviet Player receives a Route-Opening Detachment at one of the following locations: 0I; 9H; 9A or 7A, or the detachment may be entered divided between 0I and 9H or 9A and 7A. The detachment’s tanks are T-72s; the motor rifle vehicles are BMP’s, and the engineer platoon has one RPG-7 LAW.
Game-Turn 40: The Soviet Player receives one tank platoon (T-72s) at megahex 9A or7A.
[58.26] Victory Conditions
The Soviet Player wins by establishing a bridgehead of two tanks. Only his four tanks arriving on Game-Turn 40 may establish bridgeheads. A tank establishes a bridgehead if, at any point before the completion of Game-Turn 50, it enters a hex at least five hexes away from the river (not merely a bridge). The two tanks do not have to establish simultaneous bridgeheads, nor do they have to survive past the instant of the entering a hex sufficiently distant from the river. Otherwise, the American Player wins.
[58.27] Structural Changes o change
58.3 INTERMEDIATE GAME
[$8.31] Anti-Tank Weapons o change
[58.32] Tank Organization
No change
[58.33] Flame Weapons
Each Soviet Parachute platoon has one LPO-50 flamethrower special weapon.
[58.34] Independent Command through
[58.36] Vehicle Smoke Depletion
No change
58.4 INTERMEDIATE GAME PHYSICAL ENVIRONMENT
[58.41] Day/Night
The scenario takes place in the night.
[58.42] Weather
Good; Smoke Dispersion, 10 Game-Turns. M113s cannot swim the Eiche in this scenario.
[58.43] Building Damage
Not applicable
[58.44] Conflagration
Not applicable
58.5 ADVANCED GAME through
58.8 OTHER ADVANCED GAME INFORMATION
Not applicable
58.9 SPECIAL RULES
[58.91] All American personnel begin the scenario suppressed. In addition, vehicles of the first Armored Cav platoon may not be moved before Game-Turn 6. Soviet BMDs may not be moved before Game-Turn 4.
[58.92] The bridges (other than the railbridge and footbridge) are invulnerable to destruction.
59.0 REVOLT IN HUNGARY (Esztergom, October, 1956) (Intermediate Game)
CASES:
59.1 THE BASIC GAME
[59.11] General Information
On October 23, 1956, a popular uprising broke out in Budapest, capital of the Hungarian People’s Republic, and soon spread to the rest of the country. A new government was formed in Budapest under Prime Minister Imre Nagy, who eventually declared Hungary neutral and withdrew it from the Warsaw Pact. With the Hungarian Army joining the uprising, the Soviet Union was forced on 28 October to withdraw its troops from the country. (See also Case 66.11.)
This scenario is set at Esztergom, a city on the Danube (which here forms the border with Czechoslovakia) some 40 kilometers northwest of Budapest; Esztergom is headquarters for the Soviet 2nd Tank Division.
The objective of the Soviet Player is to retain control of the city and exit forces in the direction of Budapest, where they could be used to put down the uprising. The objective of the Hungarian Player is to prevent the Soviets from moving in the direction of Budapest, and force them instead to leave in the opposite direction.
[59.12] Map
The direction labeled “Nord” on the map is actually west, toward the main road to Budapest. The river is the Danube. The entire north side of the Danube is outside of the scenario, being in Czechoslovakia. The following hexes are open hexes at normal ground level: 4B3, 5C1, 6G1, 6G6, 7I3, 7I7, 6L3, 6L5, and 6L7. The big structure in megahexes 3J and 3K is HQ, 2nd Tank Division.
[59.13] Time
The scenario length is 100 Game-Turns or earlier if either of the following occur: all Hungarian combat units are dead; all Soviet platoons have exited, been demoralized or have not been fired upon for six Game-Turns.
[59.14] Set-Up Forces :
The Soviet Player, using the Soviet counters, deploys the following:
-
A tank company of T-54 tanks. The tank’s ’ 100mm main gun has a hard strength of 9; the 12.7mm turret machinegun a soft strength of 7; and the two coaxial 7.62mm machineguns have a combined (integral) soft strength of 7. The company’s HQ tank may be placed anywhere. The first platoon sets up in megahexes 4J, 5K and 4K. The second platoon sets up in megahex 5G and any adjacent megahexes. The third platoon sets up in megahexes 2I, 1I and 1J.
-
A motor rifle company equipped with BTR-50 APCs and RPG-2 LAWs. The BTR-50 has a transport capacity of 12, is always “open” (having no roof at this time), and a single 7.62mm turret machinegun, with the following soft strength values:
| Range (in hexes) | 0...10 | 11...24 | 25+ |
|---|---|---|---|
| Strength | 7 | 6 | 5 |
The RPG-2 has the following hard strength values:
| Range (in hexes) | 1...3 | 4,5 | 6 |
|---|---|---|---|
| Strength | 7 | 5 | 3 |
The company HQ vehicle (BTR-50) is set up in megahex 5E, company commander and company’s (i.e., headquarters) squad in hex 5E5. The first platoon’s vehicles are set up in megahex rows A through E, its first squad in megahex 2D, second squad in megahex 4C, third squad in megahex 4E. The platoon leader, platoon sergeant and sniper may be freely placed with any of the platoon’s vehicles. The second platoon’s vehicles are set up in megahex rows F through:H, its first squad in megahex 4G, second squad in 5H and third squad in 2F. The platoon leader, platoon sergeant and sniper may be placed in any of the platoon’s vehicles. The third platoon’s vehicles are set up in megahex rows K through N, its first squad in megahex 9K, second squad in 5L and third squad in 2L. The platoon leader, platoon sergeant and sniper may be placed in any of the platoon’s vehicles.
- A division staff consisting of: Three BTR-50s, eight 4-man “spotter” units (these are noncombat units, use sapper counters), a platoon leader, a platoon sergeant, a Lt. General (use the Shernov or an improvised leader counter), a Maj. General (his Chief of Staff, use the Rudnyy or an improvised leader counter), and two Colonels (use the two company commander counters left over after the two actual company commanders have been picked). The Division Staff is set up in the Division Headquarters Compound, megahexes 2J-3J-3K-3L. The division staff is treated as if it were a platoon, with the “spotters” contributing available Action Points and expending them when performing actions, as well as counting for demoralization. The division staff has no weapons and may not be given Fire commands.
The Hungarian Player, using the NATO countermix, deploys the following: Twelve ad hoc snipers, four trucks, thirty-six 4-man fireteams without machineguns (soft attack strength of 4) and six leaders anywhere except megahexes 2D, 2J, 2K, 3J, 3L, 3K or 5G or hexes 1D3, 2E1, 4C5, 5E5, 2F7, 4F4, 4G1, 4G2 or 5H2. These initially set-up Hungarian units all have independent command. The Hungarian leaders (use platoon sergeant counters)’ must have leader ratings of 1...4 and may be used to remove suppression from any setup Hungarian unit.
[59.15] Advantage
Hungarian Player has the advantage
[59.16] Leader Rating Ranges
Hungary
Co Cdr: Not applicable
Plt Ldr: see Case 59,25
Plt Sgt: see Case 59.14
U.S.S.R.:
Co Cdr: 5...8
Plt Ldr: 2...4
Plt Sgt: 1...3
[59.17] Ammunition Recovery Ratings
Hungary: 2 (Set-Up units); 3 (Reinforcements) U.S.S.R.5.
[59.18] Suppression Recovery Ratings
Hungary: 5
U.S.S.R.: 1
[59.19] Preservation Levels
Hungary: 108 (Set-Up units) Snipers and Spotter teams count for Preservation Points. See Case 59.25. :
59.2 BASIC GAME (continued)
[59.21] River Fordability and
[59.22] Bridge Status
No change
[59.23] Observation Posts/Spotters
Hungary:
Spotters: 15 (also use FO counters as Spotters)
Observation Posts: 5
U.S.S.R.:
Spotters: see Case 59.14
Observation Posts: None
[59.24] Telephone
Both Players may make use of the telephone center in 5E5. If either player destroys it, neither may use it.
[59.25] Reinforcements
There are no Soviet reinforcements.
Hungarian Player’s Reinforcements are as follows:
Game-Turn 3: One tank platoon of T-34 tanks led by a crazy Hungarian lieutenant (use the 9-rated counter). The tank’s 85mm main gun has a hard strength of 8; its coaxial 7.62mm machinegun. has a soft strength of 4. No preservation level.
Game-Turn 6: One motor rifle platoon in trucks (use APC counters) with RPG-2 LAWs led by a 7-rated platoon leader. (Use fireteam with machinegun counters for the three squads.) Preservation level is 20.
The reinforcements may enter at any open map-edge hexes between 4A6 and 1G4 inclusive. Their ammo rating is 3.
[59.26] Victory Conditions
The Soviet Player receives 10 Victory Points for each undemoralized ‘tank platoon he exits from megahexes 1A through 4A inclusive; 2 Victory Points for each Undemoralized tank or motor rifle platoon exited from megahexes 2N through 5N inclusive; 25 Victory Points for exiting the Lt. General from any of megahexes 1A through 4A inclusive; 15 Victory Points for exiting the Major General from any of these megahexes; 10 Victory Points for exiting a colonel from any of those same megahexes; and for occupying sites with squads at the end of the game.
The Hungarian Player receives 25 Victory Points for killing the Lt. General, 15 Victory Points for killing the Major General, 10 Victory Points for killing a colonel, 10 Victory Points for killing a tank (not a KF or KM), 3 Victory Points for killing a BTR-50, 5 Victory Points for killing a squad; and for occupying sites with combat units at the end of the game.
| Location | Victory Point Value: Soviet | Victory Point Value: Hung |
|---|---|---|
| Any one hex in the New Town Hall (1D-2D-2E) | 5 | 10 |
| All four hexes of the New Town Hall | 0 | 50 |
| Police Station (2D2) | 5 | 25 |
| Telephone Center (5E5) | 3 | 5 |
| Any one hex (not each) in 5G | 3 | 0 |
| Old Town Hall (5F4) | 0 | 5 |
| Hotel Joseph Stalin (5H2) | 0 | 5 |
| hex 3K7 (division commander’s office) | 0 | 50 |
[59.27] Structural Changes
No change
59.3 INTERMEDIATE GAME
No change
59.4 INTERMEDIATE GAME PHYSICAL ENVIRONMENT
[59.41] Day/Night
The scenario takes place in the day.
[59.42] Weather
Good; Smoke Dispersion, 3 Game-Turns.
[59.43] Building Damage
Not applicable
[59.44] Conflagration
Not applicable
59.5 ADVANCED GAME.
through
59.8 OTHER ADVANCED GAME INFORMATION
Not applicable
59.9 SPECIAL RULES
[59.91] Any Russian vehicle occupied by a general or colonel may take actions even if its platoon has no Action Points left.
U.S.S.R.: 5 (Tank plt); 10 (Tank co); 8 (Motor Rifle plt); 22 (Motor Rifle co); 4 (Division staff)
60.0 ASSAULT ON DOSHAN TAPPEH AIR BASE (intermediate or Advanced Game)
CASES:
60.1 THE BASIC GAME
[60.11] General Information
The battle for Doshan Tappeh Air Base, Tehran, Iran, took place on the night of February 9-10, 1979. Earlier on the 9th the air base at the eastern edge of the Iranian capital city had been seized by a collection of guerrillas, armed civilians and Air Force cadets loyal to the revolutionary forces of Ayatollah Ruhollah Khomeini. Shortly after midnight, elite units of the crack Javidan (“Immortal”) Guards Division moved toward the base, fighting their way through the city of Tehran. The Guards, however, did not succeed in putting down the rebellion; and at a Feb. 10 meeting of the Shah’s Prime Minister, Shahpur Bakhtiar, with the commanders of the Army and Air Force, it was decided to pull the army back to its bases, ensuring the fall of the Shah of Iran. The revolutionaries’ objective is to bar the way to the air base and demoralize the Iranian army. The army’s objective is to speedily crush the rebellion, thereby keeping the Shah in power. It is shortly after midnight, Saturday, February 10, 1979. (Note that this scenario takes a long time to complete.)
Players may adapt this scenario for Advanced Game play by using the height rules. No other Advanced rules are necessary.
[60.12] Map
There is no river on the map; in addition, ignore all bridges and embankments on streets crossing the printed river. The railroad is ignored. The direction labeled “N” is east for this scenario. All further compass directions in this scenario will be to the true (i.e., reoriented) map directions. The air base is off-map to the east while the Parliament building is off-map in the opposite direction (west). Historical Notes: Route 298 represents Shabbaz Street, Route 1A represents Farahabad Street and the building in 6D is a power station.
[60.13] Time :
Scenario length is indefinite. The scenario ends at the completion of the first Game-Turn in which all of either Player’s platoons are Demoralized.
[60.14] Set-Up Forces
The Khomeini Player uses the Soviet countermix and sets up his forces in megahex rows A through L. He possesses three types of units; airmen, guerrillas and armed civilians.
- One company of airmen consisting of a headquarters force and three platoons. Each platoon consists of a platoon leader and three 8-man squads (with one MG3 machinegun and seven G3 rifles) with the following strengths: 10 at 0... 14 hexes, 7 at 15 ... 18 hexes and 4 at 19... 24 hexes. .
The headquarters force consists of a company commander, one RPG-7 LAW, one 90mm recoilless rifle MAW, two tripod machineguns (use Soviet values) two trucks (use BMP counters) and a ZSU23 (antiaircraft) vehicle. The ZSU23 has a quad 23mm MG which possesses a hard attack strength of 5 and a soft attack strength of 40. (Note that while the ZSU23 may use either of its attack strengths on any attack, it is a single weapon and may not fire at both hard and soft targets in a single attack).
-
One company of guerillas consisting of one company commander and two platoons. Each platoon consists of five 4-man fireteams without MG (use Soviet values), one tripod machinegun (use Soviet values), four snipers (use SVD counters) with a soft strength of 6 and a maximum range of 18 hexes, a platoon leader and three platoon sergeants.
-
An armed civilian force consisting of eight ad hoc snipers with a soft strength of 4 and a maximum range of 18 hexes, and thirty-six 2-man fire units (use sapper counters) with soft strength values of 4at 0... 10 hexes and 3 at 11... 18 hexes. These units do not have leaders and do not expend Action Points in performing actions.
The Shah Player uses the NATO countermix and sets up a battalion in megahex rows M and N, The battalion consists of three companies of infantry and a tank platoon. The tank platoon consists of a platoon leader, a platoon sergeant and five Scorpion tanks (see UK). Each company of infantry consists of a company commander, one truck, four jeeps with machineguns (use scout counters; treat it as a soft vehicle with a soft attack strength of 7) and three platoons. A Javidan platoon consists of three 5-man fireteams with MG (rated A,G with a strength of 15 at0... 14 hexes, 10 at 15... 18 hexes, 7 at 19... 24 hexes and 5 at 25+ hexes), three 5-man fireteams without MG (rated A,G with a strength of 8 at 0... 9 hexes, 6at 10... 14 hexes and 3 at 15 ... 18 hexes), a platoon leader, a platoon sergeant, four M113 APCs, one RPG-7 LAW and two tripod MG teams (use UK values).
[60.15] Advantage
Khomeini Player has the advantage
[60.16] Leader Rating Ranges
The Khomeini Player’s leaders are restricted as follows: The air force company commander must be rated a 5, 6 or 7; the guerrilla company commander must be rated a 9 or 10; the:air force platoon leaders must be rated 2 or 3; the guerrilla platoon leaders must be rated within a range of 5...9 (inclusive); the guerrilla platoon sergeants must be rated 3,4or5.
Shah
Co Cdr: 9...12
Plt Ldr: No change
Plt Sgt: 1...3
[60.17] Ammunition Recovery Ratings
Khomeini: 2
Shah: 5
[60.18] Suppression Recovery Ratings
Khomeini: 6
Shah: Not applicable
[60.19] Preservation Levels:
Khomeini: 20 (Air plt); 80 (Air co); (ZSU counts as 5); 22 (Guerrilla plt); 50 (Guerrilla co); 50 (Civilians; treat as plt)
Shah: 8 (Tank plt); 12 Infantry plt); 40 (Infantry co); 100 Battalion)
60.2 BASIC GAME (Continued)
[60.21] River Fordability
No change :
[60.22] Bridge Status
No change
[60.23] Observation Posts/Spotters
Khomeini
Spotters: 15 (also use FO counters as Spotters)
Shah: Observation Posts: 10
Spotters: None
Observation Posts: None
[60.24] Telephone
Not applicable (no telephone)
[60.25] Reinforcements
Not applicable
[60.26] Victory Conditions
The Khomeini Player receives 10 Victory Points for each enemy platoon Demoralized, 5 Victory Points for each company commander killed, 2 Victory Points for each platoon leader killed, 50 Victory Points for occupying a hex in or adjacent to Jaleh Square (the square in megahex 5G) at the end of the scenario and 20 Victory Points for occupying a hex in or adjacent to Farahabad Street (Route 1A) at the end of the game.
The Shah Player receives 10 Victory Points for each enemy platoon Demoralized, 4 Victory Points for killing the guerrilla company commander, 3 Victory Points for each guerrilla platoon leader killed; and 10 Victory Points for each eligible platoon which is exited off the east map-edge (except for platoons exited solely from hex 7A6, which instead scores 15 Victory Points for the Shah Player). Eligibility is determined at the end of the scenario. Only undemoralized platoons are eligible.
The Shah Player must indicate a travel route for each exited platoon. He may indicate a different route for each platoon. The route must extend from any hex in megahex row M or N to any of the hexes the platoon exited from. The route must be traversable by vehicles (i.e., consist of all streets and/or open hexes). After all of the routes have been listed the Khomeini Player may negate the control of any or all of the routes. Any platoon whose route’s control is negated is no longer eligible. The Khomeini Player negates a route by having any unit in a position to fire hard weapons at any hex of the route or by having any combat unit in or adjacent to a hex of that route. A Khomeini unit may negate an unlimited number of routes.
[60.27] Structural Changes
No change
60.3 INTERMEDIATE GAME
No change
60.4 INTERMEDIATE GAME
PHYSICAL. ENVIRONMENT
[60.41] Day/Night .
Scenario takes place in the night. Tanks are STANO-equipped.
[60.42] Weather
Good; Smoke Dispersion, 10 Game-Turns.
[60.43] Building Damage
Not applicable
[60.44] Conflagration
Not applicable
60.5 ADVANCED GAME through
60.9 SPECIAL RULES
Not applicable
61.0 BEIRUT (Advanced Game Training Scenario)
CASES:
61.1 THE BASIC GAME
[61.11] General Introduction.
Beirut, Lebanon’s capital city and metropolis, has a number of high-rise buildings, which are frequently fought over. This scenario depicts a duel between two of the many factions in Lebanon’s civil war, which has been going on since 1975 (with occasional cease-fires) without signs of ending.
The objective of each faction is to kill the other and occupy its building.
[61.12] Map
The map is limited to megahex 8A.
[61.13] Time
The game ends when one side or the other is demoralized.
[61.14] Set-Up Forces
Faction A sets up in hex 8A3: 12 x 4-man fireteams without MG (use American ratings), 2x tripod MG (use American ratings), a platoon leader anda sergeant; 2 ad hoc snipers.
Faction B sets up in hex 8A4: the same.
In addition, Faction A receives an extra platoon of 12 sapper teams, platoon leader, and a platoon sergeant. This faction should be the one to go charging over to the other building. Use American values. Both sides can use the NATO countermix.
[61.15] Advantage
The player without the sappers has the advantage.
[61.16] Leader Rating Changes
Faction A
Co Cdr: Not applicable
Plt Ldr: No change
Plt Sgt: No change
Faction B
Co Cdr: Not applicable
Plt Ldr: No change
Plt Sgt: No change
[61.17] Ammunition Recovery Ratings
Faction A: 3
Faction B: 2
[61.18] Suppression Recovery Ratings
Faction A:2
Faction B: 3
[61.19] Preservation Levels
Faction A: 20
Faction B: 16
61.2 BASIC GAME (continued)
[61.21] River Fordability and
[61.22] Bridge Status
No change \
[61.23] Observation Posts/Spotters
Faction A
Spotters: 4
Observation Posts: none
Faction B
Spotters: 4
Observation Posts: None
[61.24] Telephone
Neither side controls the telephone
[61.25] Reinforcements
Not applicable
[61.26] Victory Conditions
Each faction receives 1 victory point per enemy man killed and 5 victory points per floor of the other faction’s building which is occupied or was most recently occupied by friendly forces.
[61.27] Structural Changes
No change
61.3 INTERMEDIATE GAME
No change :
61.4 INTERMEDIATE GAME PHYSICAL ENVIRONMENT
[61.41] Day/Night
Scenario takes place in the day.
[61.42] Weather
Good; Smoke Dispersion, 2 Game-Turns.
[61.43] Building Damage
Not applicable
[61.44] Conflagrations
Not applicable
61.5 ADVANCED GAME
[61.51] Wind Direction
Not applicable
[61.52] Dozer Tanks and Mine-Clearing Plows Not applicable
[61.53] Height Levels i
Each of the two buildings is 15 floor levels high.
61.6 INDIRECT FIRE UNITS
No change
61.7 ENGINEERS AND RELATED ITEMS
[61.71] Engineer Units
See 61.14.
[61.72] Boobytraps
Faction A: 2
Faction B: None
[61.73] Breaches through
[61.77] Demolition
No change
61.8 OTHER ADVANCED GAME INFORMATION
Not applicable
61.9 SPECIAL RULES
Not applicable
62.0 ASSAULT ON GERLAFINGEN (Advanced Game)
[62.11] General Introduction.
This scenario depicts a prepared assault with the objective of capturing the town of Gerlafingen. Participating are a Soviet assault detachment and a U.S. Infantry-Heavy Team. The Soviet objective is to cross the Eiche and occupy key facilities. The American objective is to prevent this.
The Soviet assault detachment is made up of units from the 39th Guards Motor Rifle Division, which has held its foothold east of the Eiche for four days while preparing to resume the attack. The Americans are from 3rd Brigade/3rd Mech Division.
[61.12] Map
No change
[62.13] Time
The game ends after the. 90th game-turn, or when the Soviet assault detachment is demoralized, whichever occurs first.
[62.14] Set-Up Forces
The Soviet player sets up an assault detachment with 6xSP74’s, 6xT-12s, divided into two assault groups and a detachment reserve. The detachment has 3 flamethrower tanks and 9 flamethrower special weapons. The Soviets are set up east of the river, and at least 5 hexes away from the river. Tanks are T-62s; BMPs are the motor rifle units’ vehicles.
The American Player sets up an Infantry-Heavy Team anywhere west of the river or within 4 hexes east of the river. Tanks are M60A3.
[62.15] Advantage
U.S. Player has the advantage
[62.16] Leader Rating Ranges
U.S.
Co Cdr: No change
Plt Ldr: No change
Plt Sgt: No change
U.S.S.R.
Co Cdr: No change
Plt Ldr: No change
Plt Sgt: No change
[62.17] Ammunition Recovery Ratings
U.S.:3
U.S.S.R.3
[62.18] Suppression Recovery Ratings
U.S.:2
U.S.S.R.: 1
[62.19] Preservation Levels
U.S.: 20 (Motor Rifle plt; see 62.32); 15 (Tank plt); 70 (Company)
U.S.S.R.: 340 (Detachment); 18 (Motor Rifle plt); 12 (Tank plt); 18 (Sapper plt); 60% Preservation Points (Group)
62.2 BASIC GAME (Continued)
[62.21] River Fordability
No.
[62.22] Bridge Status
All bridges across the Eiche River are destroyed, save one (American choice).
[62.23] Observation Posts/Spotters
U.S.
Spotters: 8
Observation Posts: 5
U.S.S.R.
Spotters: 7
Observation Posts: None
[62.24] Telephone
U.S. control in 5E5.
[62.25] Reinforcements
Not applicable
[62.26] Victory Conditions
The American player wins 100 Victory points for each Assault Group which is demoralized and a total of 300 Victory Points if the whole Assault Detachment is demoralized. If no undemoralized Soviet platoons have crossed the Eiche by the end of the game, the American player wins an additional 500 Victory Points.
The Soviet player wins Victory Points for being the sole occupant of the following buildings: Metalwaren Fabrik 100 Victory Points
Hotel Gerlafingen 20 Victory Points
Guterlager 20 Victory Points
Altes Rathaus 10 Victory Points
Postamt 15 Victory Points
Bahnhof 20 Victory Points
Polizeiamt 20 Victory Points
Neues Rathaus 50 Victory Points
The Soviet Player wins 50 Victory Points for each American platoon which has been demoralized, and 10 Victory Points for each undemoralized Soviet platoon which exits the map west of the Eiche (15 Victory Points if the exit is from megahex 1G or 1F).
[62.27] Structural Changes
No change
62.3 INTERMEDIATE GAME
[62.31] Anti-Tank Weapons
No change
[62.32] Tank Organization
Soviet tanks are in tank platoons; American tanks may be attached to mech rifle platoons. (Add 3 preservation points to the Preservation Level of a mech rifle platoon for each tank attached to it.)
[62.33] Flame Weapons through
[62.36] Vehicle Smoke Depletion
No change
62.4 INTERMEDIATE GAME PHYSICAL ENVIRONMENT
[62.41] Day/Night
Scenario takes place at night. All tanks and combat personnel units are STANO-equipped.
[62.42] Weather ;
Good; Smoke Dispersion, 9 Game-Turns. The M113 can swim in this scenario.
[62.43] Building Damage
Roll one die for each building hex on the east bank of the river, other than those in 7F7, 7F3, 9C1, and the Schloss. On a one, the building is demolished; on a 2 it is destroyed; and on a 3-4, it is only damaged; on a 5-6, it is intact. The Dorfpark has burned to the ground, so that its hexes are treated as if they were open.
[62.44] Conflagrations
Not applicable
62.5 ADVANCED GAME
[62.51] Wind Direction
Not applicable
[62.52] Dozer Tanks and Mine-Clearing Plows One Soviet tank per platoon is dozer-equiped.
[62.53] Height Levels
Not applicable
62.6 INDIRECT FIRE UNITS
[62.61] Pre-Plotting
U.S.: Yes
U.S.S.R.: Yes
[62.62] Opening Barrage
U.S.: No
U.S.S.R: 3...15 Game-Turns, as agreed.
[62.63] Forward Observers Not in TO&E
U.S.: 1 (Company)
U.S.S.R.: None
[62.64] Dedicated Batteries
Not applicable
[62.65] Indirect Fire Reference Data
U.S. has a second battery of 155mm guns in general support.
62.7 ENGINEERS AND RELATED ITEMS
[62.71] Engineer Units
The U.S. player has a combat engineer detachment under the team, consisting of 6 sappers, 1 Dragon MAW, 6 M72 LAWs, Jeep, and 1 CEV; preservation level: 12; treat as platoon.
[62.72] Boobytraps
U.S.: 10.
U.S.S.R.: None.
[62.73] Breaches ot applicable
[62.74] Obstacles
U.S.: 10
U.S.S.R.: None
[62.75] Mines
U.S.: 10 (real); 10 (dummy)
U.S.S.R: 20 (real)
[62.76] Ditches and Craters
U.S.: 10 ditches
U.S.S.R.: 5 ditches
[62.77] Demolition
The one remaining bridge and 5 open hexes may be set up for demolition by the U.S.
62.8 OTHER ADVANCED GAME INFORMATION
[62.81] Building Status
The rubble has been cleared away already except in the three megahex rows closest to and on the east side of the river. For this area, see 68.43.
[62.82] Ammo Stores
The U.S. may set up one ammo store, and the Soviets two.
[62.83] Prepared Positions
U.S.: 50 squad-hours.
U.S.S.R.: 50squad-hours.
[62.84] Rules of Engagement
If any Soviet objective hex is damaged by Soviet effort, it is worth only half as many Victory Points (fractions rounded up); if destroyed or demolished it is worth 0 Victory Points. The U.S. may not fire at the Schloss, Krankenhaus, or any building on the west side of the river until a Soviet unit has been observed in that hex. The Krankenhaus is off limits to both players. Ammo stores may not be placed in or within 2 hexes of Soviet objectives.
62.9 SPECIAL RULES
Not applicable
63.0 THROUGH FRIENDSHIP PASS, Dong Dang, Vietnam. (Advanced Game)
CASES:
63.1 THE BASIC GAME
[63.11] General Introduction.
‘“At the railhead city of Dong Dang, A 30-ft. yellow gate marks Japan’s invasion of Indochina in 1940, which prompted President Franklin Roosevelt’s perhaps apocryphal vow that ‘we will not go to war over any damn Ding Dong.’ ”
TIME, March 5, 1979
At 9. a.m. on Saturday, Feb. 17, 1979, forces of the Chinese People’s Liberation Army crossed through Friendship Pass, swept through the village of Nam Quan, and marched 2 kilometers to the town of Dong Dang, there encountering the first resistance from border troops of Vietnam. Thus began the Chinese- Vietnamese war.
The Chinese objective is to quickly pass through the town on the way to the provincial capital of Lang Son, and secure a clear road for the thousands of troops and trucks to follow.
The Vietnamese objective is to delay the Chinese so that the defences of Lang Son can be organized. See Case 68.11.
[63.12] Map
The map is upside down, so the direction “N” is actually south.
[63.13] Time
The game ends when no Vietnamese combat units are left on the map, or Game Turn 60, whichever is sooner.
[63.14] Set-Up Forces
The Vietnamese player, using the Soviet countermix, sets up a company consisting of one BTR-60-equipped Motor Rifle Platoon, one T-62 Tank Platoon, one Engineer Platoon (from Regiment), including 1 dozer, and one BRDM Recon Platoon, in megahex rows A-I. The Vietnamese have one extra SVD sniper per platoon. Also, they have 2 militia platoons (each: 3 squads without vehicles, a platoon leader, and a platoon sergeant), and a militia company commander.
The Chinese set up one infantry platoon, one tank platoon, one truck, and one FO in megahex row J through N, using the NATO countermix.
[63.15] Advantage
Vietnam Player has the advantage.
[63.16] Leader Rating Ranges
Vietnam
Co Cdr: 9...10 (regular); 8...9 (militia)
Plt Ldr: 4...9 (regular); 4...7 (militia)
Plt Sgt: 4...5 (regular); 3...5 (militia)
China
Co Cdr: 8...11
Plt Ldr: 4...8
Plt Sgt: 3...5
[63.17] Ammunition Recovery Ratings
Vietnam: 4
China: 3
[63.18] Suppression Recovery Rating
Vietnam: 4
China: 1
[63.19] Preservation Levels
Vietnam: 18 (Militia plt); 40 (Militia co); 28 (Motor Rifle plt); 16 (Tank plt); 16 Engineer plt); 19 (BRDM plt); 95 (Motor Rifle co).
China: 20 (Infantry plt); 50 (Infantry co); 10 (Tank plt); 20 (Tank co); 14 (Engineer plt); 45 (Engineer co); 25 (Flamethrower plt); 6 (Light Machinegun plt); 10 (Heavy Machinegun plt); 17 (Machinegun co); 8 (Recoilless Rifle plt); 8 (Assault Gun co); 290 (Battalion).
63.2 BASIC GAME (Continued)
[63.21] River Fordability
Yes
[63.22] Bridge Status
Not applicable
[63.23] Observation Posts/Spotters
Vietnam
Spotters: 7
Observation Posts: 5
China
Spotters: 9 (1 with each infantry plt)
Observation Posts: None
[63.24] Telephone
Vietnam control in 5E5.
[63.25] Reinforcements
The Vietnamese player receives Motor Rifle Platoon Game-Turn 15 and another one Game-Turn 30, both belonging to the same company as the setup platoon, at any map-edge hexes between 1F5 and 0I1.
The Chinese player receives reinforcements as follows:
GT 3: 1 truck, 1 infantry platoon, company commander
GT 4: 1 truck, 1 infantry platoon
GT 5: 1 truck, 1 light MG platoon
GT 6: 1 truck, 1 infantry platoon (2nd company)
GT 7: 1 truck, 1 infantry platoon (2nd company)
GT 9: 1 truck, 1 infantry platoon (2nd company)
GT 10: 1 jeep (carries Battalion commander), 1 dozer, 1 FO
GT 11: 1 truck, Battalion Recoilless Rifle platoon
GT 12: 1 tank platoon, tank company commander
GT 14: 2 trucks, engineer platoon, engineer company commander
GT 15: 1 dozer
GT 16: 1 truck, heavy MG platoon, MG company commander, 1 FO
GT 18: 1 assault gun company
GT 20: 1 truck, 1 flamethrower platoon
GT 22: 2 trucks, engineer platoon
GT 24: 1 MTU55 (AVLB)
GT 27: 1 truck, 1 infantry platoon (3rd company)
GT 30: 1 tank platoon
GT 33: 1 truck, 1 infantry platoon (3rd company), company commander
GT 36: 1 truck, 1 infantry platoon (3rd company)
Notes: use M113 counters for trucks. Chinese reinforcements arrive megahex N. Troops arrive mounted or three Game-Turns later: dismounted.
[63.26] Victory Conditions
The Vietnamese receive 10 Victory Points for each enemy platoon which is demoralized, and 2 Victory Points for each Game-Turn in which no undemoralized Chinese platoon has exited the map from megahex row A.
The Chinese receive 10 Victory Points for each enemy platoon which is demoralized, and 10 Victory Points for each undemoralized Chinese platoon which exits the map from megahex row A (1A5 to 0A6). In addition, the Chinese receive 50 Victory Points for clearing a street route from megahex row A to megahex row N, such that no enemy combat units are in position to fire on the hexes constituting that route; if this is done by Game-Turn 40, this is worth 75 Victory Points; if this is done by Game-Turn 20, this is worth 100 Victory Points. The Chinese also receive 5 Victory Points for each unit removed from the map under Case 63.91 and not exited southward.
[63.27] Structural Changes
All concrete buildings on the map are stone; all stone buildings are wood.
63.3 INTERMEDIATE GAME
[63.31] Anti-Tank Weapons
The North Vietnamese have 3 SPG9 MAWS at setup.
[63.32] Tank Organization
Vietnamese tanks may be attached to MR platoons during the command decision stage of any Game-Turn by the Vietnamese player, but if this is done, they may not be reformed into a tank platoon.
[63.33] Flame Weapons
Not applicable
[63.34] Independent Command
Not applicable
[63.35] Snipers
Eight ad-hoc snipers are attached to the Vietnamese militia company.
[63.36] Vehicle Smoke Depletion
Not applicable
63.4 INTERMEDIATE GAME PHYSICAL ENVIRONMENT
[63.41] Day/Night
Scenario takes place during the day.
[63.42] Weather
Good; Smoke Dispersion, 4 Game-Turns.
[63.43] Building Damage
Not applicable
[63.44] Conflagrations
Not applicable :
63.5 ADVANCED GAME
[63.51] Wind Direction
2 :
[63.52] Dozer Tanks and Mine-Clearing Plows Not applicable
[63.53] Height Levels
All two-floor buildings on the map are 1-floor, all 3 and 4-floor buildings on the map are 2-floor, all higher buildings on the map are 3-floor. In addition, there is no tower in hex 4G2 (the former Buddhist Temple); it is the same height as the other hexes of that building.
63.6 INDIRECT FIRE UNITS
[63.61] Pre-Plotting
Vietnam: No
China: Yes
[63.62] Opening Barrage
Vietnam: No
China: 3...15 Game-Turns, as agreed
[63.63] Forward Observers Not in TO&E through
[63.65] Indirect Fire Reference Data
The Vietnamese have 2 sections of 82mm mortars. The Chinese have organic mortars, all of which are effective from the beginning of the scenario; regimental 82mm mortars (4 sections); and, from division, two sections of 120mm mortars, two platoons of 122mm guns; two platoons of 100mm guns, and two platoons of 107mm MRL.
63.7 ENGINEERS AND RELATED ITEMS
[63.71] Engineer Units through
[63.73] Breeches
Not applicable
[63.74] ‘Obstacles
Vietnam: 5 (not in street hexes)
China: None
[63.75] Mines
Vietnam: 10 (real); 10 (dummy) (none in street hexes)
China: None
[63.76] Ditches and Craters
Vietnam: 10 ditches (not in street hexes)
Chima: None
[63.77] Demolition
Vietnamese have prepared 3 street hexes for demolition.
63.8 OTHER ADVANCED GAME INFORMATION
[63.81] Building Status
Not applicable
[63.82] Ammo Stores
The Vietnamese may set up ammo store.
[63.83] Prepared Positions
Vietnam: 100squad-hours
China: None
[63.84] Rules of Engagement
The Vietnamese player may not fire building damaging weapons against a building hex unless an Enemy unit has been observed there. The Medical Clinic (7F3) and the Fire Department (8C7) are off-limits to both sides.
63.9 SPECIAL RULES
[63.91] Vietnamese border guard units (non-militia) must be removed from the map if not exited southward (megahex row “A”) within 10 Game-Turns after their platoons are demoralized. Militia units may remain.
[63.92] Only concrete (stone in this scenario; see 63.27) buildings have cellars.
Historical note: We have it on good authority that when Deng Xiaoping’s troops crossed the border, militiamen rang the town’s bell to alert the townsmen. This prompted many curses. Said Tram Van Huong, who was standing in the fields a few kilometers away: “Listen! There goes the damn Deng Dong Dang ding-dong!”
64.0 BAADER-MEINHOF (Advanced Game)
CASES:
64.1 THE BASIC GAME
[64.11] General Introduction
Revolutionary urban guerrilla activity, symbolized by such groups as the Baader-Meinhof organization in Germany, the Brigate Rosse, in Italy, the Irish Republican Army in Ulster, and the Weather Underground in the United States, has become a prominent element of life in the developed
Western world. In this scenario, Gerlafingen is chosen for a strike by the Baader-Meinhof unit.
[64.12] Map
No change
[64.13] Time
This scenario is played until all revolutionaries have exited the map or have been killed, or Game-Turn 50, whichever is sooner.
[64.14] Set-Up Forces
The Gerlafingen police force is set up as described in case 57,14, using NATO counters.
The Baader-Meinhof “platoon’” consists of a platoon leader, a platoon sergeant, 5 sapper teams (use West German sapper ratings), 5 snipers (use West German sniper ratings), 5 two-man fire teams (use same ratings as the police), 8 cars, and 1 bipod MG team (use West German ratings). These units are set up anywhere on the map other than in a school, town hall, police station, or armory. Use Soviet counters.
[64.15] Advantage
Baader-Meinhof has the advantage.
[64.16] Leader Rating Ranges
Baader-Meinhof
Co Cdr: Not applicable
Plt Ldr: 5...9
Plt Sgt: 4...5
Government
Co Cdr: Not applicable
Plt Ldr: No change
Plt Sgt: No change
[64.17] Ammunition Recovery Ratings
Baader-Meinhof: 4
Government: 2
[64.18] Suppression Recovery Ratings
Baader-Meinhof: 6
Government: 1
[64.19] Preservation Levels
Baader-Meinhof: Not applicable
Government: 7 (Police); 12 (Soldiers)
64.2 BASIC GAME (continued)
[64.21] River Fordability
The Eiche may be swum by personnel units, but only at the cost of giving up their ability to fire from that point on.
[64.22] Bridge Status
Not applicable
[64.23] Observation Posts/Spotters
Baader-Meinhof
Spotters: 12 (also use FO counters as Spotters)
Observation Posts: None
Government
Spotters: 12 (also use FO counters as Spotters)
Observation Posts: None
[64.24] Telephone
Government controls in 5E5.
[64.25] Reinforcements
The police force is reinforced by a Jaeger Home Defense platoon in megahex 8E on Game-Turn 30. This platoon, being reservists, has an ammo rating of 2. Their vehicles are M113s, their LAWs are PZf44.
[64.26] Victory Conditions
The government receives 20 Victory Points for each revolutionary killed or surrendered and 25 Victory Points for each of the leaders.
The Revolutionaries receive 20 Victory Points for each sapper unit which exits the map after performing at least one deed, 8 Victory Points for each other revolutionary who exits the map after 5 or more deeds are performed by the whole group, 3 Victory Points for each policeman Killed, and 1 Victory Point for each soldier killed. Deed Victory Points are as follows:
| Blowing up | Victory Points |
|---|---|
| a factory hex | 10 (once) |
| Kaiser-Wilhelm-Bruecke | 30 |
| Freiherrn Bruecke, Die Neubruecke, or the railroad bridge | 20 |
| Hotel Gerlafingen | 20 |
| Paulus-Kirche | 10 |
| a Schloss hex | 40 (once) |
| a school hex | 30 (once per school) |
| the Kommerzbank | 40 |
| a shopping center hex | 10 (once) |
| the Postamt | 30 |
| a Bahnhof hex | 30 (once) |
| a Neues Rathaus hex |
[64.27] Structural Changes
Not applicable
64.3 INTERMEDIATE GAME
Not applicable
64.4 INTERMEDIATE GAME PHYSICAL ENVIRONMENT
[64.41] Day/Night
Scenario takes place during the night. No units are
STANO-equipped.
[64.42] Weather
Rain, no mud; Smoke Dispersion, 15 Game-
Turns, M113s are amphibious.
[64.43] Building Damage
Not applicable
[64.44] Conflagrations
Not applicable
64.5 ADVANCED GAME through
64.7 ENGINEERS AND RELATED ITEMS
Not applicable
64.8 OTHER ADVANCED GAME INFORMATION
[64.81] Building Status
Not applicable
[64.82] Tank Organization
Not applicable
[64.83] Prepared Positions
Not applicable
[64.84] Rules of Engagement
Government weapons may not be fired against building hexes unless revolutionaries have been spotted in them during that Game-Turn. Government units may not fire at the medical clinic (7F3), theater (7M-8M), Schloss (7J), Beer Hall (5F6), or the Old Folks Home (9D1).
64.9 SPECIAL RULES
[64.91] Cases 57.93 and 57.92 also apply to this scenario.
[64.92] All objectives listed in the Deed list of case 64.26 are considered wired for demolition. When sapper-destroyed, they catch on fire. (these buildings may only be destroyed, not demolished, by sapper action). Whenever a building is blown up, the government player is immediately so informed. Any units in a building hex when it is blown up are killed immediately.
[64.93] Any revolutionaries left on the map at the end of the game are considered surrendered.
[64.94] No. revolutionary unit may enter the Bundeswehr building until the Jaeger platoon has entered the game.
65.0 LONDON’S BURNING (Advanced)
CASES:
65.1 THE BASIC GAME
[65.11] General Introduction
This scenario is a riot. It all starts off with a big mob at a punk rock concert in the Hammerscythe Palace, fired up by one of the better groups, and sent out into the world with the urge to burn...
It is the punks’ objective to burn, loot, and pillage. It is the police objective to contain the mayhem. It is the players’ objective to have fun.
[65.12] Map
No Change (65.13] Time
The game ends on the 90th game-turn, or when all the kids have been rounded up, whichever occurs sooner. :
[65.14] Set-Up Forces
The police, using the Soviet countermix, set up a local “platoon” of 4-man fireteams (using squad counters) and police cars (use BMP counters) as follows: 3 of each in 2D, one of each in: 4B, 5G, 9I, 8C, 8M, 7M (all in open hexes except 2D2). Each team is armed with clubs; these may only be used in close assault, and have a soft strength of 5. Also in 2D2: one company commander, one platoon leader, two platoon sergeants.
The punks, using the NATO countermix, set up: 1 All the leaders in the NATO countermix
-
15 cars (use M113 counters)
-
12ad hoc snipers (use USA values)
-
118 4-man teams (use all fireteam and sapper counters). These teams are variously armed, they may be used in close assault only, and have a soft strength of 3.
These units are set up in megahexes 7M, 8M, 6N, 7N. All have independent command, but can be unsuppressed by using any leader stacked with or adjacent to them. Disregard stacking limits in setting up punk units; outside the set-up area see 65.96.
[65.15] Advantage
Punks have the advantage.
[65.16] Leader Rating Ranges
Punks
See Case 65.14.
Police
Co. Cdr: No change
Plt Ldr: No change
Plt Sgt: No change
[65.17] Ammunition Recovery Ratings
Punks: Not applicable
Police: 4
[65.18] Suppression Recovery Ratings
Punks: 2
Police: 4
[65.19] Preservation Levels
Punks: 8 (Snipers); 350 (Teams) Punk leaders are not affected by demoralization and do not count for Preservation Points. The 12 Snipers and 118 Teams count as separate “platoons’” for Preservation only.
Police: Not applicable.
65.2 BASIC GAME (continued)
[65.21] River Fordability
Yes
[65.22] Bridge Status
Not applicable
[65.23] Observation Posts/Spotters
Punks
Spotters: None
Observation Posts: 7M1, 7M2, 8M5, 8M6
P olice
Spotters: 12 (also use FO counters as Spotters
Observation Posts: all named buildings (except theatre in punk set-up area).
[65.24] Telephone
Police controlin 5E5.
[65.25] Reinforcements
Police reinforcements enter in platoons; each platoon has 4 cars and 4 x 4-man fireteams, with one platoon leader. All police platoons belong to one police company.
Game-Turn 15: 1 platoon, north map-edge
Game-Turn 30: 1 platoon, east map-edge
Game-Turn 35: 1 platoon, south map-edge
Game-Turn 38: 1 platoon, west map-edge
Game-Turn 45: 1 platoon, north map-edge
Game-Turn 60: 1 platoon, random
Game-Turn 70: 1 platoon, random
Game-Turn 80: 1 platoon, random
Random reinforcements arrive as follows: the police player rolls one die. On a 1, north map-edge; on a 2, east map-edge; on a 3, west map-edge; on a 4, south map-edge; on a 5 or 6, roll again. This roll is made when the reinforcements are due.
Also, the fire department turns out in megahex 8C three game-turns after the first fire is set. This consists of three firetrucks (use tank counters), each with a squad of 8 firemen, a platoon leader, anda platoon sergeant. Each firetruck has a transport capacity of 10 men.
[65.26] Victory Conditions
The police player receives Victory Points as follows:
20 Victory Points for each sniper killed or captured (see 65.94)
2 Victory Points for each team captured
Triple the leader rating in Victory Points for each leader captured.
The Punk Player receives Victory Points as follows:
5 Victory Points for each police team put out of action
Victory Points for fires:
| Fire location | Victory Points |
|---|---|
| any hex of The Manor House (7J-8K) | 10 (whole house: 50) |
| The New Church (7F7) | 10 |
| Bank of Commerce (8F2) | 15 |
| any hex of the New Shopping Centre (8D2-9G1) | 5 |
| any school hex (2F7, 6E1-6D1) | 40 (whole school 6D-6E: 200) |
| any factory hex | 30 |
| Old Town Hall (5F4) | 30 |
| Hotel hex (5H2, 3D1, 3D2) | 5 |
| St. Anne’s Church, any hex | 15 (whole church: 50) |
| Post office (5E5) | 20 |
| RR station, any hex | 10 |
Victory Points for fires are counted up at the end of the game. If the fire department puts out a fire, only one-third the victory points (fractions rounded up) are awarded.
[65.27] Structural Changes
Not applicable
65.3 INTERMEDIATE GAME
Not applicable
65.4 INTERMEDIATE GAME PHYSICAL ENVIRONMENT
[65.41] Day/Night
Scenario takes place in the night. No units are STANO-equipped.
[65.42] Weather
Fog; Smoke Dispersion not applicable.
[65.43] Building Damage
Not applicable
[65.44] Conflagrations
Not applicable
65.5 ADVANCED GAME
Not applicable
65.6 INDIRECT FIRE UNITS
Not applicable
65.7 ENGINEERS AND RELATED ITEMS
[65.71] Engineer Units through
[65.73] Breaches
Not applicable
[65.74] Obstacles
Punk units may build barricades (obstacles) in hexes containing or adjacent to a non-burning building, being given work commands for this purpose. It takes 15 men 15 game-turns to construct a barricade, 30 men 8 game-turns, etc. Police units may do likewise, though it takes them twice as long since most of them are no longer in good shape.
[65.75] Mines through
[65.77] Demolition
Not applicable
65.8 OTHER ADVANCED GAME INFORMATION
[65.81] Building Status through
[65.83] Prepared Positions
Not applicable
[65.84] Rules of Engagement
Police units may not use firearms (65. 93) against anyone but a sniper or a unit stacked with a sniper in the same location. The Old Folks Home (9D1) and Medical Clinic (7FA3) are off-limits to both sides. 7
65.9 SPECIAL RULES
[65.91] A firetruck may extinguish a fire in any hex occupied by or adjacent to it by spending a number of game-turns equal to the following formula: (x) x (y) X (z) = GT, whereby x = number of floors in the building, y=1 for stone, 2 for concrete, and 4 for wood, and z= the sum of two dice. This is determined when firefighting begins. Once begun, a firefighting effort may not be abandoned, or it will all have been in vain, until the requisite number of Game-Turns has passed. For every 10 building hexes burning at the end of a Game-Turn divisible by 10 evenly, one firetruck and squad arrives at a random map-edge (see 65.25) 8 Game-Turns later. See 65.99 for hoses.
[65.92] Vehicles may not occupy a hex containing 8 or more men whose presence is known to the owner of the vehicle,
[65.93] Any police unit in the set-up deployment may become armed by spending 5 Game-Turns in the police station (2D2); this may only be done after sniper fire has begun. Any armed police team may fire with a strength of 8 at a range of 1-20 hexes. Reinforcement police units may also come in armed, once sniper fire has commenced, but only if delayed by 15 Game-Turns. Note: if any sniper is captured prior to the initiation of sniper fire, the arming of the police may begin no later than 15 Game-Turns later.
[65.94] A K result against a unit, if not produced by sniper fire, indicates arrest (capture), being injured, knocked out, etc.
[65.95] Punk units stacked with leaders only may perform anti-vehicle close assault; all police units may do so.
[65.96] Stacking limits are 20 men per open hex for punks; normal for police.
[65.97] Any punk unit which is in a building or woods hex may attempt to set fire to that hex. This is a fire action. This is done by rolling one die and consulting the flamethrower table (Case 22.4). If successful, a “burning” marker is placed on the hex.
[65.98] Any police unit which has been in 2D2 may fire tear gas grenades at a I-hex range. These grenades attack with a soft strength of 5, whereby all K results are converted to Suppression.
[65.99] Firemen may attempt to turn fire hoses on the punks instead of the fires.. This may be done at a 1 or 2-hex range; the punks are attacked with a soft strength of 4, whereby all K results are converted to Suppression; the firetruck must-remain stationary for 5 game-turns prior to and must remain stationary during the use of the hose weapon. Any firetruck which has used the hose is subject to capture as long as it remains on the spot (having used the hose, it takes another 5 Game-Turns to uncouple before the truck may be moved). Capture is made whenever the punk player has units in the hex with the firetruck and the government player does not (this may be claimed and tested at any time by the punk player). Once captured, the truck becomes part of the punks’ TO&E and may be used by the punk player, including the hose weapon.
66.0 GYOR, HUNGARY (Advanced Game)
CASES:
66.1 THE BASIC GAME
[66.11] General Introduction
The Hungarian Revolt of 1956 forced the Soviets to pull out of the country, and for a week the people were jubilant. The Soviets, however, were merely gathering their forces, and on October 31 came pouring back across the border in great strength and began shooting November 4. The Hungarians fought bravely, but could not hold off the Soviet tanks indefinitely. While the Hungarians delayed the Soviet re-conquest of their country, 200,000 Hungarians were given time to escape to Austria. Resistance ended November 9.
This scenario is set at Gyor, a provincial capital 45 kilometers from the Austrian border. This city, a center of the Hungarian revolt, was a key chokepoint for the Soviets seeking to seal off the border, for all the main roads from the east converged here, crossed the Raba River, and then fanned out to a 120 kilometer-long stretch of the. AustrianHungarian border.
The objective of the Soviet Player is to secure a safe route across the Raba River and exit toward the border as soon as possible.
The objective of the Hungarian player is to hold the bridges as long as possible, then delay the exit of the Soviet forces; for every minute of delay, hundreds will escape to the West.
[66.12] Map
The river is the Raba. The main road from Budapest to Wien (Vienna), today called Route ES, enters at 7A6, follows the map’s route la to the intersection with the map’s route 298, then follows that route to exit at 1F5. There is no bridge at 4B3-5B5, and nostreet from 4B3 to7A5.
[66.13] Time
The game ends when all undemoralized Soviet platoons (including reinforcements) have exited the map and the truck movement required by Case 66.26 has been completed or aborted.
[66.14] Set-up Forces
The Hungarian player, using the NATO countermix, sets up one tank platoon and a motor rifle company, as described in Case 59.25; the tank platoon is attached to the company; also an irregular force of 12 ad hoc snipers, 4 trucks, and 36 4-man fireteams without MG (soft attack strength: 4). The fireteams are organized into platoons of 6 teams each, complete with platoon leader and sergeant; the trucks and snipers have independent command; the whole irregular force constitutes a company, with company commander.
The Hungarians may set up anywhere but in megahexes 6A, 7A, 6B, 8A, 9A, 0A, 9B, 9H, 0I, 8N and hex 9M5.
The Soviet Player sets up a tank company and a motor rifle company, as described in Case 59.14. There are three Soviet set-up areas, and no company may be set up (or enter as reinforcements) at more than one set-up area. The set-up areas are: (a) megahexes 6A, 7A, 8A, 9A, 0A; (b) megahexes 0G, 9H, 0I; (c) megahex 8N.
[66.15] Advantage
Hungarian Player has the advantage
[66.16] Leader Rating Ranges
Hungarian
Co Cdr: No change
Plt Ldr: No change
Plt Sgt: No change
U.S.S.R.
Co Cdr: No change
Plt Ldr: No change
Plt Sgt: No change
[66.17] Ammunition Recovery Ratings
Hungarian: 2
U.S.S.R: 2
[66.18] Suppression Recovery Ratings
Hungarian: 6
U.S.S.R.: 1.
[66.19] Preservation Levels
Hungarian: Not applicable
U.S.S.R.: 8 (Tank plt); 25 (Tank co); 75 (Tank bn); 10 (Motor Rifle plt); 40 (Motor Rifle Co); 10 (Engineer plt)
66.2 BASIC GAME (continued)
[66.21] River Fordability
No
[66.22] Bridge Status
Bridge at 6L3-7L5 is destroyed.
[66.23] Observation Posts/Spotters
Hungarian
Spotters: 12 (also use FO counters as Spotters)
Observation Posts: 15
U.S.S.R.
Spotters: None
Observation Posts: None
[66.24] Telephone
Hungarian controlin 5E5.
[66.25] Reinforcements
The Soviets receive a second motor rifle company on Game-Turn 10 and a third one on Game-Turn 30. A combat engineer platoon (from division) enters Game-Turn 15, together with a BTR-50. An MTU-55 enters Game-Turn 20. Tank platoons which have been demoralized may be removed from the map at the end of any Game-Turn by the
Soviet player and brought: on as reinforcements the next Game-Turn, until in this manner a battalion of 3 companies has been brought on. Exited platoons may also be recycled. However, no tank company may begin appearing in any given reinforcement area (see 66.14) until 3 Game-Turns after the last vehicle of the previous company has appeared there.
[66.26] Victory Conditions
The Soviet Player receives Victory Points for exiting an undemoralized platoon from megahex 1F or 1G or 1M, as follows:
by Game-Turn 15: 20 Victory Points
by Game-Turn 25: 15 Victory Points
by Game-Turn 35: 10 Victory Points
by Game-Turn 50: 7 Victory Points
by Game-Turn 75: 5 Victory Points
by Game-Turn 100: 3 Victory Points
The Soviet Player also receives 100 Victory Points for moving a truck from 7A6 to 1F5 via the Budapest-Wien road (see Case 66.12), without leaving the road. The location of this truck is always known to the Hungarian Player; it always has a Cautious Movement command and always moves as fast as permitted by the rules.
The Hungarian Player receives 7 Victory Points for each tank which is either killed, KM, or KF; 5 Victory Points for each BTR-50 which is either killed or KM.
[66.27] Structural Changes
Not applicable
66.3 INTERMEDIATE GAME
[66.31] Anti-tank weapons
The Hungarian irregular company is equipped with 15x RPG2; the motor rifle company is also equipped with 3x 82mm recoilless ‘rifle MAWs.
[66.32] Tank Organization through
[66.36] Vehicle Smoke Depletion
Not applicable
66.4 INTERMEDIATE GAME PHYSICAL ENVIRONMENT
[66.41] Day/Night
Scenario takes place in the day.
[66.42] Weather
Good; Smoke Dispersion, 5 Game-Turns.
[66.43] Building Damage
Not applicable
[66.44] Conflagrations
Not applicable
66.5 ADVANCED GAME
[66.51] Wind Direction
[66.52] Dozer Tanks and Mine-Clearing Plows In each Soviet tank company, 2 tanks are dozer-blade-equipped; these must be designated when the company is set up or brought on.
[66.53] Height Levels
Not applicable
66.6 INDIRECT FIRE UNITS
Not applicable
[66.7ENGINEERS AND
RELATED ITEMS
[66.71] Engineer Units
Not applicable
[66.72] Boobytraps
Hungarian: 20
U.S.S.R.: None
[66.73] Breaches
Not applicable
[66.74] Obstacles
Hungarian: 10
U.S.S.R.: None
[66.75] Mines
Not applicable
[66.76] Ditches and Craters
Hungarian: 5 ditches
U.S.S.R.: None
[66.77] Demolition
Not applicable
66.8 OTHER ADVANCED GAME INFORMATION
[66.81] Building Status
Not applicable
[66.82] Ammo Stores
Hungarians may set up one ammostore.
[66.83] Prepared Positions
Hungarian: 10 squad-hours
U.S.S.R.: None
[66.84] Rules of Engagement
Hungarian units may not fire hard (building-damaging) weapons against building hexes unless an enemy has been spotted there in that or the preceding Game-Turn.
66.9 SPECIAL RULES
[66.91] Soviet vehicles may not use Bold Movement commands to enter any hex which is in a megahex with a printed search rating of 30 or more.
[66.92] Main gun elevation on the T-44 and T-34 is 15 degrees.
67.0 ESTELI, NICARAGUA: SANDINISTA GUERRILLAS vs. SOMOZA’S ARMY (Advanced Game)
CASES:
67.1 THE BASIC GAME
[67.11] General Information.
The second battle for the Nicaraguan city of Esteli (pop. 35,000) took place from April 9 to 15, 1979. Guerrillas of the Sandinista National Liberation Front seized the city, overcoming a 100-man garrison, on April 5, and immediately proceeded to set up its defenses. Esteli was to become the symbol of the second wave of uprisings against Nicaraguan strongman Anastasio Somoza and his Army, called the National Guard; it had been the scene of the bloodiest fighting of the first wave (September 1978). The Sandinista objective was to hold out long enough to gain world attention, humiliate the National Guard, and thus begin the second-wave offensive with a political and psychological victory. The National Guard’s objective was to crush the uprising as soon as possible, thus discouraging the Nicaraguan populace from lending further support to the Sandinista rebels. It is Good Friday, April 13, 1979.
Note: this scenario takes a long time to complete.
[67.12] Map
The river is the south branch of the Coco River. Route 1A is the Pan-American Highway. The building in 8E is a National Guard barracks.
[67.13] Time
The game continues until one Player accumulates 100 Victory Points.
[67.14] Set-up Forces
Sandinista forces, using the Soviet countermix, set up in megahex rows A through I, but not in 8E. Set up are two companies, each: consisting of three platoons. Each platoon has five 6-man fireteams (use squad counters), one trained sniper (use SVD snipers counters), a platoon leader and one platoon sergeant. Each company also has two tripod MG teams, a company commander, a sapper platoon of 5 sapper units, platoon leader and platoon sergeant, and four trucks (use BRDM counters). Having independent command are: 8 ad hoc snipers.
Soft strength ratings for the Sandinistas are as follows: Fireteam: (1 RPK MG, 5 AKMs) A, G 10 (0-18 hexes), 5 (19+ hexes); trained sniper (SVD) 15 tripod MG (PK) 7 (0-10 hexes), 6 (11-24 hexes), 5 (25+ hexes); sapper (2 AKM) A 4, maximum range: 18 hexes normal, 12 hexes automatic ad hoc sniper (AKM) 4, max range: 18 hexes
National Guard forces, using the NATO countermix, set up in megahex rows K through N and also in megahexes 3J and 7J. The National Guard is organized along U.S. lines, so references are to U.S.A. TO&E and strengths, as herein modified.
A National Guard infantry platoon has three 4-man fireteams with MG, three 4-man fireteams without MG, 2 tripod MG, a Platoon Leader, a Platoon Sergeant, and I armored car (use scout counter; turret MG with soft strength of 7, transport capacity 5, non-amphibious, non-smoke). An infantry company has 3 infantry platoons, company commander, 1 jeep, 1 truck, and 1 FO. Battalion has 3 infantry companies and 1 jeep. This battalion is set up. Also attached to the battalion is one tank platoon of 5 M4 tanks (main gun hard strength of 8, .50 turret MG soft strength of 7, .30 coaxial MG soft strength of 4), a platoon leader; and one engineer platoon of 3 dozers, 10 sapper teams, a platoon leader, anda platoon sergeant.
In addition to the above, in megahex 8E is set up: 2 infantry platoons without armored cars, organized into a company with a company commander.
[67.15] Advantage
Sandinistas have the advantage.
[67.16] Leader Rating Ranges
Sandinistas
Co Cdr: 9...10
Plt Ldr: 5...9
Plt Sgt: 2...5
National Guard
Co Cdr: 6...9
Plt Ldr: 2...6
Plt Sgt: 1...4
[67.17] Ammunition Recovery Ratings
Sandinistas: 2
National Guard: 4
[67.18] Suppression Recovery Ratings
Sandinistas: 5
National Guard: 1
[67.19] Preservation Levels
Sandinistas: 15 (plt); 60 (co); 4 (Sapper plt)
National Guard: 10 (plt); 30 (co); 90 (bn)
67.2 BASIC GAME (Continued)
[67.21] River Fordability
No
[67.22] Bridge Status
Not applicable
[67.23] Observation Posts/Spotters
Sandinistas
Spotters: 14 (also use FO counters for Spotters)
Observation Posts: 25
National Guard
Spotters: None
Observation Posts: None
[67.24] Telephone
Sandinistas control in 5E5.
[67.25] Reinforcements
Any time a National Guard infantry company is demoralized, it may be removed from the map and brought in as a reinforcement infantry company (at full strength) in the N megahex row. This may be done a total of twice for each company. The company set up in 8E may not, however, be replaced.
[67.26] Victory Conditions
The Sandinista win 10 Victory Points each time a National Guard company is demoralized, 5 Victory Points for each enemy company commander killed, 2 Victory Points for each enemy platoon leader killed, 1 Victory Point each time the National Guard fires at civilians, and 1/2 Victory Point for each Game-Turn played to conclusion. The Somoza Player wins 100 Victory Points by clearing the map of all Sandinista combat units. Each player must keep track of the other player’s Victory Points and inform him when the 100 level is reached.
[67.27] Structural Changes
All stone buildings on the map are wood.
67.3 INTERMEDIATE GAME
[67.31] Anti-tank Weapons
Each Sandinista company has 3 RPG7 LAWs.
[67.32] Tank Organization through
[67.36] Vehicle Smoke Depletion
Not applicable
67.4 INTERMEDIATE GAME PHYSICAL ENVIRONMENT :
[67.41] Day/Night
Scenario takes place in.day.
[67.42] Weather ;
Good; Smoke Dispersion, 10 Game-Turns.
[67.43] Building Damage
Not applicable
[67.44] Conflagrations :
Not applicable ; 7
67.5 ADVANCED GAME
Not applicable
67.6 INDIRECT FIRE UNITS
[67.61] Pre-Plotting
Sandinistas: Yes
National Guard: Yes
[67.62] Opening Barrage
Sandinistas: No
National Guard: No
[67.63] Forward Observers Not in TO&E
Sandinistas: 2
National Guard: None
[67.64] Dedicated Batteries
Sandinistas: 2 sections, 82mm mortar
National Guard: 6 tubes, 81mm mortar
[67.65] Indirect Fire Reference Data
National Guard has 2 x 105mm SP guns, used in a direct fire role (use UK values).
67.7 ENGINEERS AND RELATED ITEMS
[67.71] Engineer Units
Not applicable
[67.72] Boobytraps
Sandinistas: 30
National Guard: None
[67.73] Breaches
Not applicable
[67.74] Obstacles
Sandinistas: 30
National Guard: 5 (megahex rows K through M)
[67.75] Mines
Sandinistas: 4 (real); 6 (dummy)
National Guard: None
[67.76] Ditches and Craters
Sandinistas: 20 ditches
National Guard: Craters in any open hexes (must be announced before mines are placed)
[67.77] Demolition
New Town Hall (2D) and police station (2D2) are prepared for demolition.
67.8 OTHER ADVANCED GAME INFORMATION
[67.81] Building Status
The National Guard Player may destroy any 5 building hexes and damage any additional 5 building hexes before the players set up. (Note: this is from previous air strikes).
[67.82] Ammo Stores
National Guard Player sets up ammo store in megahex rows K through M and another ammo store in megahex 8E.
Sandinista Player sets up 1 ammo store in his setup area.
[67.83] Prepared Positions
Sandinistas: 100 squad-hours
National Guard: None
[67.84] Rules of Engagement
The Sandinista Player may not fire building-damaging weapons at buildings unless an enemy unit has been observed there. The Medical Clinic (7F3) and Old Folks Home (9D1) are off-limits to him unless enemy units are observed in them, and even then may not be targets of building-damaging weapons. The Sandinista Player may not fire at civilians. There are no rules of engagement for the National Guard Player.
67.9 SPECIAL RULES
[67.91] The Sandinista Player sets up and controls 20 “civilian units’ of 9 men each, using any available unused counters or markers. Civilians may only perform movement actions, and may only be given cautious or bold commands; they do not expend Action Points and cannot recover from suppression without leaders; their location is always known to both players. These units count against stacking limits for both players, as long as they are alive. A vehicle may not enter a hex containing a civilian unit which is still alive.
[67.92] Any Sandinista organization (platoon or company) which is demoralized is removed from the map 10 Game-Turns later.
[67.93] Each Game-Turn, at least one Sandinista combat unit must make its presence known, either by being spotted, or by firing, or declaring its position. (This enables the National Guard to hunt down the ad hoc snipers who remain in Esteli after the regular Sandinista forces havewithdrawn to the north).
Historical note: The Sandinistas were to hold out for a week in the second battle of Esteli against everything the National Guard could throw at them. Then they withdrew, having touched off a wave of revolution that was to lead them back into Esteli in mid-June for a full month of fighting and ultimate victory July 16. In the three battles of Esteli, most of the town was destroyed.
68.0 FALL OF LONG SON, VIETNAM (Advanced Game)
CASES:
68.1 THE BASIC GAME
[68.11] General Introduction
The provincial capital of Lang Son (pop. 46,000) sits at the junction of highways 1A and 4 astride the main route from China to Hanoi; it was a considerable industrial center with a major airfield just outside town. This city, whose civilian population had been evacuated, became the major focus of the Chinese-Vietnamese war in the winter of 1979. The battle for the immediate approaches to the town (which is 12 miles south of the Chinese border) began on February 21. About a week later, Chinese troops had reached the outskirts of the city. The city fell on March 4.
The People’s Liberation Army used six divisions in the battle; the Vietnamese supplemented their militia and border troops first with a regiment of regulars, then with the remainder of the division. According to the Vietnamese, the PLA suffered 7,000 casualties in the course of the battle.
This scenario depicts the final phase of the battle as it might have taken place in one part of the city. The Chinese objective is to clear the map of enemy units; the Vietnamese objective is to hold out as long as possible, while inflicting casualties on the
PLA. Note: this scenario takes a long time to complete.
[68.12] Map
Route 1A on the map is the Vietnamese Route 1A (a happy coincidence); route 298 on the map is the Vietnamese Route 4. The map is upside down, so that “N” is actually south. The airfield is off to the east. The river is the Ky Cuong.
[68.13] Time
The game ends when the Vietnamese no longer have any combat units left on the map, or have accumulated more than 500 Victory Points.
[68.14] Set-up Forces
The PLA sets up all or any part of an Infantry Battalion plus attached Flamethrower Platoon, Tank Company, Regimental Recoilless Rifle Platoon, Assault Gun Company, and Engineer Company, plus 2 MTU55s and 5 dozers (in addition to the one dozer in the TO&E) in the Engineer Company, in any map-edge megahex except 9B, 9D, 9F, 9H, 9J, 1H, 1D. Any units not set up may be brought on as reinforcements during any Game-Turn at a map-edge hex in one of the megahexes listed as setup areas. Use the NATO countermix.
The Vietnamese sets up a Motor Rifle Battalion, using the Soviet countermix, a Tank Company, and an Engineer Company (Regt). The battalion is equipped with M113 APCs (see USA for values; use BMP counters) instead of the BTR-60. The battalion has already lost its 3 BRDMs; in the Tank Company, the first platoon is down to 2 tanks, the second platoon has 3 tanks, and only 1 tank survives from third platoon. In the engineer company, there are no MTU55s, but there are 3 dozers. First engineer platoon is down to 4 sappers, second platoon to 3 sappers, third platoon is at 5 sappers. First motor rifle company has a 1st platoon which is down by one squad (and vehicle), a full-strength 2nd platoon, and a 3rd platoon which is down for some vehicle, one squad, one sniper, and one RPG7; company assets are intact. Second motor rifle company has full-strength 1st and 2nd platoons; 3rd platoon is minus one squad and has no vehicles left; company assets remain. Third company has 1st and 2nd platoons each minus one squad and two vehicles, 3rd platoon is down to one squad, no vehicles, but two RPG-7s. (all other platoons have one RPG-7 each). These units are set up in any megahex other than the‘ones in which the Chinese may set up.
[68.15] Advantage
Vietnam has the advantage
[68.16] Leader Rating Changes
Vietnam
All Vietnamese company commanders are rated 10, except one who is rated 12. Vietnamese platoon sergeants are rated 2 higher than the rating on the counter shows.
China
Co Cdr: 8...11
Plt Ldr: 4...8
Plt Sgt: 3...5
[68.17] Ammunition Recovery Ratings
Vietnam: 1
China: 2
[68.18] Suppression Recovery Ratings
Vietnam: 4
China: 1
[68.19] Preservation Levels
Vietnam: No Preservation Levels
China: 20 (Infantry plt); 50 (Infantry co); 10 (Tank plt); 20 (Tank co); 14 Engineer plt); 45 (Engineer co); 25 (Flamethrower plt); 6 (Light Machinegun plt); 10 (Heavy machinegun plt); 17 (Machinegun co); 8 (Recoilless Rifle plt); 8 (Assault Gun co); 290 (Battalion); 18 (Recoilless Rifle Regt plt).
68.2 BASIC GAME (continued)
[68.21] River Fordability
The river may be forded by leaders, spotters, sappers and fireteams without MGs under a Cautious Movement command.
[68.22] Bridge Status
All bridges are destroyed, except for the footbridge. However, makeshift bridges ‘(which will carry anything but a tank or APC) exist between 714 and 7J6 and between 5B4 and 5C2; also there is a footbridge between 7G5 and 6G3.
[68.23] Observation Posts/Spotters
Vietnam
Spotters: 15 (also use FO counters as Spotters)
Observation Posts: 15
China
Spotters: None
Observation Posts: None
[68.24] Telephone
Not applicable
[68.25] Reinforcements
The Chinese Player may remove any demoralized units from the map, one company at a time, and may bring in such a company as reinforcements at any open map-edge hex the next Game-Turn; such companies are elements of other battalions. This may be done any number of times.
[68.26] Victory Conditions
The Chinese Player receives 500 Victory Points for eliminating all enemy combat units.
The Vietnamese Player receives 25 Victory Points for each Chinese platoon which is demoralized, and 10 Victory Points for each Game-Turn after Game-Turn 90 in which he still has combat units onthe map.
[68.27] Structural Changes
The only concrete buildings are the factory and the New Town Hall. All other concrete buildings on the map are stone. All l-story stone buildings on the map are wood.
68.3 INTERMEDIATE GAME
[68.31] Anti-tank Weapons
The Vietnamese have an additional 4x SPG9 MAW.
[68.32] Tank Organization through
[68.35] Snipers
No change
[68.36] Vehicle Smoke Depletion
Vietnamese vehicles have 5 Game-Turns’ worth of smoke remaining; Chinese tanks have full smoke.
68.4 INTERMEDIATE GAME PHYSICAL ENVIRONMENT
[68.41] Day/Night
Scenario takes place in the day.
[68.42] Weather
Good; Smoke Dispersion, 6 Game-Turns. Vietnamese M113 is amphibious.
[68.43] Building Damage
Before setting up, the players share the task of rolling for previous building destruction. Roll one die for each building on the map. If the roll is 1, the building hex has somehow survived the bombardment and is undamaged. On a 2 or 3, the building is damaged. On a 4 or 5, the building hex is destroyed. On a 6, the building hex is demolished.
Note: if the number rolled is a 4 or 6, roll again. If the second roll is even, apply rubble procedures (Case 37.4).
[68.44] Conflagrations
In executing the foregoing roll, if the number rolled is 5, roll again. If the resultant roll is even, place a ‘fire spreading” marker on the hex.
68.5 ADVANCED GAME
[68.51] Wind Direction
[68.52] Dozer Tanks and Mine-Clearing Plows Not applicable
[68.53] Height Levels
The former Buddhist temple running from 7J to 8K has no tower; hex 7J7 is the same height level as the rest of the War of Liberation Museum.
68.6 INDIRECT FIRE UNITS
The Chinese have mortars as noted in the standard TOE, and in addition, in general support: 2 sections 120mm mortar, 1 platoon of 122mm guns, platoon of 100mm guns, platoon 107mm MRL,
1 platoon 140mm MRL.
[68.61] Pre-Plotting
Vietnam: Not applicable
China: Yes
[68.62] Opening Barrage
Vietnam: Not applicable
China: Yes
[68.63] Forward Observers Not in TO&E
Not applicable
[68.64] Dedicated Batteries
Vietnam: Not applicable
China: 3 sections 82mm mortar
[68.65] Indirect Fire Reference Data
In addition, there is a dedicated battery of 3 sections of 82mm mortar. The Vietnamese have lost reliable radio communications with the remainder of their forces, hence have no indirect fire.
68.7 ENGINEERS AND RELATED ITEMS
[68.71] Engineer Units
No change
[68.72] Boobytraps
Vietnam: 30
China: None
[68.73] Breaches
Vietnam may create 50 or fewer Breaches in its setup area.
[68.74] Obstacles
Vietnam: 30
China: None
[68.75] Mines
Vietnam: 10 (real); 10 (dummy)
China: None
[68.76] Ditches and Craters
The Chinese Player suggests 30 sites for craters. The Vietnamese Player must choose 15 of these sites and place crater markers on those hexes before setting up; he chooses up to 10 more sites on his own.
68.8 OTHER ADVANCED GAME INFORMATION
[68.81] Building Status
See 68.43.
[68.82] Ammo Stores
The Vietnamese Player may set up two ammo stores; there are no organizational restrictions on their use.
[68.83] Prepared Positions
The Vietnamese Player may designate up to 50 building locations which have not already been destroyed or demolished (see Case 68.43) as prepared positions, within their set-up area.
[68.84] Rules of Engagement
As the hospital in hex 7F3 is full of Vietnamese wounded, the Vietnamese Player may not fire on it. The Chinese Player may not use direct fire on it. The hex is also off-limits to the forces of both players.
68.9 SPECIAL RULES
[68.91] In each Game-Turn, at least one Vietnamese unit must make its position known.
69.0 BERLIN-LICHTERFELDE (Advanced)
CASES:
69.1 THE BASIC GAME
[69.11] General Introduction
Fourth battalion, 6th Infantry is trying to hold the Teltow Canal in Lichterfelde, West Berlin, against the Soviet onslaught. Not 200 meters away is McNair Barracks and the Finckenstein Family Housing Area, where the American families are waiting. Three kilometers to the northwest lies the American Headquarters complex on the Clayallee. The orders to 4th battalion: hold the canal. Entrusted with the task is Alpha Company.
Note: This scenario takes a long time to play.
[69.12] Map
Route 298 on the map is actually Drake Strasse; Ludwigstrasse on the map is actually Hindenburgdamm; Bundesallee and Hindenburgallee on the map are actually Goertzallee; the river is actually the Teltowkanai, which caused the Soviets so many problems in 1945. McNair Barracks is to the west of megahex 1F.
[69.13] Time
The game ends when all American platoons have reached preservation level, cr the Soviet Assault Detachment has been demoralized, or Game-Turn 90, whichever occurs first.
[69.14] Set-Up Forces
The United States sets up one Berlin Garrison Rifle Company with battalion assets listed in the standard TO&E, plus one combat engineer platoon, with CEV and 2 dozers, in any megahex on the west side of the Teltowkanal.
Also set up by the U.S. Player is a platoon of West Berlin police, including a platoon leader, platoon sergeant, and six 4-man fireteams without MG (use U.S. values); also set up 12 ad hoc snipers (use U.S. values) with independent command.
The Soviet Union sets up one Assault Detachment with SP73s, an extra engineer company from division with 2x MTU-55, and 3x T-12s, 3 Flamethrower tanks, in any megahex on the east side of the canal. Soviets are equipped with the BTR-60 APC; tanks are T-62s.
[69.15] Advantage
U.S. Player has the advantage.
[69.16] Leader Rating Ranges
U.S.
Lt.Stuart commands one of the American platoons. Otherwise, no change in normal leader pool.
U.S.S.R.
Co Cdr: No change
Plt Ldr: No change
Plt Sgt: No change (69.17] Ammunition Recovery Ratings
U.S.:5
U.S.S.R.:3
[69.18] Supression Recovery Ratings
U.S.:5(U.S.); 6 (Police)
U.S.S.R.: 1
[69.19] Preservation Levels
U.S.: 40 (Combat Engineer plt); 40 (Rifle plt); 150 (Company); 21 (West Berlin Police)
U.S.S.R.: 18 (Divisional Engineer plt); 75 (Divisional Engineer co); 11 (Regimental Engineer plt); 40 (Regimental Engineer co); 8 (Tank plt); 45 (Tank co); 14 (Motor Rifle plt); 40 (Motor Rifle co); 330 (Assault Detachment)
69.2 BASIC GAME (Continued) :
[69.21] River Fordability
No
[69.22] Bridge Status :
All bridges over the canal are destroyed [69.23] Observation Posts/Spotters
USS. :
Spotters: 12
Observation Posts: 30 :
U.S.S.R.
Spotters: 7
Observation Posts: None
[69.24] Telephone
U.S. controls, off-map.
[69.25] Reinforcements
Soviets may replace demoralized platoons or companies each once, bringing the reinforcements in at any eastern map-edge hex.
[69.26] Victory Conditions
The Soviet Player wins 10 Victory Points for each
U.S. or police platoon which is demoralized and 10 Victory Points for each undemoralized Soviet platoon which exits the map west of the canal.
The U.S. Player wins 10 Victory Points for each Soviet platoon which is demoralized and 100 Victory Points if no undemoralized Soviet platoon exits the map west of the canal.
[69.27] Structural Changes
No change
69.3 INTERMEDIATE GAME
[69.31] Anti-Tank Weapons
Not applicable
[69.32] Tank Organization
Soviet tank organization is at Soviet Player’s option.
[69.33] Flame Weapons
Soviet companies each have 3 flamethrowers and the Assault Detachment has 3 flamethrower tanks.
[69.34] Independent Command through
[69.36] Vehicle Smoke Depletion
No change
69.4 INTERMEDIATE GAME PHYSICAL ENVIRONMENT
[69.41] Day/Night
Scenario takes place during the day.
[69.42] Weather
Good; Smoke Dispersion, 5 Game-Turns.
[69.43] Building Damage
Not applicable.
[69.44] Conflagrations
Not applicable
69.3 ADVANCED GAME
[69.51] Wind Direction
[69.52] Dozer Tanks and Mine-Clearing Plows One tank in each Soviet platoon is dozer-equipped.
[69.53] Height Levels o change (69.6] INDIRECT FIRE UNITS
[69.61] Pre-Plotting
U.S.: No
U.S.S.R.: Yes
[69.62] Opening Barrage
U.S.:No
U.S.S.R.: No
[69.63] Forward Observers Not in TO&E
U.S.: None
U.S.S.R.: None
[69.64] Dedicated Batteries
The Soviets have organic indirect fire, plus three batteries of 122mm guns.
[69.65] Indirect Fire Reference Data
The U.S. has one platoon of 155mm guns in general support.
69.7 ENGINEERS AND RELATED ITEMS
[69.71] Engineer Units through
[69.73] Breaches
No change
[69.74] Obstacles
U.S.: 5
U.S.S.R.: None
[69.75] Mines
Not applicable
[69.76] Ditches and Craters
U.S.:3 ditches
U.S.S.R.: None
69.8 OTHER ADVANCED GAME INFORMATION
[69.81] Building Status
Not applicable
[69.82] Ammo Stores
The U.S. has an ammo store at McNair Barracks. U.S. units may exit the map at 1F or 1G, spend 9 Game-Turns getting there, time to resupply (see Case 43.42), and 9 Game-Turns getting back.
[69.83] Prepared Positions
Not applicable.
[69.84] Rules of Engagement
U.S. may not fire at building hexes unless a Soviet unit has been spotted there in the current or immediately preceding Game-Turn. If any fire other than smoke is called from the 155mm guns, the U.S. Player loses 50 Victory Points. If the Soviet Player calls for anything but smoke from his 122mm guns, he loses 30 Victory Points.
70.0 TACHING, Heilongjiang, Manchuria, China (Advanced)
CASES:
70.1 THE BASIC GAME
[70.11] General Introduction
The Taching oil fields and refinery complex is the largest in China. It is also less than 300 kilometers from the Soviet border. The only road from Blagoveshchensk in the U.S.S.R. to Taching runs through the town of Baiquan, and here the Chinese are bound to resist with everything they’ve got, relying on the surrounding hills to effectively block off armored movement, and, even more importantly, Soviet logistics.
It is the objective of the Soviet Player to push through Baiquan to the Taching oil complex and secure a logistical route through the town. It is the Chinese objective to stop this.
[70.12] Map
The direction noted “N” on the map is actually east. The bridge at 6G1-6F3 is the only one on the map, other than the footbridge. There are no embankments on the map, other than between 6G6 and 6F2. There is no railroad. The north-south road (the one to Taching) runs along the map’s route 298 from 1F to 5G, then over the bridge to 7E, then down the Schillerallee to 9H.
[70.13] Time
The game ends when either Player has achieved 500 Victory Points, or by mutual agreement, or after 540 Game-Turns, whichever occurs first.
[70.14] Set-Up Forces
The Chinese set up an infantry battalion with flamethrower platoon, regimental recoilless rifle platoon, assault gun company, engineer company, 10 trucks, and a tank company anywhere in the Old Village or in megahex rows 3-0. Note: If Players have lots of spare counters (from other games), they should feel free to set up a regiment (3 battalions) or more.
The Soviets set up or bring in as reinforcements an assault detachment (engineer company is from division with 3xMTU-55), 3xT-12, 3 flamethrower tanks; SP guns are SP73s. These are set up in any megahex other than the ones in which the Chinese may set up. Note: If Players have lots of spare counters, they should feel free to set up 2 assault detachments, bring in a third as second echelon (around Game-Turn 60), and replace the whole mess with a fresh regiment if it gets chewed up. Soviets are equipped with BMPs and T-80 tanks.
[70.15] Advantage
China has the advantage.
[70.16] Leader Rating Ranges
China
Co Cdr: No change
Plt Ldr: No change
Plt Sgt: No change
U.S.S.R.
Co Cdr: No change
Plt Ldr: No change
Plt Sgt: No change
[70.17] Ammunition Recovery Ratings
China: 3
U.S.S.R.: 1
[70.18] Suppression Recovery Ratings
China: 5
U.S.S.R.:2
[70.19] Preservation Levels
China: 32 (Infantry plt); 80 (Infantry co); 12 (Tank plt); 35 (Tank co); 22 (Engineer plt); 72 (Engineer co); 40 (Flamethrower plt); 9 (Light Machinegun Plt); 15 (Heavy Machinegun plt); 28 (Machinegun co); 13 (Recoilless Rifle plt, battalion); 13 (Assault Gun co); 30 (Recoilless Rifle plt, regiment); 500 (Battalion)
U.S.S.R.: 20 (Divisional Engineer plt); 80 (Divisional Engineer co); 15 (Tank plt); 50 (Tank co); 20 (Motor Rifle plt); 55 (Motor Rifle co); 400 (Assault Detachment)
70.2 BASIC GAME (Continued)
[70.21] River Fordability
No
[70.22] Bridge Status
See 70.12.
[70.23] Observation Posts/Spotters
China
Spotters: 12
Observation Posts: 15
U.S.S.R.
Spotters: 7
Observation Posts: None
[70.24] Telephone
China controls in 5E5.
[70.25] Reinforcements
Soviet reinforcements (elements of the assault detachment which are not set up) arrive at any map-edge hex between 1J6and 1A1.
By agreement between Players, an option may be used to replace any demoralized company with a fresh company. For the Chinese, this reinforcement company arrives at any southern (megahex rows 9 and 0) map-edge hex.
[70.26] Victory Conditions
The Soviet Player wins:
100 Victory Points for every undemoralized platoon which is exited from any map-edge hex between 0F4 and 0K2.
500 Victory Points for moving a truck from 1F5 to 9H2 via the north-south road (see Case 70.12), without leaving the road. The location of the truck is always known to the Chinese Player; it always has a Cautious Movement command and always moves as fast as permitted by the rules. This truck may be entered at any time of the Soviet-Player’s choosing :
5/
200 Victory Points for demoralizing the Chinese battalion (or any three companies, if using the option in Case 70.25).
The Chinese Player wins:
100 Victory Points for every Soviet company.
demoralized.
500 Victory Points for occupying the bridge at the end of the game.
[70.27] Structural Changes
All 1- or 2-story concrete or stone buildings on the map are actually wood. All woods hexes of the Nordwald, Burschenhaim and Pilzwald on the map are actually open.
70.3 INTERMEDIATE GAME
[70.31] Anti-Tank Weapons
The Chinese Player has 1x HOT ATGM MAW available per company. Soviet BMPs are equipped with 4 x’ the AT4 ATGM MAW.
[70.32] Tank Organization
Organization of Soviet tanks is up to the Soviet Player.
[70.33] Flame Weapons
Each Soviet platoon is provided with one flamethrower, and the tank company has an extra 3 flamethrower tanks.
[70.34] Independent Command
No change.
[70.35] Snipers
The Chinese have 12 ad hoc snipers, all with independent command.
[70.36] Vehicle Smoke Depletion
No change.
! [70.4] INTERMEDIATE GAME
| PHYSICAL ENVIRONMENT
[70.41] Day/Night
The scenario takes place in the day.
[70.42] Weather
Good. Smoke Dispersion, 10 Game-Turns.
[70.43] Building Damage
Before setting up, the Players share the task of rolling for previous building destruction. Roll one die for each building on the map. If the roll is 1, the building hex has somehow survived the bombardment and is undamaged. On a 2 or 3, the building is damaged. On a 4 or 5, the building hex is destroyed. On a 6, the building hex is demolished. Note: if the number rolled is a 4 or 6, roll again. If the second roll is even, apply rubble procedures (Case 37.4).
[70.44] Conflagrations
In executing the foregoing roll, if the number rolled is 5, roll again. If the resultant roll is even, place a “fire spreading” marker on the hex.
70.5 ADVANCED GAME
[70.51] Wind Direction
Not applicable
[70.52] Dozer Tanks and Mine-Clearing Plows Two of the tanks in each Soviet tank company are dozer-equipped.
[70.53] Height Levels
The former Buddhist temple running from 7J to 8K has no tower; hex 7J7 is the same height level as the rest of the War of Liberation Museum. No building is higher than 3 floors.
70.6 INDIRECT FIRE UNITS
[70.61] Pre-Plotting
China: Yes
U.S.S.R.: Yes
[70.62] Opening Barrage
China: 3 to 15 Game-Turns, as agreed
U.S.S.R.: 3 to 15 Game-Turns, as agreed
[70.63] Forward Observers Not in TO&E
China: None
U.S.S.R.: None
[70.64] Dedicated Batteries
All indirect fire units in this scenario are dedicated.
[70.65] Indirect Fire Reference Data
In addition to organic units, the Chinese have full regimental mortars and full divisional support; also 2 platoons worth of RPU-14 MRL from Army.
In addition to organic units, the Soviets have full regimental support; also 1 battalion’s worth of 122mm, battery of 152mm, 1 FROG section, 1 battery BM-21 MRL, 1 battery 24Cmm mortar from division and higher levels.
70.7 ENGINEERS AND RELATED ITEMS
[70.71] Engineer Units :
No change :
[70.72] Boobytraps
China: 30
U.S.S.R.: None
[70.73] Breaches
Chinese may create 20 breaches.
[70.74] Obstacles
The Chinese Player may set up 20 obstacles. The’
U.S.S.R. Player sets up none.
[70.75] Mines
China: 10 (real); 10 (dummy)
U.S.S.R.: None
[70.76] Ditches and Craters
The Chinese Player may set up 20 ditches. Also, see 68.76 (mandatory craters).
[70.77] Demolition
The Chinese Player has prepared the bridge and any 15 building hexes for demolition.
70.8 OTHER ADVANCED GAME INFORMATION
[70.81] Building Status
See Case 68.51.
[70.82] Ammo Stores
The Chinese Player may set up one ammo store. The Soviets may also set up one ammostore.
[70.83] Prepared Positions
China: 250 Squad-hours
U.S.S.R.: None
[70.84] Rules of Engagement
No holds barred.
70.9 SPECIAL RULES
Not applicable.
PLAYER’S NOTES
Cityfight being an accurate simulation, those tactics which are recommended in real life tend to work well for the game player. The most important “Player’s Notes,” therefore, can be gleaned from a careful reading of the accompanying article. Other advice can be found in the rules themselves.
Urban combat has much in common with “hide and seek,” though there is no “home base” and being ‘“tagged” is lethal. The key advice to the
Player therefore is simple: avoid being seen; search for the enemy. Monitoring of playtesting indicates that most players do not undertake enough sighting actions. Infiltrating units should remain quiet or search areas behind them. Use your most expendable units for declared sighting and declared position; back them up with overwatching combat units possessing Fire commands. Use declared position to counter an enemy advance through smoke. Move into megahexes with high Search ratings, and move into a megahex after rather than before it has been searched. Spread units out among more than one megahex, so that not all of them will be spotted at once.
It is a good idea to have another friendly unit with a Fire command placed with a line of sight to the enemy before your first unit opens fire on him. Backup units are very handy in case the first attack fails. Suppressive fire is very important; friendly units whose positions are already known should seize every opportunity to lay down suppressive fire against known or suspected enemy positions. In many cases a suppression is almost as good as a kill. Also force enemy vehicles to button up whenever you can’t kill them directly.
Voluntarily suppressed friendly units are more likely to remain hidden, and allow the Player to concentrate his Action Points on other units of the platoon. In the Advanced Game, place a few units in cellars and leave them there until after the enemy has moved through. Higher floor levels also offer many advantages.
Do not rush forward blindly. It is better to take-the time to occupy a good position, with fields of overwatching fire and protected firing stations, before starting a local firefight, than to rush ahead with whatever units get there first. Impatience is costly.
Keep infantry dismounted unless maneuvering in safe areas or taking cover from artillery. Leaders must be used carefully, kept near their units but protected as much as possible.
The timing of actions in the course of the Action Stage is important, as it not only determines which side holds the initiative but has important effects on your chances of being spotted, successfully infiltrating, and many other tactics.
DESIGNER’S NOTES
Part I
J.F.C. Fuller, the great British military writer, once wrote, “Let us now be clairvoyant as regards the future, for unless history can teach us how to look at the future, the history of war is but bloody romance.’”
Such is the task of any game designer who is given the job of creating a contemporary-futuristic military simulation. Being such.a game, Cityfight was created primarily with Fuller’s hypothesis in mind. Because it is universally recognized in contemporary military circles that the tactics of city-fighting have grown to almost paramount importance in recent years, this simulation is, in effect, an attempt to “be clairvoyant as regards the future.”
Yet how can one accurately predict the factors that will dominate city-fighting in the years to come? Even the U.S. Army admits that “the whole subject of combat in built-up areas is one in which we are not well versed.” But, with an historian’s hindsight, it should be possible to comprehend the potential behavior of soldiers who are under the influence of any given set of weapons, regardless of the environment they are engaged in. As such, it is clear that an effective series of tactics can be created from this understanding.
For all intents and purposes, this was the designer’s role in Cityfight. All contemporary weapons statistics, as well as organizational data, were available from open sources. The creation of the game’s terrain—a fictional, although highly realistic town—was a function of imagination. The most difficult element of the design lay in creating a foundation for the game-system—i.e., how soldiers will react in this peculiar terrain under the influence of the given weapons.
In this respect, Cityfight was definitely designed from an historian’s point of view. From the First World War through Vietnam, there are numerous clear examples of urban fighting. These were examined carefully by those involved in the Cityfight project, and a number of surprising conclusions were reached concerning the key elements of cityfighting. The most important of these was what was to eventually dominate the game-system itself: visibility. It was universally agreed that a conventional wargame could not come close to accurately simulating the atmosphere of an urban engagement. What was needed was a new system of limited intelligence that placed the Players as close as possible to the position of the low ranking officer attempting to lead men in battle in such an environment. The result of this decision—the two separate, identical maps—simulates the confusion of this frustrating form of warfare.
The other major basis on which the game-system is founded is that of command-control. It was clear that historical examples of city-fighting had proven that in an urban environment, rational decision-making, communications, and command were far more difficult to fulfill properly than in open countryside. Thus, it is common in Cityfight for a Player’s forces not to act in a manner that this Player desires—or even if they do, they are often in for rude shocks from enemy forces of which they were not aware.
Cityfight is by no means a conventional game. Players will find effective game-tactics hard to master at first, for, as in real city-fighting, a simple error of maneuver or weapon placement will invariably lead to disaster. Perhaps the most effective technique in playing the game is common sense —that is, attempting to visualize the terrain as if you were standing in the streets themselves. Would you think it safe to dash across a street? Would you think it wise to place a machinegun in the second floor of a particular building?
Joe Balkoski
Part II
Turning to some of the specific elements of Cityfight, the command system, the action point system, and the alternating sequence of play are mutually interdependent parts of the basic system. The command system was inspired by Mech War 2, the alternating sequence by Firefight, supported by Joe Balkoski’s conviction that some such sequence of play is essential to a tactical game. The platoon was chosen by me as the basic level of organization, though for professional military use one might want to modify the game so as to reckon command control at the squad or even fireteam level.
Megahex search is supposed to include aural as well as visual detection, and it also assumes that a searching party will spread out rather than remain in the small area where the counter is located, but basically it is a major abstraction. Declared sighting was put in to provide more precise information, at the cost of revealing the searching unit. Declared position was necessary, in order to keep the attacker from winning just by keeping himself in a moving curtain of smoke. It represents the guy who is placed out in the street with orders to shoot at anything which tries to pass him, smoke or no.
The Immediate Fire Action, which should account for most of the combat, represents the soldier’s tendency to shoot at whatever he sees, when he sees it. .
The map I developed from the Gerlafingen area in Firefight, Back when we were trying to integrate the two games. Each megahex in Cityfight matches exactly a hex in Firefight; the roads match, the river matches, and the Town hexes of the earlier game have become the Old Village in the new one. A set of rules for integrating the two games does exist, and may be printed in MOVES someday. The map design intention was to make it look as much like an actual German town map as possible; thus all names are in German. Numerous actual German maps were studied in preparation, to make sure that our map, while functional, was also representative, The “tourist brochure” (Welcome to Gerlafingen) helped me conceptualize the place and bring it to life.
Weapons effectiveness data was basically taken from Army and other sources, and in most cases was depicted as battlefield expectations rather than best-condition firing-range figures. We nevertheless degraded all the figures by 10% to account for a wide variety of factors, discussed in the Progress Report in MOVES 44. One could argue that the figures should have been devaluated even more. Still, at the extremely close range of Cityfight, often it is just hard to miss.
The rules sections on defilade and drive-ins (our term) were added at the urging of Bob Ogus of the U.S. Army Infantry School at Ft. Benning, in order to make the game as useful as possible for Army training.
Air and helicopter rules were omitted on the grounds that the likelihood of operations in such an air-defense-intensive environment would not justify the problems inclusion would entail in rules-writing, system adjustment, countermix, and, most of all, time/budget. Players will spot other omissions—the backblast effects of certain weapons, for example. Somewhere one must draw the line, and where you make your compromises between completeness and playability is undoubtedly a subjective judgment. Amateur designers should feel free to build upon this system, or to apply it to such battles as Stalingrad. My personal hope is that players and designers familiar with this game will proceed to apply more realistic abstractions when treating their town or city hexes in higher-level tactical and operational games. Stephen Donaldson
WELCOME TO GERLAFINGEN!
The first mention of a settlement at Gerlafingen on the Eiche River is found in a chronicle dating from the 13th century. In 1723, the sleepy agricultural village became the home of Freiherr (Baron) Friedrich von Gerlafingen, who soon gave the hamlet his own name. As administrative seat for the Kreis (District) Obereiche, the village began to
E take on the character of a local trading center. Each year, in October, farmers from miles around still gather for the festival on the Baron’s Mall. ' And it was with funds from the Gerlafingen family that the Church of St. Anne was built in 1792, fire having destroyed the wooden church which had occupied the site since 1541.
In 1805, our sleepy village suffered a trauma from which it took many years to recover. Marauding French soldiers, foraging for Napoleon’s Grande Armee, pillaged Gerlafingen most cruelly. Every house was searched and ransacked for food and weapons. Our people fled in horror — never before had Gerlafingen witnessed warfare on this scale, not even in the time of Frederick the Great. The only building treated with some respect was St. Anne’s Church (although a month later, a French soldier was found drowned in the church’s cellar wine vat). Field Marshal Bluecher later visited Gerlafingen and vowed revenge on the “Corsican Ogre.” (The pew in which the Field Marshal worshipped is marked in St. Anne’s with a plaque. This spot is open to tourists from 2 to 4 PM daily.) It is also said that Field Marshal Bluecher drank more beer-toasts in Gerlafingen than any man before or since!
As merchants settled down and opened business in the nineteenth century, our village prospered. With the coming of the railroad in 1875, Gerlafingen assumed a place on the maps of the province.
In the years before World War I, many of the old houses were replaced by 2- and 3-story buildings, with shops on the ground floor and residence above.
In 1923, however, inflation ruined the Gerlafingen family, and the magnificent Schloss (Manor House) became the property of the First Bank of Commerce and Industry. Construction ceased. In 1934 the seat of the Kreis was moved elsewhere, but the Gerlafingen family remained. Today Klaus von Gerlafingen, a civil engineer at the Metalwaren factory, lives with his young bride in the east wing of the Schloss. The Gerlafingen family has perpetual use of the east wing under an agreement with the town, which acquired the Schloss from the bank in 1978.
Allied troops entered Gerlafingen in March, 1945, meeting no significant resistance. The manor house served for a few days as headquarters for an Allied brigade, but before long the village was forgotten again.
Beginning about 1949, prosperity began to return to the region. With automobile traffic becoming denser along route 1A, the government decided to build a by-pass in 1962; before long motorists were whizzing by without even knowing the name of our lovely village.
Fortune struck in 1976, however, when the giant Metalwaren Inc. moved in, purchasing most of the surrounding farmland. The company soon erected a major factory on the southern edge of the village. Hundreds of new residents came to work here, and Metalwaren built housing, shops, etc., to accomodate them. The federal government helped out by erecting a new armory/reserve training center to the northeast. With grants from the province, the village built a new Rathaus (Town Hall)/Community Center and a new high school. In 1978 the village was incorporated as a town, and Manfred Schneider was elected its first mayor.
The north wing of Schloss Gerlafingen (the Baronial Manor) has been restored and is now open to the public between 1 and 4 PM Daily. Visitors are welcome to inspect the baronial wine cellar and climb the old winding staircase to the tower, with its fine view of the mall and St. Anne’s Church across the Eiche. The Figurine collection of the Gerlafingen family is also on exhibit. Visitors may also want to see the old village cemetery, in which there are tombstones dating back to 1412; St. Anne’s Church; the old mill on the Eiche; or the pleasant footpaths of the Mushroom Forest (Pilzwald). Accomodations may be had at the Hotel Gerlafingen on the Muhlendamm just off the village square or at the Station Hotel just across from the railroad station.
For evening entertainment, visitors may drop in at the Schultheiss Beer Hall, Handelsstrasse 15 (just behind the indoor market); or inquire as to films or other events at the theatre on the Gertrudstrasse just south of the Adenauer Bridge.
Ever since Baron Friedrich came to our hamlet in 1723, Gerlafingen has bid a hearty, old-fashioned welcome to our visitors. Whether you come on a summer afternoon’s outing or on a hasty business ‘trip, the people of Gerlafingen will do their best to make your stay an enjoyable one.
Manfred Schneider,
Mayor of Gerlafingen ,
CHARTS AND TABLES
[6.23] ACTION POINT LOSS MATRIX
Results indicate number of Action Points subtracted from platoon’s Action Point total (see 6.0, Procedure).
| Initial Action Points in Platoon | Loss 1 | 2 | 3 | 4 | 5 | 6 | 7 | 8 | 9 | 10 | 11 |
|---|---|---|---|---|---|---|---|---|---|---|---|
| 2 | 0 | 0 | 0 | 0 | 0 | 0 | 1 | 1 | 1 | 1 | 1 |
| 3-4 | 0 | 0 | 1 | 1 | 1 | 1 | 2 |
(Column headings after the first: Initial Action Point Loss 1 through 11.)
[18.8] HARD COMBAT RESULTS TABLE (Intermediate Game)
Fire Strength of Attacking Unit. In the results, Kf, Km and Sd etc. are printed with subscripts; Kf is written below as KF and Km as KM (the manual's own terms are "KF" and "KM").
| DIE | 1 | 2 | 3 | 4 | 5 | 6 | 7 | 8 | 9 | 10 | 11 | 12-14 | 15+ |
|---|---|---|---|---|---|---|---|---|---|---|---|---|---|
| 2* | KFP | KFP | KFP | KFP | KFP | KFP | KFPD | KFPD | KFPD | KFPD | KFPD | KFPD | KFPD |
| 3 | – | – |
*On roll of 2 or 12, main gun runs out of ammunition (see 18.6). – = No effect.
If target hex is occupied by vehicle unit: K = Vehicle eliminated; KM = Vehicle may not move for remainder of game; KF = Vehicle may not take fire action for remainder of game. If anti-vehicular close assault (see Case 20.4) all “K” results against buttoned up vehicles are read as “KM”. If mine attack, all “KF” results against vehicles are read as “KM.”
If target hex occupied by personnel: S = Personnel are suppressed (see Case 11.52B); P = Personnel are eliminated (see Case 11.52C).
If target is building hex: If firing weapon was GL or LAW ignore (but see Case 23.24); d = Damage if wood, no effect if stone or concrete (see Case 21.1); W = Destruction if wood. No effect if concrete or stone. D = Destruction if wood. Damage if concrete or stone.
Notes:
-
Results are all encompassing (i.e., if a target hex is occupied by two different types of units — or personnel and a building — both may be affected.)
-
In breach attempts (see Case 36.1), all “Damage” and “Destruction” results are treated as “Breached”.
-
See Case 18.53 for adjustments to attack strengths. These may be summarized as follows: woods/wood buildings: –2; concrete: –3; Stone = –4; Suppressed concrete = –6; suppressed stone = –8; range adjustment = +4; unspotted = halved.
[10.39] SEARCH RATING MODIFICATIONS CHART
A. Modifications to Dice Roll for Megahexes
- +20 ... for searching own megahex
- +20 ... for 9 or more men searching
- +10 ... for 6 to 8 men searching
- –10 ... for rain (does not apply when searching own megahex)
- –20 ... for night
- –20 ... for fog (does not apply when searching own megahex)
- –20 ... for snow (does not apply when searching own megahex)
- –20 ... for searching 2 megahexes away
- –20 ... for 1 or 2 men searching
B. Modifications to Dice Roll for Particular Units
- +40 ... if object of search fired that Game-Turn and has not moved since during night
- +20 ... if object of search fired that Game-Turn and has not moved since during day
- +10 ... if object of search is on roof
- +10 ... if object of search was previously spotted in current Game-Turn and has not moved since
- –20 ... if object of search is suppressed in building or woods hex
- –20 ... if object of search is in prepared building
- –30 ... if object of search is a sniper
[15.49] SUPPRESSION RECOVERY MODIFICATIONS CHART
A. Modifications to Die Roll
- +4 ... if leader is not in same megahex as suppressed unit (no telephone)
- +3 ... if leader is not in same megahex as suppressed unit (with telephone)
- –1 ... if suppressed unit is in unilluminated megahex at night
- –1 ... if suppressed unit has a line of sight to leader in different hex
- –2 ... if suppressed unit is a sniper
- –2 ... if suppressed unit is in smoke or obstacle hex
- –3 ... if leader is stacked with suppressed unit
- –X ... Suppression Recovery Rating specified in scenario (for units other than spotters, Player with advantage only; for spotters, both Players)
[11.8] SOFT COMBAT RESULTS TABLE
Attack Strength of Attacking Unit.
| DICE | 1 | 2 | 3 | 4 | 5 | 6 | 7 | 8 | 9 | 10-11 | 12-13 | 14-19 | 20+ |
|---|---|---|---|---|---|---|---|---|---|---|---|---|---|
| 2* | K | K | K | K | K | K | K | K | K | K | K | K | K |
| 3 | S | S | S |
– = No Effect; S = Suppression (see Case 11.52B); K = Kill (see Case 11.52C); *On a roll of 2, firing unit is out of ammunition regardless of type (see Case 14.1); (a) = Firing unit is out of ammunition if it is machinegun unit or an automatic rifle attack is made (see Case 11.7) only on last target hex fire resolution; (b) = Firing unit is out of ammunition if machinegun unit (but only on last target hex fire resolution of action; see Case 11.63); (c) = Firing unit is out of ammunition if it is fireteam with machinegun or squad.
Notes:
If target is woods hex or open hex occupied by vehicle unit, all dice rolls of “5” or less are converted to “No Effect”. If target is stone building hex all dice rolls of “6” or greater are converted to “No effect” and “K” results on a 4 or 5 are converted to “S”; if concrete building, rolls of “7” or greater are “No Effect” and K results on a “6” are converted to “S”; if woods or wood building, rolls of “10” or greater are “No Effect”. Out of ammo results always remain effective. If target hex is unspotted, all “K” results are read as “S” results (see Case 11.55).
[22.4] FLAMETHROWER TABLE (Intermediate Game)
| DIE | Wood | Stone | Concrete | Woods Hex |
|---|---|---|---|---|
| 1 | F | F | F | F |
| 2 | F | – | – | F |
| 3 | F | – | – | F |
| 4 | F | – | – | F |
| 5 | – | – | – | F |
| 6 |
(Column group heading: Building Type.) F = Fire; place a Burning marker immediately in affected hex. – = No effect.
[27.25] DECLARED SIGHTING CHART (Intermediate Game)
| Conditions | Personnel Sta | Personnel Mov | Vehicles Sta | Vehicles Mov |
|---|---|---|---|---|
| Night, Clear | 5 | 10 | 10 | U |
| Night, Rain | 3 | 7 | 7 | 25 |
| Night, Fog | 2 | 5 | 4 | 8 |
| Night, Snow | 2 | 5 | 5 | 10 |
| Day, Clear | U | U | U | U |
Results are number of hexes maximum sighting range. Category is target unit. Stationary (Sta) includes personnel units issued no command, fire command, or search command; vehicles issued fire command. Moving (Mov) includes personnel units issued movement command or work command; vehicles issued movement, search, or work command. U = Unlimited
[32.25] GUN ELEVATION CHART (Advanced Game)
Elevation angle (degrees) against Range (in hexes):
| ELEVATION ANGLE (DEGREES) | 0 | 1 | 2 | 3 | 4 | 5 | 6 | 7 |
|---|---|---|---|---|---|---|---|---|
| 12 | 2 | 4 | 6 | 8 | 11 | 13 | 16 | All |
| 15 | 2 | 4 | 7 | 10 | 13 | 16 | All | – |
| 17 | 2 | 5 | 8 | 12 |
Summary of Unit Elevation Angles
- 12° ... ASU57, tripod MG
- 15° ... ASU85, Kanone
- 17° ... T62, T59 main gun
- 19° ... M60 main gun
- 20° ... BMP main gun, XM1 main gun, XM2 main gun, XM3 main gun, T72 main gun, AMX30 main gun, AMX10 main gun, AML90 main gun, Chieftain main gun, Leopard main gun, Centurion main gun, Dragon, T-12, BRDM 7.62 MG
- 25° ... BMD main gun
- 30° ... BRDM 14.5mm MG, BTR60, TOW, PT-76 main gun
- 35° ... Scorpion, improved TOW
- 40° ... Scimitar, Fox
- 53+° ... all others
In using the Gun Elevation Table, first determine which weapon system is being used, and locate its maximum elevation in degrees on the left-hand column of the Table. Next determine the range (distance horizontally in hexes from firing hex to target hex, not counting the firing hex, but including the target hex). By cross-referencing the angle and the range, find the figure which represents the highest height level to which fire may be directed. If the gun is not at height level 1, simply add the difference (in height levels) between the actual height of the gun and height level 1 to the highest permissible target hex height level obtained from the table. If the Table yields an “All” instead of a height level number, any height level in Cityfight may be targeted.
[32.66] DAMAGED BUILDING PROTECTION TABLE (Advanced Game)
| Height Level of Personnel | Die Roll: Killed | Die Roll: No Effect |
|---|---|---|
| Top Floor | 1...3 | 4...6 |
| 1 below Top Floor | 1...2 | 3...6 |
| 2 or more below Top Floor, but not in cellar | 1 | 2...6 |
| Cellar | – | 1...6 |
Results are die rolls necessary for Kill or No Effect.
[42.34] CONFLAGRATION TABLE (Advanced Game)
| DICE | Conflagration to Woods or Wood Bldg | Conflagration to Stone or Concrete Bldg |
|---|---|---|
| 2...6 | Stopped | Stopped |
| 7...8 | Spread | Stopped |
| 9...12 | Spread | Spread |
Dice roll of less than 2 is treated as 2; dice roll of greater than 12 is treated as 12.
[33.68] INDIRECT FIRE BURST EFFECTIVENESS RANGE CHART
Columns (by target): (1) Personnel in Open; (2) Personnel in Woods, on Roof, in Obstacle hex, in Open Vehicle; Woods; Soft Vehicle; Wood Building; (3) Hard Vehicle; Stone or Concrete Building; (4) Crater Formation (Open hexes only).
| Indirect Fire Unit | Personnel in Open | Personnel in Woods, on Roof, in Obstacle hex, in Open Vehicle; Woods; Soft Vehicle; Wood Building | Hard Vehicle; Stone or Concrete Building | Crater Formation (Open hexes only) |
|---|---|---|---|---|
| MORTARS | ||||
| 60-82mm | Ia | I | I | – |
| 83-120mm | Ia | Ia | I | I |
| 240mm | M3 | Ma | Ia | I |
| GUNS |
Indirect fire attacks units, buildings, woods, or open hexes only if within the burst effectiveness range of the attacking indirect fire unit. I = impact hex only; Ia = impact hex and any adjacent hex; I2 = impact hex and any adjacent hex or any hex 2 hexes away from the impact hex; Ma = impact megahex and adjacent megahex; M2 = impact megahex, adjacent megahex, and any megahex 2 megahexes away from impact megahex; M3 = impact megahex and any megahex within 3 megahexes of the impact megahex; M4 = impact megahex and any megahex within 4 megahexes of the impact megahex.
[33.69] INDIRECT FIRE COMBAT RESULTS TABLE
Target columns: PERSONNEL (Unsuppressed in Open; Suppressed in Open, Unsuppressed in other terrain); VEHICLES (A: Soft; T-12; AT Gun; BMD; BRDM; ASU-57; LVTE-7. B: Tank; CEV; Bridgelayer; Kanone. C: SP Gun; MICV; APC; Scout; ATGM; ASU-85; Dozer); BUILDINGS (Wood; Concrete; Stone).
| DICE | Crater Formation | Personnel: Unsuppressed in Open | Personnel: Suppressed in Open; Unsuppressed in other terrain | Vehicles A | Vehicles B | Vehicles C | Wood | Concrete | Stone |
|---|---|---|---|---|---|---|---|---|---|
| 2 (Wb) | All | K | K | K | K | K | Db | Db | Db |
| 3 | All | K | K | KM | KM | B | Db | d | d |
(Wb) = Woods burning (see Case 22.32)
During the Resolution Phase of the Indirect Fire Stage, both Players must consult the table separately for each hex which is within the “burst effectiveness range” (see 33.68) of the impact hex and which contains a building or woods hex, a vehicle, or personnel which are not inside a building. The two dice are rolled and the results under the appropriate target column applied to all such units or features in the hex.
K = Kill (unit eliminated); S = Suppressed (unit is suppressed); KM = Mobility kill (vehicle may no longer be moved); KF = Firepower kill (vehicle may no longer perform fire action; for vehicles without attack strengths, this result becomes KM); B = Button-up (vehicle must button up if open; for soft vehicles and T-12, this result becomes No Effect); – = No effect; b = Burning (place Burning marker on hex); D = Destroyed (building is destroyed; if already destroyed, is demolished; if attack is by mortar other than 240mm, building is only damaged); d = Damaged (building is damaged; if already damaged, is destroyed; if result is parenthesized and if attack is by mortar other than 240mm, there is no effect).
Notes:
-
If a vehicle is listed by specific type (e.g., ASU-57), use the column in which it is listed. Otherwise, use the column in which the vehicle type (e.g., “tank”) is listed.
-
A K result against a vehicle also eliminates any transported personnel; otherwise personnel in buttoned-up vehicles are not affected. Personnel in buildings are not directly affected, but may be affected by results obtained against the building (see Cases 32.66, 21.26, 31.75).
-
“Doubles” dice rolls may result in ammunition depletion for the indirect fire unit (see Case 33.91).
-
If fire is Suppression Fire (see Case 33.46), convert all dice rolls of 4 or less to S for personnel and B for vehicles.
-
Attacks are resolved against woods or buildings only if the woods or building hex is the actual impact hex.
-
Craters are produced in open hexes only by fire from units of the calibers listed for that dice result or from units of greater caliber. FROGs and SCUDs are considered to have the highest calibers.
WORK ACTION REQUIREMENTS SUMMARY
| Action | Sappers | CEVs | Dozers |
|---|---|---|---|
| Demolition: Preparing | 15: Obstacles & open hexes; 30: Wooden buildings; 40: Other buildings | – | – |
| Demolition: Performing | 1 (see 34.33) | – | – |
| Demolition: Defusing | 3 (see 34.37) | – | – |
| Boobytraps: Constructing | 2 dice | – | – |
| Boobytraps: Defusing | 1 | ||
| Obstacles: Clearing | See Demolition |
*CEVs breach walls via Fire Action. – = Unit type does not perform indicated Work Action.
LINE OF SIGHT REFERENCE
| Action | Attacker’s Position | to | Defender’s Position |
|---|---|---|---|
| Megahex Sighting (Optional Rule) | any part of hex | to | any part of hex in megahex being searched |
| Declared Sighting | center of hex | to | center of hex |
| Fire Combat (Personnel) | any part of hex or woods/buildings feature | to | center of hex or woods/buildings feature |
| Fire Combat (Vehicles) | center of hex or street | to | center of hex or woods/buildings feature |
COMMAND EFFECTS SUMMARY
| Command | Personnel | Vehicles | Prohibited for... |
|---|---|---|---|
| Cautious Movement | 1 move/1 sight | 1 move/1 fire/1 sight | None |
| Bold Movement | 2 move | 2 move/1 fire | Spotters; Vehicles in old vill.; Smoke |
| Fire | 1 fire/1 sight | 2 fire (see 18.52)/1 sight | Spotters |
| Search | 2 sight | 1 move/2 sight | Sappers, CEVs, Dozers |
| Work | 1 work (2 action points) | 1 work (3 action points) | All except Sappers, CEVs, Dozers, vehicles with plows |
MOVEMENT SUMMARY
| Movement | Personnel | Vehicles |
|---|---|---|
| Normal | 1 hex or floor (2 height levels) per action | 2 hexes per action |
| Street | 1 hex per action | 2 hexes per action (if unit has a Bold Command, each hex counts as 1/2 hex) |
| Woods | 1 hex per Game-Turn maximum | May not enter (see 18.33) |
| Buildings | 1 hex per Game-Turn maximum | May not enter (see 18.33, 19.62, 47.0) |
| Craters/Ditches | May enter only with a Cautious Command | May not enter |
| Obstacles | May enter only with a Cautious Command | May not enter |
| Embankments (in bad weather) | If not entered along Street, may enter only with a Cautious Command | May be entered only via street hexside |
ABBREVIATED SEQUENCE OF PLAY
A. COMMAND DECISION STAGE
B. COMMAND CONTROL STAGE
- Initial Action Point Determination Phase
- Action Point Total Adjustment Phase
C. ACTION STAGE
D. ENGAGEMENT DETERMINATION STAGE
E. AMMUNITION STAGE
F. SUPPRESSION RECOVERY STAGE
G. GAME-TURN RECORD STAGE