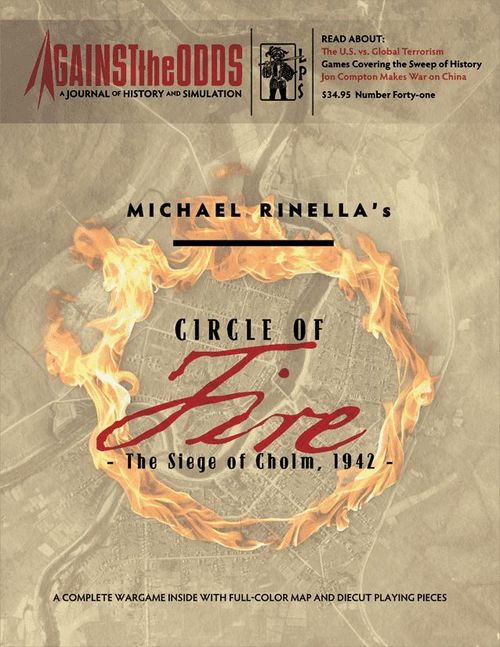
Circle of Fire: The Siege of Cholm, 1942
Circle of Fire: The Siege of Cholm, 1942 Rulebook
The source PDF (hosted by Against the Odds) ends at Section 21.2; Optional Section 21.3 and 23.2 (cited in the Player Aid Charts and in Case 11.2.4) and the list of map name translations mentioned in Section 3.0 do not appear in it.
Table of Contents
Table of Contents
- 1.0 INTRODUCTION
- 2.0 COMPONENTS
- 3.0 THE MAPBOARD
- 4.0 PLAYING PIECES
- 5.0 PREPARE FOR PLAY
- 6.0 OCCUPATION AND CONTROL
- 7.0 SEQUENCE OF PLAY
- 8.0 THE ADVANTAGE
- 9.0 NIGHT
- 10.0 REINFORCEMENTS PHASE
- 11.0 MANUEVER/FIRE PHASE
- 12.0 MOVEMENT IMPULSE
- 13.0 DIRECT FIRE IMPULSE
- 14.0 BOMBARDMENT IMPULSE
- 15.0 RUBBLE
- 16.0 CLOSE COMBAT PHASE
- 17.0 LOGISTICS
- 18.0 END PHASE
- 19.0 VICTORY CONDITIONS
- 20.0 SIDE DETERMINATION
- 21.0 OPTIONAL RULES
- Player Aid Charts
- Movement Cost (12.2)
- Sequence of Play (7.0)
- Area/Zone Type Key
- Rubble Creation (15.1)
- Random Reinforcements (10.3) Roll 2d6
- Stuka Interdiction (10.5) Roll 1d6
- Partisan Attack (5.3) Roll 1d6
- Retreat Priority List (13.4)
- Advantage Use (8.1)
- Direct Fire (13.0)
- Bombardment Fire (14.0)
- Close Combat (16.0) Roll 1d6
1.0 INTRODUCTION
Circle of Fire: The Siege of Cholm, 1942 is a two-player game that simulates the first ten days of the assault on the German-occupied city of Cholm (first day [night of the 18th actually] abstracted into the Partisan Attack rule) by the Soviet Union's Third Shock Army, January 18-27, 1942. One player commands the attacking Soviet forces and the other player commands the defending German forces.
2.0 COMPONENTS
This game has the following components: one 22x34″ map, one sheet of 176 ⅝″ die-cut counters, this rule booklet, and two pull-out Player Aid Charts.
2.1 Dice
2.1.1 Two six-sided dice are required for play of this game (Game Play Note: It is handy if both players each have two dice).
2.1.2 When the rules state "2d6," the player rolls two six-sided dice and adds the results together for a result.
2.1.3 When the rules state "1d6," the player rolls one six-sided die for a result.
2.1.4 DRM (Die Roll Modifier) A value (positive or negative) that modifies the 1d6 or 2d6 roll's result.
3.0 THE MAPBOARD
The map depicts the portion of the Kalinin region of northern Russia where the Cholm campaign took place between January 18 and January 27, 1942. There is a list on the last page of name translations.
The list of name translations is not present in the source PDF.
3.1 Map Scale
The map scale is approximately 4cm = 1km (1:25,000).
3.2 Map Areas/Zones
3.2.1 The map is divided into 35 numbered locations (hereafter called Areas) and 6 lettered exterior locations (hereafter called Zones).
3.2.2 Two Areas are adjacent to each other if they share a common border and thus units can move directly from one to another.
3.2.3 If two Areas meet only at a vertex, movement is not permitted between the two Areas. Example: Units cannot move directly between Areas 23 and 26 or between Areas 22 and 24 (Case 12.3.3).
3.2.4 Two Areas are considered connected by a road or trail if their common border is a hollow border (symbol not reproduced).
3.2.5 Areas that have a solid red border (symbol not reproduced) are not connected by a road or trail and thus cost a unit its entire MA to move from one to another.
3.2.6 River The two rivers on the map are considered non-road (solid red) borders between adjacent Areas.
3.2.7 Identifiers Each Area and Zone on the map contains an Identifier. A Zone Identifier contains a letter (from A to F). An Area has a number between 1 and 35. Each Zone or Area has a name as well, derived from the German defenders' historical battle maps.
3.2.8 Terrain The shape of each Area/Zone Identifier indicates its terrain type: Clear, Forest, or Urban. Clear Areas have a light grey circle. Forest Areas have a green triangle. Urban Areas have a dark grey square. Terrain type is used in resolving attacks against units in that Area (Sections 13.1 and 14.3).
3.2.9 Victory Area An Area containing a red star above the Area Identifier (Section 19.2).
3.3 Turn Track
3.3.1 The Turn Track is printed on the map and is used to note the current Game Turn in play.
3.3.2 The Turn marker is placed in the space corresponding to the current turn, with the side of the marker that is face up indicating which player has the Advantage.
3.4 Impulse Track
The Soviet Player has an Impulse Track on his side of the map to keep track of his first 4 Impulses so that he knows when to start the Logistics roll to end the Maneuver/Fire Phase (Module 17.0). The marker for this track also identifies if the turn is currently daytime or nighttime.
3.5 Holding Boxes
3.5.1 The map contains boxes for each player's At Start units, regular Reinforcements, Random Reinforcement Groups, Regrouped units, Artillery/Stuka units, Non-Regrouped Eliminated units and Permanently Eliminated units.
3.5.2 Players set up their units in their appropriate boxes before beginning play of the game.
4.0 PLAYING PIECES
Included with the game are die-cut playing pieces called units, representing the various military formations that fought in the campaign, as well as markers that assist in game play.
4.1 Unit Coloring
German units are grey on their front side, while Soviet units are tan.
4.2 Unit Types
4.2.1 There are three basic types of units in the game: Infantry (INF), Armor (ARM), and Artillery/Air (ART/DB). The front (colored) side represents an Uncommitted unit while the back (white) side represents a Committed unit.
4.2.2 All armored units contain a vehicle silhouette of some kind printed on the counter. The type of vehicle picture is provided for historical accuracy and ease of recognition during gameplay.
4.2.3 Artillery bombardment units represent the prolonged shelling effect of a battery or more of off-map guns. The Stuka unit represents aerial bombardment strikes by the Germans
4.2.4 All remaining units are Infantry (Headquarters [HQ], Machine Gun [MG], Pioneer Engineers [PNR], Mountain [MTN], and Reconnaissance Cavalry [CAV]). Each side also has Regrouped units (KG or RG) that come into play as the game progresses.
4.3 Unit Information
Units in the game are roughly company-sized formations. All units have information printed on them as identified below:
A) Parent Organization Most units have a Parent Organization. Units belonging to the same Parent Organization share a common color text on their counter. For those who are color blind, the Parent Organization is printed in the middle left side of the unit's counter and is noted in the following list:
German: POL (rose text), 8 JAG (purple text), 416th Regiment (green text), 386th Regiment (blue text).
Soviet: 73rd Regiment (dusty rose text), 82nd Regiment (brown text), 164th Regiment (green text), 79th Regiment (purple text).
Units without any Parent Organization are considered Independent units and have black or burgundy text (or do not have an historical parent ID in the middle-left of their counter).
B) Historical unit identification (KG and RG are noted on Regrouped units).
C) Cholm (C) Setup letter, Entry Turn number (1 to 5), or Random Reinforcement letter code (German J or U; Soviet A or K).
D) Pictorial unit identifier:
E) Movement Allowance (MA) which is the total number of Movement Points (MPs) a unit can expend during its Movement Impulse.
F) NATO-style symbols:
G) Combat Factor (CF) of unit used for attack or defense
H) Once an Uncommitted unit activates, it becomes Committed and is flipped to its back (white) side which contains only a CF.
I) Artillery Night CF (Stuka does not have one)
J) Artillery/Stuka Day CF
K) "Used" identifies that Artillery/Stuka unit has bombarded this turn
The counter diagram and the NATO symbol / pictorial identifier illustrations are images and are not reproduced.
4.4 Markers
Markers represent non-combat units and/or are used to record various game information.
4.4.1 Control Markers Control markers are placed in Areas to indicate which side controls them, German or Soviet.
4.4.2 Advantage/Turn Marker The first use of this marker is to indicate the current turn on the Turn Track. The second use is to show who has the Advantage currently, which is an abstract reflection of the edge that one side will temporarily possess due to factors such as morale, position, surprise, leadership, intelligence, or fate. Control of this can switch back and forth between players. Whoever controls the Advantage may use it to gain certain game benefits (Module 8.0).
4.4.3 Day/Night/Impulse Marker The first use of this marker is to indicate if the turn is currently under Day (sun) or Night (moon) conditions. The second use of this marker is to indicate which Impulse it is (up to Impulse 4) on the Impulse Track on the map. This is so that the Soviet player knows when to begin making the Logistics roll to see if the Maneuver/Fire Phase ends (Module 17.0).
4.4.4 Rubble This marker, when in an Area, can impact both movement and combat (Module 15.0). There are two levels of Rubble: Rubble (Front) and Heavy Rubble (Back).
4.4.5 Stubborn Defense This marker is placed in an Area (under certain conditions) by the German player to improve the defense of the Area.
5.0 PREPARE FOR PLAY
5.1 Unit Setup
5.1.1 The German player sets up first, placing any unit with a "C" printed as its setup letter in an Urban Area (Case 3.2.8).
5.1.2 Units with a number for their Turn of Entry on the counter should be placed in the Reinforcement Box on the map where their unit or grouping of units is shown.
5.1.3 All units with non-"C" letter codes should be placed in their Random Reinforcement Group Display on the map.
5.1.4 Regrouped units (German KG and Russian RG units) should be placed into their respective Regrouped Units box on the map.
5.2 Marker Placement
5.2.1 Place the Turn marker in the "Turn 1" space on the Game Turn Track, Soviet Advantage side facing up.
5.2.2 Place the Day/Night/Impulse marker on the Impulse Track in the "1" box with the Day side facing up.
5.2.3 Place a control marker, German side up, in every Area and Zone on the map except Zone A, which is under Soviet control.
Game Play Note: To reduce map clutter, the players may if they wish only place Control markers in Soviet-controlled Areas and Zones (Soviet side face up) and treat Areas and Zones without a control marker as German-controlled.
5.3 Partisan Surprise Attack
Design Note: This rule depicts the attack of the 2nd Leningrad Partisan Brigade that caught the town's defenders totally by surprise during the night of January 18, 1942. This unit fought the German garrison in close quarter combat for several hours and then withdrew after its ammunition became depleted.
5.3.1 After the Initial German units and the markers have been placed on the map, the Soviet player will perform a 1d6 roll for each at-start German unit in Cholm. Reference the roll's result on the Partisan Attack Table (see PAC) to find and apply the effect on the German unit.
6.0 OCCUPATION AND CONTROL
6.1 Occupation Limits (Stacking)
6.1.1 Each side may have a maximum of three infantry and/or armor units plus one armor or headquarters unit occupying an Area.
6.1.2 Control, Stubborn Defense, and Rubble markers do not count against occupation limits.
6.1.3 Units may not normal move (Module 12.0) into an Area already occupied to the maximum.
6.1.4 An unlimited number of units may occupy a Zone.
6.2 Control
6.2.1 Each Area and Zone is always controlled by either the German or Soviet player.
6.2.2 Control changes only when one side is the sole occupant of an opponent's controlled Area/Zone at any point during the turn.
6.2.3 Control of an Area/Zone may be gained during movement without the units having to stop in that Area.
6.2.4 Control is shown by flipping the control marker to either its German or Soviet-Controlled side as is appropriate.
6.3 Contested
6.3.1 An Area/Zone is considered Contested if it contains units of both sides in it.
6.3.2 Contesting an Area/Zone that is controlled by the enemy does not alter control of that Area.
6.4 Vacant
An Area/Zone is Vacant if it contains no enemy units, regardless of the presence of friendly units or who currently controls it.
6.5 Free
An Area/Zone is Free if it has no units in it and is under friendly control.
7.0 SEQUENCE OF PLAY
A game has nine Turns. Each Turn represents one day and comprises of four Phases. During the Maneuver/Fire Phase a variable number of "mini-turns" or Impulses are performed. The Phases of a Turn are conducted as follows:
- Reinforcement Phase (Module 10.0)
- Maneuver/Fire Phase (Modules 11.0 to 14.0)
- Close Combat Phase (Module 16.0)
- End Phase (Module 18.0)
8.0 THE ADVANTAGE
At the start of each Phase/Segment/Impulse, one player always has control of the Advantage. This is shown by the Advantage/Turn marker having the side of the player controlling the Advantage being face-up. The Soviet player starts the game with control of the Advantage. Advantage control will shift back and forth upon its usage (or lack thereof).
8.1 Voluntary Use
8.1.1 The Advantage may be used to:
- A. Add a Random Reinforcements DRM
- B. Declare the turn to be Night from this point on
- C. Place a Stubborn Defense marker (German only)
- D. Prevent a Logistical Pause (Soviet only)
- E. Infiltrate Soviet Lines (German only)
- F. Redeploy your units
See the Advantage Use Table on the PAC for details on each of the above.
8.1.2 Advantage Shift After the Advantage is used by a player, it is controlled by neither player until the end of the current Phase or Impulse it was used in, at which time the opponent has it (marker flipped to the appropriate side).
8.1.3 If a player begins the turn controlling the Advantage and ends the turn not having used it at all and still possessing the Advantage, the Advantage automatically shifts to the control of his opponent at the end of the turn (use it or lose it).
9.0 NIGHT
9.1 Specific Rules
9.1.1 Starting with Turn 1 the player controlling the Advantage (Module 8.0) may use it to declare a Night Turn at the start of any of his Impulses during the Maneuver/Fire Phase (Module 11.0).
9.1.2 Use of the Advantage to declare Night does not prevent other movement or fire during that Impulse.
9.1.3 Once declared, Night conditions exist until the end of the current Game Turn.
9.1.4 Artillery The reduced Night CF (red text) of an artillery unit is used to resolve a Bombardment attack during an Impulse when the turn is Night.
9.1.5 Stuka This unit (Section 14.2) may not be used for Bombardment during a Night Impulse of a Turn.
9.1.6 Movement During a Night Impulse the MP cost to enter an Area containing Enemy units is 3 MPs instead of the usual 4 MPs (Section 12.2).
9.1.7 Direct Fire Combat During a Night Impulse the defender receives an additional +1 DRM to his Defense Total (Case 13.2.3) in a Direct Fire attack.
9.1.8 There is no Night DRM applicable to Bombardment Fire attacks (Module 14.0) because it is already factored into the unit's Night CF.
10.0 REINFORCEMENTS PHASE
Reinforcements are new units that enter the game during the Reinforcement Phase.
10.1 General Rules
10.1.1 The Reinforcements Phase consists of 3 Segments performed in the following order:
- Regrouped Units Segment (Section 10.2)
- Random Reinforcements Segment (Section 10.3)
- Normal Reinforcements Segment (Section 10.4)
10.1.2 The German player places his reinforcements first, followed by the Soviet player in each Segment.
10.1.3 During Normal Reinforcements players automatically receive units marked with the turn number of the current turn (Exception: Section 10.5).
10.1.4 Units with a Random Reinforcement letter code may only enter play as the result of a Random Reinforcements die roll (Section 10.3) result during that Segment of this Phase.
10.1.5 Reinforcements always enter play Uncommitted.
10.1.6 Reinforcements and Regrouped units must be placed on the map within valid occupation limits (Section 6.1).
10.2 Regrouped Units Segment
This is the first part of each Reinforcements Phase in which both players check the units in their Eliminated Units Not Regrouped Box to see if they can regroup them and bring on a Regrouped Unit (German KG unit or Soviet RG unit).
10.2.1 At a player's option, for every three units (any type) in a player's Eliminated Units Not Regrouped box, he can move them to the Eliminated Units Permanently Eliminated box and receive one Regrouped infantry unit (see units shown above).
10.2.2 If there are less than three units, those units remain in the player's Eliminated Units Not Regrouped box until a later turn when there are the three needed to create a Regrouped unit.
10.2.3 German Regrouped units have the option of being placed in either Zone D or a Cholm Urban Area. The Zone/Area may be contested, but must be German-controlled at the time of placement.
10.2.4 Soviet Regrouped units may be placed in any Soviet-controlled Zone (even if contested).
10.2.5 If all of a player's Regrouped units have been placed on the map, then that player is no longer eligible to Regroup units for the remainder of the game, and all units eliminated from that point onwards are placed directly into the Eliminated Units Permanently Eliminated box.
10.2.6 A Regrouped unit that is eliminated from the map is permanently eliminated and placed into the owning player's Eliminated Units Permanently Eliminated box.
10.3 Random Reinforcements Segment
10.3.1 The player controlling the Advantage may, before he makes the roll for this turn's Random Reinforcement, use his Advantage to modify the Random Reinforcement roll in his favor (Section 8.1.1A and PAC).
10.3.2 After the above decision is made, the player who began the Segment with control of the Advantage then makes a 2d6 roll.
10.3.3 Apply any applicable DRMs to the roll as detailed at the bottom of the Random Events Table (see PAC).
10.3.4 Cross-reference the modified result with the current Turn number (across the top). The letter code is the forces received as reinforcements.
10.3.5 Unit selection (and how to deploy those units) is detailed below the Random Reinforcements table on the PAC.
10.3.6 If the noted Reinforcements have already been received (there are no units left to pick), treat the result as No Reinforcement, unless there is an available substitute choice as per its "Selection" details listed below the Random Reinforcements Table on the PAC (Exception: Optional rule Section 21.1).
10.4 Normal Reinforcements Segment
10.4.1 During Turns 1-5, one or both players receive automatic reinforcements.
10.4.2 These units have an entry turn number located on their counter (see Section 4.3C).
10.4.3 Place the units on the map as directed by their Reinforcements Display instructions printed on the map. Artillery/Stuka units are placed into the owning player's Artillery box on the map.
10.5 Stuka Off-Map Interdiction
10.5.1 Starting Turn 2 or later, if the Soviets are receiving reinforcements (Random or Normal) of ground troops (not artillery), the German player can decide during the pertinent segment to flip his Stuka unit over to its "used" side and roll to delay some of the Soviet non-artillery forces that are currently to enter.
10.5.2 If it is a Soviet Random Reinforcement Group that has been determined to enter, the German player must announce this action immediately after the group is determined.
10.5.3 If for normal reinforcements, the German player announces this at the very beginning of the Normal Reinforcement Segment.
10.5.4 Once announced, the German player rolls 1d6. If the result is a 5 or 6, the Soviet player receives only 1d6 worth of units that are part of the force eligible to enter. The balance of the force's units will enter the next turn (at which point they cannot be delayed again). If the result is a 1-4, there is no effect. This is noted in the Stuka Interdiction Table on the PAC.
10.5.5 Since the Stuka unit is now used, it will not be available this turn for on-map bombardment.
11.0 MANUEVER/FIRE PHASE
11.1 Impulses
11.1.1 The majority of the game is played during the Maneuver/Fire Phase, consisting of a variable number of "mini-turns" called Impulses.
11.1.2 The Soviet player performs the first Impulse of every Turn, the German player the second, the Soviet player the third, and so on, alternating Impulses until the end of the phase.
11.1.3 When it is a player's Impulse, he has the opportunity to activate a single Area or Zone.
11.1.4 The active player during an Impulse is called the Attacker; his opponent is called the Defender.
11.1.5 No enemy unit may move during a friendly Impulse except to retreat as a result of resolution of an attack (Modules 13.0 and 14.0).
11.1.6 The Maneuver/Fire Phase ends in one of two methods:
- Soviet Logistics Roll (Module 17.0)
- Both players pass consecutively (Case 11.2.5b).
11.2 Types of Impulses
11.2.1 There are 4 types of Impulses:
- Movement (Module 12.0)
- Direct Fire (Module 13.0)
- Bombardment (Module 14.0)
- Pass (Case 11.2.5)
11.2.2 Only Uncommitted units (those on their front sides) in the activated Area/Zone may perform an action during an Impulse.
11.2.3 Only an unused Artillery or Stuka unit can perform a bombardment attack during an Impulse.
11.2.4 A unit may either move or fire during a turn (Exception: Optional Section 23.2) and if it does so, after completing its action it is flipped to its Committed side.
11.2.5 The Pass Impulse The attacker may elect to take no action at all during his Impulse (the Soviet player must still make a Logistics roll if required).
a) If a player has no units to activate, he must declare a Pass Impulse.
b) If both players pass consecutively the Maneuver/Fire Phase ends.
11.2.6 Legalities and Errors A player may not change his move once a die roll has been made, or his opponent has declared any action (including a Pass Impulse) he will take during his Impulse. An illegal move/attack's results are valid if the opposing player does not challenge them prior to completing his own next Impulse.
12.0 MOVEMENT IMPULSE
12.1 Mechanics of Movement
During a Movement Impulse the Attacker chooses one Area to be the Active Area. Units move one at a time. A unit may move from an Area to any adjacent Area, the number of Areas entered during movement being limited by the MA of the moving unit.
12.1.1 Area or Zone Activation All of the Uncommitted units in an Area or Zone may move when that Area or Zone is chosen to activate.
12.1.2 Units in the activated Area or Zone may move until there are no units left within the Area/Zone to perform an action or the player chooses not to activate any more units therein.
12.2 Movement Costs
12.2.1 Movement requires the expenditure of MPs during an Impulse.
12.2.2 A unit may continue to move into adjacent Areas until it either lacks enough MPs remaining to enter another Area or it enters an Area occupied by at least one enemy unit, whereupon it must stop.
12.2.3 Movement into an Area incurs an MP cost as detailed in the Movement Cost Table (see the PAC). Use only the one cost that applies.
12.2.4 If a unit has not yet expended any MPs in the Impulse, and lacks sufficient MPs to enter an adjacent Area that it is not otherwise prohibited from entering, it may enter that Area by expending all its MPs. Historical Note: The Cholm battlefield was characterized by waist-deep snow that hampered movement and encouraged the Soviet side to attack again and again along the same avenues of approach.
12.2.5 If the Active Area is contested, friendly units may exit the Area at normal MP costs, so long as the first Area they enter is a Free Area/Zone (Section 6.5).
12.2.6 Multiple Area Destinations Units starting in an Active Area may move into different Areas during the same Impulse. Movement into different Areas does not have to be designated in advance.
12.3 Movement Restrictions
The following situations restrict movement:
12.3.1 Overstacking Units may not move into a fully occupied Area (Section 6.1).
12.3.2 Rubble Units must stop and move no further that Impulse upon entering any Area containing a Rubble marker.
12.3.3 Vertex-only Adjacency Movement is not permitted between Areas that are only connect at a border vertex.
12.4 Zones and Movement
Zones are located around the edges of the map. Each Zone is connected to other Zones and certain Areas on the map by connector arrows. Game Play Note: Zones are considered the equivalent of Areas in every respect except as modified below. All other rules pertaining to Areas apply equally to Zones.
12.4.1 Movement from Area to Zone or between two Zones A Zone may only be entered by a unit starting its Impulse in a connected Zone or Area, and the unit must end movement upon entry of that Zone (Exception: Case 12.4.3).
12.4.2 Zone to Area Movement A unit beginning its Impulse in a Zone may move to a connected Area normally, paying the MP cost of that connection arrow to the Area and may continue movement to other Areas if it still has enough MPs remaining (see Movement Cost Table on the PAC).
12.4.3 Zone to Zone Special Movement A unit beginning its movement in a Zone, which then moves directly to a Vacant or Free Zone, may do ONE of the following (a bonus move):
- move a second time, and enter another adjacent Zone if the latter is also Vacant or Free,
- move a second time, and utilize a road arrow to enter a Vacant or Free Area that is not adjacent to an occupied enemy area.
13.0 DIRECT FIRE IMPULSE
13.1 Restrictions
13.1.1 Only Uncommitted units that begin the Fire Impulse in the Active Area/Zone may fire.
13.1.2 Uncommitted units may fire at enemy units occupying their Area/Zone.
13.1.3 Units in a non-contested Area may fire at enemy units in an adjacent Area. Exception: If only infantry units are firing, they may not fire upon an adjacent Area if enemy armor units are present.
13.1.4 Direct Fire may not be combined with Artillery Bombardment (14.0) during the same Impulse.
13.2 Fire Resolution
Attacks are resolved by players determining their Attack Total or Defense Total and then computing the result.
13.2.1 First, the attacker picks a Lead Attacking Unit and the defender picks a Lead Defending Unit in the Area/Zone the combat is in.
13.2.2 Attack Total (AT) The attacker next makes a 2d6 roll and adds any Attacker DRMs as listed in the attacker section of the Direct Fire Table (see PAC) to his roll to derive his AT.
13.2.3 Defense Total (DT) The defender next makes a 2d6 roll and adds any Defender DRMs as listed in the defender section of the Direct Fire Table (see PAC) to his roll to derive his DT.
13.2.4 Computing Results. The result of the attack will depend upon the difference between the AT and the DT. There can be two possible results: Failure or Success.
- Failure If the AT is equal to or less than the DT, there is no effect.
- Success If the AT is greater than the DT, the difference between the AT and DT is the number of Casualty Points that is assessed against the defender in the Area.
- Also determine if Rubble is created (Module 15.0)
13.3 Casualty Points (CPs)
13.3.1 The defender must assign ALL CPs assessed against him to his units in the defending Area/Zone.
13.3.2 CPs may be taken in any combination, except that the Lead Defending Unit must suffer the first CP assigned by the owning player.
13.3.3 The defender assigns CPs received from an attack as detailed at the bottom of the Direct Fire Table (see PAC)
13.3.4 If after eliminating all defending units in an Area there are still remaining CPs to allocate, the additional CPs to be allocated are ignored.
13.4 Retreats
Any unit called upon to retreat must follow the following rules.
13.4.1 Units must be retreated by the controlling player one at a time using the guidelines in order (top to bottom) on the Retreat Priority List (see PAC). There are separate guidelines for Areas and Zones.
13.4.2 If the Area being retreated into becomes fully occupied, any subsequent units must continue their retreat to another Area that is not fully occupied and that is adjacent to the Area now fully occupied, and in accordance with the Retreat Priority List (see PAC).
13.4.3 Fire Combat Voluntary Retreat Some or all (owning player's choice) of the defenders in an Area or Zone, except Uncommitted Soviet units, being attacked may voluntarily retreat after a fire combat resolution, even if the attacker suffered a Failure result.
13.4.4 Retreat Elimination If for any reason a unit is unable to retreat as per the Retreat Priorities list (see PAC), it is eliminated.
14.0 BOMBARDMENT IMPULSE
A player may use one Artillery unit or the Stuka unit (German player only) to bombard an Area with opposing units during his Impulse. Bombardment may not be combined with Direct Fire (Module 13.0) during the same Impulse. Artillery units represent the indirect fire weaponry possessed by each side. Each Artillery or Stuka unit is held in that player's Artillery Box on the map.
14.1 General Rules
14.1.1 Each player may place and attack with one unused artillery or Stuka (Germans only) unit by performing a Bombardment Impulse.
14.1.2 An Artillery or Stuka unit may be used only once per turn.
14.1.3 A bombardment attack may only be made into an uncontested Area adjacent to an Area with a friendly unit (Committed or not).
a) Cholm An Artillery unit may be placed in any non-Urban Area that is within two Areas of an Urban Area containing at least one friendly unit. Design Note: the town of Cholm occupied the battlefield's "high ground," giving greater lines of sight to artillery spotters posted there.
b) Ostkirche (Area 9) The player who controls and occupies this Area may place his artillery markers in any uncontested Area (not Zone) on the map. The binocular symbol is printed in Area 9 to remind players of this.
14.1.4 Artillery bombardment attacks may not be made into Zones.
14.1.5 After resolving the attack, the Artillery unit is returned to its Artillery Box with its "used" side face-up to indicate it has been Committed and may not fire again until the next Turn.
14.1.6 Bombardment Fire Strength If an artillery unit is bombarding during a Day Impulse, use the unit's Day (left) CF. If the unit is bombarding during a Night Impulse use the Night (right) CF (red text).
14.2 German Stuka Unit
14.2.1 The German Stuka unit represents air strikes made by German air power.
14.2.2 The Stuka unit may bombard any uncontested Area on the map.
14.2.3 The Stuka may bombard any Zone on the map, even if contested.
14.2.4 The Stuka unit may not be used for a bombardment attack if it is currently Night (Module 9.0).
14.2.5 If the Stuka was used for Off-Map Interdiction (Setion 10.5), it is not available for bombardment this turn.
14.3 Bombardment Resolution
A Bombardment attack is handled in much the same way as a Direct Fire attack (Module 13.0).
14.3.1 The attacker designates the eligible Area/Zone he is attacking and determines his AT by making a 2d6 roll and adding the appropriate printed CF of the Artillery/Stuka unit. There are no other DRMs to the AT.
14.3.2 To determine the DT, the defender selects one unit in the Area as the Lead Defending Unit, makes a 2d6 roll and applies any applicable DRMs as listed on the Bombardment Table (see PAC).
14.3.3 Results are determined the same as detailed in Direct Fire (Section 13.2).
14.3.4 CPs are assessed the same as detailed in Direct Fire (Section 13.3).
14.3.5 Once an Artillery/Stuka unit has performed its bombardment, flip it over to its "used" side indicating it cannot be used again this turn.
15.0 RUBBLE
There are two levels of Rubble in the game: Rubble and Heavy Rubble. There are no Rubble markers on the map when the game begins. Historical Note: Direct combat and bombardment rapidly transformed Cholm into ruins, creating positions that naturally favored the side defending in that part of the city.
15.1 Creating Rubble
15.1.1 Rubble may only be created in Urban Areas.
15.1.2 Rubble can be created as a result of combat during a Fire or Bombardment Impulse.
15.1.3 If the AT value is 6 or more than the DT value for a Direct Fire Combat, place a Rubble marker in the Area after the attack.
15.1.4 If the AT value is 4 or more than the DT value for a Bombardment Fire Combat, place a Rubble marker in the Area after the attack.
15.1.5 If an Area already contains a Rubble Marker and either 15.1.3 or 15.1.4 occurs again, flip that marker to its Heavy Rubble side.
15.1.6 Rubble creation cannot exceed Heavy Rubble.
15.2 Rubble Effects
15.2.1 Movement Units must stop their movement when entering an Area with Rubble.
15.2.2 Combat Rubble provides a beneficial DRM when determining the DT for a combat (see DT modifiers on the Direct Fire and Bombardment Tables on the PAC).
16.0 CLOSE COMBAT PHASE
At the start of the Close Combat Phase flip all Committed units back to their Uncommitted sides.
16.1 General Rules
16.1.1 Close Combat is only performed in Contested Areas and Zones.
16.1.2 Both players are allowed to attack during this phase.
16.1.3 A unit may attack and be attacked only once per Close Combat Phase.
16.1.4 Close Combat is resolved one contested Area or Zone at a time.
16.1.5 Although attacks are resolved one at a time, the results are considered to be simultaneous in a particular Area/Zone, such that units that must retreat or are eliminated during Close Combat still have a chance to attack back in the same Close Combat Phase before being retreated or removed from the map.
16.2 Pre-designation
16.2.1 During the player's portion of the Close Combat Phase, all his Close Combat attacks in the Area/Zone must be pre-designated first. In other words, a player may not have his units switch targets after seeing the results of one of his previous attacks within the Area/Zone.
16.2.2 The player with the Advantage may observe the results of his opponent's Close Combat attacks in that Area/Zone before pre-designating his own attacks.
16.3 Pairing Off
16.3.1 The player with the Advantage lines up all his combat units in the contested Area. The non-Advantage player then places each of his units beside the specific enemy unit he wishes to attack (Exception: Section 16.4) and resolves Close Assault attacks.
16.3.2 After the non-Advantage player has attacked, he too arranges his units in a line to have the Advantage player attack with his units (Exception: Section 16.4).
16.3.3 The player may have more than one unit attack an enemy unit (additional units being in support and providing a DRM), but only if he has attacked every other enemy unit within that contested Area/Zone.
16.3.4 Units that are eliminated before they attack may still participate in Close Combat attacks during their portion of the phase as all combat is considered to be simultaneous in this phase.
16.4 Screening
16.4.1 Armor units may only be attacked by infantry if all the armor's friendly infantry units in the Area/Zone are designated (paired) to be attacked first.
16.4.2 Armor may always be paired to attack an opposing armor unit.
16.4.3 If a player cannot screen all of his armor units from attack, he may choose which of those armor units will accept Close Combat attacks and thereby act as a screen for the others.
16.4.4 A player who has more units than his opponent in an Area/Zone may select the number of excess units of his that will be screened and thus his opponent will not be able to attack them this phase.
16.4.5 Screened units may still attack in Close Combat, but must attack in conjunction with one of the screening units in a combined attack. They may not attack separately.
16.5 Close Combat Resolution
16.5.1 Close Combat attacks are resolved by making a 1d6 roll for each attack against an opponent's unit.
16.5.2 Modify the roll by any DRM listed below the Close Combat Table that applies (see PAC).
16.5.3 Apply the effect listed to the right of the roll's result on the Table.
16.5.4 Units that were eliminated are flipped to their Committed side as a reminder they have been eliminated and are to be removed once all the Close Combat attacks in that Area/Zone are complete.
16.5.5 Units that receive a retreat result are rotated 90 degrees to indicate they must retreat.
16.5.6 After both players have finished all their attacks in an Area/Zone, all eliminated units are removed from the map and placed in that player's Eliminated Units Not Regrouped Box (Exception: Section 20.2).
16.5.7 After eliminated units have been removed, players (non-Advantage player first) retreat those units that must retreat using the rules from Cases 13.4.1 and 13.4.2.
17.0 LOGISTICS
Historical Note: The Soviet side suffered from severe logistical problems leading to shortages of everything from ammunition to food. It was these shortages that in part prevented the German garrison from being overrun in the opening phase of the battle.
17.1 General Rules
17.1.1 Starting at the end of the Soviet player's 4th Impulse to activate (the 7th Impulse) of a Maneuver/Fire Phase and each Soviet Impulse thereafter, a 1d6 Logistics Roll must be performed.
a) The Soviet player has an Impulse Track on the map to track his Impulses until it reaches his 4th Impulse to activate, at which point he must make Logistics Rolls at the end of each of his Impulses. The Day/Night/Soviet Impulse marker is used to track this.
b) Each time the Soviet player completes his Impulse, move the marker one higher on the track.
17.1.2 If the Soviet player has performed an action (not passed) and the result of the Logistics Roll is a 1, the Maneuver/Fire Phase ends immediately.
17.1.3 If the Soviet player passes in his Impulse, he still makes this Logistics Roll, but there is a -1 DRM to the roll (i.e. a 1 or 2 result ends the Phase).
17.1.4 Preventing a Logistical Phase end The Soviet player may spend the Advantage (Case 8.1.1D) or either player may use their "Seize the Initiative" option (Section 20.1) to prevent the end of the Maneuver/Fire Phase.
18.0 END PHASE
18.1 General Rules
18.1.1 Determine if the Soviet player has won an Automatic Victory (Section 19.1).
18.1.2 If it is the End Phase of Turn 4, determine if the Soviet player has lost, or if the game carries on (Section 19.2).
18.1.3 The player with the Advantage can choose to perform a Redeploy (Section 8.1).
18.1.4 If the German Stubborn Defense marker (Case 8.1.1c) is currently on the map, remove it and set it aside for possible use in a later turn.
18.1.5 Air and artillery units that are on their used side are flipped over to their unused side.
18.1.6 In the absence of either an Automatic or German Tactical Victory (Turn 4 only), advance the Game Turn marker to the next space on the Game Turn Track. Switch Advantage if Case 8.1.3 applies.
18.1.7 Move the Day/Night/Soviet Impulse marker to the 1 box with the Day side up on the Soviet Impulse Track.
18.1.8 If this is game turn 9, determine the victor of the game (Section 19.3).
19.0 VICTORY CONDITIONS
There are two ways for the Soviet player to win the game: either an Automatic Victory or a Game End Victory; otherwise the German player wins.
19.1 Automatic Victory
The Soviet player wins an automatic victory if during the End Phase of any Turn he controls every Urban Area on the map.
19.2 German Tactical Victory
19.2.1 At the end of Turn 4 a game continuation check is performed and both the following conditions must apply:
a) The Soviet player must have Cholm surrounded. For Cholm to be considered surrounded, the Soviet player must either control or contest Areas and Zones so that there is no way the German player can trace a line of connected Areas and/or Zones from a Controlled Urban Area of Cholm to an uncontested German Controlled Zone C, D, or E.
b) The Soviet player must control at least one Urban Area of Cholm and control or contest Area 30 (Flugfeld, noted with a red star).
19.2.2 If both conditions (a and b above) are met, the game will continue. If only one or neither of the conditions are met, the game immediately ends in a German Tactical victory.
19.3 End of Game Victory
If at the end of the game the Soviet player:
- controls at least 4 Urban Areas,
- and has Cholm still surrounded (Case 19.2.1a),
- and controls or contests Area 30 (Flugfeld, noted with a red star),
then the Soviet player wins. Otherwise the German player wins.
20.0 SIDE DETERMINATION
If both players wish to play the same side, this rule is used to decide which side each player commands and to compensate for either player's perceptions regarding the relative chances of each side.
20.1 Bids
20.1.1 Each player submits a secret, written "Seize the Initiative" bid to command the side they want.
20.1.2 The higher bid player gets to play the side he desired and his bid value becomes the number of times his opponent can declare that he is "Seizing the Initiative" during the game.
20.1.3 Use a pencil and paper or some convenient method to record this. Example The bid winning player bid 2, so his opponent is able to declare "Sieze the Initiative" 2 times during the game.
20.1.4 If the bids are tied, both players roll a die and the higher die roll is the winner of the bid and gets to play the side chosen while his opponent gets the number bid of "Seize the Initiative" declarations for the game.
20.1.5 Seize the Initiative Uses
a) Reroll Combat Dice Both players must either reroll the Fire/Bombardment combat attack or the player who just rolled his Close Combat attack.
b) Prevent Logistical Phase End (Case 17.1.4).
c) Second Activation When it is the player's Impulse to activate, he can select an Area that has friendly Committed units. These Committed units are now able to activate again and perform as if they are were not Committed (it is like a second activation for those units).
21.0 OPTIONAL RULES
Both players must agree to use any of the following rules prior to beginning the game.
21.1 Substitute Random Reinforcement Results (Neutral)
If the Random Reinforcement roll's result is for units which have all arrived and any available alternate choice has already been placed on the map, the owning player may instead choose:
a) To activate one Area His units therein perform an Impulse immediately, but are not flipped to their Committed side after completing this special activation (those units will have the ability to perform an Impulse normally later in the turn).
b) German Player only can choose to place the Stubborn Defense Marker in any Area not containing the Scherer HQ unit.
21.2 Bombardment into Contested Area (Pro-Soviet)
21.2.1 Players may choose to bombard a Contested Area, but at a risk of Friendly Fire inflicting CPs against their units in the Area being bombarded.
21.2.2 Resolve the attack against the defending units normally.
Player Aid Charts
Movement Cost (12.2)
| Cost | Type of Movement |
|---|---|
| 1 MP | Enter a Vacant Area across a Road Border or via a Road connector |
| 2 MPs | Enter a Vacant Area that is adjacent to an Area with an enemy unit in it across a Road Border or via a Road connector. |
| 3 MPs | Enter an Area across a Road Border or via a Road connector that contains at least one enemy unit at Night. |
| 4 MPs | Enter an Area across a Road Border or via a Road connector that contains at least one enemy unit during the Day. |
| Entire MA | To enter an Area (enemy-occupied or not) across a Non-road border or via a Non-road connector. Also to enter a Zone from an Area or another Zone. |
Zone Special Movement If the moving unit that starts in a Zone and first enters a Vacant or Free Zone, it can be:
- moved one additional Zone that is connected if it also is Vacant or Free, OR
- moved into a road-connected Area if that Area is Vacant or Free and not adjacent to an enemy occupied Area (Contested or not).
Key: Road Border; Road Connector; Non-road Border; Non-road Connector (symbols not reproduced).
Sequence of Play (7.0)
- Reinforcement Phase (Module 10.0)
- Maneuver/Fire Phase (Modules 11.0 to 14.0)
- Close Combat Phase (Module 16.0)
- End Phase (Module 18.0)
Area/Zone Type Key
Clear (grey circle), Forest (green triangle), Urban (dark grey square).
Rubble Creation (15.1)
- Direct Fire: If the AT result is 6 or more higher than the DT
- Bombardment: If AT result if 4 or more higher than the DT
Random Reinforcements (10.3) Roll 2d6
Each cell gives the reinforcement letter code for the modified Dieroll (DR) and Turn.
| DR | Turn 1 | Turn 2 | Turn 3 | Turn 4 | Turn 5 | Turn 6 | Turn 7-9 |
|---|---|---|---|---|---|---|---|
| ≤3 | U | U | U | U | U | U | U |
| 4-5 | J | U | U | U | U | U | U |
| 6 | J | J | J | J | J | J | J |
| DRM | Reason |
|---|---|
| +1 | if Advantage controlled by Soviets |
| -1 | if Advantage controlled by Germans |
| +/- 2 | in favor of side that expends their Advantage |
| Code | Selection | Deployment |
|---|---|---|
| U | The German player may select up to five "U" units of his choice from those still available to enter the game. The German player has the option of declining a rolled "U" result and taking a "J" result instead if available. This option must be exercised immediately after the Random Reinforcement is rolled. | "U" reinforcements are placed in Zone D regardless of who controls it and whether or not there are Soviet units present. The Advantage may be used to "Infiltrate" units (see Advantage Use Table). |
| J | The German player receives all three units marked "J". If already received, consider this a "U" result. | They may be placed in either Zone E or any Cholm Urban Area (observing occupation restrictions). |
| A | The Soviet player may elect to receive either one T-34 (5 CF) or up to three T-26 (3 CF) armor units that turn. After turn 3, The Soviet player has the option of declining an "A" result and taking a "K" result instead if available. This option must be exercised immediately after the Random Reinforcement is determined. | Soviet Random Reinforcements may be placed in any Soviet-controlled Zone except Zone D. The Zone may be Contested. |
| K | The Soviet player receives all of his units marked "K". | (as for A) |
Stuka Interdiction (10.5) Roll 1d6
| DR | Result |
|---|---|
| 1-4 | No Effect |
| 5-6 | Make a 1d6 roll. Result is the number of non-artillery units of the reinforcing forces that may enter this turn. The balance of the forces enter next turn (they cannot be delayed again). |
Partisan Attack (5.3) Roll 1d6
| DR | Result |
|---|---|
| 1-3 | No Effect |
| 4-5 | Unit Committed |
| 6 | Unit Eliminated |
Retreat Priority List (13.4)
Retreats must always be to an Area or Zone that is connected (common border or connector symbol)
Unit in an Area:
- A) A Free Area or Zone
- B) A Vacant Area which is adjacent to the least number of enemy-controlled Areas (units may never retreat into an enemy controlled Zone, even if contested)
- C) A friendly-controlled contested Area, which is adjacent to the least number of enemy-controlled Areas
- D) An enemy-controlled contested Area, which is adjacent to the least number of enemy-controlled Areas
Unit in a Zone:
- A) Into a Free Area or Zone
- B) Into a friendly-controlled contested Area or Zone
Note Units may never retreat into an enemy-controlled Zone, even if contested.
If a unit is unable to retreat, it is eliminated and placed into its side's Eliminated Units Not Regrouped Box.
Advantage Use (8.1)
| Action | Details |
|---|---|
| Modify Random Reinforcements DRM | Before making the Random Reinforcement roll (Section 10.3), the player with the Advantage can declare he is using the Advantage to additionally modify the roll. This provides an additional 2 modifier in the player's favor (-2 for Germans or +2 for Soviets). |
| Declare a Night Turn | During a player's Impulse, the player may declare a Night Turn (Module 12.0). |
| Place the Stubborn Defense marker (German only) | During his Impulse, he may place his Stubborn Defense marker into one German occupied Area but not the Area with the German HQ unit. This provides the German units in the Area Direct Fire (see PAC) and Close Combat (Case 16.5.3) benefits unless the German HQ is also in that area, in which case the marker's benefits are ignored. The Stubborn Defense marker is removed from the map if the Area it occupies becomes Soviet-controlled. Only one marker is available each turn and it is removed from the map during the End Phase. Design Note: The Stubborn Defense marker represent the superhuman defensive efforts made by very small groups of German soldiers. |
| Prevent a Logistical Pause (Soviet only) | During the Maneuver/Fire Phase the Soviet player (only) may negate the effects of a Logistics DR that would have ended this Phase (Module 17.0). |
| Infiltrate Soviet Lines (German only) | Once per game prior to turn 8, when a "U" random reinforcement is received and Cholm is surrounded (Case 19.2.1a), he can use the advantage to infiltrate some of these units. This must be declared as soon as the "U" Random Reinforcements is determined. After selecting the units to arrive, he rolls 1d6. Result: 1-4 = 1 unit, 5 = 2 units, 6 = 3 units. The number of units indicated in the result is the maximum number of the selected infantry units that can be placed in Area 31 (Gefechtsstand) instead (stacking permitting). Historical Note: Group Uckermann was the relief column intended to lift the siege of Cholm. A few units from this formation were able to slip through Soviet lines but the column itself did not possess the strength to open and maintain a corridor to the beleaguered city at that point. |
Direct Fire (13.0)
ATTACKER AT = Roll 2d6 and add all applicable DRMs below.
| DRM | Reason |
|---|---|
| +? | The CF of the Lead Attacking Unit |
| +1 | for each additional unit firing beyond the Lead unit (up to a maximum of +3) |
| +1 | If three or more of the firing units have the same Parent Organization |
| +1 | (German only) If the Scherer HQ unit is present in the Area |
| +1 | (German only) If the Stubborn Defense marker is present in the Area being attacked, unless the Scherer HQ unit is also in that area. |
DEFENDER DT = Roll 2d6 and add all applicable DRMs below
| DRM | Reason |
|---|---|
| +? | The CF of the Lead Defending Unit |
| +1 | If the Area the defender is in is Clear |
| +2 | If the Area/Zone the defender is in is Forest |
| +3 | If the Area the defender is in is Urban |
| +1 | If currently a Night Impulse |
| +1 | (German only) If Scherer HQ unit is present in the defending Area |
| +1 | (German only) Stubborn Defense marker and the Scherer HQ unit is not present in the defending Area. |
| +1 | If the Area contains a Rubble marker |
| +2 | If the Area contains a Heavy Rubble marker |
RESULT (subtract DT from AT)
| Result | Effect |
|---|---|
| ≤ 0 | Failure: No Effect. |
| > 0 | Difference between the AT and DT is the number of Casualty Points that is assessed against the defenders in the area. |
Casualty Points (13.3) All CPs must be allocated if possible
| CPs | Effect |
|---|---|
| 1 CP | Each defending unit that retreats (see Section 13.4) |
| 2 CPs | Each infantry unit eliminated |
| 4 CPs | Each armor unit eliminated |
Note: Armor 2 CP absorption ability (Optional Section 21.3)
Bombardment Fire (14.0)
ATTACKER AT = Roll 2d6 and add the appropriate CF of Bombarding unit
DEFENDER DT = Roll 2d6 and add applicable DRMs below to result
| DRM | Reason |
|---|---|
| +? | The CF of the Lead Defending Unit |
| +1 | If the Area is Clear |
| +2 | If the Area/Zone is Forest |
| +3 | If the Area is Urban |
| +1 | If the Area contains a Rubble marker |
| +2 | If the Area contains a Heavy Rubble marker |
RESULTS and CASUALTY POINTS: Both are determined or assessed as detailed in Direct Fire Table.
Note: The Stuka is the only artillery-type unit that can make a Bombardment attack into a Zone.
Close Combat (16.0) Roll 1d6
| DR | Result |
|---|---|
| 1-4 | No Effect |
| 5 | Opponent's Unit Retreats |
| 6 | Opponent's Unit Eliminated |
| DRM | Reason |
|---|---|
| +1 | For each additional unit above the first that has been paired off against the enemy unit. |
| +1 | (Germans only) HQ unit or Stubborn Defense marker is present in the Area. |
| +1 | If a German PNR unit is attacking a Soviet Armor unit |