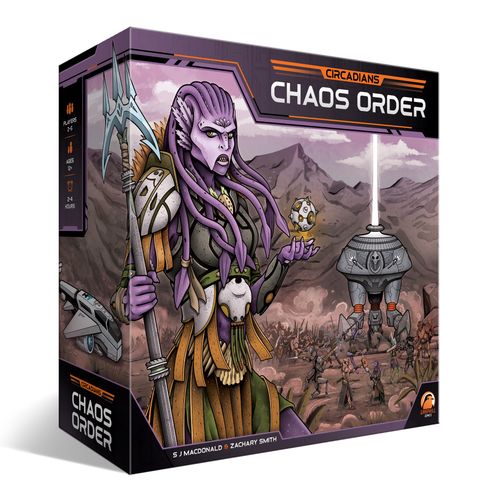
Circadians: Chaos Order
Circadians: Chaos Order Rulebook
Table of Contents
Table of Contents
Game Overview
Circadians: Chaos Order is a competitive, confrontational area control game with highly asymmetric Factions. Each Faction has unique Leaders and Attributes, all of which are upgradable within the game. They also have unique Buildings to construct and their own personal win condition. This is in addition to the global win condition of controlling all remaining Relics on the Map. Over the course of up to 6 Rounds, players will be researching, constructing Buildings, and harvesting resources. They will also be recruiting and moving Units, all in an effort to capture the ancient Relics, control Regions vital to their strategy, and gain enough Fame to be crowned the winner of Chaos Order.
Rulebook, Faction Rulesheets and Tuck Boxes
Rather than overloading this Rulebook with every little detail of the game, a lot of Faction-specific rules have been provided separately on the 6 Faction Rulesheets. These are freely available for all players to read during the game, as they also provide some quick tips when playing as, or against a particular Faction.
Also included are 6 Faction Tuck Boxes. These are designed to house all components for each Faction (other than their Faction Board, Rulesheet and Base Tile). On the back of each Tuck Box is a component list. Use this list, along with the Faction Rulesheets to identify each Faction's components.
Before the first game, place Standees in their plastic bases. Punch out all cardboard Tokens and sort them, along with all wooden components into the associated Faction Tuck Boxes.
Combat Wheel Assembly
Each Combat Wheel is made up of a frame, wheel and clip. Once assembled, these do not need to be separated. Both Combat Wheels are identical.
Tuck Box Assembly
- Fold and unfold each side down upon itself to create clean fold lines.
- Fold up 1 side at a time, in such a way that the small tabs fold over themselves on the inside corners, locking the sides in place. The triangular sections should tuck under the longer sides of each box.
- Once all sides are folded and locked, the tuck boxes will be ready for use.
Components
Non-Faction Components
- 1 Main Board
- 6 Production Tokens
- 4 Neutral Pricing Tokens
- 9 Neutral Foundations
- 1 Flare Gun
- 6 Relics
- 50 Energy: 40 Small (value 1), 10 Large (value 5)
- 30 Gems
- 10 Mountains
- 3 Gold-Backed Land Tiles
- 3 Blue-Backed Land Tiles
- 3 Red-Backed Land Tiles
- 2 Combat Wheels
- 50 Tactics Cards
- 2 Dice
Faction Components
All Faction Components are listed on the back of each Faction's Tuck Box and Faction Rulesheet. Also included are the 6 Faction Boards.
The Main Board
The Main Board features the Vault (the Round Structure and Research Tracks) and the Map, featuring 26 hexagonal Regions.
- Research Tracks — down the left side of the board, one per Action Phase.
- Round Structure — down the left side of the board, showing the 9 Phases.
- Vault — where Factions' Pricing Tokens are kept and used.
- Tactics Cards Draw Pile and Discard Pile — at the bottom of the Vault area.
- The Map — the 26 hexagonal Regions.
- Fame Track (1 for each Faction) — down the right side of the board.
Map Regions
There are 6 Types of Regions: Base Location or Tile Location, Faction Base, Lake Region, Swamp Region, Cliffs Region, Plains Region. Only Swamp, Cliffs and Plains are classed as Land Regions.
Adjacencies
For setup purposes, Regions are considered adjacent if they touch on 1 side and do not have a Mountain sitting between them. Further adjacency rules will be explained later.
Production Tokens
All Bases and Land Regions have Production Tokens printed on them. This indicates what resource or reward they produce.
Cards
Leader and Ryh-zu Cards
Each Leader/Ryh-zu Card shows: Name and Combat Values/Icons; Gem cost to Deploy (top-left); Gem cost to Upgrade; and an Ability available in the indicated Phase. Cards have a Basic Side and an Upgraded Side.
Tactics Cards
Each Tactics Card shows Combat Values (top corners), an Ability if used in the Combat Phase, and an Ability if played in the indicated Phase. Some abilities are covered by a Gem Lock.
Attribute Cards
Each Attribute Card shows a Name, Abilities available in the indicated Phases, and a Gem cost to Upgrade. Cards have a Basic Side and an Upgraded Side.
Intel Cards
Each Intel Card shows a Faction Logo and Abilities available in the indicated Phase. Cards have a Circadian Side and an Other-Faction Side.
Setup
Begin setting up Chaos Order by placing the Main Board in the centre of the playing area. Have each player choose a Faction to play as, taking the associated Faction Board, Faction Rulesheet, Base Tile and Tuck Box. All players should follow the setup instructions, as outlined on their Faction Rulesheet. Once they have finished setting up their Faction, all Tuck Boxes may be returned to the box. From this point on in the Rulebook, players will always be referred to as "Factions".
Once Faction setup is complete, follow these steps:
- Shuffle all Tactics Cards and place them into a facedown Draw Pile on the indicated space of the Main Board.
- Place both Combat Wheels and Dice, along with all Energy and Gems into a Main Supply nearby. Each Faction gains 6 Energy and 1 Gem from the Main Supply.
- Place the 6 Production Tokens in the top-left area of the Map.
- All Factions place 1 Research Marker of their colour on the left-most space of each Research Track.
- All Factions place their Fame Marker on the 0 space of their Fame Track.
- Place all grey-backed Pricing Tokens in a facedown pile on each Faction's space in the Vault. Factions keep their 4 orange-backed Pricing Tokens in their Supply.
- Give the Flare Gun to the left-most Faction present in the Vault (Circadians in the example below).
- Return any Neutral Pricing Tokens not applicable to the Faction count to the box (see the Faction count numbers printed on the back of each Token). Neutral Pricing Tokens come in pairs. For each pair being used, turn them faceup and place the Token featuring a numbered Relic icon on top of the other Token. Place these Tokens near the Research Track.
- The following sets of Land Tiles are required for the indicated Faction counts: Gold-Backed = 3+ Factions; Blue-Backed = 4+ Factions; Red-Backed = 5 Factions. For each set being used, shuffle all 3 Tiles and randomly place them faceup onto the Tile Locations of the Main Board with the associated icon (Blue-Backed Land Tiles onto the Tile Locations showing a blue hex icon, etc). Return any unrequired Land Tiles to the box.
Each Faction completes steps 1-3 in full, following the Vault order from right to left:
-
Place their Base Tile onto a Base Location from those available on the Map. A Base Location is considered available if its icon applies to the Faction count and has not already been selected by another Faction.
The Base Location pictured on the Main Board is only available in games with 2 Factions. With 3 or more Factions it will be covered by a Gold-Backed Land Tile.
-
Place Mountains on adjacent borders if necessary. Each Base may only be adjacent to 2 Land Regions (Swamp, Cliffs, Plains). The 2 Land Regions must be adjacent to each other, and to the Base. If a Base is adjacent to 3 or more Land Regions, the Faction must place Mountains onto a number of borders of their Base until there are only 2 adjacent Land Regions. It is their decision where Mountains (if any) are placed.
-
Randomly place 1 Starting Foundation from their Faction, faceup onto each of the Land Regions adjacent to their Base. Once placed, these are all considered neutral (no Faction owns them).
Once all required Bases, Mountains and Starting Foundations have been placed, follow these steps:
-
Of the 9 Neutral Foundations, set aside the 6 featuring a numbered Relic icon. If playing with fewer than 5 Factions, randomly return 1-3 of the other 3 Neutral Foundations to the box: 4 Factions = Return 1; 3 Factions = Return 2; 2 Factions = Return 3.
Shuffle all Neutral Foundations that haven't been returned to the box and randomly place 1 faceup onto each Land Region that doesn't currently have a Foundation.
-
For each Neutral Foundation featuring a numbered Relic icon, take the corresponding Relic and place it on top of the Foundation.
-
Starting with the Faction holding the Flare Gun and moving clockwise around the table, each Faction selects any 1 of their Leaders and places their Standee onto 1 of the 2 Regions adjacent to their Base. If their Leader has a Gem cost in the top-left of their Card, they must pay that to the Main Supply. They must then place all Fighters not currently on their Faction Board onto their 2 adjacent Regions. They may distribute these as they please, but each Region must have at least 1 Fighter.
-
Finally, place 1 remaining Mountain on each of the 3 printed Mountain spaces (Region borders with 2 close parallel lines). Any unused Mountains can be returned to the box.
4-Faction Setup Example
Jrayek were the right-most Faction in the Vault, so they chose their Base Location first, deciding on the top-right area of the Map. Since there were 3 adjacent Land Regions, they placed a Mountain between their Base and the Swamp to the right. Zcharo then decided to place their Base on the right, also placing a Mountain as required. Next, AI chose to place their Base down the very bottom of the Map, with a Mountain between their Base and the Plains to the right. Lastly, Circadians chose the lower of the 2 remaining options, placing their Drop Ship and 2 Foundations adjacent to it.
8 Neutral Foundations in total were added to the Map and the 6 Relics where placed over their corresponding Foundations.
In turn order, all Factions placed their starting Leader and Fighters onto the 2 Regions adjacent to their Base.
Round Structure
Chaos Order is played over a series of Rounds, up to a maximum of 6. Each Round runs through the same 9 Phases, as shown down the left side of the Main Board:
SET PRICES
Factions will each have the opportunity to price 1 (2 in games with only 2 Factions) of the next 5 Phases. These are known as the "Action Phases". By pricing an Action, Factions are setting the price that their opponents must pay in order to Act in that Phase. It also ensures they won't need to pay for that Phase and that they'll get to Act first (or last in the Move phase, if they wish). Pricing is done in turn order, starting with the Faction holding the Flare Gun and continuing clockwise around the table.
ACTION PHASES (DISCOVER, BUILD, HARVEST, RECRUIT AND MOVE)
In each of these Phases, all Factions have the option to Act or Pass. Turns begin with the Faction who priced the Phase (not always true in the Move Phase), followed by each Faction clockwise around the table. Once all Factions have taken their turn, play continues to the next Phase, starting again with the Faction who priced it.
COMBAT
During the Combat Phase, Factions will select and resolve each Battle on the Map. A Battle takes place in every Region where more than 1 Faction has presence (Units or Buildings). Battles are selected and resolved 1 at a time, starting with the Faction holding the Flare Gun and continuing clockwise around the table. This continues until all Battles are resolved, skipping Factions that are not involved in any remaining Battles.
GAIN INCOME
Each Faction simultaneously gains all their Income. Based on how many Regions they control, they may gain resources, redeploy Units, or potentially upgrade 1 or more Attributes. Factions are reminded of these benefits at the bottom-left of the Main Board. Factions may also gain Income from their Faction Board, Leaders, Attributes, or by playing Tactics Cards that have abilities in the Income Phase.
CHECK RELICS
If 1 Faction controls all remaining Relics on the Map, they win the game. If not, the Faction controlling the current Round's Relic collects it, and returns all Units from that Region to their Base. After this, play continues into the next Round, beginning again with the Set Prices Phase.
Set Prices
Pricing Action Phases
Starting with the Faction holding the Flare Gun, and continuing clockwise around the table, each Faction will Price 1 of the 5 Action Phases. In games with just 2 Factions, they will each price 2 Action Phases each Round, 1 at a time, alternating between the 2 Factions.
To set the price of an Action Phase, Factions select 1 of the Pricing Tokens currently in their Supply and place it faceup onto the chosen Phase. Each Phase may only contain a single Pricing Token. This is called "Pricing an Action".
This may have some immediate effects, potentially resulting from both the chosen Action Phase and the Pricing Token being placed. Pricing the Build Phase immediately rewards 1 Gem. Pricing the Recruit Phase immediately rewards 2 Energy.
When pricing the Move Phase, there are 2 options: Move First and gain 1 Tactics Card; or Move Last. Although the Move Phase has 2 options, only 1 Pricing Token may be placed here. The other option must be ignored.
Faction Pricing Tokens
All Factions have the same set of Pricing Tokens in their Faction's colour (exception: Jrayek).
When acting in each of the Action Phases, Factions must pay the indicated amount of Energy shown on the Pricing Token of that Phase. Costs shown in the Faction's colour must be paid directly to that Faction. Costs shown against an orange background must be paid to the Main Supply.
- When placed, one Pricing Token causes its Faction to immediately collect all their Pricing Tokens from the Vault and gain 1 Tactics Card. Pricing Tokens taken from the Vault cannot be used in the same Round that they were collected (only applicable in games with only 2 Factions).
- When placed, another Pricing Token immediately rewards its Faction 1 Research on the Research Track where it was placed. They must still pay to move past Gem Locks. If they cannot pay, or are already at the end of that Research Track, this effect is ignored.
- The remaining Pricing Token has no immediate effect.
Neutral Pricing Tokens
During setup a number of Neutral Pricing Tokens may have been placed near the Main Board based on the Faction count (none in games with 5 Factions). Once all Factions have finished Placing their Pricing Tokens, Neutral Pricing Tokens are placed on any Action Phases that don't currently have a Pricing Token.
Neutral Pricing Tokens begin stacked in a pair. On the top Pricing Token of each pair is an icon showing a numbered Relic. These top Tokens should be returned to the box during the Check Relics Phase of the indicated Rounds. Doing so increases their cost as the game progresses.
These Tokens are used in games with exactly 3 Factions. The initial cost is 2 Energy: 1 paid to the Faction seated to the left; and 1 to the Faction to the right. After Round 2, Factions must also pay 2 additional Energy to the Main Supply.
These Tokens are used in games with 2-4 Factions. The initial cost is 3 Energy, paid to the Main Supply. This increases to 5 Energy after Round 4.
In games with exactly 3 Factions, both pairs of Neutral Pricing Tokens are used. When placing both, the Token with the lowest total Energy cost is placed in the top-most available Phase, with the other Token then being placed in the remaining Phase. This results in their placement order switching every 2 Rounds.
Flare Gun
Immediately after the Move Phase has been priced, the Flare Gun must be moved.
If a Faction priced the Move Phase, the Flare Gun is given to the Faction seated to the left of the Faction that priced it. If that Faction already had the Flare Gun, or if the Move Phase was priced by a Neutral Pricing Token, it must be passed to the next Faction in clockwise order from the Faction currently holding it.
When Move is priced by a Neutral Pricing Token, place that Token on the "Move First" spot.
Action Phases
While each Action Phase serves a different function, they all operate in the same way. For each Phase, the Faction who priced the action will take their turn first (or last in the Move phase, if selected), followed by each other Faction in clockwise order around the table. If the Phase was priced by a Neutral Pricing Token, the Faction holding the Flare gun will take their turn first. On their turn, each Faction has the choice to Act or Pass.
To Act, they must pay the Energy cost, shown on the Pricing Token in that Phase. If they cannot pay this cost, or choose not to, they must Pass. The Faction who priced the Phase never pays the Energy costs shown on their Pricing Token. Passing has no effect and costs no Energy. However, there are some specific Tactics Cards that can be played to gain the printed effects when Passing.
Research Tracks
Each Action Phase has its own Research Track. The positions of their Research Markers on these Tracks determine what Factions can do in each Action Phase. Research Tracks are each broken down into 3 rows: Main Action; Immediate effects and Gem Locks; Auxiliary Action.
MAIN ACTION
To perform a Main Action, Factions simply resolve the effects printed in the top row of the same column where their Research Marker sits. These may only be performed once per turn, and are always optional. However, it is more beneficial to gain the most out of these actions if possible.
IMMEDIATE EFFECTS AND GEM LOCKS
Any time Factions move their Research Markers into a new column containing icons in this row, they may immediately resolve its effects. Some columns are separated by a Gem Lock. Any time Factions want to move past a Gem Lock, they must pay 1 Gem to the Main Supply. If they cannot pay, they cannot move their Research Marker.
AUXILIARY ACTION
To perform an Auxiliary Action, Factions simply resolve the effects printed in the bottom row of the same column where their Research Marker sits. These may only be performed once per turn, and only after the Main Action has been resolved. All Auxiliary actions have an Energy or Gem cost, followed by some sort of benefit. The cost must always be paid in full before resolving the benefit.
Example: In this example, AI have priced the Discover Phase. This would not cost them any Energy to Act. On their turn they could gain 1 Research. They decide to use this to Research on the Discover Track, moving their Research Marker into the fifth column. This costs them 1 Gem to move past the Gem Lock, but immediately gains them 1 Tactics Card. Despite their new position on the Track having 2 Research as the Main Action, they cannot benefit from this until the next Round. However, their movement on this Track does affect their Auxiliary Action. Now that they are in the fifth column, the Auxiliary Action available to them is to spend 1 Gem for 1 Tactics Card.
Once AI has taken their turn, Circadians, Zcharo and Jrayek would also have the opportunity to Act or Pass. Each Faction that chooses to Act would have to pay 2 Energy to AI and 3 to the Main Supply.
For example, if Jrayek decided to Act, they would pay the required Energy, then gain 1 Research from the Main Action. After doing so, they could pay 1 Gem to gain another Research from the Auxiliary Action. These could both be on the same Research Track, or 2 different Tracks.
Discover
The Main Action in this Phase allows Factions to gain Research in any of the 5 Action Phases. When gaining Research, they simply move their Research Marker 1 space to the right on their chosen Track. The Auxiliary Action allows Factions to spend Gems for 1 more Research or a Tactics Card.
Build
The Main Action in this Phase allows Factions to construct Foundations and Buildings by spending 1 Build Point for each. The position of their Research Marker determines how many Build Points they have available. When moving Research Markers into the second and fourth columns, Factions may immediately construct a Foundation or gain 1 Tactics Card. The Auxiliary Action allows Factions to spend Energy for 1 additional Build Point or to gain 1 Tactics Card.
When spending a Build Point to construct a Foundation, Factions take any 1 Board Foundation from their Faction Board, turn it over, and place it in a Land Region they control. Once placed on the Map, Foundations are considered neutral (no Faction owns them). This is true even for Starting Foundations. Each Region may contain no more than 3 Foundations. Some Board Foundations have Gem Locks, which require Factions to spend 1 Gem in order to construct. Once removed from Faction Boards, these Foundations reveal new abilities for Factions to take advantage of (see the Further Rules section).
When spending a Build Point to construct a Building, Factions take 1 Building from their Faction Board and place it on a Foundation in a Region they control. Buildings always require a Foundation, unless an effect states otherwise.
All Factions have 3 types of Buildings: Foundry, Outpost and Stronghold.
Factions must always construct the left-most Building of the type they choose. Some Buildings have Gem Locks, which require Factions to spend 1 Gem when constructing. Once removed from Faction Boards, Buildings reveal additional resources that they will gain in each Gain Income Phase. Buildings also provide a variety of different benefits in the Region where they are constructed (see the Further Rules section). Some Foundations have Location Rewards on them. Any time Factions construct Buildings, they gain the reward of whatever they cover over.
Important rule: Each Region may only contain 1 of each Building type (exception: Zcharo's Outposts).
Example: In this example, Zcharo have priced the Build Phase. This would not cost them any Energy to Act. For other Factions to Act, they would only need to pay Zcharo 1 Energy. On their turn, Zcharo can spend up to 3 Build Points. After doing so, they could also spend 2 Energy to gain 1 Tactics Card.
Looking at their Faction Board, they decide to first construct their second Stronghold. This Stronghold has a Gem Lock. Normally this would cost 1 Gem, but their previously constructed Board Foundation allows them to spend 2 Energy instead. After paying this cost, they place their Stronghold onto a Foundation in a Region they control, immediately gaining 1 Gem from the Location Reward.
They use their second Build Point to construct their bottom-left Foundation, increasing their hand limit and immediately gaining 2 Energy. With their third Build Point, they construct their second Outpost on top of the Foundation they just constructed. Lastly, they decide not to make use of the Auxiliary Action.
Harvest
The Main Action in this Phase allows Factions to gain Energy and additional resources from Regions they control on the Map. The position of their Research Marker determines how much Energy they gain, and how many Harvest Points they have available.
When moving Research Markers into the third column, Factions may immediately take 1 of the Production Tokens from the top-left area of the Map and place it in such a way that it covers a printed Production Token on any Region they control, including their Base.
When moving Research Markers into the fifth column, Factions may immediately upgrade 1 Production Token on the Map in a Region they control, including their Base. Upgrading Production Tokens always improves upon the benefits shown on the basic side.
The Auxiliary Action allows Factions to spend Energy to gain Gems.
By default, Factions can only harvest Production Tokens on their Base or on Regions where they have a Foundry. However, there is a Board Foundation that once constructed, allows Factions to harvest from any of their Buildings. For each Harvest Point they have, Factions may select 1 Region from which they are able to harvest, and gain the indicated resources or other benefits shown on its Production Token. Each Faction may never harvest the same Production Token more than once per Round. Factions may harvest from their available Production Tokens in any order they choose.
Example: In this example, the Harvest Phase has a Neutral Pricing Token. This would cost Factions 3 Energy to Act, paid to the Main Supply. Jrayek's Research Marker is in the second column. After paying to Act, they immediately gain back 5 Energy from the Main Supply and have 2 Harvest Points to spend. They may also spend 2 Energy to gain 1 Gem if they choose.
Recruit
The Main Action in this Phase allows Factions to spend Recruitment Points in order to get more Fighters onto the Map. The position of their Research Marker determines how many Recruitment Points they have available. Each Faction Board also allows Factions to spend Recruitment Points to gain either Gems or Tactics Cards. The Auxiliary Action allows Factions to spend Energy to deploy a Leader.
Spending Recruitment Points allows Factions to advance their Fighters from left-to-right across the Recruitment Track, situated at the bottom of their Faction Board. This is all in an effort to advance them off the final Sector of the Track and onto their Base. Each Faction has a slightly unique Recruitment Track. For example, Circadians have 3 Sectors, whereas AI have 1. Advancing each Fighter from 1 Sector into the next (or onto their Base) costs 1 Recruitment Point. This is shown on the Recruitment Track by the icons separating each Sector.
Factions (other than AI) also have the option to Fast-Track Fighters from the first Sector, directly to their Base (or Drop Ship, for Circadians). This is shown by a path leading directly along the top of their Recruitment Track. Each Fighter who advances this way not only costs 1 Recruitment Point, but also the indicated amount of Energy.
To deploy a Leader using the Auxiliary Action, Factions must pay the indicated Energy cost, along with any Gem Cost shown on the chosen Leader Card. They may choose any 1 of their Leaders not currently on the Map. After paying all required costs, place the Leader's Standee onto their Base.
Example: In this example, Circadians have 7 Recruitment Points to spend. They spend 2 to advance the 2 Fighters from the third Sector onto their Drop Ship (it acts like a Base for them). They then spend 2 more Recruitment Points, advancing the Fighter from the second Sector, into the third and then onto the Drop Ship. They could Fast-Track the remaining Fighter or advance them 3 times, but they instead decide to spend 3 Recruitment Points to gain 1 Gem.
Circadians also decide to spend 4 Energy to deploy Sable. As shown in the top-left of her Card, she also costs 1 Gem to deploy. They take her Standee and place it on their Drop Ship, alongside their newly recruited Fighters.
Once Circadians have taken their turn, AI, Zcharo and Jrayek would also have the opportunity to Act or Pass. Each Faction that chooses to Act would have to pay 1 Energy to Circadians and 1 to the Main Supply.
Move
The Main Action in this Phase allows Factions to spend Movement Points to move their Units around the Map. The position of their Research Marker determines how many Movement Points they have available. When moving Research Markers into the fourth column, Factions may immediately spend 2 Recruitment Points or gain 1 Tactics Card. Recruitment Points spent this way work identically to those spent during the Recruit Phase. The Auxiliary Action allows Factions to spend Energy to upgrade a Leader. The fifth column also rewards 1 Tactics Card as part of the Main Action.
Each Movement Point spent allows Factions to move any number of Units from 1 Region, to any other adjacent Region. Regions are considered adjacent if they touch on 1 side and do not have a Mountain sitting between them. Regions containing Outposts are also considered adjacent to their Faction's Base. There are also a variety of Faction-specific abilities and other effects that can create adjacencies (such as Leyrien's ability to treat all Swamps as if they were adjacent).
Each Faction may never end their movement (or a redeployment) with more than 1 of their Leaders in a single Region (other than their Base). Factions may have multiple Leaders in a Region during their movement, but never by the end of it (exception: Oxataya).
Units may move off a Base, but never onto them. There are other ways for Units to return to Base, but never willingly through movement or redeployment.
Units cannot move onto Lakes (exception: Oxataya).
Units cannot move onto Base Locations or Tile Locations (Regions not being used at the Faction count).
Multiple Factions may have Units in the same Region. This will result in Battles taking place in the Combat Phase.
Each Movement Point spent is isolated from all others spent before or after. This means that a Faction could move any number of Units from 1 Region to another, then move any Units from that Region, to another, including the Units they just moved there, or any others that were already present.
To upgrade a Leader using the Auxiliary Action, Factions must pay the indicated Energy cost, along with any Gem Cost shown on the chosen Leader Card. They may choose any 1 of their Leaders to upgrade, even those not currently on the Map. After paying all required costs, they must turn over the Leader's Card, showing their upgraded artwork, Combat Values and ability.
Example: On their turn, Jrayek can spend up to 4 Movement Points. They spend 1 to move Lynke and 2 Fighters from the Cliffs Region, to the central Swamp Region. They spend another to bring 1 Fighter from the adjacent Swamp into the same central Region with their 2 Leaders. They wanted to bring over more Fighters, but Zcharo had already Pinned them with their 2 Fighters. With 2 Movement Points left, they move Lynke and 1 Fighter into the Region containing Zcharo Units. Lastly, they move Ikryla and 3 Fighters down to the Plains Region containing Relic 5 and 3 AI Fighters.
After completing all their Movement, Jrayek also decide to spend 4 Energy and 1 Gem to upgrade Lynke, making him much stronger for the upcoming Battle with Zcharo.
Tunnels
In games with 4-5 Factions, the 2 Regions bordering either end of the Blue Tunnel are considered adjacent. In games with 5 Factions, the 2 Regions bordering either end of the Red Tunnel are considered adjacent.
Redeployment
Redeployment is another type of movement that Factions can gain in a variety of ways. This is a single Movement Point, but has 1 further restriction than regular movement: Factions can only move Units into an adjacent Region where they already have Units or Buildings present. This prevents them from starting new Battles or from claiming Regions where no Factions are present. Moving Units through redeployment always ignores all Pinning rules (see below).
Pinning
Units get Pinned by opposing Units in the same Region. In order to move out of a Region with opposing Units, Factions must leave behind at least as many Units as their opponent has there. Factions decide which of their Units will stay behind. If there are multiple Factions present, Units are only Pinned by the opponent with the most Units (they ignore the other Factions' Units). For example, if Zcharo had 4 Units in a Region with 7 AI Units, they would not be able to move out any Units. However, AI would be able to move out up to 3 of their Units, as the other 4 are Pinned by Zcharo.
Example: In this example, Jrayek have priced the Move Phase, selecting to Move Last. This Phase will begin with the Faction seated to the left of Jrayek, and continue clockwise around the table to Jrayek. Since they priced it, Jrayek wouldn't pay any Energy to Act. For other Factions to Act, they would need to pay Jrayek 3 Energy and another 3 to the Main Supply.
Combat
In the Combat Phase, Factions resolve all Battles on the Map. Battles take place when at least 2 Factions have presence in the same Region. Starting with the Faction holding the Flare Gun and moving clockwise around the table, Factions take turns selecting a Battle they are involved in to resolve. Once a Faction has no more Battles remaining on the Map, their future turns are skipped. Each Battle follows these 4 steps:
1. Battle Selection
On their turn, Factions must select 1 Region on the Map where they are involved in a Battle. If there are multiple opponents present, they must also select which opponent they will fight. Both Factions involved in the Battle must declare their current Strength, Attack, Shields, any special abilities they might have, plus how many Gems and Tactics Cards they have in their Supply.
Example: In this example, it's Jrayek's turn to select a Battle. They have selected a Region, but as there are 2 opponents present, they must also select who they will fight. They decide to take on Zcharo. If there are any Units remaining in this Region after the Battle, Circadians will have to fight them on a later turn.
2. Planning
Both Factions take a Combat Wheel and any Tactics Cards they have into their hand. They secretly and simultaneously spin their Combat Wheels to the desired section and optionally place a Tactics Card faceup over the middle of the Combat Wheel.
When selecting a section of the Combat Wheel, Factions must line up the black lines so that there is a Combat Icon above each of the Combat Values on the Card below.
The Combat Wheel has a pre-printed Tactics Card, allowing Factions to still fight without a Card. They may also choose to place a Tactics Card facedown on the Combat Wheel as a bluff (making their opponent think they are playing a Card). If they do this, after revealing their Combat Wheel, they should return the facedown Tactics Card to their hand (they do not reveal it).
Combat Wheel Sections
- Retreat. This section forces the Faction who chose it to redeploy all remaining Fighters. Any Leaders they had in Battle must be sent to their Base.
- Two sections each cost 1 Gem to use, but allow the Faction who chose it to roll 1 Die. Dice add additional Strength, and sometimes Shields to a Faction's Combat Values. If they do not have a Gem to spend, then they cannot choose this section of the Combat Wheel.
- One section may only be selected if a Faction has 4 or more Fighters and no Leader. It's also the only section that deals Attacks using both the left and right side of the Combat Wheel.
- The remaining sections have no additional benefits, but they always provide Strength on either the left or right side, along with either Attack or Shields on the other.
Fighting Without a Tactics Card
If selecting to fight without a Tactics Card (or if bluffing), both the left and right sides of the Combat Wheel provide a Combat Value of 1. However, as shown at the bottom of the Wheel, if a Faction chooses to Retreat without a Tactics Card, they will have 2 fewer Shields. It is far better to play a Tactics Card when Retreating, unless a Faction has enough Shields from other sources.
Fighting With a Tactics Card
If selecting to fight with a Tactics Card, it should cover over the pre-printed Card. In one example, the Tactics Card and Wheel position provides 1 Attack and 3 Strength. Most Tactics Cards also have an ability that may provide additional benefits or effects. The Tactics Card shown there provides 2 additional Attack. When using Tactics Cards in Battle, any printed effects from other Phases should be ignored.
See the Further Rules section for more rules pertaining to Tactics Cards, and the Glossary for any questions around terminology.
3. Revealing Plans
Once both Factions have made their plans, they must simultaneously reveal their Combat Wheel and Tactics Card (if any). If Factions selected to roll a Die, they must pay 1 Gem now and roll their Die. Factions are reminded of the 6 Die faces on the right side of the Combat Wheels.
4. Resolution
There are 3 steps to follow during each Battle Resolution. The order of these is very important. A reminder of these steps can be found down the sides of the Combat Wheels.
Strength. Both Factions add up their total Strength. This can come from the following:
- Combat Wheel, Tactics Card and Dice
- Leaders
- Buildings
- Fighters (each worth 1 Strength)
- Faction-specific abilities
The Faction with the highest Strength is declared the victor. If tied, the Faction who selected the Battle is the victor. Any effects that pertain to victories or losses must be resolved before moving onto the next step. In the rare case that a Faction selected to Retreat, but had the highest Strength, they still lose the Battle and Retreat.
Attacks and Shields. Both Factions add up their Attacks, minus any Shields that their opponent has. Attacks and Shields can come from the following:
- Combat Wheel, Tactics Card and Dice
- Leaders
- Buildings
- Faction-specific abilities
Each unshielded Attack Wounds 1 opposing Fighter (up to a maximum of 4 per Battle). For example, if AI had 6 Attack and Jrayek had 4 Shields, 2 Jrayek Fighters would be Wounded. If Jrayek also had 6 Attack and AI had no Shields, 4 AI Fighters would be Wounded, as 4 is the limit.
Wounded Fighters must be sent to the first Sector of the Recruitment Track on their Faction's Board. They will be available to Recruit again in the future. Any effects that pertain to Wounded Fighters must be resolved before moving onto the next step. If a Faction selected to Retreat, this must also be resolved now.
Winner/Loser effects. If the losing Faction still has presence in the Region, they must do the following:
- Return any remaining Fighters to their Base.
- Return any Leaders to their Supply. This does not cause upgraded Leaders to flip back to their basic side. Once upgraded, they remain that way.
- Return any Buildings to the Faction Board. Razed Buildings are always returned to the right-most empty space of that Building type on their Faction Board. As compensation, Factions immediately gain whatever resources or other benefits that each Building covers. For example, Strongholds always provide 1 Gem from the Main Supply when returned. Foundations are never removed from the Map.
After each Battle is resolved, all used Tactics Cards are placed in the Discard Pile and the Combat Wheels are returned to the Main Supply. Only once all Battles have been resolved should the Round continue into the Gain Income Phase.
Retreating
After Wounds are resolved, if a Faction selected to Retreat on their Combat Wheel, they must redeploy any remaining Fighters to an adjacent Region where they have presence (other than their Base). This can even be into a Region with an unresolved Battle that they are involved in. If there is no Region available to redeploy into, those Fighters are instead returned to their Base. Retreating also forces a Faction to send all their Leaders from the Battle's Region, to their Base.
There are a few rules to remember when Retreating:
- For the purposes of card effects and other abilities, Retreating counts as a loss, even if the Retreating Faction had the highest Strength.
- Leaders are not technically defeated, but rather forced to Retreat back to Base.
- If both Factions select to Retreat, only the Faction with the highest Strength does so. The other Faction remains in the Region, becoming the victor.
Victory With No Surviving Units or Buildings
It is possible for Factions to win a Battle, but have no presence in the Region after Wounds are dealt. This does not affect the loser of the Battle (they still follow step 3 of Resolution). The winning Faction is still victorious, but does not gain control of the Region.
Battle Example 1
It's Round 3 and Jrayek have selected to resolve this Battle against AI. Jrayek have 4 Strength from their Fighters, 2 from their Hostile Attribute, 2 from Ikryla and 3 from Uryk. This gives them a total of 11 Strength. However, they have no Gems, meaning that they won't be able to roll a Die in this Battle. AI have 5 Strength from their Fighters and plenty of Gems and Tactics Cards in their Supply.
The Factions secretly make their plans and simultaneously reveal their chosen Combat Wheel section and Tactics Card. AI has selected to roll a Die in Battle. They pay their Gem and manage to roll 4 additional Strength. They also gain another 3 Strength from their Tactics Card, giving them a total of 12 Strength in the Battle. Jrayek have selected to Retreat. However, before they Retreat, Attacks and Shields must be resolved.
AI have 4 Attack from their Tactics Card's ability (rolled Strength also counts as Attack). Fortunately for Jrayek, their own Tactics Card has provided 3 Shields. This results in only 1 of their Fighters being Wounded. The Wounded Fighter is returned to Jrayek's Faction Board, and AI gains 1 Fame (from their unique Faction ability). Jrayek have 3 Attack from Uryk. AI have no Shields, resulting in 3 of their Fighters being Wounded. Jrayek gains 1 Energy from their Aggressive Attribute, and AI returns the Wounded Fighters to their Faction Board.
Jrayek must now Retreat. Ikryla is sent back to Jrayek's Base. Uryk remains in the Region and command is given over to AI (see Jrayek's Faction Rulesheet to learn more about Ryh-zu Units). The 3 remaining Jrayek Fighters must redeploy to an adjacent Region where they have presence. They decide to move to the adjacent Relic Region where they have another upcoming Battle against either Circadians or Zcharo. They also gain 1 Gem from the text ability of their Tactics Card (because they Retreated).
The Battle ends with AI controlling the Region with Uryk and their 2 Fighters.
Battle Example 2
It's Circadians' turn to select a Battle. They choose the Region containing Relic 3 and select Jrayek as their opponent.
Circadians have 6 Strength from their 3 Fighters, thanks to their Militarized Attribute. Jrayek have 4 Strength from their Fighters and 2 from their Outpost.
The Factions make their plans and reveal their chosen Combat Wheel section and Tactics Card. Both Circadians and Jrayek have selected to roll a Die in Battle. After paying their Gems and rolling their Dice, both Factions have a total Strength of 13. Since Circadians were the ones to select the Battle, they break the tie and claim the victory.
Jrayek have 2 Attack from their Tactics Card's ability (from having a Building present), but no Circadian Fighters are Wounded, thanks to their Tactics Card's ability (2 Shields for having fewer Units than Jrayek). Circadians do not have any Attack.
Because they lost the Battle, Jrayek must send their Fighters back to their Base. Their Outpost is returned to their Faction Board, immediately gaining them 1 Tactics Card. The Foundation it was built upon remains where it is.
Circadians gain the Jrayek Intel Card from the Supply, as instructed on their Covert Attribute. Their 3 Fighters remain in the Region for the upcoming Battle against Zcharo.
The Battle ends with Circadians and Zcharo both still present in the Region.
Gain Income
In this Phase, all Factions gain resources and other benefits simultaneously from various sources. They may resolve these in any order. If there are any disputes over timing, such as 2 Factions gaining a Production Token, these are resolved in turn order, moving clockwise from the Faction holding the Flare Gun.
Region Count
Based on how many Regions they control on the Map, each Faction will gain 1 of the benefits shown here on the Main Board:
| Regions Controlled | Benefit |
|---|---|
| 0-2 Regions | Gain 3 Energy and 1 Tactics Card. |
| 3-5 Regions | Make 1 redeployment. This is for any number of Units from 1 Region, to an adjacent Region where that Faction has presence. During this Phase, Factions may not redeploy from the Region containing the current Round's Relic at this point. |
| 6-7 Regions | Upgrade 1 Attribute or gain 1 Gem. To upgrade an Attribute, Factions must pay any Gem Cost shown on the chosen Card. After paying any required costs, they turn over the Attribute Card, showing the upgraded abilities. Some Attributes also have effects that should be resolved immediately when upgraded. |
| 8+ Regions | Same as above, but they may do it twice. This could be upgrading 2 Attributes, gaining 2 Gems, or gaining 1 Gem and upgrading an Attribute. |
Factions only qualify for 1 of these 4 options and cannot voluntarily take a lower option. However, there are some Tactics Cards and Faction abilities that allow Factions to raise or lower their Region Count. Remember that all Bases count as 1 Region. Circadians do not technically have a Base, but have other ways of increasing their Region Count.
Faction-Specific Abilities
- Jrayek have Ryh-zu, which could either gain or cost them resources.
- Leyrien have Morale for gaining Fame.
- Circadians may give Intel Cards from their Supply to their opponents to increase their Region Count. They may also count each of their Strongholds as an additional Region.
Leaders, Attributes and Tactics Cards
Some Leaders and Attributes have abilities or effects that activate during the Gain Income Phase. Some Tactics Cards have abilities that allow them to be played during the Gain Income Phase. Any Tactics Cards gained during this Phase cannot be played until the next Round.
Buildings
Underneath each Building are resources that Factions gain during each Gain Income Phase. The top-most Foundation also has an ability during this Phase. Factions only benefit from visible effects (those not covered by Foundations or Buildings).
Example: In one example, AI would gain 2 Energy or 1 Gem, plus 2 Energy from their Foundries. From their Outposts they would gain 2 Tactics Cards. Their Strongholds would earn them 3 Gems, but their Foundation allows them to forgo any number of those Gems to instead gain Research (1 for 1).
Resource Limits
There are no limits for how much Energy or Gems each Faction may hold. Should the Main Supply run out, use something else as a substitute. Factions carry over all their resources into subsequent Rounds.
Check Relics
If 1 Faction controls all remaining Relics on the Map, they win the game. If not, the Faction controlling the current Round's Relic must follow these steps:
- Remove the current Round's Relic from the Map and place it onto the left-most empty space at the top of their Faction Board. They immediately gain any benefits that they cover.
- Send all Units from that Region to their Base.
Example: In this example, it's Round 4 and Jrayek control the current Round's Relic. They remove the Relic and place it on their Faction Board. This immediately rewards them with 1 Research and 1 Fame. They then send all their Units from that Region to their Base.
If no Faction controlled the current Round's Relic, it is removed from the game entirely.
After this, place all used Pricing Tokens from the current Round facedown onto their respective spaces in the Vault. Any Neutral Pricing Tokens are returned to the side of the Main Board. If a Neutral Pricing Token shows a numbered Relic Icon matching to the current Round, return it to the box. This will increase the cost for this Token in future Rounds. Alternatively, this can also be done after resolving each Action Phase. Play then continues into the next Round, beginning again with the Set Prices Phase.
Ties
In the rare case that this was the sixth Round and no Factions controlled the last Relic on the Map, the Faction controlling the most Land Regions on the Map is the winner. If tied, the tied Faction with the most Relics on their Faction Board is the winner. If still tied, all tied Factions share the victory.
Fame Victory
Rather than winning by controlling all remaining Relics on the Map, Factions can also win by having their Fame Marker reach the end of their Fame Track. For most Factions, this results in an immediate victory and the game ends. Zcharo are the 1 exception: They win with 20 Fame only at the end of the Check Relics Phase. To win in Round 6 they must control the final Relic, or have 20 Fame while no other Factions control the Relic.
Be sure to follow each step of Battle Resolution as written. For example, it is possible that Jrayek may gain their final Fame during step 1, before AI gains theirs in step 2. Jrayek would win in this case.
It is possible for Leyrien and Circadians to both reach the end of their Fame Track during the same Gain Income Phase. This results in a tie. Follow the same rules for breaking ties as outlined above under Ties.
Each Faction's Fame requirement and how they gain Fame (as printed in the rulebook):
- Circadians require 4 Fame to win. They gain Fame by upgrading their Attributes.
- AI require 10010 (18) Fame to win. They gain Fame by Wounding opposing Fighters.
- Zcharo require 20 Fame to win. They gain Fame for each Research that they gain.
- Leyrien require 14 Fame to win. They gain Fame as income from their revealed Morale Bonuses.
- Jrayek require 5 Fame to win. They gain Fame by being victorious in Battle while fighting against opposing Leaders or Ryh-zu.
- Oxataya require 9 Fame to win. They gain Fame by being victorious in Battle.
Most Factions also have other ways to gain Fame from their Leaders, Attributes, or by collecting Relics. These are all outlined on their Faction Rulesheets.
Further Rules
Foundation Abilities
There is some variation between which Foundations have Gem Locks for each Faction, but once constructed, they all provide the same following abilities:
- During the Gain Income Phase, Factions may forgo gaining Gems from each of their Strongholds to instead gain Research (1 for 1).
- Gem Locks may optionally be paid for with 2 Energy, instead of 1 Gem.
- Factions may spend Harvest Points to harvest Production Tokens in Regions containing any of their Buildings. This is usually only true for Foundries.
- The hand limit is increased from 5 Tactics Cards to 6. This also immediately rewards 2 Energy.
- Regions are considered adjacent when moving Units from a Faction's Base to those containing any of their Buildings. This is usually only true for Outposts.
Foundation Types
- Neutral Foundations. The numbered Relic Icons are only for setup purposes and should be ignored when constructing Buildings on these.
- Starting Foundations. Each Faction places 2 of these adjacent to their Base during setup. These function just like Neutral Foundations after setup.
- Board Foundations. When placed onto the Map, these should be flipped over. They function just like Neutral Foundations, but have no Location Rewards.
Troop Tokens
At any time, Factions may replace 5 or 10 Fighters on the Map with their Troop Tokens. Fighters removed this way should be set aside until they are needed again (when removing a Troop Token). On the Map, Troops count as either 5 or 10 Fighters. These serve only to help declutter the Map and do not provide additional Fighters beyond those supplied to each Faction.
Building Abilities
Foundries and Outposts provide the same abilities for each Faction (exception: Zcharo). Strongholds are unique for all Factions. Some simply provide Combat Values, while others have abilities specific to their Faction. These are explained in detail on Faction Rulesheets where required.
- Factions may spend Harvest Points to Harvest Production Tokens in Regions containing their Foundries.
- Outposts provide 2 Strength to their Region during each Battle. Regions are considered adjacent when moving Units from a Faction's Base, to those containing their Outposts.
Fame Tracks
Each Fame Track has a number of immediate effects printed on specific spaces. Whenever a Fame Marker moves over an icon on their Fame Track, they immediately gain the depicted reward (Energy, Gems, Research, Tactics Cards, Recruitment Points, or a redeployment).
Using and Playing Tactics Cards
Using Tactics Cards in Battle and playing Tactics Cards during other Phases are 2 separate functions. The first are "used", while the second are "played". There are a few rules which are always true:
- Only 1 Tactics Card may be used per Battle. This should be placed onto the Faction's Combat Wheel during the Planning step and discarded at the end of the Resolution step.
- There are no limits to how many Tactics Cards each Faction may play during each Phase. Played Tactics Cards should always be placed in the Discard Pile.
- Each Faction has a hand limit of 5 Tactics Cards. They may draw above this limit, but must then discard Cards of their choice until they have only 5.
- Some Tactics Cards have a Gem Lock covering the Phase in which they can be played. This Gem must be paid before resolving the Card's effect.
- Should the Tactics Card Draw Pile ever run out, simply shuffle the discards to form a new Draw Pile.
- Tactics Cards cannot be played in the same Phase they were acquired.
Iconography
| Phases | Actions & Resources | Leaders & Cards | Combat & Region Control |
|---|---|---|---|
| Set Prices Phase | Collect all Pricing Tokens from the Vault | Leader | Strength |
| Discover Phase | Research | Upgrade Leader | Attack |
| Build Phase | Building or Foundation | Upgrade Attribute | Shields |
| Harvest Phase | Foundation | Deploy Leader | Battle Victor |
| Recruit Phase | Place a Production Token on a Land Region or Base | Fighter | Battle Loser |
| Move Phase | Place a Production Token on a Lake Region | Wound / Wounded | Gain Region Control |
| Combat Phase | Upgrade Production Token on the Map | Tactics Card | Lose Region Control |
| Gain Income Phase | Harvest Point | Hand Limit | Remove Token |
| Check Relics Phase | Recruitment Point | Numbered Relic | Reset Trap |
| Immediate Effect | Movement Point | Gem Lock | Morale |
| Fame | Redeploy | Unlocked Gem Lock | Foundry |
| Gem | Retreat | Base | Outpost |
| Energy | Region Count | Tunnel | Stronghold |
| Dice | Drop Ship |
Glossary
ACT — Taking a turn during an Action Phase, rather than choosing to Pass.
ACTION PHASE — The 5 Phases which get priced each Round: Discover, Build, Harvest, Recruit and Move.
ADJACENT — A Region that is 1 Movement Point away. Regions are considered adjacent if they touch on 1 side and do not have a Mountain sitting between them. Tunnels, Faction abilities and other effects can also create adjacencies.
ALLIED — A Faction's Units or Ryh-zu that they command.
ATTACK — Each unshielded Attack Wounds 1 opposing Fighter in Battle. See Combat.
AUXILIARY — The bonus action available during each specific Action Phase, as shown along the bottom row of each Phase.
BASE — Regions to which Factions Recruit their Units. Factions can never willingly move Units to a Base (even their own). Factions can always Harvest from the Production Token on their Base (a Foundry is not required).
BATTLE — A fight between 2 Factions who both have presence in the same Region.
BORDER — The edge of a Region. Each Region has 6 borders.
BUILD POINT — Points available for spending during the Build Phase to construct Foundations and Buildings. See Action Phases (Build).
BUILDING — Foundries, Outposts and Strongholds.
COMBAT ICON — The white icons, as seen at the top-right of each Leader Card, symbolizing Strength, Attack and Shields.
COMBAT VALUES — Numbers providing Strength, Attack, or Shields in Battle when paired with a Combat Icon.
COMMAND — A term describing Leaders, Fighters, Ryh-zu and Buildings belonging to a Faction.
CONTROL — Regions where only 1 Faction has presence are under control of that Faction. If multiple Factions have presence in a Region, no Faction has control.
CURRENT RELIC — The Relic bearing the number of the current Round.
DEFEAT — The result of losing a Leader during the Resolution step of a Battle. Leaders that Retreat are not Defeated.
DEPLOY — Placing a Leader onto the Map.
DOUBLE — In reference to Location Rewards. It simply repeats the initial reward as if they'd gained it again.
FAME — The means by how Factions track their progress in the game. Fame cannot be lost, only gained. Any Fame gained is shown by moving a Faction's Fame Marker 1 step along their Fame Track.
FAST-TRACKING — Spending Energy and Recruitment Points to advance Fighters from the first Sector of their Recruitment Track, directly to their Base (or Drop Ship for Circadians). See Action Phases (Recruit).
FEWER UNITS — Having less Units. Equal Units does not qualify.
FIGHTER — The smaller wooden Units of each Faction. All Fighters have 1 Strength in Battle (exception: Circadians).
FIGHTING — The act of taking part in a Battle.
FOUNDATION — Required for constructing Buildings on the Map. Each Region gains 1 Foundation during setup. Factions may construct more Foundations from those available on their Faction Boards. See Action Phases (Build).
FREE ACTION — Ignoring the usual costs for the associated action. This does not allow Factions to ignore paying for Gem Locks.
FREE MOVE — A movement that does not require spending Movement Points.
GEM LOCK — A Board Foundation, Building, Tactics Card, or step on a Research Track that requires a Gem to be paid in order to unlock. A Gem cost shown without a lock is not a Gem Lock, and therefore cannot be paid for using 2 Energy by Factions that have the associated Foundation ability on their Faction Board. If a Gem Lock cannot be paid, then it remains locked and whatever component or effect that it locked cannot be acquired.
HARVEST POINT — Points available for spending during the Harvest Phase. See Action Phases (Harvest).
LAKE REGION — 1 of the 2 Regions on the Map showing water within their borders. The water down the right side of the Map is not a Region.
LAND REGION — Swamp, Cliffs and Plains.
LEADER — Unique Units available to each Faction. They all have specific Combat Values and special abilities. Leaders cannot be Wounded.
LOCATION REWARD — The rewards printed on most Foundations while on the Map. These are immediately gained by Factions when they construct Buildings on them.
LOSS — Losing a Battle, rather than being victorious. Retreating still counts as a loss.
MAP — The area of the Main Board containing all Regions.
MOVEMENT POINT — Points available for spending during the Move Phase. See Action Phases (Move).
OPPOSING — Any Units or Buildings of another Faction.
PASS — Choosing not to take a turn during an Action Phase, rather than choosing to Act.
PHASE — 1 of the 9 steps that take place each Round (from Set Prices, through to Check Relics).
PINNED — Units that cannot move due to opposing Units in the same Region. See Action Phases (Pinning).
PRESENCE — Having 1 or more Buildings or Units in a Region.
PRICING AN ACTION — When Factions place their Pricing Tokens onto Action Phases.
PRODUCTION TOKEN — The cog-shaped icons printed onto each Land Region and Base. This indicates what resource or other benefit each Region may produce during the Harvest Phase. There are also 6 physical Production Tokens which can cover over those pre-printed, permanently changing what they produce.
RAZE — When a Building is removed from the Map during the Combat Phase.
RECRUITMENT POINT — Points available for spending during the Recruit Phase. See Action Phases (Recruit).
REDEPLOY — A special type of movement between 2 Regions where a Faction has presence. See Action Phases (Redeployment).
REGION COUNT — The number of Regions that a Faction controls. See Gain Income.
RELIC REGION — A Region where a Relic is currently present.
RESEARCH — Recorded by each Factions' Research Markers on the 5 Research Tracks. Any time Factions gain Research, they must move any 1 of their Research Markers 1 space to the right on their chosen Track. See Action Phases (Build).
RETREAT — 1 of the 6 options available on the Combat Wheel. This forces a Faction to redeploy their Fighters and send their Leaders back to Base. See Combat.
SHIELD — Each Shield prevents 1 Fighter from being Wounded in Battle. See Combat.
STRENGTH — Used to determine the victor in each Battle. See Combat.
TEMPORARY BOOST — Referring to a Faction's Research Marker on the specified Research Track. They may act as if their Research Marker was 1 column to the right from where it currently sits.
UNIT — A Fighter, Leader or Ryh-zu.
UNPINNED — Units that are not Pinned by opposing Units in the same Region. See Action Phases (Pinning).
VAULT — The top-left area of the Main Board where grey-backed Pricing Tokens are placed during setup, and where all used Pricing Tokens are placed during each Check Relics Phase.
VICTORY — Winning a Battle by having the most Strength, or when an opposing Faction Retreats.
WOUND — An effect that results in a Fighter being removed from the Map and placed into the left Sector of the Recruitment Track on their Faction's Board.
X — Some Tactics Cards have an X as a Combat Value, rather than a set number. The Value of X is determined by a Die roll. If a Die is not rolled, X always equals 1.
Quick Guide
Set Prices
- Turns are taken in clockwise order, starting with the Faction holding the Flare Gun
- Each Faction prices 1 Action Phase (2 each with only 2 Factions)
- Gain any immediate effects when placing Pricing Tokens
- The Flare Gun always moves when the Move Phase is priced
Discover
- Turns are taken in clockwise order, starting with the Faction who priced the Discover Phase
- Each Research gained moves any Research Token 1 space to the right on the chosen Research Track
Build
- Turns are taken in clockwise order, starting with the Faction who priced the Build Phase
- Each Build Point can be spent to construct a Foundation or Building
- Factions can only construct in Regions they control (not on Bases)
- Each Region may only have up to 3 Foundations
- Each Region may only contain 1 of each Building type
Harvest
- Turns are taken in clockwise order, starting with the Faction who priced the Harvest Phase
- Each Harvest Point can be spent to harvest 1 Production Token on a Faction's Base, in a Region where they have a Foundry present, or where they can legally harvest due to other abilities
- Each Faction may never harvest the same Region more than once per Round
- Factions may harvest from their available Production Tokens in any order they choose
Recruit
- Turns are taken in clockwise order, starting with the Faction who priced the Recruit Phase
- Each Recruitment Point can be spent to advance a Fighter 1 space along the Recruitment Track
- Advancing off the right-most space sends Fighters to their Base
- Fast-Tracking Fighters sends them from the left-most space of their Recruitment Track to their Base, but costs the indicated Energy
- Each Faction can also spend Recruitment Points for Gems or Tactics Cards, as shown directly above their Recruitment Track
- The Auxiliary Action allows Factions to deploy 1 Leader to their Base
Move
- Turns are taken in clockwise order, starting with the Faction who priced the Move Phase, or with the Faction seated to their left (depending on which option they selected)
- Each Movement Point can be spent to move any number of Unpinned Units from 1 Region to an adjacent Region
- Factions may never end their turn in the Move Phase with more than 1 of their Leaders in a single Region
- Units can be Pinned by opposing Units, preventing them from moving out of a Region
- Tunnels are available for Units to move through in games with 4 or more Factions
- The Auxiliary Action allows Factions to upgrade 1 Leader
Combat
- Turns are taken in clockwise order, starting with the Faction holding the Flare Gun
- Factions who are not involved in any upcoming Battles are skipped
- On their turn, a Faction must select 1 Battle that they are involved in to resolve
- Both Factions secretly make their plans, setting their Combat Wheel and using 1 Tactics Card if they choose
- Plans are revealed simultaneously and the 3 steps of Battle Resolution are resolved, as outlined along the sides of the Combat Wheels
- Any ties are broken in favour of the Faction who selected the Battle
- The Combat Phase only ends once all Battles have been resolved
Gain Income
- Turns are taken simultaneously, with any timing disputes being resolved in clockwise order from the Faction holding the Flare Gun
- Income is gained from the Region Count, Faction abilities, Leaders, Attributes, played Tactics Cards and Buildings
- Factions may not redeploy from the Region containing the current Round's Relic
- Tactics Cards gained in this Phase cannot be played this Round
Check Relics
- If 1 Faction controls all remaining Relics on the Map, they win the game
- If there was no winner, the Faction controlling the current Round's Relic removes it from the Map and places onto the left-most empty space along the top of their Faction Board, gaining all rewards that they cover over
- All Units from that Region are returned to their Base