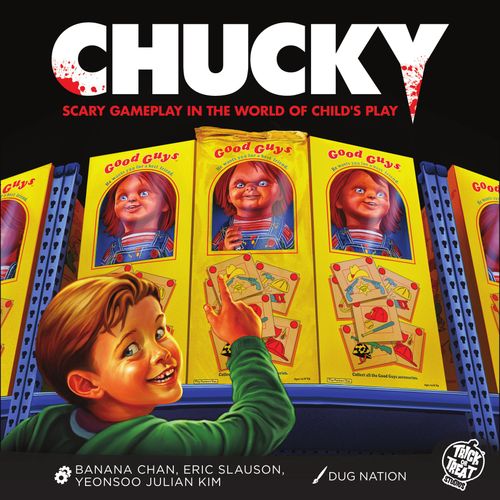
Chucky
Chucky Rulebook
Table of Contents
Table of Contents
Components and Setup
- A - 1 Game Board. Place this face-up in the center of the table, within easy reach of all players.
- B - 4 Survivor Mats (1 each in 4 player colors). Place 1 in front of each player for them to keep track of their cards and Stats. Return any mats that are left over to the game box; they will not be used this game.
- C - 12 Survivor Stat Cubes (3 each in 4 player colors). For each player, place the Stat cubes matching the color of their Survivor mat onto the three starting Stat numbers (white box) of those mats. Return any unused cubes to the game box. The number each cube is placed on indicates the current Stat value of that type for the player. During the game, if one of your Stat values increases, you will move the appropriate cube one space to the right (do not move it if it's already on the furthest right space); if one of your Stat values is lowered, you will move the appropriate cube one space to the left to keep track of this (if it's already on the furthest left space of the track, remove it from the board instead - that stat is now considered to be the lowest printed value, and can no longer be increased).
- D - 16 Survivor Time Tokens (4 each in 4 player colors). Give each player the 4 Survivor Time tokens matching the color of their Survivor mat. Return any that are left over to the game box. The side with the number is considered the face of the token. You may look at this number at any time, but should keep the value hidden from the other players. When you use one of these tokens, it will return to you at the end of the round; you can never permanently lose your Survivor Time tokens through any means.
- E - 16 Generic Time Tokens. Mix these together face-down above the Game board (so that the number side cannot be seen). After using one of these tokens, it will be discarded back to this area at the end of the round. While you have one of these tokens, its value should be kept hidden from the other players.
- F - 45 Victim Tokens. Give each player 3 of these, representing their acquaintances who are destined to meet an untimely end. Place the rest in a pile above the Game board. When you gain Victim tokens, take them from this pile. When Victim tokens are discarded, return them to this pile. These are not limited by the components in the box; if they run out during the course of the game use a suitable substitute.
Game Board Locations and Tracks (from the page 3 illustration)
The Game board has three action tracks, one for each evidence type: Research, Sightings and Clues. Each track has two action spaces above it (Research: Library and Newspaper; Sightings: Gas Station and Grocery Store; Clues: Park and Police Station) and a row of Victim/Time spaces along it, marked with the numbers 1 and 2. To the left of each track is its evidence deck (G). Along the right side of the board are the Crime Scene spaces (Crime Scene 1, 2 and 3, and the Final Encounter), each showing the Crime Scene deck placed on it, and the Bloodlust space (I).
-
Library (Research track). Its icon group is shown with an arrow pointing to the COST 1 and COST 2 spaces.
-
Newspaper (Research track). "Flip over 2 evidence cards and keep 1." Its icon group is shown with an arrow pointing to the COST 2 and COST 3 spaces.
-
Gas Station (Sightings track). "Flip over 2 Quirk cards and keep 1." Its icon group is shown with an arrow pointing to the COST 2 and COST 3 spaces.
-
Grocery Store (Sightings track). "Flip over 3 Time tokens and keep 2." Its icon group is shown with an arrow pointing to the COST 1 and COST 2 spaces.
-
Park (Clues track). "+2 Attack, Escape, or Search." Its icon group is shown with an arrow pointing to the COST 2 and COST 3 spaces.
-
Police Station (Clues track). "Draw and keep 1 Evidence card." Its icon group is shown with an arrow pointing to the COST 1 and spaces.
Gameplay Overview
Each round you will take turns placing Time tokens face-down on one of the 6 locations on the Game board, then the tokens are revealed and the player who spent the most time (the highest value token) at each location receives the benefit listed, while other players receive consolation benefits. This process is repeated a second time, then the players proceed to a Crime Scene, where they will be given their own individual challenge to overcome using dice. After 3 rounds, a Final Encounter card will be revealed, and all players will have one last chance to score points (the red splat symbol is the point symbol). The player who accrues the most points during the game will be declared the winner (and the sole survivor).
Gameplay in Detail
Each round is broken up into 3 phases. The first 2 phases are "Pass the Time" phases, and the last is the "Crime Scene" phase. At the beginning of each round, give each player 2 Victim tokens.
Phase 1 - Pass the Time
If you have the Chucky figure at the beginning of this phase, place it on the title of any of the Locations of the Game board, then take the first turn.
Place Tokens: On your turn, choose one of the available Locations on the left side of the Game board. Place 1 of your Time tokens face-down on this space in the spot that corresponds to the player color indicated on your Survivor mat. The Time token you place may be a Survivor Time token or a Generic Time token, if you have any. Then pass the turn to the next player seated clockwise around the table. This continues, with each player taking a turn to place a single Time token, until all players have placed 2 Time tokens in total. Please note that no circular token spot on the board can contain 2 tokens - if you already placed a token on your player-color spot for a particular Action during the current phase, you may not place a second one there.
Pay Costs: Flip all the Time tokens on the board face-up so the numbers are visible, and resolve all Locations one at a time, in the following order: Library, Newspaper, Gas Station, Grocery Store, Park, Police Station. To resolve a space, determine which player has the highest value Time token assigned to their color spot on the Location. Move that Time token to the lowest "COST" spot on that space that doesn't already have a token in it. Only 1 token per location is moved in this way during this phase. If you are the owner of that token, you must place a number of your Victim tokens equal to that cost onto the Victim track below that space, starting with the leftmost empty spot of the Victim track and proceeding toward the right, filling up empty spaces as you go.
Chucky figure on a Location: If the Chucky figure is currently on the title of the space, the costs on that space are considered to be 1 higher for all purposes.
Drawing Evidence from the Victim track: If you place a token in a 1 spot this way, immediately draw an Evidence card from the stack corresponding to that Victim track and add that card to your hand. If you place a token in a spot with the 2 symbol, draw two of those cards instead.
Not enough Victim tokens: If you do not have enough Victim tokens to pay for the entire cost, you must also reduce one of your Stat values by 1, moving the appropriate cube one space to the left on your Survivor mat (you will still get to perform the action associated with the space, even if you did not have enough Victim tokens to pay the cost).
Full Victim track: If the Victim track is full after placing a token, immediately clear the track by discarding all Victim tokens there back to the pile beside the board before placing any more tokens on that track. Then flip over the top card of the Bloodlust deck onto the card space to the right of the track. The effect described on that Bloodlust card is immediately applied to ALL players.
Resolve Actions: After paying the cost (and/or reducing one of your Stat values), perform the action described next to the title of the Location.
- Library: +1 to Attack, Escape, or Search. Choose a New Start Player.
- Newspaper: Flip over 2 Evidence cards and keep 1.
- Gas Station: Flip over 2 Quirk cards and keep 1.
- Grocery Store: Flip over 3 Time tokens and keep 2.
- Park: +2 to Attack, Escape, or Search.
- Police Station: Draw and keep 1 Evidence card.
Consolation: If your Time token was NOT the highest value played to the Location this round, move that token down to the consolation area of the board and perform the action described there which corresponds to the value of your Time token.
- 1-8: Draw and keep 1 random Time token.
- 9-21: Gain 2 Victim tokens.
- 22-26: Gain 3 Victim tokens.
Chucky Finds You: After all Locations have been resolved in this way, if anyone won the Library Location this round, they give the Chucky figure to the player of their choice - that person will be the new Start Player. Otherwise, the player who received the last benefit of any Location receives the figure and becomes the new Start Player. Proceed to the second Pass the Time phase if this was the first one this round.
Playing Cards
During the game, you will frequently gain Quirk cards and Evidence cards.
Quirk cards represent aspects of your personality that are coming to light because of the current stressful events. Whenever you gain a Quirk card, immediately increase one of your Stats by 1, as indicated on the card, then place the card face-up in front of you. Before or after placing a token or resolving an Action, you may choose to discard the type and quantity of Evidence cards indicated on that Quirk to "complete" it. Turn the Quirk card face-down and tuck it under the edge of your Survivor mat to indicate it has been completed - you will earn points from it at the end of the game. Completing a Quirk does not cause you to lose the Stat bonus you gained when you acquired it.
Evidence cards represent pieces of information you've gained from investigating. These may be discarded to score a Quirk card, or they may be discarded to cause the effect described on them. Some Evidence cards specify when they may be played. If they do not, you may play them before or after placing a token or resolving an Action. Discarded Evidence cards are placed in a face-up discard pile next to their corresponding deck. You may have any number of Evidence cards in your Hand at a time, and you do not have to reveal the abilities printed on them until they are played or discarded - though which types of Evidence (Sightings, Research, or Clues) you have are public knowledge.
Phase 2 - Pass the Time
This phase is resolved in the same way as the first Pass the Time phase, though there may be Time tokens taking up cost spots on some spaces, leaving only the more expensive cost spot available for a player who does that Action. It is possible for you to place a token on your player color spot for a Location that you used (or tried to use) during the previous Pass the Time phase.
At the end of the second Pass the Time phase, all Generic Time tokens are discarded from the board and mixed back in with the other Generic Time tokens above the board, face-down. All Survivor Time tokens are returned to the corresponding player.
Phase 3 - Crime Scene
At the end of the first round, you will go to Crime Scene 1. At the end of the second round, Crime Scene 2. And after the third round, Crime Scene 3. When you go to a Crime Scene, read the corresponding Set Up card aloud.
Then deal each player 1 of the other cards from that Crime Scene. Beginning with the Start Player who currently has the Chucky figure and proceeding clockwise around the table, each player will resolve their own Crime Scene card. Read your card aloud and make any decisions involved in the challenge described on the card, resolving what's printed on it. Note: Some players may wish to play a faster game - rather than reading out your individual cards, you might choose to resolve them all simultaneously (or as simultaneously as the cards allow).
These cards usually have several possible levels of difficulty or failure. If instructed to gain an Evidence card or lower a Survivor Stat, but it is not specified which one, you may choose. Once you've resolved the card, place it in one of the card spots on your Survivor mat with the indicator (printed on the mat) pointing at the result you achieved.
Crime Scene Challenges
On your Survivor mat, the Assembly Line area is where you line up your achieved result. Its four levels are Easy Success, Medium Success, Hard Success and Failure. The Survivor Stats (Attack, Escape and Search) are shown in the lower part of the mat, with the Points track beneath them. Completed Quirks are tucked under the edge of the mat.
The two Resolved Crime Scene spaces on the mat hold the Crime Scene cards you have resolved.
There are 4 different kinds of challenges
-
Competition. Choose another player to roll dice against. Both of you secretly roll 2 dice up to 3 times. Either of you (separately) may stop after any of those 3 rolls and keep the current result. Once both players have chosen to stop and/or have rolled 3 times, players reveal their rolls and apply their Stat indicated by the challenge to modify their roll. The player with the highest total is the winner. If you were the player who drew the card, you will be the person to keep the card on your Survivor board (and earn the victory points on it) regardless of whether you win or lose. If you are the player who drew the card, gain or lose the things indicated on the card, based on if you won or lost.
- Card text (example): "Choose another player. You both roll 2 dice secretly up to 3 times each. You may stop at any time. Once both players stop, results are revealed, and players add your Search values. Highest result wins." Reward: Winner gains the card's reward; Loser loses the indicated item.
-
Art-based. Choose a difficulty level, and sometimes choose a number based on the illustration and instructions. Roll dice corresponding to the difficulty level. Based on the card's instructions, if you rolled a die that's high enough or rolled the chosen number on any of them, gain the indicated benefits or suffer the consequences. Some of these may indicate a survivor stat to add to your roll.
- Example card: "You must roll 5+ in total to succeed." Easy: In the dumpster (roll 2 dice). Hard: Under the truck (roll 1 die).
- Crime Scene Set example: "Choose a place to hide: Numbers 1-6." If Chucky rolls the same number you chose, he finds you. Difficulty: Easy - Roll for Chucky once; Medium - Roll for Chucky twice; Hard - Roll for Chucky three times. Choose a difficulty AND a number from the image.
-
Push your luck. Decide whether you want to roll dice in an attempt to hit a target number. If you choose to do so, roll 1 die. Then apply the Stat indicated to the value to determine the result. If the result equals or exceeds the target number, you can decide if you want to push your luck and roll an additional 1 die - attempting to reach the second target number. Add the values of the first and second dice together, then apply the Stat indicated to the result. If you reach the second target number, you can roll a third die attempting to hit the final number by adding the first, second, and third dice rolled together, only then applying the Survivor Stat indicated. If you fail to reach the target number at any of these levels, you may not roll any further and must resolve the failure section of the card. You may always choose to stop before proceeding to the next roll and gain the benefits listed in the success section of the highest level you reached. (Note that the rolls are cumulative, and you only add the Stat to the total of your rolls, not to each dice that is rolled separately.)
After everyone has resolved their Crime Scene card, if this is the third Crime Scene, proceed to the Final Encounter. Otherwise, begin a new round with a Passing the Time phase.
Final Encounter
After resolving the 3rd Crime Scene of the game, determine which type of Final Encounter you are going to experience. If any one of the Victim tracks has the single most Bloodlust cards next to it, randomly select a Final Encounter card of that Evidence type. If there is more than one track that has the most Bloodlust cards, the tied track with the most Victim tokens on it currently is the type of Final Encounter you should use. If still tied, randomly select 1 Final Encounter from all the Final Encounter cards.
Read the card aloud - this presents a challenge similar to the Crime Scenes, however all players participate. When you roll, apply ALL your Stats to the results of the roll. If you fail a roll at any time during the Final Encounter, you may not continue - place one of your Survivor Time tokens next to where you failed on the card to indicate how many bonus points you earned. If you failed during the first roll, you will gain 2 points; if you failed during the second roll you gain 3 points; failing the third roll earns you 4 points; and succeeding at the third roll earns you 8 points. Once all players have either failed and/or succeeded at all the rolls described on the card, proceed to End-game Scoring.
Transcriber's note: The text printed on the individual Final Encounter cards (stage thresholds and outcomes) is too small to read reliably in the source scan, so it is not reproduced here. The procedure above is transcribed from the rulebook text on page 8.
End-Game Scoring
Add up each player's points based on the following things:
- Final Encounter bonus points.
- Crime Scene cards on the Survivor mat.
- Completed Quirk cards.
- Points indicated below the current column for each Stat on the Survivor mat.
The player with the highest total of points from all these sources is the winner... and the only remaining survivor of Chucky's rampage. If there is a tie for the most points, the tied player with the most Evidence cards wins. If there is still a tie, all tied players should share their victory... but may mutually choose to roll off to break the tie if they would like. If they choose to roll off, they each repeatedly roll 1 die as fast as they can. The player who rolls a 6 first, wins.