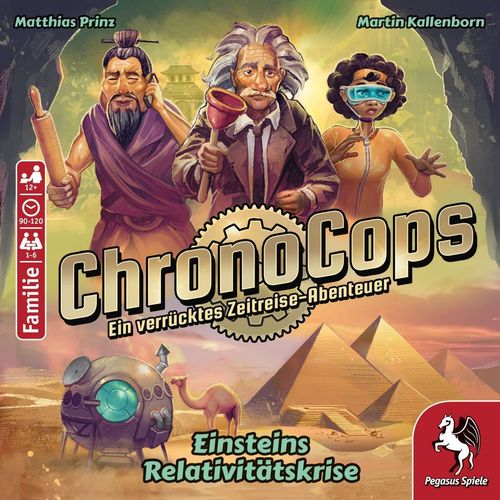
ChronoCops: Einstein's Relativity Crisis
ChronoCops: Einstein's Relativity Crisis Rulebook
Table of Contents
Table of Contents
Is This (Not) Your First Adventure?
If this is your first ChronoCops adventure, skip the next paragraph and continue reading at "Introduction."
If this is not your first ChronoCops adventure, you do not need to read this rulebook. The setup and the flow of the game are as you already know them. Only the number of timelines might differ — in this adventure there are 8 stacks of timelines. Have fun with Einstein's Relativity Crisis!
Game Material
- 1 decoder, two-sided: blue side is the Chrono-Decoder, green side is the Tip-Decoder
- 50 large cards: the topmost card is the "Briefing" card; the next cards form 8 separate stacks, one for each timeline (all cards of the same color/symbol, black or white, belong in the same stack — the cards are pre-sorted, so do not shuffle them, turn them over, or look at them closely); the second-to-last card is the "Final Briefing"; the last card is not needed and can be put back in the box
- 72 small cards: 47 cards whose border shows a spiral form a stack — these are cards you will receive over the course of the adventure; 4 answer cards (A, B, C, D); 20 green tip cards form a separate stack, needed only if you get stuck somewhere and want a hint; the last card is not needed and can be put back in the box
- 12 time orbs
Each of the 8 timeline stacks contains a cover card and one or more location cards. Do not shuffle or look through either the large-card stack or the small-card stack in advance — spoiler risk! Read the rulebook first, and only look at the back of a card once you are explicitly told to.
Idea of the Game
ChronoCops is an entertaining time-travel adventure, full of crazy humor and a good wink of the eye. The idea is based on so-called point-and-click adventures. You visit different times and places and face puzzling challenges there: bring objects to the right places, think outside the box, and clear obstacles out of the way in order to move on.
You play cooperatively, so you make all decisions together. Talk things through well and give everyone enough room to bring in all opinions and ideas before you decide on anything. That's how ChronoCops is the most fun!
Setup
- Take the stack of 50 large cards:
- The top card is the "Briefing" card; set it aside for now without turning it over.
- Form a separate stack from the next cards for each of the 8 timelines, so that all cards with the same color or symbol (whether black or white) end up in the same stack. The cards are pre-sorted accordingly — you should neither shuffle them, nor turn them over, nor look at them closely. Place the 8 stacks side by side in the middle of your play area. (It is normal for the stacks to be different heights.)
- Place the second-to-last card, "Final Briefing," next to them.
- The last card is not needed for the game; put it back in the box.
- Place the Chrono-Decoder (blue side up) next to the timelines.
- Take the stack of 72 small cards:
- Place the 47 cards whose border shows a spiral as a stack. These are cards you will receive over the course of the adventure.
- Place the 4 answer cards (A, B, C, D) next to the decoder.
- Place the 20 green tip cards as a stack off to the side. You will only need these if you get stuck somewhere and want a hint.
- The last card is not needed for the game; put it back in the box.
- Place the 12 time orbs out as a supply.
- Now turn over the Briefing card and read it aloud before continuing to read this rulebook. Afterward, follow the instructions at the end of the Briefing, as described in more detail below.
The Timelines
In front of you lie 8 timeline stacks. Each stack contains 1 cover card plus 1 or more location cards. The cover card of each timeline shows whether the timeline is closed or open. At the start of the adventure, all timelines are still closed. Whenever you receive the instruction to open a timeline, turn over the cover card of the named timeline. From then on, that timeline is open.
At the end of the Briefing you received the instruction to open the Gemini timeline. So turn over the cover card of the Gemini timeline now, if you have not already done so; Gemini is now open. (The other instruction from the Briefing is explained on the next page under "The Location Cards.")
Every cover card of an open timeline shows one or more jump markers within that timeline, together with a short note on who or what awaits you there.
The Jump Markers
Jump markers consist of a combination of a year and a timeline. They symbolize the time rifts that Professor Knix has left behind. Each jump marker corresponds to a specific place you may travel to. Exactly how this works is described on the next page under "Sequence of Play."
Example: This jump marker allows you to travel to the year 1916 in the Gemini timeline.
Sequence of Play
After your Briefing, you may set out on your first journey through time! Decide together which place you want to travel to. In general, you may only travel to a place whose jump marker is shown on some openly displayed card. At the start of the adventure, these are the 6 jump markers on the cover card of the open Gemini timeline. Later on, more cards with jump markers will be added. Some stacks contain location cards you may not yet travel to, even though the timeline is open. You may never travel to a place if its jump marker is not visible.
Once you have decided on a place, find the matching location card from the stack of the corresponding timeline, turn it over, and lay it out face up. What can happen at a place, and what options you have there, is described in more detail below under "The Location Cards."
Example: If you decide to travel to the place "1916 Gemini," you take the Gemini timeline stack, find card 1916 in it, turn it over, and lay it out.
When you are (for now?) done at your current place, decide which place you want to travel to next. First put the current location card back, face down, into the corresponding stack, before you find the next location card. Since you can only be in one place at any given time, only 1 location card may ever be laid out at the same time. (The Briefing is not a location card and stays permanently laid out.)
It is allowed, and sometimes even useful, to travel again later to a place you have already visited before — as long as the jump marker for that place is still visible.
As the game progresses you will open further timelines. This does not cause other timelines to close. Several timelines can then be open at the same time, and you may continue to travel to any jump marker of any open timeline.
Important: think of the different timelines as parallel universes. If you change the past somewhere and thereby open a new timeline, then that parallel timeline turned out differently because of your change!
Example: In the Gemini timeline you travel to the place "2022 Gemini – Game Fair." There you are supposed to buy all the adventures of the new "ChronoCops" game series for Commander Karla. When you arrive, you find that nobody there has heard of "ChronoCops." You then travel to the place "2018 Gemini – Fight at Game Night," where Matthias and Martin, the later authors of "ChronoCops," get into such a heated argument during a game that afterward they never speak another word to each other — the work of Professor Knix! You make a wise decision there and prevent the argument. This opens the Taurus timeline. Now you travel to the place "2022 Taurus – Game Fair" — and hooray, there you can buy "ChronoCops" and complete your task.
Explanation: In the year 2018, Matthias and Martin fall out with each other in the Gemini timeline and therefore never invent any games together. Through your intervention there, you opened the parallel Taurus timeline. In Taurus, Matthias and Martin do not fall out and soon afterward invent the "ChronoCops" game series. That is why in Taurus you can buy the games at the fair, while in Gemini nobody knows these games.
In this way you travel through time, from place to place, solving tasks and puzzles — until you meet Professor Knix and hopefully can stop him. Whenever you are asked to read the Final Briefing, your adventure ends.
The Location Cards
When you reveal a location card, it is best to read the text aloud. Also look together at the picture in the upper part of the card, since important information can sometimes be found there. Many things on the cards explain themselves; here are a few further explanations:
Take a card. When you see this symbol, you find the matching small card from the stack, turn it over, and lay it out face up. More details about the small cards can be found below under "The Small Cards." At the end of the Briefing you received the instruction to take cards 1, 2, and 3. If you have not done this yet, take these cards now.
Jump markers. When you find one or more jump markers on a location card, you may travel there from this place. But note: since you will have to put your current location card back later, the jump markers will then no longer be visible! (Normally, though, you can simply travel to your current location card again later and the jump markers will be available to you again.)
Choices. Some cards show several choices at the bottom. Depending on your decision, this can lead to different effects, for example a jump marker or taking a card. Some choices require the answer cards. Exactly how this works is described below under "The Answer Cards." Important: you do not have to make a decision immediately! If you are not sure which is the correct decision, or if you think you are still missing an important piece of information, simply don't make a decision! Instead, travel back to this place later, once you are ready to decide.
Using items. At some places you can only progress if you use a specific item. Exactly how this works is described below under "The Items."
Losing time orbs. When you see this symbol, put the corresponding number of time orbs from your supply back into the box. More details can be found below under "The Time Orbs."
The Small Cards
Largely the same applies to the small cards as to the location cards: when you receive a card, it is best to read the text aloud. If there is a picture on it, everyone looks at it together. Here too you can find jump markers, open timelines, lose time orbs, etc.
Unlike the location cards, all small cards stay laid out face up in front of you. It is best to place small cards with jump markers next to the timeline stacks, so that you have a good overview of all visible jump markers.
Sometimes you will be instructed to discard a small card again or put it back into the stack. Here is an explanation of the corresponding symbols:
- Take this card from the stack and lay it out face up.
- Take this card from your display and put it in the box.
- Sort this card face down back into the stack.
On some small cards you receive items. How and where you can use them is described below under "The Items."
The Answer Cards
On some location cards, a decision leads you to an answer card A, B, C, or D. When this happens, the Chrono-Decoder (blue side) comes into play:
- Place your current location card against the matching outer edge of the Chrono-Decoder, matching the same timeline symbol. Make sure the colored area lines up exactly.
- Place the chosen answer card, blue side up, on the corresponding field in the middle of the Chrono-Decoder, in the same reading direction. Be sure to pay close attention that the answer card lines up exactly on all 4 sides at the color transitions.
It is very important that both cards line up very precisely. Even a small inaccuracy can lead to an incorrect result.
Now follow the line, initially colored, that runs from the location card onto the Chrono-Decoder, through the colors gray/silver, to the answer card, and there to the single line that leads back onto the Chrono-Decoder in black. This black line leads you to a small card, which you take and lay out face up as usual.
Note: at intersections, always follow lines straight ahead, without turning.
Should the rare case occur that the line runs off into nothing somewhere, then unfortunately you have triggered a time paradox! Your action changed time either not at all or even negatively. You immediately lose 2 time orbs! (More details can be found below under "The Time Orbs.")
Afterward, set the answer card and the decoder aside again.
Example: On the card "2022 Virgo" you chose option B. You place the location card against the outer edge to match, and answer card B in the middle. The line from the location card leads to small card 14. You take card 14 and lay it out face up. Afterward you set the decoder and the answer card aside again.
The Items
Over the course of the adventure you will receive small cards with items. (You can recognize them by the silver and black lines running along the outer border of the items, which match the lines of the Chrono-Decoder.) You must use these items at the right time and in the right place. You are not prompted to do this — you can do it at any time, whenever you believe you have found a sensible combination.
If you decide to use an item at your current location card, you proceed the same way as with the answer cards. You place the current location card against the outside of the Chrono-Decoder (blue side) and the item in the middle. Here too, always make sure both cards line up exactly and that the reading direction is correct.
As with the answer cards, the line leading out from the location card normally leads you to a small card (or, in rare cases, off into nothing, and you lose 2 time orbs).
On some location cards, no line leads out at the top. At such places you cannot use items.
The Tip Cards
If at any point you feel that you are not getting any further and need help, you can use the Tip-Decoder (green side) to get a hint. There are two different ways to do this:
Hint for a location card. If you want a hint for your current location card, first check whether a line leads out from the top of the card, because only then can you get a hint for it. Then place the location card against the outside of the Tip-Decoder so that the colored area lines up exactly. The colored line leading out from the location card takes you, via a yellow line, to a tip card.
Example: The line from "2045 Gemini" leads to tip card No. 1.
Hint for a small card. If you want a hint for a small card, first check whether a yellow marking leads out from somewhere on the card, because only then can you get a hint for it. Then place the small card in the middle of the Tip-Decoder so that it lines up exactly on all 4 sides. The line leading out from the yellow marking on the small card takes you to a tip card.
Example: The yellow marking on small card 2 leads to tip card No. 3.
Find the matching green tip card from the stack, turn it over, and lay it out face up. You lose 1 time orb, as indicated on the tip card. If the tip card only tells you something you already knew anyway, you do not have to give up a time orb.
The Time Orbs
You begin the adventure with 12 time orbs. They exist in order to make an assessment at the end of your adventure:
- When a decision or change you made was not so good, this can lead to a time paradox. Usually you then lose 2 time orbs, but it can also be a different number — you will be told accordingly.
- When you have a hint given to you, you always lose exactly 1 time orb.
In the Final Briefing you will learn how well you did.
Important: you can lose time orbs, but you can never lose this adventure! Should you lose all your time orbs, your adventure continues anyway! Even if you were to lose more time orbs than you still have, you simply keep playing and ignore all further time-orb losses from then on. Even your old friend Confucius knew: "once your reputation is ruined, you can live quite freely!"
Tips for a Better Play Experience
- Always look very closely at all the cards and read the texts carefully! Sometimes a clue is hidden in the picture or in a single word.
- Get into the theme and don't be afraid of "big" changes to the course of time. Which changes in the past could lead to which changes in the future? Which information from the future could help you in the past? Which item might usefully be used where? Put yourselves in the situation and don't think abstractly, but thematically!
- Don't neglect "old" timelines when you open new ones. If you're stuck, read all the places aloud again for which you have visible jump markers. Don't wait for a specific reason to visit a place you don't yet know. Sometimes you only recognize the reason afterward.
- You may not need to open every timeline. You may not need every item you find. On the other hand: just because you have already made a decision at a place once, you shouldn't "check it off" — it might make sense to make a different choice there, or you might be able to do something else useful there!
- Don't hold on too tightly to your time orbs — don't be afraid to lose one or another of them. And feel free to take a hint if you think you're stuck; there's no shame in that!
- At some points you will need general knowledge, but never specialized knowledge. That means: if you are missing a piece of information at a place for a decision that, in your judgment, is not general knowledge, then postpone the decision and travel elsewhere; you will very likely find the information you need somewhere in the game!
- For place names we deliberately used today's names. In general, this adventure does not claim to be historically accurate.