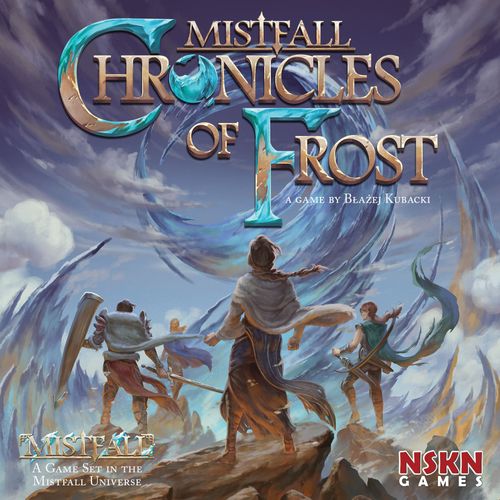
Chronicles of Frost
Chronicles of Frost Rulebook
Table of Contents
Table of Contents
Base Game, Solo Game, Modules
Chronicles of Frost comes with two Modules — extra sets of mechanisms that can be added to the base game. It is recommended that you ignore them during your first game. When setting up for the first time, simply place any components unused in the setup back in the box.
Game Components
220 cards:
- 60 Starting Fate cards (10 per Hero)
- 40 Advanced Fate cards (28 silver, 12 gold)
- 18 Search Quest Chapter cards
- 16 Exploration Quest Chapter cards
- 13 Item cards (6 silver, 7 gold)
- 25 World Event cards
- 7 Borderlands Location cards
- 7 Deadlands Location cards
- 7 Wildlands Location cards
- 1 Hearthfire Inn Location card
- 6 Hero cards
- 7 Ally cards
- 5 Hireling cards
- 4 Villain cards
- 4 Player Aid cards
65 tokens:
- 30 Enemy tokens
- 20 Skill tokens
- 40 Wound tokens
- 10 Reward Tokens
4 Player Markers
Setup
- Place the Hearthfire Inn Location card in the middle of the table.
- Shuffle all other Location cards and place the deck within easy reach of all players.
- Place the 5 Hireling cards face up next to the Location deck.
- Separate the Enemy tokens by type (according to their backs) and place these face-down near the play area. Also place all Wound tokens and Skill tokens within easy reach.
- Each player will choose (or randomly be assigned) a Hero together with its corresponding Character card and unique deck of Starting Fate cards (identified by the Hero artwork and name).
- Return all unused Character cards and Starting Fate cards to the game box.
- Collect the Skill token indicated on your Character card, placing it next to your Character card, along with a Player Aid. Select a marker to represent your character on the board. All characters begin the game at the Hearthfire Inn.
Quest Setup
Give 1 random Search Quest and 1 random Exploration Quest to each player.
Each Search Quest consists of 3 cards separated into three numbered chapters. Ensure that the Quest cards are placed in numerical order with Chapter 1 on top.
The Exploration Quests are very similar, except these consist of only two chapters. The Exploration Quest cards are also double-sided for ease of play — if the Hearthfire Inn card is placed upside-down in relation to where you are sitting, use the side which shows North at the bottom of the card; otherwise, use the side with North at the top of the card.
Return all unused Quest cards to the game box.
Final Setup
Separate the Advanced Fate cards by type (silver cards are valued 2 or 3; gold cards are valued 4 or higher). For your first game return the World Event Cards back to the game box. Shuffle each deck separately, placing them within easy view of all players. Reveal 5 cards from each deck. This forms the Card Offer tableau.
Each player should shuffle their Starting Fate cards and draw 5 cards to form their starting hand.
The player who most recently went on an adventure becomes first player. (Alternatively, determine first player randomly.) You are now ready to play Chronicles of Frost!
Game Overview
On your turn you will move, explore, fight, and progress in your Quests. To do so, you will play Fate cards (including Items and Allies) from your hand and activate cards in your Hero Area. You will also acquire new cards and retire old ones, thereby tuning your deck and scoring extra Victory Points.
Game End
The Game End is triggered when one of the following conditions are true:
- One player has completed both of their Quests
- One of the Advanced Fate decks has been exhausted
- All Locations have been discovered and all Enemies have been eliminated
The player who has accumulated the most Victory Points is the winner!
Your Hero Area
Each player has their own Hero Area. This is where you keep your Character card, your deck and discard pile, your Skill tokens, Enemy tokens, Wound tokens, as well as all cards you play on your turn. Basically, everything that belongs to you is considered in your Hero Area.
The left-hand side of your Hero Area is referred to as your Chronicle. This is where you keep retired cards and Enemy tokens. Retired cards should be placed face-down in your Chronicle. (For more information about retiring cards, see the Retiring Cards and Tokens section.) At the end of the game, each retired card is worth a number of Victory Points as indicated on the card.
Whenever anything refers to your Hero Area, it includes everything in your possession.
Legend
- Draw/Scout — Draw cards from your deck or from the Location deck.
- Move — Pay the Exit Cost of your current Location and move to an adjacent Location.
- Wound — Represents wound tokens.
- Attack — Fight to eliminate Enemies.
- Resolve — Spend to acquire cards from the Offer.
- Skill — These icons appear on Skill tokens and cards. Using the proper Skill token will unlock the bottom part of any card with the same Skill token.
- Enemy — Each icon represents a different type of Enemy.
You do not have to memorize the icons by heart, since all icons can also be found on your Player Aid. In fact, most of them will also make more sense after reading the rest of the rules.
Player Turn Summary
Your turn consists of 3 phases:
- STEP 1 — Action Phase: Perform Actions or Retreat to Hearthfire Inn.
- STEP 2 — Clean-up Phase: Discard all cards you played on your turn, along with any cards you want to discard from those still left in your hand, then draw back up to your current Hand Limit (normally 5).
- STEP 3 — Location Phase: If no Enemy is present at your current Location you may Rest.
Once you have resolved these phases, your turn ends and play proceeds clockwise.
STEP 1 — Action Phase
To perform Actions, you will play Fate cards (including Action cards, Items and Allies) from your hand and activate cards in your Hero Area. Played cards must remain in your Hero Area until the Clean-up Phase.
Most cards generate resources when activated. (Action cards are activated simply by being "played".) A card may generate different resources at once, or it may present you with options (clearly separated by "OR").
Whenever you see a notation similar to "+2 [resource]", "+1 [resource]", etc., this always indicates how many resources are generated, and of what type.
Important: Generated resources do not need to be spent all at once or in any particular order. All generated resources remain available to you until the end of your Action Phase. You may spend resources to perform Actions in any order you choose and you may perform the same Action more than once, as long as you have enough resources available to pay for it. (Example: If you have generated 3 of a resource but only use 2, the remaining 1 can be used at any time during your Action Phase.)
Sometimes a card may provide you with a unique effect. If so, simply resolve the text.
Unlocking Cards
In order to unlock and activate the bottom portion of a card you must either:
- Use a Skill token
- Retire an Enemy token
- Exert your Hero
Using a Skill token means placing a Skill token from your Hero Area on the card you wish to unlock. The Skill token must match one of the Skill icons on the card and must not have been previously used this turn.
Your Skill tokens are permanent. Each Skill token can only be used once per turn. However, they are not expended. Instead, you will keep the Skill token in your Hero Area during the Clean-up Phase. So, when you have acquired a particular Skill token, it can be used once every turn for the rest of the game!
If you, instead, wish to unlock a card using an Enemy token, simply place an Enemy token from your Hero Area face-down on the card you wish to unlock. That Enemy token is now considered retired and will be moved to your Chronicle during the Clean-up Phase.
Finally, to unlock a card by Exerting your Hero, simply place the indicated number of Wound tokens on the card in order to unlock it. The total number of Wound tokens in your Hero Area may never exceed your maximum Health, as indicated by your Hero Card. If any effect would cause you to exceed this maximum, you are not allowed to resolve that effect.
Important: Regardless of the method used to unlock a card, each card can only be unlocked once during your Action Phase. Each token used can also only unlock a single card each turn.
Ally and Item Cards
While most Fate cards are Action cards, Ally and Item cards are not. Unlike Action cards, when you play an Ally or Item card into your Hero Area, the card is not automatically activated. In order to activate an Ally or an Item you must exhaust the card (turning it sideways). Any exhausted card cannot be used again during the same turn, unless an effect or ability would first refresh the card.
At the end of your turn, during the Clean-up Phase, all Item cards are automatically refreshed, meaning they can be used again on the following turn. Exhausted Ally cards are discarded instead. (For more information about the Clean-up Phase, see the Clean-up Phase section.)
Hireling cards are a special type of Ally and can be recruited at the Hearthfire Inn. An exhausted Hireling card is returned to the general Hireling deck after their ability is resolved. Hireling cards cannot be unlocked. (For more information about recruiting and discarding Hirelings, see the Hirelings section.)
Detailed Action Descriptions
DRAW — Spend Draw to draw cards from your deck. For every 1 Draw spent, draw 1 card from your deck. If you have generated more than 1 Draw, you do not have to declare the number of cards you will draw. You may draw and look at 1 card (spending 1 Draw) before deciding to draw another card (spending another 1 Draw), etc.
Important: Your discard pile should not be shuffled as soon as it is empty. Only shuffle your discard pile if your deck is empty and you need to draw a card.
SCOUT — Spend at least 2 Scout (you may spend more than 2, but never less). For every 1 Scout spent, immediately draw 1 Location card from the Location deck. Choose 1 of the drawn Locations and place it adjacent to your current Location. You must declare how many Location cards you will draw before actually drawing any. After taking this Action, shuffle the declined Location cards back into the Location deck. (For more information about building the board, placing Locations and resolving their Discovery effects, see the Locations section.)
Important: You may not choose this Action if there are already 4 Locations adjacent to your current Location, or if the Location deck is empty.
After discovering a new Location, you will usually have something to do there. To speed up game play, let the player to your left shuffle the Location deck (without looking at the cards you declined).
MOVE — Spend Move equal to the Exit cost of your current Location. You may Exert your Hero to pay some or all of this cost, placing 1 Wound token on your Hero Card for every 1 Move paid for this way. After paying the Exit cost, move your Hero to an adjacent space. If you move into a space that does not already contain a Location, draw and place the top card from the Location deck (resolving all Discovery effects as normal).
Important: You may not move into an empty space if the Location deck is empty.
Moving is the only thing you can simply Exert yourself to do. While it might be tempting to pay with your own blood for the ability to afford something expensive, you really don't want to deal with beings that would offer you such a deal.
PURCHASE — Spend Resolve to acquire any card from the Offer. The newly acquired card should be placed on top of your discard pile. Then, replenish the Offer by drawing a card from the appropriate deck to replace the card you Purchased.
ATTACK — Spend Attack to eliminate an Enemy at your current Location. You must pay an amount of Attack equal to the value printed on the Enemy token. Additionally, if the Enemy token has any Wound number (presented as 1, 2, 3, etc.), you must be able to take that many Wounds as well. If attacking an Enemy would result in having more Wounds than your Hero's maximum capacity, you may not Attack that Enemy.
After attacking an Enemy, place the defeated Enemy token face-up in your Hero Area.
Remember to always count all Wound tokens in your Hero Area before adding new ones. It is easy to forget that you already Exerted yourself to enter the Enemy Location.
Important: Some effects may allow you to Attack an Enemy in an adjacent Location. You may spend any Attack generated during your turn to make that Attack (even from cards that do not allow you to attack Enemies in other Locations). When you Attack an Enemy that is not in your current Location, you suffer no Wounds regardless of the Wound number printed on the Enemy token.
QUEST — Each Quest card specifies exactly what you need to do in order to progress further. In case of a Search Quest, simply follow the description on the card. In case of an Exploration Quest, you must also be in the space indicated on the map depicted above the text.
Most Quest cards require you to spend resources in order to progress (sometimes asking you to do something other than spending resources). Resources spent to Quest cannot also be used to Purchase cards, Attack enemies, etc. The only exceptions are Quest actions that specifically note that you have to do something while you are resolving a specific action. (For more information about Quests, see the Quests section.)
RETREAT TO THE INN — Instead of performing any other Action, you may decide to Retreat to the Inn. Move your Hero directly to the Hearthfire Inn (regardless of distance and without paying any costs). Immediately proceed to the Clean-up Phase.
You may be tempted to show your true grit, and soldier on despite wounds. I've held torches to many great heroes who shared this opinion, and I even remember where most of them were buried or eaten. At times, it's genuinely better to return to a safe haven and rest, proving that discretion indeed is the better part of valour.
Important: You may not play or activate any cards or perform any other Actions before retreating. You spend your entire Action Phase to Retreat to the Inn. If you have already performed an Action or activated any card, then you may no longer choose to Retreat to the Inn until your next turn.
STEP 2 — Clean-up Phase
- Move all Wound tokens and used Skill tokens from your Hero Area to your Hero character card.
- Move all face-down Enemy tokens from your cards to your Chronicle. (You do not receive any extra benefits for doing so at this time.)
- Discard all played Action cards. Also discard any exhausted Ally cards, unless their bottom portion was unlocked this turn. Exhausted Hireling cards are returned to the Hireling stack.
- You may now discard any number of cards from your hand.
- Draw cards from your deck until you reach your current hand limit. (If your deck is empty and you still need to draw cards, reshuffle your discard pile to form a new deck.)
Important: If you have more cards in hand than your current hand limit, you do not have to discard any cards. However, you also do not draw any new ones.
STEP 3 — Location Phase (REST)
Many new adventurers get confused here. However, there is a simple mnemonic to help you remember the order of these Phases: going to sleep is the last thing every adventurer does on any given day. Once your weary head hits that pillow — or rolled blanket — there is nothing else you'll do on that day.
If there is no Enemy token at your current Location, you may use its Rest ability. Using the Rest ability is not mandatory. However, if you decide to Rest, you must resolve it fully. Effects prefaced by "you may" are optional.
Important: Remember that the Clean-up Phase happens before you Rest, and not the other way around.
Detailed Rules
Exertion and Wound Effects
As a general rule, you may Exert your Hero to pay Exit costs (partially or in full) of a Location you are moving out of. You may also Exert your Hero to unlock a card in your Hero Area.
Important: Regardless of the reason of Exertion, you can never have more Wound tokens in your Hero Area than the maximum capacity indicated on your Hero Card. If Exerting would bring you over the capacity, the Action cannot be performed, even if the Action would immediately let you discard some of the Wound Tokens from your Hero Area.
Your Hero Card explains the effects of having a certain number of Wound tokens in your Hero Area. Usually, having a certain number of Wound tokens means that your hand limit is reduced to the number printed next to the hand icon. Other effects are described on your Hero character card. Most Heroes become unable to Attack Enemies once they have accumulated a certain number of Wound tokens.
Important: Being unable to Attack an Enemy token does not prevent you from generating Attack for other purposes (like progressing Quests).
Retiring Cards and Tokens
Different game effects allow you to Retire cards or Enemy tokens.
Retiring Cards
Whenever an effect allows you to Retire any number of cards, each of those cards may be taken either from your hand, your discard pile, or from Items and Allies (but not Action cards) in your Hero Area. A Retired card is then moved to your Chronicle (placed face-down to the side of your Hero Area). At the end of the game, a Retired card will score you the higher number of Victory Points (the number to the right, after the slash "/").
Retiring Tokens
You may retire Enemy tokens from your Hero Area to generate Resolve as part of a Purchase Action, or to generate Scout/Draw when drawing from your personal deck or from the Location deck. Most Enemy tokens have a Resolve value (presented as 2, 3, 4, etc.). Simply flip the Enemy token face-down to generate that Resolve, and move it to your Chronicle. Likewise, an Enemy with a Scout/Draw value may be flipped to generate that resource.
If you Retire an Enemy token as part of a Quest Action, you will likewise flip the token face-down and move to your Chronicle; however, you do not generate any Resolve in this case.
When using an Enemy token to unlock a card, place the token face-down on the unlocked card. During your Clean-up Phase the token is moved to your Chronicle; however, you do not generate any resources (from those printed on the token) in this case.
Face-down Enemy tokens in your Chronicle and face-up Enemy tokens in your Hero Area both count for Victory Point purposes.
Chronicle Interactions
Cards or tokens in your Chronicle never count as being part of your hand, deck, or discard pile. No game effect can interact with a Retired card or Retired token unless explicitly stated. Players may freely examine the contents of their own Chronicle.
Locations
Except for the Hearthfire Inn, all Locations begin the game as part of the face-down Location deck.
Location Adjacency
Two Locations are considered adjacent if they share a side (either the long or the short side of the card). Locations that only share a corner are not considered adjacent. Each Location can therefore be adjacent to a maximum of 4 other Locations.
Building the Board
During the game, you will be placing Locations on an imaginary grid with the Hearthfire Inn in its center. The grid may span a maximum of 2 Locations into any direction from the Hearthfire Inn. This means that the imaginary grid has a maximum potential size of 5×5 Locations. Since there are only a total of 22 Location cards in the game, even with all Location cards on the table, the "board" will never actually fill all 25 "spaces".
Placing Locations
New Locations are placed as a result of Scout Actions, as well as whenever a Hero moves out of a Location into an empty space. When taking the Scout Action, you must place 1 (and only 1) of the Locations drawn. If there is more than 1 eligible "space" where the new Location can be placed, you may choose where to place it. If you drew a Location as a result of moving into an empty "space", you must place the Location card under your Hero marker.
Location Discovery
After placing a new Location for any reason, you may resolve its Discovery effect. Whether you decide to resolve the effect or not, the effect can never again be resolved by any player. Entering a Location or changing its position on the grid never triggers its Discovery effect. Discovery effects are never mandatory — they are supposed to help and not hinder.
Enemy at Location
After placing a Location (and optionally resolving its Discovery effect), draw a random Enemy from the stack that corresponds to the Location type drawn. Simply match the Enemy icon on the location to the back of an Enemy token. Reveal the Enemy token by placing it face-up on the Location card. Entering a Location with an Enemy token, or ending your turn in such a Location, has no immediate detrimental effect. However, you may not use the Rest ability of any Location with an Enemy token.
Each location is rather large, so you can easily avoid enemies during your travels. They usually only get angry if you decide to poke them. Yet, the mere presence of beasts, brigands, or the walking dead makes it impossible to get a good night's rest as you have to stay on your guard.
Location Exit Costs
Whenever you perform a Move Action, pay the Exit cost of the Location you are leaving (using any combination of Move and Wounds). The Exit cost of the Location you are entering is irrelevant. You only pay these costs if you decide to leave.
Quests
There are two types of Quests in Chronicles of Frost: Search Quests and Exploration Quests. Everyone begins the game with one randomly assigned Quest of each type.
Quest Progression
When taking the Quest Action you may progress any one of your Quests. Only the top card (chapter) of each Quest is currently available.
Search Quests
Search Quests describe the Location you have to be in, and what exactly you need to do in order to progress the Quest. Whenever a Quest Action refers to a Borderlands, Deadlands, or Wildlands Location, you need to be in any Location of the given type in order to perform the action. If a specific Location name is given, then you must be in that exact Location in order to perform the action.
Exploration Quests
Exploration Quests show you the position of a Location on the board. When you are in a Location that occupies that "space" on the board you may perform that Quest Action in order to progress the Quest.
Completing Quests
After successfully performing a Quest Action, resolve the Reward section of the quest (choosing one or none of the options), and immediately move that Quest chapter card to your Chronicle (thus revealing the next chapter of the Quest). When all Quest chapter cards of a given Quest are in your Chronicle, then the Quest has been completed. If both of your Quests have been completed, the End Game is triggered.
Hirelings
Hirelings are a special type of Ally card available at the Hearthfire Inn.
Purchasing Hirelings
A Hireling card can be purchased during your Action Phase at a Haven Location. When purchasing a Hireling, you may freely choose a Hireling from the deck. A purchased Hireling is placed directly in your Hero Area. You are not allowed to have more than one Hireling at any time in your Hero Area. If for any reason you would go above this limit, return any Hirelings you choose to the deck until you are left with just one.
Using Hireling Abilities
You may use a Hireling ability at any time during your turn. After resolving the ability, immediately return the Hireling card to the Hireling deck.
Game End
The Game End is triggered when one of the following conditions are true:
- One player has completed both of their Quests
- One of the Advanced Fate decks has been exhausted
- All Locations have been discovered and all Enemies have been eliminated
At this point, all other players (in other words: not the player who triggered Game End) will receive one final turn, after which the game is over, and points are scored.
Final Scoring
To calculate your final score, add the following:
- The lower Victory Points printed on all cards in your hand, deck, or discard pile.
- The higher Victory Points printed on all cards in your Chronicle.
- The Victory Points printed on all Enemy tokens in your Hero Area and Chronicle (both face-up and face-down Enemy tokens should be counted).
The player with the highest total number of Victory Points is the winner!
In case of a tie, the tied player with more Victory Points in their Chronicle is the winner. If still tied, the tied player who has more cards in their Chronicle is the winner. If still tied, the tied players share in their victory! In this case, we recommend that the tied players enjoy a game of Mistfall or Heart of the Mists together. They have just demonstrated that they would make a great team!
Game Modules
Your copy of Chronicles of Frost comes with two modules you can use during a game. The first of these Modules (World Events) adds an extra layer of strategy and flexibility to the game. The second Module (Villains) can be added to a game already using the World Events.
Below follow the descriptions and rules for all the modules.
Module 1 — World Events
This Module adds the World Event Deck and another row of cards to the Offer, allowing you to purchase cards that are similar to Quests. However, unlike Quests their objectives are not spread over multiple cards.
Setup
Shuffle all World Event cards forming a single deck, and create an offer of five face-up cards below the Advanced Fate cards.
Purchasing World Event Cards
Unless a given card specifically provides alternative rules, World Event cards are purchased just like any other from the offer. However, instead of being immediately discarded, just like Hirelings they are placed in your Hero Area. Some of these cards do not have a purchase cost. In this case follow the special purchasing rules detailed on such cards.
World Event Cards may also be purchased with special actions allowing you to gain a card without paying its Resolve cost. However, you may never target them with effects that would specifically place them in your deck or discard pile. Similarly, no effect may ever bring move them out of your Chronicle back into your Hero Area.
Limits and Progression
World Events in your Hero Area work just like Quests. You progress through them using the Quest Action. Upon fulfilling all the requirements of a given card, resolve its Reward section and move the card into your Chronicle.
You may never have more than two face-up World Event cards in your Hero Area, nor may you ever have two face-up World Event cards with an identical name. No effect may move a face-up World Event card from your Hero Area to your Chronicle, excluding that card's own text, or an effect that specifically allows for that type of an action.
New Clean-up Phase and Game End Rules
During the Clean-up Phase, if you purchased no World Event cards, choose and discard a single World Event of your choosing, and refill the offer with a new card.
When the World Event Deck is exhausted for any reason, the game end is triggered the same way it would be with the exhaustion of any other deck.
Module 2 — Villains
This Module expands the World Events with Villains: a new type of enemy so powerful that it can be rarely eliminated by a single player. Heroes will have to form temporary alliances to battle them — and share in the spoils — together.
Setup
In order to use the Villains Module you need to also use the World Events module. After shuffling the World Event Deck, divide it into five roughly equal face-down piles. Shuffle the Villain cards face-down, and add one at random to four of the piles. Finally, create the deck by stacking the piles, with the pile containing no Villain card on top of the deck.
Drawing Villain Cards
When a Villain card is drawn, set it aside, next to the offer, and refill it from the World Event deck. From that point on any Global effect printed on the Villain card becomes active — and will remain active until the Villain is eliminated.
Fighting Villains
You may face a Villain in any Key Location of the type given in the Challenge section of the Villain card. In order to eliminate a Villain you must match their attack value. Before attacking a Villain you may ask other players for help. Starting with the player on your left, each player may play cards, exhaust items and allies and unlock any cards in their Hero Area in order to generate attack. Any Hero may take part in the attack, regardless of their position on the board. If the total attack generated by you and other players matches the Villain attack, the Villain is eliminated.
The actual combat only happens if the players willing to participate can generate enough attack to eliminate the Villain, so discuss their option with everyone around the table to make sure that you will not have to take back cards played, unlocked or drawn.
Each Villain requires you to place wounds in your Hero Area. The first (greater) number of Wounds is placed in the Hero Area of the player who initiated the combat. The second (lower) number of Wounds is placed in the Hero Area of every player who helped eliminate the Villain. As with placing Wounds for any other reason, the total may not exceed the maximum Wound threshold of a Hero.
Eliminating Villains
After you have generated enough attack to eliminate the Villain, follow the steps below:
- Each player acting out of turn discards any exhausted (and not unlocked) Allies and refreshes any used items. Action Fate cards played to their Hero Areas are discarded, and each of those players draws back to their current hand limit.
- Each player acting out of turn receives a Reward Token of value equal to the lower Resolve value printed on the eliminated Villain card.
- The player who initiated the combat receives the higher Resolve value, which is generated like any other resource to be used on their turn, and moves the Villain card into their Chronicle.
Reward Tokens
A Reward token can be used at any time of your turn to generate one of the resources printed: either Resolve or Scout. Any Reward tokens you receive are kept in your Hero Area until you decide to generate the resources printed. You may flip a Reward token at any time. After you generate the resource the Reward token is discarded.
You may have at most one Reward token in your Hero Area at any time. After you receive your second Reward token, you must immediately discard either the one already in your Hero Area, or the token just received.
Brash Hero — Solo Mode
Introduction
Chronicles of Frost is a race to glory between up to 4 iconic heroes. However, if you have no other players on hand, or you simply want to face the Mists alone, this mode will allow you to do so, by automating an opponent: a Brash Hero looking to forge a Chronicle that will eclipse yours.
On their turn the Brash Hero will move (possibly discovering a new location), conquer Enemies or purchase cards, all that on the way to finish their own set of quests. At the end of the game you will compare your score to the score of the Brash Hero, and if you have more victory points, prove to them that you should be the one venerated all across the land.
Setup
Perform regular setup of the game with one exception: if you are using the World Event deck, remove the Enemy of Undead, Enemy of Beasts and Enemy of Brigands from the World Event Deck. Also remove any Villain cards from the game. Do not set up the Brash Hero yet.
When you have gone through the whole setup procedure, place an unused pawn (or an unused miniature from the Heroes of Mistfall Miniatures Pack) in the Hearthfire Inn. Draw two random Exploration Quests and stack one on top of another, forming the Brash Hero's Quest (the pile should contain cards in the following order: Quest A – Chapter 1, Quest A – Chapter 2, Quest B – Chapter 1, Quest B – Chapter 2).
You are now ready to play.
To enhance your gaming experience, miniatures of heroes are available separately in the Heroes of Mistfall Miniatures Pack.
Brash Hero Turn
The Brash Hero always takes the first turn. Each turn go through all the steps below in order, until you reach the end of the list, or until you are told to end Brash Hero's turn.
- If the Brash Hero has 6 or more wounds, discard all their wounds and purchase the cheapest Fate Card from the offer. End Brash Hero's turn.
- If the Brash Hero is in a location with an enemy, she eliminates that enemy and purchases the cheapest Fate Card from the offer. The enemy deals damage normally — place wound tokens in Brash Hero's Hero Area. End Brash Hero's turn.
- If the Brash Hero is on a location marked on her top Chapter Card, retire that Chapter Card into her Chronicle and purchase the most expensive Fate Card in the offer. If this is the first Chapter 2 card, move the Brash Hero to Hearthfire Inn and discard any of her wounds. If this is the second Chapter 2 card, trigger the Game End. End Brash Hero's turn.
- If the Brash Hero is in a location with no enemies, move the Brash Hero to an adjacent space on the grid towards the location marked on her top Chapter Card:
- If the space is not filled with a discovered location, the Brash Hero discovers the top location card (ignoring any discovery effects), immediately eliminates the enemy placed on the location (receiving damage normally) and purchases the cheapest Fate Card from the offer.
- If the space is filled with a location, the Brash Hero moves into that location and purchases the most expensive Fate Card from the offer. End Brash Hero's turn.
Brash Hero Rules
The Brash Hero does not work the same way as a player hero. Here are the special rules you need to move during the Brash Hero's turn:
- All cards purchased and enemies eliminated by the Brash Hero go into her Chronicle. Finished Chapter Cards are also placed in her Chronicle.
- If you are using the World Event Deck, discard the rightmost card of the Event offer at the end of every turn — yours or the Brash Hero's.
- The Brash Hero will only purchase a World Event Deck card if it is the cheapest card in the whole offer, and will never receive any card with a special purchase condition (a card with no price).
- The Brash Hero will never purchase a Hireling card.
- The only game pieces not belonging in Brash Hero's Chronicle are unfinished Chapter Cards and wound tokens. Wounds discarded by the Brash Hero are returned to the stock normally.
- The Brash Hero can never purchase a card from the World Event Deck. When purchasing a Fate Card from the offer, the Brash Hero may purchase items and allies, but these cards also go directly into her Chronicle.
- The Brash Hero ignores all Discovery and Rest effects.
- Whenever during the Brash Hero's turn there is more than one option to choose from (like having more than one viable location to move or more than one card to purchase), you are allowed to choose freely from between these options.
Game End
The solo game can end in one of two ways: either triggered by you (following normal conditions), or by the Brash Hero (immediately after she retires her last Chapter Card). Unlike in the multiplayer mode, solo game ends immediately upon meeting any of the game end conditions.
Final Scoring
Count your points normally. The Brash Hero receives the higher point value for each of her cards (after all, they are in her Chronicle), as well as points for eliminated enemies. If you have more victory points than the Brash Hero, you win! If you have fewer points or you are tied, you lose the game.
Brash Hero Hard Mode
If you want a more challenging game, simply ignore all the text written in italics in the Brash Hero Turn section of the rules above. That means that the Brash Hero will not receive damage from enemies (and they will never discard any wound tokens).