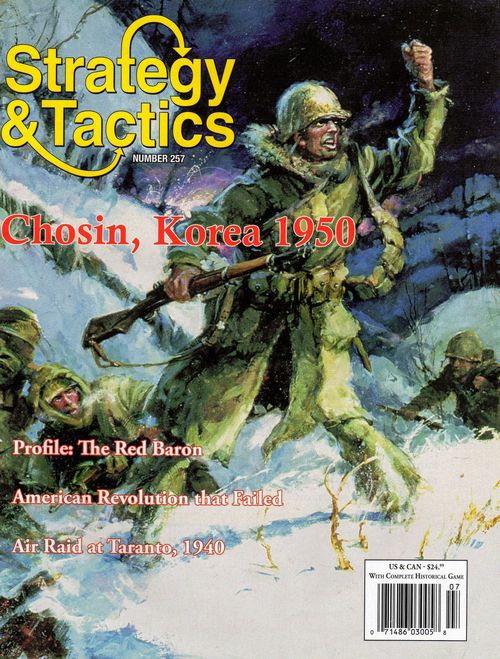
Chosin: X Corps Escapes the Trap
Chosin: X Corps Escapes the Trap Rulebook
Table of Contents
Table of Contents
- 1.0 INTRODUCTION
- 2.0 SEQUENCE OF PLAY
- 3.0 Random Events
- 4.0 Reinforcements
- 5.0 Unit Breakdown & Recombination
- 6.0 Land Unit Movement
- 7.0 Zones of Control (ZOC)
- 8.0 Land Unit Stacking
- 9.0 Exiting the Map
- 10.0 Barrage & Naval Gunfire
- 11.0 Land Combat
- 12.0 Combat Effectiveness & Recovery
- 13.0 Air Operations in General
- 14.0 TAC & SAC Air Warfare
- 15.0 Air Transfer
- 16.0 Airborne Supply Markers
- 17.0 Airborne Units
- 18.0 Naval Combat Operations
- 19.0 Naval Transport
- 20.0 Logistics
- 21.0 Limited Intelligence
- 22.0 Co-Belligerents
- 23.0 Bridge Destruction & Repair
- 24.0 Victory Conditions
- Chosin Scenarios
- Optional Rules
- 25.0 Fog of War Markers
- 26.0 Meeting Engagements
- 27.0 Optional Barrage
- 28.0 Organizational Integrity
- 29.0 Entrenchments
- 30.0 Armor
- 31.0 Partisan Units
- 32.0 UN Ranger & Special Operations Units
- 33.0 Amphibious Units
- 34.0 Port Units
- 35.0 Airfields & Airfield Units
- 36.0 Combat Engineers
- 37.0 Atomic Warfare
- 38.0 Scenario Options
- 39.0 Strategic Game
- 40.0 Gauntlet (S&T 190) Additional Units
- 41.0 Gauntlet (S&T 190) Errata
- 42.0 Organization of Forces
- 43.0 Chosin Gazetteer
1.0 INTRODUCTION
Chosin: X Corps Escapes the Trap, is a simulation of the fighting in eastern North Korea in late 1950 in which the Chinese attacked the UN X Corps as it approached the Yalu River. One of the more famous incidents of the campaign was the US Marine Corps 1st Division fighting its way out of an envelopment at the Chosin reservoir. Chosin covers the entire campaign. Chosin uses the same game system as Gauntlet, which appeared in Strategy & Tactics 190. The two games are compatible, and the Strategic Game scenario included in this issue provides instructions, as well as extra units, to create one grand campaign game of the entire Chinese offensive of late 1950. Players may also use the Chosin rules and charts to update Gauntlet. Unless otherwise stated, these rules supersede those of Gauntlet.
A "###" symbol indicates a rules change or modification from Gauntlet.
1.1 Players
Chosin is a two-player game. One player is the Communist player, the other is the UN player.
1.11 The Communist player controls all Chinese and North Korean units.
1.12 The UN controls all United States (US), Republic of Korea (ROK) and other UN forces.
1.2 Scale
Each game turn equals one day. Each hex represents four kilometers (2.5 miles) across. Each regiment/brigade contains 1,500 to 5,000 men; each division 6,000 to 24,000. Each air unit represents 30 to 50 sorties.
1.3 Equipment
A complete Chosin game should include the following: one game map, this set of rules and 280 die-cut counters. Players will have to provide a six-sided die.
1.4 Map
The game map shows the region where the actual campaign took place. A hexagonal grid has been superimposed on it to regularize movement and the placement of units, and to delineate terrain types. For newcomers to wargaming, units are placed in hexes, and must remain within the hex boundaries at all times.
1.5 Counters
The counters—the die-cut, square cardboard playing pieces—represent the armed forces that fought in the original campaign. There are two basic types of counters in the game: units, which represent military forces, and markers, which are used to record various game functions and other information.
1.51 Colors
- United States: green
- Republic of Korea (South Korea): blue
- Other UN: light green
- UN air and naval: green on white with icon
- People's Republic of China: white on red
- Democratic People's Republic of Korea (North Korea): black on light red
1.52 Military Units The front of a combat unit is its "combat effective" side. The reverse of a unit is its "disrupted" status. Certain units don't have a disrupted status. ### Certain battalions don't have a disrupted side. That's a change from the original system, and additional counters are provided to retrofit this to Gauntlet.
1.53 Unit Abbreviations
- 2SE: 2nd Special Engineer
- 3L: 3rd Logistic Group (elements)
- Cap: Capital Division
- Cav: Cavalry
- CW: Commonwealth
- Gd: Guard
- IX: Chinese Ninth Group Army
- M: Marine
- MAW: Marine Aircraft Wing
- PLA: People's Liberation Army (Communist Chinese armed forces)
- RMC: Royal Marine Commando
- ROK: Republic of Korea (South Korea)
- TF: Task Force
- X: US Tenth Corps
- XIII: Chinese 13th Group Army
1.54 Game Markers. Certain markers are back-printed with other types of markers. Players use whichever side they need for the current game function. If you run out of markers, you may make more.
1.6 Charts & Tables are used to conduct certain game functions and to simplify certain game procedures.
1.7 Die Roll Modifiers
Certain charts require a "die roll modifier." That's a number added to, or subtracted from, the result rolled on the die. For example, a die roll modifier of "2," added to a rolled result of "3," would give a final outcome of "5." A negative die roll modifier is subtracted from the number rolled. If more than one die roll modifier is applied, use the cumulative total.
1.8 Sample Unit Counters
1.81 Sample Infantry Regiment 1.82 Sample Headquarters 1.83 Sample Artillery Unit 1.84 (see chart on page 2) 1.85 Air Unit Types 1.86 Naval Unit Types
[Editor's note: the sample counter illustrations in 1.81–1.86 and 1.84's chart are images in the source and do not appear in the text version.]
1.9 Size
Size refers to the organizational echelon of a unit.
- XXXX = army
- XXX = corps
- XX = division
- X = brigade or group or combat command
- III = regiment or regimental combat team or group
- II = battalion or US squadron
- I = company or detachment
2.0 SEQUENCE OF PLAY
The game is played in turns called "game turns." Each game turn is divided into two "player turns," a UN Player Turn and a Communist Player Turn. Each player turn is composed of several segments called "phases." The player whose turn is in progress is called the "phasing player," and the other player is the "non-phasing player." All actions during each player turn and game turn take place in a prescribed order of phases, called the "sequence of play."
2.1 Game Turn Sequence Outline
a. Events Phase The players roll on the Random Events Table and apply the result.
b. UN Player Turn
- Reinforcement Phase: The UN player places any of his side's reinforcements arriving that turn.
- Air Allocation Phase: The UN player allocates his air missions for the game turn by placing air units in the appropriate Air Mission boxes.
- Reorganization Phase: UN units may breakdown or recombine. UN units may also entrench and attempt to destroy depot markers.
- Movement Phase: The UN player moves some, none, or all of his side's land units, as he chooses and within the framework of these rules. UN units may also conduct meeting engagement combat (optional rules) and destroy bridges.
- Air Strike Phase: The UN player places on the map any air units he earlier allocated to air strike missions and resolves that combat.
- Barrage Phase: The UN player conducts barrage attacks using his artillery and naval task force units.
- Land Combat Phase: The UN player conducts his ground attacks.
- Recovery Phase: The UN player may restore to combat effectiveness any of his disrupted units. He may also remove "Bridge Destroyed" markers.
- Administrative Phase: Remove all "Operations Completed" markers from all UN units.
- Interdiction Segment: The UN player places on the map air units he earlier allocated to interdiction missions.
c. Communist Player Turn
- Reinforcement Phase: The Communist player places any of his side's reinforcements arriving that turn.
- Reorganization Phase: Communist units may breakdown or recombine. Communist units may also entrench.
- Movement Phase: The Communist player moves some, some, none, or all of his side's land units, as he chooses and within the framework of these rules. Communist units may also conduct meeting engagement combat (optional rules) and destroy bridges.
- UN Interdiction Removal Phase: Remove from the map all UN air units allocated to interdiction missions.
- Barrage Phase: The Communist player conducts barrage attacks using his side's artillery units.
- Land Combat Phase: The Communist player conducts his ground attacks.
- Recovery Phase: The Communist player attempts to restore to combat effectiveness his side's disrupted units. He may also attempt to rebuild destroyed bridges.
- Administrative Phase: Remove all "Operations Completed" markers from all Communist units.
d. Game Turn Indication Phase The Game Turn marker is advanced on the Game Turn Record Track, signaling the start of a new game turn.
2.2 Game Length
Players continue the above sequence of play until the requisite number of game turns, as indicated in the scenario rules, are completed, at which time the winner is determined.
3.0 Random Events
3.1 During the Random Events Phase, each player rolls a die on the Random Events Table to determine the random event for that turn. The Communist player's die is considered the "10" digit; the UN player's die the "1" digit. Cross index the two rolled results and apply the final result. For example: if the Communist player rolls a "1" and the UN player rolls a "2," the final result is "12," "Bug Out."
3.2 The result is applied immediately; in some cases, an event may apply throughout an entire game turn (such as "23-26 Really Bad Weather"). Events may occur more than once per game unless otherwise noted.
3.3 Random Event Listing
- 11-12 Bug Out. This applies only if the Communists currently have 10 or more victory points than the UN; otherwise, treat as "No Event." This turn: 1) UN units pay no movement points to disengage, though they still pay normal movement points to infiltrate; and 2) All UN ground attacks and barrages are shifted one column left on the CRT (in addition to all other applicable shifts).
- 13-14 Communist Morale Cracks. This applies only if the UN currently has 10 or more victory points than the Communists; otherwise, treat as "No Event." This turn all Communist ground attacks and barrages are shifted one column left on the CRT (in addition to all other applicable shifts).
- 15-16 Refugees Clog Roads & Ports. No units may use road movement or take advantage of bridges this turn. This doesn't affect tracing lines of supply. Reduce the UN Naval Transfer Capacity to "1" this turn. (Apply this change to the Refugees Clog Roads event in Gauntlet.)
- 21-22 Disease. The Communist player rolls a die and divides that result by two (round up). He must disrupt a number of his units equal to that result. He may completely eliminate combat effective units, counting each such elimination as two disruptions.
- 23-26 Really Bad Weather. This turn: 1) halve the total number of UN air units available [UN player choice, round down]; 2) no unit on either side may force march; 3) shift all attacks an additional column to the left; and 4) subtract an additional "1" from all recovery die rolls. (Apply this change to the same event in Gauntlet.)
- 31 Really, Really Bad Weather. Skip this game turn; proceed to the next game turn. Treat as "No Event" if this is the last turn of the game and proceed normally.
- 32-33 UN Communications Break Down. This game turn, the UN player may not involve land units from different nationalities in the same attack, including barrage. US Marine and US Army units may not participate in the same attacks. No UN close air support, offensive or defensive, may be executed.
- 34-36 Third Infantry Division Ordered Redeployed. This event may occur only if the UN currently has more victory points than the Communists. No units of the US 3rd Infantry Division may move, attack or advance after combat this turn and the next. (They defend and retreat normally, and may use barrage for defense.) This event may be triggered only once per game; if rolled when the UN has less than or equal the number of Communist victory points, treat as "No Event"; however, in that case, it may be triggered if rolled again when the UN has more victory points than the Communists. Always ignore this event if playing the Strategic Game. (Note: no units are actually withdrawn from play due to this event—it represents a higher-level command debate on where the 3rd Infantry should go.)
4.0 Reinforcements
4.1 Reinforcements are new units received during the course of the game. Their placed on the map during in your own side's Reinforcement Phase. They're arrivals are specified in the scenario rules.
4.2 Players may also receive additional reinforcements if the Random Events Table outcome list so instructs.
4.3 Placement 4.31 Placing a reinforcement on the map doesn't cost movement points. Units may be over-stacked when first arriving. A unit may conduct operations normally in the turn it is placed. Reinforcements may be placed in enemy zones of control but not in enemy occupied hexes.
4.311 If the designated reinforcement arrival hex is enemy occupied, the reinforcement appears during the first friendly Reinforcement Phase in which the hex is cleared. This rule may be altered by scenario special instructions.
4.32 UN Reinforcements 4.321 In Chosin, UN land reinforcements are placed according to scenario instructions. That may be on the east map edge, a functioning port, or flown in via air transfer. 4.322 In Gauntlet, UN land unit reinforcements are placed on any land hexes on the southern map edge, on the port of Chin Nam 'Po if UN occupied, or flown in via air transfer. 4.323 UN air reinforcements are placed in the Air Reserve holding box.
4.33 Communist Reinforcements are placed on any hexes on the northern map edge or as given in the scenario special instructions. The "northern map edge" in Chosin is defined in the scenario rules.
4.4 Withdrawals 4.41 UN Air Unit Withdrawals (Gauntlet) The UN player may be required to withdraw certain air units on a designated turn (Gauntlet only). Those air units are removed from play at the beginning of the UN Reinforcement Phase and are never returned. They may not fly any missions in the turn of withdrawal. (They were carrier based air units used to support the X Corps withdrawal in the east.)
5.0 Unit Breakdown & Recombination
5.1 Certain unit types may break down into several smaller units or be recombined into larger units, which—in both directions—is termed "reorganization." Breakdown and recombination occurs during friendly Reorganization Phases. Simply replace the units on the map with the equivalent unit types.
5.2 Unit Equivalents (Both Games) Only the units in the following list may reorganize.
- US 7-6-10 armored cavalry regiments are equivalent to three 2-2-10 armored cavalry squadrons.
- US 5-7-8 infantry regiments are equivalent to one 2-2-8 and two 1-2-8 infantry battalions.
- US 4-6-8 infantry regiments are equivalent to three 1-2-8 infantry battalions.
- US 3-5-8 infantry regiments are equivalent to two 1-2-8 infantry battalions.
- US 5-6-8 airborne infantry regiments are equivalent to one 2-2-8 and two 1-2-8 airborne infantry battalions.
- US 6-7-8 Marine brigades are equivalent to two 2-2-8 and one 1-2-8 Marine battalions.
- US 5-6-8 Marine regiments are equivalent to one 2-2-8 and two 1-2-8 Marine battalions.
- British Commonwealth 7-8-8 armored infantry brigades are equivalent to one 3-1-8 armored and three 1-2-8 infantry battalions.
- British Commonwealth 5-6-8 infantry brigades are equivalent to one 2-2-8 and two 1-2-8 infantry battalions.
- Republic of Korea 3-4-8 motorized infantry regiments are equivalent to three 1-1-8 motorized infantry battalions.
- Republic of Korea 3-4-6 infantry regiments are equivalent to three 1-1-6 infantry battalions.
- Republic of Korea 2-3-6 infantry regiments are equivalent to two 1-1-6 infantry battalions.
- Republic of Korea 4-4-6 Marine regiments are equivalent to three 1-1-6 Marine battalions.
5.3 You don't have to use the same units into which you broke down a unit to recombine it. You may use any suitable combinations. Units must, however, be of the same nationality in order to break down or recombine.
5.4 Only combat effective units may reorganize. Units may reorganize only during their own side's Reorganization Phases, not at any other time in the turn. For example, units may not breakdown in order to more efficiently extract losses in combat.
5.5 Units available for reorganization should be placed in the Units Available for Reorganization Box. They may not be otherwise taken as reinforcements. Eliminated units may be reorganized into play.
5.6 Initial Deployment You may choose to break down units down as part of your initial scenario deployment. They may not then be recombined, however, unless otherwise allowed by scenario instructions.
6.0 Land Unit Movement
During your side's Movement Phases you may move all, some or none of your land units. Each unit may be moved as many or as few hexes as you want, as long as its movement factor (MF) isn't exceeded in any one phase. Unused movement points (MP) may not be accumulated or transferred from unit to unit. There are three movement columns on the Terrain Effects Chart (TEC) printed on the mapsheet. One is for "UN" (all non-ROK UN units, that is, US, British, etc.), one is for "Korean" (both South and North), and one is for "CCF" (Chinese). The differing movement rates reflect the relative degrees of motorization of the armies involved.
6.1 Procedure Move each unit individually from one hex to another adjacent hex. Once a unit's been moved, and your hand withdrawn from it, that unit may not be moved again that phase. During your side's movement phases, only your own side's units may be moved. You may move together a stack of units as long as all the units in it began the phase in the same hex and you don't exceed the MF of the slowest unit in the stack. Stacks may drop off units and continue moving.
6.2 Movement Costs Each hex entered costs a certain number of MP to enter. Some hexsides (such as rivers), when crossed during movement, cost additional MP. All hex and hexside costs are indicated on the TEC. If a unit doesn't have sufficient MP to enter a hex, it may not move into it, even if it hasn't moved at all during the current Movement Phase.
6.3 Prohibited Movement A unit may never enter a hex containing enemy land units of any kind, nor terrain it's not allowed to enter according to the TEC (for example, all-sea/lake hexes).
6.4 Zones of Control (ZOC) Units pay extra MP to leave and move through enemy zones of control (EZOC). See section 7.0.
6.5 Forced March A unit may double its MF in a process called "forced march."
6.51 UN and Korean units conducting forced march must begin their movement In Supply. Chinese units conducting forced march don't have to be in supply.
6.52 Restrictions. Units conducting forced march may not begin, enter or move through an enemy land unit ZOC. They may move though enemy air interdiction zones, paying the appropriate movement costs, but note that interdiction air attacks made against units conducting forced march receive a die roll modifier. Units that force march may not normally attack; however, if end their forced march adjacent to an enemy unit with no ZOC (that is, a disrupted unit), they then can attack.
6.53 Headquarters units that forced march may not provide supply or support the recovery of friendly units during that same player turn.
6.6 Roads When moving on a road (from one road hex to another through a hexside connected by a road), units ignore all other terrain costs and pay the road movement cost listed on the TEC.
6.61 Units moving through rough terrain via roads pay a different movement cost than when moving through clear/road hexes. See TEC.
6.62 Units moving by road must still pay the extra movement costs to disengage and infiltrate EZOC when moving along a road. See section 7.0.
6.7 Bridges A road or railroad crossing a river hexside is considered to contain a bridge. Bridges allow units to cross river hexsides at no additional MP cost when using road or railroad movement.
6.8 Railroads 6.81 Units moving along railroads move similarly to those moving along rough-roads, always paying just one MP per hex.
6.82 Railroad Movement (Chosin Only) The UN player may move one regiment (or three battalions/companies) per turn by railroad movement. Such units must start the friendly movement phase already on a rail hex. They then move through any number of contiguous rail hexes. A unit that uses rail movement is subject to the following strictures.
- It may not begin, enter, or otherwise move through an EZOC.
- It may conduct no other movement that same player turn.
- It may not cross an unbridged river hexside.
- It may not attack that same player turn.
- Rail movement may be conducted only via rail hexes that are on or between the eastern map edge (east of Hongwon), Hungnam, Hamhung, Yonghung and the line that goes directly from Yonghung to Wonsan.
7.0 Zones of Control (ZOC)
Combat effective land units have ZOC, which represent the area in which they can influence enemy activity via firepower and patrolling.
7.1 ZOC affect movement, retreat and tracing of lines of supply.
7.2 ZOC extend into all six hexes adjacent to a friendly land unit. The presence of an enemy unit in a hex doesn't negate the effect of a friendly ZOC for purposes of movement or retreat. The presence of an enemy unit in a hex negates the effect of a friendly ZOC for purposes of tracing a line of supply. That is, you may trace a line of supply into and through a hex containing enemy zones of control (EZOC) if a friendly unit occupies that hex.
7.3 ZOC Limits ZOC don't extend into terrain a unit is forbidden to enter. Disrupted units lose their ZOC while they remain in that state.
7.4 ZOC affect only enemy land units. They never affect enemy air units, air movement, naval task forces or naval transport.
7.5 Movement Effects 7.51 Engaging. Entering an EZOC is called "engaging." Units may engage at no extra MP cost.
7.52 Disengaging. Leaving an EZOC is called "disengaging." It costs all UN and Korean (North and South) units one extra MP to disengage. It doesn't cost Chinese units any extra MP to disengage.
7.53 Infiltration. Moving directly from one EZOC to another EZOC is called "infiltration." MP costs to infiltrate aren't calculated in addition to those required for disengagement. That is, it will cost a UN unit two extra MP to infiltrate, maximum. It costs UN and Korean (North and South) units two extra movement points to infiltrate. It costs Chinese units one extra movement point to infiltrate. Note that the extra MP cost to disengage or infiltrate is in addition to any normal cost for entering hexes.
7.6 Combat Effects No unit is forced to engage in combat simply because it's in an EZOC. Units may advance after combat through an EZOC at no penalty.
7.61 Retreats. Combat effective units that retreat into EZOC thereby become disrupted. Units that began such a retreat already disrupted are eliminated. A combat effective unit that retreats into a second EZOC is thereby disrupted twice and is eliminated.
7.7 Supply Effects EZOC block the tracing of lines of supply into their hexes, unless a friendly unit occupies that hex. See section 20.0.
7.8 Air and naval units don't exert ZOC; however, air units conducting interdiction missions have "interdiction zones" (see 14.1).
8.0 Land Unit Stacking
Stacking is defined having more than one friendly unit in the same hex at the same time.
8.1 UN Stacking There may be no more than three UN units per hex. Only two of those units may be regimental size or larger. For example, the UN may have as maximum in each hex: 1) two regiments or brigades plus one battalion; or 2) three battalions; or 3) one regiment and two battalions.
8.11 The following UN units count as one regiment/brigade for the purposes of stacking: all units with the regiment (III), brigade (X), division (XX) or corps (XXX) symbol, whether combat effective or disrupted.
8.12 The following UN units count as one battalion for the purposes of stacking: all units with the battalion (II) or company (I) symbol, whether combat effective or disrupted.
8.2 Communist Stacking The Communists may have a maximum of three units per hex. Of those, no more than two may be regular or elite infantry units. For example, the Communists could stack two infantry regiments plus one armor regiment.
8.3 Rough Terrain The stacking limit for both sides in every hex containing any rough terrain is a maximum of two units of any types and sizes.
8.4 Effects of Over-Stacking Generally, stacking limits apply only at the end of any given phase, not during it. You may violate stacking limits intentionally or unintentionally. Over-stacking has the following effects.
8.41 Movement. A unit may not employ road movement into or out of a hex in excess of stacking limits. It would pay the movement point cost for other terrain in the hex. (This reflects traffic congestion.)
8.42 Combat. A player may conduct combat only with units up to the stacking limit in a hex. Excess units in a stack are considered to have a combat strength of "0." They're affected by all combat results inflicted on their hex if defending. The owning player may designate which units are the over-stacked ones.
8.43 Logistics. No disrupted unit in an over-stacked hex may recover.
8.44 Friendly and enemy land units may never be stacked in the same hex.
8.45 Initial Deployment. UN units may not over-stack in initial deployment. Communist units may do so.
8.46 Holding Boxes. An unlimited number of units may be placed in holding boxes.
8.5 Intra-Alliance Stacking Units of different nationalities, but that are otherwise on the same side, may stack together within the other strictures given above.
8.6 Air & Naval Units Friendly land units and enemy air units may stack in the same hex. See the air and naval rules for air and naval stacking restrictions.
9.0 Exiting the Map
Both players may move units off the map under certain circumstances.
9.1 Moving Off a Map Edge
Land units may be moved off of a map edge simply by moving to a designated map edge hex, paying the appropriate MP cost, and then leaving the map. Units pay the number of MP to exit the map equal to the cost of the hex from which they exited. For example, a unit exiting from a clear hex would pay one MP. Units exiting from a road hex pay the road movement cost.
9.11 Gauntlet. Both the UN and Communist players may move units off the southern map edge.
9.12 Chosin. The Communist player may move units off the southern map edge; the UN player may not do so.
9.2 Air Exit In both games, UN units that are eligible for air transfer may be flown off the map (see 15.2).
9.3 Naval Exits In both games, UN units that are eligible for naval movement may be sailed off the map. See section 19.0.
9.4 Within the strictures of 9.11 and 9.12, units may exit the map using advance after combat. Units may not exit the map via retreat after combat; they are eliminated instead.
9.5 Units that have exited the map are permanently out of play. They don't check for supply, may not recover if disrupted, conduct combat, etc.; however, they don't count as having been eliminated. Players may gain victory points for exiting the map. See the scenario rules.
10.0 Barrage & Naval Gunfire
Artillery and naval task force units may engage in a special form of combat called "barrage." Each such unit has a barrage factor that represents the amount of firepower it can generate. Barrage is conducted in the friendly Barrage Phase, not in the Land Combat Phase. Note that here barrage refers only to use of the Barrage/Air Strike Table to attack units with artillery/naval units alone, not to fire support for units engaged in combat.
10.1 Procedure Total the number of barrage points being directed against a hex. Roll a die on the Barrage/Air Strike Table, cross-indexing that result with the number of barrage points used. Make any die roll adjustments for terrain and apply the result.
10.2 Restrictions 10.21 Artillery units must be in supply to conduct barrage.
10.22 Artillery and naval units may be combined in the same barrage attack; however, they may not be combined with air units.
10.23 Disrupted artillery units whose barrage strength has been reduced to "0" may not fire barrage or fire support missions.
10.3 Range Barraging units must be in range of their target hex. Range for units is as follows: 1) all artillery have a range of three hexes; 2) all naval units have a range of four hexes.
10.31 Units may fire through friendly and enemy units and terrain, including across otherwise prohibited hexsides.
10.4 There's no limit on the number of barrage points that may be directed against a hex when using the Barrage/Air Strike Table. There are limits when firing fire support (see 11.5).
10.5 A single hex may be attacked only once per Barrage Phase by barrage. It may be attacked separately by air strike.
10.6 A unit's barrage strength must be used as a unitary whole; it may not be split up between different hexes.
10.7 Only units of the phasing player may fire in that player's Barrage Phase.
10.8 A unit that conducts barrage may not be used to conduct offensive fire support in the same player turn. Place an Operations Completed marker on such units as a reminder.
10.9 Barraging in Rough Terrain Apply a die roll modifier of minus-one (-1) if the hex being barraged contains any rough terrain.
10.10 Barrage/Air Strike Table Results
- C# (Collateral Damage): This applies only if this is a UN air strike or interdiction attack and if there is at least one UN unit adjacent to the hex being attacked. Roll a die. If the number rolled is less than or equal to the indicated number, the UN player must disrupt any one friendly unit adjacent to the hex being attacked. If the die roll is greater than the indicated number, treat as no effect. Losses inflicted on friendly units count for Communist victory points. Additionally, if collateral damage is inflicted, the UN player loses one victory point.
- D: Apply all applicable: 1) Disrupt two land units in the hex (attacking player's choice). 2) If an interdiction attack, the disrupted units must also cease movement. 3) If an air strike (not an interdiction attack), the UN player may instead, and at his option, destroy any one bridge hexside adjacent to the targeted hex instead of 1 or 2 above.
- DD: Apply all applicable: 1) Disrupt all land units in the hex. 2) If an interdiction attack, the reduced units must also cease movement. 3) If an air strike (not an interdiction attack), the UN player may instead, and at his option, destroy any one bridge hexside adjacent to the targeted hex instead of 1 and 2 above.
- R: Apply all applicable: 1) Disrupt one land unit in the hex (attacking player choice). 2) If an interdiction attack, the disrupted unit must also cease movement.
- –: No Effect
11.0 Land Combat
Combat occurs between adjacent opposing units at the discretion of the phasing player. The phasing layer is the attacker; the non-phasing player is the defender.
11.1 Combat Procedure For each combat the players must use this following sequence.
- The phasing player designates the attacking units and which enemy hex they will be attacked.
- The phasing player chooses one of the Combat Results Tables (CRT).
- Both players fully reveal all the units involved in the combat.
- Total the attack Strength of all involved attacking units. That attack strength is halved if the attacker is out of supply.
- Total the defense strength of all involved defending units. That defense strength is halved if the defender is out of supply.
- State the comparison of attacker strength to defender strength as a ratio by dividing the attacker's strength by the defender's strength. If the attacker has more strength than the defender, round down any remainder. If the defender has more strength than the attacker, round up any remainder.
- The UN player may allocate close air support missions to the combat (up to three attacking, one defending).
- The attacker declares any artillery fire support.
- The defender declares any artillery fire support.
- Determine all applicable CRT column shifts for the combat, including terrain, close air support, artillery fire support, Communist surprise, and random events. That gives the final column of the CRT in which the combat will be resolved.
- The attacker rolls a die and cross-indexes that result beneath the appropriate odds column heading. That will give a combat result that's applied immediately.
- Conduct any retreats after combat, advances after combat, and breakthrough combat.
- Resolve the next attack, if any.
11.2 Which Units May Attack A unit must have an attack factor of at least "1" to engage in an attack.
11.21 Attacking units may attack only in their own side's combat phase. Attacking is always voluntary. The attacking player may attack with some, none, or all of his eligible units, as he chooses.
11.22 Attacking units must generally be directly adjacent to the units they're attacking. Exception: artillery units conducting fire support may do so "at range."
11.23 A unit may generally not attack more than once per friendly Combat Phase. Exception: Some UN units that obtain a "Breakthrough Combat" result may attack more than once per Combat Phase. See rule 11.8.
11.24 More than one attacking unit may be combined in an attack against a single defending hex as long as all attacking units are adjacent to the defender's hex.
11.25 An attacking force may attack only a single adjacent enemy hex. No attack may have as its objective the enemy units in more than one hex.
11.26 Units may generally not attack into hexes they could not normally enter, nor may they attack across hexsides they could not normally cross. Exceptions: they may attack into otherwise forbidden terrain if a road connects the two hexes, and also see 11.55(3).
11.27 A given hex may be attacked more than once during the same Combat Phase, as long as each attack is conducted by previously uncommitted units. Note this is different from most wargames.
11.28 Once an attack has been declared, it may not be called off; it must be resolved.
11.3 Defending 11.31 A defending force may not refuse combat.
11.32 All defending units in a hex must be attacked as one combined defense strength.
11.4 Combat Results Tables There are three CRT: Probe, Assault and Mobile.
11.41 The attacking player chooses the CRT he will use for each attack within the strictures given below.
11.411 All units may use the Probe and Assault Tables in any attacks.
11.412 You may choose to use the Mobile Table only under the following circumstances:
- Communist: if at least half the attacking land unit attack strength is made up of Chinese regular and/or elite infantry.
- UN: if at least half the attacking land unit attack strength is made up of armor, armored infantry, armored cavalry, motorized infantry or motorized Marine units.
11.42 Artillery and naval units conducting fire support, and air units conducting close air support, don't count for the percentage needed for the Mobile Table.
11.5 Combat Odds 11.51 Combat odds are determined by dividing the attacker's total involved attack strength by the defender's total involved defense strength. For example, if the attacker had 14 strength points and the defender had 5 defense strength points, the combat odds would be 14 divided by 5, which equals 2.8. Drop the .8 remainder and you get a final odds of 2:1. Final odds less than 1:3 are treated as 1:3. Final odds greater than 7:1 are treated as 7:1.
11.52 Supply. Attacking units that can't trace a line of supply at the instant of combat have their attack strength halved. Remainders are retained. Note: out of supply artillery may not provide fire support; see below.
11.53 Odds Shifts. Various things will shift combat odds. A shift to the right (or a "+" shift) favors the attacker. A shift to the left (a "-" shift) favors the defender. When both the attacker and defender have shifts, subtract the defender's shifts from the attacker's and use the difference (either positive or negative) as the final shift. For example, if the attacker has three shifts to the right, and the defender one to the left, the final shift is two to the right. In such a situation 3:1 odds would shift to become 5:1. If the initial combat odds are greater than 7:1 or less than 1:3, use the 7:1 or 1:3 column, respectively, as the base line for odds shifts. For example, if the attacker has 10 times as much strength as the defender, and the defender gets two shifts for terrain, the final odds are 5:1. And finally here, note that all applicable combat shifts are all cumulative in their effect.
11.54 Defender's Terrain. The defender will receive a shift bonus for defending in certain types of terrain. In certain cases a defender will be able to take advantage of more than one defensive bonus; for example, if defending in a city behind a river. The defender may use a maximum of three shifts to the left for terrain. Note that shifts are different for UN and Communist units. See the TEC.
11.55 Close Air Support (CAS). The UN may employ CAS missions to improve its combat odds. Each CAS mission committed to a particular combat shifts the odds one column in the UN's favor. The UN player may commit up to three TAC units per attack for CAS, but he may commit no more than one CAS unit per defense.
11.55A Fire Support. Both the attacker and defender may commit artillery and naval task force units to improved the odds for a particular combat. That's called "fire support."
- Attacking. If the attacker has friendly Artillery or naval task force units in range of at least one of the defending enemy units, the attack receives a number of shifts to the right equal to the barrage factors of the supporting force.
- Defending. If the defender has a friendly artillery or naval task force units in range of at least one of the defending friendly units, the defense receives a number of shifts to the left equal to the barrage factors of the supporting units.
- Range. Fire support may be fired through any type of terrain or intervening units. All artillery units have a range of three hexes. All naval task force units have a range of four hexes.
11.551 UN Fire Support. A UN force may receive no more than four shifts for fire support when on the attack, and no more than two fire support shifts when on the defense.
11.552 Communist Fire Support. A Communist force may receive no more than two shifts for fire support when on the attack, and no more than one fire support shift when on the defense.
11.553 More Fire Support Shift Strictures
- Limits on shifts count even if the total of barrage factors involved is greater. For example, if the UN player combines a "2" and a "3" for fire support in the attack; that would still only provide four shifts.
- The total number of shifts for fire support doesn't include shifts for CAS. For example, a UN unit could have a maximum of three CAS shifts and four fire support shifts in a single attack.
- Each artillery or naval task force unit may support only one combat per player turn. Artillery and task force units that conducted barrage in the Barrage Phase may not provide fire support to an attack in the Combat Phase of that same player turn (and vice versa). Place an Operations Complete marker on such units as a reminder. A single support unit may conduct no more than one mission in the friendly player turn and one mission in the enemy player turn of the same game turn. For example, a given support unit could fire one fire support mission on the attack and one on the defense.
11.554 Support units that provide fire support to an attack are never affected by the outcomes of combat results.
11.555 Support units that provide fire support to a defense are affected by the outcome of the combat only if they occupy the hex being attacked.
11.556 Artillery units may provide fire support to the defense of their own hex, even if there are no non-artillery units in the same hex. Artillery units also use their own printed defense strengths (usually "1") in their hex. If a hex containing an artillery unit is attacked, the artillery unit may not provide fire support to other hexes in the same game turn after that combat has been completed. That doesn't prevent such artillery units from supporting another hex prior to the attack against their own hexes being resolved, though it would preclude such artillery units from firing in support of the defense of their own hexes.
11.557 Supply. Artillery that's out of supply at the instant of combat may not employ fire support. That applies to both attackers and defenders.
11.558 Entrenchments. The defender receives a two-column leftward shift for occupying a hex containing entrenchments. See section 29.0. That's in addition to shifts for terrain.
11.6 Application of Combat Results Combat results are applied immediately as they occur. The players conduct any retreats, advances, and breakthrough combats for each combat before going to the next attack.
11.7 Units with a "0" attack factor may never advance after combat, and artillery providing fire support may not advance after combat. Units with "0" attack factors retreat normally. Air and naval units may not advance after combat.
11.72 Advance after combat may be one or more hexes, as stated in the combat result. In order to advance, all enemy units must have been cleared from the attacked hex. The first hex entered must be the one formerly occupied by the force involved in the combat. After that, advancing units may advance in any directions.
11.8 Breakthrough Combat Breakthrough Combat is a special type of combat performed by certain units that receive a "Breakthrough Combat" result. After such units complete their advance after combat, they may conduct another combat.
11.81 Only US and British Commonwealth units may conduct breakthrough combat.
11.82 Units in a stack conducting breakthrough combat must all attack the same enemy hex.
11.83 Breakthrough combat is resolved immediately upon completion of the advance after combat. It's generally resolved as a normal attack, but only units involved in the original attack may participate. The attacker may choose any appropriate combat results table. If using the Mobile Table results in another breakthrough combat result, the attacking units may advance again and conduct further breakthrough combat.
11.84 CAS may be added to breakthrough combat. CAS used for breakthrough combat may not have been previously used, even in the original combat. (That is, each breakthrough combat counts as a separate mission.) Previously uncommitted fire support may similarly be added to attacking units conducting breakthrough combat. The defender may employ fire support and close air support within normal strictures.
11.9 Combat Result Explanations
- AA Attacker Attrition: 1) disrupt all attacking units; 2) all surviving attacking units retreat one hex; 3) defending units may advance one hex.
- AR Attacker Retreat: 1) all attacking units retreat one hex; 2) defending units may advance one hex.
- AT Attacker Routed: 1) disrupt all attacking units; 2) surviving attacking units must retreat two hexes; 3) defending units may advance one hex.
- AZ Attacker Annihilated: 1) eliminate all attacking units; 2) defending units may advance one hex.
- BB Bloodbath (a.k.a. exchange): 1) disrupt all attacking units; 2) disrupt all defending units; 3) no retreats. If one side is completely eliminated, the other may advance one hex.
- B/D Defender's Option: the defender chooses between the following two results: BB or DR; apply the chosen result immediately.
- DD Defender Attrition: 1) disrupt all defending units; 2) all surviving defending units retreat one hex; 3) attacking units may advance one hex.
- DR Defender Retreat: 1) all defending units retreat one hex; 2) attacking units may advance one hex.
- DR+ Defender Retreat Enhanced: 1) all defending units retreat two hexes; 2) attacking units may advance two hexes; 3) attacking US and Commonwealth units may conduct breakthrough combat.
- DT+ Defender Routed: 1) disrupt all defending units; 2) surviving defending units must retreat two hexes; 3) attacking units may advance two hexes; 4) attacking US and Commonwealth units may conduct breakthrough combat.
- DZ Defender Annihilated: 1) eliminate all defending units; 2) attacking units may advance one hex.
- DZ+ Defender Annihilated Enhanced: 1) eliminate all defending units; 2) attacking units may advance three hexes; 3) attacking US and Commonwealth units may conduct breakthrough combat.
- NE No Effect: nothing happens.
- RA Attacker Ambushed: 1) one attacking unit is disrupted; 2) no retreats or advances.
- RF Reconnaissance in Force: 1) one defending unit is disrupted; 2) no retreats or advances.
11.10 Selecting Eliminated & Disrupted Units The owning player always decides which of his involved units will be disrupted or eliminated if there's a choice.
11.11 Retreats & Terrain A unit forced to retreat is moved the designated number of hexes by its owner. Units may never retreat into any of the following: an enemy occupied hex; across an all-sea or all-lake hexside or into an all-sea or all-lake hex; across an unbridged major river hexside; off the map. If there's no other choice other than to retreat into or across one of the above, the unit is eliminated instead.
11.12 Retreats & EZOC Combat effective units may retreat into or through EZOC, but all such combat effective units are thereby disrupted, and already disrupted units would be eliminated. EZOC aren't negated by the presence of friendly units for purposes of retreat. You may voluntarily retreat your units into EZOC even if there are other routes available. That also includes retreating into hexes adjacent to one of the enemy units involved in the combat.
11.13 Multi-Hex Retreats A unit retreating more than one hex may not reenter a hex it from which it already retreated. If that's the only choice, the unit is eliminated instead.
11.14 Advance After Combat An advance after combat, if it's to be made at all, is conducted immediately upon receiving that combat results. The designated player may move some, all or none of his involved land units the designated number of hexes, but units must have a printed attack strength of at least "1" in order to advance after combat. The first hex entered must be the one vacated by the defeated enemy; after that, however, an advancing force may split to advance into different hexes. If a force is allowed to advance more than one hex, subsequent hexes advanced into may be in any directions. Advance after combat does not cost any movement points and may be made into EZOC at no penalty. Advances may not be made into terrain normally forbidden for the advancing unit to enter nor may they be made into enemy occupied hexes. All units may advance after combat off the southern map edge in Gauntlet. Only Communist units may advance off the southern map edge in Chosin. Such units count for victory points as exited units.
11.15 Breakthrough Combat Units allowed to conduct breakthrough combat may attack again at the end of their advance after combat.
###Units conducting breakthrough combat must all be in the same hex and attack the same enemy hex. (While units may still advance into different hexes, only the units stacked in one hex may conduct a breakthrough attack.)
12.0 Combat Effectiveness & Recovery
12.1 Units are in one of two states: 1) combat effective, which is the normal state of a unit and is indicated by its front side of the counter; or 2) disrupted, which is when a unit has suffered sufficient losses to reduce its effectiveness and is indicated by flipping the unit to show its reverse side. Disrupted units have reduced combat strengths and movement allowances, as indicated on their counters. They also lose their ZOC while disrupted, but otherwise function normally. Certain units have no disrupted side. When something calls for them to be disrupted, they're eliminated instead.
12.11 Disruption When a combat effective unit is disrupted, flip it to its reverse side. If a disrupted unit is disrupted again, it's eliminated and removed from the map. When a combat effective unit that has no disrupted side is disrupted, it's eliminated and removed from the map.
12.2 Sources of Disruption Units may become disrupted by due to the following: 1) certain combat results; 2) barrage or air ground attack results; 3) retreating into or through EZOC; 4) airborne scatter results; and 5) certain random events.
12.3 Recovery Units recover from their disrupted side to their combat effective side through the process of "recovery," which occurs during the Recovery Phase.
12.31 Procedure. Roll a die on the Recovery Table, making any die roll modifiers. Immediately apply the result. Each disrupted unit may have only one recovery attempt per game turn.
12.32 Limitations. A disrupted unit must be in an in supply at the instant its recovery is attempted. Supply may be provided by tracing a line of supply, or by aerial supply or automatic supply.
12.321 A headquarters with a support radius of "0" may support recovery only for units in its own hex. Additionally, it must be located on a road or railroad leading back to a friendly supply source.
12.322 A disrupted headquarters may support its own recovery attempt.
12.323 Units in EZOC receive a negative die roll modifier when attempting Recovery. The current victory point levels may provide a die roll modifier for recovery. See the notes beneath the Recovery Table for other die roll modifiers.
12.4 Recovery Table [Editor's note: the Recovery Table in the text version is flattened; the rows below are reproduced as printed in the source. Check against the printed chart if in doubt.]
- Die Roll: ≤ 1-3 — No Effect
- Die Roll: ≥ 4-7 — Unit Recovers
12.5 Recovery Table Cumulative Die Roll Modifiers
- The owning player has 10 or more victory points than the enemy: +1
- The enemy player has 10 or more victory points than the owning player: -1
- The unit checking for recovery is a headquarters: +1
- The unit checking for recovery is a battalion or company: -1
- The unit checking for recover is in an EZOC: -1
- Random events: see rule section 3.0.
13.0 Air Operations in General
UN airpower is represented by three types of units: Tactical Air (TAC), Strategic Air (SAC), and Military Airlift (MAC). Each air unit has a strength of one "air point" of its type.
13.1 Procedure During the Air Allocation Phase, the UN player allocates his air units to various missions. Throughout the course of each game turn, those missions will be executed according to the instructions below.
13.2 Allocation of Air Units The UN player places each of his TAC, SAC and MAC units in one of the Air Missions boxes on the Air Operations Chart printed below the TEC on the mapsheet.
- Interdiction: TAC and SAC units may conduct. Interdiction missions are executed during the Communist Player Turn to inhibit that side's movement.
- Air Strike: TAC and SAC units may conduct. Air strike missions are executed in the Air Strike Phase to attack Communist units.
- Close Air Support: TAC units may executed. CAS missions are conducted during either side's Land Combat Phase to improve UN unit combat odds.
- Airborne Supply: MAC units may executed. Airborne supply missions are conducted in any phase to provide supply to land units.
- Air Transfer: MAC units may executed. Air transfer missions are conducted in the UN Movement Phase to evacuate land units from the map.
- Parachute Landing: MAC units may conduct. Parachute landing missions are conducted in the UN Movement Phase to allow air landings by airborne (parachute) qualified units.
- Reserve: See 13.5 below.
13.3 There's no limit to the number of air units of the proper type(s) that may be allocated to each mission. There may be limits to the number of air units that may be involved in a single combat.
13.4 Each air unit may perform only one mission per game turn. As soon as a unit completes its mission, place it in the Reserve category. It becomes available for new operations in the next UN Air Operations Phase.
13.5 During the course of the turn, air units allocated to various missions conduct designated operations during the appropriate phases in the sequence of play. The UN player may generally not change the operation to which a particular air unit was assigned. Exception: an air unit may always be reassigned to Reserve at any time. An air unit doesn't have to complete an assigned mission. For example, you may assign air units to CAS; if there were no ground combat during the turn, those units would not, obviously, be used.
13.6 The UN player may reuse each of his air units once each game turn.
13.7 Range Air units have unlimited range. They may fly anywhere on the map. Air units may fly over and into hexes containing enemy land units. Air units have no ZOC and aren't affected by EZOC. Note, though, air units may have "interdiction zones" (see 14.1). Enemy ground units may move, retreat and advance into and out of hexes containing enemy air units.
13.8 Air units are never affected by the outcomes of ground combat.
13.9 Pyongyang & Yonpo If at any time the Communists occupy one or more Pyongyang hexes (on the Gauntlet map) or Yonpo (on the Chosin map), permanently remove from play two UN TAC units. That happens only once per game per map, regardless of how many hexes are captured (that is, capture of two or three Pyongyang hexes would not cause the loss of additional air units). The air units aren't restored even if the UN regains control of the lost hexes. See the Optional Airfields rule for a modification of this.
14.0 TAC & SAC Air Warfare
TAC and SAC units are used to attack ground targets and otherwise support land combat.
14.1 Interdiction 14.11 UN interdiction missions are placed on the map during the Interdiction Segment. Interdicting air units are removed from the map and returned to the reserve category during the Interdiction Removal Phase.
14.12 Restrictions. The UN player may commit up to five TAC units or three SAC units to interdiction over a hex. He may not combine TAC and SAC units in the same interdiction mission.
14.13 Interdiction Effects. Each interdicting air unit has an "interdiction zone" (IZ) consisting of the hex it occupies and all hexes within two hexes of it. The IZ extends through all types of terrain and enemy units. IZ have the following effects.
- Movement. Communist units pay one extra movement point to enter each interdicted hex. Communist units conducting meeting engagement attacks (optional rules section 26.0) may retreat into an IZ at no penalty. ###2) Interdiction Attack. The UN player may declare an "interdiction attack" (IA) against enemy land units that enter an IZ. That's done at the UN player's option. The air unit immediately makes a ground attack against the land units entering the hex. The IA is resolved on the Barrage/Air Strike Table and only the moving units are affected; non-moving units in the same hex are not effected. Each air unit may conduct only one IA per turn (use an Operations Complete marker to indicate that). The air unit remains on the map. A unit (or stack) that's disrupted as the result of an IA must cease movement for the remainder of the phase in the hex where the IA was conducted. IA attacks use the following cumulative die roll modifiers.
- The moving force is conducting forced march: +1.
- The target hex contains rough terrain: -1.
- A combat effective Communist anti-aircraft unit is in or adjacent to target hex: -1. (No more than -1 regardless of the number of such units present.)
14.14 If there's more than one IZ on the same hex, there's no additional effect for movement; each interdicting air unit may make an IA separately or be combined by type. TAC and SAC may not be combined in the same attack.
14.15 If a hex contains both a ZOC and an IZ, the Communist player must pay the combined movement cost for both.
14.2 Air Strike Air Strike missions are conducted against Communist ground units and bridges during the UN Air Strike Phase. That's done by placing TAC/SAC units on top of the Communist units to be attacked or in a hex adjacent to a bridge hexside. Roll a die on the Barrage/Air Strike Table, cross-indexing it beneath the column heading corresponding to the type and number of air units employed. Make all die roll modifications called for. That may result in the disruption or elimination of enemy units or the destruction of a bridge.
14.21 Restrictions. The UN player may commit up to five TAC units or three SAC units to air strikes over any given hex. He may not combine TAC and SAC on the same air strike mission.
14.22 Air strikes may cause the destruction of bridges adjacent to an attacked hex (see 10.10). If the result calls for it, place a Bridge Destroyed marker pointing to the appropriate hexside.
14.23 If the Communist player has one or more combat effective anti-aircraft units in or adjacent to a hex being hit by an air strike, subtract one from the die roll (a maximum of -1, regardless of the number of anti-aircraft units present).
14.3 CAS CAS missions are performed during the Communist and UN Combat Phases in order to shift the odds in favor of the involved UN ground units. Pre-allocated CAS units are placed to support individual land combats during the close air support allocation part of the combat sequence.
14.31 For each TAC utilized for CAS, shift the odds one column in favor of the UN.
14.32 The UN player may use a maximum of three TAC units for CAS per individual attack. He may use no more than one TAC per individual defense. Following completion of each CAS mission, return the units used to the reserve.
14.33 CAS may be used to support breakthrough combat. Such units must come from those previously allocated to CAS but that haven't yet been used.
14.34 Optional Rules: the UN player may use air units to provide CAS for units attacking or defending in meeting engagements.
15.0 Air Transfer
During the Air Operations Phase, the UN player may allocate his MAC units to air transport missions.
15.2 Air Transfer involves moving land units via aircraft. Each MAC unit may move one battalion or company each turn (three MAC units may carry one regiment or brigade). This occurs during the UN Movement Phase.
15.21 Units to be transferred must begin the UN Movement Phase on an airfield hex or marker, and they may conduct no other movement during the same player turn. The unit(s) are picked up and placed in the Exited Units holding area or on any other airfield on the map occupied by a friendly unit. Such units may start in an EZOC and they may be in or out of supply.
15.22 Units may use air transfer to move onto the map on the turn they appear as reinforcements, in a reverse of the process described above.
15.23 Units may use air transfer to exit the map, but not to return from the Exited Units box.
15.24 Armor, armored infantry, armored cavalry and armored artillery may never use air transfer.
15.3 Upon completion of an air transfer mission, return the MAC units used to the Reserve box.
16.0 Airborne Supply Markers
The UN player has Airborne Supply markers as designated by the scenario. He may use them to provide supply to units that would otherwise be out of supply. Each marker requires one MAC unit in order for it to be placed on the map.
16.1 Airborne Supply markers may be placed on any hexes on the map at any time in the game turn. A deployed marker places all land units in its hex in supply for one complete phase. The marker is removed at the end of the phase in which it's used.
16.2 Airborne supply provides supply only to units in its own hex. Units in other hexes may not trace a line of supply to an airborne supply marker.
16.3 Each airborne supply marker may be used once per game turn. They may be reused each game turn.
16.4 Airborne supply markers aren't units. They don't count for stacking and don't affect combat. If for some reason an enemy unit enters a hex containing an airborne supply marker, that marker is immediately removed from the map. It becomes available for reuse the following game turn.
17.0 Airborne Units
Airborne units are units whose personnel and equipment are all capable of landing via parachute in "airborne landings." Airborne units include all units types with the "airborne" symbol.
17.1 Airborne Landing Procedure Airborne landings occur during UN Movement Phases and are conducted exactly as an air transfer, except the unit may land on any hex on the map. The UN player picks up the airborne unit and places it on any hex on the map, checking for "airborne scatter."
17.2 An airborne unit may make no other movement in the turn it makes an airborne landing. It may start in an EZOC and may be in or out of supply.
17.3 Airborne units may not land in hexes containing enemy units or prohibited terrain. They may land in EZOC and attack normally.
17.31 Each airborne unit may make a maximum of one airborne landing per game. If one battalion of an airborne regiment makes an airborne landing, the regiment as a whole may no longer make an airborne landing (its other battalions may). If the regiment as a whole makes a landing, then its breakdown battalions may not do so.
17.4 Scatter Table The UN player must roll a die for each airborne unit making an airborne landing on the Airborne Scatter Table. Note, though, that scatter doesn't apply to airborne supply.
17.5 Certain scatter results will give an airborne unit a one-column right shift in attacking (surprise attack). If more than one airborne unit gains that result, only one shift is made for it, and it applies only to combat that impulse.
17.6 Supply Airborne unit supply status is determined normally. The UN player may use airborne supply in the same hex as an airborne landing to provide supply.
17.7 Optional US airborne reinforcements may enter the map using airborne landing.
17.8 Airborne Scatter Table
- Die roll ≤ 2: Unit Lands Disrupted
- Die roll 3: Unit Lands Normally
- Die roll 4: Unit Lands Normally & Gets One-Column Right Combat Shift*
- Die roll ≥ 5: Unit Lands Normally
17.9 Cumulative Airborne Scatter Die Roll Modifiers & Notes
- Hex contains any rough terrain: -1.
- Hex is in an EZOC: -1.
- Hex contains an airfield: +1.
*Applies only to land combat, not artillery barrage. The +1 shift is received even if attacking with other units that did not obtain the result.
18.0 Naval Combat Operations
18.1 The UN player has a naval unit representing a task force from the US Seventh Fleet. It may move only on all-sea hexes. Within that restriction, it may move to any all-sea hex each UN Movement Phase.
18.2 The naval unit has no ZOC and is never affected by EZOC. The unit may never be attacked by Communist units, nor is it ever affected by combat.
18.3 The unit has a barrage strength that may be used to conduct separate barrages or to provide fire support to UN units. See section 10.00.
19.0 Naval Transport
The UN player may move land units at sea in a process called "naval transport." Naval transport occurs, in two types, during UN Movement Phases.
19.1 Naval Transfer The units to be transported must start the phase in a port; they're then moved to any other friendly port hex on the map or the Exited Units holding area. Newly arriving reinforcements may also enter the map using naval transfer.
19.2 Naval Evacuation Units to be evacuated must start the phase on any coastal hex; they're then moved to the Exited Units holding area. Evacuated units are affected as follows: combat effective units are disrupted; disrupted units remain disrupted.
19.3 Limits The UN player may move up to two regimental equivalents per turn via naval transfer, or he may evacuate up to one regimental equivalent per turn. If using both maps, those limits are per map.
19.4 Units that move via naval transport may make no other move that phase. They may start or end the transport move in an EZOC. Units may not end their movement at sea, nor may they land in hexes occupied by enemy units. Supply state is irrelevant.
20.0 Logistics
Logistics is the process of providing supply, maintenance, administrative and medical support to combat units. Logistics applies only to land units. Air and naval units are always supplied.
20.1 A land unit is always in one of two supply states: 1) in supply; or 2) out of supply. 20.11 A unit may be placed in supply in one of the following ways: 1) if it can trace a line of supply; 2) it's in the same hex as an airborne supply marker; 3) it's a type of unit that has automatic supply. 20.12 A unit's supply status may change throughout the game turn. Supply is checked at the instant a unit performs any action.
20.2 Supply Effects 20.21 Forced March. Out of supply UN and Korean (North and South) units may not force march. That's checked at the instant a unit begins its move, and doesn't change even if the unit moves into or out of a supplied position. Chinese units may always force march regardless of supply status. 20.22 Combat. A unit out of supply has its combat strength halved for both attack and defense. Retain all remainders. This is checked at the instant of combat. 20.23 Barrage. An artillery unit out of supply may not conduct barrage or provide fire support. That applies to both the attacker and defender. Supply status is checked at the instant of combat, attacking or defending. 20.24 Recovery. A unit out of supply may not make a recovery attempt. 20.25 Bridge Repair. A headquarters unit must be in supply in order to attempt bridge repair. 20.26 Entrench (Optional Rule). A unit must be in supply to entrench.
20.3 Lines of Supply (LOS) An LOS is a path of hexes from a unit back to a headquarters that can, in turn, trace a path of hexes to a friendly supply source. An LOS consists of two parts: 1) "support radius," which is the path from a unit to a friendly headquarters; and 2) "line of communications," which is the distance from that headquarters back to a friendly supply source, or road or railroad leading to a supply source. Other than as given below in 20.53, an LOS may not be traced directly from a unit to a supply source.
20.31 Support Radius. The path of hexes from a unit back to a supply relaying headquarters is indicated on the headquarters units as the "support radius" (the circled number). The support radius is traced from the unit receiving the supply back to the headquarters, and is counted as a number of hexes, regardless of terrain.
20.311 Special UN Support Radius Extension. If a UN unit is a tracing support radius from its own hex to a headquarters entirely along contiguous road hexes, then the supply radius for that HQ unit is doubled.
20.32 Lines of Communication. Once an LOS has reached a friendly headquarters, the headquarters unit itself must be able to trace a path of hexes, no longer than its support radius, back to any of the following: 1) a friendly supply source hex; or 2) a road or railroad hex that can trace a line of connected road and railroad hexes of any length back to a friendly supply source hex; or 3) another headquarters that can, in turn, trace a support radius back to a road or railroad, or to another headquarters, etc. (forming a chain), which eventually reaches a friendly supply source hex. Any number of headquarters may be in a chain forming an LOS; however, once a player declares he's tracing an LOC via a road or rail line, it must remain on those road or rail lines until it reaches a supply source. Also note that a UN headquarters support radius in (3) above is doubled if traced entirely along road hexes.
20.4 Limits An LOS may not be traced into or through any of the following: 1) enemy land units; 2) prohibited terrain; 3) an unnegated EZOC.
20.41 LOS may be traced through an air interdiction zone.
20.42 Destroyed Bridges. A support radius may be traced across a destroyed bridge. A line of communication may not be traced across a destroyed bridge hexside.
20.5 Supply Sources 20.51 UN: 1) any hex with a UN supply symbol; 2) A UN supply depot marker. 20.52 Communist: any hex with a Communist supply symbol. 20.53 Units may generally not trace supply directly to a supply source; they must first go through a friendly headquarters. Exception: a unit in the same hex as a supply source or air supply marker is always in supply, regardless of other considerations. 20.54 Supply sources printed on the map may never be destroyed. If occupied by enemy forces, or placed in an unnegated EZOC, they temporarily cease functioning as supply sources. If the enemy units or EZOC are removed, such hexes immediately are restored to supply source status. Captured enemy supply source printed on the map may not be used for friendly supply. 20.56 Headquarters units must be able to trace lines of communications to a supply source for them (the HQ) to be in supply. HQ aren't automatically in supply. An HQ can provide supply to all friendly units within its radius, regardless of unit designation, nationalities, etc.
20.6 UN Supply Depot markers start the game on the hexes designated by the scenarios instructions. They may be used as supply sources for all UN units. 20.61 UN depots aren't units. They don't count for stacking, may never move, are never affected by combat, and have no ZOC. Communist units may enter hexes containing only UN supply depot markers. 20.62 Capture. If Communist units enter a UN supply depot hex, immediately flip the depot to its reverse side. It then becomes a Communist supply source for all Communist units in the hex (other units may not trace to it). At the end of the player turn of capture, the depot is removed from the map. 20.63 Demolition. A depot may be destroyed during any UN Reorganization Phase. There must be at least one friendly unit in the hex. Roll a die. On a 1-4 the depot is destroyed; on a 5-6 there's no effect. The UN player may make only one demolition attempt against each depot per turn.
20.7 Airborne Supply UN airborne supply markers may be used as sources of supply for units in their hex. See section 16.0.
20.8 Automatic Supply Certain units are always in supply for all purposes. Those types are: 1) Communist partisan units; 2) UN airborne rangers, special operations and partisan units; 3) units located in the same hex as a friendly supply source, depot or airborne supply marker, regardless of all other considerations.
20.9 Units entering the map as reinforcements must establish supply normally.
21.0 Limited Intelligence
21.1 Players may not examine the composition of enemy stacks unless certain conditions are in effect. Both players may generally examine the top unit in any stack. Exception: the UN player may not examine any unit in a stack with an optional Fog of War marker. See optional rule section 25.0.
21.2 A player may always examine a stack after he's declared any type of combat against it (land or air); however, he may not call off the attack once it has been declared.
21.3 A player may always examine the type of terrain in an enemy occupied hex, including any destroyed bridge markers.
21.4 The UN player may examine any unit (or optional Fog of War marker) that enters or leaves an air interdiction zone. He may not examine stacks that start a phase in an air interdiction zone but that then don't move from it.
22.0 Co-Belligerents
22.1 The Communist player controls all Chinese and North Korean units. The UN controls all US, South Korean, British Commonwealth, and all other UN contingents. All forces controlled by one player are considered "co-belligerents" and are friendly to each other. Co-belligerent land units may perform all game functions together (such as participating in the same attacks), with the following exception: units of different nationalities may not be used for breakdown or recombination. For example, a US regiment may not be broken down using ROK battalions or vice versa.
22.11 Co-belligerents may use the same supply sources.
22.2 Only US and British Commonwealth units may conduct breakthrough combat.
22.3 For all game purposes, the terms "British," "British Commonwealth" and "Commonwealth" are interchangeable. For example, British and Australian units are considered to be of the same nationality.
23.0 Bridge Destruction & Repair
23.1 Bridges may be destroyed by either air attack or demolition. A destroyed bridge hexside functions like a river hexside. Place a Destroyed Bridge marker with the arrow facing the hexside to indicate a destroyed bridge.
23.2 Demolition occurs at any time during the friendly Movement Phase. Any combat effective unit may demolish a bridge. It must be in a hex adjacent to the bridge hexside.
23.21 Procedure. Roll a die. On a one through five, all bridges running across the hexside are demolished; on a six there's no effect. A player may make only one demolition attempt against each bridge hexside per game turn. If more than one bridge hexside is adjacent to a single unit, the unit may attempt to demolish only one of those hexsides per game turn.
23.3 Bridge Repair Bridge repair occurs during friendly Reorganization Phases. Any combat effective headquarters unit may repair a destroyed bridge hexside. The headquarters must be adjacent to the bridge hexside to be repaired and it (the HQ) must be in supply (airborne supply OK). Each headquarters may make only one bridge repair attempt per game turn. Roll a die. On a one or two all bridges across a destroyed hexside are rebuilt; remove the Demolished marker. On a three through six there's no effect. A player may make only one attempt to repair any given destroyed bridge hexside per game turn. An HQ may not attempt to repair a bridge if the bridge hexside is adjacent to an enemy unit. To be "adjacent to an enemy unit," the enemy unit must be along the side of the hex, not a vertex.
23.4 Effects You may not use bridge movement across a destroyed bridge hexside. You may not trace a line of communication across a destroyed bridge hexside.
23.5 If there's more than one bridge going through a single hexside (for example, a road bridge and a railroad bridge), both are destroyed or repaired by the same die roll.
24.0 Victory Conditions
24.1 The game is won by gaining control of geographic objectives, inflicting losses on enemy forces, and by moving units off the map. Players total their victory points (VP) throughout the course of a game. At the end of the game, they determine who is the winner. Victory points are recorded on the Victory Points Index printed on the mapsheet. The Victory Points Schedule below gives the number of VP gained for each action.
24.11 At the end of a game, each player adds up the number of VP he has attained. Subtract the lower player's total from the higher player's to get a victory level. That determines the extent of the victory, if any.
- 0-20 = Draw (neither player wins)
- 21-50 = Marginal Victory
- 51-80 = Operational Victory
- 81+ = Strategic Victory (highest)
Historically, the UN gained a Marginal Victory in the Chosin campaign.
24.2 Control A player "controls a hex" if he has one or more land units of any types occupying it. There may be an EZOC in the hex. Certain VP are gained for controlled objectives during the course of the game; others are gained at the end of the game.
24.21 In order to count for VP, you must be able to trace a line of hexes from the VP hex itself to a friendly supply source. That line of hexes may be as long or convoluted as necessary. It may at no time cross or enter an all-sea/lake/reservoir hex or hexside, an enemy unit, or an unnegated EZOC. The supply source must be one printed on the map and not a UN depot, a captured supply source or an airborne supply marker.
24.3 Destroying Enemy Units Players gain VP for completely destroying enemy units.
24.4 Exiting the Map Players may gain VP for exiting units from the map. Units may be exited from the map in the following ways: 1) by moving off an indicated map edge; 2) UN units may also exit by using airlift and naval transfer.
24.41 In Gauntlet, the Communist player gains VP for exiting units off the southern map edge. The UN player gains VP for exiting units off the southern map edge, or by airlift and/or naval transport on a one-for-one basis (maximum) with Communist units. That is, the UN player may never gain more VP for exited units than did the Communist player. Note the UN player may exit more units off the southern Gauntlet map edge than the Communist; the UN player simply doesn't receive VP for the number of units exited in excess of Communist units exited. The Communist player may gain more VP than the UN for exited units.
24.42 In Chosin, the Communist player gains VP for exiting units off the southern map edge. The UN player gains VP for exiting units by airlift and/or naval transport. The UN may not exit units off the southern map edge in Chosin. Unlike Gauntlet, though, the UN doesn't have the one-for-one restriction on receiving VP for units in Chosin.
24.43 Exited units do not have to be in supply at the time of their departure in order to get VP for them.
Chosin Scenarios
There are two scenarios in Chosin. Players should choose which scenario they will play, then set up in the order indicated. Additionally, there's a "Strategic Game," available in the optional rules, which allows players the opportunity to combine Chosin with Gauntlet (from S&T 190) for one grand simulation of the 1950 Chinese offensive. Unless otherwise stated, all units are deployed on their full strength sides. Several units in the Chosin counter-sheet aren't used in the basic Chosin scenarios. They're either used in the scenario options or are variant counters for Gauntlet.
Scenario 1: Advancing to the Rear
This scenario shows the historic situation in late 1950, with the Chinese launching their offensive against overextended UN forces in northeastern Korea.
1.0 Scenario Length 1.1 27 November - 24 December 1.2 If using the Quick Scenario rule, scenario length is 27 November - 10 December.
2.0 Deployment Order UN sets up first, Communist second. Units may be broken down as part of initial deployment; battalions may not be recombined into regiments during deployment (they may do so later in the game).
3.0 UN Forces
3.1 Initial Forces
- US 1st Marine Division: 1/1M Regiment begins the game broken down into 1 x 2-2-8 and 2 x 1-2-8 battalions. Deploy one battalion each on or adjacent to Hagaru-ri, Koto-ri and Chinhung-ni. On or adjacent to Yudam-ni: 5/1M Marine Regiment, 7/1M Marine Regiment. On or adjacent to Yudam-ni, Hagaru-ri, Koto-ri and/or Chinhung-ni: 1M Division headquarters, 11M Artillery Regiment, 1M Tank Battalion. On any hex of Hungnam or Wonsan: 1/1M Amphibious Battalion.
- US 3rd Infantry Division: 7/3, 15/3 and 65/3 Infantry Regiments begin the game broken down into 7 x 1-2-8 battalions. Deploy two 1-2-8s on or adjacent to Yongchung; deploy one each 1-2-8 on or adjacent to Huksu-ri, Hamhung, Chungsin-ni, Yangdok and Tagwon. On Wonsan: 3rd Division headquarters. On or adjacent to any hex containing any other 3rd Division unit: 64/3 Tank Battalion, 3 Artillery.
- US 7th Infantry Division: 31/7 Regiment begins the game broken down into 2 x 1-2-8 battalions. Deploy one on Hudong-ni and one on the hex two hexes directly north of it. Remaining 7th Infantry Division units appear as reinforcements.
- In Hamhung: US X Corps headquarters.
- On or adjacent to any hexes of Hungnam: US 8227 Special Operations Battalion, US 56 Amphibious Battalion, US 4 Chemical Battalion, Commonwealth 41RMC Battalion, ROK "H" Military Police Battalion.
- On or adjacent to Wonsan: ROK 1st Marine Regiment, ROK 5th Marine Battalion.
- ROK 26 Infantry Regiment begins the game broken down into 2 x 1-1-6 infantry battalions. Deploy one each on or adjacent to: Huksu-ri and Majon-ni.
- On any city/town hexes within 10 hexes of any coastal hexes, inclusive, no more than one unit per hex: US U.S. 5th Artillery Group, 58, 59, 88, "X" Military Police Companies, ROK 2 AP Military Police Regiment.
- On Yonpo airfield (optional rules only): 6151 Airfield Group.
- On Wonsan North Airfield (optional rules only): 1 MAW Airfield Group.
- In either Hungnam hex: 1 x Supply Depot.
- In either Hungnam hex (optional rules only): US 2SE Port Brigade.
- In Wonsan: 1 x Supply Depot.
3.2 UN Reinforcements
- 30 Nov: 1 x SAC point 2a) 5 Dec: US 7th Infantry Division Headquarters, 17/7, 32/7 Infantry Regiments, 73/3 Tank Battalion, 7 Artillery Group. Place on or adjacent to any east map edge road hex(es) between hexes 0501 and 2701 (inclusive). (Note this is on the northeast map edge.) 2b) 5 Dec: 2 x TAC points
- 10 Dec: 1 x TAC point
- 11 December: ROK I Corps Headquarters, Cap Division Headquarters, Cav/Cap and 1/Cap Regiments. Place on any functioning port hexes.
- 20 Dec: 1 x TAC point
3.3 Placement of UN Reinforcements All units are placed in the UN Reinforcement Phase. Air units are placed in the Air Reserve box; they may be used on the turn of arrival. Land units are placed on the hexes listed. Placement hexes may be in EZOC but may not be enemy occupied. Units may be over-stacked during initial placement. If all listed placement hexes are enemy occupied, the blocked units aren't received. (They don't count as units eliminated; they've simply been committed elsewhere.) Units placed on port hexes don't count against UN naval transport capacity.
4.0 Communist Units
4.1 Initial Forces
- On or adjacent to "20" deployment hexes: Chinese 20th Army Headquarters; 58th, 59th, 60th and 89th Divisions (all units).
- On or adjacent to "27" deployment hexes: Chinese 27th Army Headquarters; 79th and 80th Divisions (all units).
- Anywhere within five hexes of the north map edge: "IX Gd" Regiment, "IX" Cavalry Regiment.
- On any rough hexes not on or adjacent to a road or UN unit, no more than one unit per hex: 4 x North Korean partisan groups (additionally, no North Korean Partisan unit may be deployed within five hexes of another Partisan).
4.2 Communist Reinforcements
- 3 Dec on north map edge (see 5.1): Chinese Army headquarters; 76th, 77th Divisions (all units).
- 8 December on north map edge (see 5.1): 81st, 90th Divisions (all units); IX Artillery Brigade, IX Antiaircraft Regiment.
5.0 Special Rules
5.1 "North Map Edge" refers only to the row of hexes to the north of the Chosin and Fusen Reservoirs, and not to the part of the Chosin map north of Yongwon.
5.2 Sequence of Play Skip the Random Event Phase and UN Player Turn on 27 November. The game turn begins with the Communist Player Turn. Resume normal sequence of play with 28 November. The UN player is considered to have three TAC units assigned to CAS, which he may use defensively in the Communist Player Turn, and one MAC unit, which he may use for airborne supply.
5.3 Communist Surprise The Communist player may declare "surprise attack" at the start of any Communist Player Turn from 27 November to 1 December, inclusive. Once declared, surprise is in effect for two complete Communist Player Turns.
5.31 Effects of Surprise During surprise attack turns: 1) Chinese units are automatically in supply; 2) UN ZOC don't exist; 3) Communist attacks that involve at least one Chinese infantry or elite infantry regiment are shifted one additional column to the right; 4) UN aerial interdiction zones have a one hex radius (that is, the hex in which the marker is placed and the six adjacent hexes).
5.4 Quick Game Players may agree to end the game at the end of the 10 December game turn. Total up VP normally, with the following addition: UN units within the "Hungnam Perimeter" count as "units exited" for victory point purposes. To be considered within the Hungnam Perimeter: 1) a unit must be able to trace a line of hexes back to either Hungnam hex; that line of hexes may be no more than four hexes long exclusive of the unit and inclusive of the Hungnam hex; and 2) that line of hexes may not enter a hex containing all-sea, enemy units or an EZOC, even if the hex is occupied by a friendly unit; the unit itself my be in an EZOC; 3) the hex of Hungnam to which the line of hexes is traced may not be enemy occupied nor in an EZOC; 4) Hungnam itself may not have been destroyed.
Scenario 2: The Great Envelopment
One UN contingency was for X Corps to sweep from the east and envelop Communist forces in northwestern Korea. This plan appeared feasible only because the UN high command underestimated Chinese strength in the country.
1.0 Scenario Length Same as Scenario 1.
2.0 Deployment Order Same as Scenario 1.
3.0 UN Forces 3.1 Initial Forces: same as scenario 1. 3.2 UN Reinforcements: same as scenario 1.
4.0 Communist Forces Prior to the start of play the Communist player chooses one of three eployment ptions: 1) historic; 2) minimal; or 3) maximum. He then secretly places the appropriate units on the map. The deployment option used will cause a variable number of VP to be awarded to the UN or the Communist side at the end of the game. The Communist player should secretly write down which option is being chosen and reveal it to the UN at the end of the game. The Communist player must use the Fog of War Markers optional rule when playing this scenario.
Deployment Options 4.1 Historical Deployment 4.11 Initial forces: same as Scenario 1. 4.12 Communist Reinforcements: same as Scenario 1. 14.13 Victory Points: none.
4.2 Minimal Deployment 4.11 Initial Forces
- On or adjacent to any Communist "20" and/or "27" deployment hexes and/or within five hexes of the north map edge: Chinese 20th Army Headquarters; 58th, 59th, 60th, 89th Divisions.
- Anywhere within five hexes of the north map edge: "IX Gd" Regiment, "IX" Cavalry Regiment.
- On any rough hexes not on or adjacent to a road or UN unit, no more than one unit per hex: 4 x North Korean partisan groups (additionally, no North Korean Partisan unit may be deployed within five hexes of another Partisan). 4.12 Communist Reinforcements: none 4.13 Victory Points: +40 Communist.
4.3 Maximum Deployment 4.11 Initial Forces
- On or adjacent to any Communist "20" and/or "27" deployment hexes and/or within five hexes of the north map edge: Chinese 20th Army Headquarters; 58th, 59th, 60th, 89th Divisions; 27th Army Headquarters; 79th, 80th, 81st, 90th Divisions.
- Anywhere within five hexes of the north map edge*: "IX Gd" Regiment, "IX" Cavalry Regiment.
- On any rough hexes not on or adjacent to a road or UN unit, no more than one unit per hex: 4 x North Korean partisan groups. 4.12 Communist Reinforcements
- 3 December: 26th Army Headquarters; 76th, 77th, 78th, 88th Divisions.
- 8 December: IX, 5 artillery groups; IX, 5 antiaircraft regiments. 4.13 Victory Points: +50 UN.
5.0 Special Rules
5.1 "North Map Edge" refers only to the row of hexes to the north of the Chosin and Fusen Reservoirs, not the part of the Chosin map north of Yongwon.
5.2 Fog of War Markers The Communist player may place up to nine Fog of War markers on or adjacent to Communist "20" or "27" Deployment hexes, and/or five hexes of the north map edge. See the Fog of War optional rule.
5.3 Sequence of Play Skip the Random Events Phase on 27 November. The game turn begins with the UN player turn (that is, don't skip the UN Player Turn as in the regular scenario, resume the full normal sequence of play with 28 November).
5.4 Communist Surprise The Communist player may declare "surprise attack" on any two turns of the game from 27 November to 1 December, inclusive. During surprise attack turns, all Communist attacks that involve at least one Chinese infantry or elite infantry regiment are shifted one additional column to the right.
5.5 Victory Points The UN player receives five additional victory points for each Communist supply source hex on the Chosin map he occupies at the end of 6 December. Exception: those points aren't received if playing the Strategic Game.
5.6 Atomic Warfare The first time that the UN player makes an atomic attack, the Communist player must reveal which deployment option he has chosen.
Optional Rules
25.0 Fog of War Markers
The Communist player uses the Fog of War markers to disguise the strength of his forces.
25.1 Procedure At the start of the game, during initial deployment, the Communist player places Fog of War markers on the map in the place of actual units. The units represented by each Fog of War marker are placed in the corresponding box in the Fog of War holding area on the mapsheet.
25.2 Movement Units in the same Fog of War marker holding area must all move together.
- A Fog of War marker may drop off units as it moves. Units that have been dropped off may move no farther that turn.
- A Fog of War marker may not pick up new units. Once a unit is on the map from one of the holding areas is actually on the map, it may no longer rejoin a Fog of War marker.
- Units in a Fog of War holding area retain their zone of control and otherwise function as if they were on the map.
- A Fog of War marker is removed from play under certain circumstances. Replace the marker with all units in the corresponding Fog of War holding box. Circumstances that remove a Fog of War marker include all the following. a) Whenever the Communist player launches an attack from a hex containing a Fog of War marker, regardless if the units in the corresponding Fog of War holding area are involved. b) Whenever the UN player makes any type of land, air, or naval attack or barrage against a hex containing a Fog of War marker. c) At any time in the game turn that the Communist player desires. d) Once a Fog of War marker has been removed, it's removed permanently from play.
- Fog of War markers aren't units in and of themselves; they have no effect on combat or stacking.
- A player must have at least one unit in a Fog of War marker's corresponding holding area in order for the marker to be maintained on the map.
26.0 Meeting Engagements
Meeting engagement is a special type of combat that occurs during movement. All units with attack factors of "1" or more may conduct them.
26.1 A force may conduct combat during its movement by declaring a meeting engagement. Meeting engagement combat costs the moving force two extra MP. The regular sequence of play is temporarily suspended while the meeting engagement is resolved.
26.2 All units launching a meeting engagement must start in the same hex and remain together for the entire move. They may not pick up other units along the way. The attacker may not include in a meeting engagement units whose attack strength is zero. Units conducting a meeting engagement may attack normally in their side's Combat Phase that same player turn.
26.3 Meeting engagement combat is resolved normally except the final odds are shifted one CRT column left, cumulative with other applicable shifts. The attacking force may choose any applicable CRT. The attacker may also employ fire support and CAS. The defender benefits from the normal effects of terrain and may also use fire support and CAS.
26.4 A single force may conduct no more than one meeting engagement per Movement Phase. It may continue moving normally after it completes that engagement.
26.5 Supply is calculated normally for both sides in meeting engagements, determined at the instant of the combat.
26.6 Artillery and CAS air units used for meeting engagements may conduct no other combat during the game turn. Artillery used for offensive fire support in a meeting engagement may not move during the Movement Phase. Artillery units may not make barrage attacks for meeting engagement by themselves.
26.7 Attacking units in a meeting engagement don't move into the enemy units' hex when conducting their attack. Meeting engagements are conducted from the adjacent hex, the same as normal combat.
26.8 Post Combat Units (attacker or defender) may advance after combat following a meeting engagement. They retreat normally. If the attacking force receives a result that forces it to retreat or reduces any attacking unit, that whole attacking force must cease movement for that turn; otherwise, it may continue to move normally to the limit of its MF.
26.9 Meeting engagements may be conducted only during friendly Movement Phases. They may not be conducted during an advance after combat. Units conducting forced march may not conduct meeting engagements.
27.0 Optional Barrage
27.1 The barrage strength of any given artillery or naval unit may be split up and applied against different hexes, as long as its applied as integers. For example, an artillery unit with a barrage strength of "2" could conduct a barrage against two separate hexes, each using a barrage strength of "1." This applies to both barrage and fire support. Barrage markers are included as mnemonics.
28.0 Organizational Integrity
Some headquarters may provide supply and recovery functions only to specific units.
28.1 UN 28.11 US divisional headquarters may provide supply/recovery only to US and non-Korean UN units. 28.12 US corps and army headquarters may provide supply/recovery to any UN units. 28.13 Republic of Korea divisional and corps headquarters may provide supply/recovery only to Republic of Korea units. 28.14 Within those restrictions, each UN headquarters can provide supply/recovery to an unlimited number of units each turn.
28.14 Communist. A Communist army headquarters may provide supply/recovery to a maximum of 15 Chinese units of any formations during any one phase. It may also provide supply/recovery to an additional one North Korean unit per phase.
29.0 Entrenchments
A player may entrench units in order to enhance their defensive capabilities.
29.1 Procedure Units entrench in the friendly Reorganization Phase. Any type of land unit may entrench by being in supply and rolling a die. UN units entrench on a die roll of one through four. Communist units entrench on a die roll of one through three.
29.2 Restrictions A unit attempting to entrench may not be in an EZOC. A unit attempting to entrench may not move during that player turn. Artillery units may not barrage in the same player turn. All other game functions may be performed normally by entrenching units.
29.3 Once an entrenchment marker is in a hex, other units gain its advantage for defense. That is, new units don't need to spend a turn immobile to enter an already existing entrenchment. An entrenchment may be placed in any type of terrain. There may never be more than one entrenchment marker in a hex.
29.4 Combat Effects Units defending in an entrenchment receive a two column shift in their favor (to the left) when defending. That's in addition to other benefits for other terrain in the hex. Further, the entrenchment benefit doesn't count against the maximum of three shifts for terrain. For example, a UN unit defending in a city behind a river in an entrenchment would receive five column shifts to the left: two for the city, one for the minor river, and two for the entrenchment. Units may attack normally from an entrenchment.
29.5 Destruction of Entrenchments An entrenchment marker is removed from the map under the following circumstances: 1) if all friendly units move out of the hex; 2) if all friendly units are eliminated or retreated out of a hex. Note that means friendly forces may never capture and use enemy entrenchments.
30.0 Armor
30.1 Armor, armored infantry and armored cavalry (but not motorized infantry) units that conduct attacks into rough, swamp or city hexes have their attack strengths halved. Round up all remainders. If such attacking, units are also out of supply, their attack strengths are quartered.
30.2 The presence of a road negates the effects of this rule as long as the unit is attacking along contiguous road hexes.
30.3 Armor type units, if participating in a Metting Engagment, 26.0, give a +1 shift to attacks.
31.0 Partisan Units
Partisans represent guerrillas as well as bypassed remnants of shattered units. Partisans function as infantry, with the following special rules.
31.1 Movement Partisans always pay Chinese movement costs on the TEC, including the costs to disengage and infiltrate EZOC.
31.2 Defending If all defending units in a hex are partisans, the combat must be resolved on the Probe CRT.
31.3 Supply Partisans are always in supply for all purposes, including recovery.
32.0 UN Ranger & Special Operations Units
UN Ranger and Special Operations units have special capabilities.
32.1 Movement Ranger/Special Operations units expend movement points as if they were Chinese units, including the costs to disengage and infiltrate EZOC.
32.2 Attacking If at least one attacking unit in a UN attack is a Ranger/Special Operations unit, and the enemy is defending in rough or swamp terrain, the UN player gains a one column shift to the right, cumulative with other shifts.
32.2 Supply Ranger/Special Operations units are always in supply for all purposes, including recovery.
32.3 This rule section applies only to UN units with the Ranger/Special Operations symbol, not to Chinese elite infantry or North Korean commandos.
33.0 Amphibious Units
Amphibious units, in addition to normal movement, may make a special form of naval movement called amphibious movement. Note this applies only to units with the amphibious icon, not to Marine units.
33.1 Procedure The amphibious unit starts its Movement Phase on a coast or port hex. The amphibious unit then moves to any other coastal or port hex on the same map. The unit may move no farther that turn.
33.2 Amphibious Transport Each amphibious unit may move one friendly battalion or company-sized unit per friendly Movement Phase. At the end of the amphibious move, the transported unit is disembarked. Both units then cease moving for the turn.
33.3 Units making an amphibious move may move through EZOC and enemy units. They may not end their move in a hex with enemy units.
33.4 Amphibious units may exit the map. They're placed in the Exited Units box. Once exited, they (and any unit they transport) are removed from the game. In the Strategic Game scenario, they may not make amphibious moves from one map to the other.
33.5 Amphibious units and any units being transported by them must end their move on a coastal or port hex or exit the map. They may not remain at sea.
33.6 Combat Amphibious units and the units they transport may attack normally after landing, in the Combat Phase. Amphibious units and the units they transport may not make assaults from all-sea hexes. (Planning and support for all-out amphibious assaults are beyond the scope of this campaign.)
34.0 Port Units
The UN player may move two units per map by naval transfer, but only if he has at least one port unit occupying a port hex on that map. Otherwise, he may move a maximum of one unit per map via naval transport.
34.1 The port unit doesn't have to be in the port from which the units debark. It only has to be in a port hex on the same map to provide the two-unit naval transfer capacity on that map.
34.2 The port unit may not move in the same turn it supports a naval transfer. It may, though, be disrupted, out of supply /or in an EZOC.
34.3 Naval evacuation capacity is always one unit per map regardless of port units.
34.4 If the random event "Refugees Clog Roads and Ports" occurs, naval transfer capacity is reduced to one unit, regardless of the position of port units. You don't need a port unit to trace supply to a depot in a port hex.
35.0 Airfields & Airfield Units
Certain TAC air units are considered to be based on the hexagon portion of the map. In order to use those units, the UN player must have airfield units on airfield hexes. When using this rule, ignore rule 13.9 (Pyongyang/Yonpo).
35.1 Each airfield hex may base one TAC air unit provided an airfield unit is in the hex. TAC units aren't placed on the map; simply hold one TAC unit off-map for each airfield unit, as per scenario instructions.
35.11 An airfield unit may be disrupted and/or in an EZOC and still provide its support function. It may not move during the turn it provides support for a TAC unit. It must be in supply to provide its support function.
35.2 For each airfield unit not located on an airfield hex, or that's out of supply, the UN player temporarily deducts one TAC unit from those available. If an airfield unit moves back into an airfield, or is placed back into supply, the use of the corresponding TAC unit is immediately restored.
35.21 If an airfield unit is eliminated, the UN player permanently deducts one TAC unit from those available. That TAC unit counts as a UN group unit eliminated for VP.
35.22 If an airfield unit is exited from the map, the UN player removes one TAC unit from play permanently. That TAC unit isn't considered to be eliminated, just flown back to Japan or South Korea. The exited air unit counts as a group for VP. Only the two TAC units per map supported by the airfield units are affected by this rule. That's four, total, when playing the Strategic Game scenario. No other air units in the game need be based on map.
35.3 Airfield Markers in Gauntlet The UN player has two airfield markers that he places on the following Gauntlet map hexes: 2217 & 2218. Airfields are considered to be map features. They don't count for stacking, are never affected by the presence of enemy units or combat, etc. The marker placed on 2217 is in addition to the Pyongyang city hex. This rule represents the air groups that were based in North Korea in direct support of UN ground forces. Other TAC units were based on aircraft carriers, in South Korea and in Japan, so they don't need on-map basing.
36.0 Combat Engineers
In the Strategic Game scenario, the UN player has one combat engineer group, the 19th (see the variant units on the Chosin counter-sheet). Combat engineers have the following special capabilities.
36.1 Bridge Repair A combat engineer unit may attempt bridge repair in the same manner as an HQ unit if it's adjacent to the bridge hexside to be repaired. If a combat engineer unit is attempting the repair of a bridge, it succeeds on a roll of one through three.
36.2 Assault If a combat engineer unit is participating in an attack in which the defender receives one or more defensive shifts owing to terrain or entrenchments, shift the combat odds one column to the right, cumulative with any other shifts.
36.3 Note the US 2nd Special Engineer Brigade in the Chosin game, despite its name, can't conduct these engineer functions in that game.
37.0 Atomic Warfare
In the Strategic Game (only!), the UN player has the option to use atomic weapons, at a potential political cost as well as the risk of starting World War III. Atomic weapons are represented by atomic bomb markers. The reverse sides of those markers are fallout markers.
37.1 Procedure At the start of any UN player Turn, that player may call for the use of atomic weapons. He rolls a die and receives the following number of atomic bomb markers in the UN Reinforcement Phase of that turn: 1-2 = 1, 3-4 = 2; 5-6 = 3. Atom Bomb markers are kept off-map until used. They don't have to be used the turn they're received. The UN player may roll for atom bombs only once per game.
37.2 The Communist player receives five VP for each atom bomb received by the UN player, as soon as the die is rolled in 37.1.
37.3 Atomic Attacks are made during the UN Airstrike Phase. The UN player places the atomic bomb marker on the hex to be attacked. He rolls a die on the Atom Bomb Table and implements the result. He must then also roll on the World War III Table.
37.4 Atomic bombs are not delivered by air units; they're delivered by high altitude bombers not otherwise included in the game.
37.5 The UN player may launch more than one atomic attack per turn; however, he may attack any given hex with only one atomic bomb per turn. The UN player may attack hexes on either or both maps with atomic bombs. A hex being attacked by an atomic bomb may not be attacked by other UN airstrikes, barrage or land combat in the same player turn. Each atomic bomb marker may be used only once per game.
37.6 Fallout Once a hex has been atomic bombed, the marker is flipped to its fallout side and remains on the map for the remainder of the game. See the Atomic Attack Table for effects of fallout.
37.7 Atomic Attack Table
- Die roll ≤1: Error
- Die roll 2-5: Hit
- Die roll ≥6: Devastation
Die Roll Modifiers (use all applicable):
- -1: if the target hex contains an entrenchment.
- -1: if the target hex contains any rough terrain.
- +1: if the target hex contains a city.
37.8 Results Error. Roll a die. The following hex is affected instead of the target hex: "1" = hex to the northeast; "2" = hex to the east; etc. Disrupt all combat units in the hex (friendly or enemy; an already disrupted unit is eliminated). Place a fallout marker in the hex. Hit. Disrupt all combat unit in the target hex. An already disrupted unit is eliminated. Place a fallout marker in the hex. Devastation. Eliminate all combat and non-combat units in the hex. Disrupt all combat units, friendly and enemy, in all adjacent hexes. Place a fallout marker in the hex.
37.9 Fallout Effect on Terrain If there is a fallout marker in a hex, apply all of the following to the hex itself and all adjacent hexes.
- Ignore any city, town, airfield, or port in the hex for the remainder of the game. Treat as other terrain in the hex; treat a city hex as clear.
- Double the normal movement costs to enter the hex, including road and ZOC costs.
- Lines of supply may not be traced into, out of, or through a hex containing a fallout marker.
- At the end of any game turn in which a land unit is in a hex with or adjacent to a fallout marker, roll a die for it. On a 1-3 it's disrupted (an already disrupted unit is eliminated); on a 4-6 there's no effect. Air and naval strikes aren't affected by fallout.
37.10 World War III Table. The UN player must roll on this table each time he makes an atomic attack.
- Die roll ≤1: World War III
- Die roll 2-3: UN Discredited
- Die roll 4: Increased Tensions
- Die roll 5-6: Communists Back Down
- Die roll ≥7: Ceasefire
Die Roll Modifiers (use all applicable):
- -1: the first time an atomic attack is made.
- -2: if the UN player has 30 or more VP than the Communist.
- -1: if the UN player has 10 or more VP than the Communist.
- +1: if the Communist player has 10 or more VP than the UN.
- +2: if the Communist player has 30 or more VP than the UN.
- +2: if playing Scenario 2 with Communist minimal deployment.
- -2: if playing Scenario 2 with Communist maximum deployment.
37.11 Results
- UN discredited: the UN player loses 20 VP.
- Ceasefire: the game immediately ends in a draw.
- Communists back down: the Communist player loses 20 VP.
- Increased tensions: the UN and Communist players both lose 10 VP.
- World War III: the game immediately ends, and both players lose.
38.0 Scenario Options
38.1 Scenario options may be used to explore various "what if" situations. Players must choose scenario options prior to start of play. They pay the designated number of VP at the end of play. Players pick their scenario options secretly and don't reveal them until the end of play, though the units they deploy on the map will usually indicate to the other player what options were chosen. Scenario options may be used with any scenario.
38.2 In addition, players may select certain Scenario Options during the course of play. That's done at the start of the player's turn. The player pays the appropriate VP cost at the end of play.
38.3 The Communist player may select "Chinese Commit IX Army Group Reserves" on any turn; however, he may choose that option only if the UN has 10 or more VP than he does. Exception: it may not be selected if using maximum deployment. The units are placed as reinforcements on the north map edge two turns following the one in which the option is selected.
38.4 The UN player may select "Units Evacuated From Northeast Korea Committed to Hungnam Front" on any turn starting with 7 December; however, the option may be chosen only if the Communist has 10 or more VP than the UN. The units are placed as reinforcements on functioning port hexes five turns following the one it was chosen.
38.5 Communist Options
- Communists Employ North Korean Army. The Communists receive the following additional North Korean units as part of their initial order of battle: 1 x commando group, 4 x infantry groups (these are deployed anywhere within five hexes of the north map edge). Additionally, the Communists place six (instead of four) partisan groups as part of initial deployment (deployed as per other Partisan units). Victory Points: +10 UN.
- Chinese Challenge UN Air Superiority. At the beginning of each Air Operations Phase, the Communist player rolls a die. The UN player must place a number of his air units equal to that amount in the Reserve box (any types, UN player choice). Those air units aren't available that turn (they may be used on subsequent turns, subject to further Chinese air superiority die rolls). Victory Points: +20 UN.
- Chinese Commit IX Army Group Reserves. Communists receive the following units as reinforcements on any game turn starting with 28 November, placed on the north map edge: all Chinese 78th and 88th Division units. This may not be used with the Scenario 2 maximum deployment. Victory Points: +20 UN.
- Chinese Divisions Bring Their Artillery. Any Communist attack involving at least one Chinese infantry or elite infantry unit receives one additional shift to the right. Any Communist defense involving at least one Chinese infantry or elite infantry unit receives one additional shift to the left. Units must be in supply to receive those shifts, and no more than one shift is received per combat by this rule. All Chinese units pay Korean movement and ZOC entry/exit/infiltration costs. Chinese units don't receive any column shifts for surprise. This option may also be used in the Gauntlet game. Victory Points: +40 United Nations.
38.6 UN Options
- Better UN Intelligence. The UN player may examine all Communist units after initial deployment and prior to the first game turn. The Communist player may not employ Fog of War markers. Victory Points: +10 Communists.
- UN Forces Less Road Bound. UN motorized infantry, airborne infantry, and Marine infantry units pay two MP to enter rough terrain. Chinese units pay the same zone of control disengagement and infiltration costs as Korean units. Victory Points: +10 Communists.
- US Commits Emergency Reinforcements. The UN player receives the US 2nd Marine Brigade, two additional TAC, one additional SAC and one additional MAC units. Marines may be landed on any coastal hex not occupied by an enemy unit. Determine the turn the air units arrive by rolling a die: 1-2 = December 4; 3-4 = December 5; 5-6 = December 6. Determine the turn the Marine Brigade arrives by rolling a second die: 1-2 = December 11; 3-4 = December 12; 5-6 = December 13. Victory Points: +20 Communists.
- US Commits More Troops. The UN starts the game with the US 2nd Armored Cavalry Regiment. It begins the scenario broken down into the 1/2, 2/2 and 3/2 Armored Cavalry Squadrons. They're placed on or adjacent to hexes occupied by other US units. Victory Points: +10 Communists.
- Units Evacuated from Northeast Korea Committed to Hungnam Front. The UN receives the following additional reinforcements on any turns starting with 12 December: ROK 3rd Division Headquarters; ROK 22/3, 23/3 18/CAP Regiments. The units are placed on any functioning port hexes. Victory Points: +20 Communists.
39.0 Strategic Game
In the Strategic Game players can combine the Chosin game with the Gauntlet game (from S&T 190) for a combined game of the Chinese offensive in North Korea in late 1950.
39.1 Maps The westernmost row of hexes of the Chosin game overlaps the easternmost row of hexes on the Gauntlet map. Players can align the maps by using the road hexes on the map edge as guides.
39.2 During initial deployment, Chinese units from Gauntlet may set up on the westernmost row of Chosin map hexes corresponding to the five hexes on the eastern edge of the Gauntlet map north of Yongwon.
39.3 Game Length The Strategic Game begins on 24 November and ends on 24 December.
39.4 Players may agree to use the Chosin Quick Game special rule, in which case the game ends on 10 December. VP received for objectives "at the end of the game" are received on whichever turn players agree to end play.
39.5 The Chosin campaign started several days after the Chongchon (Gauntlet) campaign. Deploy units normally on the Chosin map, but no unit on the Chosin map may move, nor may units cross the map boundaries or be transferred, nor may Chosin air/naval units conduct missions until the start of 27 November, at which time play moves forward normally. On the Chosin map, skip the Events Phase and UN Player Turn if playing Scenario 1, and the Events Phase if playing Scenario 2. The UN player is considered to have three TAC units assigned to CAS, which he may use defensively in the Communist Player Turn, and one MAC unit he may use for airborne supply.
39.6 Random Events Players roll for random events once for each map per turn. That is, roll once for Chosin and once for Gauntlet, using the appropriate table for that map. Ignore the following events: Third Infantry Division Ordered Redeployed (Chosin), Eighth Army Holds at the Chongchon (Chosin), Marines Hold at Chosin (Gauntlet).
39.7 Additional UN Units Used Only in the Strategic Game The following units are placed as part of the UN initial deployment on either map.
- 19th Engineer Group: if on Gauntlet map, anywhere south of the I/IX/ROK II Corps boundary line; if on Chosin map, within 10 hexes of any coastal hex, inclusive.
- 1 Partisan Group: placed after the Communist player has placed all of his units, on any hex not on or adjacent to a Communist unit or ZOC.
39.8 Chinese 42nd Army The Chinese player may place all units of the Chinese 42nd Army (from the Gauntlet counter mix) on either the Gauntlet or Chosin map. (He must choose one map.) If placed on the Gauntlet map, use scenario deployment instructions. If placed on the Chosin map, it must be placed on or adjacent to any "20" or 27" deployment hexes. If using the Minimal Deployment Option, the 42nd isn't received. Prior to deploying the 42nd, the Chinese player must disrupt any three regiments in it (his choice of units), representing casualties from the fighting prior to the campaign start.
39.9 UN Reinforcements The UN player may allocate reinforcements to either game map. Units placed on the Gauntlet map are placed on the south map edge or functioning ports. Units placed on the Chosin map are placed on functioning ports. Reinforcements may also use air transfer and airborne landing procedures to enter either map.
39.91 When playing the Strategic Game, the UN player doesn't withdraw the 2 x TAC points on 2 December, as per Gauntlet Scenario rule 3.c. The UN player doesn't receive the 2 x TAC points on 5 December, the 1 x TAC on 10 December, and the 1 x TAC on 20 December, as per the Chosin reinforcements. Those were air units transferred from one theater to the other. Of course, there is nothing to stop the UN player from transferring those air units by choice.
39.10 Communist Reinforcements must be placed on the map designated by the scenario.
39.11 Crossing Boundaries Units may move from map to map under certain conditions. Land units may freely move from map to map. A unit may trace supply only to headquarters and supply sources on the same map. Lines of Supply may generally not be traced across the map boundary. Exception: Communist units on either map may trace supply to the one source directly north of Yongwon; however, such units may trace only through headquarters on the same map as themselves.
39.12 Air Units on one map may not conduct missions on the other map unless they first transfer. The UN player may transfer air units from one map to the other. That may cause a delay in their ability to conduct air operations. Remove the air unit from the map during the UN Reinforcement Phase. Return it to play on the new map after the designated number of turns, during the UN Reinforcement Phase. Any number of air units may be transferred in a turn. It takes one turn for the UN player to transfer SAC and MAC units from one map to the other map. It takes three turns for the UN player to transfer TAC units from one map to the other map. TAC units based on airfields (if using the airfield units optional rule) on a map may not be transferred from map to map; they may be exited from the map if their airfield exits the map.
39.13 The random event Really Bad Weather doesn't affect the transfer of air units. Examples: a SAC unit is removed from the Gauntlet map on Game Turn 5. Throughout that turn it's considered to be in transit. On Game Turn 6 it's placed on the Chosin map and is available for operations. A TAC unit is removed from the Chosin map on Game Turn 5. Throughout Game Turns 5, 6 and 7 it's in transit. On Game Turn 8 it's placed on the Gauntlet map and is available for operations. The UN player can indicate game turns of arrival of transferred air units by placing them on the appropriate space of the Turn Record Track.
39.14 Naval Units The UN player may not transfer naval units from one map to the other.
39.15 Naval Transport The UN player may transfer land units from one map to the other. Remove the land unit from the map according to the standard rules of naval transport. Return it to play on the new map after six turns during the UN Reinforcement Phase. Units may be moved from map to map only by naval transfer, not by naval evacuation. Units in the UN Units Exited box may not be returned to play. Naval transport capacity for each map is fixed; it may not be transferred from map to map. A unit using naval transfer from one map to the other is counted against only the capacity of its starting map, and only at the start of the move, not per turn.
39.16 Air Transfer Land units may use air transfer to move from one map to the other. The unit is picked up from an airfield hex on one map and is placed on an airfield hex on the other map on the following turn. The MAC unit that performed the air transfer may remain on the map on which it started or it may also be transferred.
39.17 Exiting the South Map Edge Units may exit the south map edge of the Gauntlet map. UN units may never exit the south edge of the Chosin map; Communist units may.
39.18 Air Supply UN air supply markers may be used on either map with no delay.
39.19 Scenario Options Players separately select scenario options for each map. Units designated as starting a particular map must start on that map. UN units received as reinforcements via scenario options may be brought in on either map. Communist reinforcements must be brought on the map designated by the scenario.
39.20 Deployment Options If using the Scenario 2 Chinese Deployment Options, the Communist player must select the same deployment option for both maps. Note that, once on the map, the Communist player may move land units and reinforcements across map boundaries according to the rules above.
39.21 Special Rules for each map apply only to units on that map.
39.22 Victory Conditions Players receive VP separately for actions and events on each map throughout the course of the game. VP are totaled for each player at the end of the game, adding both maps' final results, to determine the final victory level.
39.23 Team Play Players should feel free to develop their own arrangements for team play. Some options include the following.
- Teams: one supreme commander for each side with one subordinate commander for each map. Check for overall victory, but if one team member wins on his map while his partner loses, he can still claim the glory.
- Tandem: two players, with one commanding UN forces on the Gauntlet map and the Communists on the Chosin; the other player commands Communist forces on the Gauntlet map and UN on the Chosin map.
40.0 Gauntlet (S&T 190) Additional Units
Add the following units to the UN initial deployment in all Gauntlet scenarios:
- US 3LC Port unit (Optional Rules only): place on Chin Nampo.
- US 6146 and 6148 Airfield Groups (Optional Rules only): place one each on 2217 and 2218.
- 2 x airfield markers (Optional Rules only): place one each on 2217 and 2218.
- Chinese "XIII Gd" Regiment, anywhere north of the Front line.
41.0 Gauntlet (S&T 190) Errata
Sample counters (error): the number on the upper left of the sample headquarters is the support factor; the number on the upper left of the artillery unit is the barrage factor.
Scenarios (omission): the TF 95 Naval unit is placed on any all sea hex at the start of all scenarios.
Combat Results Table (error): The "DE" result is supposed to be "DZ" (Defender Annihilated). The "EX" result is supposed to be "BB" (Bloodbath).
Errata Counters: the U.S. 24/25, 27/25, 35/25 Infantry, 25 Artillery, 8 Airborne Ranger, 865 Antiaircraft, 2A Self-propelled Artillery and 70 Tank units provided in the Chosin counter set replace the units of the same designation in the Gauntlet set which were misprinted.
Replacement breakdown units. A set of infantry battalion units is provided to replace those in the Gauntlet game. The replacement counters do not have a disrupted side. If disrupted, they are eliminated, instead. These battalions include:
- 10 PH, 21 TH, NL, B-L, GK, FR.
- US, Commonwealth and ROK breakdown battalions.
Note that Commonwealth (CW) breakdown battalions have the names of the actual units on them, while other breakdown units have a generic letter. Armor and certain independent battalions retain their disrupted sides. These were units with a little more resiliency, or which operated independently.
42.0 Organization of Forces
Communist organization in Chosin:
- Chinese IX Group Army units: "GD IX" elite infantry regiment, "IX" cavalry regiment, IX artillery group, IX antiaircraft regiment.
- Chinese 20th Army: 20th Headquarters, 58th, 59th, 60th, 89th Divisions (three regiments per division).
- Chinese 26th Army: 26th Headquarters, 76th, 77th, 78th, 88th Divisions (three regiments per division).
- Chinese 27th Army: 27th Headquarters, 79th, 80th, 81st, 90th Divisions (three regiments per division).
- "What if" units: Chinese 5th artillery group, 5th antiaircraft regiment. North Korean: 766 Commando Group, 2, 5, 15, 24 Infantry Groups, 6 x partisan groups.
- Extra units for Gauntlet: Chinese "GD XIII" elite infantry regiment.
UN organization in Chosin:
- X Corps: X Corps headquarters, 2SE Port Brigade, 5 Artillery Brigade, 8227 Special Operations, 56 (-) Amphibious Battalion, 58, 59, 88, "X" Military Police companies, 6151, 1 MAW Airfield Groups, 411 RMC British Commonwealth Battalion.
- 1st Marine Division: 1M headquarters, 1, 6, 7 Marine Regiments, 1/1M Artillery Regiment, 1 Amphibious Battalion.
- 3rd Infantry Division: 3 headquarters, 7, 15, 65 Infantry Regiment, 64 Tank Battalion, 3 Artillery Group.
- 7th Infantry Division: 7 headquarters, 17, 31, 32 Infantry Regiment, 73 Tank Battalion, 7 Artillery Group.
- ROK I Corps: I Corps headquarters, Cap Infantry Division (Cap headquarters, Cav, 1, 18 infantry Regiments), 3rd Infantry Division (3 headquarters, 22, 23, 26 infantry Regiments).
- 1 Marine Regiment, 5 Marine Battalion, "H" Military Police Battalion, 2AP Military Police Group.
- "What if" units: 2 Marine Brigade, 1/2, 2/2, 3/2 Armored Cavalry Squadrons.
- Optional units for Strategic Game: 19 Engineer Group, ROK 1G Partisan Group.
- Extra units for Gauntlet: 6146, 6148 Airfield units, 3LC Port Group; 2 x airfield markers.
43.0 Chosin Gazetteer
Cities
- Hamhung – 3212
- Hungnam (port) – 3511 & 3410
- Wonsan (port) – 5614
- Yonghung – 4319
Towns
- Anbyon – 5912
- Chigyong – 3414
- Chinhung-ni – 2317
- Chong P'yong – 3616
- Chungsin-ni – 4027
- Hagaru-ri – 1618
- Hongwon – 2803
- Hudong-ni – 1417
- Huksu-ri – 2522
- Koto-ri – 2017
- Majon Dong – 2616
- Majon-ni – 5821
- Munch'on – 5217
- Oro-ri – 2914
- P'ach'unjang – 4115
- Sin Hung – 2312
- Tagwon – 5616
- Tara-ri – 1209
- Tang P'ang-ni – 1805
- Tongyang – 5626
- Yangdok – 5431
- Yongwon – 3433
- Yonpo – 3612
- Yudam-ni – 1321
Airfields
- Wonsan North Airfield – 5416
- Yonpo Airfield – 3612
Communist Deployment Hexes
- 0917 (27th Army)
- 0920 (27th Army)
- 1423 (20th Army)
- 1623 (20th Army)
- 1823 (20th Army)
- 2023 (20th Army)
Communist Supply Source Hexes
- 0514
- 0521
- 1323
- 2934
UN Supply Source Hexes
- 6106
- 6114
- 6122
- 6129