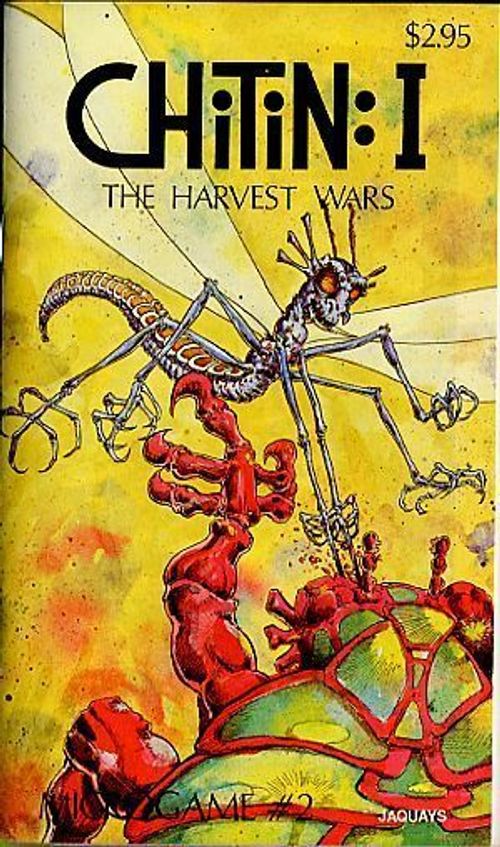
Chitin: I
Chitin: I Rulebook
Table of Contents
Table of Contents
1.00 Introduction
Beneath cool, gray morning mists, the fields of reddened grain wait for fall. But as dawn's yellow glint pierces the fog, the early calm is broken by a chitinous rustling. Moving through the fields in gleaming rivers, their carapaces sparkling with dew, come two deadly harvest parties.
Mandibles click as they sight each other - then claws crush and spikes pierce armor. The warriors destroy each other while the workers scramble - not for cover, but to collect the grain and the bodies of the fallen. Dragonish Gantuas loom through the tattered fog, scattering smaller opponents. Termagants hack at soft underparts. Fliers hover overhead, waiting to plunge their stings between armor plates. This season's harvest battle is under way...
CHITIN I: The Harvest Wars is a two-player MicroGame tactical abstract from Metagaming's multi-factor society-level game Hymenoptera. Chitin I simulates the food-harvesting phase of the Hymenopteran game year. During the Harvest Wars, the never-ending rivalry between the hive cities erupts into open combat, as they struggle for larger shares of food.
This game represents a battle, lasting about a day, for control of a small valley. Victory goes to the player capturing the most food at the least cost to his/her Hive. Basic scenarios last from 45 to 75 minutes; advanced games may take up to two hours. Battles tend to be short, sharp, and bloody (ichory?). Since the Hymenopterans are hive sentients, they tend to be more than willing to expend their easily-replaced warriors if it will increase the hive's stocks of food.
The map and time scale of Chitin I don't exactly reflect those of Hymenoptera. Scales are smaller by a factor of about ten. Rather than a precise reduction, the design goal was a good, stand-alone tactical game that gave the "feel" of the Hymenopteran world in a smaller game situation.
2.00 Game Components
2.01 Map. The hex-grid map contains four types of terrain: plains hexes, river hexes, slope hexes, and forest hexes. More than one type of terrain may occur in a hex. These hexes affect movement and combat as explained in Sections 6.00 and 7.00. The map is divided into Megahexes by the heavier black lines. Each hex is numbered; these numbers may be used for controlling play-by-mail games.
Terrain features are:
- Plains hexes: no markings. All ground units enter at a cost of one movement point.
- River hexes: hexes containing meandering blue lines. Gantuas enter at a cost of one movement point; other units enter at a cost of two movement points.
- Rough terrain hexes: these include forest hexes (light blue-green shading) and slope hexes (dark wavy lines). These hexes have the same effect on movement: Low Renders enter at a cost of one movement point; other units enter at a cost of two movement points. Forest hexes halve the combat strength of air units attacking ground units (see Section 8.01).
Megahexes are the heavy outlined groups of 19 smaller hexes. Megahexes control harvest points (see Section 3.00), food points for dead units (see Section 8.04), and air unit movement (see Section 8.01).
2.02 Counters. There are two types of counters: playing counters and Harvest Chits.
2.021 Playing Counters. Each side has 56 counters (which must be cut apart), indicating different types and numbers of units. Each "unit" actually represents a number of insects.
2.022 Combat Units. There are five classes of combat units: Renders (R), Hackers (H), Thrusters (T), Smashers (S), and Flyers (F). Chitin I uses only one type from each of these classes; Hymenoptera has many more. Basics are treated as combat units, although their real function is to provide command control (see Section 8.03).
Each combat unit counter shows (a) a unit silhouette; (b) the number of units represented by that counter; (c) the combat strength and disrupted combat strength; (d) its regular movement allowance, and whether it can use charge movement; (e) the initials for the unit type and class. Examples:
- The silhouette and GN abbreviation show this is a Gantua counter. The three black dots mean 3 ground units. The combat strength is 12; the disrupted strength is 6. Regular movement is 4; the C means Gantuas can charge. The S means these units are Smashers.
- The silhouette and PL abbreviation show this is a Plunge counter. Two wedges mean 2 air units. The combat strength is 4; there is no disrupted strength because fliers don't disrupt. Movement is 2 megahexes. The F means the units are Fliers.
2.023 Worker Units. The Worker is a special type of unit. A Worker has only defensive strength; it cannot attack. Workers have no zone of control. Workers are the only units that can pick up Harvest Chits. The Worker counter represents one unit. It has a defensive strength of 1 and a movement allowance of 4.
2.024 Harvest Chits. These are the small counters. Some Harvest Chits bear both a number and a letter; others, only a letter. Those with letters and numbers correspond to the seven lettered megahexes in the center of the map; they are placed before the game according to the scenario being played (see Section 3.00). The Harvest Chits without numbers are used only with the advanced rules, and are placed on the map to represent food value of dead units.
Counter sheet (each side's 56 counters, as printed on the sheet)
Format: counter type, combat strength-disrupted strength (where shown), movement (c = can charge; m = megahexes for air units). Unit counts per counter are shown by dots/wedges on the counters.
| Unit | Counters (strength / movement) |
|---|---|
| Basic (B) | six counters, strength 1, movement 5 |
| Worker (W) | six counters, strength 1 (defense only, "1d"), movement 4 |
| Plunge (PL-F) | four counters 2, 2m; four counters 4, 2m; one counter 8, 2m |
| Phlanx (PX-T) | three counters 9-6, 4c; three counters 6-4, 4c; three counters 3-2, 4c |
| Low Render (LR-R) | three counters 6-3, 5; three counters 4-2, 5; three counters 2-1, 5 |
| Termagant (TR-H) | three counters 6-3, 6; three counters 4-2, 6; three counters 2-1, 6 |
| Gantua (GT-S) | three counters 8-4, 4c; three counters 4-2, 4c; two counters 12-6, 4c |
3.00 Setup for Play
Each player selects one set of counters to represent his hive's forces. The makeup of the armies is specified in the scenarios below.
3.01 Harvest Chit Placement. Harvest Chits are placed in the lettered hexes in the center of the map. Each scenario specifies which Harvest Chits are to be used.
3.02 First Move. Each player rolls a die. The high roller chooses either first move or the end of the map he/she will start from. The low roller moves second and chooses starting end if the high roller chose to move first, or vice versa.
3.03 Scenarios. Each of the following scenarios represents a possible battle. In each case, forces are evenly matched. As a rule, players should start with the Learning Scenario and work up.
3.031 Learning Scenario. Harvest Chits A, C, and F are used. Each player takes 3 Gantua units, 3 Phlanx units, 3 Termagant units, 3 Low Render units, and 6 workers. No advanced rules are used. The winner is the player whose workers exit his side of the map with at least two of the Harvest Chits.
3.032 Basic Scenario. Harvest Chits A, B, C, D, E, F, and G are used. Each player selects a force of warriors totaling 48 points in combat strength. Each player also gets 6 workers. No advanced rules are used. The winner is the player whose workers exit his side of the map with at least four of the Harvest Chits.
3.033 Small Scenario. Harvest Chits A, C, and F are used. Each player selects 48 combat strength points of warriors and Basics. Each player gets 6 workers. No more than 8 combat strength points of Plunge units may be used. Use all advanced rules (see Section 8.00) and the Advanced Victory Conditions (see Section 4.0).
3.034 Intermediate Scenario. Harvest Chits A, B, C, D, E, F, and G are used. Each player selects 60 combat strength points of warriors and Basics. Each player also gets 6 workers. No more than 12 combat strength points of Plunge units may be used. Use all advanced rules and the Advanced Victory Conditions.
3.035 Advanced ("Bitter End") Scenario. Harvest Chits A, B, C, D, E, F, and G are used. Each player selects 78 combat strength points of warriors and Basics. No more than 16 combat strength points of Plunge units may be used. Use all advanced rules and the Advanced Victory Conditions.
3.036 All-Units ("Armageddon") Scenario. Harvest Chits A, B, C, D, E, F, and G are used. Each player takes all the units of his color. This is purely a game of maneuver, since you have no chance to outguess your opponent with your selection of forces. It tends to be long and bloody.
4.00 Objectives and Endgame
4.01 Basic Victory Conditions. Learning and Basic Scenario victory conditions are simple; the player who moves the most Harvest Chits off his/her end of the map wins.
4.02 Advanced Victory Conditions. In games using the Advanced Rules, a more complex and realistic scoring system is used. Each player is required to keep a record of victory points on a piece of scratch paper. One player will also need to keep a record of dead units added to each Harvest Chit (see Section 8.04). Victory points are computed as follows:
4.021 Harvest Chits. Each Harvest Chit counts at its face value, if any, plus one for each dead unit added to it.
4.022 Lost Units. Two points are subtracted from a player's score for each unit - Basic, Worker, or warrior - that that player loses.
4.023 Example. A player gets Harvest Chit A (face value 20) off his edge of the map. Five dead units had been added to that chit - so its total value is 25. If all five of the dead units had belonged to that player, 10 points would be subtracted from his final score. In other words, final score is computed by adding the values of all Harvest Chits and dead bodies a player gets off the map, and subtracting two points for each unit that he/she lost.
4.03 Basic endgame. Basic and Learning scenarios end when all Harvest Chits have been moved off the map.
4.04 Advanced endgame. The advanced-rule scenarios end when all Harvest Chits specified in the beginning setup have been moved off the map. Players compute victory points at that time, ignoring all units and other Harvest Chits left on the map. This gives a relatively short game.
4.05 Alternate advanced endgame. The "first off" endgame rule can be used instead. This rule lets the game continue until all of one player's units have left the map. The player whose units are still on the map then credits his victory point total with all Harvest Chits left on the map. This scenario tends to yield long, running battles. Use of this rule with the larger scenarios effectively converts Chitin I into a full-sized four-hour tactical game.
5.00 Sequence of Game Events
Turns alternate between players. Each player moves his/her units and resolves combats caused by those movements, in the following sequence:
- Move all ground and air units according to Ground Movement and Air Movement rules.
- Turn all disrupted units right-side-up. They are now undisrupted.
- Resolve all combats as follows:
- (a) Announce which units are attacking which enemies, whether charge attacks are being made, and what the odds are for each attack.
- (b) Roll the die for each combat and apply the results. Remove destroyed counters; replace affected counters with smaller ones where not all units were lost. The defending player retreats all the attacking units that rolled an "AR" result; the attacker retreats all defending units that received a "DR" result. Each player may then advance or change facing on any of his/her ground units which eliminated or forced retreat of enemy ground units.
- If the Advanced Victory Conditions are being used, record the number of units lost by each side, and add the units lost to the values of the nearest Harvest Chit in the megahex(es), starting new Harvest Chits as necessary.
It is now the other player's turn to go through Steps 1-4 as outlined above.
6.00 Ground Movement
6.01 Moving onto the Map. All units are assumed to start in a non-existent hex next to the short edge of the map, i.e., the ends of the map next to the Combat Results Tables. They move onto the map by paying the normal entry cost for the hex they move into.
6.02 Movement Allowance. Each counter has a certain number of movement points, shown in the upper right-hand corner. (Some counters also have a C in the upper right-hand corner. This means those units can charge - see Section 8.02.) It costs a certain number of movement points to enter each hex, as described below. A counter never has to move at all, and never has to use all its movement points, but it can never exceed its movement allowance or save movement points from one turn to another.
6.03 Terrain Effects. Ground units are affected by the terrain shown on the map. It costs all units 1 movement point to enter a plains hex. All other types of terrain cost 2 to enter, except that Gantuas only pay 1 to enter river hexes (they are so big, they just wade through), and Low Renders only pay 1 to enter rough terrain hexes (they just scuttle across).
6.031 Combined Terrain Effects. It never costs more than 2 to enter a hex on account of terrain. If a hex contains (for instance) both a river and rough terrain, all types will pay 2 to enter it, but not more than 2 (unless it is in an enemy zone of control - see the next section).
6.04 Zones of Control. Each ground unit (except workers) exerts a zone of control in the six adjacent hexes. It costs one extra movement point to enter each hex in an enemy zone of control. Thus, a River/Rough Terrain hex in an enemy zone of control would cost 3 to enter.
6.05 Stacking. Only three ground units may stack in any hex. Each black dot on a counter represents one unit - so no hex may ever contain more than three dots' worth of counters...two warriors and one Basic, for instance.
6.051 Warrior stacking. Different types of warrior units may never be placed in the same hex; they are too stupid not to fight among themselves in such close quarters. Basics and Workers may stack with any units, but Gantuas may stack only with Gantuas, Phlanx with Phlanx, etc.
6.06 Facing. Each ground unit must be "faced" toward one of the six sides of its hex when it finishes a move. This is very important in combat. The top of the counter is considered to be the direction in which the unit is facing - see examples in Section 7.00. All units in a hex have the same facing.
6.07 Leaving the Map. Units may leave the map only at the end at which they entered. No combat unit may reenter the map once it has left. Workers may move back and forth off the edge of the map, paying one movement point to leave and the appropriate cost for the hex they re-enter.
6.08 Worker movement. Special rules for the Worker counters include:
6.081 Harvest chits. The workers are the only units that can pick up and carry the Harvest Chits. The Worker just moves into the hex containing the chit; thereafter the chit moves with the Worker. No Worker may carry more than 30 food points; therefore, if a chit would reach 31 points (in the advanced game), a new chit must be started instead. Each Worker unit may carry only one chit at a time. If a Worker carrying a chit is killed, the chit remains in that hex until it is picked up by another Worker. If two Workers are carrying a chit and one is killed, the other one keeps carrying it (and, in the advanced game, the dead Worker counts into the chit!).
6.082 Workers and ZOCs. A Worker has no zone of control. Furthermore, a Worker may never enter a hex in an enemy zone of control unless a friendly combat unit is in that hex or is moving with the Worker.
6.083 Replacement of Workers. Whenever a Worker unit is killed, it is (in the Advanced Rules) added to the food value of the nearest Harvest Chit and counted against its owner just like any other unit. However, on the next turn, its owner may start a new Worker unit from his/her side of the map. Thus, each Hive has an unlimited number of Workers - but only six are seen on the map at any one time.
6.09 Movement Through Enemy Units. Ground units may never move onto or through enemy ground units (exception: overrun attacks, Section 7.07.) Air units may pass over enemy ground units.
7.00 Ground Combat
Ground combat is resolved after movement. If air units (Section 8.01) are being used, their combat is figured in with that of the ground units.
7.01 Stacks. Each stack of counters attacks and defends as a unit. A stack attacks at the combat strength (shown in the upper left-hand corner of the counter) of all warriors and Basics in the stack, plus any combat adds for facing or type of warrior attacked (see below). A stack defends at the combat strength of all warriors in the stack, plus 1 for each Basic and/or Worker. Note: whenever these rules mention a "stack," the rules also hold true for lone counters or single units.
7.02 Making Attacks. The attacker (the player who moved last) must attack all adjacent enemy units in front of his units. "Front" is determined by the facing of the units, as shown in the diagram (a counter's facing points to one hex side: the three hexes adjacent to that side and its two neighbours are the front hexes, marked F; the three opposite hexes are the rear hexes, marked R).
In these rules, a reference to "in front of" a counter will mean in one of the three adjacent front hexes. "Behind" or "to the rear of" a counter will mean in one of the three adjacent rear hexes.
All units in a stack have the same facing. A ground unit may attack only units in front of it.
7.03 Combining Attacks. Two or more stacks may attack one enemy stack, as long as the stack being attacked is in front of both attackers. One stack may attack two or even three stacks, as long as all stacks attacked are in front of it. Remember: any enemy stack in front of one of your units after movement MUST be attacked somehow.
7.04 Combat Adds. There are three ways in which an attacking stack may increase its strength for an attack: by attacking from the rear, by attacking the type of unit against which it fights best, or, in the Advanced Game, by making a "charge attack" (Section 8.02).
7.041 Attacks from the Rear. When a stack attacks from one of the enemy's three rear hexes, it gets one additional point of combat strength (in that attack) for each unit in the stack. Thus, two Termagants (4 combat strength points) attacking an enemy stack from the rear would add two points - one for each Termagant unit - for a total of 6 points in that attack.
7.042 Class Adds. Each type of warrior unit has one other type against which it fights exceptionally well. These are shown under "Class Adds" with the Combat Results Table and below:
- Smashers are best against Hackers.
- Hackers are best against Renders.
- Renders are best against Thrusters.
- Thrusters are best against Smashers.
When the warriors in the defending stack (regardless of Workers or Basics in either stack) are of the type the attacking warriors are best against, each attacking unit gets one additional point. For example, Hackers are best against Renders. If the two Termagants in the above example were attacking Renders (whether or not there were Workers or Basics in either stack), they would get another two combat points - one for each unit of Termagants - in that attack. Units get class adds whether or not they attack from the rear, and class adds are in addition to adds for attacking from the rear.
7.043 Combat Adds in Combined Attacks. If one stack is attacking two or more stacks, it gets no class adds unless ALL the warriors attacked are of the type it is best against. If two or more stacks are attacking one stack, the warriors attacking warriors of the right type can get class adds, but the others don't. The same holds true for attacks from the rear, except that only ground units are considered. See the Combat Examples below.
Example 1. The Phlanx 6-4 counter (PX) and the Low Render 6-3 counter (LR) are attacking the Gantua 8-4 counter (GT) from the Gantua's front. The Phlanx are in a charge attack, designated as they moved; therefore, their strength is doubled. They also get one class add per unit because they are attacking Smashers. The attackers' combat strength is (6 x 2) + 2, or 14, for the Phlanx, plus 6 for the Low Render; a total of 20 to the defenders' 8. The attack odds are 20 divided by 8 = 2 1/2, so the attack is rounded down to 2 to 1 odds.
Example 2. The Gantua (GT) 12-6 is attacking both the Termagant (TR) 4-2 from the rear and the Low Render (LR) 4-2 from the front. It is not a charge attack. The three Gantua units get no adds, so the attack is at 12 to 8, or 3 to 2 odds.
However, if the Gantuas were attacking only the Termagants, they would get +3 (one for each Gantua unit) for attacking from the rear, and another +3 because they were Smashers attacking Hackers. In that case, the odds would be 12+3+3 = 18 to 4, which would round down to 4 to 1 odds.
Adds for each attacking stack are computed separately and the totals combined to give total attack strength for each attack.
7.05 Enemy Units in Rear Hexes. A unit cannot attack enemy units behind it. However, any stack which BEGINS an attack phase with an undisrupted enemy warrior unit behind it will lose one extra unit (owning player's choice) after combat, unless all the enemy units behind it are attacked during that turn. In other words, if something doesn't keep those enemy units busy, they will jump on you while your backs are turned...
7.06 Resolving Combats. After the odds for each particular combat have been calculated, that combat is resolved. The attacker rolls one die and consults the Combat Results Table shown on the map.
7.061 Odds Calculation. Total the combat strength of each attacking stack, adding any class adds and adds for attacking from the rear. Add all these to get the total attack strength. Total the combat strength of the defending stack(s) and add them together. Now figure the ratio of the attackers' to the defenders' strength, rounding down IN THE DEFENDERS' FAVOR to one of the odds shown on the Combat Results Table. For example, a strength of 20 attacking a strength of 12 is not quite enough for a "2 to 1" attack; it would be rounded down to "3 to 2."
7.062 Combat Resolution. After the odds for a combat are calculated and the attacker has rolled the die, the Combat Results Table shows the results of that combat. The intersection of the number rolled with the combat odds gives the result; for instance, a 2 rolled on a "1 to 2" attack gives an "A-1" result. Possible results are:
(The booklet lists none here; the results are explained in 7.063 to 7.066.)
7.063 Combat Losses. Lost units are indicated by the notation A-(number) or D-(number). For instance, A-2 means the attacker loses 2 units. D-3 would mean the defender loses 3 units. The owning player always selects which units are to be lost from among those involved in that combat. If the CRT shows that more units are lost than the player actually had (for example, D-3 when the defender had only one unit), no other units are lost. If the loss means that a counter representing a number of units must be replaced by a counter representing fewer units, this is done immediately.
7.064 Disruption. Disrupted counters suffer no losses, but become confused and ineffective. Disruption is indicated by AD (attacker disrupted) or DD (defender disrupted) on the Combat Results Table. Disrupted units:
- (a) may move only one hex (regardless of terrain) in the next movement phase.
- (b) may never move into a hex in an enemy zone of control.
- (c) attack and defend at the disrupted combat strength - the second number in the upper left-hand corner.
- (d) become undisrupted at the end of their next movement phase, and may attack (but never charge-attack) at that time.
An AD result means all attacking units in that combat are disrupted. A DD means that all units defending in that combat are disrupted. Disrupted counters may be flipped over so players may easily keep track of their status.
7.065 Which Units May Be Disrupted. The four types of ground warrior units are the only ones subject to disruption. Fliers, Basics, and Workers never suffer disruption. When the CRT indicates disruption for Fliers or for a stack composed wholly of Basics and/or Workers, they retreat. Basics and/or Workers in a stack with disrupted warriors stay with the stack, but are not disrupted; the stack does not retreat.
7.066 Retreat. The Combat Results Table indicates "retreat" results by AR and DR. An AR result means all attacking units in that combat must retreat. A DR means all defending units in that combat must retreat. Units forced to retreat are moved one hex in any direction by the enemy player. Stacks may not be split up in retreat. If a stack of units is completely surrounded by enemy units, friendly units with which it cannot stack, or the map edge, it loses ONE unit instead of retreating. When units are forced to retreat, the enemy player may move any of his ground units in that combat into the hex formerly occupied by the defender, and change facing on any of his other units which were involved in that combat.
7.07 Overrun Attacks. When the attack strength in a given attack is 6 or more times greater than the defense strength - that is, when the combat odds are 6 to 1 or better - the attack may be an "overrun." The defenders are automatically eliminated during the MOVEMENT phase. The attacker(s) may proceed through the hex formerly occupied by the overrun defenders at a cost of two movement points (plus terrain effects if any). They suffer no losses, and may make a regular attack at the end of their movement.
Combat Results Table (printed on the map)
Roll one die; read the column for the odds (attacker to defender).
| Die | 1-4 | 1-3 | 1-2 | 2-3 | 1-1 | 3-2 | 2-1 | 3-1 | 4-1 |
|---|---|---|---|---|---|---|---|---|---|
| 1 | A-3 | A-2 | A-2 | A-1 | A-1 | AD | AR | DR | D-1 |
| 2 | A-3 | A-2 | A-1 | A-1 | AD | AR | DR | D-1 | D-1 |
| 3 | A-2 |
- On 1-5 attacks, all attackers are eliminated. Attacks at worse than 1-5 are not allowed.
- On attacks at 5-1 or better, all defenders are eliminated.
- On attacks at 6-1 or better, the attacker has the overrun option.
Combat Adds (printed on the map)
Units which get combat adds against specific types are: Smashers against Hackers; Hackers against Renders; Renders against Thrusters; Thrusters against Smashers. Units attacking from the rear also get one add each, regardless of type.
8.00 Advanced Rules
The advanced rules below expand Chitin I to the fullest. They should be added by players after they have mastered the learning and basic scenarios. Experienced players may find that starting with the advanced rules is more suited to their play style.
8.01 Air Movement and Combat. The only air unit provided in Chitin I is the Plunge. It is a warrior unit that can enter into ground combat or fight enemy air units.
8.011 Air Unit Movement. Air units move at the same time as ground units. Their movement is computed in megahexes. Each Plunge unit may move two megahexes per turn. Air units are considered present in every hex of the megahex they occupy; they may be placed anywhere in a megahex and may attack ground units in any hex of that megahex. Terrain does not affect air movement.
8.012 Air Unit Stacking. There is no limit to the number of air units that may occupy one megahex.
8.013 Air Unit Combat. Air units use the same combat system and values as ground units, as well as the same Combat Results Table. Unit facing and class add rules do not apply to air units. Air units are never disrupted; if the CRT indicates disruption, they retreat instead. Air units which retreat are moved one megahex in any direction by the enemy player. Air units may not advance after combat. Dead air units count into harvest chits, and count against their owner's victory points, like all other units.
8.014 Compulsory Air Combat. Air units must attack enemy air units in any megahex they enter with at least equal strength. Excess air units not committed to combat with enemy air units may attack enemy ground units anywhere in the megahex. Example: A player moves five Plunge units into a megahex containing three enemy Plunge units. At least three of the entering units must attack the enemy air units. The other two entering units may join that attack, attack enemy ground units in that megahex, or - if they have sufficient movement left - enter another megahex. If a player moves a number of air units into a megahex smaller than the number of enemy air units in that megahex, all the entering air units must attack those enemy air units.
8.015 Air-Ground Combat. Ground units may never attack air units. Air units may always attack ground units (subject to the Compulsory Air Combat rule above) in the same megahex. When air units attack a given stack, they must include in that attack any enemy units in hexes adjacent to that stack unless some other unit is attacking those adjacent units. Enemy units in hexes adjacent to the adjacent hexes, and so on, do not have to be attacked.
8.016 Air-Ground Combat Example. Three separate combats are shown, illustrating different possibilities of air-ground combat. The stack of 3 Plunge units is supporting the attack of the two 3-unit PX counters (9-6 each) on the Gantua 12-6 counter. The Phlanx are charging, so their combat strength is doubled; they also get 1 point for each unit because they are attacking Gantuas. Thus, the attack strength is (9 x 2) + 3 = 21 for each of the two Phlanx counters, plus 6 for the 3 Plunge units, or a total attack strength of 48. The defending GN's combat strength is 12, so the attack is at 4 to 1 odds.
The second attack is the Low Render 6-3 on the Termagant 6-3. This is a 1 to 1 attack, since there are no adds for the attackers. The Plunges do not have to fight the enemy Termagants, even though they are next to the Gantuas the Plunges are actually attacking, because the Termagants are being attacked by the Low Renders.
The third attack is the lone Plunge unit at the top of the megahex, attacking the Worker adjacent to it. The Basic adjacent to the Worker is not under another attack, so it must be included. Thus, the attack strength is 2, and the defense strength is also 2; one for the Basic and one for the Worker. The second Worker, on the other side of the Basic, is not attacked, since it is not adjacent to the first Worker. (If the player with the Plunges had wanted to attack the Basic and both Workers all at once, he could have had the Plunges attack the Basic; since both Workers are adjacent to the Basic, they would have been included in the attack.)
8.02 Charge Attacks. Gantua and Phlanx units may make "charge attacks," as indicated by the C after their movement factor in the upper right-hand corner of the counter. The owning player has the option to declare a charge attack during the movement phase. Rules governing charge attacks are:
8.021 Movement Bonus. A unit which charges gets two extra movement points. It does not have to use all of its movement allowance to make a charge attack, but must attack at the end of movement in order to get the charge movement bonus.
8.022 Attack Strength Bonus. A unit which makes a charge attack has its strength doubled (BEFORE adds) for that attack.
8.023 Results. A unit which made a charge attack undergoes all combat results normally.
8.024 Disruption After Charge. Units which make a charge attack become disrupted after combat results are applied and advance-after-combat, if any, takes place.
8.025 Charging After Disruption Forbidden. A unit which began its movement phase disrupted may not make a charge attack during the attack phase. Thus, a unit may never make charge attacks in two successive turns.
8.026 Charge Attack Illustration. A Gantua 12-6 counter - 3 GT units - begins its movement in a megahex under command control. It is not disrupted. That counter may execute a "charge attack," with a movement allowance of up to 6 points: its normal move of 4 plus 2 extra for the charge. Its combat strength of 12 is doubled to 24 for that attack, before any class add or rear-attack add is made. The Gantua units do not lose any effect of the charge if they end movement in a megahex out of command control (see Section 8.03). They will not be able to make a charge attack again next turn, since they will be disrupted. If the enemy attacks them on his next turn, they will defend at the disrupted strength of 6.
8.03 Command Control. This rule simulates the telepathic command ability of the Basic units. Although the Basics are not fighters, they are needed to control the warriors.
8.031 Definition of Control. Units are in command control during a move if one of their Basics is in the megahex where they BEGIN that move.
8.032 Units requiring control. Ground warrior units require control. Fliers, Workers, and Basics do not.
8.033 Effects of Loss of Command Control. Any ground warrior unit which begins its movement in a megahex without a Basic in it is disrupted. It will be disrupted throughout that movement phase.
8.034 Control and Charge Attacks. Since units which began their move in a megahex without a Basic in it are disrupted, it follows that they cannot make a charge attack that turn. This will be true even if there is a Basic in their megahex by the end of the turn.
8.035 Moving Out Of Command Control. Units may freely move out of command control range, using their normal or charge movement, as long as they began movement in control range. They may attack or charge-attack normally at the end of their move. The disruption will take effect at the beginning of their next move if there is still no friendly Basic in their megahex.
8.04 Food Value of Dead Units. This rule takes into account the fact that dead units are edible - and that, in its search for food, a Hive will not overlook them.
8.041 Adding Bodies to Harvest Chits. A list should be made, at the beginning of each game, of the Harvest Chits being used and their values. Whenever a unit is killed, add 1 to the value of the nearest Harvest Chit in the megahex - if more than one are equally close, determine which by die roll. Thus, the more combat takes place over a chit, the more valuable it will become.
8.402 Starting New Harvest Chits. When a unit is killed and there is no Harvest Chit in the megahex, place one of the Harvest Chits without a number on the hex where that unit was killed, and add the letter of that chit to the list being kept. Thereafter, treat that Harvest Chit like any other Harvest Chit.
8.403 Limit to Chit Value. No Harvest Chit may be worth more than 30 points, that being the limit to the weight a Worker unit can carry. Instead of letting dead units increase a chit past 30 points, add new bodies to the next closest chit in the megahex or start a new chit in the same hex, adding all further bodies to it. Of course, a second Worker will be required to move the new chit.