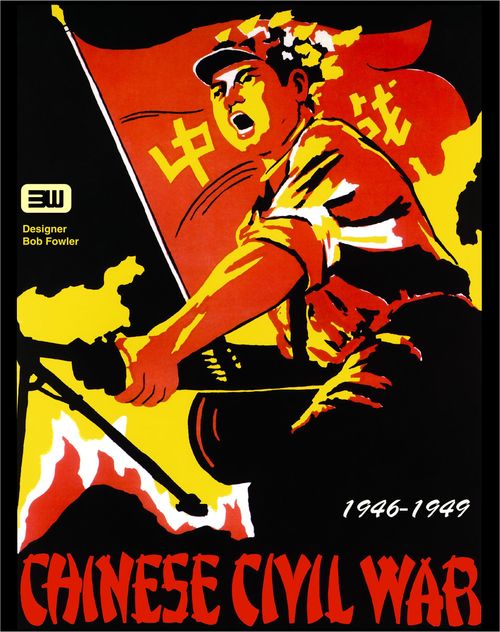
Chinese Civil War: 1946-1949
Chinese Civil War: 1946-1949 Rulebook
Table of Contents
Table of Contents
- 1.0 Introduction
- 2.0 Game Components
- 3.0 Setup
- 4.0 Sequence of Play
- 5.0 Game Length and Victory Conditions
- 6.0 Stacking
- 7.0 Zones of Control
- 8.0 Movement
- 9.0 PLA Base Areas
- 10.0 Fortresses
- 11.0 Supply
- 12.0 Supply Units
- 13.0 KMT War Zones and War Zone HQs
- 14.0 KMT Leader Units
- 15.0 PLA Guerillas
- 16.0 Combat
- 17.0 Retreats
- 18.0 Guerrilla Suppression
- 19.0 Replacements and Reinforcements
- 20.0 PLA Unconventional and Conventional Warfare
- 21.0 Optional Rules
- 22.0 Historical Notes
1.0 Introduction
A. Originally released in issue #10 of the Wargamer, Chinese Civil War is a simulation of the civil war that wracked China in the years 1946-49. It is a classic game of guerrilla warfare, in which a revolutionary army, supported by a steadily increasing proportion of the population, wrests power from an established government and its conventional forces. One side commands the Nationalist Kuomintang Army (KMT), the other the Communist People's Liberation Army (PLA).
B. The original map produced with the Wargamer edition was so attractive that we decided to retain it for this new edition of the game. Reproducing the map from a copy of the earlier one meant that crease marks are visible on the reproduction. We considered this a small price to pay for retaining the earlier graphics; we hope you agree.
2.0 Game Components
A. Each copy of Chinese Civil War includes the following:
- One 22" x 34" game map
- 200 die-cut counters
- One rule book
B. A six-sided die is also needed for play.
2.1 Game Map
The map represents the areas in which the major campaigns of the civil war took place. A hexagonal grid has been superimposed on the map to regulate movement and combat.
2.2 The Counters
PLA counters are printed in red, KMT counters in blue.
2.2.1 Kuomintang Units
- Leader Unit
- Supply Unit
- Infantry Unit
- Communications Police (CP)
- Fortress
- Air Transport
- Cavalry Unit
- Headquarters (HQ)
2.2.2 People's Liberation Army Units
- Infantry Unit
- Artillery Unit
- Guerilla
- Base Area Marker
2.3 Abbreviations
| Abbr | Explanation | Abbr | Explanation |
|---|---|---|---|
| CP | Communications Police | MP | Movement Point |
| CRT | Combat Results Table | TEC | Terrain Effects Chart |
| DRM | Die Roll Modifier | ZOC | Zone of Control |
| HQ | Headquarters |
3.0 Setup
Follow the steps below in order.
3.1 PLA Base Markers
The PLA side places 15 Base Area Markers in the designated hexes on the map (the Red Stars), one to each hex. Place the five remaining Base Markers to one side.
3.2 KMT Units
A. The KMT side assigns one leader to each HQ unit. A maximum of two +1 leaders may be assigned, in addition to Ma (Ningsia). Place the remaining leader counters to one side.
B. The KMT side sorts its units by War Zone, and deploys onto the map all its combat units, CP, War Zone HQs, assigned leaders, and supply units.
- Combat units and HQs must be set up in their appropriate War Zones.
- Supply units and CP may be set up in any War Zone.
- CP units must be placed on road or rail hexes.
- Each leader must be stacked with the HQ to which he has been assigned. Ma must be placed in Ningsia.
C. KMT units cannot set up in a PLA Base Area zone of control (7.3). However, where a KMT-controlled 4 or 5 point city is adjacent to a PLA Base Area Marker, the intrinsic defense factor of the city negates the Base Area ZOC in the city hex, even though no KMT units are present, thus KMT units may set up in such a city (Example: Taiyuan).
D. When setting up, do not confuse the counters which belong to the Nanking War Zone (with the word Nanking in full on the counters) with those belonging to Manchuria (with the abbreviation Man on the counters).
E. After deploying its units on the map, the KMT side places its aircraft, and fortress markers, and its remaining three leaders to one side.
3.3 PLA Combat Units
The PLA side has available at the start of the game, twenty-two 1-8 units, and two 2-10 units. Set these up adjacent to the Base Area Markers on the map, with at least one unit per Base Area Marker.
4.0 Sequence of Play
A. Chinese Civil War is played in game turns (referred to as "turns"), each representing approximately eight weeks of real time.
B. Each turn is divided into a KMT player-turn and a PLA player-turn. Player turns are further subdivided into phases. The KMT side moves first. The phasing side is the side whose player-turn it is. The other side is the non-phasing side.
C. Turns are played according to the following sequence.
4.1 KMT Player-Turn
4.1.1 Replacement Phase
The KMT side may bring into play any allowed replacements and any supply units.
4.1.2 Movement Phase
The KMT side may move its combat and supply units and place any air transport unit markers.
4.1.3 Combat Phase
A. The KMT side resolves any desired attacks per the Combat rules and performs any post-combat movement.
B. Guerrilla Suppression takes place during this phase.
4.2 PLA Player-Turn
4.2.1 Reinforcement/Replacement Phase
A. The PLA side may bring into play any allowed reinforcements and replacements.
B. New Base Areas may be created per the replacement rules (19.5.1).
4.2.2 Movement Phase
A. The PLA side may move its combat units and place guerrilla markers.
B. Guerrillas are placed at the end of this phase.
4.2.3 Combat Phase
The PLA side resolves any desired attacks per the Combat rules and performs any post-combat movement allowed.
5.0 Game Length and Victory Conditions
A. Chinese Civil War consists of 16 turns, representing the period from July 1946 to March 1949.
B. Various cities and towns on the map have a point value associated with them as shown in the city or town symbol.
C. A side controls a town or city by occupying it or by being the last to have occupied or passed through it.
D. At the end of the last turn of the game, each side identifies the towns and cities it controls and totals the associated points.
E. At the start, the PLA side controls Tsitsihar, Harbin, Chifeng, Kalgan, and Yenan (17 points), while the KMT side controls all other cities (70 points).
F. Refer to the Victory Conditions Table for the required points for each level of victory.
6.0 Stacking
When more than one unit occupies a single hex, such units are said to be stacked.
6.1 KMT Stacking
A. The KMT side may normally stack two combat units together, except in fortresses where four may be stacked.
B. KMT HQs, leaders, and supply units may stack freely. They do not count toward stacking limits.
C. This rule is modified by the rules for units in War Zones other than their own (13.2.B).
6.2 PLA Stacking
The PLA stacking limit varies as the game progresses, and depends on the mode of Warfare being used (20.0).
A. Unconventional Warfare: two units may stack.
B. Conventional Warfare: three units may stack.
7.0 Zones of Control
Each combat unit has a zone of control (ZOC) that extends into the six adjacent hexes to the unit and includes the hex that the unit occupies.
7.1 KMT Units
KMT units cannot move directly from one enemy ZOC to another, not even if the second hex is occupied by another KMT unit.
7.2 PLA Units
A. PLA units cannot move directly from one enemy ZOC to another if they are in the Conventional Warfare mode.
B. When using Unconventional Warfare (20.2) PLA units may move directly from one enemy ZOC to another, stopping in the first ZOC they enter.
7.3 PLA Base Area ZOCs
A. These include the hex that the Base Area Marker is in, and the adjacent six hexes.
B. KMT combat units may not enter Base Area hexes (9.2) without combat first occurring.
C. KMT units adjacent to PLA Base Area hexes do exert ZOCs into those hexes.
7.4 KMT Communication Police
The ZOCs of these units extends only into the adjacent hexes through which a railroad line or road passes.
7.5 Rivers
ZOCs do not extend across water (all-blue hexsides).
7.6 KMT-Occupied Hexes
When tracing KMT supply routes or moving units along a railroad by rail movement, KMT units may ignore PLA ZOCs in hexes occupied by a KMT unit.
7.7 Retreats
A. PLA units can retreat through a hex containing a KMT unit in special circumstances (17.1.2.2).
B. KMT units may retreat into a hex in an enemy ZOC only if that hex is occupied by a friendly unit.
8.0 Movement
8.1 In General
A. During the Movement Phase, the phasing side may move as many of its units as desired.
B. Units may move in any direction or combination of directions up to the limit of their movement factors.
C. A unit can move into a hex only if it has sufficient movement points (MPs) to pay the cost of moving into that hex (see TEC).
D. PLA units may never enter a hex containing a KMT unit (Exception: 17.3).
8.2 KMT Interaction with PLA Guerilla Units
A. KMT units may enter a hex containing a PLA guerrilla unit, and may end their turn stacked with PLA guerrilla units.
B. A PLA guerrilla unit does not count towards KMT stacking limits.
8.3 Restrictions
A. KMT units may not enter a hex containing a regular PLA combat unit.
B. PLA guerrilla units may not enter a hex containing a KMT combat unit, police unit, or city of point value 3, 4 or 5.
C. KMT units cannot enter a ZOC of a PLA Base Area except as a result of combat (9.0).
D. KMT and PLA units may not normally enter any hexes in Mongolia and Korea. Exception: PLA units may retreat after combat into Mongolia and Korea, with restrictions on their movement (8.8.B, 17.7).
8.4 KMT Rail Movement
The KMT side may move units by rail each turn.
8.4.1 Limits
A. The limit is 9 rail load factors.
B. Supply units cost 2 load factors.
C. All other units (including police and HQs) cost 1 load factor each.
8.4.2 Restrictions
Units using rail movement cannot pass through:
A. PLA Base Area ZOCs,
B. Hexes containing an enemy combat unit,
C. Hexes in an enemy ZOC, unless occupied by another KMT unit.
8.4.3 Moving by Rail
A. KMT units may move an unlimited distance by rail at a cost of 1 MP for any distance travelled.
B. Rail movement may be blocked by guerrilla units (15.0).
C. Rail movement can be combined with other forms of movement in a turn. It is possible for a single unit to move twice by rail in the course of a single turn. A single unit moving in this way counts as 2 railroad factors.
Example: A unit might move seven hexes by rail (1 MP), then move around a blocking enemy combat or guerilla unit (4 MPs), then again by rail (1 MP).
8.5 KMT Sea Movement
The KMT side may move units by sea each turn.
8.5.1 Limits
The limit is 4 sea load factors. Supply units cost 2 sea load factors. All other units (including police and HQs) cost 1 sea load factor each.
8.5.2 Moving by Sea
A. KMT units may move an unlimited distance by sea between any two ports, as long as neither is PLA-controlled. (Ports are indicated by an anchor sign.)
B. Units pay 1 MP for any distance travelled.
C. Sea movement can be combined with other forms of movement.
8.6 KMT Air Supply Movement
A. The KMT side can use aircraft to move supply units between any two cities having point values of 3-5 (12.0).
B. Air units are not destroyed if the city they are in is captured by PLA units; they are simply removed from the map, and become available for reuse again in the next KMT-player turn.
C. Upon removal from the map, the general supply they had been providing disappears.
8.7 Lake Hexsides
A. No units may move across all-blue hexes of inland lakes.
B. There are two impassable lake hexsides east of Changchun; two north west of Suchow; one in each of the lakes immediately northwest of Nanking; and two in the lake north of Hankow.
C. The impassable lake hexsides in the major lakes in the Nanking War Zone are as illustrated in the diagram below.
D. There is also one impassable hexside in the small lake to the east of these major lakes.
8.8 Partial Hexes
A. Partial hexes are playable no matter how small they are.
B. A retreat into Mongolia by a PLA unit takes it off the hex grid altogether. The unit then remains in place. Upon reentering the map, it must do so by an adjacent hex.
8.9 Combined Movement
KMT units may use land, sea, and rail movement in a single turn. The use of sea and rail movement reduces the respective load factor each time a unit uses that form of movement.
8.10 Restrictions on CP
A. Even when using regular movement, CP units may only move along roads or railroads.
B. They may only retreat into such hexes; if required to retreat. If no road or rail hex is available into which they can retreat, they are instead eliminated.
9.0 PLA Base Areas
A. PLA Base Areas are indicated by placing a Base Area Marker in any allowed hex.
B. The Base Area consists of that hex and the six surrounding adjacent hexes (7.3).
C. Base Area markers cannot be moved from one hex to another.
9.1 Intrinsic Defense
A. Each Base Area hex has an intrinsic defense strength of 1 combat factor. This strength is added to that of any regular combat unit in the hex.
B. Intrinsic defense is negated when a KMT combat unit is in the same hex as the Base Area Marker.
C. A Base Area hex can never have an intrinsic defense factor or more than 1, even if areas overlap from two or more Base Area Markers.
D. Terrain effects do not modify intrinsic defense. Terrain effects apply as normal if (and only if) a regular PLA combat unit is also located in the same hex. In this case the intrinsic defense strength is also affected.
E. As long as the Base Area marker exists, adjacent Base Area hexes do not have their intrinsic defense factor destroyed by KMT units advancing. The intrinsic defense factor is negated only when a KMT unit occupies a Base Area hex. It reappears if the KMT unit leaves that hex and is not replaced by another KMT unit in the same turn.
9.2 KMT Entry into Base Area Hex
A. To enter a Base Area hex, a KMT combat unit must attack the hex, defended by the intrinsic defense factor (plus any PLA combat units present).
B. A KMT combat unit can enter a Base Area hex only as a result of advancing after combat.
9.3 Elimination of Base Area Markers
A. A Base Area is eliminated only if the hex containing the Base Area Marker is attacked by KMT units which achieve a DE, DR, or EX result.
B. All Base Area hexes associated with a Base Area marker are destroyed, along with their intrinsic defense factors, when the Base Area marker is destroyed.
C. Eliminated Base Area markers become available as replacements and can be brought back into play in subsequent turns per the replacements rules (19.0).
9.4 Use for Reinforcement/Replacement Entry
A. Place PLA replacements and reinforcements on Base Area Markers that have been on the map prior to the current turn.
B. No more than one replacement combat unit and one reinforcement combat unit can be placed on a single Base Area marker in a turn (see 19.0).
10.0 Fortresses
A. Only the KMT side may use fortresses.
B. Fortresses modify the combat factors of defending KMT units in the fortress hex and allow a different stacking limit.
10.1 At-Start Fortresses
Certain cities have fortresses at the start of the game: Peking, Tienstsin, Taiyuan, Tsinan, and Shanghai.
10.2 Defensive Benefit
A. One defense factor is added to each KMT combat unit, but not to leader or CP units in the fortress hex.
B. There is no change to attack strength.
C. KMT units in a fortress do not have to retreat when called to do so as a result of combat, either in defense or when attacking (DR or AR result).
10.3 Fortress Stacking
Up to a total of four KMT combat units and/or CP units may stack in a fortress hex, irrespective of their original War Zone.
10.4 Fortress Effect on PLA ZOCs
PLA ZOCs areas are negated in any hex in which a fortress is located, even if the fortress is unoccupied.
10.5 Construction
A. Fortresses may be constructed at the end of the Movement Phase.
B. To do so, a supply counter must be located in the hex in which the fortress is to be built at the time of construction. Remove the supply counter from the map and replace it with a fortress counter.
C. Once built, fortresses cannot be moved.
10.6 Supply
A. Fortresses can be isolated in the same way as combat units (11.3).
B. Units in a fortress are subject to all normal supply rules.
10.7 Elimination
Unoccupied Fortresses are destroyed any time a PLA unit moves into their hexes. Once destroyed, fortresses may be constructed again by the KMT side, if desired.
10.8 Limits on Units in Fortresses
A. All units within a fortress may defend against attack.
B. When attacking out of a fortress hex, KMT units are subject to all normal rules for War Zones and combat. That is, no more than two units may attack, and these must be related to the same HQ which must also be in the same geographic War Zone as the fortress. Otherwise only one unit may attack.
11.0 Supply
11.1 In General
A. To be in supply, a unit must be able to trace a supply route to a supply source.
B. A supply route is a line of hexes of any length free of enemy units or their ZOCs. Friendly units negate enemy ZOCs for purposes of tracing supply routes or attack supply distance.
C. Supply routes can pass through desert hexes only along rail lines or roads. The desert hexes on the map are only in the Ningsia, Shansi, and Peking War Zones.
D. The PLA side cannot trace a supply route via sea.
E. PLA Base Areas block KMT supply.
11.2 Supply Sources
11.2.1 PLA Supply Sources
PLA supply sources are any Base Area hex a supply line can reach.
11.2.2 KMT Supply Sources
KMT Supply Sources are:
A. Any hex on the south edge of the map.
B. Any city hex with an aircraft unit on it (11.2.3).
C. Any KMT controlled port hex to which a route can be traced.
11.2.3 KMT Air Supply
A. A supply source can be created by means of an aircraft unit. Place an aircraft unit on any city having a 3-5 point value to which the otherwise isolated units can trace an open line of hexes.
B. This city then acts as a supply source for that turn only.
C. The KMT side must expend one supply unit per turn for each air unit used this way.
11.3 Isolation
A. Units which do not have a supply route to a supply source are isolated.
B. When isolated, units can defend at full strength, and move normally, but are automatically eliminated after two complete player-turns in this state.
C. The player-turn in which isolation occurs does not count toward this limit.
Example: A unit that became isolated during the KMT player-turn is eliminated at the end of the next KMT player-turn if a supply is not reestablished.
11.4 Attack Supply
Attack-supply is judged at the moment of attack.
11.4.1 KMT Units
A. In order to attack, KMT units must be within two hexes of a supply unit, unobstructed by PLA ZOCs.
B. PLA ZOCs are negated for this purpose by the presence of KMT units.
C. One supply unit may create attack supply for as many attacks as are within two hexes. Only units in attack supply may attack enemy combat units.
D. When the KMT side attacks, remove the related supply unit from the map. The expended unit returns to play on the following KMT Reinforcement/Replacement Phase.
E. A KMT unit can be isolated and still be in attack supply.
11.4.2 PLA Units
PLA units are always in attack supply, even if isolated.
12.0 Supply Units
12.1 In General
A. The KMT side uses supply units to create attack-supply. Supply units are expended and removed from the board whenever attacks are made by the KMT side (i.e., when all attacks supplied by the unit have been made).
B. Expended supply units return to play by placing them on any hex on the south edge of the board, or in Shanghai in the Reinforcement I Replacement Phase of the KMT player turn.
C. Supply units move according to the same rules as combat units.
12.2 Movement by Air
A. Supply units can also be moved by air units, at a cost of 1 MP for the air portion of the move.
B. To move by air, place an aircraft unit on the city receiving the supply unit (the destination city).
C. Supply units can be transported by air only from and to cities having point values of 3-5.
D. The use of an aircraft unit in this manner requires the expenditure of a second supply unit per air transport unit used per turn. Thus it essentially costs two supply units to provide supply by air.
E. A supply unit can combine land movement and air movement in a turn so long as it has sufficient MPs.
Example 1: An air unit is placed in Peking (value 5), which has become isolated. The air unit then acts as a source of general supply for KMT units which can trace a supply route to it. It cannot, however, provide attack supply. The KMT must remove one supply unit from anywhere on the map to use of the air unit in this way.
Example 2: A supply unit is placed in Shanghai (value 4) in the KMT Reinforcement and Replacement Phase. It is transported by air to the city of Yenan (value 3). The aircraft unit in Yenan and acts as a source of general supply. The supply unit may act as a source of attack supply. It has expended 1 MP in being transported by air, so has 5 MPs remaining. The KMT side must remove two supply units from elsewhere on the map (one to pay for the use of the aircraft unit as a general supply source, the other to pay for the transporting of a supply unit by air). This demonstrates that the airlift of supplies is an expensive business that ties up valuable resources.
12.3 Destruction
A. Supply units not stacked with a KMT combat unit or HQ are automatically destroyed when in a PLA ZOC.
B. Such destroyed supply units may be returned to play the next turn in the normal way.
12.4 Ningsia Supply Unit
A. One supply unit must be set up in Ningsia.
B. It can be used one time to provide attack-supply to combat units only in Ningsia (not outside the city).
C. Once used, this unit is permanently eliminated. (It may no longer be brought back into play.)
13.0 KMT War Zones and War Zone HQs
13.1 In General
A. KMT forces are assigned initially to geographic War Zones. These combat forces are always assumed to be under the command of their related War Zone HQ.
B. Each War Zone HQ also has a leader counter assigned to it.
C. The War Zones are:
| Zone Title | Geographic Area |
|---|---|
| Manchuria | Manchuria |
| Shansi | Shansi-Shensi |
| Peking | Hopeh-Chahar-Jehol |
| Honan | Shantung-Honah-Honan |
| Yangtze | Kiangsu-Anhwei-Honan |
| Chungking | Shensi-Hupeh-Kansu-Honan |
| Szechwan | Szechwan |
| Nanking | South of the Yantze River |
| Ningsia | Ningsia |
13.2 Inter-Zone Movement
A. Combat units may be moved into War Zones other than the one to which they are initially assigned.
B. Combat units that have moved to other zones without their associated HQ unit cannot stack, even with units with the same War Zone designation. Exception: War Zone restrictions do not apply in fortresses.
C. When units of a particular War Zone make attacks while located in a different geographical War Zone than their HQ, they must use the die roll without any DRM for leadership factors. (Exception: 13.4.)
13.3 Multi-Zone Attacks
KMT combat units physically located in different War Zones cannot combine combat factors together in making an attack, no matter which War Zone headquarters they are associated with.
Example: The diagram at the right has a thick green line between two war zones. KMT units A and B cannot combine to attack C. A or B may attack, but not both.
13.4 Zone Abandonment
A. The KMT side may choose to abandon a War Zone completely. It can do this only if there is a PLA combat unit (not guerrilla) or Base Area in the War Zone being abandoned.
B. The combat units which have abandoned that war zone may now combine attacks with other provincial units and use applicable leadership values, but they may not stack with units from other War Zones, nor may they receive reinforcements until their respective HQ returns to its home province.
13.5 Headquarters
A. HQ units normally have no defense value and are eliminated if the KMT combat units they are stacked with are eliminated as a result of PLA attack.
B. If an HQ is not stacked with a KMT combat unit, it has an intrinsic defense factor of 1, and is eliminated only if due to a combat result after combat with the PLA side.
C. Eliminated HQs can be brought back into play two turns later.
D. In the intervening turn, no units of that War Zone may combine their strength for attack or for defense. Attacks made by single units follow the rules for combat and use of the Combat Results Table (CRT) for a leadership value of 0.
13.6 Replacements
Replacements for a particular War Zone designation can be brought on to the map at their respective War Zone HQ (19.0).
13.7 Combined Attacks
A. When two different HQs are in the same geographic War Zone, their related combat units may combine factors when attacking from different hexes, but still may not stack together.
B. The leader with the lower leadership value is used to modify the combat die roll.
13.8 HQ Retreats
War Zone HQs can be forced to retreat into another War Zone as a result of retreating after combat. In this case, the effects of War Zone restrictions stated above are postponed until the next turn, thus KMT units may defend and stack as they normally would for the remainder of that player-turn.
13.9 Ningsia/Shansi
A. If the War Zone HQ for Ningsia or for Shansi leave its original War Zone, no replacements for the respective zone may be brought back from the previously eliminated units.
B. Similarly, if the Peking HQ leaves its original War Zone, the Militia units (1M, 2M, 3M) cannot be brought back as replacements.
C. These restrictions are lifted if the respective HQs reenter their War Zones.
13.10 Police Units
Police units are not related to any War Zone; therefore no restrictions apply; police units may stack with any combat unit.
14.0 KMT Leader Units
14.1 Leader Assignment
A. At the start of the game, the KMT side assigns a leader to each War Zone HQ.
B. Leader units can be assigned to any HQ the KMT side wishes.
C. Leader units are considered always to be associated with the HQ unit they are assigned to.
14.2 Elimination
If an HQ unit is eliminated, the particular leader is also eliminated and cannot be brought back into play. Some extra leader units are supplied with the game. These can be used as replacements for destroyed leader units.
14.3 Combat Effect
Leaders affect the manner in which the KMT side uses the CRT to attack. Leader units with a leadership value of 1 apply a +1 DRM whenever combat units of that War Zone make an attack in the same War Zone as their related HQ.
14.4 Changing Leaders
A. The KMT side can change leaders as desired on turns 4 and 10. Otherwise, no leaders may change their War Zone Assignment.
B. New leaders can only be brought on to replace destroyed leaders. Such replacements have a zero leadership value.
15.0 PLA Guerillas
Guerrilla units are used by the PLA side to disrupt railroad traffic.
15.1 Placement
A. Place guerrilla units during the PLA Movement Phase on any rail hex within three hexes of the nearest PLA combat unit or Base Area zone, outside of KMT ZOCs.
B. Only one guerrilla unit per hex is allowed.
C. Guerrilla units may not be placed in hexes containing a KMT-controlled town or city with a point value of greater than one.
15.2 Rail Movement Effects
A. The effect of the guerrilla unit on the rail line is resolved in each KMT Movement Phase when the first KMT unit using rail movement moves adjacent to the guerrilla unit.
B. The PLA side rolls one die.
- On a 1-4, the guerrilla unit is considered to be effective in blocking all rail movement.
- On a 5-6, the guerrilla unit is ineffective, and rail movement may be used normally.
C. In both cases, the guerrilla unit remains in position, and the die may be rolled by the PLA side on subsequent turns.
D. The only way a guerrilla unit may be removed is by the choice of the PLA side, or by successful Guerrilla Suppression Action by the KMT side (18.0).
15.3 Land Movement Unaffected
Irrespective of a guerrilla unit's effectiveness, the KMT side may move units using normal land movement rates through a hex containing a guerrilla unit and may also end the Movement Phase in the same hex.
15.4 No ZOC
Guerrilla units do not have a ZOC, and therefore cannot be used to isolate KMT units.
15.5 Relocation
A. Guerrilla units which have not previously been placed on the map, or which have been suppressed and removed, can be placed on the map during the PLA Movement Phase.
B. Guerrilla units already on the map may also be relocated at this time; the PLA side simply picks them up and places them elsewhere per 15.1.
16.0 Combat
A. Combat occurs between opposing adjacent units during the Combat Phase at the option of the phasing side.
- Attacks are voluntary; units are never compelled to attack, and not every friendly unit capable of attacking an enemy unit need participate in an attack if one is made.
- Only one defending hex can be the subject of a single attack.
- No defending unit may be attacked more than once in a player turn.
B. A single attack may be made by units stacked in several hexes if all attackers are all adjacent to the defending hex.
16.1 Intrinsic Defense
A. Some units other than combat units have defense combat factors under specific conditions:
B. Unoccupied PLA Base Area hexes have an intrinsic defense value of 1. This value is added to any PLA combat unit(s) defending in the hex.
C. KMT cities with point values of 3-5 have an intrinsic value of 1 if the KMT side was the last to pass through it. This value does not apply if any regular KMT combat unit occupies the city, including CP.
D. KMT HQ units have an intrinsic value of 1 when not stacked with KMT combat units.
E. PLA guerrilla units have no intrinsic defense value.
16.2 Attack Supply
A. KMT units must be in attack-supply to be able to attack (11.4.1).
B. PLA units are always in attack-supply.
16.3 Combat Procedure
16.3.1 Attack Designation
The phasing side declares which units are attacking and designates the defender's hex.
16.3.2 Attack Strength
A. Total the combat factors of the attacking units.
B. KMT units cannot be combined in attack if their War Zone HQ is eliminated.
C. Total the combat factors of the defending units. Adjust the total for terrain effects.
16.3.2 Defense Strength
(Printed with the same number as the preceding section in the source.)
A. All PLA units defending a hex must be attacked as a single combined defending force.
B. All defending KMT units of the same War Zone must be attacked as a single combined defense factor, unless their War Zone HQ has been eliminated. In that case, they can be attacked individually.
C. All KMT units in a fortress defend as a single combined force, irrespective of HQ and War Zone status.
16.3.3 Odds Ratio
Calculate the ratio of attack strength to defense strength, then reduce it to the odds in the CRT by dropping any fractions in favor of the defender.
Example: 3.5 to 1 becomes 3 to 1.
16.3.4 KMT Leader Defection
If the KMT is attacking, roll first to determine if any senior KMT officers defect. On a 6, the attack is aborted due to a defection.
16.3.5 Die Roll Modifiers
A. Apply a +1 DRM when KMT units attack in the same War Zone as their HQ, and have a leader with a +1 value.
B. Apply a -1 DRM when PLA units attack in Unconventional Warfare mode.
16.3.6 Combat Result Determination
A. For each attack, roll a die, cross-referencing the result with the appropriate CRT. Separate CRTs are used for PLA and KMT attacks.
B. Refer to the CRT to obtain the combat result, implementing it immediately.
16.3.7 Advance After Combat
A. If the hex under attack is completely vacated by the defenders through retreat or elimination, the attacking units may advance after combat, moving into the vacated hex.
B. HQs, leaders, and supply units may also advance after combat. Regular stacking limits apply.
C. If PLA units exercise the option to retreat two hexes, KMT attackers may advance only one hex.
D. The defender may not advance after combat.
16.3.8 KMT Police Units
KMT CP units may participate in combat, subject to all normal rules for stacking and ZOCs. Because they are not associated with any War Zone, they may stack, but they have no ZOCs themselves.
16.4 Seaborne Attacks
A. Amphibious assaults are not possible. KMT units using sea movement must first disembark at a port unoccupied by PLA units before they can have combat.
B. KMT units may not attack directly from the sea.
C. KMT units may not land on a non-port hex.
16.5 Lakes
Attacks may not be made across all-blue lake hexsides.
16.6 PLA Artillery
A. PLA artillery cannot attack in two consecutive turns. When a PLA artillery unit attacks, it must be inverted. Inverted artillery units can move and defend normally.
B. At the end of the subsequent player-turn, return it to its face up side.
Player's Note: This will require the PLA side to keep track of which units attacked each turn so that the correct ones are inverted.
Example: A PLA artillery unit attacks in the Turn 4 PLA player-turn. Invert it at the end of the Turn 4 PLA player-turn. It will defend normally if attacked in the Turn 5 KMT player-turn, and may move normally in the Turn 5 PLA player-turn. Turn it face up at the end of the Turn 5 PLA player-turn. It may attack again in Turn 6.
16.7 Combat Results
The following results can be obtained on the CRT.
| Result | Explanation | Result | Explanation |
|---|---|---|---|
| AE | Attacker Eliminated | DR | Defender Retreat |
| ½ AE | One-Half Attacker Eliminated | DE | Defender Eliminated |
| AR | Attacker Retreats | DS | Defender Surrenders |
| EX | Exchange | NE | No Effect |
| ½ EX | Partial Exchange |
17.0 Retreats
17.1 In General
Each side normally retreats all affected units one hex away from the opposing units. The owning side retreats its own units, including any HQs or supply units.
17.1.1 Displacement
Retreating units can displace friendly units which are not in an enemy ZOC by moving any adjacent units back one hex. Such displacement cannot occur if there are alternate hexes into which the unit can retreat, or if the unit to be displaced is in an enemy ZOC.
17.1.2 Prohibitions
Units may not normally retreat in violation of stacking limits, into the sea, nor into an enemy ZOC which does not also have a friendly unit in it.
17.1.2.1 KMT Units
If a KMT unit cannot retreat without violating these conditions, it is eliminated.
17.1.2.2 PLA Units
A. A PLA unit which can retreat only into a hex with a KMT unit or ZOC, may choose to retreat two hexes, subject to 17.1.2 when retreating to the second hex.
B. This is an exception for the normal rule for movement since the PLA side, in retreating two hexes, is allowed to move over KMT units occupying adjacent hexes or through an adjacent KMT ZOC.
17.2 Lake Hexsides
Retreats cannot be made across all-blue lake hexsides.
17.3 Subsequent Combat
KMT and PLA units which retreat onto other friendly units without violating stacking limits do not add their strength to that hex if it is subsequently attacked. However, results of any such subsequent attack apply to all units located in the hex being attacked.
17.4 KMT Retreat into Different War Zone
A KMT unit can be retreated onto a friendly unit of another War Zone, but must move off in the next Movement Phase or it is automatically eliminated.
17.5 Retreat into Mongolia or Korea
A. KMT units forced to retreat into Mongolia or Korea are eliminated.
B. PLA units may retreat into Mongolia or Korea, but cannot move into any other hexes in these territories.
- Such PLA units may trace supply routes through Mongolian or Korean hexes.
- They may not be attacked by KMT units when in Mongolia or Korea.
- PLA units may not attack when they are in Mongolia or Korea.
18.0 Guerrilla Suppression
A. Guerrilla suppression takes place during the KMT Combat Phase. It is carried out by placing one or more CP and/or combat units onto or adjacent to a guerrilla unit.
- For purposes of guerrilla suppression, a CP unit is considered to have a suppression factor of one-half.
- Combat units are considered to have a suppression factor equal to their combat factor.
B. KMT units which attack regular PLA combat units in that turn cannot carry out guerrilla suppression as well.
18.1 Supply Not Required
Neither attack supply nor general supply is required to carry out Guerrilla Suppression. That is, isolated units can carry out Guerrilla Suppression, and no supply units are expended regardless.
18.2 Procedure
A. To resolve the action, the following procedure is used for each guerrilla unit:
B. Sum the suppression values of all KMT units on or adjacent to the guerrilla unit (KMT units adjacent to more than one guerrilla unit may use their full suppression value against each guerrilla unit).
C. Roll the die and reference the Guerrilla Suppression Table. Apply the result immediately. KMT units do not move during or after this action even if the guerrilla unit is removed.
D. The KMT side does not roll for senior leader defection (16.3.4) before attempting Guerrilla Suppression.
19.0 Replacements and Reinforcements
A. During the Reinforcement/Replacements Phase, the phasing side receives additional units either as replacements and/or reinforcements.
B. Replacements are units previously destroyed in combat, eligible to be brought back into play.
C. Reinforcements are units which have not previously been in play.
D. Keep reinforcements (unused units) and potential replacements (eliminated units) separate.
19.1 KMT Replacements
A. The KMT side may bring back units totaling up to six attack factors per turn. CP units are considered to have one-half attack factor for this purpose.
B. Combat units may be taken back onto the map at their War Zone HQ or at any friendly inland city or town in the same War Zone as their HQ.
C. CP units can be taken back at any friendly city or town.
D. The fourth +1 KMT leader becomes available on Turn 4.
E. KMT replacements can be brought back at locations which are not in general supply (i.e., isolated). They can even be placed with a city or War Zone HQ that is completely surrounded by PLA units, though in practice this will seldom occur.
F. Stacking limits may be exceeded when placing replacements in already occupied hexes, as long as units are moved off in the immediately following Movement Phase so as to satisfy the limit.
19.2 PLA Replacements and Reinforcements
A. The PLA side may bring onto the map units totaling a varying amount of combat factors:
| Turns | Combat Factors |
|---|---|
| 1-5 | 5 |
| 6-11 | 6 |
| 12+ | 8 |
B. The total includes both units recovered from the pile of previously destroyed units (replacements), unallocated 1-8 units (reinforcements), and new 2-10 units (reinforcements).
C. No more than half the defense factors brought on each turn can be 2-10 units.
D. At least three of the total combat factors must be taken in the Northeast War Zone (Manchuria). If the Manchurian War Zone is lost by the PLA (all cities are held by the KMT, and all PLA Base Markers in the War Zone have been eliminated), these PLA combat factors are lost for that turn, thus three factors must be subtracted from the replacement/reinforcement rate given above.
E. Replacements and reinforcements are brought on at Base Area markers, with a maximum of two units allowed per marker.
F. Stacking limits may be exceeded when placing reinforcements and replacements on the map in already occupied hexes, as long as units are moved off in the immediately following Movement Phase so as to satisfy the limit.
19.3 Replacements Not Accumulated
Replacement combat factors for both sides that are not taken in any turn cannot be accumulated.
19.4 Special PLA Reinforcements
19.4.1 Bonus PLA Units for City Capture
A. The PLA side receives a 2-10 combat unit immediately upon capture of any 4 or 5 point value city when advancing onto it after combat. This only occurs the first time a specific city is captured.
B. The new unit is placed in the city. Any resulting violation of stacking limits must be ended by the end of the PLA side's next Movement Phase.
C. PLA units obtained in this manner cannot participate in any attacks during that Combat Phase.
19.4.2 Turn 10 Artillery
A. On Turn 10, the PLA side also receives two 4-1-6 artillery units, placed on any Base Area marker, one artillery unit allowed per marker. These are subject to the restrictions in 19.4.1.
B. PLA artillery units, once eliminated, cannot be returned as replacements.
19.5 Additional Base Area Markers
19.5.1 Regular Reinforcements
A. On Turns 4, 8, and 12, the PLA side receives new Base Area Markers.
B. The turn the new Base Area is set up, its zones have their intrinsic defense factors, but no combat unit replacements or reinforcements can be taken there until the following turn.
C. Base Area markers placed on the map (other than on Turn 1) must normally be placed in a hex in which there is already an in-supply PLA combat unit or its ZOC.
19.5.2 Bases Received for Garrison Violations
A. The garrison requirement is the minimum number of KMT police or combat units required for each zone.
| War Zone | Garrison Req |
|---|---|
| Ningsia* | 0 |
| Chungking* | 0 |
| All Other | 3 |
* Additional PLA Base Areas never become available due to KMT garrison falling below the required amount.
B. New Base Area markers need not be placed on the board on their turn of availability, but can be placed on any subsequent turn.
C. The Base Area marker may be placed anywhere in that War Zone.
D. A Base Area marker becomes available on the first PLA player-turn that a garrison limit is violated by the KMT side.
E. This Base Area marker is in addition to those received as normal replacements.
19.5.3 Replacement Base Area Markers
Eliminated PLA Base Area Markers become available as replacements on the turn following their elimination. Place them on the Turn Record Track, one turn ahead of the turn in which they are eliminated.
19.6 KMT Leader Replacements and Reinforcements
A. The KMT side may replace eliminated leaders with a 0 value as long as these are available.
B. All leaders become available on Turn 4, and may be replace any leaders presently assigned to HQs.
C. Leaders may be reassigned to War Zone Headquarters again on Turn 10.
19.7 Ningsia and Shansi Requirements
A. If the War Zone HQ for Ningsia or Shansi leaves its original War Zone, no replacements may be brought back on for the respective War Zone.
B. This restriction is lifted if the HQ returns to its zone.
19.8 Placement in Enemy ZOCs
Both KMT and PLA reinforcements (including Base Area Markers) and replacements may be placed on the map in enemy ZOCs.
20.0 PLA Unconventional and Conventional Warfare
20.1 In General
A. The PLA side uses two different warfare modes (doctrines) at different times in the game. At the start of the game, it uses Unconventional Warfare.
B. Beginning on Turn 7, it may choose to use Conventional Warfare. Once this choice is made, all PLA units on the board must use this doctrine and may not use Unconventional Warfare again.
C. On Turn 12, the PLA side must begin using Conventional Warfare if not yet chosen to do so.
D. These warfare Modes affect stacking, movement in KMT ZOCs, and the use of the CRT for the PLA.
20.2 Unconventional Warfare
A. The PLA can stack only two units per hex.
B. PLA units can move directly from one KMT ZOC to another, but must stop in the first new ZOC entered.
C. The PLA side resolves combat using the standard CRT, but applies a -1 DRM when referencing the CRT. Die values of less than 1 are treated as a 1.
20.3 Conventional Warfare
A. The PLA can stack three units per hex.
B. PLA units cannot move directly from one enemy ZOC to another. They must first exit the ZOC they are in, going to a hex not in an enemy ZOC.
C. No DRMs are applied to the CRT.
21.0 Optional Rules
To adjust play balance, say between unequal players, the following rules modifications are suggested.
21.1 PLA Side
A. Drop the stacking restriction during unconventional warfare.
B. Do not subtract 1 from the die roll when attacking during the Unconventional Warfare Phase.
21.2 KMT Side
A. KMT units can move direct from one PLA ZOC to another, provided the latter is negated by another KMT unit being in the hex.
B. Only the hex a PLA base occupies blocks KMT supply.
22.0 Historical Notes
The Kuomintang Army
The Kuomintang (KMT) armies can be classified into three groups:
- The Central Army (Chung-yangchun) under the direct authority of Chiang Kai-shek.
Most of the officers were graduates of the Whampoa Military Academy or Central Military Academies. The officers and men were regularly paid and received priorities in terms of supplies and equipment having most of the armor and artillery. The elite of this group comprised the 39 divisions trained and equipped by the US during the war with Japan.
- Provincial troops raised from the outlying provinces.
Officers were not from the higher social classes and many were political appointees. Corruption was rife, morale was low and equipment poor.
- Allied troops of the provincial warlords.
The most significant of these were the troops of Yen Hsi-shan in Shansi and the Muslim cavalry of Ma Pu-fang in Tsinghai and Ma Hung-k'uei in Ningsia.
The basic tactical unit was the division having a standard paper organization of about 10,000 men, although the actual strength was closer to 5,000. Three divisions usually made up a corps, the basic strategic unit. In June 1946, the KMT had a total strength of 248 divisions of which 193 were employed against the PLA.
Some confusion in the records results from a reorganization of KMT units south of the Yellow River starting in May 1946. What had been corps became reorganized divisions, and former divisions became brigades, each with three (sometimes only two) regiments. This reorganization was carried out in stages, so that part of the forces north of the Yellow River were reorganized. When using "reorganized divisions," an army of three divisions was roughly the equivalent of a US corps in infantry strength and of a US division in artillery strength. A KMT "Group Army" consisted of a variable number of armies which could vary from the approximate strength of a large US corps to a US field army.
Total combat troops numbered about 2,000,000 men, while others in special arms, communications police and peace preservation corps numbered about 1,200,000. Noncombatants in "rear" areas numbered about another 1,000,000.
People's Liberation Army
The People's Liberation Army (PLA) forces were formally divided into three significant groups:
- Regular Forces.
Regular forces were the main mobile forces coming directly under the main military headquarters. The "column" was the main tactical organization comprising two light divisions (or brigades), each consisting of three or four regiments of 1,500 men each. Equipment was obtained either from disarmed Japanese troops or captured from the Nationalists. Several columns plus special brigades combined to form "Liberation Armies." In July 1946 the PLA had 28 columns made up from 118 brigades, each brigade of 3 regiments totaling less than 5,000 men. Expansion of the PLA from various causes took place throughout the Civil War, such that by March 1948 it was made up of ten armies comprising fifty columns of regulars, or 156 brigades each brigade averaging close to 8,000 men. By July 1948 the PLA were able to organize their forces into five main armies: the Yenan, Central Plains, East China, Northeast, and North China Liberation Armies. These were reformed again in October 1948 into the 1st, 2nd, 3rd, 4th, and 5th Field Armies respectively.
- Guerrillas.
The Guerrillas were another significant force. These were full-time soldiers, but they served in theory only in the locality of their home base. Their actions were coordinated with those of the regular army, and they have sometimes been called "irregulars."
- Militia.
The Militia (min-ping) was a "home guard" formed from peasants to whom land had been given when Base Areas were established. Their main task was defense of their own village, but another important function was to provide labor, messengers, sentries, and guides whenever the regular army operated in their area. Once the KMT entered the Base Area, the Militia were to assist the regular army generally by interference and destructive guerrilla tactics. Usually they concentrated their attacks on the second-line Nationalist organizations such as the Peace Preservation Corps and Communications Police. They specialized in mining, tunnelling, demolitions, sabotage and intelligence operations. A third major function of the Militia was as the source of replacements for the irregular forces.
A three-tier system was established by which the Militia provided recruits for guerrillas, while guerrillas provided both replacements and additional reinforcements for expansion of the regular forces. The Militia remained strictly under control of the local Soviet governments which selected the draftees for the irregular forces requirements.
In June 1946 the strength of the PLA included 612,000 regulars, 665,000 guerrillas and 2,688,000 militia. By June 1949 these strengths had increased, despite losses, to 2,100,000 regulars and 1,900,000 guerrillas.
KMT War Zones
The Nationalist field armies were controlled through regional commands known as "War Zones." A War Zone comprised the geographical area that lay within a major theater of operations. In 1945 there were twelve War Zones. During the Civil War, the major groupings involved in the conflict were the Northeast (Manchuria), North China, Kwangsi, Northwest, Szechwan, Yunnan, and Southern (based on Shanghai). In addition there were the warlord areas of Ningsia, Shansi, and Tsinghai. Within each War Zone, the commander usually had complete authority, except when a crisis took place; at such time, Chiang Kai-shek would often take personal command and give direct orders to the troops. Some of the more competent independent commanders would resist such interference, but they in turn would not be allotted the supplies they needed.
In the second year of the war, after the PLA began to gain the initiative, the Nationalists decided to amalgamate some pacification areas, as the War Zones came to be known, and to organize new "mobile army corps" each having under its command from five or six, to as many as twelve or thirteen brigades. Some of the more competent commanders had long proposed a unified command for Nationalist forces in the five provinces between the Yellow River and Yangtze River to more effectively combat the PLA forces. It appeared this was about to happen when a headquarters was set up at Hankow to command troops in the Central China area, but Chiang Kai-shek chose not to give too much power to a single command, and set up another headquarters at Hsuchow.
PLA Base Areas
The key to political development by the Chinese Communists was the secure control of geographic areas where Communist governments could be established to carry out social and economic policies that they advocated. These areas were the Base Areas. However, while the objective of military strategy was to preserve and expand such geographical areas, the policy was also flexible. The Communists did not seek permanent occupation of any specific piece of territory, but wanted eventual control of the "Maximum" amount of territory. The preservation of the army was the predominating goal since it was felt to be harder to replace an army than to replace a Base Area.
As early as the late 1930s, the Communists had selected three remote areas in Shansi Province for their major bases: the Wut'ai Mountains dominating the central plains, the Taihang Range in the southeast part of that province, and the northwest region. First, the Red Army succeeded in establishing "border governments" in two of these areas. The next step in their methodical approach was to establish these as "guerrilla areas" to mobilize the mass of peasants. Finally, when the political and military conditions had been successfully developed, they could be transformed into Base Areas.
One of the first goals was to make each Base Area self sufficient, especially in food. Mutual aid teams and other cooperative efforts were introduced to achieve some degree of industrialization. The North West Border Region established an arsenal to manufacture mines, grenades, and ammunition, and eventually was able to produce electrical parts and radios.
When the Japanese occupied North and Central China in the Second World War, the communists used the opportunity to expand their political influence in these areas. By the end of 1944, there were fourteen Red Base areas of some size and stability, each having its own armed force. The main center continued to be the Northwest Border Region, with its capital at Yenan, but there were also four bases in North China, eight in Central China, and one on Hainan Island. With the defeat of Japan, the communists moved rapidly to consolidate and expand these areas before the Kuomintang forces take over again. In August 1945, Mao Tse-tung controlled 1,000,000 square kilometers containing over 100,000,000 people in 19 large Base Areas. It was at this stage that Civil War had to occur to resolve the confrontation.
Kuomintang Leaders
The Kuomintang military leaders could be divided into two types: those that were competent and those that were not. The second type predominated. The following observations are largely taken from Lie.
Chiang Kai-shek's main goal was to maintain his personal power over the military. He relied on generals who either had taught at or who had graduated from the Whampoa Military Academy in the early years during his rise to power, and who had personally supported him. This was the "Whampoa clique."
In 1946 and 1947, the Whampoa clique considered that the war had been won and they became busy dividing the spoils. With Chiang's support they replaced competent generals in the more significant War Zones, and took these zones over themselves. Soon there was incredible confusion in the command structure, which was characterized by uncertainty, lack of competence, and lack of continuity.
Two of the better leaders were Pai Chung-hsi and Li Tsung-jen. They had been leaders of the Kwangsi Army, a provincial army with a bold fighting tradition, and rated second only to the Central Army as a fighting force. Because of his military skill, Pai was a candidate for the vital post of Chief-of-Staff of the Nationalist armies in 1948. However he was not reluctant to oppose Chiang, and therefore was given a minor field command instead.
Li Tsung-jen distinguished himself in the early days of the Sino-Japanese war as the field commander who achieved the first great Chinese victory against the Japanese at the Battle of Tai-erh-chuang. Li dared to run as candidate for vice president in 1948 against the wishes of Chiang Kai-shek, and fell from favor.
Fu Tso-yi, Governor of Suiyuan and commander of the 12th War Zone (North China) gained the confidence of the local people sufficiently to raise a 100,000 man "personal" militia. The regular army units under his command were considered fine units made up of experienced troops. However, because of his independent attitude, the War Ministry refused to cooperate with sufficient supplies to allow him to conduct a large-scale all-out campaign.
Ch'en Ch'eng was appointed Chief of the Supreme Staff in 1945 and attempted to apply needed reforms to the military, but was sabotaged by jealous opponents. He was considered a man of great personal integrity, a severe commander, even though a ranking member of the Whampoa clique. Ch'en assumed command of the Northeast (Manchurian) War Zone during a crisis in the autumn of 1947. He immediately commenced to purge his armies of incompetents, raising the indignation of Manchurian representatives at the Nationalist capital, Nanking. When the military situation was not immediately corrected, he was recalled.
While other leaders at different levels were competent, none was given any opportunity to use their abilities. Other War Zone leaders were described as follows: Tu Yu-ming was "incompetent," Ku Chu-t'ung had "no conspicuous ability," Liu Chih was "a man of no particular ability," and Yen Hsi-shan "cooperated little, if any, with adjoining War Zones."
The Events
The basic strategies applied have been well described by Chassin: "In China from earliest times, kingdoms based in Shensi always attempted to apply what the classics called the 'horizontal plan,' the conquest of a strip of land which, following the course of the Yellow River, would extend eastward from Shensi to the sea. The states of the south, on the other hand, always sought to apply the 'vertical plan,' which called for the formation of a north-south bulwark capable of confining their enemies to the west." In the Civil War, the Communists attempted to achieve the horizontal plan while the Nationalists concentrated on the vertical plan; perhaps this indicates that geopolitical facts are timeless.
Chu Teh, the Commander-in-Chief of the PLA, has divided the strategy of the "Third Revolutionary War" into two stages, based on Mao Tse-tung's military concepts: the initial stage was the Nationalists' strategic offensive and the PLA's strategic defensive from July 1946 to June 1947; in the second stage, starting in July 1947, the PLA passed over to the strategic offensive.
The formal outbreak of war occurred in July 1946, as peace negotiations broke down. The Nationalists had two goals, around which the war revolved for the next two and a half years: to drive the Reds out of Manchuria and to clear the rail lines in Central China. Manchuria was a key province due to its abundant resources and factories, and Chiang felt he must clear the Reds out to avoid "losing face." While he was attempting to do this, the Reds threatened Manchuria sufficiently to siphon off Nationalist forces from Central China, thereby allowing them to grow in strength in the latter area, especially in the Shan and Shantung base areas.
Initially the Nationalists made some impressive gains. They pushed ahead in Manchuria with their best armies, to establish a bridgehead over the Sungari River. Kalgan, the second capital of the Reds, was captured. In south China, the PLA were pressed so hard that they abandoned the Hupeh-Honah Base to escape into Shensi Province. In the west a force of fifteen brigades was assembled under Hu Tsung-nan to capture Yenan, the center of Mao Tse-tung's government. It was entered on March 19, 1947, and Chiang proclaimed to the world that a great victory had been achieved.
But this was the high water mark. The Yenan victory was in reality a sterile one, since the Communists, always flexible, had merely abandoned Yenan to transfer their principal base of maneuver into Shansi. In Manchuria, Lin Piao launched five successive limited diversionary offensives which ultimately forced the Nationalists back into their main bases of Mukden, Changchun, and Kirin, with only precarious rail links between them. A bitter struggle developed in Shantung, as the Nationalists massed three group armies with a total of thirteen reorganized divisions to destroy this important base area. The Red Commander here, Chen Yi, showed brilliant tactical ability as he constantly gave way to frontal attacks only to reappear on the Nationalists' flanks and rear. In the west, the PLA moved to cut the rail links to Taiyuan, linking two base areas in the process, by the early summer of 1947.
In the late summer of 1947, the PLA was strong enough to move into the offensive, as the second phase developed. In the south they could now begin working to achieve the horizontal plan. The biggest move in this plan occurred in July-August when PLA troops crossed southwards to set up new base areas in the southern part of Central China. The PLA then massed eighteen columns and, by clever maneuvering, seized Kaifeng. This was a serious blow to the Nationalists as it was the first provincial capital to be taken by the Reds. The KMT moved in from all sides and a great battle took place, forcing the PLA to withdraw. However, it was a moral victory for the PLA as they proved themselves tactically superior to the KMT.
Meanwhile, in the west, a PLA army of twelve columns made a daring raid towards Szechwan, "the Nationalists' holy of holies." To counter this, the Nationalists evacuated Yenan. The Battle of Paoki forced the PLA back with heavy losses; however, they had regained Shensi by the maneuver.
These events led to the period September 1948 to January 1949 when four decisive campaigns were fought and won by the PLA, causing the collapse of the Nationalist armies. First, Chen Yi threw fourteen columns against the fortress city and provincial capital of Tsinan, garrisoned by 100,000 Nationalists. Using "human wave" assault tactics, the Reds captured Tsinan and all its supplies. This was a mere prelude to the greater Nationalist disaster in Manchuria. In a series of decisive battles, the KMT forces with a total of seven armies of 400,000 men were cut to pieces and destroyed by Lin Piao who had massed a PLA force of 600,000 men. This event was again overshadowed by the decisive battles called the Hwai-Hai Campaign by the Reds, or "Chiang Kai-shek's Waterloo" by one historian. Around the Central China base of Suchow, the KMT had massed ten field armies in four group armies totalling 600,000 men. The main PLA liberation armies of Chen Yi, Liu Po-cheng, and Chen Keng, also totalling 600,000 men, moved in on this KMT force from all sides. Chiang ordered another group army and an additional field army to move up from the south to relieve the Suchow force. By the time all fighting was finished on 10 January, 1949, the entire Nationalist force had been wiped out, killed or captured. Now Lin Piao moved down on North China from Manchuria, while the central PLA armies were free to move on it from the south.
After an initial PLA attack on Tientsin, Fu Tso-yi realized the hopelessness of his situation and surrendered his 250,000 men, averting needless bloodshed.
The outcome had basically been decided by this time. After a short respite, the PLA massed all its forces and attacked across the Yangtze River on 20 April. By December 27 all provinces of the Chinese mainland had been occupied and the surviving Nationalist forces had fled to Formosa.