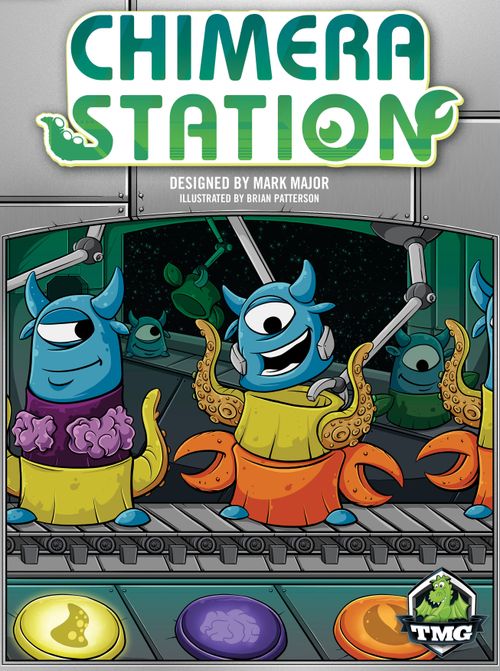
Chimera Station
Chimera Station Rulebook
Table of Contents
Table of Contents
Setup
A. 1 game board: Place in the center of the table.
B. 1 LOCKED token: Place this over slot B of the Command Hub.
C. 1 round marker: Place on the first space of the round track.
D. 4 score markers: One for each player. Place these on the 10 space of the score track.
E. 1 start player token: Randomly choose a player to be the start player.
F. 4 double sided player mats: Give one to each player. We recommend using side A for your first game so that all players are on equal footing. Side B has unique player powers for experienced players (see Advanced Play at the end of this rulebook).
G. 4 research markers: One for each player. Place these on the "start" tier of the research track on your player board.
H. 24 worker tops/bottoms: 6 for each player matching the color of their player mat. Return 1 or 2 of each to the box when playing with 3 or 4 players, respectively. Set 2 workers for each player aside and give each player the rest to form their initial worker pool:
- 4 workers per player for 2P
- 3 workers per player for 3P
- 2 workers per player for 4P
I. Genetic Components AKA Components (7 brains, 7 claws, 7 leaves, 7 tentacles): Place in a supply pile near the board.
J. 40 station module tiles: Place in a face down supply near the reactor portion of the board. Deal 6 of these face up in the reactor spaces on the board.
K. 22 perk cards: Shuffle and deal 3 face up near the board.
L. Lots of coin tokens: Place in a supply pile near the board. Coins are unlimited, so if you run out use something else as a substitute.
M. Lots of food tokens: Place in a supply pile near the board. Food is unlimited, so if you run out use something else as a substitute.
N. 6 starting resource cards: Hand these to the player to the right of the start player for now, using only the ones indicated for your player count (return the rest to the box):
- 2P: use the 2+ cards.
- 3P: use the 2+ and 3+ cards.
- 4P: use all of the cards.
The player to the right of the start player (who will play last in round 1) chooses one of the starting resource cards and passes the rest to the right (counterclockwise). Players each choose one and pass to the right until the start player has chosen a card. Put unchosen cards back in the box.
O. Take the resources shown on your starting resource card. If your card shows a research symbol, advance your research marker to tier 1 of the research track and immediately claim the reward (on side A that will be a perk). Save your starting resource card! You'll be able to use it later to flush the reactor (see page 8).
Game Play
Chimera Station is played over a series of 5 rounds, and each round has a Placement phase, a Splicing Lab phase, and a Feeding phase. Sometimes there is some bookkeeping to do between rounds — there is a reminder of this on the round track so you don't forget.
Placement Phase
During the Placement phase, starting with the start player and progressing clockwise around the table, you'll take turns placing a worker from your worker pool onto a module, either on the board or on one of your perk cards. When you place a worker, immediately activate that module and gain its benefit. As a general rule, you cannot place a worker onto an occupied module. The many different modules and their effects will be detailed in the Modules section.
You may instead place your worker in the Splicing Lab to add components to it, or the Worker Lounge if you desperately need food or coins.
Additionally, the components attached to your worker can modify what happens when that worker is placed. Please see the Genetic Components section for details.
If you have no workers in your pool when it's your turn to place, your turn is skipped. Once all players have placed all of the workers, the Placement phase ends.
Note: You must be able to fulfill the effects of a module in order to place a worker there. For example, if the module effect is to buy something and you have no coins, you may not place a worker onto that module.
Splicing Lab Phase
During the Splicing Lab phase, workers in the Splicing Lab will be placed again, one at a time, in alphabetical order starting with slot A. You may place these workers on any legal space except the Splicing Lab.
If you end up with a worker in your pool as a result of an effect during the Splicing Lab phase, you will place that worker before the next Splicing Lab slot is resolved. Remember, no workers may be placed into the Splicing Lab during this phase!
Example: Andy's worker is in Splicing Lab slot A and Beth's worker is in slot B.
During the Splicing Lab phase Andy places his worker from slot A onto the Laboratory, advancing his research track to tier 3 and earning him an additional worker. Since Andy now has a worker in his pool, he will place this new worker before Beth places her worker from slot B!
Feeding Phase
To begin the Feeding phase, collect your workers from the board and return them to your worker pool. You must now pay 1 food for each worker in your pool. If you don't have enough food then for each food you are short you must lose one of the components attached to one of your workers (return it to the supply). If you have no components attached to your workers, then lose 2 points instead.
Example: Beth has 4 workers, 3 with no components and 1 with one component. During the feeding phase she must pay 4 food. But Beth only has 3 food, so she must lose the component from her worker, returning it to the supply.
If Beth only had 2 food, then in addition to losing her single attached component, she would have lost 2 points as well.
Station Progress
At the beginning of rounds 3 and 5, certain aspects of the game change to reflect the progress of the station. These changes happen in the order listed below:
Round 3:
- Deal out three new perks, adding them to the supply (there will now be 6 cards in the supply).
- Advance one tier on your research track. If more than one player earns a perk card due to this, choose them in turn order, clockwise from the start player.
- Slot B on the Command Hub becomes available for use, remove the LOCKED token from the board and return it to the box.
- From now on, points awarded for building modules will be doubled.
Round 5:
- Deal out three new perks, adding them to the supply (there will now be 6 or more cards in the supply).
- Advance one tier on your research track. If more than one player earns a perk card due to this, choose them in turn order, clockwise from the start player.
- From now on, points awarded for building modules will be tripled.
End Game Scoring
After the final round, players gain bonus points for their resources and Perks.
- Every 3 coins = 1 point
- Every 2 food = 1 point
- Every component (attached or not) = 2 points
- Perk cards each have specific end game scoring printed on them.
Winning the Game
After all end game scoring, the player with the highest score is the winner! If there is a tie, the player with the most components in their supply (attached or not) is the winner. If there is still a tie, join forces and rule the galaxy in an unstoppable partnership!
Genetic Components
Genetic components (AKA Components) help make your workers special. Workers can have a maximum of 2 components attached, and they're usually attached at the Splicing Lab.
Components can be mixed and matched, though having two of the same component can give your worker an extra boost in one specific area.
Any time an action would get you a component and the supply is empty, score 2 points instead.
Brains
Brains enable your worker to work smarter, not harder.
When you place a brain worker (a worker with at least 1 brain component), score points equal to the point value of the module it's placed on.
When your double brain workers (a worker with 2 brain components) command modules, also count modules occupied by your own workers.
Claws
Claws are used to displace workers from occupied modules so that you may use them. Displaced workers are sent to the Worker Lounge where their owner gains a food or a coin.
Your claw workers may displace an opponent's worker with 0 or 1 attached components.
Your double claw workers may displace any opponent's worker.
Note: You may never displace a worker from the Splicing Lab, the Worker Lounge, or any module that says "workers here cannot be displaced" (such as the Dispatch Station).
Leaves
Leaves provide sustenance to help feed your workers at the end of the round.
Your Leaf workers do not require food during the Feeding phase.
Your double Leaf workers also produce 2 food at the beginning of each Feeding phase.
Tentacles
Tentacles allow your workers to collect additional resources.
When your tentacle workers collect coins or food in an action, collect 1 additional resource of the same type at the end of that action from the general supply (so you may gain 1 food, 1 coin, or both at the end of the action).
When your double tentacle worker gains a component in an action, gain an additional component of the same type at the end of that action. If that supply is empty, score 2 points instead.
Commanding Modules
The Command Hub and certain other modules allow you to do a command modules action and take credit for your opponents work. When Commanding modules, you score points equal to the value of all modules occupied by opponents' workers. When Commanding modules with a double brain worker, don't forget to score modules occupied by your own workers as well.
Christina places in Command Hub slot A, taking start player and then scoring some points base on the value of the module occupied by Andy, Beth, and Daniel's workers.
Daniel places in Command Hub slot B, doesn't take start player, and scores some other amount based on Andy, Beth, and Christina's workers.
Building a Module
The Constructor and certain other modules allow you to do a Build action and expand the station. When building...
A. Choose a module from the reactor and pay its coin cost.
B. Gain points equal to the module's value (x2 in rounds 3 and 4, x3 in round 5).
C. Place the module onto the board adjacent to the Command Hub or an already built module.
D. Gain the build bonus printed on that board space.
E. Slide remaining modules to the right so that the leftmost spaces in the reactor are the empty ones.
Build Bonus
Each space has a build bonus printed on it. When building a module in that space, collect that build bonus:
Coin, Food, Star (points): Collect the amount of coins, food, and points shown.
Coin, Clock: Collect coins equal to the current round number.
Food, Clock: Collect food equal to the current round number.
Star, Clock: Score points equal to the current round number.
Component: Collect a component of your choice from the supply. If that supply is empty, score 2 points instead.
Brain, Claw, Leaf, Tentacle: Collect the indicated component from the supply. If that supply is empty, score 2 points instead.
Research flask: Advance 1 tier on your research track and gain the benefit.
Recall (worker icon): Return one of your already placed workers to your worker pool.
Reactor (radiation icon): Collect the current reactor reward (see Refilling the Reactor).
Snowflake: Activate an adjacent module as if you had placed a worker there. Since this is a workerless activation, you may not use this bonus to activate a module that would affect the placed worker, such as the Autosurgeon.
Refilling the Reactor
Each time a module is built, it uses up a bit of the station's power supply. If the reactor track is empty, no new modules can be built until its fuel is refilled at the Boiler Room.
Remember that a tentacle worker will gain an extra one of each resource you get from this action.
Reactor Rewards
A. Drained 1: Nothing
B. Drained 2: 1 point
C. Drained 3: 1 food
D. Drained 4: 1 coin
E. Drained 5: 1 component
F. Empty: 1 research tier
Flushing the Reactor
Once during the game you may discard your starting resource card to discard any number of modules from the reactor, then refill the reactor from the module supply. Note: This is in addition to your turn, so after doing it you may still place a worker.
Symbols and Keywords
Star: Points added to your score.
Coin: Coin, the currency used for buying components and building modules.
Food: Food, required to feed workers during the Feeding phase.
Brain: Brain component.
Brain (attached icon): Brain that is attached to the placed worker.
Claw: Claw component.
Claw (attached icon): Claw that is attached to the placed worker.
Leaf: Leaf component.
Leaf (attached icon): Leaf that is attached to the placed worker.
Tentacle: Tentacle component.
Tentacle (attached icon): Tentacle that is attached to the placed worker.
Component (box): Any component.
Component (attached icon): Any component that is attached to the placed worker.
Worker: A worker, normal or upgraded. Usually refers to the one placed on the module.
No entry: Workers may not be placed on this module.
Flask: Advance one tier on the research track.
Snowflake: This module's effect is related to adjacent modules or the workers on them. This can affect both Slots of the Command Hub. The Splicing Lab, reactor, Worker Lounge, perk modules, and other modules printed on the right side of the board are not considered to be adjacent to anything.
Attach: Add components to this worker, usually from your component pool.
Detach: Remove one component from this worker, returning it to the owner's component pool.
Lose: Remove components from this worker, returning them to the general supply.
Build: Bring a module into play. See Building a Module for detailed rules.
Recall: Return one of your already placed workers to your worker pool.
Command [component]s: Score points based on the value of modules occupied by opponents.
Modules
Default Modules
Refinery Gain 3 coins.
Hydroponics Gain 2 food.
Academy Buy 1 brain component for 2 coins OR Buy 2 brain components for 5 coins OR Gain 2 coins per brain attached to this worker. For each component you would get when the supply is empty, score 2 points instead.
Seed Repository Buy 1 Leaf component for 2 coins OR Buy 2 Leaf components for 5 coins OR Gain 2 coins per Leaf attached to this worker. For each component you would get when the supply is empty, score 2 points instead.
Claw Shop Buy 1 claw component for 2 coins OR Buy 2 claw components for 5 coins OR Gain 2 food per claw attached to this worker. For each component you would get when the supply is empty, score 2 points instead.
Genetics Vat Buy 1 tentacle component for 2 coins OR Buy 2 tentacle components for 5 coins OR Gain 2 food per tentacle attached to this worker. For each component you would get when the supply is empty, score 2 points instead.
Constructor Build one of the available face-up module tiles (see Building a Module), and then optionally move this worker to and activate that module.
Command Hub slot A Take the start player marker and command modules occupied by opponents' workers (See Commanding Modules).
Start player may only change hands once per round.
Command Hub slot B Unavailable until round 3. Command modules occupied by opponents' workers (See Commanding Modules).
Boiler Room Gain coins, food, or points according to the components attached to this worker. Then gain the current reactor rewards and refill the reactor from the supply. If the supply runs out, shuffle any discarded modules to make a new supply.
Laboratory Detach one component from this worker to advance one tier on your research track and gain the benefit.
- Standard (A-side) research benefits:
- Tier 1: Your research marker starts here.
- Tier 2: Draw 1 perk.
- Tier 3: Add 1 additional worker to your worker pool.
- Tier 4: Draw 1 perk.
- Tier 5: Add 1 additional worker to your worker pool.
- Tier 6: Draw 1 perk.
- Tier 7: Take 2 components of your choice from the supply.
- Tier 8: Score 8 points.
Any further advances on the track will grant the tier 8 benefit again.
See Advanced Play for details about the unique research tracks on the B-sides of the player boards.
Splicing Lab Upgrade a worker with components from your component pool. You may attach multiple components at a time, but each worker can have a maximum of two components. You may also send an upgraded worker to the Splicing Lab to change its components (detach some and attach others). At the end of the Placement phase you will have the opportunity to place workers in the Splicing Lab again. Note: When placing a worker in the Splicing Lab, fill the slots in alphabetical order.
Worker Lounge Unlike other modules, the Worker Lounge may contain any number of workers. You may place a worker into the Worker Lounge, and when displaced by a claw worker, your worker is sent there as well. When your worker enters the Worker Lounge for any reason, gain either 1 coin OR 1 food, your choice.
Buildable Modules
Each buildable module below lists its coin cost and point value (the points scored when the module is built).
Advanced Laboratory — Cost: 4 coins. Value: 3 points. Advance on the research track (detaching a component is not required).
Aquarium — Cost: 2 coins. Value: 2 points. Gain 1 tentacle component.
Autosurgeon — Cost: 2 coins. Value: 1 point. Pay 2 coins to attach any 1 component from the supply to this worker. A double tentacle worker may gain an additional component, but may not attach it.
Biofuel Refinery — Cost: 3 coins. Value: 2 points. Lose any number of components attached to this worker (return them to the supply). Score 7 points per component lost this way.
Break Room — Cost: 3 coins. Value: 2 points. Gain 1 food. Gain additional food according to the current round.
Cargo Bay — Cost: 3 coins. Value: 2 points. Gain 2 coins AND 2 food (A tentacle worker gets its bonus for both effects).
Catering Service — Cost: 4 coins. Value: 3 points. Copy the effect of an occupied module. Pay food equal to the point value of that module. (Modules blocked by Maintenance Crew count as occupied.)
Commissary — Cost: 2 coins. Value: 1 point. Score 1 point, gain 1 coin, and gain 1 food.
Covert Cloning — Cost: 2 coins. Value: 1 point. Gain 1 component from the supply for each worker in the worker lounge.
Cryogenics — Cost: 2 coins. Value: 1 point. Trade 1 unattached component from your supply for 6 coins.
Dispatch Station — Cost: 5 coins. Value: 3 points. Recall one of your workers. Workers here cannot be recalled or displaced.
Dispensary — Cost: 3 coins. Value: 2 points. Gain 1 coin or 1 food (in any combination) for each worker you have already placed this round.
Farmer's Market — Cost: 3 coins. Value: 2 points. Trade 1 food for 5 coins, OR trade 1 coin for 5 food.
Freelancer Dormitories — Cost: 5 coins. Value: 3 points. Choose an adjacent module and copy its effects.
Gardens — Cost: 2 coins. Value: 2 points. Gain 1 leaf component.
Generic Genetics — Cost: 3 coins. Value: 2 points. Pay 1 coin to take any 1 component from the supply.
Giant Statue — Cost: 7 coins. Value: 6 points. Workers may not be placed here.
Grant Office — Cost: 3 coins. Value: 2 points. Gain 2 coins. Gain 1 extra coin for every 2 levels of research you have achieved.
Hunting Park — Cost: 3 coins. Value: 2 points. Gain 3 food. Gain 1 extra food per claw attached to this worker.
Inspection Station — Cost: 4 coins. Value: 3 points. Score 1 point per module adjacent to the Command Hub.
Integrated Constructor — Cost: 5 coins. Value: 3 points. Build a module tile at -2 to cost. Do not move your worker to it.
Life Support — Cost: 4 coins. Value: 2 points. Score 2 points per attached component on adjacent modules.
Medical Bay — Cost: 3 coins. Value: 2 points. Trade 1 unattached component from your supply for any 2 other components.
Mercenary Outpost — Cost: 3 coins. Value: 2 points. Gain 4 coins. Gain 1 extra coin per claw attached to this worker.
Modules (cont'd)
Monolith — Cost: coins equal to the current round number. Value: points equal to the current round number. Workers may not be placed here.
Newsroom — Cost: 4 coins. Value: 3 points. Score 2 points for each worker you have already placed this round.
Periphery Command — Cost: 5 coins. Value: 3 points. Score modules (as Command Hub).
Petty Cash — Cost: 3 coins. Value: 2 points. Gain 1 coin. Gain additional coins according to the current round.
Predatorium — Cost: 2 coins. Value: 2 points. Gain 1 claw component.
Quantum Constructor — Cost: 5 coins. Value: 3 points. Pay 2 coins to build a module at random from the supply. Do not pay the module's cost. Your worker does not move to or activate the module.
Science Fair — Cost: 4 coins. Value: 2 points. Attach any number of components from your personal supply to this worker. Gain 3 points per component added this way.
Scientific Display — Cost: 4 coins. Value: 2 points. Score 1 point per level of research you have achieved.
Shady Restaurant — Cost: 2 coins. Value: 1 point. Trade any unattached component from your supply for 6 food.
Shopping Center — Cost: 3 coins. Value: 2 points. Gain 2 coins per worker on adjacent modules.
Symposium — Cost: 3 coins. Value: 2 points. Gain 2 food. Gain 1 extra food for every 2 levels of research you have achieved.
Tanning Salon — Cost: 4 coins. Value: 3 points. Gain current reactor rewards based on this worker's attached components. Do not refill the reactor.
Think Tank — Cost: 2 coins. Value: 2 points. Gain 1 brain component.
Underground Lab — Cost: 4 coins. Value: 3 points. Detach any number of components from this worker. Advance on the research track for each component detached.
Union Hall — Cost: 4 coins. Value: 3 points. Score and discard a perk. Take a new one.
Vineyard — Cost: 3 coins. Value: 2 points. Gain 1 food for each adjacent module.
Expansion Buildable Modules
Espionage Center — Cost: 5 coins. Value: 4 points. Detach a component from a worker on an adjacent module. (The victim chooses which component to remove).
Giant Billboard — Cost: 5 coins. Value: 3 points. Steal 3 points from each worker on an adjacent module. (This may effect multiple workers of the same player.)
Maintenance HQ — Cost: 3 coins. Value: 2 points. Move a Maintenance Crew to an unoccupied module and activate it. The Maintenance Crew must already be in play.
Underground Clinic — Cost: 4 coins. Value: 3 points. Pay 2 coins: Steal a component from another player's supply and attach it to this worker. (A double tentacle worker may gain an additional component of the same type from the general supply, but may not attach it.)
Perk Modules
These perks give you an exclusive module where you may place your workers. They are often situational, or slightly less powerful than modules on the board, but nobody can block you from using a module perk you own. Other players don't score points off of these modules when commanding modules.
Beggar's Alley +2 coins AND +1 food. Each player may give you 1 coin or 1 food. If they do, they get 1 point.
Game End: 9 points if you have the most food
Conference When acquired: Points equal to the current round
Send any 1 of your placed workers back to your worker pool. Workers here cannot be displaced or recalled. When acquired, score points equal to the current round.
Game End: 5 points
Dispatch Immediately place 2 more workers. At the end of the Splicing phase, place this worker again.
Game End: 8 points
Foundry Discard all modules from the reactor and refill it (gain no benefits). Then Build a module and activate it (don't move to it).
Game End: 8 points
Mint Collect 1 coin for each gold-bordered module in the station (modules that provide coins).
Game End: 9 points if you have the most coins
Morale Center Send any 2 placed workers to the Worker's Lounge. Then place another worker.
Game End: 3 points for each worker with at least 2 components.
Nonhuman Resources Swap a worker on the board with another player's worker. Both workers may trigger placement effects if possible. (This is the only way a player's worker may end up in an illegal position.)
Game End: 8 points
Zoning Board Take any available build bonus.
Game End: 8 points
Vendor +2 coins AND +1 food
Game End: 9 points
Workshop Gain 1 coin then build any module from the discard pile and activate it (don't move to it).
Game End: 1 point for each module tile adjacent to the Command Hub
Perks
When you gain a perk, select one from the available face up perks. Then, if there are fewer than 3 available perks, replace it with the top card from the perk deck. If you run out of Perks in the deck, shuffle any discarded Perks to create a new deck.
There are two kinds of Perks: Passive and Module. Passive Perks confer a constant bonus. Module Perks provide a private space where you may place a worker. Both types provide a scoring bonus at the end of the game. Some Perks also award points equal to the current round when you take them.
Passive Perks
Architect +1 point when building modules.
Game End: 8 points
Engineer When acquired: Points equal to the current round.
When you refill the reactor, take double the base reactor reward.
Game End: 2 points per empty space on the reactor track
Foreman When you score at the Command Hub, you may count modules occupied by Maintenance Crew.
Game End: 5 points
Geneticist You may have one worker with 3 components, but no more than 2 may be of the same type.
Game End: 2 points per research tier
Grocer Whenever your leaf worker would gain food, you may instead gain that many coins +1 extra coin
Game End: 2 points per leaf owned (attached or in pool)
Investor +1 coin OR +1 food at the beginning of every round for each modified worker you have.
Game End: 8 points
Lounge Lizard When acquired: Points equal to the current round.
+2 points whenever your workers go to the Lounge. When acquired, score points equal to the current round.
Game End: 5 points
Objectivist When acquired: Points equal to the current round.
Your claw workers may displace your own workers.
Game End: 5 points
Overseer When acquired: Points equal to the current round.
Your workers cannot be displaced by another player's claw worker.
Game End: 8 points
Prime Specimen At the end of any turn in which your tentacle worker scored points, score 1 additional point.
Game End: 2 points per tentacle owned (attached or in pool)
Savant When another player scores at the Command Hub, you score 1 point for each brain worker you have already placed.
Game End: 2 points per brain owned (attached or in pool)
Thug Whenever your claw worker displaces a worker, you receive the coins or food (your choice) when it goes to the Worker Lounge instead of the owner.
Game End: 2 points per claw owned (attached or in pool)
Warlord Whenever you take Employee Of The Month, also steal 2 coins from each other player.
Game End: 9 points if you are start player
Advanced Play
Once you're familiar with Chimera Station, feel free to use the B sides of the player boards. The B side gives you a particular faction with unique player powers, making you slightly better at certain strategies or at using one of the types of components. You'll have a unique research track, and at the base tier you'll start the game with one attached component of your preferred type.
Brainiacs
- Start on tier 2.
- Start with 1 brain worker.
- Start with 1 Perk card.
- Perk card at research tier 3.
- Worker at research tier 4.
- 6 points at research tier 8.
- When your double brain worker uses the Laboratory, do not detach a component.
Eco-Friendlies
- Start with 1 leaf worker.
- Score 2 points for every 3 food at the end of the game.
- You may pay food instead of coins to build modules. Pay either all food or all coins, do not mix and match.
- Your double leaf workers produce 1 additional food each Feeding phase.
Toughies
- Start with 1 claw worker.
- Worker at research tier 4.
- Perk at research tier 5.
- Score 1 point for every 2 coins at the end of the game.
- Your double claw workers may displace your own workers.
- When your double claw workers displace an opponent's worker, collect 1 food or 1 coin from the supply.
Weirdos
- Start with 1 tentacle worker.
- Tentacle at research tier 2.
- Perk at research tier 3.
- Worker and Food at research tier 4.
- Perk and component at research tier 5.
- Perk and Worker at research tier 6.
- 3 points, 1 food, and 1 coin at research tier 7.
- 5 points and 1 component at research tier 8.
- When your double tentacle worker Commands modules or activates a perk module, collect a component of your choice from the supply (do not collect a 2nd one).
As you can see, differences between the A side and B side are highlighted so you don't forget about them. While the B side player boards are fair to use against each other, they are not balanced against the A sides. If you're more experienced than your friends and you want to give yourself a handicap, try using the A side while your opponents use the B side… just give yourself a perk of your choice from those available at the start of the game.