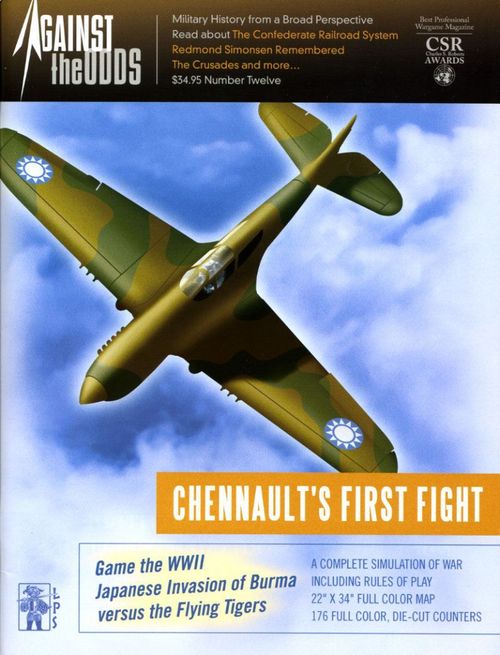
Chennault's First Fight
Chennault's First Fight Rulebook
Table of Contents
Table of Contents
- Read This First
- 1.0 Introduction
- 2.0 Game Components
- 3.0 Important Concepts
- 4.0 Sequence of Play
- 5.0 Random Events Phase
- 6.0 Airbases
- 7.0 Initiative Phase
- 8.0 Air Operations Phase
- 9.0 Ground Operations
- 10.0 Supply Determination Phase
- 11.0 Regroup Phase
- 12.0 Reinforcement Phase
- 13.0 Victory Points Phase
- 14.0 Initial Deployments
- 15.0 Examples of Play
- 16.0 Designer's Notes
- 17.0 Bibliography
- 18.0 Random Events List
- Optional Rules (Addenda as of Oct. 3, 2007)
Read This First
We've organized the overall structure of the rules of this LPS simulation game to follow this game's sequence of play in introducing concepts. The rules themselves are written in a format known as the Case System. This approach divides the rules into Modules (each of which deals with a major important aspect of play). Modules are numbered sequentially as well as possessing a title. Each Module is divided into Sections (that deal with a major sub-topic inside the Module) which are also numbered sequentially. Modules and Sections are introduced by some text that briefly describes the subject covered by that particular Module or Section. Finally, the majority of each Section consists of Cases. These are the specific, detailed rules that govern play.
Each Case is also numbered sequentially. The numbering follows a logical progression based upon the number of the Module of which the Cases are a part. A Case with the number 7.51, for example, is the first Case of the fifth Section of the seventh Module of the rules. Each Module can have as many as ninety-nine Sections and each Section can have as many as ninety-nine Cases. The numbering system is designed as an organizational aid. Use it to determine where a Case is located in the rules.
The example 3.1.4 is the number of the fourth Case of the first Section of the third Module of the rules. Learning to Play the Game. Begin by familiarizing yourself with all of the components listed for this game. Then skim through the charts and rules, reading all the titles of the Modules and Sections. Set up a game scenario or portion of a scenario (after reading the applicable Module) and play a trial game against yourself. During this trial game, try referring to the rules only when you have a question and remember the numbering system we employ makes it easy to look up rules when you do. While a trial game may take you an hour or two, it is the quickest and most pleasant way to learn (short of having an experienced friend teach you). We also don't recommend attempting to learn the rules word-for-word. Memorizing all the details is an effort that few can do. We've written these rules to be as comprehensive as possible – but they are not designed to be memorized. Taking in the rules in this way (as you play along) is the best approach to mastering this game. We're always open to suggestions on how to improve the comprehension of our rules. Write to us (see addresses in 3.0) if you have an idea on how we can communicate better with you.
1.0 Introduction
Chennault's First Fight is a wargame simulation of the campaign waged by the Japanese to capture Burma at the beginning of World War Two.
2.0 Game Components
Components. Your copy of Chennault's First Fight should contain the following components below:
- One 34" by 22" map containing the main game map, an aerial battle board, and various displays and tables.
- 176 double-sided counters
- Two airbase display charts – one for each player.
- One 20 page rulebook.
Not supplied with this game but needed for play is a ten-sided die.
If any of these parts are missing or damaged, write to:
Against the Odds Magazine, PO Box 165, Southeastern, PA 19399-0165 USA. Attn: Chennault's First Fight. Or e-mail us at: [email protected]
We hope you enjoy this game. Should you have any difficulty interpreting the rules, please write to us at the above postal address, or send e-mail to: [email protected], phrasing your questions so that a simple sentence, word, or number can answer them. If you send a letter by mail, you must enclose a stamped, self-addressed envelope to receive a reply. We recommend e-mail as the best way to resolve a query. Although we welcome comments and suggestions about the game's interpretation of events, we cannot promise to respond to questions on theory or design intent. We also suggest that you check the game's folder on www.consimworld.com.
2.1 The Game Map
The game is played on a stylized map divided into hexagons (hexes). The map portrays the northwestern areas of Southeast Asia. The hexes facilitate positioning and movement of the playing pieces. Each hex contains a terrain type that is referenced on the Terrain Key. A hex is also individually designated with a four-digit number, which is used in set-up. Fractional hexes without numbers are unplayable and may not be entered.
2.1.1 Map Features. Various types of terrain and certain features are denoted on the game map, and are defined and their effects explained on the Terrain Key. Some of these terrain types and features are: Clear, Mountains, Sea, and Borders. In addition, the Burma Road runs through many of the terrain features above.
Errata note (Addenda as of Oct. 3, 2007): The picture for Mountain Terrain on the Terrain Key located on the map is missing from the printed map; the Addenda supplies the missing picture, which is not reproduced here.
Note. The oil well graphic in 0503 indicates the presence of the oilfields located in that part of Burma. It is there to explain the increased Victory Point award for control of the hex and has no other effect on play of the game.
2.1.2 Map Charts and Tables. Also printed on the map board is a Turn Record Track to assist in recording the game turn, the Terrain Key, a Victory Points Track, and several of the game's reference tables.
The game map also includes an "Air Battle Board" used for resolving the aerial combats in the game. This part of the map includes an Air Battle Round Track, as well as spaces for recording the air units' altitude, status (normal or disrupted) and whether an ace is flying a particular fighter.
2.2 The Playing Pieces
The cardboard playing pieces (or counters) in the game should be carefully separated before trying to play. The pieces are of different types depending on the information that appears on each. In general the pieces represent one of three types of counters: air combat units, ground combat units, and informational markers (Retired, etc.). Combat units represent the actual historical units that fought, or could have fought, in such an operation. The front side of each combat unit shows the combat unit at "Normal" (full strength) while the back of the counter (usually) represents the same combat unit in its "Reduced" side. If there is no reverse side, the unit cannot be reduced; instead, it is eliminated. Each face of a combat unit presents information that determines its capabilities in the game. Combat unit counters are illustrated on the printed sample counters.
Sample counters (as printed): Sample Fighter Unit (front: Full Strength, back: Reduced Strength; fields: (S)traffing, Aircraft Type, BF, AF, Range, DF, Unit ID, (F)ighter). Sample Bomber Unit (front: Full Strength, back: Reduced Strength; fields: Acceleration, Aircraft Type, BF, AF, Range, DF, Unit ID, (B)omber). Sample Ground Combat Unit (front: Full Strength, back: Reduced Strength; fields: Nationality, Unit Size, CF, Unit ID, Unit Type).
2.2.1 Nationality. Unit counters, referred to as units in the rules, are printed with various background color patterns for national identification:
- Allies: Green (AVG), Brown (Commonwealth) or Blue (Chinese)
- Japanese: White (5th Hikoshidan and Army), Pale Yellow (7th Hikoshidan) or Pink (Naval Air: Kido Butai).
The color bands on the aerial units serve to easily distinguish the different formations within the major groupings.
2.2.2 Aerial Unit Type Symbol. There are several different types of air combat units with a top-down aircraft symbol on the counter, demonstrated on the sample counters. Also in the game, but not shown here, are Recon Aerial Units. The two Japanese aerial reconnaissance units each has an aircraft icon, but the only number appearing in the counter is its range (8). The type is Ki46 (code name "Dinah").
The counter fields are:
- AF – This (attack factor) value in the upper-left corner of the counter represents a unit's capability of damaging an enemy aerial unit by firing at it during aerial combat (Section 8.7).
- DF – This (defense factor) value in the lower-left corner of the counter represents a unit's capability of defending (warding off damage) against hostile fire.
- BF – This (bombing factor) value in the upper-right corner of the counter represents a unit's capability of inflicting damage against targets on the ground (Section 8.10).
- Range – This value in the lower-right corner of the counter represents the limit to a unit's movement over the hex map (Section 8.2).
- Acceleration – A bomber unit with an "L" next to its BF gains in speed in the round after it delivers its bomb load.
- Strafing – A fighter unit with an "S" next to its BF may make low-level strafing attacks against ground targets. This is a subset of bombing combat.
- Aircraft Type – This information is useful when cross-referencing the aircraft behavior on the Aerial Combat Movement Table, where the tactical movement rating (MP) of each type also appears.
- Aerial Combat Altitude, Aerial Disruption, Aerial Surprise, Ace, Individual Regroup, Ground Disruption, Rangoon Radar, , , , , , , , , and are the symbols used on the markers (see Section 2.3).
Unit ID. Each unit has a unique identifier which is used in entering it into the game; either as an initial placement (Module 14.0), or a reinforcement (Module 12.0).
2.2.6 Ground Combat Unit Type Symbol. There are two different types of ground combat units: Infantry and Armored. The Unit Type Symbol is printed in the center of the counter and identifies both the kind of unit the piece represents and its principal role.
- CF – The Combat Factor of a ground combat unit serves as both its attack and defense factor. It determines its ability to inflict damage on an enemy ground unit, as well as its resilience in enduring attacks from other ground combat units and aerial bombing.
- Unit Size – In this game the unit size is decorative, especially since a single formation may have several counters. The sizes are: Brigade (X), Division (XX), and Army (XXXX).
2.3 Markers
Markers are special pieces used to record various game functions, such as who is an ace, who is Disrupted, or the current Turn. Markers generally contain only a symbol or notation for their use.
2.4 The Die
The game uses a ten-sided die to resolve combat and other factors for which performance will vary. A '0' is a "ten", not a "zero". Unfortunately, you will have to provide your own die, as they are very difficult to staple into the magazine. Throughout these rules, the abbreviations DR and DRM are used to stand for Die Roll and Die Roll Modifier, the latter being a plus or minus number used to adjust the DR.
2.5 Game Charts and Tables
Various charts and tables simplify and illustrate the game and furnish results for certain game actions. These include the Turn Record Track and the Terrain Key, both printed on the map board, the Combat Results Tables, along with other charts and tables mentioned in the rules.
3.0 Important Concepts
Before getting on with the main body of the rules, there are several important concepts with which players should familiarize themselves. These are presented here.
- Aerial Combat Unit – A counter with an aircraft symbol on it is an Aerial Unit. Excluding the two Japanese aerial reconnaissance units, all other aerial units are aerial combat units; i.e. they have factors that allow them to perform bombing, strafing and aerial combat. Aerial combat units are sub-divided into fighters (F) and bombers (B).
- Airbases and Cities function as static combat units during air operations. Their anti-aircraft factors may attack enemy aerial units conducting attacks against them.
- AVG – American Volunteer Group, the Flying Tigers.
- Bombing – An aerial combat unit may participate in one bombing mission per turn if it has a bombing or strafing factor of '1' or more (printed in the counter's upper right corner).
- British Commonwealth – This is a collective term for British, Indian and Burmese units (the brown/tan counters).
- Chutai – Japanese squadron.
- City – There are three cities on the map: Bangkok, Rangoon and Kunming. All other named sites are towns.
- Control – Control of a hex is determined by the last player to have a ground combat unit passing through or occupying the hex. All hexes, including hexes with international borders, not occupied by the Japanese player in Burma, China and India begin the game under Allied control. All hexes in Thailand and Indochina, excluding hexes with international borders, begin the game under Japanese control.
- Ground Combat Units – Although the air campaign plays the decisive role in the game, the ground combat units that participated are also represented. The units are, with the exception of the British 7th Armored Brigade, infantry. At this stage of the war the ground campaign in Burma was very one-sidedly in favor of the Japanese. Ground units represent regiments and brigades (2,000 to 3,000 men), divisions (8-10,000 men) and Chinese Nationalist armies (ca. 15,000 men).
4.0 Sequence of Play
Chennault's First Fight is played in game turns. The game starts and keeps going until 10 turns have been completed, using the sequence of play below.
4.1 Random Event Phase
Events outside of the controlled game parameters have, or may have an impact on the campaign.
4.2 Mobile Airbase Construction Phase
Both sides can construct mobile air bases in friendly, controlled, non-mountain hexes during the Mobile Airbase Construction Phase of the game.
4.3 Initiative Phase
The player who gains the initiative is called the "initiative player" for the current turn. His opponent is referred to as the "reaction player". A variable number of initiative air missions are also awarded to the initiative player.
4.4 Air Operations Phase
The Air Operations Phase is played as a series of air missions. The player executing an air mission is known as the "mission player", while his opponent is the "interceptor player".
4.5 Ground Operations Phase
Players may move their ground combat units to occupy enemy territory and to attack enemy ground combat units.
4.6 Supply Determination Phase
Ground combat units and airbases (not aerial combat units) on the map, in order to remain fully functional, must trace an uninterrupted supply line of any length to a friendly supply source during the Supply Determination Phase.
4.7 Regroup Phase
Both sides may attempt to remove the disrupted status of each airbase and aerial and ground combat unit so afflicted, and remove hits.
4.8 Reinforcement Phase
Reinforcements are placed during the Reinforcement Phase of their turn of arrival.
4.9 Victory Points Phase
If the turn (initiative) marker is not on Turn 10, advance the turn (initiative) marker one space along the Turn Track, carrying with it all markers or units currently still with it on the track. If it is Turn 10, stop play and determine the victor.
5.0 Random Events Phase
Events outside of the controlled game parameters have, or may have an impact on the campaign.
At the beginning of each turn one of the players rolls a DR10 to, perhaps, invoke a random event (the number preceding the event corresponding to the DR10 result). The list of random events appears in Module 18 at the end of this rulebook.
Errata (Addenda as of Oct. 3, 2007): the last sentence above is corrected to read Module 18 (the printed text said Module 17); the Random Events List is at Module 18.0 at the end of the rulebook.
6.0 Airbases
Airbases are the display and holding areas for each side's aerial units. Players will find it difficult to conduct effective aerial operations without them. Each airbase on the map is marked with an airbase symbol (see the Terrain Key).
6.1 Limited Intelligence
Each player's Airbase Display Chart is kept hidden from his opponent throughout the game. Real wargamers are subject to a code of scrupulous honesty. Disclosure to an opponent happens only as a result of espionage (random event #4) or aerial reconnaissance (Section 7.4).
6.2 Types of Airbases
There are four types of airbases:
- Major off-map airbases that are located in India (for use by Allied aerial units only) and Indochina (for use by the Japanese player only).
- Major on-map city airbases: Bangkok, Kunming, and Rangoon.
- Minor on-map airbases are at most towns located in non-mountain hexes.
- Minor mobile airbases (2 Allied and 3 Japanese maximum): These may be constructed in friendly, controlled, supplied, non-mountain hexes during the Mobile Airbase Construction Phase of the game.
6.3 Airbase Hosting Capacity
An aerial unit must be based or hosted at a friendly airbase.
6.3.1 Major Airbases. A major on-map city airbase can host the following aerial units:
- All of the aerial units of the same squadron or sentai; or
- Any 2 units from differing squadrons/sentais as long as they are of the same type (i.e., both bombers or both fighters); or
- Any 2 units from differing nationalities as long as they are the same type (both bombers or both fighters).
A Japanese reconnaissance unit can also be based at a major airbase in addition to all other units based there. It does not count against the hosting capacity.
Exception: The major airbase at Kunming can host up to six aerial combat units, provided they are all Chinese (CAF) units.
6.3.2 Minor Airbases. A minor airbase, including the mobile airbases, can host:
- Any 2 units as long as they are of the same type (i.e., both bombers or both fighters); or
- Any 2 units from differing nationalities as long as they are the same type (both bombers or both fighters).
6.3.3 Major Off-map Airbases. A major off-map airbase can host any number and type of aerial units. Off-map airbases cannot be disrupted or destroyed (Section 8.10).
Designer's Note: The off-map airbases represent many airbases scattered throughout the region.
6.3.4 Over Capacity Penalty. If the number of aerial units at an airbase exceeds the hosting capacity, all of the units at the base are placed in the "flown" half of the airbase, and may only stage-move (Section 8.2) until the hosting capacity is restored.
6.3.5 Allied Airbase Nationality Limitations. Only RAF air units can base at Indian off-map airbases; Chinese and AVG units may not base in India. Similarly, RAF air units may not base at any airbase (major, minor or mobile) in China. Any Allied air unit may base at any type of airbase in Burma.
6.4 Airbase Layout
Each airbase is graphically represented on a player's Airbase Chart.
Note: Not every airbase is represented on a player's airbase chart. If the ones not shown on a side's chart are taken, the game is probably a blow-out!
An aerial combat unit that is eligible to perform a mission during the Air Operations Phase resides in the "ready" half of an airbase graphic. An aerial combat unit that has already performed a mission or an interception is placed in the "flown" half of the airbase. Each airbase is also divided into areas that separate disrupted aerial combat units from undisrupted ("normal") ones. Thus, a unit that returns from a mission during which it was disrupted is placed in the "flown-disrupted" quadrant of the airbase where it lands.
6.5 Mobile Airbase Construction
Both sides can construct mobile air bases in friendly, controlled, non-mountain hexes during the Mobile Airbase Construction Phase of the game.
6.5.1 Restrictions. No more than one mobile airbase can be constructed in a particular hex.
6.5.2 Procedure. The player constructing the airbase designates the hex where the airbase is to be located, placing the counter "Under Construction" side up on the map. During the Regroup Phase (Module 11.0) an under-construction airbase is turned over to reveal its functional side. It may start hosting aerial units immediately.
6.5.3 Attacks Against Mobile Airbases. An under-construction airbase may be the target of aerial bombing as a regular airbase (it has no AA defense). If an under-construction airbase suffers disruption or destruction as a result of bombing, it is removed from the map. The owning player may attempt to construct it during the next or a subsequent turn.
An operational mobile airbase may be the target of aerial bombing as a regular airbase. If bombing destroys a mobile airbase, it is removed from the map. The owning player may attempt to construct it during the next or a subsequent turn.
6.5.4 Dismantling Airbases. An un-disrupted mobile airbase that does not have any aerial units based on it can be dismantled for use somewhere else by simply removing the unit during the Regroup Phase (Module 11.0). It can be re-constructed in the next turn.
6.6 Airbases as Targets
Airbases can be the targets of enemy aerial or ground attacks. Effects are detailed below.
6.6.1 Airbase Defense. An airbase may be designated as the target of an air mission, and may be attacked by bombing (Section 8.10). An airbase can defend itself against bombing or strafing aerial units with anti-aircraft (AA) fire (Section 8.9). A minor airbase has an intrinsic AA factor of 2, while a major airbase has an intrinsic AA factor of 3. This is reduced to 1 if the airbase becomes disrupted. An under-construction mobile air base has no AA factor. An airbase has no intrinsic defense against ground combat units. A ground unit cannot attack an airbase. The ground unit can capture a non-mobile enemy controlled airbase. Off-map airbases cannot be attacked, captured, disrupted or destroyed.
6.6.2 Airbase Disruption. The disrupted status of an airbase lowers its AA defense, hinders the ability of its aerial units to scramble, and prevents the regrouping of aerial units based there (Module 11.0).
6.6.3 Airbase Destruction. Destroyed non-mobile airbases cannot be repaired or used by either player (at least in the time span of the game). Place an airbase "Elim" marker on its location.
6.6.4 Airbase Capture. A player's ground combat unit(s) can capture an operational enemy airbase printed on the map by occupying the hex containing the airbase, thus turning it into a friendly airbase. Such an airbase is automatically disrupted until the new owner repairs it during a Regroup Phase (Module 11.0). At the instant of capture all aerial units based there may attempt an airbase evacuation (6.6.5), and escape to other airbases. A mobile airbase is removed from the game if an enemy ground combat unit occupies its current hex location. In this case neither player may rebuild it.
6.6.5 Airbase Evacuation. At the instant that an enemy ground combat unit captures an airbase, each aerial unit based there may attempt to relocate to another friendly airbase. For each aerial unit at the airbase the owning player rolls a DR10, modifying it as follows:
- +1 if the unit is in the "flown" section of the airbase.
- +1 if the unit is disrupted.
- +2 if the airbase is disrupted.
- +3 if the unit is slated for an individual regroup this turn.
If the die-roll result is equal to or lower than the MP rating (basic movement points, printed on the Aerial Combat Movement Table) of the scrambling aerial unit, the scramble attempt succeeds and the unit may stage-move to any other friendly airbase that is within its printed (not doubled) range. In this case a bomber with an acceleration option ("L" on the counter) uses its lower MP rating.
A unit that fails to evacuate is destroyed.
7.0 Initiative Phase
The player who gains the initiative is called the "initiative player" for the current turn. His opponent is referred to as the "reaction player".
Note: There is no initiative determination die-roll (Section 7.5) on turn 1. The Japanese player is the initiative player on the first turn of the game.
Execute the following sections sequentially:
7.1 Japanese General Regroup?
The Japanese player declares whether the current turn is a general regroup turn (Section 11.2). If this is a January turn, advance the 'Rgrp Turn' marker to the Turn '6' (Feb 1) space on the Turn Track. If this is a February turn, remove the 'Rgrp Turn' marker from the game. There may be a maximum of two Japanese general regroup turns in the game.
7.2 Individual Unit Regroup Designation
Both players may designate some of their disrupted aerial combat units at airbases as undergoing regrouping. Place a regroup marker on the unit, and if there is a shortage of such markers, agree on some other counter or device to indicate that a unit is undergoing regrouping (Section 11.1). This is normally done in secret, requiring honesty – which true gamers need not be reminded of.
7.3 Commitment of the 7th Hikoshidan
All of the aerial units of the 7th Hikoshidan (7H) are available to the Japanese player from the start of the game. The decision whether or not to commit the 7H has to be made each turn. The Allied player is awarded one victory point each turn in which the Japanese player states his intent to commit the 7th Hikoshidan. Commitment does not entail any obligation to actually fly 7H aerial units.
If the Japanese player decides to commit the 7th Hikoshidan, each existing 7H unit starts the turn from the base where it is currently located.
If the Japanese player does not commit the 7th Hikoshidan, all existing 7H units are immediately placed in the ready-normal quadrant of the Indochina off-map airbase, regardless of their current location.
Note: In this case they may have been committed to another theatre of operations. A practical advantage is the removal of any disruptions to 7H units.
However, at the end of each turn, during the Victory Points Phase (Module 13.0), a number of victory points may be awarded to the Allied player for both of the following conditions:
- The number of 7H units of any status in the "flown" segments of Japanese airbases.
- The number of currently destroyed 7H units.
Example: The Japanese player flies one 7H unit on a mission during turn 2. The unit is destroyed in aerial combat. At the end of turn 2 the Allied player is awarded one victory point. On turn 3, not a general regroup turn, the Japanese player commits two other 7H units to missions or interceptions. They return safely (possibly disrupted) from their tasks, and are placed in the flown segment of a Japanese airbase. At the end of turn 3, the Allied player will receive another three victory points: (2 flown 7H units) + (1 destroyed 7H unit).
Hint: When committing 7th Hikoshidan units to a mission or an interception, keep those units hidden from the Allied player until the last moment, for he will surely concentrate on them as interception or mission targets.
7.4 Japanese Reconnaissance Flights
The Japanese player has two aerial reconnaissance units (Ki-46, codenamed "Dinah" by the Allies). The unit from the 5th Hikoshidan is normally in play. The other is available only if the 7th Hikoshidan has been committed (and the penalty paid) to action during the current turn.
7.4.1 Basing. A reconnaissance unit is based at any operating Japanese airbase, and counts as either a fighter or a bomber against the hosting capacity (Case 6.3.2) of a minor or a mobile base. It does not count against the hosting capacity of a major airbase.
7.4.2 Procedure. Aerial reconnaissance missions are flown in the Initiative Phase. The Japanese player rolls a DR10 for each reconnaissance unit. A die-roll result less than or equal to 7 allows a reconnaissance unit to fly. Add one to the die if the current turn has been declared a general regroup turn by the Japanese player. If the die-roll result is 8 or more the aerial unit is not available this turn and must remain grounded at its airbase as flown. If available, the aerial unit can be placed on any geographical map hex within its range (up to 8 hexes) from the base where it is currently stationed (Section 8.2).
The initiative die-roll result is modified by -1 for each if Kunming and Rangoon have a reconnaissance aerial unit flying over it. If a Ki-46 is placed elsewhere it will add 1 to the Allied player's scramble die-roll result for any fighters that attempt to intercept in that hex.
7.4.3 Restrictions. Only the Japanese player can conduct reconnaissance missions. Ki-46 reconnaissance units cannot be intercepted or engaged in aerial or AA combat (and hence can only be disrupted or eliminated if caught on the ground). If destroyed on the ground while at an airbase, a Ki-46 unit cannot be replaced or rebuilt.
7.4.4 Outcomes. When an aerial reconnaissance unit is placed in a hex, the Japanese player may designate an airbase in the hex for examination. The Allied player must disclose the numbers and type (fighters or bombers) of aerial units at the base.
Designers Note: The Ki-46 Dinah was one of the fastest and highest flying aircraft of the day, making it virtually untouchable at this point in the war.
7.5 Initiative Determination
The Allied player rolls a DR10 and modifies it as follows:
- -3 if Rangoon is Japanese-controlled.
- -1 if Rangoon is Allied-controlled, and currently has 3 or more hits.
- -1 if Kunming currently has 3 or more hits.
- -2 if the radar at Rangoon is destroyed.
- -1 for each hit on the Burma Road.
- -1 for a Japanese reconnaissance (Ki-46) aerial unit in place over Rangoon.
- -1 for a Japanese reconnaissance (Ki-46) aerial unit in place over Kunming.
- +1 if the Japanese player has declared a General Regroup Turn.
Errata (Addenda as of Oct. 3, 2007), clarification: the -2 DRM for destroying the Rangoon Radar is only in effect as long as Rangoon is Allied controlled. Use the -3 DRM for Rangoon's occupation once the Japanese take control.
If the die-roll result is 6 or higher the Allied player is the initiative player. If the die-roll result is 5 or lower the Japanese player has the initiative.
7.6 Initiative Air Mission Determination
The initiative player rolls a DR10 to determine the number of air missions he can perform before alternating air missions commence in the Air Operations Phase (Case 8.1.2).
| DR10 | Initiative air missions |
|---|---|
| 1-4 | 2 initiative player air missions |
| 5-8 | 3 initiative player missions |
| 9 or 10 | 4 initiative player missions |
8.0 Air Operations Phase
The Burma campaign was dominated by the air war raging overhead. The key actions by the players in the game involve their aerial units.
The Air Operations Phase is played as a series of air missions. The player executing an air mission is known as the mission player, while his opponent is the interceptor player. The purpose of an air mission is to disrupt or reduce the units, bases, cities, roads and other assets of the enemy through targeted bombing, strafing (a subset of bombing for game purposes) or aerial combat. The interceptor player may want to prevent or reduce the success of the air mission by engaging the air mission units in aerial combat and with anti-aircraft (AA) fire.
8.1 Air Missions
Conducting air missions is the heart of the game.
8.1.1 Initiative Air Missions. The initiative player gets to conduct a number of air missions, the number having being determined in the Initiative Phase (Section 7.6), before the reaction player gets a chance to conduct an air mission.
8.1.2 Alternating Air Missions. Once the initiative player has flown all of his initiative air missions, or no longer wishes to fly any initiative air missions, play switches to alternating air missions, starting with a reaction player air mission and followed by an initiative player air mission. Players then take turns performing air missions.
8.1.3 Passing. A player eligible to perform an air mission may elect to pass on (not perform) the mission; whereby the eligibility switches to his opponent.
8.1.4 Closure. When both players, in succession, elect to pass on air missions, or no player has aerial units that have not flown during the current turn, the Air Operations Phase is over for the current turn. Complete the Air Operations Conclusion tasks (Section 8.12), and proceed to the Ground Operations Phase.
8.1.5 Air Mission Composition. The number of aerial units that can participate in an air mission is limited as follows:
Allied Player
- Up to 4 aerial units, if all are RAF.
- Up to 4 aerial units, if all are AVG and/or Chinese.
- Up to 2 aerial units, if one is RAF and the other is AVG/Chinese.
Japanese Player
- Up to 4 units from any two Sentais or Chutai.
- During a general regroup turn (Section 11.2), only 2 units, regardless of formation. If flying carrier aerial units (the pink counters), only carrier units may participate in the air mission, and then only up to 3 units per mission.
Note: These limits, admittedly artificial, are necessary to keep the air battles at a manageable level.
8.1.6 Air Mission Eligibility. Each aerial unit may perform no more than one air mission per Air Operations Phase. There is no limit to the number of times a particular target can be attacked by air missions during a turn.
A fighter unit may attempt and, if successful, perform any number of interceptions per Air Operations Phase, even though it may have participated in an air mission earlier in the phase. On the other hand, a fighter unit that attempts (even if it does not perform) an interception before it has performed an air mission during an Air Operations Phase, is no longer eligible to perform an air mission during the Air Operations Phase. A fighter unit attempting an interception from the "flown" half of an airbase does so with a reduced chance of success.
An individual unit marked with a "Rgrp" marker cannot perform an air [attack] mission. A fighter with a "Rgrp" marker may attempt an interception, but in doing so will lose its regroup status.
Carrier fighters may not attempt interceptions.
An aerial combat unit that is eligible to perform a mission against an enemy target during the Air Operations Phase has to be in the "ready" half of an airbase graphic. An aerial combat unit that has already performed a mission or an interception is placed in the "flown" half of the airbase. Each airbase is also divided into areas that separate disrupted aerial combat units from undisrupted ("normal") ones. Thus, a unit that returns from a mission during which it was disrupted is placed in the "flown-disrupted" quadrant of the airbase where it lands.
Within the eligibility limits, disrupted aerial combat units may participate in missions and interceptions, but with lower odds of success and with greater risk. Such units take off from the "disrupted" segment of its airbase, and will have an aerial disrupt marker ("D" with negative numbers in three of the four corners) assigned to it if it is part of the air mission or a successful interception attempt.
Note: It is recommended that players not reveal the constituent aerial units of an air mission until air-to-air, AA or bombing combat occurs, whichever comes first.
8.1.7 Air Mission Target Hex Designation. Place the air mission "Target" marker on the hex to be attacked by the air mission. If the mission player decides to perform a staging mission (8.3), no target hex designation is made.
8.1.8 Kido Butai. The 6 carrier units (2 A6M, 2 B5N, and 2 D3A) can be used once per game on any turn in February. The Allied player gains 10 (ten) victory points if the Japanese player exercises this option. Further, the carrier units may not be used on a turn the Japanese player has declared a General Regroup (Section 11.2).
The 6 naval aerial units are based on the Kido Butai (carrier task force) "airbase" off the coast on the geographic map. The carrier units are removed from the game once they have flown. The Allied player cannot attack the Kido Butai "airbase."
Designer's Note: This is a very optional and a-historical event. It is, however, a legitimate what-if to explore the effects of Admiral Nagumo diverting the Kido Butai before the Indian Ocean offensive to help out in the Burma campaign. The no-attack prohibition is to keep the game simple, and assumes the Royal Navy is taking on the Imperial Japanese Navy. Also, all of the Japanese naval aerial units have ranges somewhat less than those listed in most aircraft reference works. This is based upon this designer's interpretation the ever-cautious Admiral Nagumo would have stood his carriers well off-shore and away from the Allied airbases as much as possible. The no-regroup restriction is due to the loss of face that the Army High Command would have incurred if seen as being "rescued" by the Navy!
8.2 Air Mission Movement
Aerial units move from one or more airbase(s) to the target hex on the geographic map. The maximum number of hexes an aerial unit can move away from its airbase is indicated by the unit's range factor (printed in the lower-right corner of the counter). Each hex entered normally costs 1 range point. Do not count an aerial unit's airbase hex against its range movement limit, but do count the target hex.
Units may only move into and/or through numbered hexes on the map. Un-numbered half hexes are considered a part of the map edge, and hence ignored.
It costs two range points to cross one of the map edge barriers (orange on the Indochina side; green on the India side), in addition to the hex entry cost, to move to or from an off-map airbase (India for the Allies, Indochina for the Japanese). Also count the first numbered hex that a unit enters when entering the map. It costs one movement point to leave the map. Units entering from or exiting to India do so from any hex in India along the green west map edge. Units entering from or exiting to Indochina do so from any hex in Indochina or Thailand along the orange east map edge. Thus, it will cost a unit flying from an off-map Japanese airbase to Rangoon via hex 0808 eight range points: 6 for the hexes, and 2 for the barrier. It will spend the same eight range points to return to the same base: 5 for the hexes; 2 for the barrier; and 1 to leave the map.
Carrier units start counting their mission range when entering the first sea hex on the map marked with the Kido Butai entry icon (see the Terrain Key).
8.3 Staging
Instead of conducting an air mission against a designated target hex, the mission player may move one of his aerial units up to twice its range factor from one friendly air base to another. The airbase the unit leaves may be disrupted, but the destination airbase cannot be disrupted. This occurs on the mission player's airbase display, obscured from his opponent.
A unit that had flown a mission or an interception earlier in the turn may stage move. A unit that starts flown remains flown, but a unit that starts ready becomes flown in a staging mission.
A disrupted unit that stage-moves runs an accident risk (Case 8.11.1).
If the unit had been slated for an individual unit regroup (Section 11.1) this turn, it loses its regroup opportunity – remove the regroup marker – when it stage-moves. Japanese units may still stage-move during a General Regroup Turn.
8.4 Interceptor Scramble
If the air mission target is within the range of fighters at the interceptor player's airbases, up to four of those fighter units may attempt to scramble in order to intercept and attack the mission player's aerial units. The interceptor player does not have to declare beforehand what fighters will scramble, but is limited to 4 (four) attempts, each for a different unit.
8.4.1 Interception Procedure. For each interception attempt the interceptor player declares that he is attempting an Interceptor Scramble, designates a fighter unit, and rolls a DR10, modifying it as follows:
-
-N where N is the number of range points that the interceptor will have to expend to reach the target hex, subtracted from the number of hexes entered by the mission aerial units that started furthest away from the target. The number of hexes entered excludes the mission unit's airbase. However, N cannot exceed 4 (four).
Example: An off-board Japanese mission unit enters six hexes to reach the target: Rangoon. An Allied interceptor in Prome uses one range point to reach the target hex. The difference is 5, but that exceeds the maximum, so N ends up being 4.
-
-2 if the radar at Rangoon is still in play, and the target hex is within two hexes of Rangoon (Allies only).
-
+1 if a Japanese aerial reconnaissance unit is in the target hex. (Allies only)
-
+2 if the interceptor unit is disrupted.
-
+2 if the interceptor unit's airbase is disrupted.
-
+2 if the interceptor unit is in the "flown" section of the airbase.
-
+3 if the interceptor unit is slated for an individual unit regroup this turn.
8.4.2 Interception Success. If the modified die-roll result is equal to or lower than the MP rating (basic movement points, printed on the Aerial Combat Movement Table) of the scrambling fighter unit, the scramble attempt succeeds and the interceptor player may move the unit to the air mission target hex, if the latter is within the unit's range.
8.4.3 Interception Failure. If there is no successful Interception Scramble attempt, there will not be Aerial Combat (Section 8.7), and the Air Operations Phase proceeds directly to AA combat (Section 8.9) and Bombing Combat (Section 8.10).
8.5 Target Scramble
After the interceptor player has completed his Interceptor Scramble attempts, and if there are aerial units, bombers, fighters or reconnaissance units, based in the air mission target hex, they may attempt to scramble in order to avoid being caught on the ground. A fighter unit that failed at its interception attempt is eligible for Target Scramble.
8.5.1 Scramble Procedure. For each such unit the interceptor player rolls a DR10, modifying it as follows:
- -2 if the radar at Rangoon is still in play (Allies only), and the target hex is within two hexes of Rangoon.
- +1 for each Interceptor Scramble attempt made from the base.
- +2 if the unit is in the "flown" section of the airbase.
- +2 if the unit is disrupted.
- +2 if the airbase is disrupted.
- +3 if the unit is slated for an individual regroup this turn.
- +N where N is the number of aerial units at the airbase.
8.5.2 Scramble Success. If the die-roll result is equal to or lower than the MP rating (basic movement points, printed on the Aerial Combat Movement Table) of the scrambling aerial unit, the scramble attempt succeeds and the unit may stage-move to any other friendly airbase that is within its printed (not doubled) range. In this case a bomber with an acceleration option ("L" on the counter) uses its lower MP rating.
Note: Both types of scramble, "Interceptor" and "Target", may be made from the same airbase. However, all the units still count towards the number of units at the airbase when such attempts are made.
8.6 Air Mission Target Designation
If there is more than one type of target in a hex, the player must declare which specific target is to be attacked. Indicate this by placing the "Target Type" marker in the target type box in the leftmost column of the Bombing Combat Table. An air mission can target only one specific ground combat unit or installation in the target hex – mission player's choice. Off-map airbases cannot be targeted.
8.7 Aerial Combat
Designer's Note: This is a game. If you wish to be presented with an accurate simulation of aerial combat, this is not the vehicle for you. The purpose is to have a tactical mechanism whereby one can arrive at an operational conflict decision, yet also one that demonstrates some of the differences between the opposing airplane designs. Here you will have to accept that, like with several other wargames, each unit takes on the characteristics of its primary individual machine (airplane type). Nevertheless, the following should present you with many interesting tactical decisions.
Aerial Combat occurs when mission aerial units encounter interceptor fighter aerial units that have scrambled (Section 8.4) in the mission target hex. If this condition has not been met, there is no Aerial Combat, and the Air Operations Phase proceeds directly to AA combat (Section 8.9) and Bombing Combat (Section 8.10).
8.7.1 Mission Group Co-ordination. If the mission aerial units were dispatched from different airbases the mission player has to designate the units from at least one base as the "late" group. The mission player finds the difference in the range flown by "late" group, and the range flown by any other non-"late" unit in the mission, and rolls a DR10. If the die-roll result is less than this range difference, then the mission groups failed to co-ordinate their arrival over the target hex. The designated "late" group (latecomers) may then only enter the aerial battle board on the second (or later) Air Battle Round.
8.7.2 Aerial Combat Components. The following components are used in aerial combat:
- The aerial battle board (on main map)
- 8 low/high altitude markers
- 8 movement sequence markers (four per side)
- 8 Aerial Combat Disruption markers
- 1 Surprise marker
- 1 Air Battle Round marker
- The Aerial Combat Movement Table (at end of rulebook)
8.7.3 Aerial Combat Set Up. Place the Air Battle Round marker in the first space on the Air Battle Track.
Be sure that each aerial unit that left its airbase from the "ready-disrupted" quadrant has a disrupted "D" marker associated with it.
Each player then secretly places a movement sequence marker on each of his aerial units involved in the air battle. A player also places a "Low Altitude" or "High Altitude" marker on each of his units that he wishes to not start at the default medium altitude (no marker). Place an altitude marker with the sequence marker. Bombers (assumed to be loaded) may not set up at high altitude. If a player has fewer than four units involved, he may place any combination of sequence markers on his unit(s). If, for example, he has only two units in the battle, he could use sequence numbers "2" and "4", while placing "1" and "3" aside. The mission player is required to assign a higher sequence number to a latecomer (Case 8.7.1) than to a unit that enters the aerial battle board on the first round of the air battle.
This sequencing is important, because it determines the order in which aerial units will move during each round of the air battle. During a round mission unit 1 (m1) will move first, followed by interceptor unit 1 (i1), followed by m2, i2, m3, i3, m4 and i4. Following up from the example in the previous paragraph, the sequence could be m1, m2, i2, m3, m4 and i4 if there are four mission aerial units.
After sequencing, the mission player sets up his aerial units on the board edge hexes labeled "M". He may place no more than one unit in a hex. Interceptor units and mission latecomers (Case 8.7.1) start off the board.
When a unit starts its first round of movement of the air battle, its movement sequence is revealed, and any markers attached to the unit is placed in the Aerial Combat Tactical Status Box numbered correspondingly with its sequence marker. The markers placed there pertain to altitude, disruption and whether or not the unit has an ace. The only marker that follows the unit around on the aerial battle board is its sequence marker. This is recommended in order to avoid clutter on the aerial battle board.
8.7.4 Aerial Combat Sequence of Play. Aerial combat is played in a series of rounds. The following sequence is followed in each round:
- Placement of mission latecomers (not on the first round)
- Mission unit movement and: a. Anti-aircraft (AA) fire, if possible b. Bombing, if possible c. Continued movement after bombing, if possible
- Mission unit fire, and continued movement, if possible
- Interceptor unit movement (and, possibly, defensive fire by mission bomber units)
- Interceptor unit fire, and continued movement, if possible
- Advance the Air Battle Round marker one space on the Air Battle Track
Repeat the sequence until six rounds have been completed, or there is no mission aerial unit left on the aerial battle board. If, at the end of six rounds, there are still mission aerial units on the aerial battle board, they are simply returned to base (Section 8.11). For each mission bomber that had failed to deliver an attack on a target hex (labeled "T"), i.e. an aborted mission, a victory point is awarded to the opposing player (Section 8.8).
Recommendation: When moving a unit, leave its sequence marker in the starting hex, facing the icon on the marker towards the hex side the unit was facing before it commenced movement. When a unit completes its movement for the round, reunite its sequence marker with it. Also, 144th scale models can be easily adapted for play as well.
A unit may not make consecutive turn or roll movements during its round. Each turn or roll must be interspersed with another form of movement. A unit may, however, end a round with a turn or a roll, and then start the next round with a turn or a roll.
8.7.5 Entering the Aerial Battle Board. Units enter onto the Aerial Battle Board as follows:
Mission Units: A mission aerial unit starts on the aerial battle board from where it was set up on the hexes labeled "M" (the mission entry area). Latecomers (Case 8.7.1) set up on a mission entry area hex, starting on round two of the air battle.
Interceptor Units: When an off-board interceptor aerial unit's movement impulse comes due, it may remain off the aerial battle board and, optionally, change its altitude by one level. To move the unit onto the aerial battle board the interceptor player rolls a D10. If the result is a "1" through a "9", the unit is placed off the aerial battle board next to one of the three hexes numbered correspondingly with the D10 result. If, for example, a "4" had been rolled, the unit may enter the aerial battle board through any of the hexes numbered 0103 through 0105. The unit faces any of the eligible hex sides that will take it onto the aerial battle board, and pays one movement point to enter the first board edge hex. From then on all of the normal movement costs and gains apply. The interceptor unit enters the aerial battle board at the last altitude it had attained while off the aerial battle board. The interceptor player rolls for each interceptor unit individually.
Surprise! When an off-board interceptor aerial unit intends to enter the aerial battle board, and rolls a result of "0" (ten) with a DR10, it has attained surprise. Place the "Surprise!" marker on the unit right after the die-roll. It may enter the aerial battle board from any board edge hex, and receives a firing bonus during its current round. Mission aerial units cannot achieve surprise. Only one unit at a time may be assigned the "Surprise!" marker. If a "0" is rolled for another unit in the same round, it is not afforded the firing bonus that comes with the "Surprise!" marker, but it may enter the aerial battle board from any board edge hex.
8.7.6 Leaving the Aerial Battle Board. Units may exit the Aerial Battle Board only as follows:
Mission Units: When a mission aerial unit leaves the aerial battle board, it is considered to have returned to base (Section 8.11). It may not return to the aerial battle board for the remainder of the mission. It costs a unit one movement point to move off the aerial battle board from a board edge hex.
Interceptor Units: When an interceptor aerial unit leaves the aerial battle board, it is considered to be at the last altitude it had attained while on the board. It costs a unit one movement point to move off the aerial battle board from a board edge hex. It may return to the aerial battle board during one of its following rounds during the mission, using the same procedure described above.
8.7.7 Aerial Combat Movement. Aerial units move from hex to hex, and from one altitude level to another by expending (or gaining, by diving) movement points. A unit's basic (unmodified) number of movement points (MP) appears in the first numeric column of the Aerial Combat Movement Table.
Most (but not all) bombers have their MP rating increased by 1 MP in the air battle round after the round in which they had unloaded their bombs. Such units have an "L" printed to the left of their bombing factor on the counter. Disrupted units have a reduced MP rating (-1 MP).
It costs a unit 1 MP to move into the hex it is facing without changing its altitude. Each aerial unit must expend all of its movement points in each round, including those gained from diving. No unit can spend more than its modified number of movement points in a round.
A unit may perform movement and fire actions in any sequence, as long as it has movement points available to pay for its actions. It may, for example, fire and move; or it may move and fire; or it may move, fire, strafe/bomb, and continue to move.
Aerial unit facing: All aerial units must be oriented such that the front of the aircraft picture is pointed towards a hex side at all times. Bomber units may only move into the hex to the unit's front. A fighter unit not performing a Roll maneuver may also only move into the hex in front of it. Units may change facing by expending MP (see the Aerial Combat Movement Table). The cost and ability to change facing will depend on the type of aerial unit and its status.
Altitude: Unless otherwise indicated, all aerial units are assumed to be at medium altitude. Use the altitude markers to indicate those aerial units at low or high altitude. No unit can move above "high", or below "low" altitude levels.
Recommendation: Some ingenious playtesters used cube dice instead of the altitude markers. A unit at low altitude is placed on the playing surface. A unit at medium altitude is placed atop one cube die. One at high altitude is placed atop two cube dice.
Changing Altitude: A unit can change its altitude level by climbing or diving. Climbing costs a unit movement points, while diving will gain a unit movement points. For the numbers, see the Aerial Combat Movement Table. No unit can climb more than one level per round. Loaded bombers cannot climb, nor start above medium altitude. Except for the P-40 no aerial unit can dive more than one level per round. A P-40 unit gains 2 MP for diving one level, and 3 MP for diving down a second level in the same round. A P-40 unit that dives down more than one level in its round may not make any turns or rolls during that round – it may only move in straight line.
Stacking: While moving aerial units may freely pass through hexes occupied by other aerial units, and may end their movement, at any altitude, in a hex occupied by another aerial unit. Opposing aerial units in the same hex, regardless of altitude, may not fire on one another.
Roll Movement: An aerial unit with enough remaining MPs may perform a special type of movement called a "roll". A roll enables the unit to move into one of the hexes to either the left or right of the front hex. This is the only occasion that an aerial unit may move into a hex through a hex side other than the one it is facing. A unit in hex 0709, facing hex 0708, for example, may normally only move into hex 0708 with its next move, but by doing a roll to its right, it will end up in hex 0808, facing hex 0807.
Immelmann Roll: An aerial unit with enough remaining movement points may perform an extreme loop-turn called an "Immelmann". This effectively enables the unit to move into the hex it is facing, and then changing its facing 180 degrees. Example: A unit in hex 0709, facing hex 0708 moves into hex 0708, and then changes its facing towards the hex it had just left (0709). It remains at the same altitude.
Dive-bombing: Japanese D3A and Ki-30, as well as the Chinese Vengeance aircraft types may increase their bombing accuracy by opting for their dive-bombing capability (at a low altitude only) (Case 8.10.3).
Firing: A fighter unit firing its guns loses momentum – expends movement points – in the process. Bombers are not so affected. The moving unit may perform one fire action per air battle round. After firing the unit may continue moving if it has movement points remaining.
Strafing: A fighter unit at low altitude in a target zone hex (labeled "T") may fire its guns at a non-aerial target. This has the same effect (cost) on its movement as the firing just described. It is, however, preceded by anti-aircraft fire, and it is resolved as a form of bombing attack (Case 8.10.2).
8.7.8 Aerial Combat. Combat is conducted on the Aerial Battle Board as follows:
Aerial Combat Fire: An aerial unit may attempt to inflict damage on an enemy aerial unit by firing its guns at the enemy unit. A unit's aerial attack capability is rated by the Aerial Fire (AF) factor printed top-left on the counter. The ability of the targeted unit to absorb such punishment without dire consequences is its Defensive Factor (DF), printed bottom-left on the counter. A unit with no AF rating may not fire, though a unit with a modified AF rating of '0' or less may fire – its AF factor still functions. Each moving unit may fire only once per air battle round.
Range of Fire: A fighter unit may fire at an aerial target up to four hexes distant at the same altitude as itself; i.e., with a maximum of three hexes between the fighter and its target. A bomber unit may fire at an aerial target up to two hexes distant at the same altitude as itself; i.e., with a maximum of one hex between the bomber and its target.
Aerial Target at a Different Altitude: A unit may never fire at an aerial target at an altitude different from its own.
Note: Altitude level differences represent about 5000 feet (1500m). Tactical altitude differences are folded into the numbers.
Aerial Target in the Same Hex: A unit may never fire at an aerial target in the same hex as itself, regardless of the target's altitude.
Blocking: A unit may not fire through a third aerial unit (friend or foe) that is at the same altitude between the firing unit and its stated target.
Field of Fire: A bomber unit may fire at an aerial target in any direction within its range. A fighter unit, on the other hand, may only fire at a target generally to its front, as depicted in the printed graphic, where numbers equal range.
Aerial Target Orientation: It is easier to hit an aerial target moving along the same or even opposite direction as the firing unit, than it is to hit a target moving across the firing unit's field of fire. This makes the target's orientation to the firing unit very important. The printed graphic depicts a target and its orientation, depending on the location of the firing unit.
Bomber Defensive Fire: A non-moving bomber unit may fire at a moving interceptor at the same altitude. The moving unit may not be fired on in the hex that it occupies before it commences its movement. Thereafter it may take fire each time that it leaves a hex within an enemy bomber's field of fire. Every non-moving bomber may fire as many times as moving interceptor is willing to present itself as a target. For purposes of this case, an interceptor is at its former altitude when it leaves a hex to start a dive.
8.7.9 Aerial Combat Resolution. The player controlling the firing unit rolls a DR10 and modifies it as follows:
Additions:
- +N for the firing unit's AF rating.
- +2 if a fighter (not bomber) is firing from the target's rear (see Target Orientation).
- +1 if a fighter (not bomber) is firing at a bomber from the target's front (see Target Orientation).
- +1 if an Allied ace is with the firing unit.
- +2 if a Japanese ace is with the firing unit.
- +1 if the firing interceptor (only) has attained Surprise! Immediately remove the "Surprise!" marker after firing.
Subtractions:
- -N for the target unit's DF rating, modified (DF-1) if disrupted.
- -1 if firing from the target's side (see Target Orientation).
- -2 if the firing unit is disrupted.
- -1 for each intervening hex between the firing unit (excluded) and its target (excluded).
- -1 if an ace (Allied or Japanese) is with the target unit.
- -1 if firing upon a Japanese fighter at low altitude. (Optional play-balance modifier, favors slightly the Japanese player.)
The modified DR10 result is then compared with the target unit's DF rating for the result. If the modified die-roll is:
- Less than or equal to the target's printed DF = No Effect.
- Greater than the target's printed DF = the target is disrupted. Place a "D" marker on its Tactical Status Box.
- Greater than or equal to the target's printed DF x 2 = the target is reduced (loses a step).
A unit is automatically disrupted for the remainder of the game turn when it loses a step. A unit already disrupted is not affected by additional disruption results.
8.7.10 Allied Aces. An Allied fighter unit can gain an ace whenever a fighter unit reduces or eliminates a Japanese aerial unit. When this occurs roll a DR10. If the result is a "9" or a "10" an ace counter is immediately placed with the Allied fighter unit. The ace may not transfer to another unit, and is lost if his unit is eliminated. The number of aces in the game at a given time is limited to those in the counter mix: The three red ace markers are only available to the Japanese player. The blue ace markers can be used by either of the players. No more than one ace may be assigned per unit. If no blue ace markers are currently available, skip this case. Japanese aces arrive as per the Random Events procedure (Module 5.0).
8.8 Aborting the Mission
This case applies to individual mission units.
Abort Procedure. At any time during a mission, before facing AA fire, a bomber unit may abort its mission. The unit jettisons its bomb load, and, if on the aerial battle board, possibly accelerates, heads for the board edge, and returns to base (Section 8.11). If the unit is a bomber – not a fighter – unit, the mission player is penalized: his opponent is awarded a victory point (Section 13.1) each time one of the mission bomber units exercises this option.
If a bomber unit fails to deliver its bombs to the target zone on the aerial battle board within the allotted six rounds, it is considered to have aborted its mission.
8.9 Anti-Aircraft (AA) Combat
Where there is air combat, when a bomber or a strafing fighter unit reaches the desired Target Zone ("T") hex on the aerial battle board, the bombing unit's altitude is deemed to be the altitude it has on the battle board at the time. Strafing fighters are always at low altitude.
Where there is no air combat at all, the mission player:
- Declares target type or exact target in the target hex (Section 8.6).
- Declares the bombing unit's altitude (Strafing fighters are always at low altitude).
The bombing or strafing fighter unit – hereafter called the "bomber" – then faces anti-aircraft (AA) fire from its intended target.
8.9.1 Target AA Fire. Targets' AA factors are as follows:
- Airbase: The AA factor is 3 for a major base and 2 for other airbases. These are reduced to 1 if disrupted, and ceases to function when the base is eliminated.
- Cities: Bangkok, Rangoon and Kunming each have an AA factor of 2. For each two hits (rounded down) on the city, its AA factor is reduced by 1 (one) point; e.g. if a city has 4 hits on it, its AA defense ceases to function.
- Ground Combat Units: A ground unit, regardless of its size, has an AA factor of 1, even when disrupted or reduced.
- Burma Road: The Burma Road has no AA defense.
8.9.2 AA Procedure. The interceptor player rolls DR10 to which he adds the target's AA factor. Find the numbered column matching the sum in the top header row (AA + DR10) of the Anti-Aircraft Combat Table. Go down the column to the cell that intersects the row matching the bomber's modified Defense Factor (DF), indicated in the leftmost column of the table. Use the upper half of the table if the bomber is at a medium altitude. Use the lower half if the bomber (or strafing fighter) is at a low altitude. In all cases, a bomber's Defense Factor (DF) is modified by -1 if the bomber is Disrupted. Apply the result in the cell to the bomber unit.
Errata (Addenda as of Oct. 3, 2007), clarification: On the map the AA Table is arranged differently. Use the left side of the table if the bomber is at medium altitude and use the right side if the bomber is at low altitude (in place of the upper and lower halves described above).
Exception: When conducting a dive bombing attack, the bomber can only be engaged on the medium altitude AA table, even though the attack is being conducted at a low altitude. This is meant to reflect the difficulty of hitting a bomber conducting such an attack.
Example: A disrupted, unreduced Ki-21 ("Sally") bomber unit is attacking Rangoon (city) from a medium altitude. The interceptor player rolls a '10' on a DR10, taking us to the 12-column along the top header row. Reading down to the (modified: 4DF – 1 for disruption =) 3-row, we find a 'D' result. As the bomber is already disrupted, the effective result amounts to "No Effect". If the bomber had attacked at low altitude, it would have been reduced by the corresponding 'X' result in the lower half of the table.
8.10 Bombing Combat
Immediately after AA Combat resolution, if there is a bomber or strafing unit over the target, Bombing Combat takes place.
8.10.1 Bombers. An aerial combat unit may conduct a bombing attack if it has a bombing factor (BF) printed in the upper-right corner of its counter.
8.10.2 Fighters. Fighter units that have not engaged in air-to-Aerial Combat during the air mission may conduct strafing attacks. Strafing must be conducted at low altitude. Fighter units have an "S" printed to the left of their BF on the counter.
8.10.3 Dive-bombers. D3A, Ki-30 and Vengeance units must expend 2 MP in a target zone hex if on the aerial battle board, and, in any case, be at low altitude to qualify for a dive-bombing attack. The dive-bombing aerial unit doesn't actually change altitude (it remains at low altitude). A successful dive-bombing attack increases the mission unit's probability of success. These units may also do normal bombing attacks at likely reduced effectiveness, and higher risk at a low altitude (Case 8.7.7).
8.10.4 Bombing Resolution Precondition. If there is aerial combat (Section 8.7), the bomber must move into one of the six target zone ("T") hexes on the aerial battle board. If there is no aerial combat, play proceeds as if the bomber is moving through the target zone.
Note the altitude and status of each participating bomber unit. Declare the target, if it had not already been done during AA combat (Section 8.9).
8.10.5 Bombing Procedure. For each bomber unit the mission player rolls a DR10, and adds the result to the bomber's printed bombing factor (BF). This sum is modified as follows:
- -1 if the Bomber is Disrupted
- -2 if bombing from Medium Altitude
- -1 if the target is a Ground Combat Unit in a hex with a City
- -2 if the target is a Ground Combat Unit in a Mountain terrain hex
- -4 if the Weather is Foul (Random Event #3)
- +2 if the attacker is Dive-bombing (D3A, Ki-30 and Vengeance units qualify)
Errata (Addenda as of Oct. 3, 2007), Bombing Combat Table correction: For a ground unit with a CF of "5," shift all of the results on the Bombing Combat Table right one column so a result of "9" is a miss and 10 to 15 is a "D."
8.10.6 Bombing Result Effects. The result of the bombing attack is as follows:
- N (a number in a cell) is the number of hits inflicted on the target.
- D – The target is Disrupted (Place the appropriate "D" marker on the base or unit).
- X – The target is Eliminated (destroyed) (place an "Elim" marker on the owning player's Airbase display chart).
Targets are affected in the following manner:
-
Airbases: When an airbase is disrupted, a black "D" marker is placed on the AA space of the airbase display, reducing its AA factor to '1'. Any aerial unit on the ground at an airbase may be damaged each time a disruption 'D' is scored on the base, even if the base is already disrupted. For each aerial unit at the airbase roll a DR10. A die-roll result of '6' or greater means the aerial unit is disrupted – move it to the disrupted half of the airbase display. If already disrupted, the aerial unit is reduced. Any other result has no effect. When an airbase is eliminated (the 'X' result), a black and red "Elim" marker is placed on the AA space of the airbase display. An aerial unit on the ground is destroyed if the airbase is eliminated.
-
Cities: Damage to a city target is measured in hits – the black, numbered markers. The number of hits on targets may affect the victory points during the Victory Points Phase. Additionally, each two hits (rounded down) on a city reduces its AA factor 1 (one) point. No city hex may carry more than 4 (four) hits on it at any given time. Hits in excess of 4 are ignored.
-
Burma Road: Damage to a Burma Road hex is measured in hits – the black, numbered markers. The number of hits on targets may affect the victory points during the Victory Points Phase. Additionally, if there is any Burma Road hex with 4 (four) hits on it during the Supply Determination Phase, Kunming cannot be used as a supply source. No Burma Road hex may carry more than 4 (four) hits on it at any given time. Hits in excess of 4 are ignored.
-
Ground Combat Units: When a ground combat unit is disrupted, an appropriate "D" marker is placed on the unit counter on the geographic hex map. A ground combat unit, while disrupted, may not move. It may not attack an enemy ground combat unit. It retains its full ground combat factor as a defense factor and as an AA factor. Additional disruption from aerial bombing does not affect it. Aerial bombing cannot reduce or eliminate a ground combat unit.
-
Rangoon Radar: Each time a Japanese bomber (not fighter) unit scores at least one hit on the city the Allied player rolls a DR10, modified as follows:
8.11 Return to Base. Following the completion of an air mission, each surviving mission unit and interceptor is returned to a friendly airbase within its range. As with the movement to the target hex, do not count the target against the range allowance. Any friendly air base can be used, not just the one(s) the aerial units took off from. An aerial unit that lands at an airbase after a mission or an interception attempt is always placed in the "flown" half of the airbase. More specifically, a unit is placed in either the "flown-normal" quadrant or the "flown-disrupted" quadrant of an airbase, depending on the unit's status.
Note: Please pay attention to the airbase hosting limits (Section 6.3). Land bombers with bombers and fighters with fighters whenever possible. Carrier units returning from a mission only land on the carrier "airbase" at sea.
8.11.1 Accidents. For each disrupted aerial unit that returns to base roll a DR10. Add one to the die-roll:
- +1 if the destination airbase is disrupted.
- +1 if the disrupted unit is a Chinese aerial unit.
These modifiers are cumulative. If the die-roll result is 10 or more the aerial unit is reduced. If already reduced the aerial unit is eliminated.
8.12 Air Operations Conclusion
Japanese aerial reconnaissance units that were placed during the Initiative Phase land at any undisrupted, Japanese airbase.
Award one victory point to the Allied player for each 7H aerial unit in a flown section of the Japanese airbase display chart.
9.0 Ground Operations
Ground operations are conducted in the following order:
- Initiative Player's Ground Unit Movement
- Initiative Player's Ground Combat
- Reaction Player's Ground Unit Movement
- Reaction Player's Ground Combat
9.1 Ground Unit Initiative
A Japanese ground combat unit located in a hex in Burma, China or India (including hexes with international borders running through them) may only conduct a ground operation (movement and/or combat) on turns in which the Japanese player has the initiative (Section 7.5).
An Allied ground combat unit located in a hex wholly in Thailand and Indochina (excluding hexes with international borders running through them) may only conduct a ground operation (movement and/or combat) on turns in which the Allied player has the initiative (Section 7.5).
Otherwise an undisrupted ground combat unit not bound by the above restrictions may conduct a ground operation each turn.
A disrupted ground combat unit, if disrupted again as a result of ground combat, has to retreat and remains disrupted.
9.2 Ground Unit Movement
Ground units may move from one land hex to an adjacent land hex each turn. They may not voluntarily move off the game map.
9.2.1 Restrictions. The British 7th Armored Brigade is restricted to hexes with a town, city, or along the coast. It may never enter mountain terrain; not even on the Burma Road. For this case only, hex 0302 is treated as a coastal hex.
9.3 Stacking
Up to 2 friendly units may voluntarily co-exist (stack) in a regular terrain hex. In mountain terrain only one unit is normally permitted. Opposing units may never co-exist in the same hex. If called upon to retreat units may temporarily exceed the stacking limit. Over-stacked units must move to comply with the stacking limit at the end of the owning player's next movement phase, else be eliminated.
9.4 Ground Combat
An undisrupted ground combat unit may attack one enemy ground combat unit – defending player's choice if there is more than one unit – in an adjacent land hex during its Ground Operations Phase. Ground combat is voluntary. More than one ground combat unit may consecutively (one at a time) attack a particular enemy unit several times in the same Ground Operations Phase.
The attacking unit may not attack into a hex if, should that hex have been empty, it could not have entered without becoming unsupplied (Module 10.0). As such, the 7th Armoured Brigade cannot attack into a mountain hex. A Japanese unit in hex 0705, for example, cannot attack into hex 0704, unless he could (hypothetically) trace supply from hex 0704 via either hex 0604 or 0804.
9.4.1 Procedure. The attacking player rolls a DR10 and modifies it with one (only) of the following modifiers chosen by the defender:
- -1 if the defending unit is in a hex with a city (not a mere town)
- -1 if the defending unit is in a hex with river
- -2 if the defending unit is in a hex with mountainous terrain
- -4 if the weather is foul
To this modified DR10 he adds the attacking unit's Ground Combat Factor (CF). Reading along the top header row of the Ground Combat Table, he discovers the column numbered correspondingly with the sum. Then, reading down that column, he finds the cell that intersects the row numbered accordingly with the defending unit's unmodified CF. He then applies the result found in the cell.
9.4.2 Combat Results. The following outcomes are possible:
- aX – Attacking ground combat unit is Reduced – invert the counter to its reduced side. If already reduced, it is eliminated. Additionally, it becomes disrupted.
- aD – Attacking ground combat unit is Disrupted – place the unit under a "D" marker.
- No Effect (blank field)
- dD – Defending ground combat unit is Disrupted – place the unit under a "D" marker. If already disrupted, it has to retreat one hex.
- dX – Defending ground combat unit is Reduced – invert the counter to its reduced side. If already reduced, it is eliminated. Additionally, it has to retreat one hex and becomes disrupted.
The Burmese units have only one step each. Reduction means elimination – remove the unit from the game.
A Chinese army-sized unit has four steps. When reduced from a '3' to a '2', remove the 3-strength counter, and replace it in place with its 2-strength counter.
Ground combat units that are eliminated may not be rebuilt. Remove them from the map and the game.
9.4.3 Disruptions. When a ground combat unit is disrupted, an appropriate "D" marker is placed on the unit counter on the geographic hex map. A ground combat unit, while disrupted, may not move. It may not attack an enemy ground combat unit. It retains its full ground combat factor as a defense factor, as well as its AA factor of 1. Additional disruption from aerial bombing does not affect it. Aerial bombing cannot reduce or eliminate a ground combat unit.
A disrupted ground combat unit, if disrupted again as a result of ground combat, has to retreat and remains disrupted.
9.4.4 Retreats. The owning player moves his retreating ground combat unit 1 hex away from the attacking enemy unit, preferably towards a supply source (Section 10.1). No unit may retreat into a mountain hex or an enemy-occupied hex. Units may retreat in violation of stacking (Section 9.3). Any units unable to retreat are eliminated.
While a ground combat unit may not voluntarily move off the game map, it may retreat off the map, but having done so, it may not return to the map.
Airbases and aerial units may not retreat. A ground combat unit cannot damage an airbase in a hex it vacates by voluntary movement or retreat.
Unlike many other games, there is no advance after combat for attacking ground combat units.
9.5 Amphibious Invasion (Optional Rule)
Designer's Note: The Japanese exercised almost complete control of the sea. A surprise amphibious attack was carried out in the opening stages of the campaign to seize Victoria Point. The British did do a good job of confiscating and/or destroying coastal and riverboats that could've been captured and used by the enemy. Other amphibious operations made by the Japanese elsewhere in Malaya, Wake Island, and the Philippines were disasters. This rule allows players to explore the possibility of the Japanese attempting an amphibious attack along Burma's coast.
Once per game, on a turn when the Japanese player has the initiative (Section 7.5), one undisrupted Japanese ground combat unit can attempt an amphibious invasion of any coastal hex. The invading ground combat unit must start in any Japanese controlled coastal hex. During the Japanese ground movement phase the unit is relocated to any other coastal hex, even if the hex is occupied by an Allied ground combat unit (Note: This is the only exception to the rule prohibiting opposing units being in the same hex). If the hex is already under Japanese control, the invasion is considered uncontested, otherwise it is considered contested.
9.5.1 Contested Landing Procedure. In the case of a contested landing the Allied player rolls a DR10 and modifies it as follows (use all that apply):
- +1 if any ready (not flown) Allied aerial combat unit is within range of the invasion hex. Move one such aerial unit to the flown segment of its airbase when applying this modifier.
- +1 if an undisrupted Allied ground unit is in the hex (+0 if all Allied units in the hex are disrupted).
- -1 if the Kido Butai flew an air mission this turn (Case 8.1.8).
9.5.2 Outcome. The modified die-roll result has the following effects:
- 3 or less – The landing is a success. The Japanese unit's move is ended for the turn and is unscathed. Any Allied units in the hex are immediately disrupted and retreated to an adjacent hex. If already disrupted an Allied unit would be reduced as well as retreated.
- 4 through 7 – The landing is recalled. The Japanese unit is disrupted and returned to its starting hex. It may not move to another hex in the current phase.
- 8 or more – The landing is a disaster. The Japanese player rolls another die. If the die-roll result is even the unit is eliminated. If the die-roll result is odd the unit is reduced, disrupted and returned to its starting hex.
9.5.3 Post Landing Operations. A Japanese ground combat unit, having successfully executed an amphibious landing, is supplied in the hex where it landed. It may not move from that hex unless a regular supply line is established (Section 10.2). If forced to retreat without having connected to a regular supply line, the unit is eliminated.
10.0 Supply Determination Phase
Ground combat units and airbases (not aerial combat units) on the map, in order to remain fully functional, must trace an uninterrupted supply line of any length to a friendly supply source during the Supply Determination Phase. Off-map airbases are always supplied.
10.1 Supply Sources
Allied airbases and ground combat units on the map must trace supply to Kunming, Rangoon, or any green (western) map edge. Rangoon may only be used as a supply source when it has 2 (two) or fewer hits on it.
Japanese airbases and ground combat units on the map trace supply to Bangkok or to any orange (eastern) map edge.
10.2 Supply Lines
A supply line is traced through a series of friendly controlled, non-mountain, contiguous land hexes. It may be traced into, but not through mountain hexes.
Exception: The Allied side (only) can use the Burma Road to trace supply over mountainous hexes (0206 and 0306) to Kunming. The Japanese player may also conduct bombing attacks against any hex or hexes of the road. While there are 4 or more hits on any one hex of the Burma Road, the entire road ceases to function as a trans-mountain supply line.
10.3 Penalty for Failing to Trace Supply
Ground combat units and airbases that cannot trace supply become disrupted, or, if already disrupted, remain disrupted.
11.0 Regroup Phase
11.1 Individual Unit Regroup
Both sides may attempt to remove the disrupted status of each airbase and aerial and ground combat unit so afflicted. A disrupted aerial unit must have been marked with a regroup marker during the Initiative Phase to indicate that it is attempting to regroup.
11.1.1 Aerial Combat Unit Regroup. Attempt the regrouping of all aerial units before trying to regroup airbases. Aerial units may not regroup at a disrupted airbase (either they must await the airbase's restoration or stage-move to another base. For each unit or base attempting a regroup, the owning player rolls a DR10, modifying it as follows:
- +1 if the weather is foul (Random Event #3)
- +1 British Commonwealth units and airbases in Burma only, if Rangoon has 4 or more hits or has been captured by the Japanese.
- -1 for all selected aerial combat units for increased logistics (Random Event #9).
A supplied Allied aerial unit is returned to normal status with a die-roll result of 1 through 5. A supplied Japanese aerial unit is returned to normal status with a die-roll result of 1 through 7. Any other die-roll result means the aerial unit remains disrupted.
Restrictions: An individually regrouping aerial unit cannot participate in air missions (Case 8.1.6). A regrouping fighter may attempt an interceptor scramble (Case 8.4) but suffers an adverse die-roll result modifier, and in doing so, loses its regroup status. Any aerial unit that stage-moves (Section 8.2) has its regroup marker removed and cannot regroup.
11.1.2 Airbase Regroup. A supplied Allied airbase is returned to normal status with a die-roll result of 1 through 5. A supplied Japanese airbase is returned to normal status with a die-roll result of 1 through 7. Any other die-roll result means the airbase remains disrupted.
11.1.3 Ground Combat Unit Regroup. An Allied ground combat unit is returned to normal status with a die-roll result of 1 through 5. A Japanese ground combat unit is returned to normal status with a die-roll result of 1 through 7. Any other die-roll result means the ground combat unit remains disrupted.
Errata (Addenda as of Oct. 3, 2007), optional rule (11.1.3 Optional Ground Combat Unit Regroup): Add 1 to the regroup DR if the unit is unsupplied (slightly pro-Japanese). This is an optional rule, not part of the standard rules above.
11.2 General Regroup Turn
The Japanese player can increase his regroup ability by declaring a General Regroup Turn during the Initiative Phase (Section 7.1). There may be a maximum of two Japanese general regroup turns in the game: Once in January and once in February.
11.2.1 Restrictions. During a General Regroup Turn the Japanese player can only fly 2 units per air mission, and is hampered by an adverse (+1) die-roll modifier for initiative determination (Section 7.6). Furthermore, the Japanese carrier aerial units may not be committed to a mission during a General Regroup Turn (Case 8.1.8).
Errata (Addenda as of Oct. 3, 2007), correction: the cases in this section that were printed as 11.5.1 through 11.5.3 are labeled 11.2.1 through 11.2.3 here.
11.2.2 Effects. During a General Regroup Turn all disrupted, ready (not flown) Japanese aerial units and supplied bases automatically return to normal status (lose their disruption) during the Regroup Phase. No die-roll is needed.
11.2.3 Procedure. The Japanese player then rolls one DR10. A number of steps equal to the result of the DR10 may be used to restore reduced or destroyed aerial combat units. The Allied player gains one victory point for each Japanese aerial combat unit step restored with these points.
In addition to the previously mentioned steps, the Japanese may "purchase" any other number of aerial combat unit restoration steps, but at a cost of awarding two victory points to the Allied player for each of these additional steps.
If there are reduced or eliminated aerial combat units from the 7th Hikoshidan (light yellow counters) they have to be restored to their full strength before any units of the 5th Hikoshidan may receive replacement steps.
This is the only form of replacements in the game. The Vichy aerial unit, if available, may never receive replacements. Allied units never receive replacements. Ground combat units cannot have steps restored.
11.3 Airbase Reorganization
Flown aerial units at all airbases are moved to the ready half of each airbase. The disrupted units move to the disrupted-ready quadrant, and other units to the normal-ready quadrant. Check for flown 7H units and award the Allied player victory points for such units (Section 13.1).
11.4 Mobile Airbase Completion or Removal
Each supplied mobile airbase under construction is flipped over to become operational. A player may remove one or more of his on-map mobile airbases for redeployment elsewhere (Case 6.5.4), as long as there are no aerial units based there at the time of removal.
11.5 Removing Hits
Both sides may voluntarily repair damage to their cities and roads by removing hits.
11.5.1 City Repair. Each turn a player may remove up to three hits (total; not per city) from cities (Rangoon, Kunming or Bangkok) under his control at the end of the Regroup Phase.
11.5.2 Burma Road Repair. Up to four hits (total; not per hex) may be removed from the Burma Road at the end of the Regroup Phase.
Errata (Addenda as of Oct. 3, 2007), optional rule (11.5 Optional Allied City and Burma repair rate DR determination): Use the tables below instead of the automatic hit removals in the regular rules.
- Optional 11.5.1: The Allied player rolls a die: DR 1-3 = 1 hit removed. DR 4-6 = 2 hits removed. DR 7-9 = 3 hits removed. DR 10 = no hits removed (bad weather and just plain bad luck).
- Optional 11.5.2: The Allied player rolls a die. Add one to the DR if the city is Rangoon: DR 1-3 = 1 hit removed. DR 4-5 = 2 hits removed. DR 6-7 = 3 hits removed. DR 8-9 = 4 hits removed. DR 10 = no hits removed (again, bad luck or lack of cooperation by the natives).
12.0 Reinforcement Phase
Reinforcements are placed during the Reinforcement Phase of their turn of arrival.
12.1 Allied Reinforcements
The Allied player receives the following units as reinforcements:
Jan. 1 (turn 2)
- 30th Sqdn. RAF Hurricanes (2 units)
- 48th Indian Brigade
- A variable number of Chinese aerial units. Put the 6 CAF units (1 Vengeance, 2 SB2, 3 P-36) in cup and roll a DR10. Add 2 to the die-roll if Random Event #10 is in effect. A die-roll result of '1' through '3' means two units are chosen randomly from the cup and placed at the airbase in Kunming. A die-roll result of '4' through '7' means three units are chosen, and a die-roll result of '8' through '10' results in four units being selected.
Feb. 1 (turn 6)
- 7th British Armoured Brigade
- 17th and 135th RAF Sqdns. (2 Hurricanes)
- 45th and 139th RAF Sqdns. (2 Blenheims)
- All of the remaining CAF aerial combat units
Feb. 3 (turn 8)
- 3 AVG aerial units (1, 2 and 3 C)
- 136th RAF Sqdn. (1 Hurricane)
Placement of Reinforcements: The 48th Indian Brigade and 7th British Armoured Brigade arrive at Rangoon or Akyab, if under Allied control. Otherwise these units are placed in hex 0301. Aerial combat reinforcements units are placed at any Allied-controlled, undisrupted airbase. The CAF units are placed at Kunming, even if the airbase is disrupted. If the Kunming airbase is destroyed, all CAF units are withdrawn from the game, regardless of their location.
12.2 Japanese Reinforcements
The Japanese player has three sets of reinforcements:
- Jan. 1 (turn 2): 47th Chutai (1 Ki-44).
- Feb. 1 (Turn 6):
- 8th Sentai (1 Ki-30 and 1 Ki-48)
- 14th Sentai (2 Ki-21) and 50th Sentai (2 Ki-27)
- Feb. 4 (turn 9): Independent (Ind.) Sentai (1 Ki-45).
All of these units, upon arrival, are placed at the Japanese off-map airbase.
13.0 Victory Points Phase
If the turn (initiative) marker is not on Turn 10, advance the turn (initiative) marker one space along the Turn Track, carrying with it all markers or units currently still with it on the track. Play the next turn.
Players attempt to win the game by accumulating victory points. The latter are scored by conducting bombing missions, reducing enemy combat units, controlling geographic hexes, and other risky options.
13.1 Victory Points Awarded During the Course of the Game
Allied Player VPs
- +1 victory point each time a Japanese bomber aborts (Section 8.8) its mission.
- +1 each turn in which the Japanese player states his intent to commit the 7th Hikoshidan.
- +1 for each 7H unit of any status in the "flown" segment of a Japanese airbase before airbase reorganization (Section 11.3).
- +1 for each destroyed 7H unit at the end of each Regroup Phase.
- +10 if the carrier aerial units were used (Case 8.1.8).
- +N for Japanese aerial unit steps replaced during a general regroup:
- +1 for each step replaced up to a number determined by a DR10.
- +2 for each step replaced in excess to the number determined by the DR10.
- +1 for each hit remaining on Bangkok during a turn's Victory Points Phase. This victory point award is ended if the Allied player captures Bangkok.
- +4 if the turn was clear (i.e. no foul weather), and the Japanese player did not execute a bombing (not strafing) attack.
Japanese Player VPs
- +1 each time an Allied bomber aborts (Section 8.8) its mission.
- +1 for each hit remaining on Rangoon during a turn's Victory Points Phase. This victory point award is ended when the Japanese player captures Rangoon.
- +1 for each hit remaining on Kunming during a turn's Victory Points Phase.
- +2 each turn for each Burma Road hex that has three hits remaining on it during a turn's Victory Points Phase.
Transcriber's note: In the printed rulebook the Allied list in 13.1 is laid out across two columns, with its first item under the "Allied Player VPs" heading and the remaining items following in the second column; they are grouped here under that heading accordingly.
13.2 Victory Points Awarded After Game End
The game ends with the Victory Points Phase of turn 10. At that stage, add the following the victory points to the players' totals… and determine a winner.
Allied Player VPs
- The Allied player is awarded the value (printed on the map) of each named site under Allied control; e.g. 16 points for Kunming.
Japanese Player VPs
- The Japanese player is awarded the value (printed on the map) of each named site under Japanese control; e.g. 5 points for Lashio.
- +5 for each Japanese ground combat unit in any of hexes 0101, 0201, and/or 0301.
Note: The sum of the points printed on the map is 98.
13.3 Victory Levels
At the end of the game, subtract the Allied victory point total from the Japanese victory point total. The difference determines the scale of victory as follows:
- 18 or fewer – Allied victory
- 19 to 57 – Draw (Historical result)
- 58 or more – Japanese victory
14.0 Initial Deployments
All units start or enter the game at full strength and normal (undisrupted) status. The game is 10 turns long. Neither side has any victory points at the start of the game.
Aerial units are set up on the Aerial Display Charts. Ground combat units are set up on the geographical hex map.
The Allied player sets up first followed by the Japanese player.
14.1 Allied Set Up
Ground Combat Units
In any hex within Burma, but not Victoria Point: 17th Indian Division (2 units), 1st Burmese Division (2 units). These units may set up in hexes with borders running through them.
In any hex in China: the 5th and 6th Nationalist Chinese Armies. These units' full strength is a '4'. The two counters showing these units at strength of '1' or '2' are set aside. Each one of these replaces its corresponding on-map counter in the case where the unit's ground combat strength is reduced below a '3'. Chinese units may not set up in a hex with a border running through it.
Aerial Units
The Allied player sorts his aerial combat units into three groups as follows:
American Volunteer Group (AVG)
- These are the 9 aerial combat units with a green background.
- The AVG mobile airbase is operational (Section 6.5) and is deployed on the map in the Kunming hex (0208).
- In the Kunming airbase (0208) and the AVG mobile airbase: 4 AVG aerial units (1st and 2nd squadrons, A and B flights [P-40 fighters]).
- In the Taunggyi airbase (0505): 2 AVG aerial units (3rd squadron, A and B flights [P-40 fighters]).
- The remaining AVG units – the C flights of each squadron – enter as reinforcements (Section 12.1).
Royal Air Force (RAF)
- These are the 12 aerial combat units with a brown or tan background.
- In Rangoon or any adjacent hex: 67th RAF Sqdn. (3 Buffalo fighters). Also, the Rangoon Radar marker unit is placed on the Rangoon airbase display.
- At any airbase in Burma or India: 60th and 113th RAF Sqdns. (2 Blenheims).
- The RAF mobile airbase is available for deployment on the map (Section 6.5).
- The remaining RAF units – 5 fighter and 2 bomber units – enter as reinforcements (Section 12.1).
Chinese Air Force (CAF)
- These are the 6 aerial combat units with a blue background. These units all arrive as reinforcements (Section 12.1).
14.2 Japanese Set Up
Ground Combat Units
One Japanese ground combat unit is placed in Victoria Point (hex 1305). The airbase is disrupted, as the Japanese had just captured it. Place a disruption marker on the Victoria Point Airbase on the Japanese airbase display. The remaining five Japanese ground combat units are placed in Indochina and/or Thailand in hexes that do not contain a border with Burma or China.
Aerial Units
The Japanese player sorts his aerial combat units into three groups as follows:
5th Hikoshidan
- These are the 24 aerial combat units with a white background.
- In any Japanese controlled airbase on the map in Indochina and/or Thailand: 77th Sentai (3 Ki-27); 31st Sentai (2 Ki-30). A (red marker) ace is assigned to one of the units of the 77th Sentai.
- In Indochina off-map airbases: All remaining units of the 5th Hikoshidan (21st Sentai [5 Ki-21], 62 Sentai [1 Ki-21 and 1 Ki-48]); 1st Sentai [3 Ki-43]; 1 reconnaissance [Ki-46] and 3 mobile airbases. One (red marker) ace is assigned to a unit of the 1st Sentai.
- The remaining units of the 5th Hikoshidan – 47th Chutai [1 Ki-44], 8th Sentai [1 Ki-30, 1 Ki-48], 14th Sentai [2 Ki-21], 50th Sentai [2 Ki-27], and the Independent Sentai [1 Ki-45] – enter as reinforcements (Section 12.2).
- The three mobile airbases are available for deployment on the map (Section 6.5).
7th Hikoshidan
- These are the 10 aerial units with a yellow background.
- The following units are placed in the Japanese off-map airbases. Their use in the game entails a significant victory point penalty for the Japanese player (Sections 13.1 & 7.3).
- 64th Sentai [2 Ki-43]
- 12th Sentai [2 Ki-21]
- 98th Sentai [2 Ki-21]
- 60th Sentai [3 Ki-21]
- 1 reconnaissance [Ki-46]
Kido Butai (Carriers)
- These are the 6 aerial combat units with a pink background. These units are placed in the Kido Butai box on the Japanese Airbase Chart. Their use in the game entails a severe victory point penalty for the Japanese player (Section 13.1 & Case 8.1.8). They may not be committed to a mission during a General Regroup Turn (Section 11.2).
14.3 Marker Placements
- Place the purple 'Foul Weather' marker on the Turn 2 (Jan 1) space of the turn track.
- Place the Japanese 'Rgrp Turn' marker on the Turn 2 (Jan 1) space of the turn track.
- Place the purple 'Spies' marker on the Turn 1 (Dec 4) space of the turn track.
- Place the purple 'Fifth Column' marker on the Turn 1 (Dec 4) space of the turn track.
- Place the purple 'Bridges Blown' marker on the Turn 1 (Dec 4) space of the turn track.
- Place the Vichy fighter unit on the Turn 1 (Dec 4) space of the turn track.
- Place the Turn (Initiative) marker – Japanese side up – on the Turn 1 (Dec 4) space of the turn track.
- Place all of the victory point (VP) markers on the '0' space of the points track.
All the other markers and the Chinese Nationalist (ground combat unit) lower value substitute counters are placed aside for use as needed.
15.0 Examples of Play
15.1 Scramble
The Japanese player has designated Rangoon as the target hex. The most distant mission unit is flying from the off-map airbase in Indochina. The Allied player has 2 unflown B339s in Prome and two flown P-40s in Lashio. For the Prome units, N (the scramble modifier) is 5, reduced to the maximum of 4. For the Lashio units N = (6 - 4) = 2. All bases and units are fully functional, the Rangoon radar is operating, and there is a Japanese aerial reconnaissance unit in Rangoon. The final DRM for the Prome units is (-4 - 2 + 1) = -5. It is (-2 - 2 + 1 + 2) = -1 for the units in Lashio. The first Buffalo (B339) rolls a DR10 of '7' (-5 = 2 < 4MP) and succeeds in its interception attempt. The second B339 rolls a DR10 of '10' (-5 = 5 > 4MP) and fails to intercept the Japanese attack mission. The first P-40 rolls a DR10 of '8' (-2 = 6 > 5MP), and also fails its interception attempt. The other P-40 rolls a DR10 of '7' (-2 = 5 = 5MP) and succeeds. There is a solitary, flown, disrupted, reduced B339 at the disrupted airbase at Rangoon. It attempts a target scramble, in case the mission target turns out to be the airbase. With a DRM of +5 it has no chance of getting away, so stays put. At this point the Japanese player reveals that Rangoon city is the target [type] within the target hex.
15.2 Aerial Combat (includes AA and Bombing)
Since there is a successful interception, play shifts to the aerial battle board. The Japanese player secretly assigns movement sequence numbers to each of the units in his coordinated mission: J1 and J2 go to the two Ki-21 (Sally) bomber units that he will place in entry hexes 0614 and 0814 respectively. Sequence numbers J3 and J4 go to each of the Ki-43 (Oscar) escort fighters, to be set up in 0915 and 0515 respectively. Unit J3 has an ace marker with it. The Allied player assigns A3 to his B339, and A4 to the P-40. All fighters start at high altitude. The loaded bombers start at medium altitude. The Air Battle Marker is placed in position '1' of the Air Battle Track. All mission units are placed in their entry area hexes.
Round 1. Bomber J1 moves to hex 0611; J2 to 0811. Fighter J3 moves to 0713, facing 0714 ("backwards"). A3 (the B339) enters on a DR10 of '5', flies to 1006, facing 0907. Japanese fighter J4 moves to 0411, facing 0311. The P-40 rolls a '6', but judging the position to be sub-optimal, enters and immediately leaves the battle board. The Air Battle marker is moved to box '2' on the track.
Round 2. J1, diving to low altitude, goes to 0607. J2 diving to low altitude, goes to 0807. J3 goes to 0711, facing 0810. A3 dives to medium altitude, to 0904, facing 0903. J4 goes to 0609, facing 0509. A4 rolls a '7', enters via 1310, dives 2 levels (+5MP, no turning), and fires on J2 from 0908. (The bomber's defensive fire at A4 was ineffective.) The final aerial combat DRM is '0'; the DR10 is '8'. J2 is reduced and disrupted (8 = DFx2). A4 rolls a 9 and is rewarded with an ace. A4 continues its movement and winds up in hex 0506, facing 0405. Defensive fire from J1 also proves to be ineffective.
Round 3. J1 gets to target zone hex 0604 to unload its bombs on Rangoon city. The AA fire ((DR10 = '4') +2 = 6) misses. The bombing DR10 is a '6'. The Ki-21, at low level, scores 4 hits on Rangoon city. A ((DR10 = '2') -1 = 1) destroys the Rangoon radar station. The crippled J2 aborts its mission, handing the Allied player a VP, and turns away from the target zone: hex 1006, facing 1106. The Japanese fighters at high altitude realize that they are out of the fight. J3 dives to medium altitude and leaves the battle board via hex 0814. A3 dives to low altitude, flies to 0703, and fires on J1. The DR10 = '2' does no damage to J1. J4 goes to 0211, facing 0112. A4 leaves the battle board.
Round 4. J1 accelerates ('L' with no bomb load), and leaves via hex 0611. J2 leaves via hex 1305. A3 feeling lonely and neglected, sulks and flies on to . . . who cares? J4 leaves via 0112. All planes return to their airbases. J2, being disrupted, rolls for a possible accident upon landing, but passes with DR10 = '6'. The battle is over.
16.0 Designer's Notes
Frightened men in fallible machines, they fought against other men just as frightened as themselves. All honor to them.
— Daniel Ford in Flying Tigers: Claire Chennault and the American Volunteer Group.
The exploits of the Flying Tigers are well known to most war gamers, and it is surprising this subject has not been dealt with more often in the hobby. When WWII broke out in Southeast Asia the Japanese juggernaut seemed unbeatable. Americans at home were stunned daily with the news that followed Pearl Harbor. Wake Island's brave defenders, as well as those engaged in the savage fighting in Bataan and later Corregidor, were doomed to defeat and surrender. The stories told of the AVG in the skies of Burma were a different story. However exaggerated, the aerial battles that raged over the jungles brought genuine hope to Americans, as well as sowing the first seeds of doubt among the Japanese.
For the loss of nearly 50 aircraft and crew the Japanese 5th and 7th air fleets lost nearly 3 times that number of aircraft, almost 5 times in aircrew, while the Japanese ground troops suffered serious casualties in a campaign that was supposed to be a "side show." Rangoon and the Burma Road would fall, but the Rising Sun would go no further west.
For all who play Chennault's First Fight, enjoy and learn!
Allied Player. Heed the maxim that one who defends everything defends nothing. If you try to fight off every Japanese attack your aerial units will quickly be littering the jungles of Burma with their wreckage. Choose your battles carefully and avoid dog-fighting with the enemy's fighters, especially at low altitude. While your P-40's outgun most of the enemy's aircraft, you will always be outnumbered, and any that fall will be hard to replace.
Japanese Player. You must decide early-on how to win this campaign, and stick with your decision for the long haul. With only 10 turns you cannot do everything despite the preponderance of force you can bring to bear. Weigh carefully any decisions to bring in the 7th Hikoshidan or the Kido Butai. They may clear the skies for the time being, but leave your ground forces having to grab too much with too little in order to regain the lost victory points.
Some notes on the historical campaign.
The 77th Sentai was destroyed by the war's end. Starved of fuel and lacking replacement parts by early 1945, most of its ground personnel and surviving pilots were sent to the Imphal-Kohima front as infantry. Fewer than 10% survived to the end of the war.
The 64th Sentai had only about 40 or so aircrew on its roster at any one time. By the war's end the unit suffered over 160 KIA, an astounding 400% casualty rate!
Both sides attempted night missions repeatedly during this campaign. Most, however, were dismal failures. They are happening but just not covered in this game. The "accident" rule (Case 8.11.1) should cover/include the casualties sustained in this aspect of the war.
17.0 Bibliography
- Bond, Charles R. A Flying Tiger's Diary. College Station: Texas A&M University Press, 1984.
- Cornelius, Wanda. Ding Hao: America's Air War in China, 1937-1945. Gretna, Louisiana: Pelican Publishing, 1980.
- Ford, Daniel. Flying Tigers: Claire Chennault and the American Volunteer Group. Washington, DC: Smithsonian Institute Press, 1991.
- ———. Warbird Forum [internet publication]. http://www.danford.net/
- Heiferman, Ron. Flying Tigers: Chennault in China. New York: Ballantine Books, Inc.: 1971.
- Hotz, Robert B. With General Chennault: The Story of the Flying Tigers. Washington, DC: Zenger Publishing Company, 1980.
- Schultz, Duane. Maverick War: Chennault and the Flying Tigers. New York: St. Martin's Press, 1987.
- Smurthwaite, David. Pacific War Atlas, 1941-1945. New York: Facts on File, 1999.
18.0 Random Events List
The number preceding the event description corresponds with the DR10 result obtained in a turn's Random Events Phase (Module 5.0).
Errata (Addenda as of Oct. 3, 2007), correction: the opening paragraph above is corrected to refer to Module 5.0; the printed text said Module 7.0.
1 – Aggressive Vichy French air patrol. The Japanese player has the Vichy MS-406 fighter unit available for interceptions over French Indochina for the current turn. The unit may not be used outside the French Indochina hexes, and cannot participate in an air mission. The unit is not based at an on-map airbase, but its range vectors from Luang Prabang (hex 0608). It counts against the Japanese interceptor quota (maximum of four fighters) when intercepting an Allied mission over French Indochina. The Allied player gets no victory points if the Vichy aerial combat unit is reduced or eliminated. The Vichy unit may not have any lost steps restored during a Japanese regroup turn. This random event may happen more than once in a game as long as the Vichy unit is available.
2 – Japanese Ace. The Japanese player may assign an ace pilot to any one of his fighter units. If all three of the red ace markers are currently assigned, assign one of the blue ace markers; else assign an available red ace marker. The ace must remain with his fighter unit for the rest of the game, or until the unit is eliminated. If a unit with an ace is eliminated, the ace marker becomes available for re-assignment should this random event occur again. No more than one ace may be assigned per unit. If no ace markers are available, treat this case as "No Event". For the effect of aces, see Case 8.7.9.
3 – Foul weather. Each aerial unit has its range (printed in the counter's lower-right corner) reduced by 1 (one) for any missions or interceptions during the current turn. All bombing attacks suffer a '-4' die-roll modifier (Case 8.10.5). All ground combat attacks suffer a '-4' die-roll modifier (Case 9.4.1).
Foul weather occurs no more than once per month in January, February, or March. This event occurs only if the purple 'Foul Weather' marker is currently with the turn (initiative) marker on the turn track. After determining that the foul weather will apply during the current game turn, place the 'Foul Weather' marker on the first space of the next month – either Turn 6 (Feb 1) or Turn 10 (Mar 1).
4 – Spies! The Japanese player must disclose the number and general type of aircraft ("fighters" and/or "bombers") at any one airbase of the Allied player's choosing. This event occurs only if the purple 'Spies' marker is currently with the turn (initiative) marker on the turn track. It occurs once per game – remove the 'Spies' marker from the turn track and the game.
5 – No Event.
6 – Fifth Columnists! One Burmese (not British, Indian or Chinese) Allied infantry unit is eliminated. The Japanese player chooses the affected unit. This event occurs only if the purple 'Fifth Column' marker is currently with the turn (initiative) marker on the turn track. It occurs once per game – remove the 'Fifth Column' marker from the turn track and the game. If there is no Burmese unit remaining on the map, treat this as 'No Event'.
7 – Bridges Blown! One Allied ground unit that is occupying a hex with a river is immediately disrupted. The Japanese player chooses the affected unit. This event occurs only if the purple 'Bridges Blown' marker is currently with the turn (initiative) marker on the turn track. It occurs once per game – remove the 'Bridges Blown' marker from the turn track and the game.
8 – No Event.
9 – Increased Logistics. Roll another DR10. An even die-roll result affects the Allied player; an odd roll affects the Japanese player. Subtract 1 from all individual aerial unit regroup die-rolls for that side for the current turn. Make a note of this for application in the Regroup Phase (Case 11.1.1). This event may occur more than once during the game.
10 – China Lobby Succeeds. Add 2 to the Allied CAF reinforcement die-roll (Section 12.1). This event applies only if it occurs on turn 2 (January 1); otherwise treat it as "No Event". Make a note of this for application in the Reinforcement Phase.
Optional Rules (Addenda as of Oct. 3, 2007)
The following optional rules are from the Against the Odds "Chennault's First Fight Addenda as of Oct. 3, 2007" sheet. They are not part of the standard rules and can be used for play balance or to introduce other aspects of the history to the game. (The optional regroup and repair rules are also noted in-line at Cases 11.1.3 and 11.5 above.)
6.3 Optional Airbase Hosting Capacity. If fighters and bombers are forced to end-up landing at the same base due to an airbase evacuation or following a mission, the Over Capacity Penalty of Case 6.3.4 is immediately invoked for that field even if the normal hosting limit in terms of total units is not exceeded (pro-Japanese, especially in the late game).
Secrecy Convention. The following is a suggested technique by J.D. Webster for conducting missions with a degree of secrecy by the players (pro-Japanese):
- Target Designation – write target type down on scrap paper, hand to opponent when attack declared.
- Launching Air Missions – State the base launched from and only the number of units, not type.
- Trace their path to the target to demonstrate range. They are only revealed upon setting up on the battle board or, if not intercepted, upon declaring their bomb attacks, and then only those that attack. The rest can be assumed to be fighters.
- Returning to base – State only how many units are returning to such and such base, but not the type. Trace the return path to the landing field to demonstrate range.
- Intercepts – Do not reveal the launch field unless the intercept is a success. Trace the flight path to demonstrate range. Do not reveal the interceptor type until it actually first enters the battle board.
- Target Scrambles / Airfield Evacuations – Reveal the type scrambling. Trace the path to a friendly field. If more than one scrambles, only state that one unit is going here and the other there...etc.
- Staging – do not reveal the unit type, its departure field or landing field. Only state: "staging one unit." The opposing player will be able to infer some information as to which types went where based on their range traces. But he is not allowed to take written notes.
Optional Play Balance Variant Rule. The VP awards are structured the way they are as the ground campaign was the reason for the air battles overhead. The following alternatives/changes are offered as play balance variants:
13.1 Allied Player VPs
- +2 for each step up to a number determined by a DR10 (instead of +1).
- +3 for each step replaced in excess to the number determined by a DR10 (instead of +2).
- Change +1 VP for every four (or part thereof) 7th Hikoshidan air units in the flown box (instead of for each unit). For example: five 7th Hikoshidan air units in the flown box at the end of turn would result in a 2 VP award to the Allied player.
Japanese Player VPs
- Delete the +1 VP award each time an Allied bomber aborts its mission if the current Japanese VP total is greater than that of the Allied player's (discretion is a virtue given the overall situation.
- +1 (not +2) each turn for each Burma Road hex that has three hits remaining on it during a turn's Victory Points Phase.
- Delete the +1 VP for Japanese bomber mission aborts.
- Change Japanese aerial unit steps replaced to units. Note: There is no VP award for restoring a reduced Japanese air unit to full strength during a Refit turn.