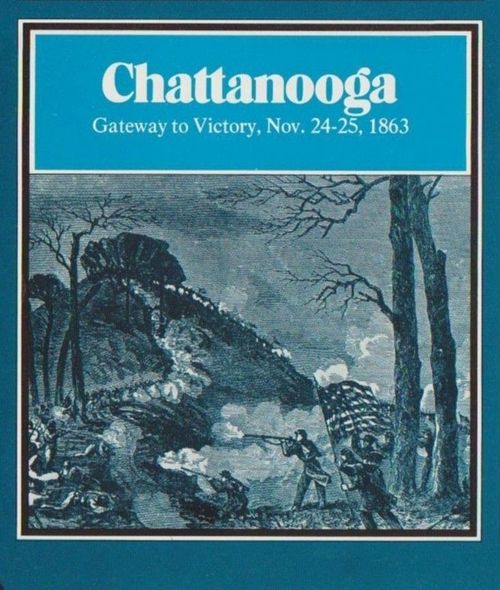
Chattanooga: Gateway to Victory, Nov. 24-25, 1863
Chattanooga: Gateway to Victory, Nov. 24-25, 1863 Rulebook
Table of Contents
Table of Contents
Part A: Blue & Gray Standard Rules
1.0 Introduction
Blue & Gray is a set of games based on battles fought during the American Civil War. The games included are Chickamauga, Shiloh, Cemetery Hill, First Bull Run and Second Bull Run.
2.0 Components
2.1 Rules. The rules are organized in numbered paragraphs, like this one. When they refer to another, related section, this is noted parenthetically, like this: (2.21). Rules for each separate game, called scenario rules, are included after the game rules, which apply to all four games.
2.2 Map. The maps are divided into hexagonal areas, called hexes, which regulate movement and combat much like the squares on a chessboard. They cover the areas over which the battles were fought at a scale of about 400 meters across each hex. Note that the First Bull Run and Second Bull Run games use the same map.
2.3 Charts and Tables. The charts and tables are used to regulate game play. The Terrain Effects Chart (abbreviated TEC) describes the terrain found on the maps and its effect on movement and combat. The Combat Results Table (abbreviated CRT) is used to resolve combat.
2.4 Counters. The pieces represent units which fought or could have fought in the battles. Union units are blue; Confederate units are gray.
2.5 Definitions.
- Movement Allowance: A relative measure of a unit's ability to move, expressed in movement points (abbreviated MPs).
- Strength Point: A relative measure of a unit's combat strength. A unit's combat strength is stated as a number of strength points. Each strength point (abbreviated SP) represents 250 to 350 men.
4.0 Sequence of Play
The game is divided into a series of game-turns, each composed of two player-turns. Each player-turn is divided into a series of phases, which must be performed in the exact order stated below. The player conducting his turn is called the phasing player; his opponent is called the non-phasing player. All activity in one phase must be concluded before the next phase may begin. The scenario rules will indicate which player conducts his turn first.
I. First Player-Turn
- A. Movement Phase. The phasing player may move his units (7.0). The phasing player's reinforcements, if any are available, are brought into play.
- B. Combat Phase. The phasing player's units may attack (8.0) adjacent enemy units.
II. Second Player-Turn
The non-phasing player now becomes the phasing player and repeats the sequence above. Once his combat phase is complete, advance the turn marker one space on the Turn Record Track and begin the next turn.
5.0 Zones of Control
Units exert a zone of control (abbreviated ZOC) into the six hexes adjacent to the hex they occupy. Units must stop moving when they enter an enemy zoc.
5.1 No unit may leave an enemy ZOC except as a result of combat (8.5).
5.2 ZOC's do not cancel one another: a hex may include ZOC's of both sides.
5.3 ZOC's do not extend across river or creek hexsides or into river hexes. They do extend across stream, ford and bridge hexsides.
5.4 If a unit is eliminated in combat (8.0), its ZOC immediately ceases to exist as well.
6.0 Stacking
Up to two combat units of the same side may occupy the same hex. This is called stacking. Stacking limits apply only at the end of the movement and combat phases: any number of units may move through the same hex during the movement phase. (Clarification: Units may not end their individual movement or retreat in violation of stacking.)
7.0 Movement
During his movement phase the phasing player may move all, some or none of his units (except those in enemy ZOC's). As a unit moves it expends MPs from its movement allowance according to the type of terrain it enters (see the TEC).
7.1 Unused MPs may not be accumulated from one turn to the next.
7.2 A unit may not enter a hex if it lacks sufficient MPs to pay the movement cost shown on the TEC (exception: see 7.4 below).
7.3 Movement costs are cumulative: therefore, a unit crossing a stream into a wooded hex would pay five MPs: two to cross the stream and three to enter the woods.
7.4 A unit not in an enemy ZOC may always move a minimum of one hex per movement phase, regardless of terrain costs.
7.5 Units may move along roads at a cost of one MP per hex, and along trails at a cost of two MPs per hex, regardless of any other terrain in the hex. To obtain the movement benefit of roads or trails, movement must follow the road or trail across a hexside containing the road or trail, not merely into or out of a hex containing it.
8.0 Combat
During the combat phase, the phasing player's units attack adjacent enemy units and his artillery may project its strength over intervening hexes to attack as well. All of the phasing player's units which are in enemy ZOC's must attack. All enemy units in friendly ZOC's must be attacked. The phasing player (the attacker) chooses which of his units will attack which enemy units, and in what order.
8.1 Resolving Combat. Total the combat strengths of all units attacking an enemy-occupied hex and compare the total to the total combat strength of all defending units occupying the hex under attack. State the comparison as a ratio of attacker's strength to defender's strength (like this: 2:1). Round off the ratio in favor of the defender to conform to the odds found on the CRT; thus, an attack of 19 against 7 becomes 2:1. The phasing player rolls the die. Read the result on the appropriate line under the odds column. Apply the result immediately, before resolving any other attacks.
8.2 Modifiers. Attacks across certain types of hexsides or into certain types of terrain may affect the defender's strength, as shown on the Terrain Effects Chart.
8.3 Results.
- AE: All attacking units are eliminated.
- DE: All defending units are eliminated.
- AR: All attacking units must retreat (see 8.5 below) one hex and may lose effectiveness (10.0).
- DR: All defending units must retreat one hex.
- EX: All defending units are eliminated, along with attacking units with a total combat strength equal to or greater than the printed defense strength of the defending units (attacking player's choice of units).
8.4 Restrictions.
8.41 No unit may attack more than once per combat phase and no unit may be attacked more than once per combat phase. Any number of units may combine their factors to attack an enemy-occupied hex, as long as all attacking infantry and cavalry units are adjacent to the hex under attack and all attacking artillery units are within range (see 8.7). A unit may never divide its strength to participate in more than one attack.
8.42 Attacking units stacked together may not attack separate enemy-occupied hexes. The phasing player may attack with only one of the units if he so chooses and not attack at all with the other.
8.43 If a unit (or units) is adjacent to more than one enemy-occupied hex it may attack all of them in a single combat, as long as all attacking units (other than artillery) are adjacent to all defending units.
8.5 Retreat. If the combat result requires units to retreat, the owning player immediately moves them to an adjacent hex.
8.51 Units may not retreat off the map or into hexes occupied by or in the ZOC's of enemy units. Units forced to retreat which are unable to do so are eliminated.
8.52 Units forced to retreat may retreat into hexes occupied by friendly units; if this results in a violation of stacking limits one of the units in the hex must be moved to an adjacent hex (within the restrictions above). If this cannot be done, the retreating unit is eliminated.
8.6 Advances. If the combat result clears a hex of all units (through retreat or elimination), one unit which participated in the successful attack or defense may advance into the hex. This must be done before the next attack is resolved. If more than one hex is cleared of enemy units, the advance is still limited to one unit.
8.7 Artillery. Artillery units (including horse artillery) may attack enemy units within three hexes of their position (count the target hex, but not the artillery unit's hex). They may add their combat strength to that of friendly units making an attack, or may attack by themselves. Artillery units adjacent to enemy units must attack the adjacent enemy units and suffer any adverse results of the attack. Artillery may not advance after combat.
8.71 Artillery units attacking non-adjacent enemy units must trace a line of sight to their target: a straight edge between the center of the artillery unit's hex and the center of the target hex. If the line crosses any forest or town hexes, the line of sight is blocked and the attack is not allowed. If the line of sight runs along the line between two hexes, it is blocked only if both are forest or town hexes. Rivers and other units (both friendly and enemy) never block lines of sight, nor does the terrain in the artillery unit's hex and its target hex.
8.72 Artillery attacking non-adjacent units never suffers any adverse result (though any friendly units adjacent to the target hex and participating in the attack would suffer them). Defending artillery units suffer any adverse results.
8.73 Attacks by artillery alone against non-adjacent units must be made at odds of 1:3 or greater.
8.74 When adding their strength to friendly infantry or cavalry units attacking defenders in more than one hex (8.43), the artillery need only be within range of one of the hexes occupied by the defender.
8.75 Artillery units may not advance after combat.
8.76 Participation by attacking artillery units does not affect terrain modifiers for streams, bridges and fords.
8.8 Voluntary Odds Reduction. Before resolving an attack, the attacker may choose to reduce the combat odds. There is no penalty for doing so, but the attacker may not change his mind once the die has been cast.
9.0 Night
During night turns (shown on each game's Turn Record Track) there is no combat phase. Units adjacent to enemy units may not move. Units may not enter enemy ZOC's during night turns.
10.0 Attacker Effectiveness
Whenever a unit receives an Attacker Retreat (AR) result due to combat, its combat value is highlighted in red and it becomes "ineffective." It remains ineffective until a night turn or the end of the game, whichever comes first. Ineffective units may not attack but may move and defend themselves.
10.1 Only attacking units lose effectiveness. Units which suffer a DR (defender retreat) result suffer no additional penalty.
10.2 Ineffective units may not enter enemy ZOC's. If an ineffective unit is in an enemy ZOC at the beginning of its side's combat phase, it must retreat (8.5). This does not allow enemy units to advance (8.6). Note that ineffective units not in enemy ZOC's at the start of the combat phase do not retreat if an enemy unit moves adjacent to them (as the result of an advance) during the course of the combat phase.
10.3 Artillery which is not adjacent to the units it attacks does not lose attacker effectiveness.
10.4 At the end of a night turn, all ineffective units return to their effective status.
11.0 Other Rules
11.1 Strategic Movement (Not allowed in Cemetery Hill, Shiloh or Second Bull Run). Units which begin their movement phase at least four hexes from the nearest enemy unit (three intervening hexes) may use strategic movement. Infantry and artillery units add three MPs to their movement allowance; cavalry units add four. Units using strategic movement may not move closer than four hexes to the nearest enemy unit during their movement phase and may not combine strategic movement with regular movement.
11.2 Cavalry Retreat. Cavalry units attacked solely by enemy infantry or artillery may retreat two hexes (observing all retreat restrictions above) before combat is resolved. The attacking units may not attack other units, but one of them may advance into the vacated hex.
Part B: Chattanooga Exclusive Rules
13.0 Introduction
Chattanooga is a tactical level simulation of the battle between General Ulysses Grant, commanding the Armies of the Cumberland and of the Tennessee, and General Braxton Bragg, commanding the Army of Tennessee.
14.0 Initial Deployment Chart
On the Initial Deployment and Reinforcement Chart, an "a" following the unit's Strength means that the unit is artillery; a "c" means cavalry; all other unspecified units are infantry.
14.1 Union Army
| Hex | Strength-Type | Designation |
|---|---|---|
| 1704 | 5 | 1/2/Xv |
| 1604 | 5 | 2/2/Xv |
| 1705 | 4 | 1/2/Xvii |
| 1605 | 4 | 322/Xvii |
| 1506 | 4 | 3/2/Xvii |
| 1606 | 5 | 1/4/Xv |
| 1507 | 5 | 2/4/Xv |
| 1304 | 1a | Sherman |
| 1204 | 6 |
14.2 Confederate Army
| Hex | Strength-Type | Designation |
|---|---|---|
| 2004 | 3 | Liddell |
| 2305 | 5 | Polk |
| 2305 | 4 | Wright |
| 2106 | 5 | Smith |
| 2207 | 2a | Calvert |
| 2109 | 5 | Lowrey |
| 2209 | 1a | Martin |
| 2110 | 5 | Wilson |
| 2210 | 5 |
14.3 Player Sequence
14.31 The Union Player is the First Player. His Player-Turn is the first in every Game-Turn.
14.32 The game consists of ten Game-Turns. Game-Turn Five is a Night Game-Turn.
15.0 Reinforcements
General Rule: The Union Player receives reinforcements according to the Reinforcement Chart. These units must arrive during the Union Player's Movement Phase of Game-Turn Two and are placed on the edge of the map in one of the specified hexes.
15.1 Restrictions
15.11 The Union Player may bring his reinforcement units onto the map at any time during his Movement Phase of Game-Turn Two.
15.12 Reinforcing units may not enter an entry hex which is also an Enemy controlled hex. If the reinforcing units are not able to enter the map on Game-Turn Two, they are considered eliminated and count as Union units eliminated for Victory Conditions.
15.13 Each reinforcing unit must expend the necessary Movement Point cost for the terrain to enter the entry hex.
15.14 Once a unit has entered the map, it may move and attack freely, just as any other unit already present.
15.15 Units may not exceed the stacking restrictions when entering the map.
15.2 Reinforcement Chart
15.21 Union Army [only]. Appearing on Game-Turn Two on hex 0427, 0528, 0627 and/or 0728:
| Strength-Type | Designation |
|---|---|
| 4 | 1/2/Xll |
| 4 | 2/2/Xll |
| 4 | 3/2/Xll |
16.0 Union Artillery
General Rule: For the months of October and November, 1863, the Confederate Army decided to starve the Union Army at Chattanooga into submission by cutting off the Union supply sources. During the two month siege the Union Army used their horses as a source of food rather than as a means of drawing artillery. Not until a portion of Sherman's cavalry were impressed for artillery duty could the Union move their guns any appreciable distances.
16.1 Restrictions
16.11 No Union artillery units (except the 1a "Sherman") may be moved. If forced to retreat due to combat, these artillery units are eliminated instead. These artillery units may not advance after combat in any attack.
16.12 Union artillery functions in the same fashion as other artillery units in every other way.
16.13 The Union 1a "Sherman" may move normally.
17.0 Movement Restrictions
17.1 Union Movement Quota
17.11 During any one Movement Phase, the Union Player may move no more than eleven units. There are no limitations as to the number of Union units which may attack.
17.12 Union reinforcements arriving on Game-Turn Two do not count toward the movement restriction until Game-Turn Five. Thereafter, they behave as any other Union unit, i.e., they may either be moved as part of the movement quota or left stationary.
17.13 Union units which advance or retreat as a result of combat do not count as part of the movement quota.
17.14 The Union Player may move an additional seven units during any Movement Phase in which he controls hex 1025. If the Union Player subsequently loses control of hex 1025, he may not move the additional units.
17.15 "Control" is defined as having a unit in the hex or being the last to have a unit move through the hex.
17.16 Confederate units do not have any extraordinary movement or combat limitations.
17.2 Night Game-Turns
No Union units may move during the Night Game-Turns. Confederate units may move during the Night Game-Turns; they may not enter, but may exit Enemy ZOC's during Night.
18.0 Redoubt Hexes
18.11 When the term redoubt is used, it refers to both the Union Entrenchments and the Confederate Rifle Pits. They are considered equal in terms of defensive and movement cost purposes.
18.12 The "enemy" side of a redoubt hexside is the side which contains the "barbed" redoubt terrain symbol (see the Terrain Key). A defending unit only receives the benefit of the redoubt hexside when attacked exclusively across redoubt hexsides from the "enemy" side (see the Terrain Effects Chart).
18.13 Zones of Control do extend across redoubt hexsides. Both Confederate and Union units are eligible to gain the defensive bonus for any redoubt hexside.
19.0 Ferry Hexes
19.1 Restrictions
19.11 Any units may cross through the Ferry Hexes - 1305, 1013, 0814 and 0517. Units may only enter and leave a Ferry Hex in the direction of the arrows shown on the map. The Movement Point Cost to enter a Ferry Hex is three Movement Points.
19.12 No unit may end its Movement Phase in a Ferry Hex; hence no unit may attack from a Ferry Hex.
19.13 Any unit which is forced to retreat into a Ferry Hex is eliminated instead.
20.0 Victory Conditions
General Rule: Victory is determined by the accumulation of Victory Points. Points are awarded to each Player according to the Victory Point Schedule for the elimination of Enemy units and/or for the control of certain hexes.
Procedure: These Victory Points are awarded for a variety of actions as detailed on the Victory Point Schedule. At the end of the game, the number of Points is totaled for each Player. The Confederate Player subtracts his Point total from the Union Player's Point total to compute a differential. The Players then refer to the Levels of Victory Chart to determine the winning Player.
20.1 Victory Point Schedule
20.11 Points Awarded During Play
- The Confederate Player receives three Victory Points for each Union unit eliminated.
- The Confederate Player receives four Victory Points for either of the following hexes 1514 and 1417 if he ever controls either hex during the game (or eight Victory Points if he ever controlled both hexes). These Points are awarded only at the time of control of the hexes, and are only awarded once during the game (see Case 17.15 for definition of "control").
- The Union Player receives two Victory Points for each Confederate unit eliminated.
20.12 Points Awarded at Game's End
- The Confederate Player receives four Victory Points for each Chattanooga town hex which is in the Zone of Control of one (or more) Confederate infantry units. The presence of a Union unit in a Chattanooga town hex does not negate the Zone of Control for Victory Point purposes.
- The Union Player receives four Victory Points for each of the following hexes 2207, 2311, 2416 and 2419 if he is the last Player to control these hexes (see Case 17.15 for definition of "control").
20.2 Levels of Victory
Stated as a differential: Union Victory Points minus Confederate Victory Points.
- Union Decisive Victory: +26 or more.
- Union Substantive Victory: between +16 and +25.
- Union Marginal Victory: between +6 and +15.
- Draw: between -5 and +5.
- Confederate Marginal Victory: between -15 and -6.
- Confederate Substantive Victory: between -25 and -16.
- Confederate Decisive Victory: -26 or less.