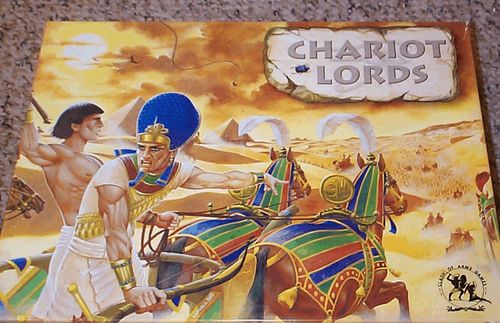
Chariot Lords
Chariot Lords Rulebook
Table of Contents
Table of Contents
- 1.0 COMPONENTS
- 2.0 COMPONENT DESCRIPTION
- 3.0 INITIAL SET-UP
- 4.0 SEQUENCE OF PLAY
- 5.0 MOVEMENT
- 6.0 BATTLE
- 7.0 CONTROL
- 8.0 REDEPLOYMENT
- 9.0 REPLACEMENTS AND NEW UNITS
- 10.0 VASSAL STATES
- 11.0 VICTORY POINTS
- 12.0 LIBYANS AND MESHWESH
- 13.0 NUBIANS
- 14.0 FOR THE ASHES OF HIS FATHERS & THE TEMPLES OF HIS GODS
- 15.0 THE CHOSEN PEOPLE
- 16.0 RULERS
- 17.0 MAJOR EMPIRES
- POTTED HISTORY
- HOW TO PLAY CHARIOT LORDS
1.0 COMPONENTS
Each game contains the following:
One hardback Map
One 12 page Rules Book
Four Victory Point Lists, one for each color
Four Turn Arrival Charts, one for each color. The reverse side has the Combat Table.
One Victory Point Chart.
Three sheets of die-cut counters.
Two 6 sided dice.
One Master Turn Arrival Chart
2.0 COMPONENT DESCRIPTION
2.1 The Board shows the Middle East divided into a number of areas. Each area has a name (for example, JUDAH) and a terrain type. There are five terrain types: Fertile (Babylon), Hill (Seha River Land), Mountain (Hyrkania), Desert (Sinai), and Marsh (Sumer). These terrain types may have an effect on combat and movement. Within certain areas are major cities (for example, JERUSALEM is in JUDAH). These have no effect on combat at this level but may have victory points attached to them. The area was covered in cities and the few that are marked are mere indications of this cradle of civilization.
2.1.1 The rules refer a number of times to radii of activity as "within ["X" number] areas" (see Rulers 16.4 for example). Areas adjacent to the active area (for example, the area in which the Ruler is situated) are within one area, areas adjacent to these which are not the active area are within two areas, and so outwards and onwards. The active area is itself within the radius.
2.2 There are three types of combat unit:
2.2.1 Foot — 5/8" square counters showing an infantryman.
2.2.2 Cavalry — 3/4" square counters showing a horseman or an Aramean camel rider.
2.2.3 Chariots — 3/4" square counters with a chariot or Sea People wagon.
2.3 In addition there are five types of marker, all of which are 3/4" square:
2.3.1 Rulers have the name and nation of the relevant King, as well as a small circle in the lower right corner.
2.3.2 Terror — with an illustration of a howling face.
2.3.3 Siege — with an illustration of a fortified tower.
2.3.4 Chosen People; there are two Chosen People Markers, one Godly and one Ungodly, representing the Children of Israel (said markers may influence victory).
2.3.5 God Markers: Four markers of the ruling gods of the major empires: Storm God (Hatti), Assur (Assyria), Marduk (Chaldea) and Amon-Ra (Egypt) — see Rule 18. Each marker has a square in the lower left corner.
2.4 Combat units count for stacking, markers do not.
2.5 Each counter has the name of the nation to which it belongs. In addition the background color of the counters are unique to each player. Counters of the same nation may (within the stacking rules) stack together. Different nations of the same color may not stack together.
2.6 Each player controls all nations of one color. The colors are red, blue, yellow and white.
2.7 There are several players aids.
2.7.1 Each color has a Victory Point List. It is important to photocopy this before playing the game.
2.7.2 One Turn Arrival Chart, listing all the units that arrive each turn.
2.7.3 Individual Turn Arrival Charts of the appropriate color with a Placement of Replacement Chart at the bottom.
2.7.4 The Combat Table is on the reverse of the Individual Turn Arrival Charts.
2.8 The dice are six sided.
3.0 INITIAL SET-UP
3.1 Ordinarily, new units are only placed on the map in their own nation's game turn (see Rule 4.2). However, on the first turn the map must be populated before the first nation takes its turn. Place the "Egypt", "Sumer", "Mitanni", "Elam", "Hatti", "Kassites", and "Canaan" chits in the container, and draw chits one-by-one, setting up the following units as their chits are drawn (all units except Canaanites may be set up in one or more of the areas listed below):
KASSITES: 8 foot and 4 chariots (Mari, Tigris, Akkad, Babylon, or Karduniash).
CANAAN: Ruler DARUSHA, 7 foot and 5 chariots (Kadesh, Ugarit, Aleppo, Phoenicia, Philistia, Judah or Syria). (End of movement phase stacking limits must be observed in set-up)
ELAM: 4 foot (South Zagros or Elam).
HATTI: 6 foot and 2 chariots (West Taurus, Pitassa, Zippasla, or Hatti).
SUMER: 5 foot (Sumer).
MITANNI: 6 foot and 5 chariots (Kizzuwatna, Hurri-land, Mitanni or Hanigalbat).
EGYPT: Ruler THUTMOSIS III, 10 foot and 4 chariots (On, Upper Egypt, Lower Egypt, Thebaid, or Naucratis).
3.2 Once all units have been placed put the chits back in the container and start Turn One.
4.0 SEQUENCE OF PLAY
4.1 Chit Pool Fill: Each Turn one chit for each nation then in play (see the Turn Arrival Chart for new nations to be included that turn) is placed in an opaque container and the chits are drawn at random in succession until the container is emptied. As each chit is drawn the indicated nation's controlling player goes through its turn before the next chit is drawn. When the nation has no units left on the map or reclaimable from the dead pile and no reinforcements scheduled, remove the chit from play for the remainder of the game.
4.2 Nation Turn: Each nation's turn consists of the same phases to be completed prior to another chit being drawn. A nation's turn is not over until either all phases have been completed or the moving player announces the turn is complete. A complete Game Turn, one in which all Nation Turns have been completed, represents 90 years.
4.2.1 New units are placed on the map as provided on the Turn Arrival Chart and per the replacement rules (9.1).
4.2.2 Movement Phase: the nation's units may be moved, with sea movement occurring first.
4.2.3 Battle Phase: If any units of another nation (including any nations controlled by the same player) are in the same area as the moving nation's units then a battle must be fought. See 6.0 Battle.
4.2.4 Redeployment Phase: Units of the nation whose phase it is may be redeployed through controlled areas or areas with no units in them but which that nation entered in its turn. (Be sure to keep a record of these during play by using appropriately colored blank counters as markers.)
4.2.5 Victory Points are added to that nation's total. This will usually happen each Turn. Victory Points may be received for territory controlled, enemies slayed or put to the sword, denying areas to others, or capturing them, as per the appropriate victory point list. Victory points are tracked on the Victory Point Table. It is recommended that players also keep the total on a separate sheet of paper in case the table is upset. A player's victory point total is public knowledge and may not be kept secret.
4.2.5.1 Immediately upon scoring victory points, whether for areas held or objectives obtained, advance that color's marker(s) to the new total on the Victory Point Chart.
4.2.5.2 Immediately upon losing the possibility to score victory points (i.e., if one must control a particular area through turn "X" and fails to do so), cross off the value on the Victory Point List.
4.3 Optional Rule — Necessary Reverence: At the instigation of any player during Phases 4.2.1, 4.2.2, and/or 4.2.3 of each Nation's turn, players may not communicate with each other save to communicate infractions of the rules, describe their activities (if it is that Player's nation's turn) request rulings, or deal with Canaanite queries under Rule 5.4. Infringement of this rule costs the infringing player the loss of his next nation's turn drawn from the chit pool. This can carry over to another turn if the offense occurred during the last nation's phase of a particular turn. In short a running commentary on the moving player's actions and options is not acceptable unless all agree.
5.0 MOVEMENT
5.1 Each nation's controlling player may move some, all, or none of that nation's units.
5.2 Movement Allowance: Each turn foot units, Siege, and Terror markers may move three areas; rulers, cavalry and chariot units may move four areas. The Chosen People may be moved three areas a turn. Some areas may count as more than one area for movement purposes (see 5.5 and 5.6). Exception: The swift-horsed Cimmerians may always move four areas irrespective of Rule 5.5.
5.3 Stacking: At the end of the movement phase, and also at the end of the redeployment phase, (but only at those points in the sequence) there may be no more than five units (plus any number of markers) of one nation in the same area. Larger stacks may exist at other points in the game (for example placement of new units). Where overstacking occurs the owning player must eliminate excess units of his choice. Canaanite Exception: The Canaanites were a numerous but divided people; unless led by a Ruler they may never have any stacks which exceed three units in size.
5.4 Entering and Exiting Areas with Enemy Units: Units may enter and exit an enemy-occupied area in the same movement phase providing they leave behind at least twice as many units as the non-moving side has in the exited area. Those units remaining will fight a battle later in the turn. Note that when units are placed in an enemy-occupied area in the New Units Phase they are not required to remain in that area (they did not enter it, but were placed there). Canaanite Exception: Units moving through Canaanite controlled areas need not leave twice as many units as already occupy it if the Canaanite player agrees. (It would be in his interest to hurry them on their way). Such moving units as do remain must have combat. The Canaanite decision is made on each and every entry (this is an exception to Rule 4.3 Necessary Reverence).
5.5 Mountain Areas: For movement purposes, a mountain area counts as two areas. There are two exceptions to this:
5.5.1 A unit entering a mountain area which is controlled by that unit's nation at the moment of entry counts the mountains as one area, and
5.5.2 Units of Medea always count mountains as one area.
5.6 Sea Movement: A limited number of units (see 5.6.1.1 and 5.6.1.2 below) and any number of markers may be moved by sea from one coastal area to another on the same coastline between West Caucasus and Naucratis (including Alasa). No one may use naval movement in the sea adjacent to Caspia and Hyrkania, the Red Sea (the sea adjacent to Sinai), or the Persian Gulf (the sea adjacent to Elam). Units moving by sea need not start in the same areas to move by sea. Sea movement occurs before any other movement, and uses the entire movement allowance of the moving units. For sea movement only, Alasa, the modern Cyprus, is one area from Kizzuwatna, Arzawa, Aleppo and Ugarit. Units of other nations may not interrupt or influence sea movement.
5.6.1 The range of sea movement is limited and is counted in a series of adjacent coastal areas from the coastal area occupied by the unit to the coastal area of debarkation (exclusive of the area the unit occupies).
5.6.1.1 Egypt, Assyria and Achaea may move a total of three units each turn by sea to coastal areas within six areas of the area of embarkation.
5.6.1.2 Other nations (except Libyans, Arameans, Chaldeans and Cimmerians) may move a total of three units each turn by sea but only within three coastal areas of the area of embarkation.
5.6.1.3 Libyans, Arameans, Chaldeans and Cimmerians may never use Sea Movement.
Example: An Egyptian unit in the On area could use sea movement to Aleppo along the coast (six areas being Pelusium, Philistia, Phoenicea, Kadesh, Ugarit and Aleppo) and to Alasa by the same route to Ugarit and then to the island. However, a Hittite unit in Aleppo could only move as far south as Phoenicea due to its three area range.
5.7 Arabian Desert: Only the Arameans may enter the Arabian desert. They treat it as a single movement area but count it as two areas for movement cost purposes. The Arabian desert does not include Sinai or Pelusium.
5.8 Libyan Desert: Only the Libyans may enter the Libyan desert. They treat it as a single movement area.
5.9 Pelusium and Sinai: These areas may be entered and fought in by units of any nation.
5.10 Beloved of The Gods: Nations gain the advantage of "Beloved of The Gods" as shown on the Turn Chart. On these turns the nation takes one complete turn and then an extra turn immediately afterwards. Both these turns are complete turns including replacements and victory points. Do not forget to count victory points twice. Rulers placed in the first of such turns are removed before the second.
5.11 Rulers: Rulers can move four areas a turn. From this position they may affect two combats in their own turn which must be in the same area or within three areas of the area the Ruler occupies (exclusive of that area). In other nation's turns they may affect only the area they occupy. For more on rulers, see Rule 16.
6.0 BATTLE
6.1 Both sides line up their units (including any vassals — See Section 10) in any convenient area of the board. Each unit from the non-moving nation is placed opposite an enemy unit. Where a nation has more units that its enemy the excess may be employed against any enemy target unit. The non-moving units then dice and record their kills, but losses are not applied until the other side has completed the same process of placement and dicing.
6.2 Where die modifiers are received for Rulers, Siege, or Terror, these must be declared and assigned before combat commences.
Note to speed play: the use of a number of different size and colors of dice will allow a number of units to be diced for at once, materially reducing playing time.
6.3 Example of Combat: Two infantry units and one chariot unit have entered a hilly area to fight two cavalry units. The non-moving player places his cavalry opposite one infantry and the chariot, leaving the second moving infantry unengaged. Cavalry in hills kill Foot (Infantry) with a 4 to 6 and kill Chariots with a 5 or 6. He throws a 4 and a 5, killing both targets (turn them at an angle, or otherwise mark them) which still retain their right to dice. The moving player places one Infantry unit against each Cavalry unit and his Chariot unit against the first Cavalry. The lone Infantry needs a 6 to kill Cavalry; he rolls a 4, having no effect. The Chariot also requires a 6; both it and the other Infantry roll 3s, neither obtaining a kill. The eliminated units are now removed, thus ending the first round of combat.
6.4 After all units of both sides in an area in which Combat occurs have each made one attack (a "round of combat") and losses (if any) have been taken, combat may cease at the choice of either player. First, the non-moving nation, and then the moving nation may choose to retreat to avoid further combat. If a stack does not retreat it must dice for another round of combat.
6.4.1 There are normally a maximum of two rounds of combat in each Battle. After the second round if the non-moving nation's units are not eliminated the moving unit(s) must redeploy out of the contested area in their Redeployment Phase (and for this purpose may pass through enemy occupied areas through which that nation's units moved that turn).
6.4.2 Where a Ruler is present in an area (and no enemy Ruler is in the same area) he may unilaterally decide combat continues for up to three rounds. The nation without the Ruler may not elect to retreat in these circumstances.
6.4.3 Units may only remain in an area after the Redeployment Phase with units of their own nation.
6.5 Non-moving nations can only retreat into adjacent areas. These adjacent areas cannot be occupied by other nations and cannot be the area the moving player's units left to enter the combat area. The moving player must retreat into the area, or one of those areas, from which he entered if he retreats. Units unable to retreat as above are eliminated.
6.6 In its own Battle Phase a Ruler may influence up to two combats within three areas of the area the Ruler occupies. In other Nation's Battle Phases a Ruler may only influence combat in the area which it occupies. A Ruler adds one to the dice of all the friendly units in the areas which he influences. Rulers do not count against the stacking limit.
6.6.1 Rulers who are alone in an area with enemy units (but not just enemy Rulers) after combat are killed and the counter removed from play.
6.7 Terror and Siege markers are available only to the Assyrian and Nubian nations. In a battle they add one to the dice roll of up to two foot units in that battle (Assyrian or Nubian player's choice) if in Fertile areas. Terror and Siege Markers may not be attacked directly but are eliminated if in an area with an enemy unit and no other Assyrian or Nubian unit (respectively).
6.8 Camels: In all areas except desert areas treat Aramean camel units as Cavalry, in the desert they fight as the more effective "Camelry" category.
7.0 CONTROL
7.1 An area is controlled by a nation for game purposes if at the end of its redeployment phase it is occupied by a unit of that Nation or of a vassal Nation.
7.2 In the case of mountain movement under Rule 5.5, control is judged at the moment of entry.
8.0 REDEPLOYMENT
8.1 After Battles are completed units may move a further full move but may only enter controlled areas or areas through which that nation's units passed this turn but which are currently free of units of other nations. Units redeploying after two rounds of combat may move through occupied areas through which they moved to reach the Battle area (See Rule 5.4 for an example of how this may occur).
8.2 Where units entered an area by Sea Movement they may redeploy by sea to the area they left. Units which invaded from the sea ("land" in the Turn Arrival Chart) may retreat/redeploy to sea and invade again next Turn (any area in their invasion range).
8.3 If a unit must redeploy after two turns of combat and cannot enter an area with its own units or which is empty, it is removed from play.
8.3.1 Vassal units do not count as one's own units.
9.0 REPLACEMENTS AND NEW UNITS
9.1 At the start of the New Units Phase (see 4.2.1) the units listed to appear that turn are placed on the board during the appropriate nation's move. New units and markers which appear according to the Turn Arrival Chart are placed in the stated areas even if the areas are enemy occupied.
9.2 Following this, units from the dead pile may be used as replacements provided that for each unit returned to play one is removed permanently from play for the rest of the game. The number of units returned in any one Turn cannot exceed the number of areas controlled by that Nation. Exception: See Major Empires, 17.0.
9.2.1 Three nations (Libya, Nubia, and Aramea) are permitted to replace at least one unit per turn (if available) even if they control no areas on the map. They are considered to be massing off map in their mountain or desert holds.
9.2.2 Replacement units are placed in the named areas, but not if they are enemy occupied.
9.3 In reclaiming units from the dead pile, where possible the same type of unit (cavalry, chariots or foot) must be discarded as is returned to play. The unit discarded must also have been in the dead pile (no suicides, please). If no such units exist then a chariot or cavalry unit can never be brought back into play by discarding a foot unit, although the reverse can occur. Where only one unit of a type is in the dead pile then, at the owning player's discretion, its replacement may be diced for: 1-3 it is replaced, 4-6 it is permanently removed. This may be changed under Major Empires (Section 17, where only 1-2 will replace). Terror counters are markers and may never be reclaimed.
9.4 Invasion: certain nations enter play by invading stated areas. Place the units in the chosen areas and then move normally that turn (they are not required to leave two units behind for every other nation's unit in the area which they invaded). If all invading units cannot enter the map, then they may wait off-map.
10.0 VASSAL STATES
10.1 If at the end of a round of battle (not at the beginning or during) a nation has less than or the same number of units (including its own vassals and meshwesh, see section 12.0) on the map as its Vassal Level then it may be subjected to Vassalage by the nation ("the Subjecting Nation") with whom it is in combat. Any unfought combats between these two nations are voided and the Subjecting Nation must redeploy its units out of the Vassal areas in its next Redeployment Phase.
10.1.1 Two Maniacs Rule: If two nations in combat simultaneously hit their Vassal Level in the same round of combat, then the non-moving player is deemed to dice first and for Vassal purposes inflict his damage on the moving player first.
10.2 Vassal status can only be visited upon units in the same area as or adjacent to units of the Subjecting Nation. Other units (if any) remain non-vassals as separate principalities arise out of the chaos. These unsubjected units may never become Vassals of any nation while Vassal status remains on their fellow units. (So no nation may be a vassal of more than one nation).
10.3 Where a nation is in vassal status, and new units are scheduled to arrive on the Turn Arrival Chart these units still arrive, and are not vassals. Consider a major rebellion to have occurred. Their arrival does not disturb the vassal status of their erstwhile compatriots.
10.4 The Vassal units are turned upside down and may not be moved or retreated again until the Subjecting Nation controls no area adjacent to the Vassals, at which point they cease to be Vassals (and flip back over). Exception: no nation ever becomes a vassal to the Cimmerians.
10.5 Nations which have all of their units in Vassal status do not receive replacements. Nations which have some or all of their units as Vassals still get Victory Points for Territory occupied by any of their units. The Vassals also count as controlling the area for the Subjecting nation (the area thus giving two lots of victory points).
10.6 Nations with all of their units in Vassal status will have combat with any nations in that area and will not become vassals to those other nations.
10.7 Vassals may not move or retreat.
10.8 Subjecting Nation units may move through areas with Vassals as if they were their own units. If they attempt to stack with vassals they must attack them in the Combat Phase. Subjecting units cannot retreat into Areas with vassals.
10.9 A Vassal nation whose Subjecting Nation itself becomes a Vassal ceases to be a Vassal and reverts to its original owner.
10.10 The Vassal Level (less than or equal to the stated number of units):
ONE UNIT: Sumer, Aramaeans, Achaeans, Medes, Cimmeria, Libyans and Urartu.
TWO UNITS: Sea Peoples, Phrygia, Luvians, Elam, Nubia, Assyria, and Lydia.
THREE UNITS: Canaan, Kassites, Chaldeans, Egyptians, Hatti, Judah, and Mitanni.
10.11 One can refuse or neglect to grant Vassal Status, but if the conditions are met a nation cannot refuse to accept such status. For Slay or Slaughter victory points purposes vassals count as their original nationality.
11.0 VICTORY POINTS
11.1 Each faction has a Victory Point Chart giving details of how points are gained for each nation. Each nation can earn victory points by controlling territory and by achieving events/conditions listed on the National lists.
11.2 Check off the appropriate box on the Victory Point Chart as it is achieved (example: after combat both sides may have "slay" results to record). When conditions may take several turns to complete (i.e., eliminating a certain number of units), record them as they happen until the total required is reached. Scores from territory should be written next to the name of the nation on the VP sheet, with multi-part conditions recorded by ticks as each stage occurs (i.e., units slain or area controlled). Tracks are printed on the board to record the cumulative scores by color.
11.3 You can never score points by achieving another nation's victory targets, only your own.
11.4 Victory points can be gained by the methods listed on the national victory charts or for controlling regions as follows:
11.4.1 Enemy units eliminated (in some cases only from specified nations).
11.4.2 Cities Occupied by controlling the relevant area. Some Areas (i.e., Aleppo) contain more than one city, Controlling that one area will control both cities.
11.4.3 Preventing the areas of specified cities being controlled by other nations (by controlling those cities themselves as non-vassals).
11.5 Victory Points for Control (General). At the end of each nation's turn that nation (except Cimmerians) earns:
2 VPs for each non-mountain, non-desert area controlled, and
1 VP for each mountain area controlled.
11.5.1 The Cimmerians earn 3 VPs for each Hill area controlled (they need grass not irrigation), and 1 VP for each Fertile, Marsh or Mountain area controlled but the Cimmerians may not claim the same area more than once in the game (everyone in such areas is dead anyway).
11.6 Notes:
11.6.1 Where a minimum condition exists it is not also a maximum ("Slay 4 units of Kassites" is achieved even if you go on to slay 5 units).
11.6.2 Where a number of turns of compliance is required these need not be consecutive unless specifically stated.
11.6.3 "Control" of cities is only judged at the end of the relevant nation's turn, so even if a city is captured by other nations as long as it is recaptured it will count as having been controlled throughout the turn. This should be contrasted with a "prevent" condition. This condition will fail if any other nation has controlled the city at the end of its own turn.
11.6.4 The control of a number of areas or cities need not be the same areas or cities ("Control two Mediterranean areas for turn 9 and 10" could be met by controlling two entirely different areas in each turn) unless specifically stated.
11.6.5 Where no time limit is given to control or prevent conditions, they apply throughout the game, i.e., Egyptian control of Memphis.
11.7 Glossary
11.7.1 "Slay" or "Slaughter": Unit of the designated nation is eliminated in combat with your units (it does not matter who initiated the combat). The two terms are interchangeable.
11.7.2 "Put to the sword": unit of the designated nation is eliminated in your nation's Battle Phase.
11.7.3 "Capture" means "Control" at your nation's Turn end.
11.7.3.1 Requiring Control by a specific turn is met by Control in or before that turn.
"Asia Minor": WILUSYIA, SEHA RIVER LAND, ASSUWA, KOS, LUKKA, ARZAWA, WEST TAURUS, KASCA, HATTI, PHYRGIA, ZIPPASLA, PITASSA.
"Mediterranean" any coastal area (including Alasa) from Kos to Naucratis.
"Rivers": MITANNI, EUPHRATES, MARI, AKKAD, and BABYLON.
12.0 LIBYANS AND MESHWESH
12.1 Libyans: When Libyans invade provinces bordering the Libyan Desert, if all Egyptians or Nubian Dynasty units in the area invaded from the Desert are not eliminated at the end of the first round of combat (in each turn they invade), the Libyans withdraw into the desert (they are only raiding not seeking to conquer). Exception: On Turn Four the invading Libyans may move and fight as normal, this seems to have been a concerted attempt by the Libyan king to defeat the Egyptians.
12.2 Raising Meshwesh: At the end of a Combat Round the Egyptian/Nubian Dynasty (see Rule 13 below) player dices for each Libyan unit eliminated in Battle with Nubian Dynasty or Egyptian troops; on 1-4 it goes to the dead pile as normal, on 5 or 6 it is placed by the dicing player in a stack no more than two areas from where it was eliminated with Egyptians or Nubian Dynasty units as Meshwesh (mercenaries).
12.3 Using Meshwesh: While a unit is Meshwesh it is not treated as a Libyan unit for any purpose in the game, and is treated as belonging to the dicing player's nation. Only Libyans, and not Meshwesh, may enter the Libyan Desert. Where both Meshwesh and controlling units (Egyptian or Nubian Dynasty as relevant) foot units are attacked in the same area, losses are always taken from the Meshwesh first, irrespective of which unit was actually attacked. Stack the Meshwesh counters under the counters of the controlling power (without which Meshwesh cannot be used — see 13.4).
12.4 Losing Meshwesh: If no Egyptian or Nubian Dynasty unit is present with Meshwesh at any time while moving or redeploying they desert (remove from the map and place in dead pile). When eliminated in Battle or deserting, the Meshwesh return to the Libyan dead pile.
12.5 Change of Dynasty: When a change of Dynasty occurs (see Rule 13 below) any Meshwesh are transferred to the Nubians.
13.0 NUBIANS
13.1 The Nubians of the Kingdom of Kush established a powerful presence in Egypt and took over the active rule of the Twin Kingdoms under Pharaoh Piye in Dynasty 25. If at the end of any Full Turn (that is after all chits have been drawn) the Nubians control three out of five of the Egyptian starting areas (or a majority of those not controlled by a third party, for example the Libyans) then the Blessings of Amon-Re have fallen on the Kushite Dynasty. All Egyptian foot units become vassals of Nubia (they now serve local feudal barons). All Meshwesh, Egyptian Chariots on the board and the Egyptian dead pile become the property of the Nubians.
13.2 The Egyptians only regain control of their units if the Nubians cease to control the relevant areas or if the Egyptian foot units outnumber the Nubians and their other units. In such a case all Meshwesh remain Nubian if stacked with Nubian units; if stacked with Egyptians they are removed from the board and placed in the dead pile.
13.3 While in control the Nubians may draw Egyptian units as replacements if they wish (they cannot be obliged to do so).
13.4 Nubians who are obliged to retreat out of Thebaid may withdraw off-map (into Nubia itself) and re-enter Thebaid next turn. No other nation's units may so withdraw.
14.0 FOR THE ASHES OF HIS FATHERS & THE TEMPLES OF HIS GODS
14.1 If a nation is required to deny access to an area ("prevent") to other powers (rather than simply to control it in its own turn) and it controls that area at the beginning of a Combat Phase then if it wishes it may elect to draw units in from adjacent areas up to the full stacking limit as each enemy unit enters that area. However, these friendly units must not be pinned two-to-one by enemy units in their adjacent areas at the moment at which movement is to occur.
15.0 THE CHOSEN PEOPLE
15.1 The Chosen People are the tribes of Israel (Judah) favored by a covenant made between Abraham and Jehovah. They start the game serving God, but this status can be lost (16.2.1). While Judah is Serving God:
15.1.1 Other nations may not place units or markers in the Judah area if that area is controlled by Judah, and
15.1.2 Judah units fight with a plus one factor against Canaanite and Sea Peoples, and
15.1.3 Judah fights with a plus one factor against anyone occupying Judah (if they slipped in before Judah arrives or during a spell of ungodliness).
15.2 This advantages given in Rule 16.1 are lost when the Israelites break God's Laws. The advantages return when the Israelites repent. To determine this status, at the end of each JUDAH turn throw a die:
15.2.1 If Judah is presently Serving God, 1-3 they continue to do so, 4-6 the nation has fallen under the spell of the Baals and Jehovah's support is lost, as they are not serving God.
15.2.2 If Judah is not currently Serving God, on a roll of 1-2 the people have repented and returned to God, 3-6 they continue to wallow in Ungodliness in the manner of the uncircumcised (no Rule 16.1 advantages for the miscreants).
15.3 Repentance may only occur up to three times in a game and never after The Chosen People have been captured (which occurs if they are left alone in an area with enemy combat units).
15.4 If in covenant with God, use the Godly Chosen People marker, if not, the Ungodly marker. Only one marker at a time may be on the board. If the Chosen People are captured remove the marker for the rest of the game (they await freedom from Cyrus the Persian).
16.0 RULERS
16.1 Rulers are placed on the map in their nation's turn of the game turn in which they are designated as arriving.
16.1.1 Rulers arriving on the first Turn are not set up until their Nation's chit is drawn.
16.1.2 Rulers are removed at the end of the game turn in which they arrived.
16.2 In its own Battle Phase a Ruler may influence up to two combats within three areas of the area the Ruler occupies. In other Nation's Battle Phases a Ruler may influence combat in the area which it occupies. A Ruler adds one to the dice of all the friendly units in the areas which he influences. Rulers do not count against the stacking limit.
16.3 Rulers who are left in an area with enemy units (but not just enemy Rulers) after combat are killed and the counter removed.
16.4 Rulers can move four areas a turn.
16.5 Rulers are markers and as such do not count against stacking limits.
16.6 The Canaanite Ruler must be in a Canaanite stack for it to exceed three units.
16.7 Where a Ruler is present in an area (and no enemy Ruler is in the same area) he may unilaterally decide combat continues up to three rounds. The nation without the Ruler may not elect to retreat in these circumstances.
17.0 MAJOR EMPIRES
The following Imperial powers are susceptible to loss of 'face' and political stability if their capitals are captured:
Egypt (Memphis)
Assyria (Ashur Turns 3-5, Nineveh 8-10)
Hatti (Hattusas)
Chaldea (Babylon).
Place the relevant god marker in the capital city. In any New Units Turn for the named nations if the named cities are not in their control then they replace at the rate of one unit for every two permanently removed. (The capturing player may remove the god marker to show this). As soon as this situation no longer applies (the capital is controlled by the nation again) the normal replacement rate is used. If Ashur is lost the rule will only apply during the turns where Ashur is required to be occupied and will immediately cease at the end of Turn Five. Face may be lost and regained an unlimited number of times in the game.
POTTED HISTORY
"The only new thing is the history we do not know." The history of any period is murky, and timings (especially where the Bible is sole evidence, or where archeological evidence is scarce) are not always argued without other issues coming in to play. This is the history I worked from, as to how correct it is, only the dead know.
TURN ONE (1500 - 1410): Late Bronze Age: THE NEW KINGDOM
Egypt had been subjected to rule by the Hyksos in 1650 but under Amosis the Egyptians had freed themselves, establishing the New Kingdom. Under Thutmosis III (1480-1448) Egypt pushed into Canaan and at Megiddo defeated a confederation led by Darusha of Kadesh which established Egyptian power as far as the Euphrates and overlordship of much of coastal Canaan. The Old Hittite Kingdom founded by Labarna in 1640 had conquered Babylon in 1531 under Mursilis I, but following his death the kingdom weakened and its borders retired to Asia Minor until the rise of the New Kingdom in 1380. The sack of Babylon ended the native dynasties which had ruled in Mesopotamia since Hammurabi. The Kassites, a tribe from the Iranian Highlands moved into Babylon in the ensuing vacuum and established a hegemony which was to last to 1160. The Mitanni, an Aryan people originally from Lake Van, had migrated into the Jezireh and established rule over North Syria to the Mediterranean.
TURN TWO (1410 - 1320): THE MIDDLE EMPIRE AND THE NEW HITTITE KINGDOM
Pharaoh Akhenaton overturned conventional Egyptian religion by his monotheism. Dynasty XIX was established in 1345 by Sethos I. The Assyrians gained their independence from the Mitanni and established The Middle Empire (1375-1047). The Mycenaeans began to expand out from the Greek mainland and to take the coast of Asia Minor. Suppliuliumas of Hatti (1380-1346) established the New Hittite Kingdom by destroying the Mitanni Empire with Assyrian assistance and pushed into the northern Syrian dependencies of Mitanni.
TURN THREE (1320 - 1230): THE LAST OF THE LATE BRONZE AGE
Egyptian and Hittite rivalry over Palestine led to a number of campaigns. Pharaoh Raamesses II fought (and may have won) the battle of Kadesh against Hittite forces under Mursilis. Shalamaneser I and Tukrul-Ninurtka I extended Assyrian power. Moses and the Twelve tribes of Israel enter Canaan c1250.
TURN FOUR (1230 - 1140) Iron Age: THE AEGEAN MIGRATIONS
About 1200 an enormous movement of peoples involving invasions of the Mediterranean coast occurred moving from north-west to east. Most of these peoples established kingdoms on the coasts displacing the former residents. Raamesses III (1197-1165) defeated the Libyan and Sea People invasions but Egypt experienced a general loss of influence in Canaan. The Elamites under Shutruk-Nahunte captured Babylon and destroyed the Kassites. The Hittite Kingdom collapsed around 1200 under attacks from Sea Peoples and Phrygians. The Luvians (a Neo-Hittite people) moved into North Syria.
TURN FIVE (1140 - 1050): THE END OF THE MIDDLE ASSYRIAN EMPIRE
Nebuchanezzar I drove the Elamites out from Babylon in 1137 and re-established a Babylonian Dynasty. Aramean tribes from the Arabian desert invaded and raided Mesopotamia and Syria. Tiglath-Pileser I of Assyria led a brief resurgence of Assyrian power against the Aramean tribes, the Syrians and the mountain tribes to the north, but the Empire then contracted towards its center.
TURN SIX (1050-960): THE RISE OF ISRAEL
Saul (1020-1000) and David of Israel (1000-960) defeated the Philistines and the Transjordanian kingdoms as far as Damascus.
TURN SEVEN (960-870): THE RESURGENCE OF THE EMPIRES
Pharaoh Shishonk reestablished some Egyptian power in Canaan and in 950 captured Jerusalem. Adad-Nirari of Assyria (909-889) began to reestablish Assyrian presence in North Mesopotamia. Solomon (966-926) lost ground to Arameans but established a large chariot army. On his death Israel split into two kingdoms.
TURN EIGHT (870 - 780): THE NEW ASSYRIAN EMPIRE
Ashur-nasir-pal II (883-859) established the New Assyrian Empire, Shalmaneser III (858-824) built on this. The arrival of Median tribesmen in the mountains attracted attention from both Assyria and Babylon. Sardur I (835-825) founded kingdom of Urartu which spread to Aleppo and the Euphrates. In 800 Phrygian kingdom formed under Midas. Nubian pressure on the Egyptians began to grow.
TURN NINE (780 - 670): THE CIMMERIAN HORDES AND THE KINGDOM OF KUSH
715, a Nubian Pharaoh, Piye, took over from native Egyptian dynasties. Tiglath-Pileser III (745-727) defeated Sardur II of Urartu, took Northern Syria and Babylon. Sargon II (722-705) and Sennacherib built further with the capture of Jerusalem and Essarhadon captured Egypt. Chaldean tribesmen from the desert attempted to re-establish a Babylonian Empire. The Cimmerians (a Scythian people) invaded from south Russia c750 attacking the Assyrians, but later combining with Assyria to destroy Urartu.
TURN TEN (670 - 600): THE NEO-BABYLONIAN AND MEDIAN EMPIRES
Egypt was conquered by Assyria in 662 but liberated by Psammetichus (who used Greek mercenaries). Ashurbanipal destroyed Thebes but faced an enormous revolt from his brother. In 648 he destroyed Babylon and in 639 Susa, but the weakened state collapsed between 614-608 under attack from Media and Babylon. Nabpolassar (625-605) established himself as king of Babylonia, Elam, Canaan and northern Mesopotamia. In 609 Urartu was captured by the Medes. The Cimmerians attacked Lydia and Phrygia. Gyges and Ardys of Lydia fought against both the Cimmerians and the Greek cities of the coast. Alyattes (605-560) expanded the frontiers to the Halys river. Cyaxares of Media in combination with the Neo-Babylonians establishes an empire from Lydia to the Persian Gulf.
In the east a young man called Cyrus would soon be in evidence.
HOW TO PLAY CHARIOT LORDS
CHARIOT LORDS is concerned with the rise and fall of kingdoms. It is not an intense historical simulation but does cover some macro-historical trends. It is important that you remember that most of your kingdoms will either fall or come close to it in the course of the game. You should not view this as a defeat. What is a defeat is for your kingdoms never to have realized their potential (measured by how many victory points they have scored). If you never attempt to capture fresh territory then your nation may last longer but it will not score points. Accordingly you should purge your minds of the senseless aggression which constitutes the major part of most wargames and concentrate on sensible aggression.
Attacking is dangerous as it can leave you with less units than you have available provinces to occupy, so only do it if it is worth specific victory points. The simple player reads his victory point schedules and seeks to do what they tell him. You should also remember that if you can prevent another team scoring points it will assist your chances of victory. Too obvious an approach will lead to obvious defenses from the other side. Do not explain that you are only attacking someone for the victory points, it is an unnecessary irritation. Read your victory points and read your rival's victory points. When in doubt occupy terrain. Never lose control of your recruitment areas.
CHARIOT LORDS permits you to concentrate your forces and then redeploy. In this it simulates the realities of many campaigns over many years (all of which are covered by a single turn) which would not leave the "army" miles away on some frontier. Remember to consider how you may wish to redeploy and ensure all necessary areas were moved through by your forces (think of these as minor campaigns preparing the way for major pushes).
The larger the stack you send in the better the chance that you will destroy the enemy. However, there is a limit to endurance even over a number of campaigns so that if victory is not achieved within two rounds of combat you must retire from the field. You cannot keep sending armies to their defeat (real kings know this, so we must stop naughty gamers pushing things too far). Remember your historical counterparts had other things to do than score victory points. If you are attacking an area held by many defenders you are unlikely to capture it in one turn's combat. Consider how you can do it over several turns and always remember that the order of play may let a rival in to benefit from your efforts. At worst your opponent will need to limit himself elsewhere to keep your armies out. This may reduce his score.
The combat table is designed to show the strength of mobile forces but chariots can only exploit this in the flatter lands of the Fertile Areas. Cavalry are assumed to be more flexible and can benefit in either Fertile or Hilly terrain. Mountains should be held with foot units.
Rulers must be deployed where they can best assist in necessary attacks. Remember that they do not directly lessen the chances of your losses but they do increase the chances of killing the enemy. Famous rulers are not good for soldiers' health.
Beloved of the Gods turns should be carefully planned to make sure sufficient forward positions are taken to permit the forward deployment of troops who were fighting in the first 'turn'. Although these turns permit the collection of a formidable amount of victory points they can also break the back of an army which is pushed too far. These turns are difficult to play well so give them some thought.
The variable play order makes it difficult to plan in detail until you get your turn. However, you should always bear in mind if you move early in one turn that you may move late in the next and thus ensure you are not overstretched. When the play order robs you of victory or drives you into defeat then you must accept this philosophically (and what a marvelous excuse).
Each game of CHARIOT LORDS has the potential for being very different from the next. Do not be tricked into accepting the inevitability of Assyrian power or Egyptian hegemony; a couple of botched battles can weaken their forces significantly and while they have more units they have more to do and many enemies.
In deciding on your route to victory try to achieve some balance between specific (event driven) victory points and territorial occupation victory points. There is only one rule to remember - there is no right answer. Consider the returns from different actions based on the position in that turn and do not be afraid to change policies. There may be times in the game where losses leave a lot of terrain empty without combat. In others taking terrain will be no easier than going for specific targets. But in determining this do not take forever to make your move, and no running commentary, thank you. If major empires show little willingness to move to the attack (as historically their rulers would have done for reasons of prestige) you can optionally play that no nation may score more from territorial points than it does from achieving specific victory conditions.
Think of all of your nations as separate and try to assess the role assigned to them. Some will tend to expansion. Others will assume a much more local role. Occasionally, once great empires will just be holding on for dear life. Although ten turns may seem lots of time (900 years, in fact!) so much must happen that you may find you only have a narrow band of time in which to act. Spend some time making notes next to your nations' victory points. And yes, the Yellow player does get points for killing his own men. It's a funny game.
In combat consider the advantages and disadvantages of concentration. If you need to take lots of territory spread out at (say) two-to-one. If you must take a particular area, concentrate your forces.
Design: Charles Vasey
Playtesters: Mike Siggins, Gareth Simon, Gary Dicken, Steve Kendall, Steve Baker, Robin Packenham, Geoffrey Griggs, Seb Wakely, Maurice Criddle, Richard Martin, Bruce Reiff, Steve Bucey, Ken Good, Steve Brown, Markus Stumptner, Christian Auernigg, Anatol Schmied-Kowarzik, Andreas Vondra, Christian Allram, Harald Kruzik, Gerard Kilgallon, Tim Deeming, Kevin Townsend and Richard Walker.
Dedicated with deep respect to my Mother, Margaret Vasey
Copyright Charles Vasey 1999, manufactured under licence by Clash of Arms Games.
Email us: [email protected]
Clash of Arms Games The Byrne Building #205 Lincoln & Morgan Sts. Phoenixville, PA 19460
Call or Fax us at: (610) 935-7622