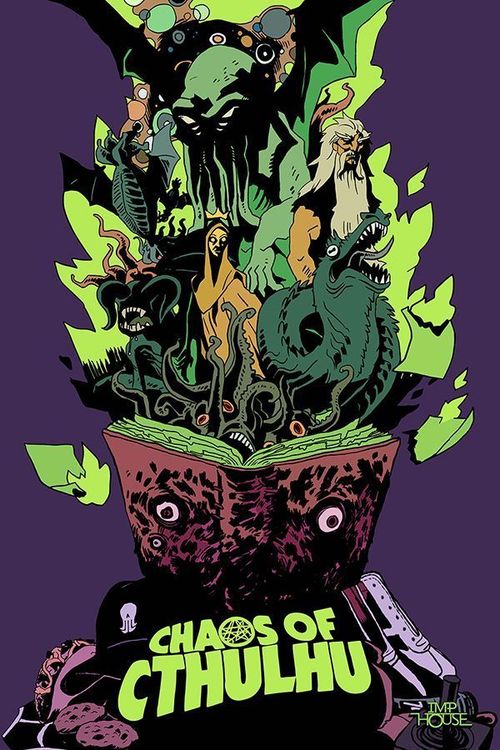
Chaos of Cthulhu
Chaos of Cthulhu Rulebook
Table of Contents
Table of Contents
Game Contents
Elder Dice (5 per player, one colour set per player):
- White Elder Dice x5 (1 top die, 1 left die, 1 right die, 1 center die, 1 bottom die)
- Black Elder Dice x5 (1 top die, 1 left die, 1 right die, 1 center die, 1 bottom die)
- Green Elder Dice x5 (1 top die, 1 left die, 1 right die, 1 center die, 1 bottom die)
- Purple Elder Dice x5 (1 top die, 1 left die, 1 right die, 1 center die, 1 bottom die)
Elder Dice Details: each Elder Die face shows an action in its top left corner (the action you may perform) and the number needed to activate that action in its bottom right corner. The number will always be on the bottom right corner of each Elder Die.
Other components:
- Attack Tokens x20: used for keeping track of attacks.
- Block Tokens x20: used for keeping track of your blocks.
- Madness Tokens x20: used for keeping track of madness.
- Heal Tokens x20: used for keeping track of your heals.
- Player Mats x4: used for tracking your actions and damage dealt to you.
- Secrecy Screens x4: used for hiding the actions on your player mat.
- Offerings x16: used for Bonus Play Actions.
- Summoning Stones x20: standard 6-sided dice, rolled to activate your Elder Dice's abilities.
Setup
-
To begin, each player receives:
- One colored set of 5 Elder Dice (1 top die, 1 center die, 1 left die, 1 right die, 1 bottom die; all the same color).
- One Player Mat with the largest diagram corresponding by color to each player's Elder Dice.
- 5 Green Summoning Stones (standard 6-sided dice).
- 4 Offering Tokens.
Note: "Left" and "Right" refer to your left and right when looking down at the dice (not the monsters' left and right).
-
Place the Player Mat in front of you with your Offering Tokens and Summoning Stones to the side.
-
Pile all Action Tokens in the center of play, within reach of every player.
-
Players roll all 5 of their Elder Dice, then position them in a cross formation on the table above their Player Mats (not on the mats), with the monster's "head" at the top, the torso in the center, the right and left appendages to each side of the torso, and the bottom under the torso.
Keep in mind that the numbers are always in the bottom right corner; this will help determine which dice go where.
Note: If you are not satisfied with your roll, you may sacrifice an Offering Token to re-roll ALL your Elder Dice (see "Using Offering Tokens" for more information). Additionally, if all 5 of your Elder Dice show the same number on your first roll, you've successfully summoned an Old One and the End Time is NOW. Give the mortals one more chance; re-roll your Elder Dice and continue with the set up. (No Offering needed.)
-
Place the Secrecy Screens around just the Player Mats, blocking the view of your opponents. The Elder Dice and Summoning Stones should be visible to every player at all times.
-
Finally, determine who will take the first turn during the Declaration of Actions phase by having each player roll a Summoning Stone. The highest number becomes Player 1 and play continues clockwise for each consecutive round.
Playing the Game
Rolling the Summoning Stones
Each round begins with every player rolling all 5 of their Summoning Stones at the same time. Players attempt to match the value of their Stones to the numbers showing on the bottom right corner of their Elder Dice in order to activate the corresponding actions that are defined by the icons on the top left corner.
You may also combine any number of Summoning Stone values to make larger or smaller numbers. (For example: 2 + 3 = 5, so you can combine the two values to activate an Elder Die showing a 5…or, alternatively, 3 - 2 = 1, so you can activate an Elder Die showing a 1.)
Any form of 6 is wild! Summoning Stones with a value of 6 can be used to activate ANY Elder Die in that player's hand.
Players then take a few moments to strategically match their Summoning Stone values to their Elder Dice numbers in order to activate the actions shown on the top left corner of their dice.
At this point, players may also choose to use one or more un-used Summoning Stones to activate a Bonus Action in addition to their normal actions (see the "Bonus Play" section for more information about Bonus Actions).
Note: Summoning Stones may only be rolled ONE TIME per round, unless a player surrenders an Offering for one chance to re-roll some or all of his Stones (see the "Using Offering Tokens" section for further explanation).
Things to keep in mind:
- Each Elder Die may only be activated a maximum of ONE TIME during each round.
- You may always look at your opponents' Elder Dice and Summoning Stones to help plan your strategy, but DO NOT look at their Player Mats. (The Secrecy Screens are included to prevent this.)
Using the Player Mats and Action Tokens
Every Player Mat includes 4 diagrams that correspond, by color, with each set of Elder Dice. Use the Action Tokens and Player Mat to keep track of your actions, as well as those being made against you, in each round. Use the largest diagram on the left for keeping track of your personal Elder Dice: which are being targeted, which are being healed, any blocks in play, etc. Use the smaller diagrams to the right for targeting your opponents' monsters.
Example: If you have activated a Madness action, and you want to use it on the green monster's center Elder Die, you will place a Madness token on the green center square. If you have matched an Attack action, you will place an Attack token next to the color that belongs to the player on your left, as he will be able to choose which body part will take the damage. If you have matched a Heal action and want to give your center Elder Die a +1, you will place a Heal token on your monster's center square. And so on.
All players place the tokens for their intended actions on the Player Mats BEFORE declaring their actions to the group. These cannot be changed once Declaration begins.
Note: Block actions are generic and can only be used in defense. If you have activated a Block, simply place the token in the vicinity of your monster's diagram and choose if you would like to use it, and how you would like to use it, during the Resolution of Actions phase.
Players place the tokens for any actions aimed toward them during the Declaration phase as they are announced.
Example: During Declaration, the player to your right Attacks you twice. Decide which body parts you would like to take the damage, and place Attack tokens in the corresponding locations on your monster's diagram. Etc.
Using the Secrecy Screens
The Secrecy Screens are provided as a way to block intended actions from public view until Declaration of Actions begins. They are designed to fit around the Player Mats only; Elder Dice and Summoning Stones (standard D6 dice) remain in view of all players at all times. Once the Declaration of Actions has begun, the Secrecy Screens should be removed for transparency.
Bonus Play
In every round, all players have the option to activate a selection of Bonus Actions by using any combination of their INACTIVE Summoning Stones (standard D6 dice) at any time prior to Resolution of Actions, even out-of-turn. These may be activated during Declaration by matching the value(s) of any inactive Summoning Stones to the numbers on the list of Bonus Actions (see "Bonus Play Actions List" for a description of each). To activate Bonus Play, surrender 1 Offering Token per desired Bonus Action. Players may or may not choose to hold back Summoning Stones to use for Bonus Actions. Rolled values may be combined, or not, depending on which Bonus Action is desired; the more inactive dice, the wider the selection of Bonus Actions available for use. Use the Player Mats and Action Tokens to track Bonus Play activity (see "Using the Action Tokens and Player Mats" section).
Things to keep in mind:
- Having inactive Summoning Stone(s) does not mean you MUST surrender an Offering Token and activate a Bonus Action. It just gives you the OPTION to do so during Declaration.
- Activated Bonus Actions only last one turn.
- While players may choose to activate more than one Bonus Action during their turns by surrendering multiple Offerings, each Bonus Action may be activated only once per player, per round.
Example: I choose to use 3 of my rolled Summoning Stones in regular play to activate three Blocks showing on my Elder Dice. I am left with 2 inactive Summoning Stones that I can use for possible Bonus Play. They are showing a 1 and a 5. This means I can choose to activate any of these four Bonus Actions: 1, 4, 5, or 6.
Example continued: I choose to activate the 5 because I don't have any offensive actions activated (or showing) on my Elder Dice, and I'd like to deal some Madness to other players while strategically leaving myself open for Attacks in order to be able to rotate my Elder Dice. So, I surrender one of my Offering Tokens, and my Blocks turn into Madness. (Alternatively, I could decide that none of the Bonus Actions available to me are worth surrendering an Offering to activate, or I could activate multiple Bonus Actions by surrendering more Offerings.)
Below is the list of Bonus Actions available, depending on the value(s) of the inactive Summoning Stones. There is also a quick guide to Bonus Actions on the back of each Secrecy Screen.
Declaration of Actions
Once all players have decided on their strategy and placed their Action tokens on their Player Mats, the Secrecy Screens are removed, and players take turns declaring their actions to the group. The first player in that round checks to make sure all players are ready, then declares the actions on the Elder Dice she has matched to her Summoning Stones, one at a time.
Example: Player 1 has chosen to match her Summoning Stones to 2 Attacks, 1 Madness, and 1 Heal; she announces that the player on her left will take 2 Attack damages, another player of her choosing will take 1 Madness damage to his center, and she will Heal her center +1. This continues in a clockwise rotation until every player has taken a turn.
Remember to include the declaration of any intended Bonus Actions during this phase (see "Bonus Play Instructions").
Things to keep in mind during Declaration:
- When using a Heal action you must declare the specific body part you intend to heal.
- When using a Madness action you must declare the specific player and body part you intend to damage.
- If the player being targeted cannot cancel out an Attack action with any defensive actions, then that player decides which of his body parts will take the damage.
- Block actions are generic, meaning you may choose which action you want to block after every player has declared, or you may choose not to use them at all.
- Once the Secrecy Screens are removed and the first player begins declaring actions, players may not change actions or adjust their strategy, UNLESS one or more players decide to activate a Bonus Action; these can be declared at any time prior to Resolution (see "Bonus Play Instructions").
- DO NOT ROTATE Elder Dice until after every player has declared all actions, including Bonus Play; use the Player Mats and Action Tokens to keep track of all actions until the Resolution phase begins.
Resolution of Actions
All healing and damage is applied to Elder Dice at the END of the round, after all players have declared their actions. Before that time, keep track of all actions using the Player Mats and Action Tokens.
All actions are simultaneous. Example: If a player plans on Healing a body part that another player is targeting with Madness, the actions will cancel each other out.
To take a damage from an indefensible Attack or Madness action, rotate the chosen Elder Die to the next lowest number. To Heal a body part, rotate the chosen Elder Die to the next highest number. Block actions are only resolved in defense.
If an Elder Die is damaged to below 1, that body part is re-rolled. If an Elder Die is ever healed past 6, that body part is re-rolled.
After all monsters have resolved their damages and heals, the Player Mats are cleared, the Secrecy Screens are placed back into position, and a new round begins with every player rolling all of their Summoning Stones simultaneously. The next player to the left will now begin the Declaration of Actions.
Note: It is possible that players may end a round with un-used Block actions. These MAY NOT be saved for later use. At the beginning of every round, the Player Mat is cleared, and every Summoning Stone must be rolled.
Using Offering Tokens
Everyone knows the Old Ones are notoriously unforgiving and hard on their faithful summoners. But, in the world of Chaos of Cthulhu, we think "Elder God crankiness" could, perhaps, be caused by some simple personal issues. Could they be hungry after awakening from aeons of slumber? Offer them a taco! Maybe they feel a bit unattractive at the moment. Offer them a Halloween mask or some clean underwear! Perhaps they are sad and depressed, feeling that they are losing significance in this world. Give them a cute cat to pet or a teddy bear to snuggle! It could be that they are just bored. Crank up the record player to 11 and blast an LP!
So, before you jump to the conclusion that you'll need an animal sacrifice or something equally messy to appease them, first grab something from around the house. We think you'll be pleasantly surprised with the results.
Each player begins the game with 4 Offering Tokens.* This is the maximum quantity that players may have in their hands at any time during the course of play. They may be used in these three ways ONLY, until none remain in your hand:
- You may surrender 1 Offering to re-roll ALL of your Elder Dice, at the beginning of the game only.
- You may surrender 1 Offering to re-roll some (or all) of your Summoning Stones at the beginning of a round. This may only be done once per player, per round.
- You may surrender 1 Offering to activate 1 Bonus Action during Declaration. (See "Bonus Play Instructions" for more information.)
*You may choose to start with less Offerings, or with more Offerings. You may even choose to add other items from around your house, such as coins, bottle caps, stones, etc. The maximum Offering quantity allowed in one player's hand at any time is whatever quantity each player began the game with. Choosing to play with less or more Offerings may shorten or extend the game, or it may not…it depends on individual player strategy as well as how the dice fall.
Winning The Game
The game ends immediately in victory for any player who matches all 5 of his Elder Dice to form one whole and complete monster. If this happens, an Old One has been successfully summoned, and the Age of Madness has begun!
Alternative Gameplay
To The Death!
For the cut-throats among us! In this version of play, if any player's Elder Dice drop below a 1, those dice are permanently removed from play, along with the corresponding Summoning Stone(s). If a center Elder Die drops below a 1, the monster is dead and out of the game. When playing "To the Death" Bonus Play is NOT allowed, but players MAY surrender an offering to save an Elder Die instead. In this scenario, matching does not matter; the last monster standing is the winner.
Timed Play
Only have a limited time to play? Set a timer, and the first player closest to matching a monster when the timer expires is declared the winner. If two or more players are equally as close, the monster matching the highest numbers wins.
Bonus Play Actions List
Below is the list of Bonus Actions available, depending on the value(s) of the inactive Summoning Stones. There is also a quick guide to Bonus Actions on the back of each Secrecy Screen.
- Regain: Roll a Summoning Stone; roll a 1, 2, 3, or 4* and regain that many Offering tokens, up to a max of 4.
- Absorb: Roll a Summoning Stone; the number rolled is the number of Block actions you may choose to use this round.**
- Mega Health: All of your activated actions (Madness, Block, and/or Attack) turn into Heals.
- Double: Double 1 of your activated actions.
- Mega Madness: All of your activated actions (Heal, Block, and/or Attack) turn into Madness.
- Cancel: Cancel 1 of another player's Bonus Actions.
- Attack Right: All of your activated Attack actions are aimed toward the player on your right.
- Mega Block: All of your activated actions (Madness, Heal, and/or Attack) turn into Blocks.
- Insanity: 1 Madness action dealt to all of your opponents; you choose which body parts to take the damage.
- Deflect: All damage from one player to you is transferred to another player of your choice.
- Steal: Steal 1/2 of one of your opponents' Offerings; round up in case of an odd number.
- Bedlam: Re-roll 1 Elder Die of your choice (yours or an opponent's).
*Rolling a 5 or 6 has no effect. ** In addition to your regular actions.
Elder Dice Reference
Each Elder Die is listed below by its monster name and race or role. For each face, the action icon (in the top left corner) is given with the number needed to activate it (bottom right corner). Faces are named by their position in the cross formation: Top, Left, Center, Right, Bottom. Action icons are described in the Game Contents section: Attack (red tentacle), Block (blue hand), Madness (yellow brain), Heal (green heart).
White Dice
1. Nightgaunt
- Lesser Servitor Race
- Faceless Servants of Nodens
- Top 1: Attack. Left 1: Block. Center 1: Attack. Right 1: Madness. Bottom 1: Attack.
2. Mi-Go
- Lesser Independant Race
- The Fungii from Yuggoth
- Top 2: Heal. Left 2: Attack. Center 2: Block. Right 2: Attack. Bottom 2: Madness.
3. Hound of Tindalos
- Greater Independant Race
- Scavenger of Time
- Top 3: Attack. Left 3: Heal. Center 3: Madness. Right 3: Block. Bottom 3: Heal.
4. Ubbo-Saltha
- Outer God
- The Unbegotten Source
- Top 4: Attack. Left 4: Attack. Center 4: Block. Right 4: Madness. Bottom 4: Block.
5. Shub-Niggurath
- Great Old One
- The Black Goat of the Woods
- Top 5: Madness. Left 5: Madness. Center 5: Attack. Right 5: Attack. Bottom 5: Attack.
6. Yog-Sothoth
- Outer God
- Opener of the Way
- Top 6: Attack. Left 6: Attack. Center 6: Madness. Right 6: Attack. Bottom 6: Attack.
Green Dice
1. Elder Thing
- Lesser Independant Race
- Ancient City Builder
- Top 1: Attack. Left 1: Madness. Center 1: Block. Right 1: Block. Bottom 1: Attack.
2. Shantak
- Lesser Servitor Race
- The Dreamlands Steed
- Top 2: Madness. Left 2: Block. Center 2: Attack. Right 2: Attack. Bottom 2: Attack.
3. Dagon
- The Great Old One
- Ruler of the Deep Ones
- Top 3: Attack. Left 3: Attack. Center 3: Madness. Right 3: Block. Bottom 3: Block.
4. Hypnos
- Great Old One
- The Lord of Sleep
- Top 4: Madness. Left 4: Block. Center 4: Attack. Right 4: Attack. Bottom 4: Madness.
5. Azathoth
- Outer God
- The Demon Sultan
- Top 5: Block. Left 5: Attack. Center 5: Madness. Right 5: Attack. Bottom 5: Block.
6. Nodens
- Elder God
- Lord of the Great Abyss
- Top 6: Attack. Left 6: Attack. Center 6: Attack. Right 6: Madness. Bottom 6: Attack.
Purple Dice
1. Shoggoth
- Lesser Independant Race
- Ancient City Builder
- Top 1: Block. Left 1: Madness. Center 1: Attack. Right 1: Heal. Bottom 1: Attack.
2. The Colour Out of Space
- Greater Independant Race
- Life Devouring Meteorite
- Top 2: Attack. Left 2: Attack. Center 2: Block. Right 2: Attack. Bottom 2: Attack.
3. Bokrug
- Great Old One
- The Great Water Lizard
- Top 3: Madness. Left 3: Heal. Center 3: Heal. Right 3: Block. Bottom 3: Attack.
4. Hunting Horror
- Greater Servitor Race
- Servants of Nyarlathotep
- Top 4: Attack. Left 4: Attack. Center 4: Block. Right 4: Madness. Bottom 4: Madness.
5. The Green Flame
- Great Old One
- Top 5: Block. Left 5: Madness. Center 5: Madness. Right 5: Attack. Bottom 5: Attack.
6. Nyarlathotep
- Outer God
- The Crawling Chaos
- Top 6: Attack. Left 6: Attack. Center 6: Attack. Right 6: Attack. Bottom 6: Madness.
Black Dice
1. Leng Spider
- Lesser Independant Race
- Huge Nightmare Spider
- Top 1: Madness. Left 1: Block. Center 1: Heal. Right 1: Attack. Bottom 1: Attack.
2. Star Vampire
- Lesser Independant Race
- Invisible Ravener
- Top 2: Attack. Left 2: Attack. Center 2: Attack. Right 2: Block. Bottom 2: Madness.
3. Hastur
- Great Old One
- The Unspeakable
- Top 3: Heal. Left 3: Attack. Center 3: Madness. Right 3: Attack. Bottom 3: Block.
4. Yig
- Great Old One
- Father of Serpents
- Top 4: Attack. Left 4: Madness. Center 4: Block. Right 4: Madness. Bottom 4: Block.
5. Abhoth
- Outer God
- The Source of Uncleanliness
- Top 5: Attack. Left 5: Heal. Center 5: Madness. Right 5: Attack. Bottom 5: Block.
6. Cthulhu
- Great Old One
- Master of R'lyeh
- Top 6: Madness. Left 6: Attack. Center 6: Attack. Right 6: Attack. Bottom 6: Attack.
FAQ
Q: Help! There are too many tentacles, and I don't know which Elder Dice belong to my monster's top, bottom, left, and right sides! A: The number will always be on the bottom right corner of each Elder Die; this will help you with set up.
Q: Can I adjust my actions after other players begin declaring their actions? For instance, I originally placed a Heal token on my left appendage, but another player has just declared that they are aiming a Madness at my center…can I switch the Heal to my center to counteract the Madness? A: NO. Once Declarations have begun, no adjustments to Elder Dice actions can be made. However, you MAY put a Bonus Action into play, if you have unused summoning stones and decide you would like to spend one of your Offering Tokens to do so.
Q: Can Bonus Actions be declared at any time during declaration, even out of turn? A: Yes. You may decide to activate a Bonus Action at any time before Resolution occurs, which means any time before the Elder Dice are adjusted at the end of the round.
Q: Can I decide to use a Bonus Action during the Resolution phase? A: NO. Bonus Actions must be decided on and announced before the Declaration phase ends.
Q: If another player activates a "Bedlam" Bonus Action against me during Declaration, when should the Elder Die be rolled and who should do the rolling? A: The die should be rolled during Resolution, after you've accounted for all other actions toward your monster, and the player who activated "Bedlam" should do the rolling.
Q: Can I activate more than one Bonus Action in a round? A: Yes. As long as 1 Offering Token is surrendered for EACH Bonus Action activated, you can activate as many as your roll has made available to you. BUT, keep in mind that you may not double-up on Bonus Actions! For example, you may only activate Bonus 2 once per player, per round. (Etc.)
Q: If I choose to activate a Block action, but then I decide I don't want to use it, is that allowed? A: Yes! Blocks are optional; meaning you don't have to use them even when activated.
Q: Can I use a Madness action on myself? A: Yes.
Q: Alternatively, can I use a Heal action on another player? A: Yes….anything that fits within the rules and causes chaos and insanity is perfectly acceptable!
Q: Can I surrender an Offering Token to Heal one of my Elder Dice? A: No. But, if you are playing the alternate "To the Death" gameplay, you may use an Offering to save an Elder Die from being taken out of the game.
Q: What happens when one of my Elder Dice is damaged below a 1? Or, alternatively, if it is healed above a 6? A: In both of these scenarios, you will re-roll the affected dice only, during the Resolution phase. This may hurt you, or it may help you; that's the nature of rolling dice! Therefore, all players should be careful with this mechanic because it may backfire!
Q: How do I know if I've matched all 5 of my Elder Dice? Some of my monster parts look similar! A: A matched monster will be showing all of the same number…all 5's, all 2's, etc.
Q: If 2 players match their monsters in the same round, who is the winner? A: The player matching the highest number wins. If they are matching the same number, roll a Summoning Stone; the highest number rolled wins.
Q: I'm having a hard time keeping track of whose turn it is to begin declaring actions! A: For now, use a coin, pebble, or small piece of paper to help track turns; simply place it in front of the first player of each round. (In the final version, if we hit the stretch goal for it, we hope to include a player tracking token!)