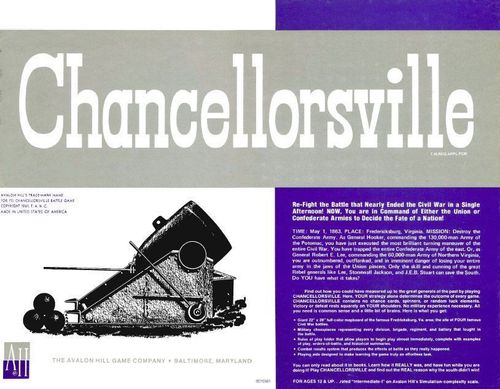
Chancellorsville (Second Edition)
Chancellorsville (Second Edition) Rulebook
Table of Contents
Table of Contents
I. Introduction
(See the introduction in the Table of Contents above.)
II. Game Components
A. The Mapboard
The mapboard represents the area of eastern Virginia where the battle was fought. Superimposed over the map is a hexagonal grid used to regulate movement and combat. Each hexagon (called 'hex' for short) represents a distance of a little more than one mile. A coordinate system is printed on the mapboard edge to facilitate recording unit positions should the need arise. To find a specific hex location, cross-index a lettered hexrow with a numbered hexrow. For example, Chancellorsville is located at hex R-28, Falmouth at HH-33, and Kelly's Ford at C-3. A complete explanation of the terrain symbols used on the mapboard is found on the Terrain Effects Chart (TEC).
B. The Unit Counters
The die-cut, cardboard unit counters represent the actual military formations that participated in the battle. Contained on the counters (interchangeably called units, unit counters, or counters) is certain information needed to play the game:
- Size of unit
- Type of unit
- Combat Strength
- Movement Allowance
- Unit commander
Unit Types:
Combat Units:
- Infantry (shown by a crossed-box symbol)
- Artillery (shown by a solid dot in a box)
- Horse artillery (shown by a dot-and-slash symbol)
- Cavalry (shown by a slash in a box)
- Headquarters (shown by 'III' in a box)
Noncombat Units:
- Assault Boat
- Pontoon Bridge
- Fortifications
- 'TIME NOW' marker
Unit Sizes:
- XXXX — Army
- XXX — Corps
- XX — Division
- X — Brigade
- III — Regiment
- II — Battalion
Abbreviations:
- R — Reserve Artillery
- I C, II C, etc. — First Corps, Second Corps, etc.
- CAV — Cavalry Corps
- Potomac — Union Army of the Potomac
- North Virg. — Confederate Army of Northern Virginia
Combat Strength — Represents the basic offensive and defensive strength of a given unit, which is stated in terms of 'Strength Points.'
Movement Allowance — Represents the basic, maximum distance a unit may move in a turn. The Movement Allowance of a unit is stated as a certain number of 'Movement Points.'
C. Charts and Tables
The card provided with the game contain charts important to play. The TERRAIN EFFECTS CHART (TEC) explains the mapboard terrain and their effects on movement and combat.
The TIME RECORD CHART is used to record the passage of game turns. The COMBAT RESULTS TABLE is used to resolve combat situations and explains the effect of those results on the units involved.
III. Sequence of Play
CHANCELLORSVILLE is played in TURNS. Each turn is divided into two identical player SEGMENTS: the Union player Segment and the Confederate player Segment. Furthermore, for ease of play each Segment is divided into Movement, Artillery Fire, and Regular Combat PHASES. The Union player Segment is always first in each turn. The exact sequence of play as outlined below is followed for each turn of the game:
A. Union Player Segment
- Movement Phase: Union player moves all, some, or none of his units and emplaces Pontoon Bridges (if any) within the limitations of the rules.
- Confederate Defensive Artillery Fire Phase: Confederate artillery may attack Union units within a two-hex range as provided by the combat rules. NO movement, by either side, allowed.
- Union Offensive Artillery Fire Phase: Union artillery may attack Confederate units within a two-hex range as provided by the combat rules. NO movement, by either side, allowed.
- Regular Combat Phase: All attacks by Union units that did not attack in the Offensive Fire Phase are resolved as provided by the combat rules. NO movement, by either side, allowed (EXCEPTION: See 'Movement After Combat').
B. Confederate Player Segment
- Movement Phase: Confederate player may move all, some or none of units within the limitations of the movement rules.
- Union Defensive Artillery Fire Phase: Union artillery may attack Confederate units within a two-hex range as provided by the combat rules. NO movement by either side allowed.
- Confederate Offensive Artillery Fire Phase: Confederate artillery may attack Union units within a two-hex range as provided by the combat rules. NO movement by either side allowed.
- Regular Combat Phase: All attacks by Confederate units that did not attack in the Offensive Fire Phase are resolved as provided by the combat rules. NO movement by either side allowed (EXCEPTION: See 'Movement After Combat').
C. Time Record
The 'Time Now' counter is advanced one box on the Time Record Chart signifying the completion of one game turn.
IV. Movement
A. Movement is calculated in terms of hexes. Each unit expends a certain number of MOVEMENT POINTS from its MOVEMENT (POINT) ALLOWANCE for each hex it enters. Different types of hexes require different expenditures of Movement Points dependent upon the terrain in those hexes. Refer to the TERRAIN EFFECTS CHART (TEC) for a complete explanation of the various types of terrain and their 'entry costs'.
B. In any given Movement Phase of a player's Segment, he may move some, none, or all of his units. Each unit (or stack of units) is moved individually, tracing its movement path through each individual hex.
C. A unit may not exceed its Movement Allowance in any single Movement Phase. Unused Movement Points may not be accumulated from turn to turn or from unit to unit. Once a unit has completed its movement, it may not be moved again, changed, 'corrected' or otherwise relocated from its final position.
D. No enemy movement is permitted during a player's Movement Phase.
E. No combat of any kind may take place in the Movement Phase.
F. Friendly units may move through or onto hexes containing other friendly units so long as they do not exceed their STACKING LIMIT in doing so (see 'Stacking', below). A unit may not move onto or through a hex containing the maximum allowable number of friendly units.
G. Units may never enter hexes containing enemy units (EXCEPTION: See 'Zones of Control').
H. Units may move through different types of terrain hexes in the same Movement Phase provided they have sufficient Movement Points to enter each hex and are not required to end movement upon entering certain terrain types. (See TERRAIN EFFECTS CHART).
I. Road Bonus: Units that begin their Movement Phase on a road hex may move up to twice their normal Movement Allowance if they move along contiguous road hexes (i.e., move directly from one road hex to another road hex of the same road), end their Movement Phase on a road, village, or city hex, and do not move adjacent to any enemy combat or HQ units during their Movement Phase. Units may NOT cross rivers via Pontoon Bridges at the road bonus rate (see below).
J. Crossing Rivers (Rappahannock and Rapidan): The Rapidan and Rappahannock Rivers are the major obstacles to movement on the mapboard. Different types of units may cross the rivers by one or more of the methods listed below:
-
Swim at Any Point (HQ, CAV only): Unit enters river hex and ends all movement. In the next friendly Movement Phase it may move off the river at its normal Movement Allowance, or move up or down the river ONE hex.
-
Cross at Fords (all combat units): Unit enters ford/river hex from one of the two 'approach hexes' (the two hexes at either end of the ford symbol) and ends all movement. In the next friendly Movement Phase the unit may move off the ford hex by moving to the opposite approach hex and continuing normal movement.
-
Cross in Assault Boats (HQ, INF only): The Assault Boat counter moves from a road hex to an adjacent river hex and ends all movement. In the same Movement Phase an infantry or headquarters unit enters the river hex containing the Assault Boat and ends all movement. In the next friendly Movement Phase the combat unit may do one of the following: a. Move off of the Assault Boat and continue movement normally. b. Remain on the Assault Boat in the same river hex. c. Move, with the Assault Boat, one hex DOWNSTREAM (i.e., towards the Potomac River) on the river. It may only move one hex downstream and must end all movement on a river hex with the Assault Boat. d. NOTE: Assault Boats may not move downstream if such a hex is occupied by ANY other type of unit.
-
Cross on Pontoon Bridges (all units): a. Emplacement: Pontoon Bridges must be EMPLACED before they may be used to cross rivers. They may not be emplaced until a friendly combat unit occupies the opposite shore land hex adjacent to the river hex in which the Pontoon Bridge is to be emplaced. b. In the same Movement Phase in which the friendly unit occupies the opposite-shore hex, the Pontoon Bridge may be emplaced by simply moving it from an adjacent road hex to the river hex. c. The Pontoon Bridge counter must be placed on board in such a fashion that the approach hexes of the counter consist of the opposite-shore land hex occupied by the friendly combat unit and a near-shore land hex. The pontoon symbol on the counter must be properly aligned to show the two approach hexes used when crossing the Pontoon Bridge. This alignment can only be changed by re-emplacing the Pontoon Bridge as outlined above. d. Units may cross an emplaced Pontoon Bridge by entering and leaving the river hex containing it via the approach hexes indicated by the position of the pontoon symbol. Units crossing rivers on Pontoon Bridges incur NO delay and are not required to end movement. Note, however, that units may not RETREAT across Pontoon Bridges. e. No units may use or occupy the Pontoon Bridge in the turn of emplacement. It may be used normally in the turn following emplacement. Pontoon bridges that are used by other units to cross rivers may not move in the same turn. f. NOTE: Only ONE Pontoon Bridge may be emplaced on a river hex at any one time.
River Crossing Chart (rows: unit type; columns: Swim at Any Point / Cross at Fords / Cross in Assault Boats / Cross on Pontoon Bridges)
| Type | Swim at Any Point | Cross at Fords | Cross in Assault Boats | Cross on Pontoon Bridges |
|---|---|---|---|---|
| Headquarters | YES | YES | YES | YES |
| Cavalry | YES | YES | NO | YES |
| Infantry | NO | YES | YES | YES |
| Artillery | NO | YES | NO | YES |
| Horse Artillery | NO | YES | NO | YES |
*See rules, above, for qualifying conditions.
K. Pontoon Bridge and Assault Boat Road Movement:
-
Pontoon Bridges and Assault Boats may only move along road hexes, when moving on land, or across a Pontoon Bridge connecting two road hexes of the same road.
-
NOTE: Movement along roads is defined as moving from one road hex to an adjacent road hex of the same road. (Village and City hexes are treated as road hexes for movement purposes.)
-
EXCEPTION: Pontoon Bridges and Assault Boats may move from a clear terrain-road hex directly to an adjacent river hex. The road does not have to lead into the river but may parallel it in this case. Pontoon Bridge and Assault Boat units may leave a river hex only by moving directly to an adjacent clear terrain-road hex.
V. Stacking
(more than one unit per hex)
A. Stacking limitations apply at ALL times, even during the Movement Phase of a player Segment.
B. The number of units allowed in a hex at one time is limited as follows:
-
Union: The Union player is limited to two units of any kind in a hex at any one time.
-
Confederate: The Confederate player is limited to any number of units totalling no more than 22 Combat Strength Points in a hex at any one time.
-
NOTE: Any number of headquarters units may be added to stacks of units without penalty. Headquarters units are ignored for stacking purposes.
C. EXCEPTION: Only one Combat unit (INCLUDING headquarters units) may occupy a river hex at any one time. Emplaced Pontoon Bridges or Assault Boats conveying regular units do not count for Stacking purpose, but such units are counted if they are traveling over an emplaced Pontoon Bridge.
D. Brigade Substitute Counters
-
Brigade substitute counters are supplemental, not additional, units. The Confederate player may use brigade counters in place of larger division-size units.
-
The Confederate player may, at any time, break down a division into brigades. He may substitute a single division counter with a number of brigade counters whose Combat Strengths total that of the division counter being substituted. These brigade counters are stacked in the same hex along with their division headquarters counter. Once placed on the mapboard they may move and operate normally.
-
A division counter that has been removed may be returned by removing from the mapboard a number of brigade counters whose Combat Strengths equal that of the division counter. All such brigade counters must be in the same hex for removal. Brigade counters need not belong to the same exact division they are to substitute for.
VI. Zones of Control
A. The six hexes directly adjacent to a given unit constitute that unit's ZONE OF CONTROL. All friendly units entering enemy zones of control must stop, end all movement, and attack those adjacent enemy units. Hexes in a unit's zone of control are called 'controlled hexes'.
B. Units may not move from one enemy controlled hex to another.
C. As many units as possible may move into an enemy controlled hex, subject to Stacking limitations.
D. All friendly units in enemy zones of control must attack in the Regular Combat Phase of the Friendly Player Segment.
E. Zones of control DO NOT extend into woods, city, or fort hexes:
-
Units IN woods, city, or fort hexes control the hex they occupy and any adjacent, non-woods, -city, or -fort hexes.
-
Units OUTSIDE of these hexes DO NOT control adjacent woods, city, or fort hexes.
-
Units in woods, city, or fort hexes are not required to attack adjacent enemy units, but have the OPTION to do so. If they do attack, they must attack all adjacent enemy units that are in their zones of control.
-
Units in non-woods, -city, or -fort hexes adjacent to enemy units in those types of hexes must attack those units in the Regular Combat Phase.
F. HEADQUARTERS units unaccompanied by Friendly Combat Units have a limited zone of control consisting of only the hex they occupy. Enemy units may move adjacent to headquarters without stopping. Further, enemy units may ENTER the hex occupied by headquarters units but must stop.
-
Headquarters units cannot block retreat routes. They are automatically eliminated if enemy units retreat through or next to the hex they occupy.
-
If enemy units move adjacent to or into a hex occupied by a headquarters unit, it is removed from the mapboard at the end of the enemy Regular Combat Phase.
-
Headquarters units may never move into the zones of control of enemy units unless accompanied by regular combat units.
-
HQ units are automatically eliminated if attacked by artillery fire when in a hex by themselves.
VII. Combat
There are two types of Combat Phases, Regular and Artillery Fire, as outlined in the Sequence of Play section. Since Artillery Fire combat is based largely on Regular Combat principles, Regular Combat is discussed first. Players should note, however, that Artillery Fire Phases are always conducted before the Regular Combat Phase.
A. Regular Combat: Combat occurs in the Regular Combat Phase of a player's turn in all situations where friendly combat units are in the zones of control of enemy units. The player whose Regular Combat Phase it is, is considered the ATTACKER, the other player is considered the DEFENDER.
-
During the Regular Combat Phase, friendly units in enemy controlled hexes must attack those enemy units to which they are adjacent. Only those friendly units directly adjacent to a given enemy unit may participate in an attack on that enemy unit.
-
EXCEPTION: Units in woods, city, or fort hexes are not forced to attack adjacent enemy units, but have the option to do so.
-
No unit may attack more than once in a player Segment. No enemy unit may be attacked more than once in a Regular Combat Phase.
-
When several units in different hexes attack enemy units in different hexes, the attacker may divide combat into more than one attack in any manner he desires providing the following conditions are met: a. Attacking units must be adjacent to the specific defending units they are attacking. b. ALL friendly units that are in enemy controlled hexes must participate in an attack. c. ALL enemy units that are in friendly controlled hexes must be attacked.
-
Friendly units in one hex may divide combat against adjacent enemy units in separate hexes into more than one attack.
-
Friendly units may not divide combat against several enemy units located in one hex into more than one attack.
-
Resolving Combat: the following procedure is followed for each attack situation in the Regular Combat Phase: a. Separately total the defender's Combat Strength Points and the attacker's Combat Strength Points involved in the attack. b. Convert these totals into a ratio of attacker's Strength Points to defender's Strength Points, rounding DOWN in favor of the defender. EXAMPLE: Two Union infantry divisions totalling nine Combat Strength Points attack the Confederate cavalry division with a Combat Strength of six. This is stated as a ratio of 9-6 rounded down to 1-1, which is the 'combat odds' for that particular attack. c. After determining the combat odds, locate the proper combat odds column on the Combat Results Table. Roll the die and cross-index the die roll number with the combat odds column to obtain a result for that attack. EXAMPLE: In the above example, a die roll of '3' cross-indexed with the 1-1 odds column yields a result of 'AR2' (attacker must retreat two hexes). d. Consult the Combat Results Table for explanations of the various combat results, and apply those results to the attack. e. This procedure (a. through d.) is repeated for EACH attack in the Regular Combat Phase.
B. The Artillery Fire Phases:
Artillery units have the option to attack in their proper friendly Artillery Fire Phase. Both Artillery Fire Phases are conducted and resolved BEFORE the Regular Combat Phase of each player Segment.
-
Attacking artillery units may attack in EITHER the Offensive Fire Phase OR in the Regular Combat Phase, but not both.
-
Defending artillery units may attack in the Defensive Fire Phase AND defend normally in the Regular Combat Phase of the other player's Segment.
-
Artillery attacks in either of the Artillery Fire Phases are executed at the option of the player whose Fire Phase it is. Artillery units are never forced to attack in the Artillery Fire Phase.
-
Artillery units attacking in the Offensive Artillery Fire Phase are inverted after they fire to signify that they may not attack in the Regular Combat Phase. They are turned face up at the end of the Regular Combat Phase.
-
Inverted Friendly artillery units in enemy controlled hexes are not required to attack those enemy units in the Regular Combat Phase if other friendly units attack them. Inverted artillery units are eliminated if they are in the zone of control of an enemy unit that is NOT attacked by other uninverted friendly units in the Regular Combat Phase.
-
Artillery Attacks in the Artillery Fire Phase: a. All artillery units have a range of two hexes in the Artillery Fire Phase. They may attack enemy units within two hexes providing there is no intervening blocking terrain. b. Artillery units ignore ADVERSE combat results on the Combat Results Table when attacking in their proper Artillery Fire Phase. c. A single artillery unit may not attack more than one enemy occupied hex per Artillery Fire Phase. d. In all other respects, artillery attacks are resolved using the Regular Combat method of determining combat odds, resolving combat on the CRT, and applying the results to the units in question.
-
Blocking Terrain: (See TEC) certain terrain types block artillery attacks at the two hex range as follows: a. Artillery units may always attack adjacent enemy units in the Artillery Fire Phase except when located on river hexes. b. Artillery units may not attack units at a range of two hexes if the intervening hex contains hill, woods, or city terrain. c. Artillery units may attack units located in any type of terrain at a range of two hexes provided the intervening hex does not contain hill, woods, or city terrain. d. In tracing the two hex range, the route most advantageous to the attacker, in terms of intervening terrain, is always used.
C. Fortification (Fort) Counters: Forts increase the Combat Strength of units occupying them as follows:
-
Units in Forts DOUBLE their Combat Strength in DEFENSE, regardless of terrain.
-
Units in Forts are never required to attack adjacent units but have the option (as in woods and city hexes). If they do attack, not all of the units in the Fort are required to participate; however, ALL adjacent enemy units must be attacked if the attacking units are in their zones of control.
-
Forts may be positioned, as per the 'At Start' instructions, on any type of terrain EXCEPT river and city hexes.
-
Forts may be voluntarily destroyed at the beginning of a player's Movement Phase, before any units are moved, if they are occupied by friendly combat units and are not adjacent to enemy units. The fort is simply removed from the mapboard.
-
BOTH sides may use captured Forts as if they were their own.
D. Pontoon Bridges and Assault Boats:
-
The Confederate player may never 'capture' Pontoon Bridges or Assault Boats, but may freely use EMPLACED Pontoon Bridges to cross rivers. He may never use Assault Boats.
-
Either player may destroy Pontoon Bridges and Assault Boats by having an undisrupted combat unit adjacent to them at the conclusion of a friendly Regular Combat Phase PROVIDING the combat unit is not also adjacent to any undisrupted enemy combat units. Destroyed Pontoon and Boat units are simply removed from the mapboard.
-
Bridge or Boat units in the same hex with friendly combat units suffer the same effects in combat as those combat units. Note, however, that such units are eliminated if forced to retreat into or through non-road type hexes (in addition to the other retreat restrictions).
-
When by themselves in a hex, Bridge and Boat units assume a provisional defensive Combat Strength of '1' when attacked in an Artillery Fire Phase or Regular Combat Phase. This provisional Combat Strength remains '1' regardless of terrain or the number of Bridge or Boat units in the hex.
VIII. Night Restrictions
During those turns signified on the Time Record Card as NIGHT turns, the following restrictions apply to both sides:
A. NO Combat, Regular or Artillery Fire, may be initiated. The three combat phases of each player Segment are ignored.
B. Units may not move adjacent to enemy combat units. If adjacent at the beginning of a night turn, they must move away from such units. If unable to move because of enemy units or terrain restrictions (i.e., in woods, for example) they must remain stationary.
C. No Road Bonus movement is allowed. EXCEPTION: See Initial Union Movement section below.
IX. Initial Union Movement
To simulate the successful surprise move around the Confederate left flank by the Union Army, follow these special rules:
A. The Confederate player may not move any units in the first two game turns; NIGHT, APRIL 29, and NIGHT, APRIL 30.
B. The Union player may move normally within the limits of the Night Restriction rules. Additionally, the Union units may use the Road Bonus for their first two night turns ONLY. Thereafter, all Night Restrictions apply to units of both sides.
C. Beginning the third turn of the game, the Confederate player may move normally.
X. Victory Conditions
A. UNION: The Union player wins by having at least a 4-1 ratio of Union Combat Strength Points compared to Confederate Combat Strength Points at the end of the last game turn.
B. CONFEDERATE: The Confederate player wins by avoiding the Union Victory Condition at the end of the last game turn.
C. NOTE: For the purpose of determining the ratio of the respective Combat Strength Points, all Confederate units NORTH of the Rapidan-Rappahannock River hexes at the end of the last game turn count DOUBLE their normal value.
XI. Prepare for Play
Before play commences, both sides set up their units on the mapboard by following the procedures outlined below:
A. The Confederate player places his units on the mapboard FIRST:
-
All units, EXCEPT cavalry and horse artillery, must be placed south of the Rapidan-Rappahannock River hexes, and EAST of hex-row 'S.'
-
Cavalry units (Stuart or W. H. F. Lee, F. Lee, and Stuart HQ) and horse artillery unit Beckham, may be placed anywhere south of the Rapidan-Rappahannock River hexes.
-
Fifteen fort counters may be placed anywhere south of the Rapidan-Rappahannock River hexes.
B. The Union player then places his units anywhere north of the Rappahannock River hexes.
-
One Pontoon Bridge may be located (already emplaced) on Kelly's Ford.
-
All Pontoon Bridge and Assault Boat units must be placed on road, village or city hexes.
-
Five fort counters may be placed anywhere north of the Rappahannock River hexes.
C. Play commences after all units are placed on the mapboard.
Optional Rules
The following optional rules may be used at the discretion of the players. Not all of the rules need be used; players should pick and choose the ones that add the most to their enjoyment. Certain optional rules may affect play balance. Therefore, players should experiment to determine which ones will produce an evenly matched game between opponents of unequal abilities.
I. Command Control
The physical presence of commanding general officers was often critical in rallying demoralized and disorganized troops. A general officer far removed from the action was often unable to direct his command in pressure situations. To reflect this, Disrupted units may only end their disrupted status, or lower their Disruption indicator number, if they are within a certain number of hexes of their proper Headquarters unit:
A. Command Control Radius (CCR)
-
Units cannot reduce their Disruption status unless they are within the Command Control Radius (CCR) of their proper HQ units.
-
Units are within the Command Control Radius of an HQ unit if they can trace a path of hexes (of the proper maximum length) from the unit in question to the HQ unit. This path may not pass through enemy-occupied or enemy-controlled hexes.
-
Command Control Radius maximum lengths are as follows: a. The Command Control Radius for all Union HQ units is 4 hexes, maximum. b. The Command Control Radius for Confederate Corps and Army HQ units is 8 hexes maximum. c. The Command Control Radius for Confederate Division HQ units is 2 hexes, maximum.
-
The CCR may be traced into or from a river hex, but may not be traced THROUGH river hexes (regardless of Pontoons, fords, etc.)
-
Cavalry and Horse Artillery units are EXEMPTED from Command Control rules. They may always reduce Disruption status normally regardless of their HQ situation.
-
During NIGHT turns, the Command Control Radius for all HQ units is cut in HALF.
B. Only the proper, UNDISRUPTED, HQ units may be used to trace CCR's:
-
For the Union side, a unit may only trace the CCR to its proper Corps HQ or to the Army of the Potomac HQ. Non-corps units (reserve artillery, Pontoon, and Boat units) may trace CCR to ANY undisrupted Union HQ unit.
-
For the Confederate side, the CCR is traced as follows: a. Infantry divisions and artillery battalions may only trace CCR's to their proper Corps HQ or Army of Northern Virginia HQ units. b. Infantry brigades may only trace CCR to their proper division, Corps HQ units or the Army of Northern Virginia HQ unit.
-
Each unit counter contains a number or letter indicating the proper HQ used to trace the CCR for that particular unit. Also, refer to the Order of Battle diagrams for a schematic breakdown of each Army's Corps and division organization.
C. Headquarters Disruption:
-
Disrupted HQ units cannot reduce their Disruption status unless they are within the CCR of the Proper HIGHER ECHELON HQ unit. HQ units are organized as Division HQ, Corps HQ, and Army HQ in ascending order.
-
If an HQ unit is eliminated from play, disrupted units under that HQ must be in the CCR of the proper higher echelon HQ (usually Army HQ) to reduce their Disrupted status.
EXAMPLE: Union XI Corps HQ is eliminated in combat. Meanwhile, Devens and Schurz infantry divisions from that same corps become Disrupted. Since their corps HQ is eliminated, these units may only reduce their Disruption status if they are within the CCR of the Army of the Potomac HQ unit. (Notice that if the Army of the Potomac HQ were also lost, these units would be disrupted for the duration of the game.)
- SPECIAL: If the Confederate Army of Northern Virginia HQ unit is Disrupted, it may only reduce its Disruption status by remaining in the same hex with an undisrupted Corps HQ unit until it is undisrupted. If the Union Army of the Potomac HQ unit is Disrupted, it must remain Disrupted for the duration of the game.
II. Unit Function Differentiation
To better represent the unique qualities and limitations inherent in the different types of combat units, employ the following rules:
A. Cavalry Units
-
If cavalry units are attacked in the Regular Combat Phase when defending in non-doubling terrain or woods, they have the option of defending normally, or retreating two hexes and suffering an automatic one-turn disruption.
-
They may only exercise this option if they are in a hex which does not contain any other type of combat, HQ, Bridge, or Boat unit. They may only exercise this option if they have a two-hex retreat route available.
B. Artillery Units
-
Artillery and horse artillery units have their Combat Strengths halved (do not round off fractions) when attacking or defending in the Regular Combat Phase in a hex by themselves without infantry or cavalry units. When attacking, artillery units are halved if infantry or cavalry units in the same hex are not attacking the same enemy-occupied hex.
-
Artillery or horse artillery units in forts are never halved when attacking or defending.
III. Inverted Confederate Counters
In spite of General Alfred Pleasonton's brilliant performance and the presence of aerial reconnaissance in the form of an observation balloon over Fredericksburg, Hooker was woefully ignorant of Confederate troop movements and dispositions. To reflect this, incorporate the following rules:
A. All Confederate units may set up and move inverted.
B. The Movement Allowance of all inverted units is '4'. They may, however, use the Road Bonus rules in the usual manner (i.e., move 8 hexes on a road.)
C. Inverting units is entirely optional. An inverted unit may move its full, normal, Movement Allowance by simply being turned face-up.
D. Inverted units MUST be turned face-up in the following situations:
-
When an inverted artillery unit fires in the Artillery Fire Phase.
-
When an inverted unit is fired upon in the Artillery Fire Phase.
-
When an inverted unit initiates an attack in the Regular Combat Phase.
-
When an inverted unit is attacked in the Regular Combat Phase.
-
When an inverted unit moves into an enemy-controlled hex in the Confederate Movement Phase.
E. Face-up Confederate units may be re-inverted at the end of the Confederate player Segment if they are not in enemy-controlled hexes at that time.
F. NOTE: When using this rule, the Union player must designate ALL attacking or firing units BEFORE ANY Confederate units are turned face-up.
IV. Historical Disposition
To handicap a superior Confederate player, require him to set up his forces in the approximate historical locations (i.e., with the bulk of the Second Corps (Jackson) to the east of Fredericksburg.) Under this restriction, Confederate initial placement is limited as follows:
A. Cavalry and horse artillery: same as regular game.
B. First Corps (Longstreet): The Anderson infantry division must set up in hex BB-34. The other units in the corps may set up south of the Rappahannock, anywhere within an area bounded by hexrow 'V' to the west, hexrow 'HH' to the east, and within five hexes of the river to the south, inclusive.
C. Second Corps (Jackson): The following infantry divisions must set up in the exact hex locations as given:
- A.P. Hill — UU-51
- Rodes — SS-51
- Early — NN-47
- Colston — WW-51
Second Corps artillery and corps HQ units may set-up south of the Rappahannock, anywhere within an area bounded by hexrow 'II' to the west, the mapboard edge to the east, and within five hexes of the river to the south, inclusive.
D. The Army of Northern Virginia HQ unit may set up anywhere east of hexrow 'V', inclusive.
E. Confederate forts may set up anywhere south of the Rapidan-Rappahannock river.
V. Stoneman's Raid
Historically, most of the cavalry units appearing in the game did not participate in the decisive phase of the campaign. This was because Major General Stoneman had been sent on a cavalry raid only two days before the Union army crossed the Rappahannock. This left only General Pleasonton with the horse artillery and 3,000 troopers. As the battle developed, couriers failed to locate Stoneman's force, which was divided into two independent columns, until May 2, when one of the columns (General Averell's) was found. Stoneman did not rejoin the army until May 7. To simulate this, employ the following rules:
A. Do not place any Union cavalry units on the mapboard during the initial set-up except the Pleasonton and horse artillery units.
B. Break down the Confederate Stuart cavalry division. Place all cavalry and horse artillery units on the mapboard except the W.H.F. Lee unit.
C. At the end of the NIGHT, AM turn of each day, the Union player rolls one die to determine which, if any, Union cavalry units return to the battle:
| Die Roll | Effect |
|---|---|
| 1, 2 or 3 | NO EFFECT |
| 4 | Averell and Morris units return |
| 5 | Stoneman HQ, Gregg, and Buford units return. |
| 6 | ALL Union cavalry units return. |
-
The Confederate cavalry unit, W.H.F. Lee, automatically returns to the game if ANY Union cavalry units return.
-
Die roll results indicating the return of units that have already re-entered the game are treated as "No Effect."
-
ALL cavalry units automatically return to the game during the May 2, 6 PM turn.
D. Returning cavalry units must re-enter the game in the Movement Phase of the 6 AM turn following the successful die roll. Units may be placed on any non-enemy controlled hex on the western edge of the mapboard at a cost of one Movement Point expended.
Historical Summary
The Army of the Potomac was a revitalized force of over 94,000 men when it moved against the Confederates at Fredericksburg at the end of April, 1863. Demoralized and dispirited after its stinging defeat at that same town some months before, the Army of the Potomac had been dramatically rejuvenated under the able organizational skill of its new commander, General 'Fighting Joe' Hooker. A corps commander under Burnside at the Battle of Fredericksburg, Hooker was Lincoln's fifth choice in his search for a general to beat Lee. In his candid letter of promotion, Lincoln admonished, "...Beware of rashness, but with energy and sleepless vigilance go forward and give us victories." His advice would become a wry preface to the campaign at hand.
According to the Official Records of April, 1863, Hooker had 130,000 troops of which 110,000 were infantry. The Union cavalry numbered in excess of 11,000. The artillery had over 400 guns and 9,500 men organized into 74 batteries. The Confederate Army of Northern Virginia had no such comparable force. Incomplete records have obscured exact figures, but as near as anyone could count, General Lee had about 65,000 men and 220 guns. Weakened by the detachment of Longstreet's corps to guard the Virginia—North Carolina coast, Lee deployed his troops behind and east of Fredericksburg. The relatively clear terrain east of the city seemed the most likely place for another Union crossing of the Rappahannock.
Hooker's plan was designed to draw Lee out of his fortified position near Fredericksburg. Sedgewick, with several corps (40,000), was to hold Lee in front of Fredericksburg while the rest of the Union army marched up the Rappahannock to move around Lee's left flank. If the Confederates remained where they were, they would be surrounded. If they retreated they would have to move across Hooker's front and face certain destruction. It was a bold and audacious plan; a sharp contrast to other Union efforts in the past.
By April 30, Hooker had moved the bulk of his army from the Falmouth area to Chancellorsville via the route Harwood Church—Kelly's Ford—Germanna Ford and/or Ely Ford, with other units crossing at Bank's and United States Fords. At the same time, the holding force at Falmouth began demonstrating on the river east of Fredericksburg. The first part of Hooker's plan had worked to perfection. Lee was trapped.
Although poorly informed of the Confederate disposition (because he had detached most of his cavalry under Stoneman on an abortive raid), Hooker knew that he had achieved complete surprise. Then, for some inexplicable reason, 'Fighting Joe' stopped dead in his tracks. He recalled his troops pressing eastward and formed a defensive line centering at Chancellorsville. His subordinates were amazed and frustrated. Hooker, for no apparent reason, had given up the offensive in favor of the defensive. The golden moment had passed. Henceforth, the initiative would be in the hands of Lee and Jackson.
Meanwhile, Lee was not standing still. Reacting to reports of the Union movement, he left 10,000 men under Jubal Early to defend Fredericksburg and moved west to oppose the Union advance from Chancellorsville. Finding the Union offensive halted, Lee was content to probe the Union front searching for weak points. There were none, at least not on the Federal left or center. Soon, however, JEB Stuart delivered a fantastic report; the Union right (western) flank was 'in the air' (i.e., not anchored to an easily defended natural position). Lee did not ignore the opportunity.
Conferring with Stonewall Jackson, his invaluable subordinate, Lee conceived the most daring maneuver of the war. He would divide again an already divided command (Early at Fredericksburg being the other part) and send Jackson's corps (28,000) around the Union right to smash the open flank. Lee would screen the Union left and center with only 14,000 men. Hidden by the dense undergrowth characteristic of the Wilderness area, Jackson's men moved undetected around the Union army and delivered a devastating attack against the ill-positioned Eleventh Corps. It crumbled. Jackson's men slammed deeper into the Union flank until darkness halted the attack.
On the Union side, confusion and despair reigned. Hooker became obsessed with guarding his retreat routes across the river. Although greatly outnumbering their attackers, the Union army clung to the defensive. Historians agree that perhaps here, Hooker missed the opportunity to dramatically swing the balance in favor of the Federals. As disorganized as certain elements of the Union army were, the Confederates were in an even worse state. Both Jackson and A.P. Hill had been wounded. Jackson's corps was fragmented and disorganized due to the density of the undergrowth and darkness. Yet Hooker did nothing.
The next morning Jackson's corps, under JEB Stuart, resumed the offensive. Hooker, whether due to battle fatigue, shock, or demoralization, failed to grasp the situation. Lee's army, fragmented into three parts, was between two superior Union forces. Instead of taking the offensive, Hooker strengthened his horseshoe-shaped defensive line. Sensing that something was seriously amiss with the Federal leadership, Lee turned his back on Hooker's force and attacked Sedgewick's force, hurling it back over the river. Turning again, he marched back and attacked Hooker, forcing that part of the Army of the Potomac back across the river. The battle was over.
Federal casualties were placed at 17,000 (K-W-M), compared to 12,000 (K-W-M) for the Confederates. At such cost the Confederates won another undecisive victory. Such victories could delay, but not change, the eventual end of the war,—and the Confederacy. Both commanders had their opportunities to deal mortal blows to the enemy and both had let such chances pass. As a footnote, the cost of such a victory became immeasurably greater when, on May 10, 1863, Stonewall Jackson died of the wounds received at the hands of one of his own men.
The Order of Battle
The Order of Battle diagrams show the schematic breakdown of each army's Corps and division organization. The Command Control rules above refer to these diagrams.
Union
- Army
- I Corps
- Wadsworth (infantry division)
- Robinson (infantry division)
- Doubleday (infantry division)
- I C (artillery)
- II Corps
- Hancock (infantry division)
- Gibbon (infantry division)
- French (infantry division)
- II C (artillery)
- III Corps
- Birney (infantry division)
- Berry (infantry division)
- Whipple (infantry division)
- III C (artillery)
- V Corps
- Griffin (infantry division)
- Sykes (infantry division)
- Humphreys (infantry division)
- V C (artillery)
- VI Corps
- Brooks (infantry division)
- Howe (infantry division)
- Newton (infantry division)
- Burnham (infantry division)
- VI C (artillery)
- I Corps
Confederate
- Army
- I Corps
- Anderson (infantry division)
- Mahone, Posey, Perry, Wilcox, Wright (infantry brigades)
- McLaws (infantry division)
- Kershaw, Semmes, Wofford, Barksdale (infantry brigades)
- Alexander, Cobell, Walton, Hardaway (artillery battalions)
- Anderson (infantry division)
- II Corps
- A. P. Hill (infantry division)
- Heth, Pender, McGowan, Lane, Archer, Thomas (infantry brigades)
- Rodes (infantry division)
- O'Neal, Doles, Iverson, Colquitt, Ramseur (infantry brigades)
- Early (infantry division)
- Gordon, Hoke, Smith, Hays (infantry brigades)
- Colston (infantry division)
- Paxton, Jones, Warren, Nicholls (infantry brigades)
- Nelson, Cutt, McIntosh, Brown, Walker, Carter, Andrews, Jones (artillery battalions)
- A. P. Hill (infantry division)
- Stuart (cavalry)
- W.H.F. Lee (cavalry division)
- F. Lee (cavalry division)
- I Corps
Printing Errata
The following errata are printed on page 2 of the booklet, "Note the following errors in printing boards and counters":
-
Counters: Subscripts for Command Control Optional Rule should be as follows: Wadsworth, Robinson, Doubleday, and Hancock: '1' (not '2'); McGowan (CSA): 'H'; Rodes HQ (CSA): '2'.
-
Mapboard: U.S. Ford is in hex T-24, NOT T-23. All named crossings are fords.