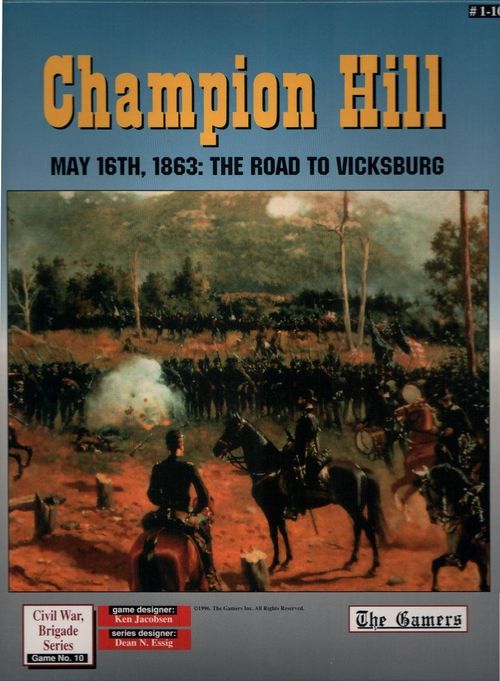
Champion Hill: May 16th, 1863 – The Road to Vicksburg
Champion Hill: May 16th, 1863 – The Road to Vicksburg Rulebook
Table of Contents
Table of Contents
1.0 General Special Rules
1.1 The Roadblock
The Roadblock in hex 26.20 was a rough breastwork fronted by an abatis. While not the most formidable defensive position, it had a paralyzing effect on the Union general confronting it: Osterhaus. It has the following effects:
A. All Confederate troops occupying the Roadblock hex (26.20) have their Morale Level raised by one when checking for Stragglers (i.e. a C rated unit would check for stragglers as a B).
B. Any Confederate troops making a Morale Check while in the Roadblock hex automatically receive an additional +2 shift.
C. If a Confederate unit is fired on while in the Roadblock hex and all those fires come through Roadblock hexsides, those fires receive a -1 shift on the Fire Combat Table.
D. Reduce all retreat results inflicted on Confederate units in the Roadblock hex by 2—retreat results of 1 or 2 are ignored, a retreat of three becomes a retreat of 1.
E. The Roadblock has no effect on regular movement—it is limited to the above effects.
1.2 "Rough" Woods
Note that the Forest terrain movement costs in this game are mildly different from other CWB games. This is because the woods in this area were particularly dense and difficult to move through (though not to the extent one sees in the Wilderness).
2.0 Union Special Rules
2.1 Army Commander Replacement
Should Grant become a casualty, the corps commanders take command according to the following order: 1) McClernand, 2) Sherman, 3) Ord, and 4) McPherson. Only use those leaders actually in play when determining the new commander.
2.2 Attachments and Detachments
Each Union Corps can have up to one division attached and/or detached at any one time.
2.3 Individual Brigades
The Union player cannot detach brigades or issue divisional goals to individual brigades at any time.
2.4 Union Minor Variants
These variants can be used in any scenario. Unlike some Confederate options, these are never automatically in force for any scenario.
2.4a Replacing McClernand. Before the start of the scenario, the Union player can replace McClernand with Ord. Place Ord's counter in charge of 13th Corps and do not use McClernand. This option gives the Confederate player 4 VPs.
McClernand was a political general appointed more for his home-state prominence than for his military skill. Grant, regarding him both as incompetent and as a rival for high command, found an excuse to relieve him later during the siege of Vicksburg. Here, it is assumed he found that reason earlier.
2.4b Thayer's Brigade. The use of First Division, 15th Corps (1-15) is called for in some scenarios. In those scenarios, the Union player may also bring on this brigade (3-1-15) with the rest of its division. This option gives the Confederate player 1 VP.
Historically, only two of this division's brigades were present at the actions around Jackson and Champion Hill. This gives the division all three.
3.0 Confederate Special Rules
3.1 Army Commander Replacement
Should Pemberton become a casualty, the following is the order in which his subordinate leaders assume command: 1) Loring, 2) Stevenson, 3) Smith, 4) Forney, 5) Bowen. Use only those leaders actually in play.
If Johnston is in play and becomes a casualty, he is replaced by leaders in the following order: 1) Breckinridge, 2) Walker, 3) French.
3.2 Confederate Command Arrangements
3.2a The Army of Mississippi. In scenarios where only the Army of Mississippi is present, Pemberton issues his orders directly to divisions in the form of divisional goals. Handle Corps Attack Stoppage on a divisional level as per series rule 10.3e.
3.2b The Army of Relief. In scenarios where both Johnston and Pemberton are in play, each commander can only issue orders to his own subordinates. Like Pemberton, Johnston issues divisional goal orders and has Corps Attack Stoppage at the divisional level. The Army of Relief consists of all units of W Division, Fr Division, Br Division, and those marked "ARelf." All other units belong to the Army of Mississippi.
3.2c Divisional Command. There is no Confederate Corps structure. Confederate Divisional commanders are restricted as Corps HQs are normally (they cannot move except when required by orders). The Confederate division commanders are exempt from the normal requirement to stack with a brigade of their division. Also, their units are allowed (in a exception to the series rules) to conduct straggler recovery while on Divisional Goals.
3.3 Stevenson's Division
Stevenson's Division is considerably larger than the other divisions (about 10,000 men more with all the options). Stevenson can trace a command radii to his units which is either 4 MPs or 6 hexes whichever is longer. This rule does not apply to any other leader including any Replacement for Stevenson.
Design Note. Frankly this rule exists to allow Stevenson to cover the large amount of ground his command was forced to defend without a lot of excess rules. Prior versions of this game saw the creation of sweeping, complicated rules (like divisional defensive zones or brigade defensive zones) merely to cover this one exceptional case. In the interest of simplicity, we've settled on this version.
3.4 Confederate Divisional Artillery
Each Confederate division has one or more artillery units directly attached. These units trace command radius directly to their divisional commander.
3.5 Confederate Army Wagons
Each Confederate army has a supply wagon. Each of these wagons is an Army Train and an infinite supply source for small arms ammunition. In an exception to the normal series rules, these wagons can move off roads.
3.6 Attachment and Detachments
No division can attach brigades from another division. Up to one brigade from each division can be detached and operate on divisional goals.
3.7 Stevenson's Infantry Detachment
In certain scenarios, the "Detachment" unit is placed in hex 26.20. When in play, this unit is subject to the following:
3.7a Command Radius. This unit can trace command radius to any Brigade of Stevenson's Division. It is within command radius if it is at or within 4 MPs of any Stevenson brigade. Eliminate this unit if it can no longer trace proper command radius.
3.7b Movement. This unit can never leave the Roadblock hex. If forced to do so, it is eliminated.
3.7c Cummings Brigade and the Detachment. When this unit is in play, mark three stragglers off of C-S's loss chart line. Whenever the detachment takes a permanent step loss, mark the Detachment's loss chart normally, but also mark one of the stragglers on the C-S line as a casualty instead. If the detachment is eliminated, it can be recovered as stragglers for C-S normally.
3.8 Pemberton's Anti-Initiative
In scenarios 5.1 and 5.2, Pemberton has an Anti-initiative of -1 for his own subordinates. This modifier is not applicable to other scenarios. No leader in the Army of Relief has an anti-initiative.
3.9 Confederate Minor Variants
The first three options are intended for use with scenarios 5.1 and 5.2. The three remaining scenarios are predicated on different circumstances and the use of non-historical troops are already factored into the scenario victory conditions. Options 3.9d and 3.9e are never assumed to already be in use and can be employed in any scenario.
3.9a Reynolds and Waul's Legion (R-S & W-S). These two units can set up within 2 hexes of Stevenson and are part of his division. Each unit chosen to be in the set up gives the Union player 1/2 VP. If this option is not used, R-S arrives in some scenarios as a reinforcement—there is no VP cost when it does this.
Historically, Reynolds was part of Stevenson's Division, but was guarding supply trains to the west of the map. This brigade could easily have been recalled to fight at Champion Hill. Waul's Texas Legion was still in Vicksburg, but it, too, could have been dispatched to support the army. Both are assigned to Stevenson since that is where they could do the most good.
3.9b Smith's Division. Have this command enter at Entry Areas E or F on the first turn. This option gives the Union player 2 VPs.
This division accompanied Pemberton out of Vicksburg, but was not called forward to fight. Smith's command was sadly underutilized guarding the Army of Mississippi's line of retreat back into Vicksburg.
3.9c Forney's Division. Use this division in the same manner as Smith's above. This option also gives the Union player 2 VPs.
This division was left back to guard Vicksburg—here they attain a more active role in the campaign.
3.9d Pemberton the Aggressive. Treat Pemberton as a 2-rated leader and do not apply his anti-initiative. This option gives the Union player 2 VPs.
Pemberton had trouble controlling his subordinates, spent several hours ignoring the main threat to Stevenson on the left, and was essentially outfought by Grant. This option assumes Pemberton played a more dynamic role on the battlefield.
3.9e Loring the Adequate. Flip Loring over to his 1-rated Repl side (it is still Loring, but he has a better grasp of what to do...). Give the Union player 1 VP for this.
Loring failed to shine on virtually every battlefield he trod upon. At Champion Hill, his condescending attitude and unwillingness to obey Pemberton severely hampered the Army of Mississippi's attempts to halt Grant.
4.0 General Victory Conditions
Victory Points (VPs) are awarded for specific terrain, overall enemy losses, and for wrecked formations. To determine the winner, total the VPs accrued by each side and subtract the Confederate total from the Union total. Compare the remainder (which can be either positive or negative) to the victory levels given in each scenario. Drop any fractional VPs remaining at this final step.
4.1 Terrain
The VPs below are awarded to the player who last occupied the hexes in question.
"Champion Hill" is defined as those Level-5 hexes in and around 23.15. (Basically, the high ground within the clearing that contains 23.15.) Only the player last to enter all the hexes of the hill will get any VPs for it (the same rule applies to any multi-hex award).
| Feature | Union VPs | Rebel VPs |
|---|---|---|
| Champion Hill | 2 | 3 |
| 33.03 and 33.04 | 2 | 2 |
| 63.02 and 63.03 | 2 | 2 |
| 28.17 | 1 | 1 |
| 26.20 | 1 | 0 |
| 15.17 | 0 | 2 |
| 40.14 | 1/2 | 0 |
| 50.16 | 1/2 | 0 |
| 49.19 & 49.20 | 2 (0 in 5.1 and 5.2) |
4.2 Casualties
VPs are awarded for enemy losses. There are two tables—"Small Army" and "Large Army." Each scenario will list which table to use.
Determine the losses in your army (ignore Stragglers) and award the points listed on the table to the enemy. (Hopefully, he will reciprocate with as many or more points in return...)
Small Army
| Union Losses | Rebel Losses | VP Award |
|---|---|---|
| 1-25 | 1-21 | 0 |
| 26-39 | 22-34 | 3 |
| 40-54 | 35-44 | 7 |
| 55-66 | 45-54 | 10 |
| 67-79 | 55-64 | 13 |
| 80-94 | 65-74 | 16 |
| 95-109 | 75-89 | 20 |
| 110 or more | 90 or more | 25 |
Large Army
| Union Losses | Rebel Losses | VP Award |
|---|---|---|
| 1-39 | 1-48 | 0 |
| 40-62 | 49-75 | 5 |
| 63-78 | 76-98 | 8 |
| 79-103 | 99-124 | 12 |
| 104-124 | 125-149 | 16 |
| 125-144 | 150-173 | 21 |
| 145-164 | 174-198 | 27 |
| 165 or more | 199 or more | 35 |
4.3 Wrecked Units
VPs are also awarded for crippling losses inflicted on major formations. Each brigade wrecked counting only permanent casualties gives the enemy 1 VP. Each brigade (not accounted for already) wrecked counting stragglers as well as permanent casualties gives the enemy player 1/2 VP.
5.0 Scenarios
5.1 The Battle of Champion Hill
Following the capture of Jackson, Grant turned his attention and army westward toward Vicksburg. Learning of this move while marching to join Johnston, Pemberton posted his own army along the ridges above Baker's Creek. By mid-morning, a fierce contest had erupted for control of the area's dominant terrain feature: Champion Hill.
First Turn: 10:30 am Last Turn: 7:00 pm Game Length: 18 turns First Player: Union
Union Information
Artillery Ammunition: 40
Special Rules:
-
McClernand has an anti-initiative rating of -1 for all units currently attached to 13 Corps. Note that in this scenario, Hovey is unaffected (being attached to 17 Corps), but Blair is (because he is currently attached to 13 Corps). (This is also the only scenario that gives McClernand this anti-initiative.)
-
No orders sent to McClernand, 9-13, 10-13, 14-13, or 2-15 can roll for acceptance before the 2:00pm turn. This restriction is lifted if any of the above are attacked by Confederate infantry. This restriction has no effect on initiative use.
Set Up:
- 26.23: 1-9-13, 13b (4), Osterhaus
- 25.24: 2-9-13
- 27.26: McClernand, 13 Corps HQ, 13 Corps Supply
- 50.19 ex 49.20: Smith, 1-10-13, 13b (4)
- 47.20: 2-10-13 (in column)
- 18.14 ex 18.15: 1-12-13
- 18.17 ex 18.18: 2-12-13
- 18.15: Hovey
- 18.16: 13b (4)
- 15.16: Grant, A Tenn HQ, A Tenn Supply
- 16.15: McPherson, 17 Corps HQ
- 10.25: 17 Corps Supply
- 18.10 ex 18.11: 1-3-17
- 18.12 ex 18.13: 2-3-17
- 18.08 ex 18.09: 3-3-17
- 18.11: Logan
- 15.12: 17b
Orders:
- 13 Corps: Defend the Middle Road.
- 10-13 has a divisional goal to defend the Raymond Road near Jackson Creek.
- 12-13 is assigned to 17 Corps and falls under its order.
- 2-15 has a divisional goal to support 10-13 in its mission. This division is attached to 13 Corps.
- 17 Corps: Attack south along the Jackson Road to capture Champion Hill and the crossroads at 28.17.
- 3-17 must support the corps' attack on the crossroads and to capture the Jackson Road between the crossroads and Baker's Creek.
Reinforcements:
- 10:30 am, entry hex C: 2-15, 15b
- 10:30 am, entry hex B: 14-13, 13b (3)
- 1:30 pm, entry hex A: 7-17, 17b
Confederate Information
Artillery Ammunition: 40
Set Up:
- 29.13: Pemberton, A Miss HQ, A Miss Supply
- 53.17 ex 52.16: T-L
- 51.16 ex 50.15: F-L
- 48.15 ex 49.16: B-L
- 50.15: Lb (4)
- 53.17: Lb (3)
- with any L unit: Loring
- 39.15: C-B
- 41.15: G-B
- 43.15: Bb (4)
- 41.15: Bb (3)
- with any B unit: Bowen
- 27.11 ex 27.12: B-S
- 25.12 ex 25.13: L-S
- 24.15 ex 24.16, 24.14: C-S
- 24.16: Sb (4)
- 28.17: Sb (3)
- 26.20: Detachment
- 25.13: Stevenson
Orders (all are divisional goals):
- L Division is to defend the Raymond Road and prevent any Union movement up the Ratliff Road in order to protect Bowen's flank.
- B Division is to defend the line of the Ratliff Road between the Roberts House and 43.15.
- S Division is to defend the crossroads at 28.17 in order to defend Champion Hill, maintain the roadblock, to defend the Confederate left flank by protecting the Jackson Road extension from the crossroads back to 29.06. (S Division's orders has multiple objectives and Stevenson is defending a zone encompassing these locations. If one or more sites are already in enemy hands, Stevenson must still attempt defend the remaining locations.)
- R-S has a brigade goal on arrival to advance to the Raymond Road over Baker's Creek (33.03) and defend the crossing's location. If either 33.03 or 33.04 is already enemy occupied (not just "controlled", physically occupied), then R-S does not enter at all.
Reinforcements:
- 4:00 pm, entry hex F: R-S
Victory
Both sides use the Small Army Tables for VPs accrued from losses.
| Victory | VPs |
|---|---|
| Union Massive Victory | +25 or more |
| Union Major Victory | +18 to +24 |
| Union Minor Victory | +11 to +17 |
| Draw | +4 to +10 |
| Rebel Minor Victory | -3 to +3 |
| Rebel Major Victory | -4 to -9 |
| Rebel Massive Victory | -10 or less |
(The table is printed exactly so in the booklet; the Draw and Rebel Minor Victory rows appear in this order there.)
Historical Victory: The Union won a major victory with 18 VPs. They garnered 9 VPs for terrain, 7 VPs for Confederate casualties, 1 VP for wrecking B-S and 1/2 VP each for wrecking C-S and L-S. There were no Confederate VPs awarded.
Loss Charts (Morale Ratings)
The booklet prints Union and Confederate loss charts (pages 5-6 of the PDF) with each brigade's Morale rating and its step/fire-level tracking boxes; the tracking boxes are omitted here. Morale ratings:
Union. 13th Corps: 1-9-13 Garrard B; 2-9-13 Lindsey B; 1-10-13 Burbridge C; 2-10-13 Landrum B; 1-12-13 McGinnis C; 2-12-13 Slack B; 1-14-13 Benton B; 2-14-13 Lawler A. 15th Corps: 1-1-15 Manter B; 2-1-15 Woods B; 3-1-15 Thayer C; 1-2-15 G. Smith C; 2-2-15 T. Smith B; 3-2-15 Ewing B; 1-3-15 Buckland A; 2-3-15 Mower C; 3-3-15 Matthies B. 17th Corps: 1-3-17 E. Smith B; 2-3-17 Leggett B; 3-3-17 Stevenson A; 1-6-17 Reed B; 2-6-17 Ransom B; 3-6-17 Hall C; 1-7-17 Sanborn B; 2-7-17 Holmes C; 3-7-17 Boomer A.
Confederate, Army of Mississippi. B Div: C-B Cockrell A; G-B Green B. F Div: H-F Hebert C; M-F Moore C. L Div: B-L Buford B; F-L Featherston B; T-L Tilghman C. S Div: B-S Barton C; C-S Cumming B; L-S Lee B; R-S Reynolds C; W-S Waul A. Det Detachment A (this unit does not count toward any division's wrecked status). Sm Div: B-Sm Baldwin B; S-Sm Shoup C; V-Sm Vaughn D.
Confederate, Army of Relief. Br Div: A-Br Adams B; H-Br Helm A; S-Br Stovall C. Fr Div: E-Fr Evans C; Ma-Fr Maxey C; Mc-Fr McNair B. W Div: Gi-W Gist C; Gr-W Gregg B; W-W Wilson C.
5.2 Champion Hill—An Early Start
This is a variation on the historical battle. It postulates an earlier start which would give players more time to develop alternative courses of action.
First Turn: 8:00 am Last Turn: 7:00 pm Game Length: 23 turns First Player: Union
Union Information
Artillery Ammunition: 40
Special Rules:
- No Union unit can move into a road hex while in Column or Limbered formation until that hex has been entered by Union Infantry in Line formation. This restriction is lifted on or after 10:00 am.
Historical Note: This rule exists to reflect the delaying effect of various Confederate detachments on the advance of Union troops. While these detachments were not strong enough to offer battle, they did for the Union columns to deploy and proceed with caution.
Set Up: None
Reinforcements:
- 8:00 am, entry hex B: McClernand, 13 Corps HQ, 13 Corps Supply, 9-13, 13b (4)
- 8:00 am, entry hex C: 10-13, 13b (4)
- 9:30 am, entry hex A: Grant, A Tenn HQ, A Tenn Supply, McPherson, 17 Corps HQ, 17 Corps Supply, 3-17, 17b, 12-13, 13b (4)
- 10:30 am, entry hex C: 2-15, 15b
- 10:30 am, entry hex B: 14-13, 13b (3)
- 1:30 pm, entry hex A: 7-17, 17b
Orders:
- 13 Corps is to advance west along the Middle Road until one or more of its units comes to or within 3 hexes of a Rebel unit or the Roadblock. When that happens, halt and defend in place.
- 17 Corps is to advance to the Champion House (15.17) and then halt and await further orders.
- 12-13 has a divisional goal of the same orders as 17 Corps. It is assigned to 17 Corps.
- 10-13 has a divisional goal to advance west along the Raymond Road until its units come to within 3 hexes of a Rebel unit or the bridge over Jackson Creek (50.19) and then halt and defend in place.
- 2-15 has a divisional goal to support 10-13 in defending the Raymond Road east of Jackson Creek. 2-15 is attached to 13 Corps.
Confederate Information
Artillery Ammunition: 40
Set Up:
- w/i 4 51.13: L Division
- w/i 3 42.13: B Division
- w/i 3 32.16: S Division (less W-S, R-S and the Detachment)
- 26.20: Detachment
- 47.25: Pemberton, A Miss HQ
- 52.12: A Miss Supply
Orders (all are divisional goals):
- L Division is to defend the Raymond Road and prevent any Union movement up the Ratliff Road in order to protect Bowen's flank.
- B Division is to defend the line of the Ratliff Road between the Roberts House and 43.15.
- S Division is to defend the crossroads at 28.17 in order to defend Champion Hill, maintain the roadblock, to defend the Confederate left flank by protecting the Jackson Road from the crossroads back to 29.06.
- R-S has a brigade goal on arrival to advance to the Raymond Road over Baker's Creek (33.03) and defend the crossing's location. If either 33.03 or 33.04 is already enemy occupied (not just "controlled", physically occupied), then R-S does not enter at all.
Reinforcements:
- 4:00 pm, entry hex F: R-S
Victory
Both sides use the Small Army Tables for VPs accrued from losses.
| Victory | VPs |
|---|---|
| Union Massive Victory | +25 or more |
| Union Major Victory | +18 to +24 |
| Union Minor Victory | +11 to +17 |
| Draw | +4 to +10 |
| Rebel Minor Victory | -3 to +3 |
| Rebel Major Victory | -9 to -4 |
| Rebel Massive Victory | -10 or less |
5.3 Pemberton on the Attack!
Here, we assume Pemberton reacted much more aggressively to Grant's end run. Not only is Pemberton treated to the use of 3.9d, but both of his other divisions that were not engaged in the historical battle are now brought forward to join the attack. McClernand's lone corps is challenged to defend Grant's rear long enough for more Union troops to be brought forward to confront the Rebel army on equal terms.
First Turn: 7:00 am Last Turn: 7:00 pm Game Length: 25 turns First Player: Confederate
Special Rule: The Roadblock does not exist in this scenario.
Union Information
Artillery Ammunition: 40
Set Up:
- 28.17: McClernand, 13 Corps HQ, 13 Corps Supply
- w/i 2 24.15: 12-13, 13b (4)
- w/i 2 29.15: 14-13, 13b (3)
- w/i 2 32.16: 9-13, 13b (4)
- w/i 2 51.15: 10-13, 13b (4)
Orders:
- 13 Corps must defend the crossroads and both the Jackson and Ratliff Roads from enemy approach.
- 10-13 has a divisional goal to defend anywhere along the Raymond Road from its current position east as far as the Ellison House, if necessary.
- 2-15 arrives with a divisional goal to support 10-13 in its defense of the Raymond Road. If that order is no longer in force, report to 13 Corps HQ. 2-15 is assigned to 13 Corps.
- All other units arrive without orders of their own.
Reinforcements:
- 8:30 am, entry hex B: Grant, A Tenn HQ, A Tenn Supply
Variable Reinforcements:
The following reinforcements only arrive on a successful roll of 10 or more on two dice. Roll once each turn beginning with the listed turn (do this during the New Order Acceptance portion of the Union Command Phase). Reroll each turn until a successful roll is made. Roll for each batch separately. There are no modifiers for the number of turns since rolling began.
- 9:00 am, entry hex C: 2-15, 15b
- 10:00 am, entry hex A or B: McPherson, 17 Corps HQ, 17 Corps Supply, 3-17, 17b
- 11:30 am, entry hex A or B: 7-17, 17b
- 4:00 pm, entry hex A or B: 6-17, 2x 17b
Confederate Information
Artillery Ammunition: 50
Set Up: None
Reinforcements:
- 7:00 am, entry hex F: Pemberton, A Miss HQ, A Miss Supply, S Division (less Detachment only)
- 7:00 am, entry hex E: L Division
- 8:00 am, entry hex F or G: B Division
- 8:30 am, entry hex E: F Division
Variable Reinforcements: Handle this entry just like the Union Variable Reinforcements above.
- 11:00 am, entry hex E, F, or G: Sm Division
Orders (all are divisional goals):
- S Division is to attack and capture the crossroads 28.17 and Champion Hill.
- L Division is to attack east along the Raymond Road with the objective of capturing the Ellison House and the bridge over Jackson Creek (at 49.20).
- B Division is to support S Division and its attempt to capture Champion Hill.
- F Division is to advance up the Ratliff Road past the Ratliff House and attack any Union troops in the vicinity of the Roberts House.
- Sm Division has no orders. It can enter the map and move no further than 5 hexes from its entry hex. Once there, it must await new orders.
Victory
Both sides use the Small Army Tables for VPs accrued from losses.
| Victory | VPs |
|---|---|
| Union Massive Victory | +15 or more |
| Union Major Victory | +8 to +14 |
| Union Minor Victory | +1 to +7 |
| Draw | -5 to 0 |
| Rebel Minor Victory | -13 to -6 |
| Rebel Major Victory | -16 to -14 |
| Rebel Massive Victory | -20 or less |
5.4 The Gathering of Hosts
Grant and Sherman are assumed to have been rebuffed at Jackson on the 14th of May by a more rapidly concentrated Confederate relief force. Johnston and Pemberton then set out to force Grant into a showdown. All three forces converged just east of Edward Station...
First Turn: 8:00 am Last Turn: 7:00 pm Game Length: 23 turns First Player: Confederate
Union Information
Artillery Ammunition: 65
Set Up:
- 43.34: McClernand, 13 Corps HQ, 13 Corps Supply
- w/i 2 41.32: 12-13, 13b (4)
- w/i 2 44.30: 9-13, 13b (4)
Reinforcements:
- 9:00 am, entry hex C: Grant, A Tenn HQ, A Tenn Supply
Variable Reinforcements:
The following reinforcements only arrive on a successful roll of 10 or more on two dice. Roll once each turn beginning with the listed turn (do this during the New Order Acceptance portion of the Union Command Phase). Reroll each turn until a successful roll is made. Roll for each batch separately. There are no modifiers for the number of turns since rolling began.
When a force enters, roll one die and apply the force's Entry Modifier. Compare the result with the Entry Chart below to determine the actual point of entry.
- 9:00 am, Entry Modifier -2: 14-13, 13b (3)
- 9:30 am, Entry Modifier -1: 10-13, 13b (4)
- 11:00 am, Entry Modifier +2: McPherson, 17 Corps HQ, 17 Corps Supply, 3-17, 2x 17b
- 12:30 am, Entry Modifier +2: 6-17, 17b
- 2:00 pm, Entry Modifier +2: 7-17, 17b
- 3:00 pm, Entry Modifier -2: Sherman, 15 Corps HQ, 15 Corps Supply, 2-15, 15b
- 6:00 pm, Entry Modifier -2: 3-15, 15b, 15b (3)
- 8:00 pm, Entry Modifier -2: 1-15, 15b
Entry Chart
| Modified Die | Entry Area |
|---|---|
| 2 or less | B |
| 3 or 4 | C |
| 5 or more | D |
Orders:
- 13 Corps is to defend in place.
- Arriving Divisions with Corps HQ's already on the map must join their corps.
- Other units can move one turn on to the map and then halt and await further orders.
Confederate Information
Artillery Ammunition: 70
Set Up:
- 34.01: Pemberton, A Miss HQ, A Miss Supply
- w/i 4 33.03: S Division (less Detachment only)
- w/i 4 53.02: L Division
Reinforcements:
All enter as Variable Reinforcements (following the same rules as the Union Variables). Where an Entry Area is given, the force must enter there. Others enter as per a roll on the Entry Chart below (there are no modifiers for these entries).
- 9:00 am: B Division
- 11:00 am: Sm Division
- 1:00 pm: F Division
- 3:00 pm, Entry Area A: Johnston, A Relf HQ, A Relf Supply, Br Division
- 6:00 pm, Entry Area A: W Division
- 7:00 pm, Entry Area A: Fr Division
Entry Chart
| One Die | Entry Area |
|---|---|
| 3 or less | E |
| 4 or more | F or G (player's choice) |
Orders (all are divisional goals):
- S Division and L Division are to defend in place.
- All other units can move for one turn after entering the map and then must await further orders.
Victory
Both sides use the Large Army Tables for VPs accrued from losses.
| Victory | VPs |
|---|---|
| Union Massive Victory | +18 or more |
| Union Major Victory | +10 to +17 |
| Union Minor Victory | +4 to +9 |
| Draw | -3 to +3 |
| Rebel Minor Victory | -9 to -4 |
| Rebel Major Victory | -17 to -10 |
| Rebel Massive Victory | -18 or less |
5.5 Day of Reckoning
This scenario is the logical outgrowth of 5.4. Here both Confederate armies have come together and confront an increasingly desperate Grant. Grant must win the battle and reestablish his supply line on the Mississippi. The Rebels have the opportunity to crush the entire Union force before it can retire to safety.
First Turn: 6:00 am Last Turn: 7:00 pm Game Length: 27 turns First Player: Union
Union Information
Artillery Ammunition: 65
Set Up:
- w/i 4 44.30: 13 Corps (all)
- 43.34: Grant, A Tenn HQ, A Tenn Supply
- w/i 5 29.29: 15 Corps (all)
- w/i 3 61.20: 17 Corps (all)
Orders:
- 13 Corps is to attack west along the Raymond Road to capture the high ground along the Ratliff Road at or south of 43.15.
- 17 Corps is to join the converging attack north towards the Raymond Road in order to capture the high ground around the Coker House and support 13 Corps' attack.
- 15 Corps is to defend in place.
Reinforcements: None
Confederate Information
Artillery Ammunition: 70
Set Up:
- 28.17: Johnston, A Relf HQ, A Relf Supply
- w/i 3 26.18: Br Division
- w/i 3 27.17: Fr Division
- w/i 3 22.20: W Division
- 40.13: Pemberton, A Miss HQ, A Miss Supply
- w/i 4 50.13: L Division
- w/i 3 42.10: S Division (less Detachment only)
- w/i 3 39.15: F Division
- w/i 2 30.20: B Division
- w/i 3 46.15: Sm Division
Orders (all are divisional goals):
- Br Division and Fr Division are to attack east along the Middle Road to capture the crossroads at 29.29.
- W Division is to attack east and southeast to support the attack along the Middle Road.
- B Division is to attack east and northeast to support the attack along the Middle Road.
- L Division is to defend the high ground around the Coker House and along the southern end of Ratliff Road.
- Sm Division, F Division, and S Divisions are to defend in place.
Reinforcements: None
Victory
Both sides use the Large Army Tables for VPs accrued from losses.
| Victory | VPs |
|---|---|
| Union Massive Victory | +21 or more |
| Union Major Victory | +13 to +20 |
| Union Minor Victory | +7 to +12 |
| Draw | -1 to 6 |
| Rebel Minor Victory | -7 to -2 |
| Rebel Major Victory | -14 to -8 |
| Rebel Massive Victory | -15 or less |
Developer's Notes
As a historical event, Champion Hill was a bloody but small action on the road to Vicksburg. It was important beyond its size—it sealed the door of Vicksburg to the outside world and the fate of Pemberton's army with it. In spite of its strategic significance, the simulated battle only lasts one afternoon.
Champion Hill examines three situations: the actual event, a more aggressive Pemberton, and circumstances leading to a fully assembled Confederate force united in an attempt to defeat Grant.
Scenario 5.3 looks at the aggressive Pemberton. Here the historical roles are reversed and the Confederates have the burden of attack. The "new and improved" Pemberton has assembled all of his available forces for the battle. Historically, he only managed to get eight of his 14 infantry brigades to the critical point—and of these, only 5 saw heavy fighting. Almost 2/3 of the Confederate army went unused, despite the fact that even without those brigades, Vicksburg had adequate numbers of garrison artillery and local militia to hold the fort for a short time.
In addition to leaving much of his strength behind to keep the home fires burning, Pemberton's slow movement allowed Grant to exploit his potentially ugly situation. Locked between Johnston's Army of Relief and Pemberton's Army of Mississippi, Grant was given the time to defeat Johnston (Jackson on May 14th) and two days to recover before having to deal with Pemberton. Had Pemberton followed Johnston's wishes, he could have struck a blow against 13 Corps while it was alone screening Grant's rear. The potential existed for dealing the Federals a serious reverse.
Scenarios 5.4 and 5.5 take the aggressive Pemberton one step further. These require a more effective response to the looming crisis by the Southern command structure. As early as May 1st, the War Department in Richmond was ordering troops from all over the deep South to assemble in central Mississippi. Under Johnston's command, this force was charged with cooperating with Pemberton and in keeping the back door to Richmond open.
Given the state of the Southern rail system and the less than enthusiastic responses by commanders forced to give up infantry, the assembly was slow in coming. The Army of Relief as shown in the game was not fully organized until the 21st of June, even though almost all the troops were available by the end of May.
One leader might have merited a 0-rating instead of a 1—Union General Smith. However, McClernand's 0, coupled with his historical anti-initiative, rendered the point moot. Smith is unlikely to ever get initiative anyway and too many 0's on a battlefield can really cripple a game. In the end, he got the benefit of the doubt.
The terrain here was also subject to speculation. It is unclear how much of Champion Hill was unwooded. The additionally "tough" woods movement effects are due to the irregular topography of the land not deemed suitable for farming.
The Raymond Road bridge over Jackson Creek was destroyed and is instead marked as a ford. The bridge where the same road crosses Baker's Creek was also destroyed. It, however, is depicted as intact as Loring had most of a day to repair it and dispatched men to that very task. The addition of actual repair and destruction rules to cover these instances were judged to be not worth the added effort. They are instead presented as faites accompli. It should be noted that it is unclear whether Loring's men ever actually finished repairing the bridge (given the outcome of the day). They certainly could have if they wanted to do so.
The "Detachment" is somewhat unusual. I usually try to avoid subdividing brigades, however the occupation of the roadblock was too critical to ignore. This is especially true given the lack of Maneuver units in Stevenson's Division anyway. On the other hand, severe restrictions tie the detachment to its historical role, ensuring that over-zealous players don't see it as some sort of elite commando unit and try to use it as such.
One playtester pointed out that Pemberton sent the army trains away before the battle began and wondered why the game did not require the same. Don't confuse the army train counter with the major supply trains that all armies packed around with them. The game counter represents the ammo and artillery rounds on hand—the tactical trains, not the armies baggage. The peculiar activities of the R-S Brigade actually represent the main army trains.
In scenario 5.1, there is an iron-clad rule prohibiting McClernand or any of his divisions from accepting any orders until 2:00 pm. I almost removed it from the game, but in the end let it stand in a revised form. McClernand's inactivity prevented a severe Confederate check from becoming a disaster—players interested in the historical situation should ensure this same burden on the Northern player. The rule can be ignored (by consensus of the players) and the players can trust to fate in the form of low leader ratings and anti-initiative. I prefer this second method since it makes for more tension and greater uncertainty in the game.
Counter Manifest & Order of Battle
Union Army of the Tennessee
Grant; A Tenn HQ; A Tenn Supply
13th Corps: McClernand; Ord; 13 Corps HQ; 13 Corps Supply; 13 Corps Artillery (3x 4-gun point, 1x 3-gun point)
- 9th Division: Osterhaus; 1-9-13 Garrard; 2-9-13 Linsey
- 10th Division: Smith; 1-10-13 Burbridge; 2-10-13 Landrum
- 12th Division: Hovey; 1-12-13 McGinnis; 2-12-13 Slack
- 14th Division: Carr; 1-14-13 Benton; 2-14-13 Lawler
15th Corps: Sherman; 15 Corps HQ; 15 Corps Supply; 15 Corps Artillery (3x 5-gun point, 1x 3-gun point)
- 1st Division: Steele; 1-1-15 Manter; 2-1-15 Woods; 3-1-15 Thayer
- 2nd Division: Blair; 1-2-15 G. Smith; 2-2-15 T. Smith; 3-2-15 Ewing
- 3rd Division: Tuttle; 1-3-15 Buckland; 2-3-15 Mower; 3-3-15 Matthies
17th Corps: McPherson; 17 Corps HQ; 17 Corps Supply; 17 Corps Artillery (4x 5-gun point)
- 3rd Division: Logan; 1-3-17 E. Smith; 2-3-17 Leggett; 3-3-17 Stevenson
- 6th Division: McArthur; 1-6-17 Reed; 2-6-17 Ransom; 3-6-17 Hall
- 7th Division: Crocker; 1-7-17 Sanborn; 2-7-17 Holmes; 3-7-17 Boomer
Confederate Army of Relief
Johnston; A Relf HQ; A Relf Supply
- Breckinridge's Division: Breckinridge; A-Br Adams; H-Br Helm; S-Br Stoval; Br Division Artillery (1x 5-gun point)
- French's Division: French; E-Fr Evans; Ma-Fr Maxey; Mc-Fr McNair; Fr Division Artillery (1x 4-gun point)
- Walker's Division: Walker; Gi-W Gist; Gr-W Gregg; W-W Wilson; W Division Artillery (1x 5-gun point, 1x 3-gun point)
Confederate Army of Mississippi
Pemberton; A Miss HQ; A Miss Supply
- Bowen's Division: Bowen; C-B Cockrell; G-B Green; B Division Artillery (1x 4-gun point, 1x 3-gun point)
- Forney's Division: Forney; H-F Hebert; M-F Moore; F Division Artillery (1x 4-gun point, 1x 3-gun point)
- Loring's Division: Loring; B-L Buford; F-L Featherston; T-L Tilghman; L Division Artillery (1x 4-gun point, 1x 3-gun point)
- Stevenson's Division: Stevenson; B-S Barton; C-S Cumming; L-S Lee; R-S Reynolds; W-S Waul; Det Roadblock Detachment (from C-S); S Division Artillery (1x 4-gun point, 1x 3-gun point)
- Smith's Division: Smith; B-Sm Baldwin; S-Sm Shoup; V-Sm Vaughn; Sm Div. Artillery (1x 4-gun point, 1x 3-gun point)