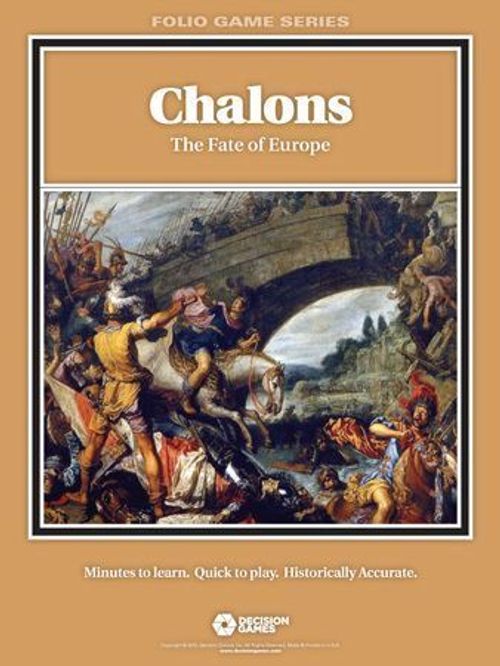
Chalons: The Fate of Europe
Chalons: The Fate of Europe Rulebook
Table of Contents
Table of Contents
- STANDARD RULES
- 1.0 Introduction
- 2.0 Game Equipment
- 3.0 Setting Up
- 4.0 Sequence of Play
- 5.0 Movement
- 6.0 Zones of Control
- 7.0 Melee Combat
- 8.0 Terrain Effects Chart (TEC)
- 9.0 Reinforcements
- 10.0 Missile Units
- 11.0 Light Troops & Skirmishers
- 12.0 Leaders
- 13.0 Rally
- 14.0 Charges
- 15.0 Demoralization & Disintegration
- 16.0 Victory Conditions
- CHALONS: THE FATE OF EUROPE - EXCLUSIVE RULES
STANDARD RULES
1.0 Introduction
The Ancient Battles game system is a tactical simulation of battles fought prior to about AD 500. Each game in the system represents one of the great battles of the ancient world. The playing pieces represent the actual units that participated in the battles, and the map represents the terrain over which those units fought. This game series has been designed to ensure maximum playability and historical accuracy (in that order). To achieve that, the components and rules have been designed to make the game easy to understand and play.
The rules in the series are presented in two sections: the Standard Rules and the Exclusive Rules. The Standard Rules are common to all the games in the series. The Exclusive Rules are different for each game, and they give scenario instructions and rules that apply only to that particular battle.
2.0 Game Equipment
2.1 The Game Map
Each mapsheet portrays the area in which a battle was fought and all the significant terrain of the battle. The map also has a Terrain Key and a Turn Record Track. A hexagonal grid is superimposed over the terrain features printed on the map to regulate movement and the positioning of the playing pieces. All numbered hexes are playable, though some types of terrain are prohibited.
2.2 Game Charts & Tables
Various visual aids are provided on the Player Aid Card to simplify and illustrate certain game functions. They are the Terrain Effects Chart, the Combat Results Table, the Missile Fire Table, and the Rally, Demoralization & Disintegration Table.
2.3 The Playing Pieces
The cardboard pieces represent the actual military units that took part in the original battle. The numbers and symbols on the pieces represent the strength, movement capability and type of unit represented by that piece. These playing pieces will hereafter be referred to as "units."
2.4 How to Read the Units
Each unit has certain information printed on it. They are identified by numerals and/or nationality, and contain information about their combat and movement capabilities.
Combat strength is the relative strength of a unit when attacking and defending, expressed in terms of strength points. Movement allowance is the maximum number of clear terrain hexes a unit may be moved in a single movement phase, expressed as movement points (or MP). Missile capability is the type of missile weapon (if any) a unit may possess.
2.5 Game Scale (Series)
Each hexagon on the map represents 100-200 meters. Each combat unit represents between 100 and 1,000 men. Each game turn represents 30 to 90 minutes.
3.0 Setting Up
The cardboard playing pieces should be punched out of the counter sheet(s). Players should decide for themselves who will command which force. They then set up their units simultaneously (unless indicated otherwise in the Exclusive Rules) in their proper positions on the map as indicated by the scenario instructions. Once the units are set up, players are ready to begin Game Turn 1. Place the Game Turn marker in the first position on the Game Turn Track. Consult the Exclusive Rules to determine which side plays first. Play proceeds according to the sequence of play through the final game turn or an automatic victory as indicated by the disintegration level (see 15.0).
4.0 Sequence of Play
The game is played in successive game turns composed of alternating player turns. During each player turn, the player whose turn it is moves his units and resolves combat in sequence, according to the following outline and within the limits provided by the rules that follow. At the conclusion of the final game turn, the victory conditions are consulted and a winner is determined.
First Player Turn
A. Movement Phase: the player who moves first each turn may move all, some or none of his units as he desires within the limits and restrictions of the rules of movement and zones of control and the Exclusive Rules of the game. The first player may bring reinforcements onto the map as allowed by the reinforcement rules. The second player's units may not move (see 5.0).
B. Missile Fire Phase: the first player may now use his units with missile capability to fire at enemy units (see 10.0).
C. Combat Phase: the first player conducts his melee attacks (see 7.0).
D. Rally Phase: roll a die and consult the Rally column of the Rally, Demoralization & Disintegration Table to determine if any of the first player's eliminated units are rallied. Place those rallied units according to the rally rules (see 13.0 and the scenario's Exclusive Rules).
Second Player Turn
The second player now goes through the sequence of play in the manner described above. In each phase, the second player carries out the same actions as the first player,
Game Turn Record Interphase
The Game Turn marker should be advanced one space on the Game Turn Record Track to indicate the end of one game turn and signal the start of the next game turn.
5.0 Movement
During the movement phase, the current player may move as many or as few of his units as he desires. They may be moved in any direction or combination of directions, but units are moved one at a time, tracing a path of contiguous hexes through the hex grid. As a unit enters each hex, it must pay one or more movement points from its movement allowance, depending on the type of terrain in each hex entered.
5.1 Movement Prohibitions
5.11 Movement may never take place out of sequence. A player's units may be voluntarily moved only during his own movement phase. During the combat phase, a unit that's attacking or defending may be called on to advance or retreat after its combat is resolved. Friendly units may not move during the enemy player's movement phase nor during any player's combat phase, except when advancing or retreating as a result of combat.
5.12 A unit may never enter a hex containing an enemy unit.
5.13 A unit may never exit a hex that is in an enemy zone of control (EZOC, see 6.0 & 7.7) during any movement phase. An EZOC hex may be left only during a retreat or advance as a result of combat.
5.14 No combat takes place during the movement phase. Once a player has begun to resolve combat and has rolled the die, he has irreversibly initiated the missile fire phase or the combat phase, whichever is relevant to his current attack.
5.15 The number of movement points (MP) expended by a unit during a single movement phase may not exceed that unit's printed movement allowance (MA). A unit may expend any portion of its MA, but unused MP may not be accumulated or transferred to another unit.
5.16 Movement from hex to hex must be consecutive; a unit may not skip or jump over hexes.
5.17 Once a unit has been moved, and the player's hand is taken from the piece, it may not be moved any farther that phase, nor may it change its move without the consent of the opposing player.
5.20 Effects of Terrain
5.21 A unit must expend one MP to enter a clear hex. To enter other types of terrain, a unit must often expend more than one MP. Some hexes are entirely prohibited to movement. MP costs are printed on the map and/or the Terrain Effects Chart (TEC).
5.22 A unit that moves from one trail hex directly into an adjacent trail hex through a trail hexside expends only one MP regardless of other terrain in the hex.
5.23 Units may cross river hexes by paying three MP to enter. No additional movement costs are assessed to leave a river hex.
5.24 Units may cross stream hexsides by paying one additional MP. For example, if a unit moves through a stream hexside into a woods hex, the cost is four MP.
5.25 A unit may cross a ridge hexside by paying two additional MP.
5.3 Effects of Friendly Units
5.31 A friendly unit may move through hexes occupied by other friendly units. There is no additional cost for entering a friendly occupied hex.
5.32 A friendly unit may not end any phase stacked in the same hex with another friendly (or enemy) unit. In general, there may never be more than a single unit in a hex at the end of any phase (Exceptions: leaders and any special exemption units listed in the Exclusive Rules.)
5.33 There is no limit to the number of friendly units that may pass through a single hex during one movement phase.
5.34 Friendly ZOC hexes never inhibit the movement of friendly units, but units may never move directly from one EZOC to another, regardless of the presence of friendly units (see 6.1).
6.0 Zones of Control
The six hexes immediately surrounding a hex constitute the ZOC of a unit in that hex, except units printed with a black dot, which don't exert a ZOC. Hexes into which a unit exerts a ZOC are called "zone of control hexes," and they inhibit the movement of enemy units. All units must cease movement when they enter any EZOC hex.
6.1 All units except those printed with a black dot exert a ZOC (including disrupted units) throughout the game turn, regardless of the phase or player turn. The presence of ZOC is never negated by enemy or friendly units or by other ZOC.
6.2 Units don't pay additional MP to enter an EZOC.
6.3 There are generally only two ways to exit a hex in an EZOC: either by retreat or advance as a result of combat or by eliminating (or retreating after combat) the enemy unit projecting the ZOC. Exception: Light troops, skirmishers and leaders have a dot next to their unit symbol and may therefore leave an EZOC voluntarily during their side's movement phase (see sections 11.0 & 12.0).
6.4 If a particular ZOC-exerting unit is in an EZOC, the enemy unit is also within that unit's ZOC. The two units are equally and mutually affected.
6.5 If enemy and friendly ZOC are exerted into the same hex at the same time, those ZOC coexist and that hex is mutually affected by both ZOC. There's no additional effect from having more than one unit exerting ZOC into a single hex.
6.6 ZOC generally extend into all hexes adjacent to the projecting unit's hex. Exception: no unit projects ZOC into any terrain prohibited to that unit.
7.0 Melee Combat
Melee combat (simply referred to as "combat" below) occurs between adjacent opposing units. It is mandatory and takes place in the combat phase. The player whose turn is currently occurring is termed the "attacker"; the other player is the "defender," regardless of the overall situation.
PROCEDURE: The attacker totals the combat factors of all the units attacking a particular hex and compares that total to the combat strength of the defending unit in the hex under attack (the "target hex"). That comparison is expressed as an odds ratio of attacking to defending combat strength points (that is, attacking strength points divided by defending strength points), and it's simplified by rounding down to one of the odds ratios printed on the Combat Results Table (CRT). For example, if 13 strength points are attacking four strength points, the combat odds ratio is 3.25:1, rounded off (always in favor of the defender) to 3:1. Having determined the combat odds, the attacker then rolls a die. The roll indicates a result on the CRT that's cross-indexed under the column heading corresponding to the calculated combat odds. That intersection of line and column yields a combat result.
Separate combats may be resolved in any order the attacker wishes, as long as all combats are resolved during that combat phase and no combat resolution is begun into the one before it has been entirely resolved.
7.1 Which Units Attack
7.11 All friendly units in EZOC must attack. All enemy units in friendly ZOC must be attacked in your side's combat phase. You may resolve those attacks in any order you desire, as long as all adjacent enemy units are attacked within the requirements of 7.2.
7.12 All units that begin their side's combat phase in an EZOC must attack at least one adjacent enemy unit during that phase. The attacking player may choose which of his attacking units will attack each defending unit, as long as all adjacent friendly units participate in an attack.
7.13 An enemy occupied hex may be attacked by as many units as can be brought to bear from the six adjacent hexes.
7.14 No unit may attack more than once per combat phase. The same enemy unit may be attacked during the missile fire phase and the combat phase of the same player turn.
7.15 Units may only attack adjacent enemy units during the combat phase using melee combat. That is, missile attacks aren't permitted during the combat phase. Similarly, melee attacks aren't permitted during the missile fire phase.
7.2 Multiple Unit & Multi-Hex Combat
7.21 If any player's unit is in the EZOC of more than one enemy unit, it must attack all those adjacent enemy units not engaged by some other attacking unit(s). In such cases, the combat strength of all those defending units are totaled into one combined strength that's then compared to the attacking unit's combat strength when determining the combat odds ratio.
NOTE: Lone leaders are never required to attack any enemy unit.
7.22 Attacking units in two or more hexes may combine their combat strengths and attack a single enemy occupied hex provided all the attacking units are adjacent to that enemy occupied hex. The combat strengths of those attacking units are totaled into a combined combat strength, and they're then compared to the combat strength of the defending unit to determine the combat odds. If there is any adjacent enemy unit that isn't also being attacked, the defender may add its combat strength to that of his defending unit.
7.3 Combat Strength Unity
Each unit's combat strength is unitary; it may not be divided among different combats whether attacking or defending.
7.4 Effects of Terrain
7.41 Units defending in certain types of terrain may have their combat strength increased (or sometimes the odds column is shifted left) because of that. That increase is expressed as a multiple or division of the original combat strength of one side. That is, it's halved, doubled or tripled. The Terrain Key printed on the map, or the Terrain Effects Chart, will indicate either NE (No Effect), AH (Attacker Halved), DD (Defender Doubled) or DT (Defender Tripled) for each type of terrain.
NE = No Effect (neither the attacking nor defending unit's combat strength is affected).
AH = Attacker Halved (all attacking units attacking that hex do so at half combat strength).
DD = Defender Doubled (the defending unit's combat strength in that hex is doubled).
DT = Defender Tripled (the defending unit's combat strength in that hex is tripled).
7.42 Units attacking across certain types of terrain features may have their combat strength reduced. For example, units attacking across a stream or a ridge are halved (AH). When units are attacking from two directions, one across a hexside terrain feature (such as a ridge) and another not across that feature, those units attacking across the feature are affected and those that are not attacking in that way aren't affected.
7.43 Units on slopes are doubled on defense only if the attackers are farther from a ridge hexside or hill hex than the defenders. If the attackers include a unit that is the same distance or closer the defenders are not doubled.
EXAMPLE: A defending unit in hex 5219 with a combat strength of "5" would be doubled to a strength of "10" if attackers were in 5218 or 5318. If any attacker was in 5118, 5119, 5220, or 5319, the defending unit would not be doubled.
EXAMPLE: A defending unit in hex 3114 would be doubled if attackers were in 3014, 3015, or 3113. It would not be doubled if any attacker was in 3115, 3214, or 3215 (however an attacker in 3215 would be halved for the ridge hexside).
7.5 Diversionary Attacks
7.51 A unit may make attacks at poor odds in order that adjacent attacks against other defenders may be made at higher odds. Such low odds attacks are known as "diversionary" (or "soak off") attacks.
7.52 Units may never voluntarily attack at odds of less than 1:4. If, by virtue of enemy advances after combat, a unit would be required to attack at odds less than 1:4, it's automatically eliminated (AL result). A player isn't required to try to save a unit in such a situation.
7.6 Explanation of Combat Results
AR = Attacker Retreat (all attacking units must retreat one hex; see 7.7).
AL = Attacker Loss (attacker must eliminate one involved attacking unit of his choice).
EX = Exchange (both attacker and defender eliminate one involved unit of their own choice).
DR = Defender Retreat (all involved defending units must retreat one hex; see 7.7).
DL = Defender Loss (defender must eliminate one involved defending unit of his choice).
- = No Effect (nothing happens to any involved unit on either side).
7.7 Retreating & Advancing After Combat
7.71 When the combat result requires a player's units involved in that battle be retreated, the owning player must immediately move those units one hex so they're no longer in an EZOC. The owning player generally decides the direction each of his retreating units moves.
7.72 A retreating unit may not retreat into a prohibited hex, cross a prohibited hexside, retreat off of the map, or enter EZOC. Within those strictures, if no hex is open to retreat, that blocked unit is eliminated in place instead.
7.73 A retreating unit may enter any adjacent vacant hex within the restrictions of 7.72. If there is no such vacant hex, that unit is eliminated unless it can displace (see 7.8).
7.74 Whenever a hex is vacated as a result of combat, one victorious unit that participated in that combat may advance into the vacated hex. That advance may be made regardless of EZOC. The option to advance must be exercised immediately, before any other combat resolution, though no unit is ever forced to advance. An advancing unit may never advance more than one hex as a result of one combat, and an advancing unit may not attack that phase after advancing. Advances are useful to potentially cut off the retreat of enemy units whose combat hasn't yet been resolved.
7.75 In general, only one victorious unit may advance into a vacated hex. If two hexes are vacated as a result of a single combat, the victorious player may still advance only one unit into one of those vacated hexes. Exception: leaders may advance with the unit with which they're stacked.
7.8 Displacement
7.81 Both sides may use displacement unless noted otherwise in a particular game's Exclusive Rules.
7.82 Procedure: if the only hex available to a retreating unit is one that's already occupied by another friendly unit (that's not involved in that same combat), that uninvolved unit is "displaced" (pushed out of its hex) by the retreating unit. The displaced unit is moved back by the owning player, as if it were retreating as a result of combat, and its hex is then occupied by the original retreating unit.
7.83 If displacement would cause a displaced unit(s) to be eliminated, the retreating unit is eliminated instead. Displaced units can themselves displace other friendly units in a chain reaction of displacement, if that's the only path open to them. A unit may be displaced more than once per combat phase, if that is the only alternative. Units may not displace other friendly units if they have other paths of retreat open to them, and they must displace the minimum number of units necessary. (The owner may choose between equal situations.)
7.84 A unit may not displace into an EZOC, even if that hex is occupied by a friendly unit.
8.0 Terrain Effects Chart (TEC)
The effect of terrain includes movement costs (indicated as an MP or Movement Point number) and combat effect (see 7.4), each of which is printed below the terrain type. Terrain types are printed on the map and/or the TEC.
9.0 Reinforcements
Some scenarios call for reinforcements, for one or both sides, to appear after the game has begun. Follow the directions in the Exclusive Rules for their starting locations and turn(s) of arrival. Upon arriving, reinforcements are treated like any other unit.
10.0 Missile Units
Unlike other infantry and cavalry units, missile type units may attack by firing (at range) at a defending unit. That occurs in the missile-unit-owning player's missile fire phases, which precedes the melee combat conducted during the combat phase. Different missile units have different capabilities, depending on their weapon type. Some games include various types of missile weapons: bows, javelins, slings, pilum, spears and ballista.
Missile units have a particular missile symbol printed in the upper right of their counter to indicate their exact capability (bow, javelin, slings, pilum, spear). Missile units may attack a unit from one or sometimes two or three hexes distance, as set out on the Missile Fire Table. Typically, bows and slings have a range of up to two hexes, whereas javelins, pilum and spears have a range of only one hex (except when designated otherwise by a particular scenario). Ballista have a range of three hexes.
NOTE: Missile attacks affect the defender only, never the attacker.
In general, missile units are permitted an unlimited number of missile fire attacks throughout the game, though some Roman legionnaire units have only a one time javelin capability. In those cases, once used (once their javelins are thrown), the legionnaire units are flipped to their reverse (non-javelin) sides to indicate their javelins have been thrown and used.
10.1 Missile Attacks
Units with missile-fire capability may launch one missile attack per turn during their side's missile fire phase. Firing missile units must be designated to fire at any one enemy unit within range. The missile unit must be able to "see" the enemy unit (according to the line of sight rules, see 10.2 below). The firing player then rolls a die and finds the corresponding result on the Missile Fire Table. The result, if any, is applied immediately.
NOTE: missile attacks can't by themselves eliminate enemy units, but they're able to "soften up" a defending unit for an impending melee attack, or "pin down" cavalry and other light troops. Further, a lone leader may never be targeted for any missile attack.
A missile attack that receives a "Disrupted" result flips that targeted unit to its reverse side; that unit thus defends at half strength (round down) during the immediately following combat phase. (A disrupted unit still projects a ZOC normally.) After that combat phase, that disrupted unit is flipped back to its front side and suffers no other effect (it functions normally until disrupted again). Additional "Disrupted" results against a unit that's already in that state have no further effect.
10.11 Missile units are never forced to make a missile attack. Missile units may use missile-fire and engage in melee combat during the same player turn.
10.12 Range from the firing missile unit to the target hex is determined by including in the count the target hex but not the firing unit's hex.
10.13 When attacking in the missile fire phase, missile units suffer no combat results; they're never destroyed or retreated as a result of their own attacks.
10.14 The Missile Fire Table is printed on the Player Aid Card on the back page.
10.2 Line of Sight (LOS)
10.21 To determine if a missile unit may fire at a particular hex, a straight path of clear hexes between the firing unit's hex and the target unit's hex (but not counting the firing unit's own hex or the target unit's own hex) must be demonstrable. If any of the hexes intervening between the firing hex and the target hex contains any terrain feature, the target hex may not be attacked by that missile unit.
10.22 If the LOS is congruent to a hexside (that is, falls exactly between two connected hexes) it's blocked only if both hexes on either side of that hexside include a terrain feature.
10.23 Note that slope hexes are considered clear hexes except when intersected by a ridge symbol between the firing unit and the target.
10.24 The terrain(s) in the target hex and the hex of the firing unit don't block Line of Sight.
10.25 Missile units may fire through ("over") other units, enemy or friendly.
10.3 Adjacent Attacks
10.31 A missile unit in an EZOC may fire during its side's missile fire phase, but is limited to firing at an enemy unit to which it's adjacent. If that situation remains unchanged, the missile unit must also participate in melee combat (using its melee combat strength) during the same player turn.
10.32 When in an EZOC during the combat phase, missile units must participate normally in an attack against adjacent enemy unit(s). In such cases, the missile unit attacks with using combat strength on the CRT.
10.4 Defense
10.41 Your missile units may never fire during the enemy's missile fire phase. They may only fire during your own missile fire phase (in other words, they may not conduct "defensive fire.")
10.42 When missile units are themselves attacked, they suffer all combat results in the same manner as any other units.
11.0 Light Troops & Skirmishers
Light troops and skirmishers (printed with a dot symbol) may leave EZOC during their side's movement phase. They may thus be able to avoid combat, depending on the type of enemy unit(s) next to them, in a process known as "disengagement."
11.1 Disengagement Procedure
Any unit printed with a dot in its upper left corner may leave an EZOC during its side's movement phase provided its printed MA is equal to or greater than the MA of all adjacent enemy units. Further, the first hex entered may not contain an EZOC. After the first hex, such disengaging units may potentially enter other EZOC and engage in combat normally.
NOTE: Cavalry units using disengagement may not "charge" during the same player turn.
EXCEPTION: If playing Battles of the Ancient World Volume II, disengagement is only allowed if the disengaging unit (printed with a dot) possesses an MA greater than (not merely equal to) that of all adjacent enemy units.
11.2 Retreat Before Combat Procedure
11.21 Light troops and skirmishers may retreat before combat if their MA is equal to or greater than that of all their attackers (considered separately, not added together). Any light troop or skirmisher meeting that criteria may, before its combat is resolved, refuse combat and retreat two hexes. Once the unit has retreated in that way, one of the attacking units may advance into the first hex vacated by the retreating unit.
EXAMPLE: Hun cavalry with an MA of "8" may retreat before combat from Roman cavalry with an MA of "8". The Hun cavalry would thus retreat two hexes, thereby allowing the Roman cavalry to advance one hex.
11.22 Disrupted units may never retreat before combat.
12.0 Leaders
Leaders aren't considered combat units; they don't exert ZOC, and they may leave EZOC during the movement phase using the disengagement process described above.
12.1 If any enemy unit moves into a hex occupied by a lone leader during the movement phase, both players roll a die and add to that result the printed MA of his involved unit. If the leader's final result is equal or higher, that leader must immediately be moved, up to the limit of his unmodified MA, toward the nearest friendly unit using normal movement rules. If the leader's final result is lower, or if the leader can't move toward a friendly unit by virtue of being surrounded by EZOC or obstructed by prohibited terrain, that leader is eliminated in place instead, and he isn't eligible for rally. In either case, the moving enemy unit that caused the retreat may continue its movement normally.
12.2 Leaders are unique game pieces insofar as they may stack with friendly units. If stacked with any friendly unit during the Combat Phase, a Leader may add its printed value to the strength of that unit (whether attacking or defending). If that friendly unit is eliminated, the leader simply remains in the hex, although if any enemy unit then advances into that hex after that combat, rule 12.1 must be enforced normally.
12.3 Enemy units may melee attack a lone leader, but that leader then automatically performs a retreat before combat, permitting the attacker to advance into the target hex. A leader may never attack by himself. If adjacent to any enemy unit(s), a lone leader isn't required to (and indeed may not) attack.
12.4 Leaders are never affected by missile attack, though any unit stacked with a leader is still subject to missile attack normally.
12.5 Leaders perform disengagement and retreat before combat as described in 11.1 and 11.2.
13.0 Rally
Each scenario indicates a rally capability for each side. During each rally phase, if a player has the ability to rally units, he may attempt to rally one unit. To do so, the owning player simply designates one unit that had earlier been eliminated (though leaders and elephants may never be rallied) and rolls a die. That roll is cross-indexed under the "Rally" column on the Rally, Demoralization & Disintegration Table to determine if the eliminated unit is returned to play. If the rally is successful, the unit is returned to play by being placed in the ZOC of any friendly leader who isn't in an EZOC.
NOTE: If there are no friendly leaders on the board, or placing a rallied unit in a friendly leader's ZOC would also place it in an EZOC, the unit isn't returned to play and the rally is considered unsuccessful. (In other words, scan the map beforehand and, if the preconditions for successful rally don't exist, don't bother rolling for it.)
Units with one-time missile-fire capability (for example, Roman legionaries) lose their missile weapon capability when rallied; they are returned to play on their reverse side even if they hadn't fired their missiles prior to elimination.
13.1 If there are no eliminated units to rally, you may not rally. Rally ability may not be accumulated from turn to turn.
13.2 A leader in an EZOC isn't eligible to rally any unit.
13.3 Once a unit has been rallied, it no longer counts as having been eliminated for purposes of victory conditions, points toward demoralization, and so forth.
14.0 Charges
Cavalry, elephants and chariots were able to utilize the element of shock during battle. As such, they may "charge" during a battle to double their combat strength.
PROCEDURE: Cavalry, elephant and chariots that don't start their move adjacent to any enemy unit may conduct a "charge." A charge is a normal move followed by an attack during the ensuing combat phase, except the charging unit's combat strength is doubled during that attack. Further, an AR result in a charge attack automatically converts to an AL, with one of the charging units eliminated.
14.1 Leader modifiers aren't doubled when accompanying charging units, though a leader may add his own combat strength to a charging unit.
14.2 In order to receive the charge bonus, the charging unit must end its movement in a clear terrain hex and the defending target of the charge must be in an adjacent clear terrain hex. Further, charging units may not move across a stream or ridge hexside nor enter river, peak, or hill hexes, though they may pass through other terrain while en route to their target hex.
14.3 After a charge is complete, a charging unit's combat strength is immediately normal again.
15.0 Demoralization & Disintegration
The demoralization and disintegration levels for both sides in each battle represent the moment when fatigue and attrition affect each army's overall morale and their soldiers' will to continue fighting.
15.1 Demoralization
When the number of combat strength points eliminated is equal to or greater than the demoralization level for a particular side, all units of that side become demoralized, and all the attack odds of a demoralized side are shifted one column left for the remainder of that game. For example, a demoralized unit conducting what would otherwise be a 2:1 attack has those odds shifted left one column on the CRT to become a 1:1 instead.
NOTE: demoralization sets in the instant the demoralization level is reached, and the effects of demoralization apply to all combat occurring thereafter, even if starting in the middle of a combat phase.
During the course of a battle, it's possible to "recover" from demoralization through the rally of enough units to bring the total losses back below the demoralization level. Such an event would immediately nullify the effects of demoralization, until such time that further losses again brought the total of eliminated combat strength to be equal or greater than the demoralization level.
EXAMPLE: a player has a total of 150 combat strength points eliminated, which is equal to his side's demoralization level for that battle, but he then rallies a unit with a combat strength of "8." His losses are thus reduced from 150 to 142 (below the demoralization level), thereby nullifying demoralization for the time being.
15.2 Disintegration
When the number of combat strength points eliminated is equal to or greater than the disintegration level of a particular side, the other side achieves an automatic victory and the game is over. If both sides disintegrate at the same time (through an EX result), the player who is currently conducting his combat phase wins.
15.3 Demoralization and disintegration levels are printed on the Player Aid Card.
16.0 Victory Conditions
If neither side disintegrates by the last turn of the game, victory is awarded to the player who has amassed the greatest number of victory points (VP). Players receive VP for eliminating enemy units and leaders. Further, each scenario may indicate additional conditions or objectives that potentially award VP to one or both sides.
16.1 Victory Point Schedule
16.11 Each player is awarded one VP for each enemy combat strength point eliminated (but see section 13.0). Only units that are entirely eliminated are tallied for VP.
16.12 Each player receives five VP for each eliminated leaders strength point. Some scenarios may award additional VP for eliminating prominent leaders.
16.13 Each scenario may indicate various and unique conditions that may yield VP during or at the end of a game.
16.14 Levels of Victory
Victory can be, from lowest to best type: marginal, tactical and decisive. To determine a specific level of victory, divide the winner's total of VP by the defender's total of VP. That ratio determines the level of victory as follows:
- More than 1:1 = Marginal Victory
- More than 3:2 = Tactical Victory
- More than 2:1 = Strategic Victory
(The text names the highest level "decisive" in the preceding sentence but "Strategic Victory" in this list; transcribed as printed.)
CHALONS: THE FATE OF EUROPE - EXCLUSIVE RULES
1.0 Introduction
Throughout the mid-5th century, Attila's Huns terrorized Europe, and by 451 they were on the move yet again. The skill of the Hun horsemen, particularly their accuracy with the composite bow while mounted, even during a full gallop, made them a veritable shock army, and they continued to bring victory after victory to Attila, making him master of Central Europe. After years of conquest, oppression and extortion, Attila's most recent invasion of Western Europe would be challenged: a remnant Roman army, under the command of Flavius Aetius, moved to stop him at a field known as the Catalaunian Plain, near the village of Chalons. The Battle of Chalons, as it came to be known, would decide the fate of Europe.
1.1 Folio Components
This folio includes a booklet of Standard Rules, these Exclusive Rules (including the Combat Results Table and other necessary scenario information), a 17 x 22" map (including the Turn Record Track), and a die-cut sheet of 100 counters. Hun units are green, Roman units are orange.
2.0 Initial Deployment
For purposes of clarity, the term "Hunnic" refers to all of the Hunnic player's units, including Barbarian and Ostrogoth units, whereas the term "Hun" refers specifically to the units printed as such.
Hunnic:
The Attila leader must begin set-up in any "Attila's Camp" hex; however, all other Hunnic units must set-up along the two northernmost hex rows, but not within three hexes of any woods hex (hex rows xx00 and xx01 from hexes 3300 and 3301 to the eastern edge/hexrow 55xx).
When setting up Hun, Barbarian and Ostrogoth units, the Hunnic player must set up each unit so it's adjacent to at least one other unit of the same tribe. For example, each Hun unit must be set up adjacent to at least one other Hun unit.
Romans:
The Aetius leader must begin set-up in hex 2725. Additionally, six "Roman" units (of the Roman player's choice) must be set-up in each of the six hexes surrounding that hex.
One ballista must begin set-up in hex 2425. Additionally, six "Roman" units (of the Roman player's choice) must be set-up in each of the six hexes surrounding that hex.
One ballista must begin set-up in hex 3025. Additionally, six "Roman" units (of the Roman player's choice) must be set-up in each of the six hexes surrounding that hex.
In any hexes surrounding 3325, five "Barbarian" units (of the Roman player's choice) must be set-up, and that may also include hex 3325.
In any hexes surrounding 3625, five "Barbarian" units (of the Roman player's choice) must be set-up, and that may also include hex 3625.
In any hexes surrounding 3925, five "Barbarian" units (of the Roman player's choice) must be set-up, and that may also include hex 3925 itself.
In any hexes surrounding 4225, five "Visigoth" units (of the Roman player's choice) must be set-up, and that may also include hex 4225 itself.
In any hexes surrounding 4525, five "Visigoth" units (of the Roman player's choice) must be set-up, and that may also include hex 4525 itself.
In any hexes surrounding 4825, five "Visigoth" units (of the Roman player's choice) must be set-up, and that may also include hex 4825 itself.
2.1 Free Deployment
Instead of the deployments listed under 2.0, both players are eligible to set-up using the following free deployment scheme, provided both players agree (the Hunnic player sets-up first).
The Hunnic player may set-up any of his units in any hexes along the two northernmost hex rows. Attila isn't required to begin set-up in Attila's camp, though the Hunnic player must set up each unit so it's adjacent to at least one other unit of the same tribe.
The Roman player may set-up any of his units in any hexes along the four southernmost hex rows; however, "Roman" and "Visigoth" units may not be set-up within 10 hexes of each other. Further, Aetius and the two ballista units may not be set-up with or adjacent to any "Barbarian" or "Visigoth" unit.
3.0 First Player
The Roman player moves first during every game turn, beginning with Game Turn 1. The game will continue until the end of Game Turn 15 or until one side or the other disintegrates (see 15.2).
4.0 Reinforcements
Neither side receives any reinforcements during the course of the game.
5.0 Special Rules
5.1 Leader Death Victory
Disregarding the VP normally awarded for the death of a leader (16.12), if the Attila leader is eliminated the game ends immediately as a Roman strategic victory. If the Aetius leader is eliminated, the game doesn't end immediately, though any Roman victory becomes a draw instead, unless Attila is also been eliminated, which is an automatic Roman strategic victory in all cases.
5.2 Ballista Stacking
Any number of Roman ballista may stack with another Roman unit (and/or with other ballista). A combat result occurring in a hex with a ballista and another Roman unit applies to both. For example, an Ex result against a ballista and a Visigoth unit in the same hex requires both the ballista and the Visigoth unit to be eliminated. If two ballistas are stacked together in the same hex with another Roman unit, a combat result occurring in that hex therefore applies to all three.
6.0 Victory Conditions
At the end of Game Turn 15, victory is awarded to the player who's amassed the greatest number of VP.
6.1 Attila's Camp
If any of the three Attila's Camp hexes are captured by any Roman unit (which includes Barbarian and/or Visigoth units), even if only momentarily, the Roman player may immediately roll a six-sided die for each captured camp hex. The number result of each die roll is added as VP to the Roman player's VP total.
6.2 Exiting Hunnic Units
In addition to the VP awarded according to 16.0, the Hunnic player is also awarded one VP per each Hunnic unit of any strength or type that exits the south end of the map via any red-dashed victory exit hex. If Attila exits the south end of the map, the Hunnic player is awarded 10 VP. To exit a victory hex, an exiting unit must have at least one MP still available to it to move off of the map.
Roman units may never exit the map.
NOTE: Exited units are not counted when determining demoralization or disintegration.
7.0 Game Notes
A. The "Attila's Camp" hexes aren't clear terrain.
B. Hexes 4719, 4720 and 4724 aren't clear terrain.
C. Hex 5216 is clear terrain.
D. Roman Barbarian units #78 and #79 aren't missile units despite the artwork depicting archer horsemen.
E. Hill hexes are defense doubled rather than attacker halved. Defenders must be closer to a peak hex to be doubled as in 7.43.
Charts and Tables
Terrain Effects Chart
| Terrain | MP | Combat Effect |
|---|---|---|
| Woods | 3 | No Effect |
| Clear | 1 | No Effect |
| Slope | 2 | Defender Doubled |
| Peak | 3 | Defender Tripled |
| Hill | 2 | Attacker Halved |
| Ridge | +2 | Attacker Halved |
| Attila's Camp | +2 | Defender Doubled |
Combat Results Table
| Die Roll | 1-4 | 1-3 | 1-2 | 1-1 | 2-1 | 3-1 | 4-1 | 5-1 |
|---|---|---|---|---|---|---|---|---|
| 1 | AR | DR | DR | DR | DR | DL | DL | DL |
| 2 | AR | AR | DR | DR | DR | DR | DL | DL |
| 3 | AR | - | - | - |
Attacks conducted at 6-1 or greater are an automatic DL. Attacks conducted at 1-5 or less are an automatic AL.
AR = Attacker Retreat (all attacking units must retreat one hex). AL = Attacker Loss (attacker must eliminate one attacking unit). - = No Effect. EX = Exchange (both attacker and defender eliminate one unit). DR = Defender Retreat (the defending unit must retreat one hex). DL = Defender Loss (defender must eliminate one defending unit).
Missile Fire Table
| Die Roll | Result |
|---|---|
| 1 | Disrupted |
| 2 | Disrupted |
| 3 | No Effect |
| 4 | No Effect |
| 5 | No Effect |
| 6 | No Effect |
| Weapon | Range |
|---|---|
| Bows | 2 |
| Javelins | 1 |
| Slings | 2 |
| Pilums | 1 |
| Spears | 1 |
| Ballistas | 3 |
Rally, Demoralization & Disintegration Table
| Army | Rally Die Roll | Demoralize | Disintegrate |
|---|---|---|---|
| Hun | 1-2 | 150 | 200 |
| Roman | 1-2 | 150 | 200 |