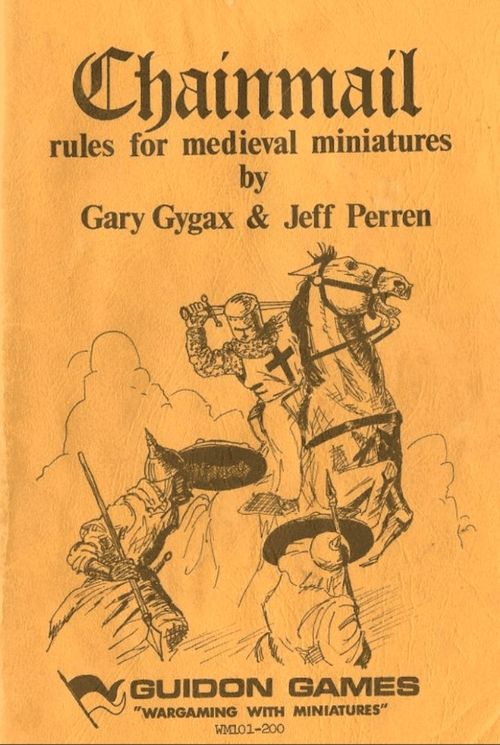
Chainmail: Rules for Medieval Miniatures
Chainmail: Rules for Medieval Miniatures Rulebook
Table of Contents
Table of Contents
- Wargaming with Miniatures
- Rules for Medieval Miniatures
- Turn Sequence
- Terrain
- Movement
- Fatigue
- Missile Fire (excluding gunpowder and catapults)
- Catapult Fire
- Gunpowder Weapons
- Melees
- Post Melee Morale
- Melee Optionals for Added Realism
- Morale
- Historical Characteristics (Optional)
- Weather (Optional)
- Sieges
- Man-to-Man Combat
- Jousting
- Suggested Point Values
- Fantasy Supplement
- Fantastic Characteristics (See also Appendix D)
- Magical Weapons
- Air Movement
- Catapult Fire vs. Fantastic Figures
- Combination Figures
- Fantastic Sieges
- General Line-up
- Appendix A: Combat Tables
- Appendix B: Man-to-Man Melee Table and Individual Fires with Missiles
- Appendix C: Jousting Matrix
- Appendix D: Fantasy Reference Table
- Appendix E: Fantasy Combat Table
- Transcription Notes
Wargaming with Miniatures
Games based on warfare have interested men for centuries, as such games as checkers and chess prove. The latter games are nothing less than the warfare of the period in which they were developed, abstracted and stylized for play on a board. Chess is so abstracted that it is barely recognizable as a wargame. At the other end of the spectrum, and of much more modern invention, are military miniatures. By use of figures scaled down to an inch or two in size the players more realistically simulate warfare and are not tied to a stylized board. Miniature warfare allows the combatants to have a never ending variety of battles over varying terrain, even refighting historic actions involving tremendous armies!
In order to play a wargame it is necessary to have rules, miniature figures and accompanying equipment, a playing area, and terrain to place upon it. There can be no doubt that you have fulfilled the first requirement, for you have purchased this set of rules. Your troops can be any scale that you desire. The playing area that the battles are fought out upon should be a table rather than the floor. It can be from a minimum of 4' to a maximum of 7' wide, and it should be at least 8' in length. These sizes will assure ample room for maneuver. There are several methods of depicting the terrain features generally used for wargames, such as hills, woods, rivers, roads, etc.
First, you can utilize odds and ends to simulate terrain, or buy commercial materials from your hobby supplier, and lay them out on a flat surface to form the battleground. Scraps of wood with the edges and corners smoothed are pyramided to form hills of varying size and elevation. Twigs with pieces of green sponge or lichen stuck on and set in clay bases serve as miniature trees. Rivers are drawn with blue chalk or made with strips of blue plastic or felt. Roads are represented in much the same way as rivers, only brown is used. With a little imagination almost any kind of terrain can be constructed in like manner.
A more advanced method is to construct terrain on 2'x2' pieces of masonite or similar material, sculpting hills, gullies, ridges, rivers, and so on with plaster and/or papier mache. Trees and houses are set into the soft modeling compound, and permanent sections of wargaming terrain are thus made. When a game is to be played, the terrain blocks are simply laid out to form the kind of battlefield desired.
Finally, the most complicated form of wargaming table is the sand table. A sand table is really nothing more than a flat table with a raised edge to allow the top to be covered with a few inches of sand. Of course, all that sand will weigh very much when wetted down to form terrain features, so the table must be of very sturdy construction and rest on a basement or garage floor. The sand table's greatest advantage is that it allows full rein to the players' desires for differing landscape, and it provides the most realistic looking battlefields for miniature warfare.
The forces to be pitted against each other can be drawn from an historical account, chosen by point value, assigned by a third (neutral) party, or worked out from a "campaign" situation where larger armies are moved on a map until hostile forces come into contact. The balance between the forces is something best determined by experience. However, troops armed with missile weapons are generally much more powerful than like troops that lack such weapons. Armored men are usually better than troops without protection--although they move more slowly. Trained pikemen are more than a match for any but an army that has either equally armed fighters or numerous missile troops. A table of point values appears in these rules, and you will find it helpful in selecting balanced forces. Playing ability and terrain must also be taken into consideration, however. If, for example, the better player is to receive a 300 point army, it might be wise to allow his opponent to select 50 additional points worth of troops in order to balance the game. Similarly, if one player decides the kind of terrain the battleground is to be composed of--or the historic terrain favors one side--the side with such a terrain advantage should probably have a considerably weaker army.
As the men are scaled down in size, 50 is the field of combat. Therefore, a move of a few inches on the table top will represent a march of ten times as many yards for our small campaigners. They move and they fight in miniature. The players order their formations about, just as medieval military commanders did (and much more efficiently in all likelihood, for a number of rather obvious reasons), but the proof of the opponents' ability only comes in combat situations. Here, each figure will do only as well as its known capabilities foretell, with allowances for chance factors which affect every battle (such as dice throwing in miniature warfare).
The different kinds of troops fight in relation to each other kind. Given normal probabilities, a body of horsemen will always defeat a like number of footmen (excluding pike armed troops), but a small chance that the footmen will somehow triumph remains, and that chance is reflected in the combat tables employed. Note that should the infantry manage to surprise the horsemen by attacking from the rear or flank, they have a much improved chance of winning the combat, or melee. Thus, while movement is scaled to size (and a set time period during which scale movement takes place), combat is based on the historically known capabilities of each particular kind of fighting man and then expressed as a dice rolling probability in relation to like and differing types of soldiers. A close simulation of actual combat is thereby attained. While a pawn can always take a knight in a chess game, a similar situation will seldom occur in miniature warfare. But the knight (cavalry) just might fail to take the pawn (infantry) when the battle is fought in miniature! In addition, the mental and physical condition of the men (their morale) is taken into consideration in this game.
Morale is checked before and after combat, basing the determination on historical precedent, just as the fighting ability in actual cases was drawn upon to calculate melee results. A loss of "heart" is at least as serious as a defeat in combat, and perhaps more so, for most battles are won without the necessity of decimation of the losing side.
Finally, how is it determined when the battle is over and one side awarded the laurels of victory? As with all facets of miniature wargaming, it is up to the parties concerned. The game can continue until one side is reduced below a certain percentage of its original strength--25%, 50%, 75%, or whatever. The battle can be continued until one opponent has driven his enemy completely off the battlefield. Or the players can assign set values to certain terrain features and troop types, keeping count of gains and losses for a set number of turns, the winner being the side with the greatest number of accumulated points. If both opponents have an historic bent, they can refight an actual battle (or even an entire campaign in a series of battles), and adjudicate the end result based on what actually took place in the past.
With no other form of wargaming--or nearly any form of game for that matter--is the player given the scope of choice and range for imagination that miniature warfare provides. You have carte blanche to create or recreate fictional or historic battles and the following rules will, as closely as possible, simulate what would have happened if the battle had just been fought in reality.
Rules for Medieval Miniatures
The Middle Ages is probably one of the best known but least understood periods of history. We do not pretend that these wargame rules will add significantly to anyone's knowledge, albeit they do reflect medieval warfare reasonably well, but they have a secondary purpose: Besides providing you with an exciting and enjoyable battle game, we hope that these rules will interest the wargamer sufficiently to start him on the pursuit of the history of the Middle Ages. Such study will at least enrich the life of the new historian, and perhaps it will even contribute to the study of history itself.
The LGTSA Medieval Miniatures Rules were developed primarily for use with Elastolin and Starlux figures, which are 40mm scale. However, they may be used equally well with any scale--including the inexpensive Airfix "Robin Hood" and "Sheriff of Nottingham" 25mm plastic figures. Although the rules have been thoroughly play-tested over a period of many months, it is likely that you will eventually find some part that seems ambiguous, unanswered, or unsatisfactory. When such a situation arises settle it among yourselves, record the decision in the rules book, and abide by it from then on. These rules may be treated as guidelines around which you form a game that suits you. It is always a good idea to amend the rules to allow for historical precedence or common sense--follow the spirit of the rules rather than the letter.
The ratio of figures to men assumed is 1:20, the ground scale is 1":10 yards, and one turn of play is roughly equivalent to one minute of time in battle. The troop ratio will hold true for 30mm figures, but if a smaller scale is used it should be reduced to 1:10.
Turn Sequence
The Move/Counter Move System
- Both opponents roll a die; the side with the higher score has the choice of electing to move first (Move) or last (Counter-move).
- The side that has first move moves its figures and makes any split-moves and missile fire, taking any pass-through fire possible at the same time.
- The side that has last move now moves its figures and makes any split-moves and missile fire, taking any pass-through fire possible at the same time.
- Artillery fire is taken.
- Missile fire is taken.
- Melees are resolved.
- Steps 1 through 6 are repeated throughout the remainder of the game.
Note: Missile fire from split-moving troops is considered to take effect immediately during the movement portion of the turn, and the same is true of pass-through fire. All other fire, both artillery and missile, is considered to simultaneously take effect just prior to melee resolution.
The Simultaneous Movement System
- Both sides write orders for each of their units (groups of figures of like type), including direction of movement and facing.
- Both sides move their units according to their written orders, making one-half of the move, checking for unordered melee contact due to opponent movement, conducting split-moves and missile fire and taking any pass-through fire; then the balance of movement is completed as ordered.
- Artillery fire is taken.
- Missile fire is taken.
- Melees are resolved.
Note: Exact orders for each unit (group of figures of like type) must be given. Cavalry may be given the order to "Charge if Charged" (CIC) either in their own behalf or in support of any nearby friendly unit. Such CIC movement begins at the one-half move and is only half of a normal charge, i.e., a unit of medium horse CIC to support a unit of archers would move up to 12" during the second half of the turn.
MORALE CHECKS ARE NOT INDICATED IN EITHER OF THE TWO SYSTEMS OF MOVEMENT AS MORALE CHECKS CAN OCCUR DURING THE FIRE AND/OR MELEE PORTIONS OF ANY GIVEN TURN, DEPENDING ON THE CIRCUMSTANCES. HOWEVER, MORALE CHECKS MUST BE MADE DURING WHATEVER SEGMENT OF THE TURN THE RULES REQUIRE.
Terrain
Terrain Effects Upon Movement
| Type of Terrain | Effect |
|---|---|
| Hill | Slows movement 50%; prevents all charge moves, but movement downhill is at normal speed. |
| Wooded | As Hill, with the additional penalty of preventing the movement of formed bodies of troops. |
| Marshy | As Hill, with the additional penalty of preventing the entrance of heavy equipment, catapults, and guns. |
| Rough | Prevents all charge moves. |
| Ditch and Rampart | As Hill. |
| River and Stream | Treat individually as to fordability, penalty for crossing, and so on. (A typical stream would require 6" to cross and prevent charge moves, while a typical river would require troops to halt before and after crossing and cost an entire move to cross.) |
Terrain Selection
Often it becomes difficult to devise new terrain for a battle, and we have found the following system to be useful:
A. On a number of 3"x5" index cards draw the following:
- Two with rivers
- One with a marsh
- One with a pond
- One with a gulley
- Two with woods
- One with rough ground
- Four with variously shaped hills
- Eight blanks
B. Each opponent draws up to four times:
- The weaker or defending side draws first.
- Terrain is placed anywhere on the table at the drawing player's option.
This system makes for some very interesting games!
Movement
Movement Rates (in inches)
| Troop Type | Move | Road Bonus | Charge Move | Missile Range |
|---|---|---|---|---|
| Armored Foot | 6 | - | 6 | - |
| Heavy Foot | 9 | - | 12 | 3* |
| Landsknechte/Swiss Pikemen | 12 | - | 15 | - |
| Light Foot/Archers | 9 | - | 12 | 15 |
| Arquebusiers/Crossbowmen | 12 | - | 12 | 18 |
* Troops armed with throwing axes and spears (such as Vikings and Saxons) fall into this category.
** Refer to the special sections for these types of weapons.
Formation and Facing
Units must pay a movement penalty in order to change their formation and/or facing.
Formation:
- Column - Line: 1 Move
- Line - Column: 1 Move
- Column - Square*: 1 Move
- Line - Square*: 2 Moves
* Foot only.
Units caught in melee during formation change are considered as flanked.
Facing:
- Oblique: 1/4 Move
- Left or Right Face: 1/2 Move
- About Face: 1 Move
Double all penalties for poorly trained troops, and half for Swiss/Landsknechte and horse.
Fatigue
Continued activity brings on weariness:
- Moving 5 consecutive turns.
- Moving 2 consecutive turns, charging, then meleeing.
- Moving 1 turn, charging, then meleeing 2 rounds.
- Meleeing three rounds.
When any troops fulfill one of the above they become fatigued:
A. They attack at the next lower value (heavy foot = light foot). B. They defend at the next lower value. C. Morale value drops -1 on values and die (dice) rolls.
Movement uphill equals two normal moves per uphill move.
Swiss/Landsknechte double above (1.-4.) numbers for fatigue.
One turn of non-movement fully restores fatigued troops.
Missile Fire (excluding gunpowder and catapults)
Unarmored and Armored Targets:
| Number Firing | Unarmored, Die 1-2 | Unarmored, Die 3-6 | 1/2 Armor or Shield, Die 1-3 | 1/2 Armor or Shield, Die 4-6 |
|---|---|---|---|---|
| 1-2 | 0 | 1 | 0 | 0 |
| 3-4 | 1 | 2 | 0 | 1 |
| 5-6 | 2 | 3 | 2 | 2 |
| 7-8 | 3 | 4 | 2 | 3 |
| 9-10 | 4 | 5 | 3 | 3 |
Fully Armored Targets:
| Number Firing | Die 1-4 | Die 5-6 |
|---|---|---|
| 4-8 | 0 | 1 |
| 9-12 | 1 | 2 |
| 13-16 | 2 | 3 |
| 17-20 | 3 | 3 |
Groups of missile troops which are larger than the maximum number shown on the above table must be into two or more equal groups so as not to exceed the maximum. Groups not exceeding the maximum which are firing at the same target may not be divided into smaller groups.
Rate of Fire: Crossbowmen, Archers, and Longbowmen may fire every turn. If Archers or Longbowmen do not move and are not meleed at the end of a turn they may fire twice. If Crossbowmen, Archers and Longbowmen are moved up to one-half of their normal movement (excluding charging) they may fire once; and if they are moved over one-half of their normal movement they may fire once only if they beat their opponent's die roll. Heavy Crossbowmen fire every other turn. They may move up to one-half of their normal movement (excluding charging) and still reload or fire, but if they are moved over one-half of their normal movement (excluding charging) they must beat their opponent's die roll to fire, and no reloading is allowed. They add 1 to Missile Fire die rolls.
Split-move and Fire: Horsemen armed with bows are permitted to perform this type of movement. To accomplish a split move and fire, the horse archers move up to one-half of their normal movement, immediately conduct missile fire procedure, and continue to move out the balance of their normal movement, not to exceed one-half of their normal movement. The horse archers may be fired upon by opponent missile troops during their firing pause.
Pass-through Fire: Stationary missile troops may elect to give pass-through fire to any enemy units which are within their missile range at the half-movement portion of the turn. This would include any enemy troops split-moving, passing by, or charging the missile troops.
Arc of Fire: Footmen - 45 degrees left or right. Horsemen - 180 degrees left, 45 degrees right.
Number of Ranks Permitted to Fire: Two ranks of missile troops are permitted to fire provided the first rank are missile troops. Additional ranks of missile troops on significantly higher ground are permitted to fire as if they composed the second rank. Note that missile range is measured from the first rank.
Indirect Fire: Archers and Longbowmen, but not crossbowmen of any type, may fire over the heads of intervening troops, friendly or enemy, providing they are more than 3" distant. Indirect fire reduces the range of the weapon firing by one-third. Indirect fire automatically classifies the target in the next higher armor category, i.e., Unarmored targets become equal to 1/2 Armor or Shield, and Fully Armored targets become "arrow proof."
Cover: Soft cover such as brush, woods, waist-high fences, and walls will reduce missile casualties by one-half (drop all fractions). Woods and overhead cover, such as roofs, prevent all indirect fire. If indirect fire is possible, then casualties will not be reduced by cover. Movable mantlets and walls with arrow slits make targets behind them, including missile troops firing thru such slits, "arrow proof" unless indirect fire is possible.
Throwing Axes and Spears: These missile weapons are treated as any other missile weapons except: They may fire only once per turn, they may always fire at enemy troops charging them, and they may not fire indirectly.
Catapult Fire
| Catapult | Minimum Range | Maximum Range | Hit Area |
|---|---|---|---|
| Light Catapult | 15" | 30" | |
| Heavy Catapult | 24" | 48" |
For the Hit Area cut a circular plastic disc to the diameter stated above. All figures wholly or partially under the circular Hit Area are killed. (For the effect of catapult hits on other artillery pieces, structures, etc., see the section entitled SIEGES.)
Rate of Fire: Light Catapults fire every other turn, and Heavy Catapults every third turn, provided they are fully crewed and have not been moved during the previous two or three turns, as the case may be. Full crew and reduction in rate of fire for partial crews are shown below:
- 4 crew: fire normal
- 3 crew: fire requires 1 extra turn
- 2 crew: fire requires 2 extra turns
- 1 crew: fire requires 3 extra turns
Additional crew above four do not add to rate of fire. Only trained crew may operate artillery.
Arc of Fire: 45 degrees left or right.
Indirect Fire: All catapult fire is considered indirect and incurs no penalty because of this.
Cover: Any substantial overhead cover negates the effect of catapult fire.
Method of Fire: The player firing a catapult must call the range by stating the distance (in inches) he is firing and how far left or right the missile is to fall (subject to the 45 degree arc of fire limitation). A triangulation is then made, with the missile falling along the long side of the triangle at the number of inches called. Example: firing 28", 8" right, the missile hit area falls at 28" along the long side of the triangle.
Fire Optional: Roll two different colored dice. One color is for an over-shoot and the other is for an under-shoot. To decide which number to use you take the highest of the two. Miss is in inches, shown by dice spots. If they tie then the rock lands at the specified range. This method is simple but effective.
Gunpowder Weapons
Arquebusiers: Regardless of the armor classification of their target, Arquebusiers will kill any figure they hit. When firing, Arquebusiers roll an "accuracy die" for each man, and use the following hit table:
| Range to Target | Score to Hit |
|---|---|
| 12"-18" | 5-6 |
| 6"-12" | 3-6 |
| 0"-6" | 1-6 |
- Rate of Fire: Treat as Heavy Crossbowmen.
- Arc of Fire: Treat as normal for missile armed footmen.
- Indirect Fire: No indirect fire is permitted.
- Cover: If the target is up to one-half concealed by hard cover (trees, walls, rocks, etc.) deduct 1 from the score rolled on the "accuracy die." If the target is over one-half concealed by hard cover, deduct 2 from the score.
- Bonus: Arquebusiers who fire while their weapon is resting on a strong support (wall, fork, etc.) add 1 to the score rolled on the "accuracy die."
Cannon:
Three classifications of Cannon are considered. They are:
- Light field guns: 30" range
- Heavy field guns: 36" range
- Bombards*: 42" range
* These weapons are usually used only in sieges.
- Rate of Fire: Treat the same as Catapults.
- Arc of Fire: Treat the same as Catapults.
- Indirect Fire: Indirect fire is permitted only for Bombards.
- Cover: Cannon fire into woods is not permitted. For the effect of cannon fire on specific targets of wood or stone, see the section entitled SIEGES.
Method of Fire: Fire is in a straight line to a target specified by the player firing. (Exception is the Bombard, see the rule below.) A wooden dowel is placed at the muzzle of the cannon, and a 6" "variation measure" is placed at the other end of it (the target end). At this time the end must pass directly over, rest on, or point to the specified target. The center of the variation measure is placed at the far end of the firing dowel. The variation measure is marked off in 1 1/2" segments and numbered from 1-6 (the printed diagram shows the numbered segments 1 through 6 along the measure). A die is rolled by the player firing the cannon, and the end of the dowel is then moved to the number on the variation measure which corresponds to the number rolled on the die. This procedure represents the variation in cannon balls, irregular gun barrels, and windage.
The Dowel: The length of a firing dowel will correspond to the maximum range of the cannon which it represents. Each is colored alternately white and black to represent the flight and bounces of a cannon ball. BEFORE PLACING THE DOWEL THE PLAYER FIRING MUST STATE WHETHER HE IS FIRING SHORT (white) OR LONG (black) AT THE TARGET. All figures that are touched by the named color on the dowel are eliminated. The color sections of the dowel, reading from muzzle to roll are:
| Range | W | B | W | B | W | B | Diameter |
|---|---|---|---|---|---|---|---|
| 30" | 16" | 6" | 3" | 5" | - | - | 5/8" |
| 36" | 28" | 6" | 3" | 2" | 1" | 6" | 3/4" |
| 42" | 20" | 8" | 4" | 2" | 1" | 6" | 1" |
Any terrain features which interpose with ANY section of the dowel stop the flight of the cannon ball at that point. These terrain features include high ground, barricades made of substantial material (wood planks or stone), trees, etc. Objects the height of a man will stop the flight of the cannon ball if they are substantial and fall within the color section named for hits. A body of water will likewise stop the flight of the cannon ball if it is passed over by a section of the dowel colored the color named for hits, other than the first such colored section which represents the cannon ball in level flight, not bouncing.
Example of Firing: A player decides to fire a Heavy Field Gun at the exact center of an advancing enemy pike square. The target is close, so the player elects to call WHITE. He places the dowel, lays the variation measure at its end, and rolls the die. The number rolled is 4, so the shot goes straight. The target is 26" distant and 8" deep, so the full 3" of the second white section, and the full 1" of the third section, fall upon it. All figures touched by the white sections of the dowel (including figures not named as the target--even friendly troops) are removed as casualties.
Melees
Melee casualties will be determined by rolling certain numbers of dice and evaluating the scores for the combatants from each side on the Combat Tables given herein (see Appendix A). Examples of troop classification are:
- Light Foot: Missile troops, Swiss/Landsknechte*, peasants, crews
- Heavy Foot: Normans, Saxons, Turks, Vikings, Men-at-arms
- Armored Foot: Dismounted Knights, sergeants, Italian city levies and condottiere
- Light Horse: Magyars, Mongols, Saracens, Turks, Hobilars
- Medium Horse: Norman Knights, Esquires, Saracens, Turks, Turcopoles
- Heavy Horse: Knights, Reiter
* SPECIAL CLASS -- see Combat Tables.
Charge: The Charge move is permitted only when melee contact is expected during some portion of the turn. When a unit moves a charge move it must move at normal speed on the following turn. Cavalry charges must be in a relatively straight line (up to a maximum of a 45 degree curve is allowable). Victorious charging units must continue to move out the balance of their charge move, in the direction first indicated, providing they attained victory before melee or during the first round of melee.
Missile Troops: Missile troops interspaced with other footmen forming a defensive line may "refuse" combat and move back 3" out of melee range. However, if the other footmen who are meleed are killed or driven away, the missile troops must fight if the attacker is able to continue his charge move.
Melee Resolution: After both players have rolled the number of dice allotted to them for their meleeing troops by the Combat Tables, casualties are removed, and morale for both opponents is checked.
Miscellaneous Melee Information:
- Missiles cannot be fired into a melee.
- All types of troops are considered to control the space 1" on either side of themselves to stop infiltration.
- Units within 3" of a melee may be drawn into it if the player to whom they belong so desires. However, the unit that joins a melee cannot have been moved over one-half of its normal movement during that turn. The unit joining the melee may move up to 6" into battle.
Retreat and Rout: Troops forced back in retreat or rout, with backs to the enemy, must remain unmoved on the following turn while they rally. If they are attacked while rallying a die must be rolled in order to determine if they manage to quickly rally or continue to retreat or rout. If they fail to rally when attacked, casualties are suffered by them, while the enemy will take none in return (the attacker only rolls dice on the Combat Tables). A score of 1-2 is required to rally when attacked.
Continued Retreat or Rout: If a retreated or routed unit is forced or voluntarily continues to move they must be diced for in order to rally them in later turns. If the required score is not made the unit must immediately be moved again, another turn of movement noted on their records, and they must check again on the following turn. Any unit that retreats or routs off the table is removed from play for the remainder of the game.
| Turn of Retreat or Rout | Die Score to Rally |
|---|---|
| 1st | Automatic on next turn if not attacked |
| 2nd | 3-6 |
| 3rd | 6 |
| 4th | Automatic removal from play |
Post Melee Morale
- The side with fewer casualties determines the positive difference between their losses and those suffered by the enemy. This number is multiplied by the score of a die roll and the total noted.
- The side with the greater number of surviving troops who were involved in the melee determines the positive difference between his survivors and enemy troops who were involved in the melee, counting by type, and multiplying each by the following "Morale Rating" factors:
| Troop Type | Morale Rating Factor |
|---|---|
| Peasants | 3 |
| Light Foot and levies | 4 |
| Heavy Foot | 5 |
| Light Horse | 6 |
| Armored Foot, Janissaries | 7 |
| Medium Horse, Landsknechte | 8 |
| Heavy Horse, Swiss Pikemen | 9 |
Note: the printed rulebook numbers this list 1, 2 and then 4; no step 3 is printed, although step 4 refers to "steps 1-3". The text is transcribed as printed.
- Both sides total the scores arrived at in steps 1-3 above, and the side with the lower total reacts as follows:
| Difference | Result |
|---|---|
| 0-19 | Melee continues |
| 20-39 | Back 1/2 move, good order |
| 40-59 | Back 1 move, good order |
| 60-79 | Retreat 1 1/2 moves* |
| 80-99 | Rout** |
| 100 | Surrender |
* Retreat is done immediately, backs to enemy. ** Rout is done immediately, backs to enemy.
For melees involving less than 20 troops per side double all totals. Example: 10 Heavy Horse attack 20 Heavy Foot, kill 8 and lose 2 of their own number. The Heavy Horse score 6 (times a die roll) for greater kills (8 minus 2 or 6). Assume a die roll of 3, times 6, totals 18. To this the Heavy Horse add a morale rating of 9, times their 8 survivors, or 72. The entire scoring for the Heavy Horse is 18 (for greater kills in melee) plus 72 (morale rating), total 90. The Heavy Foot have more survivors, so they score 4 (12 minus 8), plus morale rating of 5 multiplied by their 12 survivors, equals 60. The entire scoring for the Heavy Foot is 4 (for 4 survivors more than the opponents) plus 60 (morale rating), total 64. Thus, although the Heavy Horse won the melee, having 26 more points than the Foot scored, the infantry are only forced to fall back 1/2 move in good order.
Flank Attack: Units attacking from the flank are at the next higher class, i.e., Heavy Foot equals Armored Foot and Heavy Horse equals +1 on each die.
Rear Attack: Units which attack from the rear deliver casualties without receiving any in return. In addition, such troops receive the bonus stated above for Flank Attack.
Melee Optionals for Added Realism
Prisoners: Before the losing side falls back from a melee, both players roll a die to determine if any prisoners are taken from the losing side. If the loser is retreating or routing back his unit automatically loses either 1 prisoner (retreat) or 2 prisoners (rout), regardless of the further outcome of the dice score.
| Winner | Loser | Winner's Die | Loser's Die |
|---|---|---|---|
| Foot | Horse | Positive difference used | |
| Horse | Foot | Both dice added together | |
| Foot | Foot | Number rolled | Not used |
| Horse | Horse | Number rolled | Not used |
| Mixed | Mixed | Number rolled | Not used |
Swiss, Landsknechte, and Turks will take no prisoners. Count prisoners as additional kills.
A guard of 1 man per 5 prisoners must be maintained at all times, or prisoners escape. Escaped prisoners may fight normally on the turn following escape.
Impetus Bonus: Heavy Foot, Armored Foot, and all Horse units receive Impetus Bonus when they charge into melee across smooth, level terrain, or down moderate slopes. Such troops add an extra die to their normal number shown on the Combat Tables.
Cavalry: When standing, Horse will defend normally but will return casualties at the next lower category, i.e., Heavy become Medium, Medium become Light, and Light return casualties as if they were Armored Foot. This does not apply after the first round of a melee. Standing Horse are defined as: A) Cavalry not ordered to move on the turn it is attacked when simultaneous movement is used, and B) Cavalry not moved during the turn melee was originated, or not moved on the turn previous to melee and meleed before being able to move on the succeeding turn, when move/counter-move is being employed.
Hedgehog: Only Swiss and Landsknechte pikemen can form a hedgehog. If ten or more of these troops are in a square-type formation, pikes or pole arms facing outwards in all four directions, a "hedgehog" has been constituted. A hedgehog can be moved at one-half speed. It may never charge. A Hedgehog will never be drawn into neighboring melees. It may be attacked only by troops armed with like weapons (pikes or pole weapons).
Morale
Instability Due to Excess Casualties: When casualties from any and all causes exceed a certain percentage of a unit's original total strength, morale for that unit must be checked by rolling two dice. If the loss is brought below the set percentage by missile fire, the unit must check before the melee portion of the turn. If the loss is brought about by melee, the unit must check morale after melees have been completed for that turn. If the unit remains stable, it need not again check morale until such time as it suffers losses to the stated percentage of its original strength, but at that time it must be removed from the table for the remainder of the game.
Loss Table:
| Unit Type | Casualty % | Score to Remain |
|---|---|---|
| Light, peasants or levies | 25% | 8 or better |
| Heavy Foot | 33 1/3% | 7 or better |
| Elite Heavy Foot, Armored Foot, Mongols | 33 1/3% | 6 or better |
| Med. Horse (not Kts.) | 33 1/3% | 7 or better |
| Swiss Pikemen | 50% | 5 or better |
| Heavy Horse, Norman Knights | 50% | 6 or better |
| Mounted Knights | 50% | 4 or better |
Any unit that fails to make the required score to remain in battle is removed from play immediately unless no route of retreat is open to it. Surrounded units that fail morale checks are assumed to immediately surrender.
Swiss/Landsknechte Pike Charge: Because of the reputation and ferocity of these troops, an enemy charged by Swiss or Landsknechte pikemen (other than like troops) must roll two dice and consult the Loss Table, just as if they had suffered excess casualties. However, if the unit being attacked fails to score high enough it is not removed from play; rather, it retreats 1 1/2 moves, backs to the enemy, and must rally. If they are followed up by pikemen before they rally, the unit is totally eliminated. Note: The charging pike formation must be eligible to receive "mass shock" dice (at least 10 figures in 5 x 2 formation) in order to force enemy units to check morale.
Cavalry Charge: In order to withstand a charge by mounted men, the defending unit must check morale. Fear of the charge was usually more dangerous than the impact of the cavalry. Units that fail to score the required total retreat 1 1/2 moves, back to the enemy, and must rally. If both units are charging, both must check morale, adding 1 to the dice score if Foot, and two to the dice score if Horse.
| Defending Unit | Light (attacker) | Medium (attacker) | Heavy (attacker) |
|---|---|---|---|
| Peasants | 9 | 10 | 11 |
| Light Foot, levies | 8 | 9 | 10 |
| Heavy Foot | 7 | 8 | 9 |
| Elite Heavy Foot, Armored Foot | 6 | 7 | 8 |
| Light Horse | 5 | 6 | 7 |
| Medium Horse | 4 | 5 | 6 |
| Heavy Horse |
Swiss and Landsknechte armed with pikes or pole arms facing the enemy automatically stand any charges.
Units charged in the flank deduct 1 from the dice score; units charged in the rear deduct 2 from the dice score.
Historical Characteristics (Optional)
Organization
Historically, units of differing types were not mixed until the emergence of "pike and shot" during the Renaissance. (Barbarian types, such as the Vikings, were somewhat of an exception, for their bands contained a sprinkling of archers.) Although Light Horse may be brigaded with Medium, or Medium with Heavy, other types of troops cannot be intermixed, and even different units of like types of troops should not be joined. Units that become intermixed in a melee will require one full turn to separate and reorganize. Units reorganizing are considered to be the same as units forced to retreat for purposes of Melee.
Knights
Feudal Knights were ill-disciplined and generally refused to take orders from anyone--even their liege lord. However, they were exceptionally brave. Whenever Knights come within charging distance of an enemy they will charge regardless of any orders, unless a 6 is rolled on an "obedience die," and regardless of any such roll if they can see other friendly troops moving towards the enemy, or attacking, they will charge or move towards the enemy if unable to charge. If more than one type of enemy troops are within charging distance the order of precedence that the Knights will follow is:
- Other Knights
- Any other mounted troops
- Baggage or missile troops firing upon them
- Armored Foot
- Missile armed troops
- Artillery or siege equipment
- Heavy Foot
- Light Foot, peasants, or levies
- Pike armed troops
Peasants
Often dragged into battle, these unwilling warriors were usually very unreliable, and poor fighters in the bargain. In a melee they will fight as Light Foot, but the problem is to get them to fight. (Usually the poor peasants stood around until the Knights decided the battle, and the peasants on the losing side were then cheerfully butchered by the winners.) Two dice must be rolled for every peasant unit before they will do anything:
- To move: score 7 or better.
| Enemy Unit | To Attack | To Defend Against |
|---|---|---|
| Peasants | 4 | 5 |
| Light Foot, Levies | 6 | 6 |
| Heavy Foot | 8 | 7 |
| Armored Foot, pikes | 9 | 8 |
| Light Horse | 10 | 9 |
| Medium Horse | 11 | 10 |
| Heavy Horse | 12 | 11 |
Peasants that fail to attack must stand unmoved. If they fail to defend, they are treated as if they lost a melee and had routed.
Levies
These units were local citizenry, watch, militia and the like, who were occasionally drilled and called to arms in times of trouble. They were used most often by the Italians and Flemish--in fact, the Flemish pikemen were good fighters if properly supported by cavalry, but it was hopeless for them to take the field without such support. As they were citizen soldiers, they were poorly trained, half-disciplined, and fought in masses. Their chief arms were long spears, various pole weapons, or pikes. Levies should be treated as Heavy Foot unless otherwise stated. The Flemish add 1 to dice scores when checking morale.
Mercenary Troops
Practically any kind of troops can be designated as mercenaries. For example, an army that normally would be unable to field a body of pikemen could do so by opting to hire a formation of mercenary pikemen. The trouble is that these troops are likely to change sides at the drop of a hat (full of silver, naturally). Before each turn a die must be rolled to see what they will do. If a 1 is rolled they merely stand still that turn, doing absolutely nothing (except defending themselves if attacked). If a 2-5 is rolled they will obey orders. If a 6 is rolled, a second roll must immediately be made:
| Die Score | Result |
|---|---|
| 1 | More pay! Stand still, no attacking or movement |
| 2-3 | March off board (things aren't going well at home, they say) |
| 4-5 | Bribed! March to join the enemy (as soon as they reach the enemy lines they turn and may attack you) |
| 6 | Carry out orders normally for the next three moves, no die checks required during that time. (You're really a winning personality) |
Once engaged in melee it is not necessary to check mercenaries until after the melee is concluded.
English Longbowmen
These troops carried long stakes which they would firmly set into the ground once they had taken up position in order to inhibit or prevent cavalry attacks. Longbowmen in position for two complete turns are therefore considered to have planted their stakes. Any cavalry attacking them from the front must roll a die for each figure in its front rank, 4-6 indicating the horse is impaled and the rider slain.
Scots Infantry
Scottish infantrymen were armed with exceptionally long spears (almost pikes) and could form massed circles, schiltrons, which in most respects are treated as Swiss/Landsknechte pike formation. The primary difference in the Scottish formation is that it is unable to move. Cavalry armed with lances may attack at even odds (i.e., each attacker and defender rolls one die, 6's killing). A schiltron requires the same amount of time to form as a column.
Saracens
All Saracen footmen are light troops, and a high percentage are armed with short bows (15" range). Saracen cavalry are predominantly light, but their elite units are medium. They will take no prisoners from "religious" orders of knighthood (Templars and Hospitallers).
Religious Orders of Knighthood
Such troops will never surrender, and when Morale results call for such they will fight on normally. They receive a +1 on all Morale dice due to their elite nature.
Army Commander
Generally speaking, most of the troops looked to their leader for moral support and would fight harder when he was nearby (probably in hopes of recognition and reward). If the figure representing the army commander is with a body of troops, that unit will add 1 to the score of each die it must roll (two dice adds 2). However, the army commander will suffer the same fate as that unit should it fail to make a required score. Any unit within 1 1/2" of the army commander will also receive a bonus of 1 to the score of any die or dice roll it must make. The army commander will automatically rally any unit it joins, but if he leaves that unit before having stayed with it three complete turns, it will return to its former unrallied status. If the army commander is killed or captured, all units on that side must check morale as if they had taken excess casualties, and at a minus 2 from the dice.
The army commander will always be the last figure killed in a unit, regardless if by missile fire or in melee.
Mercenaries are not affected in any manner by the army commander.
Baggage
Loot was usually foremost in the thought of the medieval soldier. Assume that each side has a baggage camp just behind their base line or point of entry onto the table. Both sides secretly indicate on a map a 6" area which will be the path to the baggage camp. Whenever an enemy unit comes within one normal move of this area, the enemy player must inform his opponent that the unit has the baggage. On the next turn the unit will move off board to loot, prevented from doing so by enemy troops (either attacking it or blocking the path). When an enemy unit is looting the baggage, all friendly units within a normal move of the path to the baggage camp will also move off board to prevent the pillage. All such units (friendly and enemy) remain out of play for the remainder of the game, unless a separate action is fought involving them. In the latter case survivors may return to the original game. Of course, baggage can be brought on board.
Weather (Optional)
If the kind of weather has not already been established, roll a die, and the result indicates the prevailing conditions; check by rolling die on even turns.
| Die | Clear (1-3) | Cloudy (4-5) | Rainy (6) |
|---|---|---|---|
| 1 | Excess heat* | No change | Light rain |
| 2 | No change | No change | Light rain |
| 3 | No change | Clears (weather moves to Clear column) | Cloudy (weather moves to Cloudy column) |
| 4 | No change | No change | Cloudy |
| 5 | No change | No change | Hard rain |
| 6 | Cloudy (weather moves to Cloudy column) | Rain (weather moves to Rainy column) | Hard rain** |
* Fatigue doubled, greater chance of fire in dry grass or woods if dry. (Applies only in summer season.)
** Three turns of hard rain brings mud, reducing movement by 1/2.
Weather moves to the column indicated by the direction of the arrow.
Sieges
At best, sieges are difficult to handle. The following rules will be helpful in conducting such a game, and it is suggested that they be used in combination with the rules for man-to-man combat.
Targets and Defense Values
| Target | Point Value |
|---|---|
| Bastions and round towers | 40-60 |
| Gatehouses, square towers, and gates | 30-45 |
| Curtain walls and stone buildings | 25-40 |
| Ramparts and earth-filled gabions | 20-30 |
| Wooden structures and palisades | 5-15 |
| Cannons and large catapults | 5 |
| Small catapults and movable mantlets | 3 |
Weapons and Attack Values
Each type of weapon destroys a certain number of defense points, and as soon as all defense value is gone the target is destroyed.
- Bombard: 6 points
- Heavy Field Gun: 4 points
- Light Field Gun and Large Catapult: 3 points
- Small Catapult: 2 points
As is observable from the above, bringing down the walls of a castle will be a long and perhaps perilous task, for the defender will have ample time to organize and conduct many forays and raids before his defenses collapse.
Bombards: During sieges, bombards may be used as high angle of fire weapons, so when firing treat them much as you would a catapult, being able to shoot over walls, and with a hit area equal to that of a large catapult when it fires indirect.
Siege Towers, Covered Rams, etc.: Each of these pieces of equipment moves 1" per turn for every two men pushing, with a maximum movement of 4" per turn with eight men pushing. Such equipment cannot be moved across ditches or moats unless they have been filled in.
Siege towers will accommodate 5 assault troops on the drawbridge story and 3 on the top deck. Up to 5 figures per turn can climb the ladder from the ground to the upper decks.
Covered war machines with rams, picks, or screws will do 2 points of damage to their target for every turn they are against it. The defender may disable such war machines (assume ram-catchers and the like) any turn during which they are in operation, and he rolls a 9 or higher with two dice.
Movable Mantlets: Mantlets can be moved 3" per turn for every man pushing, with a maximum movement of 6" (two men pushing). Each movable mantlet will provide full cover for up to three footmen. One missile figure can fire through the slit of the mantlet without being exposed; additional missile troops firing from behind the same mantlet will only receive protection equal to soft cover.
Ladders: One man carrying a ladder moves at one-half normal speed, and two men can carry a ladder with penalty. However, no charge movement is possible. As the besiegers always had an ample supply of scaling ladders, treat them as indestructible. Three men can climb from the base to the top of a ladder during a turn. Each man that goes to the top of a ladder will have to fight any defending troops within melee range on the wall. If there is no defender, the climbing man may move to a position on the wall, but only far enough to allow successive climbers room to stand at the head of the ladder. All combat is man-to-man.
If the defending troops win any single melee against escalading attackers, a die is rolled to determine if the defenders manage to push the ladder away. A die score of 5-6 succeeds in pushing off the ladder, the second man climbing is considered killed, and the third man stunned for one turn. (See MAN-TO-MAN COMBAT.)
Boiling Oil: "Have some nice hot oil," said the smiling sergeant. When poured from atop a castle wall, flaming oil will sweep a 2" path downward, killing all figures within it; and at the base of the wall the flaming oil will form a puddle 4" wide by 3" deep, which will also kill all figures in its area. It will burn for three turns, preventing any troops from entering the area it lies on. Any wooden structure struck by flaming oil will begin to burn immediately (exceptions: ladders and peak-roofed rams) and must be abandoned next turn. Thereafter, the wooden structure will burn for five turns and then be removed from play as completely destroyed.
Rocks: One of the most effective and easiest defenses against escalading attackers was a large, weighty piece of rock or stone dropped from above onto the heads of the besiegers. A rock dropped down a ladder will kill the first climber, and the second and third men on the ladder must roll a die to see if they survive, 1-3 saving the second and 1-5 saving the third. When thrown down on top of siege equipment and war machines rocks will do 1 point of damage.
Note: Men active on the castle wall can at best claim the protection of soft cover from missiles being fired at them from outside the walls.
Mines and Counter-mining: These operations are only possible to conduct on paper. A third party is necessary to act as judge of the various attempts at mining the walls or counter-mining to prevent it. The attacking player must designate certain numbers of his troops as "sappers" or "miners." While the defender will always know where these men are located, he will not know if they are actually at work on a mine, or merely serving to decoy his counter efforts from a real attempt elsewhere. As battle progresses on the table top, the paper operations should keep pace. Allow the attacker to actually attempt two or three mines, while allowing the defender only one or two counters to them. If counter-mines are at all near to the attacker's mines (say about 6"-12"), the mining attempt fails, and all attacking miners are killed. If a mine succeeds, a 6" wide breach is created wherever the mine strikes the wall.
Breaches: Whenever the walls of a castle are destroyed by artillery, war machines, or mines, a breach is caused. Troops may move through a breach at Rough Terrain speed. The defender may block a breach with abatis in three turns, providing no attackers are within it during that period. Abatis will act as movable mantlets as far as protection and defensive values are concerned. Destroyed abatis may be rebuilt just as original abatis was built. Attackers may tear it down in three uninterrupted turns, but if they are attacked or killed before destroying the abatis they are considered to have done no damage to it.
Man-to-Man Combat
Instead of using one figure to represent numerous men, a single figure represents a single man. Use this system for small battles and castle sieges. When using the Man-to-man combat system all preceding rules apply, except where amended below:
Melee: When two figures are within melee range (3"), one or several blows will be struck. The order of striking depends upon several factors. The man striking the first blow receives a return blow only if he fails to kill his opponent.
1st Round: First blow is struck by:
a) the attacker, unless b) the defender has a weapon which is two classes higher, or c) the defender is fighting from above (castle wall, rampart, etc.).
2nd Round and thereafter: First blow is struck by:
a) the side which struck first blow previously, unless b) the opponent has a weapon which is two classes lower, or c) the opponent is fighting from above.
Men attacked from the rear do not return a blow on the 1st round of melee and automatically receive 2nd blow position on the 2nd round of melee. Men attacked from the left flank automatically receive 2nd blow position on the 1st round of melee.
- For non-mounted versus mounted men: add one to the die roll of the mounted man, subtract one from the die roll of the man on foot--1st round only, horsemen add two.
- On the 2nd round of melee the horse as well as its rider attack, the horse counting as the following weapon(s), and able to attack a different opponent than its rider, but only footmen:
- Light: 1 Mace
- Medium: 2 Maces
- Heavy: 2 Flails
- For any man attacking from the rear in melee (after accepting all pass-through and split fire): add one to the die roll of the attacker and give the defender no counter attack.
- a) For any weapon 2 or more classes higher than the attacker the ability to parry does not exist. b) For any weapon 1 class higher to three classes lower than the attacker the defender may parry the blow by subtracting 2 from the attacker's roll, but he has no counter blow. c) For any defender whose weapon is four to seven classes lower than the attacker, the defender has the option to give the first blow OR parry the attacker's blow, by subtracting 2 from the attacker's roll. If the attacker equals the original requirement for a kill the higher weapon breaks the defender's weapon. If the parry is successful, the defender gets one counter blow. d) For any weapon whose class is eight or more classes lower than the attacker, the defender gets the first blow and may parry the second or strike the second. He subtracts one for the parry and a roll equal to the original kill requirement breaks the weapon. (Pikes, spears or lances of the attacker do get the first blow over lower class weapons if there is a charge. Here the length of the weapon prevents the defender, even with his lighter weapon, the ability to get the first blow.)
Melee Table: Note that each weapon listed has a number designating its class. The shorter and lighter the weapon, the lower its class. A man wielding a weapon four classes lower (1 vs. 5, 2 vs. 6, and so on) strikes two blows during every melee round. If a man has a weapon eight classes lower, he will strike three blows during every melee round. (See Appendix B.)
Morale: Generally speaking, defenders in a castle need never check morale. In other cases morale is to be checked when 33 1/3% of an army has been killed. Use the standard morale tables, check by type of troop, and allow any bonuses to dice. For a Cavalry Charge use Combat Tables for 1:20 to determine if a check is necessary; double for flank and/or rear attacks, i.e., 4 Heavy Foot must check if charged by 1 Heavy Horse (8 Heavy Foot must check if attacked in flank/rear).
Jousting
Knights in "friendly" combat, armed with lance and shield, and mounted upon mighty destriers. Each player can operate one or several knights to stage a tourney.
Method of Play: Each player selects an aiming point (his attack) and a position in the saddle (his defense). Note that the aiming point will preclude certain defensive positions in most, but not all, cases. The aiming point of each player is matched against the position of their opponent and the result found. Results can vary from both opponents missing to both being unhorsed, as a study of the Jousting Matrix will reveal. (See Appendix C.)
When results have been determined, one "ride" has been completed. If neither opponent has been unhorsed the procedure is repeated until one (or both simultaneously) opponent is knocked from his saddle, or three "rides" have been completed. The joust is over as soon as either or both opponents are unhorsed or three "rides" have been completed without either party being unhorsed.
Tourneys: To simulate a medieval jousting tourney it is necessary to have teams consisting of several knights each. Score each ride on the following table:
| Result | Attacker | Defender |
|---|---|---|
| Breaks lance | -1 | 0 |
| Helm knocked off | +3 | 0 |
| Injured | 0 | -10 |
| Unhorsed | +20 | 0 |
Although a simple won/lost record will suffice, use of the above table will assure that there will be few ties in the tourney.
Suggested Point Values
| Troop Type | Points |
|---|---|
| Peasant | 1/2 point |
| Levee | 3/4 point |
| Light Foot | 1 point |
| Heavy Foot | 2 points |
| Armored Foot | 2 1/2 points |
| Light Horse | 3 points |
| Medium Horse | 4 points |
| Heavy Horse | 5 points |
Additional weapons costs:
| Weapon | Points |
|---|---|
| Pike | 1 point |
| Arquebus or any crossbow | 1 1/2 points |
| Bow | 2 1/2 points |
| Longbow or composite bow | 4 points |
| Light Catapult or Cannon | 15 points |
| Heavy Catapult or Cannon | 20 points |
| Bombard | 30 points |
Notes:
- Mercenaries cost one-half of the above points.
- Swiss or Landsknechte are all equal to Heavy Foot, plus weapon for Point Value cost selection.
- Traditional composition of historic forces should be kept in mind when selecting armies by Point Value.
Fantasy Supplement
Most of the fantastic battles related in novels more closely resemble medieval warfare than they do earlier or later forms of combat. Because of this we are including a brief set of rules which will allow the medieval miniatures wargamer to add a new facet to his hobby, and either refight the epic struggles related by J. R. R. Tolkien, Robert E. Howard, and other fantasy writers; or you can devise your own "world," and conduct fantastic campaigns and conflicts based on it.
The utilization of varied scales of figures is almost a must for fantastic wargaming, considering that spectacle is an important part of miniature warfare, and doubly so when fighting fantastic battles. This dictates that the scale for man-size be either 30mm or 40mm:
| Type | Man--30mm | Man--40mm |
|---|---|---|
| Hobbits, sprites | 10mm | 20mm |
| Dwarves, gnomes, goblins, kobolds | 20mm | 25mm |
| Elves, fairies, orcs | 25mm | 30mm |
| Balrogs, ogres, trolls | 40mm | 54mm |
| Djinn, dragons, efreet, elementals, ents, giants, rocs | 54mm | 70mm |
Man-sized figures include: ghouls, heroes (including anti-heroes and super-heroes of the "Conan" type), shape changers, wights, wizards, wraiths (including Nazgul, etc.).
Fantastic Characteristics (See also Appendix D)
Hobbits: These little chaps have small place in the wargame, but you may want them for recreation of certain battles. Remember that they are able to blend into the background and so make excellent scouts. They can fire a stone as far as an archer shoots, and because of their well known accuracy, for every two Hobbits firing count three on the Missile Fire table.
Morale Rating: 5. Point Value: (-).
Sprites (and Pixies): These are also small creatures who have the power to become invisible--and remain so in battle! When Sprites attack they suffer no casualties during the first round of melee; thereafter, surprise wears off and the defenders are able to note the minor shadows and air distortions caused by the Sprites. Sprites can fly for three turns (maximum) before landing.
Morale Rating: 3. Point Value: 4.
Dwarves (and Gnomes): Because their natural habitat is deep under the ground, these stout folk operate equally well day or night. Although they are no threat to the larger creatures, Trolls, Ogres, and Giants find them hard to catch because of their small size, so count only one-half normal kills when Dwarves and Gnomes fight with them, for either attacks upon the Dwarves and Gnomes or returns should the Dwarves be the attacker. Goblins and Kobolds are their natural (and most hated) enemies, and Dwarves (Gnomes) will attack Goblins (Kobolds) before any other enemies in sight, regardless of orders to the contrary. However, Dwarves and Gnomes will not have to roll an "obedience die" (as do Knights) to follow orders, i.e., they will not automatically attack, but if ordered to attack, and Goblins (Kobolds) are within charging distance, they will attack the Goblin (Kobold) formation to the exclusion of orders to the contrary.
Morale Rating: 5. Point Value: 2.
Goblins (and Kobolds): Goblins and Kobolds see well in dimness or dark, but they do not like bright light. When fighting in full daylight or bright light they must subtract 1 from their Morale Rating, as well as 1 from any die rolled. Because of their reciprocal hatred, Goblins (Kobolds) will automatically attack any Dwarves (Gnomes) within charging distance.
Morale Rating: 5. Point Value: 1 1/2.
Elves (and Fairies): Armed with deadly bows and magical swords, Elves (and Fairies) are dangerous opponents considering their size and build. They can perform split-move and fire, even though they are footmen. When invisible, Elves (and Fairies) cannot attack--or be attacked unless located by an enemy with the special ability to detect hidden or invisible troops--but they can become visible and attack during the same turn. Those Elves (and Fairies) armed with magical weapons add an extra die in normal combat, and against other fantastic creatures they will perform even better:
| Versus | Effect |
|---|---|
| Goblins | Add 3 dice to Combat Tables |
| Orcs | Add 2 dice to Combat Tables |
| Hero-types | Fantasy Combat Table, score 9 |
| Super Heroes | Fantasy Combat Table, score 11 |
| Wizards | Fantasy Combat Table, score 10 |
| Wraiths | Fantasy Combat Table, score 8 |
| Wights | Fantasy Combat Table, score 6 |
| Lycanthropes | Fantasy Combat Table, score 9 |
| Ogres | Fantasy Combat Table, score 7 |
| Balrogs | Fantasy Combat Table, score 12 |
| Giants | Fantasy Combat Table, score 10 |
(See rule for Magical Weapons.)
Morale Rating: 6. Point Value: 4.
Orcs: Besides reacting to light in the same manner as Goblins do (after all, Orcs are nothing more than over-grown Goblins), Orcs are quarrelsome and factious. According to the best authority, there are at least five kinds (tribes or perhaps clans) of them. These are: 1) Orcs of the (Red) Eye, 2) Orcs of Mordor, 3) Orcs of the Mountains, 4) Orcs of the White Hand, and 5) Isengarders. It can therefore be assumed that if there are two or more units of Orcs, they will be from differing bands. If Orcs of different kinds approach within a charge move of each other, and they are not meleed by the enemy, they will attack each other unless a score of 4 or better is rolled on an "obedience die."
Morale Rating: 5. Point Value: 2.
Heroes (and Anti-heroes): Included in this class are certain well-known knights, leaders of army contingents, and similar men. They have the fighting ability of four figures, the class being dependent on the arms and equipment of the Hero types themselves, who can range from Light Foot to Heavy Horse. Heroes (and Anti-heroes) need never check morale, and they add 1 to the die or dice of their unit (or whatever unit they are with). They are the last figure in a unit that will be killed by regular missile fire or melee, but they may be attacked individually by enemy troops of like type (such as other Hero-types) or creatures shown on the Fantasy Combat Table. Heroes (and Anti-heroes) may act independent of their command in order to combat some other fantastic character. When meleed by regular troops, and combat takes place on the non-Fantasy Combat Tables, four simultaneous kills must be scored against Heroes (or Anti-heroes) to eliminate them. Otherwise, there is no effect upon them.
A Hero-type, armed with a bow, shoots a dragon passing within range overhead out of the air and kills it on a two dice roll of 10 or better, with 2 plus 1 on the dice firing an enchanted arrow.
Morale Rating: 20. Point Value: 20.
Super Heroes: Few and far between, these fellows are one-man armies! (Particularly when armed with magical weaponry.) They act as Hero-types in all cases, except they are about twice as powerful. When a Super-hero approaches within his charge movement of the enemy, all such units must check morale as if they had taken excess casualties.
A Super-hero, armed with a bow, shoots a dragon passing within range overhead out of the air and kills it on a two dice roll of 8 or better (7 or better with an enchanted arrow).
Morale Rating: 40. Point Value: 50.
Wizards (including Sorcerers at -1, Warlocks at -2, and Magicians at -3): This class includes Sorcerers and Warlocks. In normal combat, Wizards will fight as two Armored Foot, or two Medium Horse if mounted, and Wizards can handle magical weaponry. However, their chief prowess lies elsewhere. Wizards can become invisible and remain so until they attack, they can see in darkness, they affect friendly and enemy morale as do Super Heroes, they throw deadly missiles, and Wizards cast terrible spells. Wizards are themselves impervious to normal missile fire but if they are struck by a missile from an enemy Wizard they must score 7 or better with two dice to survive. (Adjust all dice scores by the lesser value of weaker magic users.)
Missiles: A Wizard can throw either of two types of missile (select which before play begins). A fire ball, equal in hit area to the large catapult hit area, or a lightning bolt, 3/4" wide by 6" long, with an attack value equal to a heavy field gun, are the two missile types employed. These missiles will destroy any men or creatures which are struck by them, with certain exceptions noted below. Both types of missiles can be thrown up to 24", direct or indirect fire, with range being called before the hit pattern is placed. The center of the fire ball is placed down at the number of inches called. The head of the lightning bolt is placed at the number of inches called, so that its body extends 6" behind it in a straight line from the Wizard who threw it.
| Target | Result of a Hit |
|---|---|
| Hero-types | Saved by a dice roll of 9 or better |
| Super Hero | Saved by a dice roll of 6 or better |
| Wraith | Saved by a dice roll of 7 or better |
| Balrog | Saved by a dice roll of 6 or better |
| Giant | Dice under 5, routs off board; dice under 9, back 1 move; dice 9 or better, no effect |
| Dragon | Drives dragon back 1 move |
| Elemental: Air | Fire drives back 1 move |
| Elemental: Earth | Lightning drives back 1 move |
| Elemental: Fire | Lightning drives back 1 move |
| Elemental: Water | Fire drives back 1 move |
Spells: There are virtually unlimited numbers of spells that can be employed, but the list below contains the major ones used in most fantastic battles. If there are two or more opposing Wizards, and the game is not a recreation of a battle found in a novel, determine which is the stronger magician (by casting dice if necessary). The stronger magician can successfully cast a counter-spell with a two dice score of 7 or better, while a weaker magician needs a score of 8, 9, or 10, depending on his relative strength. A counter-spell fully occupies a magician's powers.
- Phantasmal Forces: The creation of the apparition of a unit or creature for four turns, maximum duration.
- Darkness: Casting increasing gloom over the entire playing area for as long as the Wizard is not attacked. On the turn that the spell is cast light is not affected, on the second turn semi-darkness sets in, and on the third turn it becomes fully dark (only those troops that can see in darkness can then attack and defend). The spell takes the reverse order when ended or countered.
- Wizard Light: The dispellation of darkness in an area extending 24" in all directions radiating from the Wizard casting the spell.
- Detection: A spell which detects either hidden enemies or the use and effect of other magic spells. It will not discover hidden enemies or the type of magic being employed if the opposing Wizard is of greater strength, but the use of magic by the enemy will be revealed.
- Concealment: A spell which will conceal a unit or fantastic creature from all save certain creatures which have the power to detect hidden enemies.
- Conjuration of an Elemental: Wizards can conjure Elementals, but no more than one of each type can be brought into existence. (Note: This does not apply to Djinn and Efreet.) If the Wizard who conjured the Elemental is disturbed (attacked) while the Elemental is still in existence, he loses control of it, and it will then attack the conjurer. An Elemental created by a Wizard who is subsequently killed will attack the nearest figure. Such Elementals must be dispelled by a Wizard or (killed) by combat.
- Moving Terrain: Causing the shifting of vegetation, hills, etc. A spell possible only to a Wizard.
- Protection from Evil: A 12" diameter circle which will keep out all evil fantastic creatures/men.
In order to cast and maintain any spell, a Wizard must be both stationary and undisturbed by attack upon his person.
Number of Spells: The power of the magic user determines the number of spells he is able to manage:
- Wizard: 6-7 spells
- Sorcerer: 5 spells
- Warlock: 4 spells
- Magician: 3 spells
Spell Distances: The distance at which the magic user can continue his spell is also reflected by his power:
- Wizard: Unlimited range
- Sorcerer: 60"
- Warlock: 48"
- Magician: 36"
| Type | Morale Rating | Point Value |
|---|---|---|
| Wizard | 50 | 100 |
| Sorcerer | 40 | 90 |
| Warlock | 30 | 80 |
| Magician | 25 | 70 |
Wraiths (Nazgul, etc.): Wraiths can see in darkness, raise the morale of friendly troops as if they were Heroes, cause the enemy to check morale as if they were Super Heroes, and paralyze any enemy man--excluding all mentioned in the Fantasy Supplement--they touch during the course of a move (not flying). Paralyzed troops remain unmoving until touched by a friendly elf, Hero-type, or Wizard. Touch means either actual contact or coming within 1" of. A Wraith can either move normally or fly, remaining in the air for as many turns as desired. They melee as either two Armored Foot or two Medium Horse, and they are impervious to all save magical weapons or combat by other fantastic creatures.
Morale Rating: 10. Point Value: 10.
Lycanthropes (Shape Changers): The two main types of Lycanthropes are Werebears and Werewolves. The Lycanthrope will bring a number of animals of its were-type with it, and this adds to their fighting ability. If they are fighting inside of, or within 6" of, a wood, other than an Entwood, they will double their melee capability. Lycanthropes attack as four Armored Foot and defend as four Heavy Foot. It takes four simultaneous hits, from either missiles or melee, to kill a Lycanthrope in normal combat. Magical weapons will kill them in a single hit. Lycanthropes can see in darkness.
Morale Rating: 20. Point Value: 20.
Trolls (and Ogres): What are generally referred to as Trolls are more properly Ogres--intermediate creatures between men and Giants. They will fight in formations, and have a melee capability of six Heavy Foot. Trolls (and Ogres) can see in darkness, but suffer no penalty in full light. True Trolls are much more fearsome beasts (see Poul Anderson's THREE HEARTS AND THREE LIONS). Ogres are killed when they have taken an accumulation of six missile or melee hits in normal combat. Elves can kill them with three hits, and Hero-types or magical weapons kill them with a single hit.
True Trolls can only be killed in Fantastic Combat against Hero-types, Balrogs, Elementals and Giants--magical weapons will also kill True Trolls. Use the combat table below:
| Opponent | Dice Score to Kill |
|---|---|
| Hero | 10 or better |
| Super Hero | 8 or better |
| Balrog | 8 or better |
| Elemental | 6 or better |
| Giant | 10 or better |
| Magical Weapon | 8 or better* |
* If used by figure that can kill a true Troll without the aid of a Magical Weapon, adds two to the dice score.
True Trolls always fight alone and need never check morale. They fight as Giants on the Fantasy Combat Table, but only as three Armored Foot when attacking or being attacked by men.
Ogres: Morale Rating 8. Point Value 15.
Trolls: Morale Rating (-). Point Value 75.
Balrogs: A Balrog is truly a terrible opponent. Balrogs cannot be killed by normal missile fire or in normal combat. It inflicts casualties in normal combat as if it were two Heavy Horse. In addition, the Balrog can immolate any normal figure it touches during its move or melee. They operate equally well in darkness or in light. They can fly 15" per turn, and remain airborne for three turns.
Morale Rating: 50. Point Value: 75.
Giants: Giants are one of the most effective fighters. They can demolish normal opponents with ease, for they melee as 12 Heavy Foot with an extra die for their oversized weapons. They defend as 12 Armored Foot, and Giants must take cumulative hits equal to a number sufficient to destroy 12 Armored Footmen before melee or missiles will kill them. Moreover, Giants act as highly mobile small catapults (20 inches), without minimum range restrictions, and they can move on turns they don't throw missiles, for reloading for them simply consists of picking up a boulder to give it a heave. Giants need never check morale!
Morale Rating: (-). Point Value: 50.
Ents (also Trees): Not only are Ents fierce fighters, but they are able to call trees to aid them in combat. If an Ent is within 6" of a tree, he can cause it to move 3" per turn (one-half Ent movement) and fight as if it were an Ent. Ents can move two trees each. Ents melee as six Armored Foot in normal combat, and they are impervious to normal missile fire and melee hits. Ents and their accompanying trees are most subject to flame (this is reflected in the Fantastic Combat Table). Any enemy figure of non-fantastic type that is in melee range of the Ent (or tree) may attempt to set it afire, and certain fantastic types may also do so. Goblins, Orcs, and men need a two dice roll of 10 or better, Hero-types need 9 or better, Super Heroes need 7 or better, and Balrogs need 5 or better.
Morale Rating: 20. Point Value: 15.
Dragons: Dragons are feared everywhere, and with good reason. We will deal here with the great Red Dragon (Draco Conflagratio, or Draco Horribilis) which is typified in Tolkien's THE HOBBIT. Dragons can see equally well in darkness or in light. They cause enemy troops within 15" of them to check morale just as if they had suffered excess casualties. Dragons have the power to detect any hidden or invisible enemies they are within 15" of. They can fly 25" per turn, and remain aloft indefinitely. They melee as if they were four Heavy Horse, being impervious to missile or melee hits in normal combat (see Hero and Super Hero sections for the only exceptions). Their most dreaded weapon is their fiery breath, which is represented by a truncated cone, 1/2" in diameter at the mouth, and 3" in diameter at the far end. The range of the Dragon fire (overall length) is 9". A dragon can fly overhead and belch fire down on its enemies at the end of its move. Dragon fire will kill any opponent it touches, except another Dragon, Super Hero, or a Wizard, who is saved on a two dice roll of 7 or better. Certain Elementals are also impervious to Dragon Fire. After breathing fire three times, a Dragon must land and remain stationary for one turn in order to rekindle his internal fires. Because they are extremely evil and egotistical beasts, Dragons will automatically attack, in order of preference, the following Fantastic creatures (regardless of which side they are on): Dragons, Giants, Balrogs, Rocs, (true) Trolls, Elementals, Ents. Dragons never check morale.
Morale Rating: (-). Point Value: 100.
Other kinds of Dragons can be introduced into games, if a little imagination is used. White Dragons live in cold climates and breathe frost. Black Dragons are tropical and spit caustic acid. The Blue variety discharges a bolt of electricity. Green Dragons waft poisonous vapors--chlorine--at their opponents. Finally, the Purple, or Mottled, Dragon is a rare, flightless worm with a venomous sting in its tail. The Basilisk and Cockatrice are probably best included as Dragons.
Rocs (including Wiverns and Griffins): Against normal troops, Rocs attack as four Light Horse and defend as four Heavy Horse. They require cumulative hits equal to a number sufficient to kill Heavy Horse to be killed themselves. Rocs cause the enemy to check morale as if they were Heroes. Rocs can detect hidden enemies within 48", but they cannot detect invisible creatures. Rocs are able to transport a man-sized figure up to 36" during any turn. Rocs never need check morale. (These equal the "Eagles" of Tolkien's Trilogy.)
Morale Rating: (-). Point Value: 20.
Elementals (including Djinn and Efreet): In order to bring these creatures into a game, it is necessary that they be conjured up by a Wizard. There are two classes of Elementals, those subject to fire (Air and Water Elementals) and those subject to electricity (Earth and Fire Elementals). Note that fire breathing Dragons will not affect the latter kind of Elementals.
- Air Elementals (including Djinn): Fly 24", attack as four Light Horse, are impervious to normal attacks against them, and add two to their dice roll when combating airborne opponents.
- Earth Elementals: Move 6", attack as four Heavy Horse, are impervious to normal attacks against them, and add 1 to their dice score when fighting earthbound opponents.
- Fire Elementals (including Efreet): Move 12", attack as four Medium Horse, are impervious to normal attacks against them, and add two to their dice score when combating opponents who normally employ fire (Balrogs, Dragons, and Wizards who cast fire balls).
- Water Elementals: Move 6" outside water, 18" in water (must remain within 6" of water at all times), attack as four Light Horse on land and as four Heavy Horse in water. Water Elementals are impervious to normal attacks against them, and they add 2 to their dice score when fighting within or in 3" of a large body of water (river or lake).
Only one Elemental of each kind may be brought into any game in play at the time. If an Elemental is uncontrolled by the Wizard who summoned it, it will attack the Wizard who conjured it, moving towards him in a straight path, attacking any figures in its path.
Morale Rating: (-). Point Value: (-).
Basilisk (Cockatrice): These horrible beasts will turn to stone anyone, except a magic user or a Super Hero (can be saved by a two dice roll of 6 or better), who looks at their face. Any figure that touches or is touched by them must throw to be saved: Hobbits, Dwarves, Gnomes, Goblins, Kobolds, Orcs, Ents, and Giants need 10 or better; all others need 7 or better to be saved.
They do not otherwise attack, and they defend as a Lycanthrope.
They should only be allowed in play under specific circumstances, and not by general selection.
Morale Rating: (-). Point Value: (-).
Chimerae: Under this general heading fall all sorts of beasts such as Griffons, Hippogriffs, Wyverns, etc. Treat them as the most nearly corresponding type of creature covered herein, i.e., Griffon = Roc, Wyvern = Dragon, etc.
Giant Spiders and Insects: The possibilities for employing such creatures are almost endless, and the abilities and weaknesses of each should be decided upon prior to the game they are to be used in. For example, a giant spider might be unkillable by normal men, but will kill them unless they roll a save of 8 or better, and it would combat fantastic opponents as if it were a Lycanthrope.
Wights (and Ghouls): Although they are foot figures, Wights (and Ghouls) melee as Light Horse and defend as Heavy Horse. They cannot be harmed by normal missile fire. Wights (and Ghouls) can see in darkness, and must subtract 1 from any die roll they roll when in full light. If they touch a normal figure during melee, it becomes paralyzed and remains so for one complete turn. A paralyzed figure is considered to be able to strike a blow at the Wight just prior to paralysis taking effect, so melee can occur but only one round.
Point Value: 10.
Magical Weapons
Elves, hero-types, and certain magic users can wield magical weapons. Enchanted weapons are of two kinds, enchanted arrows and magical swords, although Odin's spear and Thor's hammer are properly in the general category.
Enchanted Arrows: These missiles will always hit a normal target, but against fantastic opponents shown on the Fantasy Combat Table they allow the figure employing the weapon to roll two dice, just as if a melee was taking place, and if the score is sufficient, the target is killed. Of course, there is no return roll, unless the target is also armed with a similar weapon. Treat Elves armed with Enchanted Arrows as Hero-types for purposes of missile fire against fantastic targets.
Point Value: 10 per arrow.
Magical Swords: Because these weapons are almost entities in themselves, they accrue real advantage to the figure so armed. In normal combat they merely add an extra die. It is in fantastic combat that Magical Swords are most potent. Besides allowing Elves to combat certain fantastic figures, they give a plus 1 to the dice score when employing the Fantasy Combat Table, and Magical Swords shed a light of their own over a circle 12" in diameter, which dispels darkness--but does not equal full light. Excaliber and other "Super Swords" would give a plus two or three!
Morale Rating: 10. Point Value: 10.
Magic Armor: Subtracts one from opponent's attack dice on Fantasy Table, three on Man-to-man attacks.
Morale Rating: 10. Point Value: 10.
Air Movement
If any number of figures are airborne at one time, it becomes difficult to maintain a side record of their height and course. It is recommended that a number of 36" dowels be set firmly into 2"x4" bases, and flying figures be secured at the proper height in the dowel by use of a rubber band.
Catapult Fire vs. Fantastic Figures
Only the following kinds of fantastic creatures will be subject to catapult fire (including missile fire by Giants): Hobbits, Sprites, Dwarves, Gnomes, Goblins, Kobolds, Elves, Fairies, Orcs, Heroes, Anti-heroes, Wights, Ghouls, Lycanthropes, Ogres, Ents, and Rocs.
Combination Figures
There are certain natural, although rare, combinations. A good example of this is Moorcock's anti-heroish "Eric of Melnibone," who combines the attributes of the Hero-type with wizardry, and wields a magic sword in the balance! Whatever combinations you do decide to use, remember to be careful so as not to make any one too powerful so as to destroy play balance.
Fantastic Sieges
To combine the siege and fantasy sections, use the following:
Dwarves dig twice as fast as an equal number of human sappers. They may attempt 2 more mines or counter-mines than usual.
(Orcs dig 1 1/2 times as fast; one more mine or counter-mine.)
Points of Damage by Fantastic Forces:
- Balrog: 4 points (may inflame any wooden structure; so can Dragons and Fire Elementals)
- Troll: 2 points
- Ogre: 1 point
- Giant: 3 points
- Ent: 2 points (also Ent-controlled trees)
- Wizard: 3 points (fire ball or lightning bolts)
- Earth Elemental: 6 points
General Line-up
It is impossible to draw a distinct line between "good" and "evil" fantastic figures. Three categories are listed below as a general guide for the wargamer designing orders of battle involving fantastic creatures:
| Law | Neutral | Chaos |
|---|---|---|
| Hobbits | Sprites | Goblins |
| Dwarves | Pixies | Kobolds |
| Gnomes | Elves | Orcs |
| Heroes | Fairies | Anti-heroes |
| Super Heroes | Lycanthropes* | Wizards* |
| Wizards* | Giants* | Wraiths |
| Ents | Rocs | Wights |
| Magic Weapons | (Elementals) | Lycanthropes* |
* Indicates the figure appears in two lists.
Underlined Neutral figures have a slight pre-disposition for Law. Neutral figures can be diced for to determine on which side they will fight, with ties meaning they remain neutral.
Appendix A: Combat Tables
Melee casualties are determined by the number of dice listed for each attacker against each defender. Each entry gives the dice per man (or per group of men) and the score that kills.
Light Foot vs:
| Defender | Dice | Kills on |
|---|---|---|
| Light Foot | 1 die per man | 6 |
| Heavy Foot | 1 die per two men | 6 |
| Armored Foot | 1 die per three men | 6 |
| Light Horse | 1 die per two men | 6 |
| Medium Horse | 1 die per three men | 6 |
| Heavy Horse | 1 die per four men | 6 |
Light Horse vs:
| Defender | Dice | Kills on |
|---|---|---|
| Light Foot | 2 dice per man | 5, 6 |
| Heavy Foot | 2 dice per man | 6 |
| Armored Foot | 1 die per man | 6 |
| Light Horse | 1 die per man | 6 |
| Medium Horse | 1 die per two men | 6 |
| Heavy Horse | 1 die per three men | 6 |
Heavy Foot* vs:
| Defender | Dice | Kills on |
|---|---|---|
| Light Foot | 1 die per man | 5, 6 |
| Heavy Foot | 1 die per man | 6 |
| Armored Foot | 1 die per two men | 6 |
| Light Horse | 1 die per two men | 6 |
| Medium Horse | 1 die per three men | 6 |
| Heavy Horse | 1 die per four men | 6 |
Medium Horse vs:
| Defender | Dice | Kills on |
|---|---|---|
| Light Foot | 2 dice per man | 4-6 |
| Heavy Foot | 2 dice per man | 5, 6 |
| Armored Foot | 2 dice per man | 6 |
| Light Horse | 1 die per man | 5, 6 |
| Medium Horse | 1 die per man | 6 |
| Heavy Horse | 1 die per two men | 6 |
Heavy Horse vs:
| Defender | Dice | Kills on |
|---|---|---|
| Light Foot | 4 dice per man | 5, 6 |
| Heavy Foot | 3 dice per man | 5, 6 |
| Armored Foot | 2 dice per man | 5, 6 |
| Light Horse | 2 dice per man | 5, 6 |
| Medium Horse | 1 die per man | 5, 6 |
| Heavy Horse | 1 die per man | 6 |
Armored Foot* vs:
| Defender | Dice | Kills on |
|---|---|---|
| Light Foot | 1 die per man | 4-6 |
| Heavy Foot | 1 die per man | 5, 6 |
| Armored Foot | 1 die per man | 6 |
| Light Horse | 1 die per man | 6 |
| Medium Horse | 1 die per two men | 6 |
| Heavy Horse | 1 die per three men | 6 |
* Men armed with pike or halbard add an extra die.
Swiss/Landsknechte attacking in close formation (5 x 2 figures minimum) fight as Armored Foot, with extra die for weapons. For every two men so attacking an additional "mass shock" die is added. When defending in close order (1" or less apart), with pole arms facing the enemy, they are treated as Heavy Foot. If attacked in flank or rear, or when in open order, they are treated as Light Foot.
All troops formed in close order, with pole arms, can only suffer frontal melee casualties from troops armed with like weapons. While a Knight armed with a lance could attack a halbard formation, he could not attack a formation of pikes.
Appendix B: Man-to-Man Melee Table and Individual Fires with Missiles
Man-to-Man Melee Table. Roll two dice; a score equal to or greater than the number shown kills. The columns are the defender's armor protection type.
| Attacker's Weapon | No Armor | Leather or Padded Armor | Shield Only | Leather Armor + Shield | Chain, Banded, Studded, or Splint Mail | Chain Mail + Shield | Plate Armor | Plate Armor and Shield | Horse No Armor | Horse Barded |
|---|---|---|---|---|---|---|---|---|---|---|
| 1. Dagger | 6 | 7 | 8 | 8 | 9 | 10 | 12* | 12* | 8 | 10 |
| 1. Hand Axe | 7 | 7 | 8 | 9 | 10 | 10 | 11 |
* If man dismounted and prone, dice score of 7 or better kills.
The weapon numbers are as printed (the Dagger and Hand Axe are both labeled "1." in the source, and Pole arms and Halbard are both labeled "9.").
Individual Fires With Missiles. There is a kill by a die roll equal to or greater than the numbers below. The columns are the class of armor worn by the defender (1 through 8) and, for horse, no armor or armored (barded).
| Range | Weapon | 1 | 2 | 3 | 4 | 5 | 6 | 7 | 8 | Horse No Armor | Horse Armored (Barded) |
|---|---|---|---|---|---|---|---|---|---|---|---|
| 15 | Short Bow | 6-7-8 | 6-7-8 | 6-7-8 | 7-8-9 | 8-9-0 | 9-0-1 | 1-2-/ | 2-/-/ | 0-2-/ | 2-/-/ |
| 18 | Horsebow | 5-6-7 | 5-6-8 | 5-6-8 | 6-7-8 | 8-9-0 |
* First number is for close range, second number for medium range, third number for maximum range. Ranges are for maximum range. Ranges are divided in thirds, so a Composite Bow's close range is 1-8", medium range 9-16", and maximum range 17-24". Note: 0 = 10, 1 = 11, 2 = 12, / = inability to kill. Cover subtracts from dice scores.
Appendix C: Jousting Matrix
Aiming point (rows) against Possible Defensive Positions (columns): 1. Lower Helm; 2. Lean Right; 3. Lean Left; 4. Steady Seat; 5. Shield High; 6. Shield Low.
| Aiming Point | 1. Lower Helm | 2. Lean Right | 3. Lean Left | 4. Steady Seat | 5. Shield High | 6. Shield Low | PDP/AP (Possible Defensive Positions considering Aiming Point) |
|---|---|---|---|---|---|---|---|
| Helm | M | M | M | H | U | M | 4-6 |
| DC | U | B | M | B | B | M | 3-6 |
| CP | B/U/I | U | G | B | B/U | U/I |
Key: B - Breaks Lance*; G - Glances Off; H - Helm Knocked Off*; I - Injured; M - Miss; U - Unhorsed.
* Any Knight who breaks his lance or has his Helm knocked off must assume position 4 during the next ride.
The Shield: The shield is divided into Dexter (D), Pale (P), and Sinister (S) columns, and Chief (C) and Fess (F) rows, plus Base. The shield areas are: Chief row: DC (dexter chief), CP (pale chief), SC (sinister chief); Fess row: DF (dexter fess), FP (pale fess), SF (sinister fess); and Base.
Appendix D: Fantasy Reference Table
Move, special ability, charge, fly, missile range, attack and defend values for the fantastic types. Values in parentheses are for mounted Heroes and Super Heroes.
| Type | Move | Special Ability | Charge | Fly | Missile Range | Attack | Defend |
|---|---|---|---|---|---|---|---|
| Hobbits | 12" | A | - | - | 15" | Lt. Ft. | Lt. Ft. |
| Sprites, pixies | 9" | A | - | 18" | - | Lt. Ft. | Lt. Ft. |
| Dwarves, gnomes | 6" | B | 9" | - | - | Hv. Ft. |
Special ability key: A - the ability to become invisible (Hobbits only in brush or woods); B - the ability to see in normal darkness as if it were light; C - the ability to split move and fire; D - the ability to raise morale of friendly troops; E - the ability to cause the enemy to check morale; F - the ability to detect hidden invisible enemies; G - the ability to paralyze by touch; H - the ability to assume the shape of and gather like animals; I - the ability to regenerate the body (trolls only and not required); J - the ability to change to flames and immolate by touch; K - the ability to cause trees to move and fight; L - the ability to transport figures of man-weight; X - the ability to cast fire or similar substances or stones.
* Either Heavy Foot, Armored Foot, Light Horse, etc., depending on arms and situations and can fire missiles equal to the same number of men, vs. regular opponents but only once vs. fantastic opponents.
** Heavy Foot.
Appendix E: Fantasy Combat Table
Roll two dice. Score UNDER total shown means NO EFFECT. Score EQUAL to total means defender must FALL BACK 1 MOVE. Score OVER the total shown indicates that the DEFENDER IS KILLED.
* May withdraw from combat if opponent dice score is NO EFFECT.
@ Note that other magic users are at lesser values.
For combat against men and smaller creatures, as well as special combat abilities, see the section pertaining to each particular type.
Columns are the defender; rows are the attacker. Each cell is the total to beat.
| Attacker \ Defender | Balrog | Dragon | Elemental | Ent (Tree) | Giant | Hero | Lycanthrope | Roc | Super Hero | Troll, Ogre | Wight, Ghoul | Wizard@ | Wraith |
|---|---|---|---|---|---|---|---|---|---|---|---|---|---|
| Balrog | 7 | 11 | 11 | 8 | 8 | 4 | 6 | 1- | 7 | 6 | 4 | 8 | 11 |
| Dragon | 6 | 8 |
Note on the printed table: the Balrog-attacker / Roc-defender entry is printed as "1-" and is transcribed as printed.
Transcription Notes
Text was taken from the Internet Archive scan (OCR layer) and corrected against the page images; the appendix tables were read from the page images. Where the printed book itself is inconsistent (no Post Melee Morale step 3 is printed, and the Appendix E entry is printed as "1-"), the text is transcribed as printed and flagged in-file.