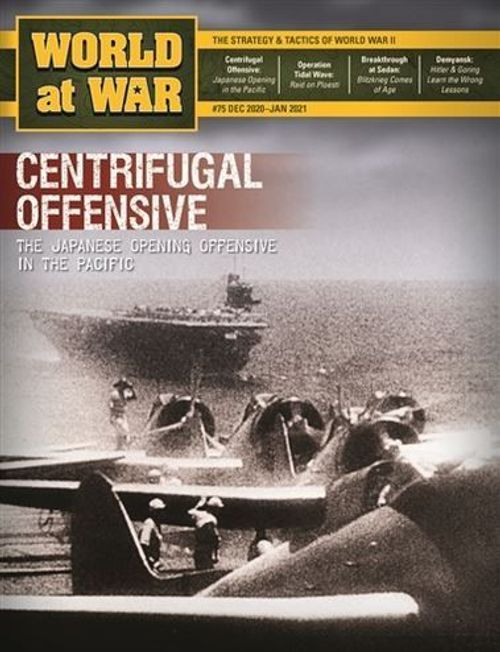
Centrifugal Offensive: The Japanese Campaign in the Pacific, 1941-42
Centrifugal Offensive: The Japanese Campaign in the Pacific, 1941-42 Rulebook
Table of Contents
Table of Contents
- 1.0 Introduction
- 2.0 Components
- 3.0 Victory Points and Victory Fever
- 4.0 Deployment
- 5.0 Sequence of Play
- 6.0 Events
- 7.0 Deployment, Stacking and Movement Restrictions
- 8.0 Actions
- 9.0 Movement
- 10.0 Allied Reaction
- 11.0 Combat
- 12.0 Japanese Reinforcements
- 13. Reorganization
- 14.0 Fog of War
- 15.0 Base Units
- 16.0 Japanese National Territory
- 17.0 Random Location
- 18.0 Unique Units
- 19.0 Allied Operations
- 20.0 Allied Movement
- 21.0 Allied Counterattacks
- 22.0 Allied Reinforcements and Reequipping
- 23.0 Japanese Shock Effect
- 24.0 Event Descriptions
- 25.0 Optional Rules
- Editor's Notes on the Source
1.0 Introduction
Centrifugal Offensive: The Japanese Campaign in the Pacific, 1941–42 is a strategic-level solitaire wargame about the initial campaigns of the Japanese Empire in the Pacific War, from 1941 to 1942. The player commands the Japanese forces, while the Allies are controlled by the game system. The player's objective is to meet the campaign objectives ahead of the original schedule, thereby delaying the inevitable Allied offensive led by the United States. A critical factor in the game is "victory fever". The more the Japanese are winning, the greater the probability that they must reach additional objectives to win the game. Another factor is that the game ends before the Allied counteroffensive in the Solomons, so there are no Allied amphibious operations.
1.1 Game Scale
Most land units in the game represent divisions, brigades and regiments. Air units represent one to three air groups or regiments (three to nine squadrons). The distances between each space on the map vary according to location and strategic importance, from 1,000 down to a few hundred kilometres. Each turn represents one month of operations.
2.0 Components
A complete game of Centrifugal Offensive includes a 22 × 34 inch game map, these rules, and a sheet of 228 counters of 9/16 inch. Players must provide a six-sided die to resolve combat and other random events of the game.
2.1 Game Map
Map errata: The Allied Targeting Priority Table (Allied Targeting Priority Table) is missing the abbreviation TR. Replace AP with TR.
The game map highlights the operational routes of critical strategic importance in the Pacific Ocean and Southeast Asia.
Charts and tables: The charts and tables on the map include the Terrain Effects, the Allied Reequipping Table, the Allied Targeting Priorities and the Japanese Reequipping Table. The Allied Air and Land Reinforcement Deployment Table is on the last page of the rules.
Allied Fleet Reserve box: Represents the Allied naval bases on the west coast of the United States and in the Middle East.
Island chain spaces: ( ) Represent the areas in and around specific island chains of strategic importance.
Initial Japanese Objective Line: ( - - ) Represents the area that the Japanese originally planned to conquer. This affects the functions of the game.
Land Axes: (—) Allow movement between specific land spaces.
Lateral Axes: (- -) Connect certain sea spaces, allowing movement from one operational sea axis to another.
Off-map boxes: Represent preparation and holding areas for various units. Example: the Japanese Reinforcement box.
Operational Sea Axes: (—) These are the lines radiating from Japanese national territory, which allow sea movement between sea spaces, island chain spaces and coastal land spaces. They show the main lines of movement.
Port: Any land or island chain space that has a connecting operational sea axis.
Reaction Range: The dice throws required to generate a possible Allied deployment.
Spaces: Various types of sea, island chain, fortress and land spaces, including Japanese national territory.
2.2 Counters
There are two types of counters: combat units (naval, air and land) and informational markers.
Important: Naval and air units printed with a red movement factor or range are elite units (optional rule 25.5).
2.3 Nationalities and Background
The background colour of a counter corresponds to the unit's nationality and therefore to the side it belongs to during the game. All Japanese units are allied with each other. All Allied units are allied with each other.
2.4 Combat Units
Combat units represent naval, air and land units. Bases represent logistical installations.
2.4.1 Naval Units: Submarines and Surface Ships
There are two broad categories of naval units: submarines and surface ships. If a rule applies to naval units, it applies to both submarines and surface ships. If a rule applies only to submarines or only to surface ships, limit the effect of that rule to that category of naval unit alone. Within the surface ship category are aircraft carriers, surface combat ships and amphibious craft.
The reverse of a naval unit shows the unit's identification, the unit-type symbol and a deployment or reinforcement code.
Deployment code: The setup position for the initial units.
Reinforcement code: Shows the period in which the unit may be available.
- 1941: 1941 reinforcements.
- 1942A: 1942 reinforcements (first wave).
- 1942B: 1942 reinforcements (second wave).
Naval unit types: The naval type is the ship represented by the counter. Ship units represent one or two fleet carriers, divisions of two to four light or escort carriers, two to four battleships, squadrons of four to sixteen destroyers, and a variable number of other ships. The abbreviations for ship types are as follows:
| Carriers | Surface ship types | Amphibious ship types |
|---|---|---|
| CV: Fleet carrier | BB: Battleship | APD: Fast transport |
| CVL: Light carrier | CA: Heavy cruiser | LS: Landing ship |
| CVE: Escort carrier | CL: Light cruiser | TR: Transport |
| AV: Seaplane carrier | CLAA: Anti-aircraft cruiser | |
| DD: Destroyer | Submarine types | |
| SS: Submarine |
Identification of ships and abbreviations: the identification of units refers to their organisation by divisions or squadrons, not to the number of ships.
Japanese:
- CV-1: Akagi, Kaga
- CV-2: Hiryu, Soryu
- CV-5: Shokaku, Zuikaku
- CVL-3: Hosho, Zuiho
- CVL-4: Ryujo
- CVL-CG: Junyo, Shoho
- CVE-1: Taiyo class
- BB-1: Mutsu, Nagato
- BB-2: Fuso, Iuga [sic; probably Hyuga], Ise, Yamashiro
- BB-3a: Hiei, Kirishima
- BB-3b: Hatuna [sic; probably Haruna], Kongo
- BB-Y: Yamato
British:
- BB-Z: Force Z: Prince of Wales, Repulse
Netherlands:
- CL-Nei: Dutch cruiser squadron
United States:
- CV-1: Lexington, Saratoga
- CV-2: Enterprise
- CV-17: Hornet, Yorktown
- BB-1: Arizona, Nevada, Pennsylvania
- BB-2: California, Oklahoma, Tenesee [sic; probably Tennessee]
- BB-3: Idaho, Mississippi, New Mexico
- BB-4: Colorado, Maryland, West Virginia
2.4.2 Air Units
Aviation units (air units) show the silhouette of the general type of aircraft they consist of; otherwise, all air units work in the same way.
Exception: Seaplanes (18.0).
The reverse of an air unit shows the unit's identification, the unit-type symbol and a deployment or reinforcement code.
Important: All aviation unit counters in the game are land-based. The combat factors of aircraft carriers already include the aircraft aboard those ships.
2.4.3 Land Units
NATO-style symbols identify the land units in the game. There are generally two types of land units: mobile and static.
Resistance points: A step or point of resistance is the term describing a unit's capacity to absorb a given amount of punishment (hits) in combat before it is eliminated from the game. Units with combat factors on only one side of their counter require a single hit to be eliminated. Two-step units have combat factors printed on their reverse side. Base units may have up to four steps. Players may increase the strength of bases through certain G-4 operations (8.2).
Important: The strength of a base (in steps) is the number in the centre of the hexagonal symbol on the counter.
Example: A base showing a 3 in the hexagon receives a hit. Remove the counter and replace it with a base showing a 2 in the hexagon. A base with a 2 receives a hit. Flip it so that it now shows the 1.
Mobile units: Mobile units have a movement factor of 1 or more. Players may move and/or transport them.
Static land units: Static units have a movement of 0. Players may not move or transport them.
Types of land combat units: (Symbols shown on the counters.)
Sizes of land units: A symbol above the unit-type symbol indicates the organisational size of each land unit. If these size symbols are in square brackets, they indicate that the unit is a task force.
- XXX: Corps
- XX: Division
- X: Brigade
- III: Regiment
- II: Battalion
2.4.4 Unit Identification
Japanese:
- A or #: Army unit
- AR: Air attack
- BF: Base force
- B: Independent brigade
- BIA: Burma Independence Army
- CF: Combined Fleet
- CG: Covering Group
- Comb: Combined
- IG: Imperial Guard
- K: Kawaguchi Detachment
- Maz: Maizuru
- NSD: Northern Seas Detachment
- R: Reinforcement unit
- Sas: Sasebo
- SNLF: Special Naval Landing Force
- SSD: Southern Seas Detachment
- SXA: Southern Expeditionary Army
- TF: Task Force
- Y: Yamato
- Yokh: Yokohama (seaplane)
- Yoka: Yokosuka
British Commonwealth:
- A: Australian
- RAN: Royal Australian Navy
- ABDA: American, British, Dutch, Australian
- AIF: Second Australian Imperial Force
Other abbreviations (listed in the Spanish text under the same heading):
- BC: Burma Command
- EI: East Indies Squadron
- FEC: Far East Command
- FEF: Far East Fleet
- IC: India Command
- Ind or In: Indian
- NAC: Northern Australia Command
- NZ: New Zealand
- RAAF: Royal Australian Air Force
- Z: Force Z
Netherlands:
- NEI: Netherlands East Indies
United States:
- AC: Allied Command
- ADC: Alaska Defence Command
- AF: Asiatic Fleet
- AVG: American Volunteer Group / Flying Tigers
- B: Bombardment
- CF: Cruiser Force
- LF: Luzon Force
- M: Marines / Marine
- MF: Manila Force
- P: Pursuit
- SF: Reconnaissance Force (seaplane)
- PS: Philippine Scouts (Errata: the counter is marked PD)
2.5 Markers
- Task Force (TF) marker: Players may use this marker to avoid overcrowding the map.
- Battle marker: Used to indicate the place where a battle takes place.
- Event marker: For the Japanese, represents random events; for the Allies, an order.
- Turn marker: Indicates the current game turn on the calendar. The reverse shows whether "Victory Fever" is in effect.
- Action Point marker: Used to keep track of the number of Japanese action points available to the player.
- Victory Point marker: Used to indicate the number of VP accumulated by the player. Use the "+" side if positive, and the "−" side if negative.
2.6 Important Terms and Definitions
Air: Refers to all land-based aircraft units, but not to aircraft carriers.
Amphibious: TR, APD and LS units are collectively called amphibious (short for amphibious craft).
Important: Under certain circumstances, the Japanese side may use DD units as APD.
Container: Any cup or large cup used to draw a counter at random.
Carriers: CV, CVE, CVL and AV units are collectively called carriers.
Force: A force is one or more units that perform an action together. Normally, the units making up a force must begin the action in the same area or space, and then move and/or attack in the same area or space. If a player has more than one unit in an area, they need not use all of them to form a single force. The player composes a force action by action, and the composition is not automatically maintained for future actions or turns.
Operational base: A land space containing an Allied base unit.
Land unit: Refers to all units with a NATO symbol or a base symbol.
Occupy: To have a unit physically within a space.
Random location: Several game actions will require you to determine a location at random (17.0).
Draw at random: When you are told to take a unit or marker at random, you must do so without looking.
Select: To deliberately choose a specific unit or marker.
You: The player.
2.7 Control
The control status of the various land spaces on the map influences the determination of the game winner (3.0), as well as determining which side may use the base facilities (if any) located in them (7.0). No player may control sea spaces; units of both sides may coexist in the same sea space at the same time.
Control of land spaces: Each land space on the map is always in one of the following control states:
- Neutral: Not occupied by land units of either side.
- Japanese control: Occupied only by Japanese land units.
- Allied control: Occupied only by Allied land units.
- Disputed: Disputed land spaces are those occupied simultaneously by land units of both sides.
Important: A disputed or controlled land space passes to the control of the other side at the moment that side becomes the only one with one or more land units in it. The control state of a given land space may change from one side to the other, and may enter or leave the neutral or disputed state any number of times during the game.
3.0 Victory Points and Victory Fever
The Japanese are trying to reach the objectives of the initial offensive faster than they did historically. A victory means you have surpassed the performance of the historical Japanese high command. A defeat means the Allies will win the war within two years. A draw means you have doubled the overall historical strategic result.
3.1 VP Scoring
The Japanese earn victory points (VP) by performing certain actions throughout the game. Record VP on Japan's VP meter. The number of VP at the end of the game will determine whether Japan wins the game. The player must immediately add or subtract VP when one of the following events occurs.
Add the indicated number of VP to Japan's VP meter immediately when any of the following occurs:
- Elimination of Allied units in combat:
- 3: For each Allied CV (carrier) or BB (battleship).
- 2: For each Allied CVL (light carrier) or CA (heavy cruiser).
- 4: For the naval unit of the FEF (Far East Fleet).
- Japanese gain control of:
- 2: Each Fortress space.
- 1: Each other Objective space.
BGG clarification: The Japanese do not earn VP for Truk. VP gains are for fortresses that were not initially controlled. If the Japanese lose control of Truk, they lose 2 VP; if they later lose it and then regain control, the 2 VP are restored.
- Japanese units eliminated that are reequipped and returned to play (on the map or in the reserve):
- 3: For each CV or BB.
- 2: For each CVL or CA.
Subtract the indicated number of VP from Japan's VP meter immediately when any of the following occurs:
- Elimination of Japanese units in combat:
- 3: For each CV, BB or BC (battlecruiser).
- 2: For each CVL or CA.
- Japanese loss of control of:
- 2: Each Fortress space.
- 1: Each other Objective space.
Important: Objective spaces may be added and subtracted several times within the same game turn (GT).
- Allied units eliminated that are reequipped and returned to the reinforcement pool or to the Fleet Reserve box:
- 3: For each CV or BB.
- 2: For each CVL or CA.
3.2 Sudden Death
Japanese sudden death defeat: From Game Turn (GT) 2 onward, the game ends and the Japanese suffer a defeat if, at any time after the first action of GT 2, the total on the Japanese Victory Point (VP) marker is less than zero.
Japanese sudden death victory: From Game Turn (GT) 2 onward, the game ends and the Japanese achieve a decisive victory if, at any time after the first action of GT 2, the total on the Japanese Victory Point (VP) marker is 18 or greater.
3.3 Victory Levels
At the end of the game, the number of points determines the level of victory or defeat that you (the Japanese side) have achieved.
- Victory: 13 VP or more.
- Draw: 7 to 12 VP.
- Defeat: 0 to 6 VP.
3.4 Victory Fever
Normally, the game ends at the end of April 1942 (Turn 5); however, Japanese Victory Fever may extend the game. During each Japanese Victory Fever Phase (5.1), the player must roll three dice and add the result.
- If the result is greater than the current number of VP (Victory Points): there is no effect this turn.
- If the result is less than or equal to the current number of VP: the effects of Victory Fever apply:
- Flip the turn marker to show the Victory Fever side.
- Perform no further checks. Victory Fever remains active for the rest of the game.
Example: The current total of Japanese VP is eight. The player rolls three dice and adds the results to get a total. In this case, the player gets a 3, a 1 and a 2, for a total of 6. Since this is less than the current number of VP, Victory Fever comes into effect.
If Japanese Victory Fever comes into effect:
- Subtract 5 VP from the current Japanese victory level. If the result is less than or equal to zero, set the VP level to one.
- Extend the game by two additional turns (June 1942).
- Add the Japanese special event markers (Operation MI and Operation MO) to the Japanese event pool.
- Add Allied Theatre Reorganization and Allied Surprise Naval Attack to the Allied event pool.
- The Japanese receive one additional AP (Action Point) per turn in accordance with rule 5.2 (3).
Designer's note: The loss of VP from Victory Fever simulates the overconfidence of the Japanese high command after the first round of great victories, which led it to seek a definitive triumph. You gain more time and actions, but you must achieve an even greater victory.
4.0 Deployment
Deploy the units in the order indicated below. Deployment instructions sometimes detail units by their specific type or identification. When a particular unit type includes individual units with different factors, draw at random the exact number of units required.
Important: When a rule refers to a base, the word "base" will include a number in parentheses indicating the strength of the base in steps.
4.1 Length of the Game
Place the turn marker on the December 1941 turn, face up (with the Victory Fever side face down). The game continues until the end of the April 1942 turn, unless Victory Fever is active (3.4).
4.2 Japanese Deployment and Reinforcement Reserve
Deploy the Japanese units following the instructions detailed below. Japanese units not initially deployed on the map make up the Japanese Reinforcement Reserve. See section 12.0 for details on their entry into play.
At the start:
- Indochina: Base (4)
- Formosa: Base (3)
- Okinawa: Base (2)
- Bonins: Base (1)
- Palaus: Base (2)
- Truk: Base (3)
- Marshalls: Base (2)
- Marianas: Base (2)
- Any sea space within the Japanese Initial Objective Line: Naval units SS-1, SS-2 and SS-3.
- Japanese national territory and/or any space with a Japanese base unit: All other land, naval and air units marked "Start" with the reverse side showing.
Exception: Set aside the Siamese and BIA infantry units.
- Available Japanese Bases box: All remaining bases.
Japanese Reinforcement Reserve
- At the start: Place all Japanese units marked "1941" in the Japanese Reinforcements box. See section 12.0 for the instructions for units marked 1942A and 1942B.
Japanese Event Reserve Set aside the Operation MI and Operation MO event markers. They are used only if Victory Fever occurs (3.4). Place the Operation AI marker in the Available Japanese Events box (it will be played on the first turn). Place the remaining ten event markers in the container.
4.3 Allied Deployment and Reinforcement Reserve
Once the Japanese deployment is complete, deploy the Allied forces following the instructions detailed below.
At the start:
- India: Base (3), IC infantry
- Ceylon: Base (3), FEF naval
- Rangoon: Base (2), AVG air
- Burma Road: Base (1), BC infantry, Air 221
- Malaya: Base (1), 3rd Indian infantry
- Singapore: Base (3), 8A infantry, Air 224, Naval BB Z
- Java: Base (2), NEI infantry, NEI air, Naval CL-NEI
- Sumatra: Base (2)
- Borneo: Base (1)
- Luzon: Base (2), LF infantry
- Manila: Base (4), PD infantry, MF infantry, 4th Marine, Air 5P, Air 5B, Naval DD-AF, Naval SS-AF
- Darwin: Base (1)
- Port Moresby: Base (2)
- Rabaul: Base (1)
- Northern Australia: Base (2), NAC infantry, RAAF air, Air 11, Naval CA-RAN
- Pearl Harbor: Base (4), 24th infantry, 25th infantry, Air 14P, Air 18B, Air SF, Naval AV-1, Naval CA-SF, Naval CL-CF, Naval DD-1, Naval DD-2, Naval SS-SF
- New Hebrides: Base (1)
- Samoa: Base (1)
- Wake: Base (2)
- Midway: Base (2)
- Aleutians: Base (2), ADC infantry
- Allied Fleet Reserve box: Naval units CA-1, CL-1, DD-3.
- Pacific Fleet: Place the naval units CV-1, CV-2, BB-1, BB-2 and BB-4 in the container and draw two units at random. Place the drawn units in the Pearl Harbor space. Place the three remaining units in the Allied Fleet Reserve box.
Reinforcement Reserve
- At the start: Place all Allied units marked "1941" on the Allied Reinforcements Board. See section 12.0 for the instructions for units marked 1942A and 1942B.
Allied Event Reserve Set aside the special event markers (Pacific Theatre Reorganization and Allied Surprise Naval Attack). Place all remaining markers in the container.
Important: The game includes an option marker. It is intended for use in future games and/or possible variants; do not use it when playing the standard game.
5.0 Sequence of Play
Game turns (GT) regulate the development of the game. Each GT consists of a sequence of steps, described below. Once a phase, or an action within a phase, has been completed, no part of it may be performed again in any way.
5.1 Turn Sequence Outline
Japanese Player Turn
- Random Event Phase: Draw at random a Japanese event marker (6.0).
- Exception: In GT 1, select the "Operation AI" event and then draw an event at random.
- Japanese Action Determination Phase: Determine the number of Japanese actions for the current game turn (5.2).
- Japanese Action Execution Phase: Perform the actions (8.0) and make the required Allied reaction checks (10.0).
- Important: Victory points must be added or subtracted immediately as dictated by combat actions (3.1).
Allied Player Turn
- Allied Naval Return Phase: Move Allied naval units from the map to the Allied Fleet Reserve box (19.2 Errata).
- Allied Reinforcement Phase: Deploy Allied reinforcements according to rule 19.1. If there are units in the Allied Reinforcements box from a previous game turn due to the Allied Reequipping Phase, deploy them also according to rule 19.2.
- Allied Event and Action Execution Phase: Draw at random Allied event markers according to the Turn Record Track (6.2). For each marker, perform the corresponding Allied action (19.0 and 20.0).
- Allied Counterattack Phase: Perform counterattacks with Allied units (21.0).
- Allied Air Return Phase: Move Allied air units on return missions to their bases (21.1).
- Allied Reequipping Phase: Check all Allied units in the Allied Units for Reequipping box, and increase the strength of base units (22.2 and 22.3).
- Japanese Victory Fever Phase: Determine whether Victory Fever will come into effect (3.4).
- Turn Record Phase: Reset the AP (Action Point) marker to zero. AP may not be accumulated from one game turn (GT) to another. If this is the last turn of the scenario, the game ends and the winner is determined (24.2); otherwise, advance the turn marker one space to the right on the Turn Record Track and begin the next turn.
5.2 Japanese Actions
Use the Japanese Action Track to record the number of AP available.
Determine the number of Action Points (AP) available by adding the following:
- Take the number equivalent to the value of Basic Actions on the Turn Record Track for that game turn.
- Add one for each Japanese-controlled fortress space that contains a base unit (of any force).
- Add one if Victory Fever is in effect.
Example: Japanese actions for GT 1: 4 from the Japanese Basic Actions on the Turn Record Track, +1 for the Truk fortress with a base, +2 special actions from G3 as described in Operation AI in 24.1. Total: 7 actions. Place the AP marker on 7 on the Japanese Actions track and continue with the Japanese Action Execution Phase (5.1).
- Carry out each action individually until it is completed. This does not advance the turn marker.
5.3 Allied Actions
During the Allied Action Phase, use the available event marker to determine the type of actions (if any) that the Allied side will perform in that phase.
- When more than one action is chosen at random, execute them in order (19.0).
- In addition, during the Allied Counterattack Phase, the Allied side may counterattack with units located in the same space as Japanese land units (21.0).
6.0 Events
Important: There are more event markers than turns; this is intended to increase the replayability of the game.
6.1 Japanese Events
During the Japanese Event Phase, you must draw at random one Japanese event marker (including on the first turn). See section 24.1 for explanations of Japanese events.
- You may keep any number of event markers in the Available Japanese Events panel.
- You may decide to implement any number of those events in any order (unless the descriptions of specific events restrict this), or retain them (if the event allows it).
- When playing each event, resolve it before moving on to the next. Certain events grant the Japanese additional actions. Resolve these actions when playing the event.
Example: Play Operation MO and perform two actions on the Central Pacific Axis. Then resume the other actions.
6.2 Allied Events
During the Allied Action and Event Execution Phase, you must draw at random a number of Allied event markers equal to the number shown on the Turn Track. See section 25.2 for explanations of Allied events.
- Allied events will normally grant the Allied actions for the current turn.
- When an event marker is played, it is discarded, retained or returned to the Allied event container as required or permitted by that event.
- You must execute each action before drawing and playing the next one.
- The actions will generate the deployment and/or movement of Allied forces on the map.
- Resolve all combat generated by those actions during the Allied Counterattack Phase.
7.0 Deployment, Stacking and Movement Restrictions
Each unit in the game may be in only one sea or land space at a time.
- Air units may be based at bases or flying a mission over spaces.
- Naval units may only be in spaces that have one or more operational sea axes connected to them.
- Land units may be in any type of land space (Japanese national territory, fortress space, land space, island chain space) or be transported by sea by means of amphibious units.
Important: Truk is both a fortress and an island chain. Treat the space as an island chain for stacking purposes (BGG clarification).
7.1 Stacking
Stacking is the term used to describe placing more than one Allied unit in the same space at the same time.
- Units belonging to the three main categories (land, air and naval) may potentially be stacked together in each land and sea space of the map. They do not count toward the limits of the others.
- The player may stack an unlimited number of units in each space/area, with the following exceptions:
- Base: Each side may not have more than one base unit in a space (of any force) (15.0).
- Naval units: May only be stacked in land spaces if the space contains a port (2.1).
- Air units: Up to five when flying a mission over a space. When on land, up to the limit of the Allied base's strength.
- Important: An unlimited number of air and land units may be stacked in Japanese national territory.
- Land units: For island chains, up to four (in addition to any base). For the sea, they may only enter if transported (and within those limits).
Important: You must respect the stacking restrictions when invading island chains.
7.2 Overstacking Penalty
At the start or end of any Japanese action, if the Japanese side has units exceeding the stacking limit in one or more of the restricted areas described in 7.1, you must eliminate enough units to comply with that limit. Place the eliminated units in the panel of Japanese Units Available for Reequipping.
7.3 Coexistence and Continuing Actions
Island chains: If an amphibious or airborne invasion fails to eliminate all Allied land units in an island chain space, all surviving invading units re-embark on the amphibious units that transported them. If there are not enough amphibious units, select the excess land units and eliminate them. Eliminate all airborne units. This ends the invasion.
Large islands / land spaces: If a Japanese amphibious or airborne invasion fails to eliminate all Allied land units on a large island or land space, all surviving Allied units remain in that space. In the following Allied Counterattack Phase, the Allied land units on the island/land space will automatically perform a counterattack action against the Japanese units (21.0). If the Japanese units survive the counterattack, you may use them to attack in their subsequent Action Phases. This requires an action (and if you perform no action, no combat occurs). Otherwise, Japanese and Allied units may coexist indefinitely.
7.4 Japanese Task Forces
You may use Task Force (TF) markers to reduce congestion on the map. Place the marker on the map and the naval units in the corresponding Task Force panel. The units are considered present on the map for all purposes of the game.
8.0 Actions
Action is the term used to describe the execution of the basic increments of movement and/or combat. Actions may be restricted to one side (as indicated), while most are available to both sides.
Important: You control the actions of the Japanese forces. The Allied operations rules (19.0) dictate the operations of the Allies.
8.1 Types of Actions
There are four basic types of actions in the game.
-
G1: Personnel
-
G2: Intelligence
-
G3: Operations
-
G4: Logistics
-
Normally, an action involves a single force of units in an area or space. Exceptions will be indicated in the description of the action.
-
A single unit or force may potentially perform more than one action per turn if sufficient action points are available to spend.
8.2 Japanese Actions
G1 Actions
- G1-1 Reinforcements (12.0): Roll one die, then draw at random that number of units (from one to six) from the Japanese Reinforcement Reserve. Place those units according to the Japanese reinforcement deployment rules (12.1). If the die result is greater than the number of units in the reserve, there is no additional effect.
- G1-2 Emergency Amphibious or Engineer Replacements: Select a naval TR unit or a land engineer unit from the Japanese Units Under Repair display and deploy it as a reinforcement (no repair is required).
- G1-3 Appeal to Imperial General Headquarters: Draw at random one Japanese event marker. This is in addition to the normal event procedure. You may perform this action at most once per turn.
G2 Actions
- G2-1 Air Reconnaissance: Designate any space containing at least one Japanese base or carrier unit. Examine all Allied units in that space and in adjacent spaces.
- G2-2 Long-Range Reconnaissance: As G2-1, except this action is carried out from a space containing at least one seaplane (AV) or air unit. The range of long-range reconnaissance is three spaces away along all connecting axes from the space containing the AV.
- G2-3 Espionage: Roll one die. If the result is an odd number, examine all Allied units on the map, or examine all Allied units in the Fleet Reserve display. If the result is an even number, there is no effect.
- G2-4 Burma Independence Army: If the Burma Road space is under Japanese control, deploy the BIA unit there.
G3 Naval Actions
- G3N-1 Move a naval unit force: Move one or more naval units up to their movement factor. These units must start in the same space and move together. Units must stop moving at the first space containing enemy naval units. The moving force may start in a space that contains enemy units (or not). You may also move directly from a space containing enemy units to another space containing enemy units, but then you must stop. See 9.0, 10.0 and 15.0 for more detail.
- G3N-2 Move a naval unit force from Japanese national territory to a sea space: As G3N-1. The force may attack at the end of the movement if the conditions for combat exist.
- G3N-3 Move a naval unit force from a sea space to Japanese national territory: As G3N-1. The moving force must stop movement in Japanese national territory.
- G3N-4 Relocate naval unit base: Doubles the movement factor of a naval unit force (per G3N-1). The force must begin and end its movement in spaces containing a Japanese base or in Japanese national territory. The force may not start or enter a space containing Allied naval units, air units or an Allied base. Each movement between spaces along a lateral axis requires the expenditure of two movement factors. The player may transport land units according to the amphibious invasion rule.
- G3N-5 Naval units in a sea space attack an enemy naval force: See 10.0 and 11.0.
- G3N-6 Move naval units from one sea space to another and attack: As G3N-1, but the moving force enters a sea space containing enemy units and then attacks them as part of that same action. The attack must include the participation of all other Allied naval units that were in the space when the moving force arrived (10.0 and 11.0).
- G3N-7 Naval units bombard enemy land units in the same space: See 11.4. If a bombardment is carried out in a disputed land zone, it may not include the participation of Allied land and air units present there.
- Exception: See G-3C Combined Actions.
G3 Air Actions
- G3A-1 Relocate air units from one Allied base to another Allied base: Move a force of air units a distance of up to twice the range of the air unit with the lowest range factor. The take-off and landing bases may be in disputed zones. The take-off and landing zones must contain bases with sufficient capacity, and/or be Japanese national territory (Japanese national territory has unlimited capacity). Forces that relocate may not engage in combat as part of this action.
- G3A-2 Land-based air attack against land and/or air units in a land space: Move a force of base-supported air units from any space to any land space within its range, and then attack the enemy land and/or air units found there. If Allied air units are already in that target zone, they may join the attack. At the end of the action, land the air units. Do not combine this action with a carrier attack.
- G3A-3 Land-based air attack in a sea space: Move a force of base-supported air units from any space to any sea space within its range, and then attack the enemy naval units found there. At the end of the action, land the air units. Do not combine this action with a carrier attack.
G3 Land Actions
- G3G-1 Move land units by land movement: Move one or more Allied land units in any space to any adjacent zone along a land axis. This may include movement from and/or to zones containing enemy land units.
- G3G-2 Move land units to an adjacent space containing enemy units and attack: As G3G-1. At the end of its movement, the moving force attacks the enemy land units in the space it moved into. If Allied land units are already in that space, they must join the attack. See section 11.0 for more detail.
- G3G-3 Land force in a land space attacks a force in that same space: Designate a land space containing Allied and enemy land units. Begin an attack using all Allied mobile land units. (Bases do not attack.) See section 11.0 for more detail.
- G3G-4 Airlift an airborne land unit from one Allied base to any other Allied base: Select a Japanese airborne land unit located in the same space as a Japanese base or in Japanese national territory. Move it up to a maximum of six spaces to any other space that has a Japanese base or to Japanese national territory. Such zones may be disputed at the time of movement, and may also include, in either direction, Pearl Harbor. Moving units may not initiate combat as part of this action.
- G3G-5 Airborne assault: Carry out this action with a Japanese airborne unit. Carry it out in the same general way as G3G-2, except that the airborne unit lands in any land space up to three spaces away (no base is required in the landing zone). If the landing space is occupied by the Allies, the airborne unit must attack those enemy units as part of that same action. If Allied land or air units are already in the space, they may take part in the attack. You may also carry this out as a G3 Combined Air-Land Attack.
G3 Combined Actions
- G3C-1 Combined land-air attack: Move or already position land units in a space and carry out an attack with them. Add to the attack any force of air units within range, under a land-based air attack action (G3A-2 and G3A-3). The player may use this to support an airborne assault (G3G-3).
- G3C-2 Combined naval/land amphibious invasion: This is the same as G3N-9, plus landing a land force transported by amphibious units (Amphibs) in the same land space. Carry out an attack against the enemy land units in that space (11.0). The amphibious force may have moved as part of this same action or have started in the assaulted space. It may also include Allied land units already in the space. You may include Allied naval units located in the same land or island chain space as the invading land units to carry out a bombardment (G3N-7). You may add a force of air units that can fly to the space or that are already in it (per G3A-2 and G3C-1).
- Important: The space in which the amphibious invasion is taking place may not contain any enemy naval units.
- BGG clarification: Transport units may move and then attack. In addition, other units of the same force may move with them (although non-transport units may not attack in this action).
- G3C-3 Combined naval-air attack: As G3N-5 or G3N-8, and adds to the attack a group of air units within range. Allied air units may not take part.
- G3C-4 Combined airborne/land attack: As G3G-2, G3G-3, G3G-5 or G3C-2, but moves an airborne unit within range to take part in the land attack.
G4 Logistics Actions
- G4L-1 Build bases: For any or all spaces with a Japanese amphibious or engineer unit that do not contain a Japanese base: place a level-1 base in the zone. For more detail, see section 15.0.
- G4L-2 Increase the strength of a base: For any or all spaces with a Japanese amphibious or engineer unit that contain a Japanese base, increase the base by one level (up to the maximum). For more detail, see section 15.0.
- G4L-3 Reequip naval units in the reequipping box: See section 13.0.
- G4L-4 Reequip air units in the reequipping box: See section 13.0.
- G4L-5 Reequip land units in the reequipping box: See section 13.0.
- G4L-6 Rebuild a reduced land unit: Designate Japanese national territory or a land space containing a Japanese base and reduced Japanese mobile land units. In the case of Japanese national territory, flip all reduced units to their full-strength side. In other land zones, flip to their full-strength side a number of reduced units equal to the level of the base unit.
- G4L-7 Administrative naval movement: Move any or all naval units that begin in Japanese national territory or in a space with a Japanese base according to rule G3N-4. The units must end the movement in the same space as the Japanese base units. As a special case, the units may move separately and end in different spaces. They may not move to spaces containing naval units, air units or an Allied base.
- G4L-8 Administrative air movement: Move any air unit that begins in Japanese national territory or in a space with a Japanese base according to rule G3A-1. As a special case, the units may move separately and end in different spaces. They may not move to a space containing naval units, air units or an Allied base.
9.0 Movement
Movement takes place between contiguous spaces. Units move from one space to an adjoining one across connecting axes. Units may move by land and sea axes (continuous lines), and across lateral axes (dashed lines).
Movement costs: Units pay a movement factor (MF) to move from one space to an adjoining one across land or sea axes (continuous lines). It costs a unit its full MF to move from one space to an adjoining one across a lateral axis (dashed lines).
Example: From Manila to Palau.
Designer's note: The cost of moving across lateral axes reflects the command and logistics requirements of changing the operational focus.
Units that move across lateral axes may also attack at the end of the movement if other rules permit them to. This rule includes airborne movement (18.0).
9.1 Forces and Movement
Designate the units that you will move together as a force under the restrictions of rule 8.0. All units forming a moving force must begin their advance already in the same zone or space. Once a force moves, the units of that force must remain together throughout that action. The units of a force may not take different directions or separate along the way.
Important: Events dictate Allied movement.
9.2 General Movement Restrictions
Naval units: May only move to spaces connected by sea or lateral axes, including Japanese national territory. They may remain at sea for an unlimited time.
Example: A naval unit may enter Singapore, but may not move directly from Singapore to Malaya, since that is a land axis. A naval unit may never occupy the spaces of Siam, the Burma Road or India, since these spaces have no connecting sea axis.
Air units: May move to sea spaces, land spaces and (Japanese units only) to Japanese national territory. Eliminate air units if they cannot land at an Allied base after completing an action.
Land combat units: Are placed in land spaces, in Japanese national territory (Japanese units only) or together with the naval units transporting them. They may move by a land axis or by amphibious transport.
Base units: Are placed in land spaces or island chain spaces. The player may not move or transport bases.
BGG clarification: Allied land units may only move along land axes, not naval ones.
9.3 Movement of Naval Units
Naval units may move in a single action up to the number of sea spaces indicated by the MF printed on their counters. Each sea space entered along a sea axis costs one MF. Naval units must stop their movement for that action at the moment they enter a space containing any enemy naval unit.
9.4 Naval Units, Land Spaces and Ports
Any land space or island that has a connecting sea axis (—) is a port. The player may carry out certain logistical support actions for naval units that are in a port with an Allied base unit.
Important: See the rules for Event AI, which is played automatically in game turn 1 (GT 1) (24.1).
9.5 Air Units
Air units may only operate from land or island chain spaces containing Allied bases, or from off-map bases (that is, Japanese national territory). They may fly over sea and land spaces, and attack targets in both.
9.5.1 Carrier Base
Eliminate an air unit if it begins or ends any action in a zone that has no Allied base. An air unit must land at the base where it began its current action, unless it is changing base. If combat causes a base to be reduced below the level capable of supporting all air units in its zone, eliminate the excess air units (at the choice of the owning player).
Example: The Japanese have a level-2 base in Taiwan. An Allied air attack reduces it to level 1. Only one Japanese air unit could have its base there.
Important: Carriers have the strength of their aircraft integrated into their own force. There are no separate counters for them. They do not fly separately from their carriers.
9.5.2 Aircraft Range
The range of an air unit is printed on its counter. The range is the maximum number of spaces an air unit may move before carrying out an attack. Each space entered on the way to the target counts as one point. Do not count the space of origin. On returning from the target zone or space, the air unit again counts the zones and/or spaces through which it moves. In practice, an air unit moves twice per action: once, up to its maximum range factor toward its target, and again, also up to its maximum range factor, back to its base.
9.6 Land Movement
Land combat units move from land space to land space. Base units may not move.
9.6.1 Land Units at Sea: Amphibious Operations
Land units may put to sea in Allied amphibious transport ships (AP, APD and LS), collectively called "amphibious units". The capacity of each amphibious unit by unit type is set out in the descriptions of the various actions. To show a land unit carried by an amphibious unit, place the land unit beneath the amphibious unit's counter.
- Embarking on an amphibious unit is not a separate action; it is part of the action of transporting them.
- While at sea, land units are part of the amphibious unit that carries them. If a transport amphibious unit is attacked, do not attack the units it carries separately.
- Transported land units share the fate of the amphibious unit that carries them. When an amphibious unit sinks, place all land units on it in the Reequipping box.
- Transported land units may not perform any other action, nor may they use their combat factors in any way, until they disembark.
- Land units may remain on amphibious units at sea for any period of time. To disembark, the amphibious unit must be in a port space (that is, a land or island chain space with a sea axis). Place the land units on the adjacent land as part of the action.
- When an amphibious unit is used to carry land units to an amphibious invasion (whether to an enemy-controlled or a disputed land space), that amphibious unit is subject to the return fire of the enemy units defending there, but only of units that have an anti-surface factor of one or more (11.16).
Important: Allied amphibious units may not transport land units. Allied land units are moved using Allied events.
9.7 Movement Blocking
The presence of enemy units does not automatically affect the movement of Allied forces. Both sides must stop movement when:
- Surface naval units must stop movement if they enter a space with enemy air, naval or base units.
- Exception: Enemy air, naval or base units do not block the movement of submarine units.
- Air units must stop movement when entering a space with enemy air or base units (air units automatically climb to intercept).
- Land units must stop movement if they enter a space with enemy land units (including bases).
- Exception: See the Administrative Movement actions G-4.
10.0 Allied Reaction
Each time a Japanese naval force enters a space containing an Allied reaction number (through a Movement action), you must immediately roll a die.
- If the result is within the figures defining the corresponding Reaction Range:
- The Japanese force must stop its movement.
- Draw at random from the Fleet Reserve box a number of Allied naval units equal to the die result, and place them in that space.
- If the result is not within that range, nothing happens and the Japanese force may continue moving.
Important: Roll for reaction even if other Japanese units are already in the same space. However, a force that does not move does not initiate a reaction check.
10.1 Reaction Combat
The Japanese must engage in combat with all Allied naval units in that space. This includes both the reacting units and any other units (of either side) that were in the space before the movement.
Example: A Japanese naval force moves toward Midway (reaction value 1, 2, 3, 4). The die result for the reaction is 3. You draw three Allied naval units at random and deploy them at Midway. The Japanese must execute an attack against the naval units before proceeding to complete their action.
11.0 Combat
Combat may occur whenever an action specifically allows it. Otherwise, opposing units may coexist indefinitely within the same land and/or sea spaces.
Exception: See 7.3.
- Combat may only occur within the same space. Units of both sides must be within the same sea or land space.
- Japanese attacks are normally at the player's option. Combat is only mandatory for the Japanese when they end an action in a space that contains Allied units.
Important: Japanese units that are not part of the force carrying out the action may not attack unless that action allows it.
- Events (19.0) and counterattacks (21.0) dictate Allied attacks.
11.1 Combat Sequence
A unit must have a combat factor of 1 or more to fire. A unit may fire during each stage if it has the appropriate combat factor.
Example: An air unit has an air factor of 3 and a land factor of 1. It could fire at enemy air units (using a factor of 3) and then at enemy land units (using a factor of 1).
- If a unit's printed combat factor for a type of target is zero, that unit may not fire at that type of target.
- Each unit has four combat factors:
- a) Use a unit's air combat factor when firing at an enemy aircraft unit.
- b) Use a unit's surface combat factor when firing at an enemy surface ship unit.
- c) Use a unit's submarine combat factor when firing at an enemy submarine unit.
- d) Use a unit's land combat factor when firing at an enemy land unit or base unit.
Execute the attacks in this order:
- Air combat phase: All units fire their air factor at enemy air units.
- Surface naval combat phase: All units fire their surface factor at enemy surface naval units.
- Anti-submarine attack phase: All units fire their submarine factor at enemy submarine units.
Important: Units performing an amphibious assault disembark after this stage.
- Land combat phase: All units fire their land factor at enemy land combat units and enemy base units.
11.2 Tactical Advantage
At the start of each battle, the tactical advantage (which side fires first) is determined. The side that fires first carries out all of its shots within each stage (11.1) and inflicts all its losses before the other side responds to fire within that same stage.
Roll two dice, one for the Japanese side and one for the Allied side. Modify each side's die result as follows:
Important: Tactical advantage is determined only once per battle and is maintained throughout the four firing stages.
Japanese:
- +1: If the Japanese have one or more air or carrier units and the Allies have none.
- +1: If the combat takes place in a Japanese fortress space (attacking or defending).
- +#: Bonuses from event markers may apply.
Allied:
- +1: If the Allies have one or more air or carrier units and the Japanese have none.
- +1: If the combat takes place in an Allied fortress space (attacking or defending).
- +#: Bonuses from event markers may apply.
Important: In Turn 1, the Allied side does not use the modifiers above.
- The side with the highest modified die result gains the tactical advantage.
- If the battle occurs within the Japanese initial objective line, the Japanese side wins all ties. If the combat takes place outside that line, the Allied side wins all ties.
11.3 Air Unit Defense
Air units based in a space under attack automatically climb to fight, attacking enemy air or land units. There is no separate action to provide combat air patrol or defensive support. Air units must take off and fight in the air if their zone is under attack; you may not leave them on the ground.
Exceptions: Air units at bases bombarded by enemy naval units, or if the air units are in a space subject to an enemy carrier attack, may not return fire against those attacking units.
11.4 Bombardment and Coastal Defence Units
Naval units in the same space as enemy land units may attack them using their land factors. Land units with an anti-naval factor may fire at enemy naval units, again, if they are in the same space. See section 9.2 for naval movement restrictions.
11.5 Combat Details
Remove from the map the units involved on both sides and place them on the Battle Board. Place the battle marker on the zone/space from which those units came, to remember where the surviving units must return.
- Neither side may reserve units to prevent them from taking part in a battle.
Exception: See the target priorities below.
- You fire each unit individually and then apply hits according to the priorities in sections 11.6.1 and 11.6.2.
- Each unit involved on both sides may fire once per stage.
11.6 Combat Resolution
A unit's combat factor determines the chance of scoring a hit. If the combat die roll is less than or equal to that number, you inflict one hit. If the result is greater than that number, there is no effect.
- One hit will eliminate a single-step unit.
- Land units may have two steps. If they receive a hit, flip them to their reduced side. If they receive a second hit, eliminate them.
- Each hit reduces a base unit by one level.
- If units inflict more hits than there are enemy units, ignore all additional hits; there is no overkill.
- When the Land Stage ends, the battle ends. There are no multi-round battles.
- Return surviving units to their positions on the map and remove the battle marker.
- Place units eliminated in combat in the Reequipping box of their side.
Example 1: A unit with an air factor of 2 attacks an enemy air unit. A die roll of 1 or 2 hits the target (a 3 or more would have no effect).
Example 2: A level-3 base receives two hits; with the first hit, replace the unit with a level-2 base, then with the second hit, flip the unit to level 1.
11.6.1 Japanese Target Priority
When Japanese units fire, you select the affected Allied units for each round.
Exception: When Japanese surface ships (other than carriers) attack Allied surface naval units, they may attack Allied carriers and amphibious units only if at least one Japanese surface unit is assigned to attack each Allied unit that is not a carrier. You may select the target for submarines, carriers and air units.
Example 1: Four Japanese surface ships attack an Allied force of two destroyers (DD) and one carrier (CV). The Japanese could assign one unit to attack each DD and two to attack the CV.
Example 2: A Japanese submarine attacks the same Allied force. It could attack the CV without needing to attack the DDs.
11.6.2 Allied Targets and Eliminations
Japanese air units: You determine which Japanese units are hit.
Japanese naval units: Hits are assigned according to the Allied Targeting Priority Table. Score at least one hit against each unit within a given type (the leftmost unit type first) before affecting the next unit type.
Example 1: An Allied naval attack against a Japanese naval force (containing two CV, one CVL and three DD) inflicts two hits. Both CV are eliminated. A third hit would eliminate the CVL.
Japanese land units: When they receive fire from air or naval units, you must apply enough hits to a base to eliminate it before inflicting hits on other land units. After eliminating the base, you determine the Japanese units hit. If a land unit fires against other land units, you determine all Japanese land units hit.
Example 2: An Allied land attack against a Japanese force containing a division and a regiment inflicts two hits. You could eliminate the division, or reduce the division and eliminate the regiment.
Example 3: An Allied air attack against a Japanese force containing a two-step base unit and a regiment inflicts two hits. You would have to reduce the base by two steps and therefore eliminate it.
12.0 Japanese Reinforcements
Units that appear in the game after it has begun are reinforcements. The Japanese begin with all units designated as 1941 reinforcements in their reserve. In the January 1942 turn, add all 1942A reinforcements to the Japanese reserve. In the May 1942 turn, add all 1942B reinforcements to the Japanese reserve. When carrying out a G-1 Reinforcement action, draw reinforcements at random from the reserve. Once drawn, place them on the map according to the instructions below.
12.1 Japanese Reinforcement Deployment
"Deployment" means placing units on the map.
Japanese national territory: You may deploy Japanese units in Japanese national territory. The player may also place units as follows:
- Naval units: Any fortress space with a Japanese base. There may be no Allied naval units in the same space.
- Air units: Any fortress space with a Japanese base, within stacking limits (7.1).
- Land units: Any fortress space with a Japanese base, within stacking limits. There may be no Allied naval units in the same space.
Embarkation: If you choose Japanese reinforcements that include land and amphibious units, you may start with the land units embarked on the amphibious units within their capacity (and deploy them as naval units).
13. Reorganization
You may return eliminated units to play through reorganization. You may carry out Japanese reorganization as an action. Allied reorganization must be carried out during the Allied Reorganization Phase (22.0).
Important: Place base units in the Available Bases section.
13.1 Japanese Reorganization
For a single reorganization action, designate one category of Japanese units to reorganize:
- Air
- Land
- Naval (both surface and submarine)
For each unit of that type in the Reorganization section, roll a die and consult the Reorganization Table.
13.2 Japanese Reorganization Results
Important: Rebuild reduced Japanese divisions using a G4L-6 Replacement Action.
13.3 Bases and Reorganization
Eliminated Japanese base units are not reorganized. Bases may be built using action G4L-1 if there are bases available in the Available Japanese Bases box.
14.0 Fog of War
You may always examine Japanese units. You may not examine Allied units on the map or in any section unless one or more of the following cases applies:
- If you have an enemy unit in the same space, examine all enemy units in that space.
- At the start of the resolution of each combat, reveal all units (of both sides) involved in that combat.
Important: The previous rule may require you to start an attack against unidentified enemy forces that you cannot select as a target. In this case, no fire occurs.
- G-2 actions will allow you to examine Allied forces.
- You may examine the strength of Allied base units at any time. For this reason, if there is an Allied base in the space, it must be the top unit of the stack.
14.1 Allied Units in Sections and Deployment
Allied mobile land units: a) Are deployed face down (hidden) in the Available section. b) Are deployed face down when placed as reinforcements. c) Allied units are deployed face up (revealed) in the other sections.
15.0 Base Units
Base units represent the main logistical and defensive installations, and represent local defence forces such as anti-aircraft artillery (flak), patrol craft and interceptors. They are immobile (static) once placed on the map.
- Bases have up to four steps. This represents the various capabilities of the base, NOT their combat values, which are zero for that purpose.
- You may not move or transport bases.
- No side may have more than one base in the same space at a time. However, there may be a friendly base and an enemy base in the same space at the same time (7.1).
- Bases are multi-step units. Each hit against a base reduces its strength by one level. Remove a base when it falls below one. You may increase the strength of a reduced Japanese base through the base-construction action G-4.
Important: Although bases have a combat value of zero, you must attack them to destroy them. BGG clarification: Bases have up to four steps, and the current step is indicated by the number in the centre of the hexagon symbol. Otherwise, bases function as static combat units.
- Bases may provide additional actions to the Japanese (5.2).
15.1 Japanese Air Base Establishment
The number of Japanese air units that may operate from a base equals the step level of the base. Immediately eliminate the number of air units that exceed the base's current level and place them in the Reorganization section.
Example: A Japanese base at level 4 could house four air units. If an Allied attack reduced the base to level 2, eliminate two of those air units.
15.2 Japanese Naval Base Establishment
Place reinforcements and carry out reorganization at bases.
15.3 Other Functions of Japanese Bases
G-4 actions may require a base. The player may use bases as places in which to place reinforcements and reorganized units (12.0 and 13.0).
15.4 Special Rules for Allied Bases
Allied bases are reorganized according to rule 22.3 during the Allied Reequipping Phase of the turn sequence (5.1). Do not check Japanese bases for reorganization.
15.5 Advanced Bases
You may build new base units in any type of land space (island chain or land space) through G-4 Action.
16.0 Japanese National Territory
The Japanese side always controls the space of its national territory.
- Allied units may not move into the space of Japanese national territory, nor attack it.
Important: The special event Doolittle Raid simulates the historical air attack on Japanese national territory, but does not involve real Allied units.
- The Japanese national territory space may contain an unlimited number of naval, air and land units.
- Japanese units that enter Japanese national territory must stop their movement during that action. They may leave in a later action.
- Use the Japanese national territory space to deploy reinforcements and reequipped units (12.0 and 13.0).
17.0 Random Location
Several actions in the game will require you to determine a location at random.
- Roll one die. The result (from 1 to 6) determines the operational axis of placement.
- Roll a second die. The result is the number of spaces, outward from Japanese national territory, where you place the unit. If the number is greater than the number of spaces available, place it in the furthest space of that axis.
Example: You roll a 1 and a 4. The 1 means you place the unit on the North Pacific Axis. The 4 means you place it in the Aleutians.
18.0 Unique Units
Japanese airborne units: Japanese airborne units may use the various airborne actions.
Japanese Marine units: Japanese Marine units may use several special amphibious actions. Other land units may carry out the general amphibious actions.
Seaplanes: Seaplane units (SP) may be based like normal air units. They may also be based in a space containing an Allied/friendly seaplane carrier (AV). A single seaplane carrier may house an unlimited number of seaplane units.
Important: There are two seaplane air units: the US Reconnaissance Force (SF) and the Japanese Yokohama air unit (Yokh).
Siamese Army: This is a unit controlled by Japan. Deploy it in Siam at the moment a Japanese land unit enters Siam. It may not leave Siam.
Burma Independence Army (BIA): This is a unit controlled by Japan. See action G-2 for its deployment. It may only enter Rangoon, the Burma Road and India. If it is reequipped, place it in any of these areas if it is controlled by Japan.
British Far East Fleet (FEF): Represents the units of the British Far East Fleet stationed in India. The FEF unit may never move and never returns to the Allied Fleet Reserve display. Otherwise, it functions as a naval unit. Once eliminated, it may never be reequipped. The Japanese earn additional VP (Victory Points) if they eliminate this unit (4.0).
Flying Tigers: If eliminated, the Allied AVG unit may not be reequipped.
19.0 Allied Operations
You control the Allied forces within the parameters of the following rules.
19.1 General
Land units: Once they are deployed on the map, they remain in their space until eliminated or until an action requires their movement.
Air units: May fly missions in their own space, which includes engaging in combat if enemy units enter it. If an event requires it, they may fly offensive missions.
Naval units: When deployed on the map, they remain there until the subsequent Allied Naval Return Phase. Place them in the Fleet Reserve box.
19.2 Allied Fleet Reserve Box
Allied naval units in play will be in the Allied Fleet Reserve box, unless they are temporarily placed on the map due to events. The Japanese side may not attack Allied units that are in this box.
20.0 Allied Movement
You move the Allied units on the map under the following guidelines, and only according to the instructions of Allied events. Because of the nature of the map, there may be more than one potential objective. Choose one at random (use a die roll).
20.1 Allied Naval Raids and ABDA Events
Roll on the Allied Naval Event Deployment Table using the Raid line or the ABDA line (depending on the event) and deploy the units in the indicated space. There is no movement.
20.2 Allied Naval Offensive Events
Roll on the Allied Naval Event Deployment Table using the Naval Offensive line and deploy the units in the indicated space. If the space contains Japanese units of any type, they remain there. Otherwise, move the stack as a combined force toward Japanese national territory a number of spaces equal to the lowest movement factor of the units in the group.
Example: A force of Allied naval units with movement factors of 2, 3 and 4 is deployed in the New Hebrides space. If there are Japanese units in that space, the Allied units stay there. Otherwise, they move two spaces: first to the Solomons and, if there are Japanese units present in that space, they stop; otherwise, they continue moving toward Rabaul.
Important: If the naval force ends in a space containing Japanese units, they engage in combat in the subsequent Counterattack Phase.
20.3 Allied Aircraft Range and Base
If an event requires an Allied air offensive, Allied air units fly missions to attack Japanese units in other spaces.
Example: There is an Allied base in Singapore with an air unit with a range of 3 that is ordered to attack. It could fly to Indochina and attack the Japanese units there; an air unit with a range of 2 could not.
20.4 Allied Land Units
If an event requires Allied land movement, move the Allied units as the event indicates.
20.5 Movement Restrictions
Allied units normally follow the same movement restrictions described in 9.0.
Example: An Allied naval unit would stop its movement if it entered a space containing a Japanese naval unit.
21.0 Allied Counterattacks
During the Allied Counterattack Phase, you must carry out attacks with the Allied units (not bases) located in the same spaces as Japanese units.
- Carry out the attacks beginning with the operational axis with the lowest number and, on that axis, the space nearest to Japanese national territory, and then outward. Once all attacks on that axis are resolved, move to the next lowest axis and repeat the process.
- Execute each attack with the Allies firing first as attackers. All Japanese naval, air and land units in the space are considered involved under (11.0).
21.1 Post-Combat
Allied air units return to the base from which they took off in the subsequent Air Return Phase. If that base is no longer under Allied control, eliminate the air units (they do not fly to another base). Land units remain in place (but see the optional withdrawal rule 25.3). Naval units remain in the space (but return to the Fleet Reserve box in the Naval Return Phase of the next turn).
Important: If units of both sides remain, you may start an action to attack with the Japanese forces in that space in the next Japanese turn (they may be reinforced by more units). Otherwise, the units may coexist without needing to fight.
22.0 Allied Reinforcements and Reequipping
The Allies begin with all units designated as 1941 reinforcements in their reserve. In the January 1942 turn, add all 1942A reinforcements to the Allied reserve. In the May 1942 turn, add all 1942B reinforcements to the Allied reserve. BGG clarification: Allied naval repairs are placed in the Fleet Reserve box.
22.1 Reinforcement Deployment
During the Allied Reinforcement Phase, you must roll a number of dice equal to the number shown on the Turn Record Track. Add the results and then draw at random that number of units from the Allied reinforcement box. Place all Allied naval units in the Fleet Reserve Display. For each Allied air and land unit, consult the corresponding line in the Allied Air and Land Reinforcement Deployment Table and deploy the unit in the location indicated:
- Naval units: Place them in the Fleet Reserve Display.
- Air units: Deploy them if there is an Allied base unit in the space with a level that allows the air unit to be based there (7.0).
- Land units: Place them if the space is under Allied control, disputed or neutral (2.7). Reinforcements may not be placed in spaces controlled by the Japanese.
Important: If a reinforcement cannot be deployed, return it to the box. Do not choose a substitute.
- If the deployment space is disputed, this will cause the reinforcements (and other Allied units in the space) to engage in combat during the subsequent Counterattack Phase (21.0).
- Use the ABDA line only when the ABDA event is chosen. Unlike the other reinforcements, roll only one die for all ABDA reinforcements and place the units in that single space.
22.2 Allied Reequipping
Place Allied units eliminated in combat in the Allied Reequipping Display (unless indicated otherwise).
- During the Allied Reequipping Phase, for each Allied unit in the Reequipping Display, you must carry out the reequipping procedure using the Allied Reequipping Table.
- Roll one die for each Allied unit (of all types). The table indicates the fate of the units being reequipped (permanently destroyed, returned to the Reequipping Display or returned as reinforcements). Place Allied reequipped units according to rule 22.1.
Important: You may examine the Allied units that are being reequipped. Unlike the Japanese, you reequip all types of Allied units as part of this action.
22.3 Allied Base Reequipping
During the Allied Reequipping Phase, you must check each Allied base on the map. Roll one die and, on a result of 6, increase its level by one. A base may not exceed level 4.
- Check only bases that are outside the Japanese Initial Objective Line.
- Begin with the Axis 1 line and proceed clockwise.
- Do not carry out the check if there are Japanese naval or land units in the same space.
- Eliminated bases may not be reequipped.
23.0 Japanese Shock Effect
The following rules are in effect throughout GT 1 (Game Turn 1): a) Japanese naval units may move through spaces containing Allied units without stopping. b) Ignore all Allied reaction checks (10.0). c) The Japanese automatically have the tactical advantage.
24.0 Event Descriptions
Each event contains instructions on the disposition of each event marker.
Important: Not all of the instructions below are used in this game.
- Discard: Place the marker in the Discarded Events display of the corresponding side. Do not use it again during the current game.
- Retain: You may play this marker in this turn or keep it and play it in a later turn.
- Play Immediately: You must immediately carry out the indicated action for the marker (not used in Centrifugal Offensive).
- Remains in Effect: The effects of the marker remain in effect for the rest of the game. Place the marker in the corresponding In-Effect Events display. It remains there for the rest of the game (not used in Centrifugal Offensive).
- Return: Return the marker to the event container after playing the event.
24.1 Explanation of Japanese Events
- Banzai!: Retain. Play at any time during the Japanese Action Execution Phase. When played, add one (+1) to all Japanese tactical initiative die rolls (11.2) during a Japanese Player Turn. Disposition: Discard after playing.
- Greater East Asia Co-Prosperity Sphere: Retain. Play at any time during the Japanese Action Execution Phase. When played, you may carry out one additional G-1, G-2 or G-4 Action. Disposition: Return.
- IHQ (Imperial General Headquarters): Play at the start of the Japanese Action Determination Phase of this game turn. Roll one die: with an even result, the Japanese receive one free action this turn; with an odd result, you lose one action this turn (but never less than zero). Disposition: Return.
Important: Play the following events at any time during the Japanese Action Execution Phase.
- Operation AI: Played automatically in Turn 1:
- Carry out two additional Naval or Combined G-3 actions on the Central Pacific Axis.
- During initial deployment, the Japanese may deploy up to six naval units (of the type you choose) in the sea zone directly west of Pearl Harbor. Do not include transports or land units. Do not roll the reaction check for this zone in this initial deployment. Disposition: Discard at the end of Turn 1.
- Operation B: Retain. When played, carry out one additional Land or Air G-3 operation. Disposition: Discard after playing.
- Operation C: Retain. When played, carry out one additional Naval G-3 operation. Disposition: Discard after playing.
- Operation E: Retain. When played, carry out one additional Land or Air G-3 operation. Disposition: Discard after playing.
- Operation J: Retain. When played, carry out one additional Land or Air G-3 operation. Disposition: Discard after playing.
- Operation MI (Special): Retain. When played, carry out two additional Naval or Combined G-3 operations on the Central Pacific Axis. Disposition: Discard after playing.
- Operation MO (Special): Retain. When played, carry out two additional Naval or Combined G-3 operations on the Southwest Pacific Axis. Disposition: Discard after playing.
- Operation R: Retain. When played, carry out one additional Land or Air G-3 operation. Disposition: Discard after playing.
- Yamamoto: Retain. When played, carry out two additional Naval G-3 actions; and if an action results in combat, add one (+1) to the Japanese tactical die roll. Disposition: Discard after playing.
24.2 Explanation of Allied Events
The explanations of Allied events provide instructions for deploying and moving units as a result of the events. The guidelines are:
-
Allied units may not be deployed in Japanese national territory.
-
Allied units are deployed regardless of whether there are Japanese units in the target zone.
-
If there is more than one zone to which Allied land or air units may move, they will move to the nearest. If more than one is the nearest, choose one at random.
-
Allied land and air units that start in the same zone as enemy land or air units remain in the zone.
-
During the subsequent Allied Counterattack Phase, combat takes place in each zone that contains both Allied and Japanese units. This includes all types of units.
-
ABDA: Choose at random one naval unit (if available) for the British, the Netherlands and the United States from the Fleet Reserve display. Consult the Allied Reinforcement Deployment Table and roll the die once using the ABDA line. Deploy all units in that zone. If there is an Allied base in the space, increase it one level. Disposition: Discard after playing.
-
Allied air offensive against Japanese naval: For each space containing Allied air units (at bases), fly all air units to the nearest space on the same Axis that contains Japanese naval units. The space must be within range. Disposition: Return.
-
Allied air offensive against Japanese land operations: For each space containing Allied air units (at bases), fly all air units to the nearest space (this movement is not limited by the range of the Allied air unit) on the same Axis that contains Japanese land and/or air units. Disposition: Return.
-
Allied land offensive: For each space containing Allied mobile land units, move them one space on the same Axis toward the nearest space containing Japanese land and/or base-supported air units. Land units may not end movement in a sea space. If the movement from a space is toward a sea space, then do not move the land unit. Disposition: Return.
ALLIED AIR AND LAND REINFORCEMENT DEPLOYMENT TABLE (22.1) Roll 1D6 for each unit.
| 1D6 | 1 | 2 | 3 | 4 | 5 | 6 |
|---|---|---|---|---|---|---|
| British Empire | India | India | Rangoon | Singapore | Port Moresby | Australia |
| China | India | India | Burma Road | Burma Road | Burma Road | Burma Road |
| Netherlands | Java | Java | Java | Sumatra | Sumatra | Borneo |
| United States | Australia |
ALLIED NAVAL DEPLOYMENT TABLE BY EVENTS (24.2) Roll 1D6 for ALL units.
| 1D6 | 1 | 2 | 3 | 4 | 5 | 6 |
|---|---|---|---|---|---|---|
| Naval Offensive (m) | Ceylon | Darwin | Australia | New Hebrides | Samoa | Pearl Harbour |
| Naval Raid (d) | Palau | Marianas | Truk | Rabaul | Gilbert | Marshalls |
| ABDA (d) | Rangoon | Singapore | Sumatra | Java | Java | Darwin |
(m) = deploy the force in the space: move it as set out in 20.0. (d) = deploy the force in the space; it does not move.
25.0 Optional Rules
25.1 Clearing Zones
If the game does not end with a Sudden Death Victory, subtract one Victory Point (VP) for each space within the Japanese Objective Perimeter that contains an Allied base unit of any level.
25.2 Capture of Bases
Whenever Japanese land units (with or without air or naval support) attack an Allied force consisting of a base unit and eliminate all Allied land units (including the base), you may place a level-1 Japanese base in that space.
Note: This rule gives a large advantage to the Japanese side.
Important: When using this rule, there may not be enough bases to replace the counters. Players must make additional Japanese bases or turn the Allied base over to indicate the capture.
25.3 Withdrawal of Land Units
If a Japanese land attack causes more hits on Allied land units than on Japanese ones, the surviving Allied mobile land units withdraw (once the entire battle is over). Otherwise, all units remain in place. Static units never withdraw.
To carry out a withdrawal, move the unit one space in any direction. A withdrawal may not be made toward an area containing Japanese land units. If there is no space to withdraw to, eliminate the Allied units.
Fortress exception: Allied units defending in fortresses never withdraw.
Note: Japanese land units never withdraw. In addition, Allied units do not withdraw if they make an attack and that attack fails.
25.4 Allied Reinforcement Entry
The Allies deploy reinforcements in the following spaces, regardless of who has control:
- India
- Burma Road
- Northern Australia
Note: Reinforcements arrive by land.
25.5 Elite Units
If a side has elite units in a battle, add an additional one (+1) to its tactical advantage die roll. The following units are elite:
- Japanese: CV-1, BB-1 (naval); 23 (air).
- United States: CV-2 (naval); AVG (air).
Editor's Notes on the Source
- This is an English translation of the Spanish translation "La Ofensiva Centrífuga" (Carlos Cáceres Espejo, version 1.0, Seville, July 2026; BGG file 455330), which was the only rules text supplied for this game. No English rulebook was available to this transcriber.
- The Spanish translation's own errata and clarifications (for example the map errata that replaces AP with TR in the Allied Targeting Priority Table, the BGG clarifications and the designer's notes) are kept in the body.
- The designer's notes are kept where they appear in the Spanish text; the translator's credit and version line are omitted.
- Ship and unit names that appear misspelled in the Spanish source are kept with a "[sic]" note: "Iuga" (probably Hyūga), "Hatuna" (probably Haruna), "Tenesee" (Tennessee).
- The Spanish text in section 11.6 and elsewhere uses "Refactorización" in one place, and "Reacondicionamiento" elsewhere; both are rendered as "Reequipping".
- Section 2.4.4 lists abbreviations under headings that the Spanish layout does not make clear for the entries BC, EI, FEC, FEF, IC, Ind, NAC, NZ, RAAF and Z. These are grouped under "Other abbreviations" here.
- Some Spanish symbols in the source (such as icons and the Land Units type symbols) are pictures in the printed rules; the text describes them as they are named in the Spanish text.