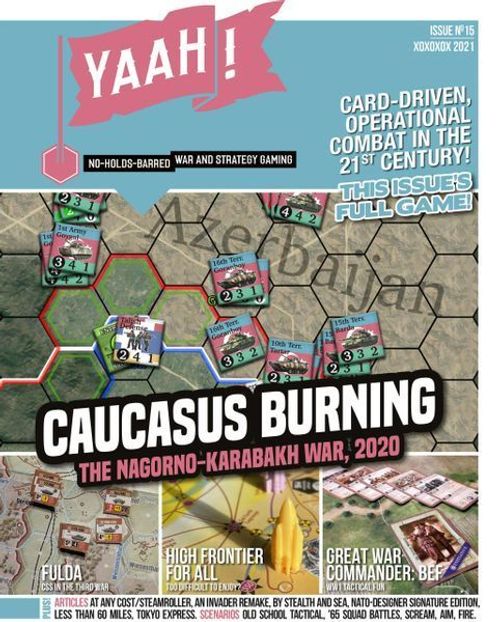
Caucasus Burning: The Nagorno-Karabahk War, 2020
Caucasus Burning: The Nagorno-Karabahk War, 2020 Rulebook
Table of Contents
Table of Contents
- 1.1 Intro
- 1.1 Map
- 1.2 Scale
- 1.3 Politics
- 1.4 Objective
- 1.5 Counters
- 1.6 Cards
- 1.7 Other game terms
- 2.0 Game setup
- 3.0 Sequence of play
- 3.1 Deck sequence:
- 3.2 Day Turn sequence:
- 3.3 Night Turn
- 3.4 Check for game end condition
- 4.0 Playing Actions
- 4.1 Logistics
- 4.2 Movement
- 4.21 Stacking limits
- 4.3 Combat
- 4.31 Assault Combat
- 4.311 Counterfire
- 4.312 Withdraw
- 4.313 Resolution
- 4.32 Artillery Barrage
- 4.33 Air Strike
- 4.331 Cities as targets
- 4.34 Entrenched
- 4.4 Reaction cards
- 4.5 Political cards
- 5.0 Political Points
- 6.0 Scoring
- 7.0 Game Strategy
- 8.0 Tactics & Postscript
1.1 Intro
Caucasus Burning: The Nagorno-Karabahk War, 2020 is about the short and probably not final war between Azerbaijan and Armenia, which took place from late September to early November 2020. It is notable for both its exceptional use of drones and missiles, and that the war was also fought through international press coverage and social media. The war did not get a lot of attention in the United States due to the lack of any US interests in the area and the attention diverted to the domestic front by the 2020 elections, but it nonetheless is an interesting conflict to try to simulate.
1.1 Map
The map is the disputed region of Artsakh, which includes Nagorno-Karabakh, and the outer edge is parts of Armenia and Azerbaijan. Iran (part of the southeast corner) is off-limits to both players. Each hex is about 20km across. Artsakh is about size of Puerto Rico or Jamaica, an irregular area approximiately 70km by 150km.
The area inside the red+blue+green border on the map is the self-proclaimed nation of Artsakh (not recognized by any nation in the UN), which includes the autonomous region known as Nagorno-Karabakh, plus area claimed by Armenia after the cease-fire that ended the 1991-1994 Nagorno-Karabakh War. We will just say the area has been fought over for a long time and leave the details to those who want to look them up.
The blue bordered areas within the red bordered region are Nagorno-Karabakh, or more properly, the Nagorno-Karabakh Autonomous Oblast (or NKAO), a region set up by the Soviet Union in 1923 as an autonomous Armenian enclave within Azerbaijan. Nagorno-Karabakh is part of Artsakh.
The green bordered areas are parts of Nagorno-Karabakh were occupied by Azerbaijan at the time of the previously mentioned cease-fire, so Nagorno-Karabakh is technically the blue-bordered plus green bordered regions, and Artsakh claims the entire red-blue-green region, though the green bordered regions are occupied by the Azeris, who owned that territory anyway before the Armenians took it from them. If this is confusing, just remember it is politics as usual for that part of the world.
Place names depend on who you ask and what alphabet you use. For instance, if you were to look up ‘Martuni’ on Wikipedia you would find an entry with four different town names in three different alphabets. As a compromise that will please neither Armenians nor Azeris, this game uses Anglicized versions of Azeri names for areas in Azerbaijan at the start of the war, and Anglicized versions of Armenian names for areas claimed by Armenia or Artsakh. By the time you play this, it is likely that all place names inside the former Artsakh will have reverted to their Azeri forms.
There are no large cities in the disputed areas. The (now former) capital of Artsakh (Stepanakert) only had a little over 50,000 people, and some spots being fought over are virtually uninhabited. The town of Fuzuli shows up in a lot of battle reports, but it is a ghost town. All its Azeri residents were kicked out at gunpoint after the last war and no Armenians moved in to settle the area. It is however, a road junction and important for strategic control of the area and while it is described as a town in media reports, there was nobody there except combatants.
1.11 Terrain
Light brown hexes are fairly open and have road networks. Light green hexes are hilly but have secondary roads that allow vehicle movement between hexes, and dark green hexes are mountains and have no roads to speak of, and no units can move into or through those hexes. A road shown on the map represent the best roads in the region, places where if there was not a war going on you could manage a sustained speed of 50kph or more. Brown and light green hexes without roads can still be moved through, but more slowly.
[Terrain diagram: Open, Hills (w/road) and Mountain hexes.]
Almost all of the disputed area is rugged, with only a few areas on the perimeter being flat and open. Roads crossing the border between Artsakh and Azerbaijan are a no-man’s land, neither side wanting to give the other an easy invasion route, and the entire border is militarized to some extent, so the actual roads that are there are not shown on the map, to represent the increased movement cost to get over the border with a mechanized force.
1.2 Scale
The war this game is trying to represent took place from about September 27 to November 9 2020. Both sides claim the other started it, but only Azerbaijan had its military mobilized for an invasion, so make of that what you will.
Maneuver and attacks in the game are done via actions played from a deck of cards, and each pass through the deck represents 2 days and nights of fighting. A game of Caucasus Burning: The Nagorno-Karabahk War, 2020 will probably take a little less than 10 passes through the deck, so it will run a little faster than the actual war.
Each unit counter represents an understrength battalion, and a set of three or four counters with the same name is a brigade. A tank unit is about 30 tanks, a mechanized infantry unit about 30 wheeled or tracked APCs plus 400-500 men, and an artillery unit about 30 pieces in some combination of conventional artillery and rocket launchers. The specialized units like air defense batteries and short range ballistic missiles may represent only a handful of specialized vehicles, and an Air Strike card represents at most a squadron of planes or a few drones. Azerbaijan theoretically started with about 24 combat aircraft and 17 attack helicopters and Armenia 17 combat aircraft and 15 attack helicopters. We say theoretically because some were out of action with mechanical issues and were never used in the fighting. Azerbaijan had drone superiority in the conflict, which is represented by their better Air Strike cards.
Both sides use a lot of T-72 tanks, with some of the more modern T-90 tanks as well as the venerable T-55. Both sides also use BMP(tracked) and BTR (wheeled) series infantry vehicles, with Azerbaijan having BMP-1, BMP-2 and BMP-3, while Armenia only has BMP-1 and BMP-2. Both sides have rocket and conventional artillery, both self-propelled and towed, long range anti-aircraft and ballistic missiles, plus the usual small arms and anti-tank weapons. Both sides have a history of not reporting arms transfers to the United Nations, so an accurate accounting of each side’s forces is next to impossible.
Not every unit that took place in the conflict is represented in the counter mix. For instance, most of the Azeri 1st, 2nd and 3rd Army Corps was stationed near the northern border of the conflict area, and by itself this is about sixteen brigades worth (or ≈50 counters). Some unknown number of these brigades are full of short term conscripts, badly understrength or lacking the logistics needed to mount an offensive operation. So, the game has enough units to make the conflict work as a game, and tries to have units start in the right areas for a good simulation (even if we are not sure who they were). But a lot of units are going to be below the game horizon for the sake of simplicity.
1.3 Politics
Both sides hate each other with the heat of a thousand suns, and probably some spot on the Azerbaijan-Artsakh border has seen gunfire on every day since the end of the previous hostilities in 1994. Russia supplies arms to both sides and tries to not get involved (there is a Russian military base in Armenia, but Russian oil pipelines in Azerbaijan are within shelling distance of the Azerbaijan-Artsakh border). Turkey supports Azerbaijan even though it shares a border with Armenia. This antipathy towards Armenia is probably completely unrelated to a series of unfortunate events between the two nations back in 1915 or so. The Politics cards each side can add to the deck largely represent off-map reinforcements drawn from within each nation’s reserves, but also include aid from Russia and Turkey, including the potential for units that never actually took part in the conflict. After all, we are playing a “what if” scenario here with you and your opponent being in charge, including being in charge of trying to manipulate the international situation to your advantage.
Iran occupies the southeast of the map and is off limits to both sides. Neither combatant wanted to get Iran involved. The Politics track on the map covers up the Azerbaijan exclave known as the Nakhchivan Autonomous Republic, which was not part of the disputed territory nor bordered it, and was not part of the conflict, possibly because neighboring Turkey did some saber-rattling and Armenia had enough on its plate without having an angry Turkey on its western border while it was being invaded from the north.
1.4 Objective
The game ends when one of the two players has 10 or more Political Points at the end of any Day turn, then one more Night turn is played before scoring. The Political Points represent domestic and international pressure that will force the side with fewer Political Points to the negotiating table, whether they want to or not. This means that the two sides end up in some sort of internationally mediated end of hostilities, and the winner of the game is based on territorial gains they have at this time. Read that again. The game ends when a player gets to 10 Political Points, but that player is not necessarily the winner. The Azeri player wants to have control of enough of Artsakh (and possibly Armenia) to claim victory, and the Armenian player wants to retain enough control of Artsakh to do the same. Historically, Azerbaijan pushed south along the eastern map edge and then moved west to isolate the Artsakh capital, combined with being able to interdict supplies that might otherwise come in via Vardenis, and scored a massive victory. Of course, both players of the game knowing this, is likely to alter the outcome from the historical one.
1.5 Counters
The illustrations below are every type of unit in the game.
[Counter illustrations omitted: sample Armenian, Reduced unit, Azerbaijan and Artsakh counters, and examples of the Firepower, Assault, Movement, Artillery, Ballistic missile and AA missile counter types.]
The Armenian player controls both the Armenian counters and the Artsakh counters, plus the potential Russian reinforcements. The Azerbaijan player (also referred to as Azeri) has the Azeri counters plus the potential Syrian reinforcements.
The numbers on the counter are, left to right: Firepower(FP), Movement(MP), Defense(DF).
A Firepower with a black circle around it is only usable in Assault Combat (4.31). This is moving into the same hex as your opponent and fighting it out. A Firepower with a red circle around it is artillery, and cannot attack in Assault Combat, but can support an Assault Combat attack up to 2 hexes away, or attack on its own at that range with an Artillery card. A Firepower with a blue circle is a ballistic missile. It has a range of 8 hexes, and can attack with an Artillery card or support an Assault Combat with a special card. A Firepower with a green circle is anti-aircraft missiles. These have a range of 8 hexes and are only used to counter the Air Strike cards or Ballistic Missile attacks or assault support. Using AA missiles requires one of these units in range and an Air Defense card. Air defense units may not attack in an Assault Combat.
Movement is just that. You get that many Movement Points as a base amount for the Advance or Transport card. Movement is in section 4.2.
Defense is an amount that subtracts from Firepower to determine how strong an attack is. A unit whose Defense is in a white circle may not Withdraw (4.312) after being Disrupted in an Assault Combat against its hex. Defense also allows you to Counterfire (4.311).
The reverse side of a unit has a gold band in the corner, and is called the Reduced side. It it takes damage that would Reduce it again, it is eliminated. The Reduced side of identical units may have different values, and represents a subjective assessment of how well that unit will handle taking combat losses.
1.5.1 Specific Counter Groups
Motor Rifle Brigade
This is a group of units that share the same name and is most often going to be a tank battalion, a wheeled or tracked armored personnel carrier battalion and an artillery battalion. Larger brigades may have an additional infantry component carried in trucks (that unit typically has Defense of 0).
Territorial Units
These are the Azeri units with ‘Territorial’ in their name. They are organized the same as other Azeri units but are really meant as border defense. They are usually supplied through the town they are based out of and lack an extended logistics train to keep them supplied on an offensive operation. They have a lower movement point allowance than front-line Azeri units to reflect their lower level of organization and the difficulty of keeping them supplied. These units are largely filled with short-term conscripts and only a small core of career personnel, so their firepower is lower and reduced side firepower is lower than the reduced side of more experienced units. Azerbaijan purchased about one hundred fifty T- 55s from Ukraine during the first Nagorno-Karabkh War (1994) and it seems likely these ended up in the more static border defense role afterwards.
Defense Units
These are the Artsakh units with Defense in their name. They are initially associated with a particular town, but are disciplined and supplied well enough to operate away from their home base, but may have lesser quality equipment and are not as experienced as front-line Armenian units. Tanks will usually be Russian T-72, APCs are Russian BTR-80 and artillery Russian BM-21 Grad or Chinese WM-80 truck mounted multiple rocket launchers. The reality is that they have whatever Armenia wants them to have, so individual battalions may have a mix of units.
Special Forces
The Azeri/Armenian Special Forces units have the special ability that they may be deployed to any hex with adequate Logistics (4.1) in friendly territory (Azerbaijan or Armenia+Artsakh, respectively) or any friendly-occupied hex with adequate Logistics.
Air Defense Units
These are long range anti-aircraft missiles on mobile launchers. Both Azerbaijan and Armenia have significant numbers of the Russian S-300 self-propelled surface-to-air missile system, as well as older, shorter range missiles relegated to defending specific cities. These units are normally deployed well behind the front lines, but are vulnerable to enemy ballistic missile strikes (or air strikes, if caught unaware). A unit will represent several vehicles, plus support vehicles like radar systems, command and fuel trucks.
Ballistic Missile Units
Azerbaijan has the Israeli LORA, Russian OTR-21 Tochka and Belarus Polonez short range ballistic missile systems, while Armenia has the Russian 9K720 Iskander, OTR-21 Tochka and SS-1C Scud-B These have varying range and accuracy, but the best of them on each side are capable of precision strikes on stationary ground targets like bridges, or supporting an assault by hitting specific enemy fortified positions. A unit will represent several launch vehicles, plus support vehicles like command, rocket fuel or missile reloads and vehicle fuel trucks.
102nd Russian
The Russian 102nd military base is in Gyumri, Armenia as part of a mutual assistance treaty, though it has never been made clear exactly how much military assistance Armenia is going to be able to give Russia in the event it is attacked. In 2013 the base commander stated that if Nagorno-Karabakh was attacked, the 102nd might join the defense as party of its treaty obligations. The 102nd is two tank battalions, several motor rifle battalions, two artillery battalions and one S-300 air defense battalion (total of ≈3,000 troops), only some of which are would be deployed as part of reinforcements.
Syrian Mercenaries
Turkey is aligned with Azerbaijan in this conflict but is not taking a direct role with ground forces. However, they did seem to hire/facilitate a few thousand Syrians for employment in Azerbaijan, and not all of those employed knew ahead of time that the job was going to involve getting shot at. The estimated fatality rate for these mercenaries over one month was about twenty-five percent.
1.6 Cards
The game cards will have either two Actions, or an Action and a Reaction. Actions have a white title, Reactions will have a green title. When you play a card, you can only use one of the two possibilities on it. Actions are only played by the acting player, Reactions are only played by the non-acting player. The acting player may not play Reactions.
[Card diagram omitted; it is labeled “Action” and “Reaction.”]
1.7 Other game terms
Unit: One of the counters on the map that represents a fighting force. All the counters on the previous page were units.
Status: The counters that say Unready on one side and Disrupted on the other. These represent combat unreadiness, and are placed on units after they act or take combat losses. Unready is the lesser state and is what you get after you take an action (like movement) that results in no combat damage. Disrupted is what happens after you take 1 hit in combat. More details on this are at 4.3.
Ready: A unit with no Status counter on it is Ready. Unless a card says otherwise, only Ready units can perform an Action or Reaction. Note that some actions like Air Strike do not require a unit on the map to perform them, so there is no ‘Ready’ state involved.
Action: Doing the text under a light-colored header on a card. You only do Actions as the acting player. After you do an Action, discard it.
Reaction: Doing the text under a green header on a card. You only do Reactions if you are not the acting player, and you can only do one Reaction per Action played. After you do a Reaction, discard it.
Withdraw: A unit exiting a combat (and the hex) upon being Disrupted, sparing it further losses in that combat but ceding the territory.
Negate: If an Action or Reaction negates something, it is though that thing did not happen for all rules involving it. For instance, if something negates a hit in Assault Combat, that hit no longer counts for seeing who took the most hits and has to leave the hex. It didn’t happen.
Hit: Taking a combat effect. For instance, if an attacker draws a card with a green circle, they do a hit to the defending force.
Reduced: The reverse side of a unit, showing combat losses.
Unready: The gray side of the Status counter. It represents having taken an action, but not taking any combat losses from it.
Disrupted: The blue side of the Status counter. It represents having taken temporary combat losses or loss of unit cohesion. A Disrupted unit that takes another hit is Reduced. Note that a Disrupted unit has its Defense reduced by 1 point!
2.0 Game setup
The game plays best with the map set up with the long side facing the players, the Azeri player on the right side and Armenian player on the left. Go through the card deck and remove the six blue Armenian Politics cards, the six green Azerbaijan Politics cards, the two gold Armenian starting cards, the four gray Azerbaijan starting cards and the two red Day End cards. Set the Politics cards face down near their respective players and the players get their afore-mentioned starting cards (gray for Azeri, gold for Armenia). Shuffle the remaining cards and deal the Armenian player two more, so that each player has four cards. Place one of the Day End cards in the top half of the deck and the other in the bottom half.
Note: Every time the deck is reshuffled, the Day End cards are set aside, and then one is placed randomly in each half of the deck.
There is a text list that shows the starting forces and their locations for each player, as well as the off-map reinforcements they may get later in the game. Set them up in the appropriate locations, leaving the off-map units to one side. This is how every game will begin.
Place the two Politics track markers on the zero space on that track.
The Azeri player has Initiative for the first pass through the Action deck, so that step (3.1) is skipped for the first deck.
Caucasus Burning: The Nagorno-Karabahk War, 2020 does not have scenarios. It is just the war, start to finish. Each game’s play will start the same, but will vary based on the Political cards that get added and the random opportunities to use them, and of course you can try different strategies both as Armenian and Azeri player, to see which ones work best to acheive your side’s objectives. The Azeri player has force superiority, but the Armenian player has defensive terrain advantage.
3.0 Sequence of play
A game of Caucasus Burning: The Nagorno-Karabahk War, 2020 is played in days and nights. One pass through the Action deck is usually two days and the deck is reshuffled at the end of the last night turn in the deck.
First day special notes (start of game)
- Azeri player starts with a hand of the four cards with gray borders (with ‘Azerbijan starting card’ at the bottom).
- Azeri player has initiative on first turn (no initiative step), Azeri player already has a hand of four cards and does not draw to refill their hand.
- Armenian player starts with the two cards with gold borders (with ‘Armenian starting card’ at the bottom), and two random cards.
3.1 Deck sequence:
When the deck is reshuffled, you will be drawing from a brand new deck. On these days, substitute this step 1 for the one listed below (3.2):
- Each player draws up to hand size of 4. If you forgot and added the Day End cards before drawing, shuffle any Day End card drawn back into the top half of the deck and redraw until you have four cards. 1a. Play initiative card. Each card in your hand has a number in the circle in the lower right, with values from one to nine. Play one of these cards face down, with a value based on how much you want to have the first action.
Then both players reveal. Ties go to green hit cards, then gold, then red. Further ties mean both initiative cards are discarded and new ones are played. Otherwise, winner discards their card, loser keeps theirs. Player with initiative acts first and has initiative for the duration of that deck.
3.2 Day Turn sequence:
- On your turn, draw up to hand size of 4. If a Day End card is drawn to your hand at any time other than a newly reshuffled deck (3.1), set it aside and redraw until you have 4 cards, then go immediately to a Night turn (3.3).
- Player with initiative plays an Action
- After Action resolves, player may discard up to 2 cards
- Alternate players for steps 1 through 3 until a Day End is set aside. Check for any game end condition (3.4), then do a Night Turn (3.3).
- After two Day End cards have been set aside and the Night Turn after the last one has resolved, that deck is over. If game end is not triggered, each player may retain 1 card, shuffle all other cards into deck for the next day.
3.3 Night Turn
Night turns run under the same movement and combat rules as Day turns, but have a special sequence. Both sides have sufficient technology to do night operations, but not as well as their day operations. Note that some Action cards say “Day turn only” and cannot be used on Night turns.
- If a Night turn is triggered by a player refilling their hand, that player’s turn is the Night turn, then play passes to the other player as a Day turn.
- If the Night turn is triggered by combat resolution, a Night turn immediately follows the combat resolution as continuation of the attacking player’s turn.
- If in either case a Night turn would immediately follow a Night turn, shuffle that Day End card back into the deck. If it is somehow not possible to have a day turn between Night turns, the deck ends. Reshuffle for a new day.
- Remove any Road Out counters before the Night Turn resolves.
3.31 Night Turn sequence
- Do not draw any new cards at the start of a Night turn unless it happens while refilling your hand, in which case you complete refilling your hand.
- Each player may play 1 Action card face down, starting with the player who triggered the Night turn. If no Action card in hand is something you want to play or you have no cards in hand, you can simply decline to play one.
- After all Action cards are played, they are revealed and resolved in the order they were played.
- A Reaction card may be played in response to an Action only by the player who did not trigger the Night turn.
- After all Actions and Reactions resolve, all Units that did not attack or were not involved in Assault Combat remove all Unready or Disrupted markers.
Note: Multiple Day End cards can be drawn in the same event, like refilling your hand or combat resolution. If this happens, you only play one Night Turn in response and shuffle the other Day End card back into the deck. A deck ends and is reshuffled after two Day End cards have been revealed and set aside, and the corresponding Night turn has been played.
3.4 Check for game end condition
Each player will accumulate Political Points during the game. The level of these points is checked and possibly adjusted at the end of Day Turns, and if a player has 10 Political Points at that time, you play one more Night Turn and then the game is over. See 5.0 for things that give you Political Points, and when they are gained.
4.0 Playing Actions
When it is your turn to act, you will play one Action card (the Push card lets you play more than one), or pass (you are not required to play an Action). When you have resolved any Action card played on a Day or Night turn, you can end your turn or discard up to 2 cards and then end your turn.
The thing to remember is this: Unless an Action says otherwise, only Ready units can take Actions, and a unit that does an Action becomes Unready. The exceptions are placing reinforcements on the map, and of course an Action that removes an Unready/Disrupted counter. Reactions will only make a unit Unready if the unit doing it makes an attack of some sort. So, an AA unit intercepting an Air Strike is a Reaction card, but it causes that AA unit to become Unready because combat results are drawn.
The Actions are fairly self-explanatory, but a few of the core concepts need elaboration.
4.1 Logistics
Before you can do the text of an Action card with a unit or hex of units, you need to see if they are in supply of fuel and ammunition. This is not usually going to be something you have to worry about until the mid- to late-game.
A unit is in supply if:
- You can trace a path to a city in Azerbaijan (for Azeri units) or Armenia (for Armenian and Artsakh units), and
- That path has no mountain hexes, and
- That path has no more than two non-road hexes, and
- That path does not cross a Road Out hexside, and
- That path is never adjacent to a Ready enemy Artillery or Ballistic Missile unit
Three things to note. First is that Artsakh units have to trace their supply to Armenian cities (not Artsakh cities). The second is the “two non-road hexes” condition. The line of supply does not have to follow the road path, so a pair of roads with a non-road between them is only one “non-road” hex. For instance, Martuni to Beylagan. Third is that logistics is only blocked by adjacent enemy Artillery or Ballistic Missiles, not regular infantry or armor. A unit that is not in supply cannot be the target of your Action cards. These units can still do Reactions on your opponent’s turn, however. They can also Withdraw (4.312) and Counterfire (4.311) as normal.
4.2 Movement
Units have a Movement (or MP), and an Action card will allow you to move a unit or a hex of units. Aside from mountain hexes (dark green), you can always move to an adjacent hex by using all your MP. Aside from that, move costs are:
[Terrain diagram: Open, Hills (w/road) and Mountain hexes.]
- Clear: 2MP, 1MP if entering it by the path of its road
- Hills: 4MP, 2MP if entering it by the path of its road
- Using a bridge: Same as terrain
- Mountain: No movement allowed
- Enter a city: Same as terrain
- Enter a hex with a damaged city: +1MP
- Enter a hex adjacent to enemy unit that is not Disrupted: +1MP
- Crossing the line of contact: +1MP
The “Line of Contact” is the white border on the north of the map, separating Artsakh from Azerbaijan (see the border between Martakert and Tartar). This is trenched, mined and all the roads that used to go between the regions are now slow going. There may also be token defenders (not represented by counters) that have to be overrun, all of which slows you down a little.
When an Action says to move a hex of units, you may move some or all of those units. You may move them one at a time, two at a time or all at once. Units moving separately do not have to take the same path or end in the same hex as other units they started with.
A unit that is Disrupted during its movement usually ends its movement in the hex it was Disrupted in (but see Stacking Limits). When a unit is done moving or has done an Action, place an Unready counter on it. If it was Disrupted, you do not do this. A unit is either Unready or Disrupted, never both at the same time.
4.21 Stacking limits
No more than three friendly units can be in a hex after an Action. You may move through a hex with three friendly units, but if attacked in that hex during the move you get -1 to your defense and retreat to and end movement in the previous hex if the attack Disrupts a moving unit. Assault combats are limited to three attacking units (but Artillery in other hexes can support the attack).
4.3 Combat
There are three types of combat that can be done as Actions: Assault Combat, Artillery Barrages and Air Strikes. Additionally, a few Reaction cards also do combat, and it will resolve in the same way. All combats cause all units attacking or supporting an attack to become Unready at the end of it (or worse than Unready, if they took damage). The resolution of all types of combat is:
- You declare the attacking Unit, or if there are multiple Units, a lead attacker. For Assault Combat the lead attacker must be in the hex where the assault takes place.
- Air Strike attacks a single Unit or city hex, Artillery attacks a single Unit or a city hex, and Assault Combat attacks all the units in a hex, with the lead defender being the Unit with the best DF (if multiple defenders).
- Attacker gets the Firepower (FP) of the lead (or only) attacker, and +1 FP for each extra unit involved in or supporting the attack, plus any special FP bonus given by the Action card used for the attack.
- The adjusted Firepower (FP) is compared to the adjusted Defense (DF) of the defending unit (adjusted DF can be negative). The difference is the number of cards that are revealed from the deck, one at a time (minimum of one draw, even for a difference of 0 or less). Each draw with a green circle is a hit on the target unit or hex of units, and hits resolve before the next card is drawn. If all targets are eliminated or Withdraw before you run out of cards to draw, you stop drawing. If the overall card deck empties before you run out of cards to draw, reshuffle it to finish the card draws and possible Night Turn, and reshuffle again for the start of the next deck.
The core of all damage done: If a target is not already Disrupted, the first hit Disrupts it (it goes from Ready or Unready to Disrupted). If target is already Disrupted, it is Reduced. If a Reduced target is Reduced again, it is destroyed.
Example: The 3rd Army Artillery (3-4-0) attacks the 2nd Air Defense by using an Artillery card. The firepower is 3 vs. a defense of 0, so the attacker draws 3 cards to see the combat results. Any card with a green circle is a hit. The first hit would Disrupt the defender, and if Disrupted, a second hit would Reduce them. If Disrupted and Reduced by the first two hits, a third hit would eliminate them.
4.31 Assault Combat
This is done by the acting player using the Advance, Assault, Coordinated Assault, Aggressive Assault, Missile Assault or Loitering Drones card. Your units move into an enemy-occupied hex and fight it out for control of the hex.
Assault combat is done against an entire hex of enemy units. An assault consists of up to three attacking units (with their FP in a black circle). Any Ready artillery unit (FP in red circle) within 2 hexes may support the attack for +1 FP each, and the specific card played may give other bonuses or allow distant Ballistic Missile units to support the attack.
The defender gets the DF of their best unit (defender’s choice if the final result is a tie), based on the following adjustments. This defender is called the ‘lead defender’. Note that DF for this choice may be affected by being Disrupted.
| Condition | Effect on defender |
|---|---|
| Defender in open terrain (light brown) | No effect |
| Defender in Hills (light green) | Defender gets +1 DF |
| Defender in Mountain (dark green) | Not possible |
| Assault only across Line of Contact (see 4.2) | Defender gets +1 DF |
| Assault only across Bridge | Defender gets +1 DF |
| Defender is Entrenched | Defender gets +1 DF |
| Defender on Road or in City | No effect on combat |
| Night turn | Defender gets +1 DF |
The net result is the number of cards the attacker draws to resolve the attack, with a minimum of one card draw, even if the adjusted total is zero or negative. Assault combat has two specific features (Counterfire and Withdraw), the first of which it shares with some instances of Artillery Barrages.
4.311 Counterfire
The adjusted DF of the lead defender is their ability to shoot back at you. If a card draw for your attack has a red circle instead of a green one, the attacking force takes a hit. The first hit is to the lead attacker and any additional allotted as attacker desires. This does not affect the resolution of the attack, but means that attacker will at the very least be Disrupted rather than Unready afterwards. Defenders in Entrenchments (4.34) do this damage on gold circles instead of red ones (if a defender already has this benefit, then it becomes gold and red). The maximum number of hits defender can do is their adjusted DF, so a defender with an adjusted DF of zero can do no counterfire damage. On the other hand, it is possible that an ill-advised assault could result in Reduced or even eliminated attackers as a result of counterfire.
4.312 Withdraw
Upon becoming Disrupted in Assault Combat, a defending Unit without a white circle on its DF may immediately withdraw (usually to an adjacent hex), if all the following are met:
- The hex withdrawn to or through is not Mountain terrain.
- The hex withdrawn to or through is not a hex the assault came from
- The hex withdrawn to or through is not a hex adjacent to an enemy unit (do not count the assaulting units for this).
- The withdraw does not violate stacking limits at any time.
If these conditions are met, that unit packs up and leaves, removing it from the combat. It is still Disrupted, however. This happens during resolution of the combat, so that Unit takes no further damage in that combat. Note that Withdraw can only happen upon becoming Disrupted. Units that were already Disrupted before they take a hit may not Withdraw. A unit may Withdraw off the map into friendly territory, but may only return with a Reinforcement card.
4.313 Resolution
The first hit done in Assault Combat is always to the lead defender. Hits after that are assigned by the defender as they wish, but all units must take one hit before any unit in the hex can take two (later hits can be in any Unit order).
If the attacker did more hits to the defender than they took from counterfire, or the defender completely Withdrew from the hex, the attacker takes control of the hex and leaves their units there, with Unready markers if they took no damage, or some combination of Unready and Disrupted markers if they took counterfire damage. Any defenders that did not Withdraw and were not eliminated must now retreat (including those with a white circle on their DF). This retreat follows Withdraw rules above, with one exception. You may retreat adjacent to an enemy unit not in the assault, but the group of units retreating to that hex takes 1 additional hit. If the attacker does not win, their Units go back to the hex they attacked from. Unless a card says otherwise, all attackers, supporting Artillery and all defenders are at the very least marked Unready.
Example: You as defender had three units in a hex which took 2 hits during an Assault and two of your units Withdrew. The enemy took no hits, so your remaining unit (still Ready) has to retreat. Due to stacking limits or other factors, the only hex available is adjacent to enemy units. The retreating unit takes one hit and is Disrupted. If it had been able to retreat to a hex that did not violate this condition, it would have retreated but still been marked as Unready.
4.32 Artillery Barrage
This is a use of just Artillery or Ballistic Missiles using the Artillery card. One Artillery or Ballistic Missile unit, supported by any number of units of that type in the same or adjacent hexes (+1 FP each), attacks a single enemy target (a unit or city) that is in range of all those units.
If the target is an Artillery or Ballistic Missile (but not Air Defense) that is within range of the lead attacker and it has an adjusted DF of more than zero, it can do counterfire damage (see 4.311). Otherwise, the target cannot shoot back. You cannot withdraw (4.312) from an artillery barrage. Note that Artillery which is able to do Counterfire while defending against an Assault does so against the lead attacker, not against any Artillery supporting that attacker.
4.33 Air Strike
This is an attack made with the Azeri or Armenian Air Strike card. You simply pick one enemy unit (or city) anywhere on the map and make an attack against it, with attacks on cities handled like Artillery Barrages against them (4.331).
Air strikes cannot be counterfired against or withdrawn from. However, if you have a Ready air defense unit (green circle on FP) and it is in range of the target of the attack, you may try to shoot down the air strike with an Air Defense card. You simply draw cards for combat based on the adjusted FP total of the air defense unit or units. One green result is sufficient to shoot down the enemy planes or drones, which usually results in an Air Strike card being removed from play (set it aside and never reshuffle it back in). Air Defense cards can also shoot down Ballistic Missile attacks that are within range.
4.331 Cities as targets
An attack with an Artillery or Air Strike card may also target an enemy city (not merely enemy-held) that is within range of the attacker, ignoring any enemy units there (you may also attack an undefended enemy city). Cities have a DF of zero (in any terrain), but only take hits on a red circle drawn for the attack. If a city takes one or more hits, put a ‘Damaged City’ counter on it. This hex costs +1 MP to move into and gains you a Political Point (once per city), but has no other effect. A city cannot be damaged more than once, and once damaged a city remains that way for the rest of the game. Damaging enemy cities generates Political Points for you and thus becomes a strategy for hastening the game end, but it has no effect on combat in that city.
4.34 Entrenched
Some units start play with an Entrenched marker. An Entrenched unit that has an adjusted DF of 1 or more does counterfire hits on gold card draws rather than red ones. An Entrenched unit gets +1 DF against attacks. If a Reaction card that grants this counterfire benefit is played on an Entrenched unit or other unit with this benefit, counterfire hits on gold and red instead of just gold.
If all units in an Entrenched hex leave the hex or are eliminated, the Entrenched counter is removed from the map (a successful Assault removes the Entrenchments). Otherwise, any friendly unit ending its movement in the hex gains the benefit of the Entrenchment. Units attacked while moving through the hex do not (so you need to declare intent before moving into the hex).
4.4 Reaction cards
Any card with a green text box is a Reaction. A Reaction may only be played by the player who is not taking an Action, and only one Reaction may be played to respond to an Action.
Reactions can involve combat, like having an Air Defense unit attack an Air Strike, or an Interdict that has one of your Ballistic Missiles target an enemy unit that just moved into a new hex.
Read the Reaction cards as written. For instance, Tactical Retreat says ‘Negate an assault combat hit, Withdraw (4.312) that unit one or two hexes.’ The card says ‘negate’, which means the hit did not happen for determining who took the most damage in the assault combat (4.31). It references the rule section for Withdraw (4.312), so you would still have to adhere to all Withdraw conditions. For instance, if all possible hexes to Withdraw to were adjacent to enemy units, this card could not be used.
The cards should be worded so that despite their brevity, the way they interact with the rules is unambiguous.
4.5 Political cards
When you are allowed to draw one of your Political cards, it goes into your hand and can be used like any other card. One part of the card is usable by both players, one part is usable only by you. Remember that you draw Political cards when your opponent gains Political points.
5.0 Political Points
Caucasus Burning: The Nagorno-Karabahk War, 2020 has an end game condition based on the politics of the situation, which is partially but not entirely based on territorial gains. When you cross a red number on the Political score track, your opponent gets to draw one of their Politics cards. That is, your successes mean that internal or international support for your opponent increases, but if you get enough political points, you force the other side to the negotiating table and the conflict ends, presumably with new territorial lines being drawn and grudges saved and nurtured for the next time. You get a political point for different things, based on which side you are playing.
Armenia Political Points (as they happen)
- Damage an Azerbaijan city: 1 point (only scoreable once per city)
- Destroy an Azerbaijan armor unit: 1 point per Unit
Armenia Political Points (end of deck)
- Control 1 or more Azerbaijan cities at end of each deck: 1 point
- Control ≥8 of the 11 cities inside red border at end of each deck*: 1 point
*This includes the Azerbaijan city of Tartar, making it potentially worth 2 points
Azerbaijan Political Points (as they happen)
- Damage an Armenian or Artsakh city: 1 point (only scoreable once per city)
- Destroy an Armenian or Artsakh armor unit: 1 point per Unit
Azerbaijan Political Points (end of deck)
- Control 1 or more Armenian (not Artsakh) cities at end of each deck: 1 point
- Control ≥3 of the 7 cities inside blue border at end of each deck: 1 point
- Control ≥6 of the 11 cities inside red border at end of each deck*: 1 point
*This includes cities inside the blue border and counts Tartar towards its total
Example: You are playing the Armenian side and get your first Political point by damaging an Azeri city. This is a red number, so the Azeri player draws the top card of their Politics deck and puts it in their hand.
The game ends if one side has 10 or more political points at the end of any day. So even if you reach 10 political points on your turn, you continue play until the end of that Day, check to make sure you still have 10 points, then do a final Night turn. That is, game end is triggered at the end of the Day, then each player gets one more action for that Night turn to try to alter the end of game scoring.
6.0 Scoring
| Armenia | Azerbaijan | |
|---|---|---|
| Each city controlled in Artsakh (inside red border) | 3 points | 4 points |
| Each of these in Nagorno-Karabakh (blue border) | +1 point | |
| Control of Stepanakert | +2 points | |
| Controlling an enemy city outside the red border | 5 points | 5 points |
| Each enemy unit eliminated (of any kind) | 1 point | 1 point |
Control is Armenia or Artsakh occupying a city with an Azeri flag, or Azeri forces occupying a city with an Armenian or Artsakh flag. Unoccupied cities default to control of the player whose flag is there (Artsakh counts for Armenia). If there is any question, you use the highest point value. High score wins.
Example: Azeri forces controlling Jabrayil or Zenglian is worth 4 points each (inside the red border), while Shusha is worth 5 points (+1 for inside the blue border), Stepanakert is worth 7 points (inside blue border and Stepanakert) and Goris or Vardenis would be worth 5 points each. Armenia controlling Tartar would be worth 5 points. It is inside Artsahk, which is normally 3 points, but it has an Azeri flag, making it worth 5 points and you use the higher value.
For your own comparison to the historical outcome, the line of ‘who controls what territory’ would be the shortest path between controlled locations that does not intersect enemy control, with any ambiguity decided by the side with the highest score. For instance, if Azerbaijan wins, the choice between two equal length paths is the one which gives Azerbaijan more territory.
7.0 Game Strategy
The political points are structured that Armenia can force game end if it holds its own, as it gets political points at the end of each deck for controlling at least 8 of the 11 cities inside the red border. Do this long enough and the game ends, likely with Armenia getting enough points for territory to win. Azerbaijan wants to get some early territorial gains (cities inside Artsakh), and if possible knock off as much Armenian armor as possible. It is tempting to use lots of artillery to support assaults, but the ease of Withdrawing from an assault when Disrupted means the extra firepower may be wasted. Disrupting a unit with artillery before an assault means it cannot Withdraw during the assault, giving you a better chance of reducing or eliminating enemy units.
Keep Logistics (4.1) in mind. Ready artillery units exert a zone of control that blocks a supply path in adjacent hexes, and a lack of logistics keeps enemy units from moving, assaulting or doing artillery barrages.
8.0 Tactics & Postscript
The historical end to the conflict came when Azeri forces pushed down the southeast edge of the conflict area, along the easier terrain near the Aras River (which runs along the Iran border on the map), and then moved west to take Shushi and its roads. Combined with being able to interdict traffic to Vardenis, this isolated the north of Nagorno-Karabakh and made the already poor Armenian position untenable. Controlling roads and specifically road junctions is very important, as they are both the path of logistics and the only way to rapidly move units in the disputed region.
Both sides used artillery constantly, attack drones were in widespread use, along with short range ballistic missiles and missile-based air defense systems, and these in turn were targets of air, drone and missile strikes to try and deny that capability to the enemy (Azeris were much more capable in this regard). Civilian populations were routinely shelled, including with cluster munitions, which did not do a significant amount of damage, but did score propaganda points for home consumption. Atrocities like the mutilation and execution of prisoners occurred on both sides. Exact casualty figures for the six-week conflict are unknown due to each side exaggerating enemy losses and downplaying their own, but reasonable estimates come in at the equivalent of five to ten battalions worth of men and material destroyed on each side (higher for Armenia than Azerebaijan).
While the 102nd Russian never took part in the conflict, it is stationed at a military base inside Armenia. Turkey, while friendly to Azerbaijan, did not take any direct role. Turkish F-16s were spotted at an airfield in Ganja, but there is no hard evidence they flew any sorties into Artsakh during the war (Armenia claims they did). Turkey did send some Syrian mercenaries to fight on the Azeri side, and over 300 of them were killed in the fighting (estimates vary).
Both sides took pains to not do anything that would anger other nations enough to get them directly involved. Russia sells weapons to both nations but has a number of important pipelines running just north of the conflict region. Iran made its position clear by shooting down anything that entered its air space. Turkey would consider an attack on the Azerbaijan exclave of Nakhchivan a serious threat, and would use its tiny border with Nakhchivan as an excuse to intervene. Azerbaijan for its part did not mount any attacks from Nakhchivan so as not to give Armenia any legitimate pretext to attack it. As a result, the Azeri military forces in Nakhchivan sat out the war.