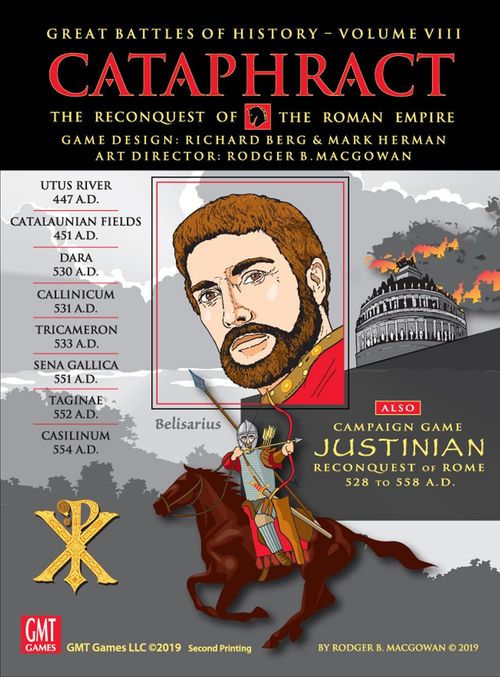
Cataphract
Cataphract Rulebook
Table of Contents
Table of Contents
(2.0) Game Components
Each game of CATAPHRACT contains:
- Four 22" x 34" map sheets
- Dara/Taginae
- Callinicum/Tricameron
- Casilinum/Sena Gallica
- Catalaunian Fields/Utus
- Two and a half counter sheets (620 single and 40 double size counters)
- 1 x Rules Booklet
- 1 x Scenario Booklet
- 4 x Player Aid Cards (2 sets)
- Game Turn/Rout Point Tracking Card
- 1 x Ten-sided die
- Plastic storage bags
(2.1) The Maps
Most battles use one half of a 22" x 34" map. The two battles from the original ATTILA module use a full map sheet. A hex grid covers each map to regulate movement and combat, and the effects of the different types of terrain on the map are covered in the rules and charts.
(2.2) The Playing Pieces
There are three types of playing pieces, or counters: combat units, representing the various types of fighting troops; leaders, the individuals who command the troops; and information markers used to note certain types of information necessary for play.
(2.21) Combat units are rated numerically for their Size, Troop Quality (TQ) and Movement capability. Units that are capable of firing missiles also have a Missile indicator, indicating the type of missile used (e.g., B = Simple Bow, C = Composite Bow, and J = Javelin, etc.). The Missile Table gives the Ranges available for these missiles. Each combat unit has two sides. For most units, the ratings are the same on both sides of the counter. The reverse side is used to indicate that the unit has "Moved" at least once that Game Turn.
(2.22) Each unit is of a certain Type (e.g., HI, LC, etc.). The Type is used to determine certain combat results and effectiveness vis-a-vis other types. Some types are subdivided by Class (e.g., HC type—Heavy Cavalry—with the Class Cataphract). A unit's Class allows for variation of effectiveness within the Type.
(2.23) Examples of Combat Units: the counters illustrate a Cavalry Unit and an Infantry Unit, each with a Front and Back side. A combat unit displays its Unit Name/ID, Size, Troop Quality (TQ), Type of Missile, Unit Type, Unit Class, and Movement Allowance.
(2.24) Leaders have a variety of ratings, used to rate their Initiative and Command, as well as their fighting capabilities—both as leaders and individually; see 4.1. A Leader counter's Front (Activated) side shows the leader's Name, Rank, Command Range, Elite Indicator, Initiative, and (for Overall Commanders only) Strategy, Personal Combat, Charisma, and Line Commands; the Back (Finished) side is used once the leader has acted. A Contingent Commander's counter also notes which units he may command.
(2.25) Informational markers, such as Shock Must Check TQ, numbered counters (representing Cohesion Hits), Routed, Missile Low, etc., are used to record certain game functions, usually the changing status of a unit. When a marker's name is mentioned in the game's manuals, its name is displayed in Small Caps font.
(2.3) Charts, Tables and the Die
There are two distinct Charts & Tables player aid cards (each player has a set). The use of each chart/table is explained in the rules, below.
The game uses a ten-sided die; the 0 is treated as a 0 (not a 10), and is less than 1.
(2.4) Terminology
Knowledge of the following game terms will be useful for play.
Activated Leader: The leader who is giving Orders or Line Commands to his troops at any given instant. Only one leader may be active at any one time.
Class: Subcategory within Type, used to differentiate between various weapons systems within a type. Example: Cat (Cataphract), a Class of Type HC (Heavy Cavalry).
Cohesion: A unit's ability to remain in an organized, fighting formation. In the game, this is measured in the form of Cohesion Hits.
DR: Acronym for die roll.
DRM: Acronym for die roll modifier.
Finished Leader: A leader who has previously been activated that Game Turn and is "Finished," and (normally) may not be activated again. Leaders may be Finished for other reasons, failure to Trump, etc.
Inactive Leader: A leader who has yet to be activated and is still eligible to be activated.
Leader: Interchangeable with the word commander. Leaders were the generals who commanded and influenced the troops.
Line: All units that are listed on a specific battle's Line Command Eligibility chart as eligible to move under a single Line Command.
MA: Acronym for a unit's basic Movement Allowance. It also represents a unit's maneuverability compared to other units in the game.
Missile Fire: Friendly units throwing javelins or shooting arrows at enemy units.
Momentum: The mechanic by which a leader can undertake more than one Orders Phase in a turn.
MP: Acronym for Movement Point.
Order/Line Command: The two methods leaders have of getting their troops to move, etc. Individual Orders (IO) apply to individual units; Line Commands (LC) to entire lines of units. In terms of whether a leader can/may issue an Individual Order or a Line Command they are treated separately. For the sake of brevity, the word "orders" will mean either a Line Command or Individual Orders.
Orderly Withdrawal (OW): Ability to move away from approaching enemy units to avoid being entangled in Shock combat.
Orders Phase: The period during a turn when a leader gives orders to his troops to move and fight.
Shock Combat: Hand-to-hand, hack and thrust, slash and crash, melee.
Size: Representing the number of men in that unit.
Superiority: The relative capabilities and "killing" effectiveness of the opposing weapons/armor systems. Superiority, when achieved, will substantially increase an opponent's losses in cohesion.
TQ: Acronym for the all-important Troop Quality rating. The TQ rating is, by far, the most important number of a combat unit. It will be consulted constantly throughout play—at almost any time a unit does something that will endanger its cohesion. The Cohesion Hit and TQ Check Chart summarizes when a player uses the TQ Rating.
Trump: The mechanic by which an enemy leader can stop a friendly leader from undergoing an Orders Phase and transfer that phase to that enemy leader. It can also be used by a friendly leader to go before another, but lower-rated, friendly leader.
Type: General, categorical description of combat unit, usually used to determine combat effectiveness and results. Examples: HI (Heavy Infantry), HC (Heavy Cavalry), etc.
Zone of Control (ZOC): The hexes—usually directly to the front of a unit—into which that unit exerts, by its presence, enough "influence" to inhibit freedom of movement.
Combat Units/Terms
Heavy Infantry: In Cataphract, this type represents dismounted Heavy Cavalry. These are troops protected by armor usually helmet, breastplate and leg armor. They are armed with lances and shields along with a variety of one-handed slash/bash weapons. The Byzantine Cataphracts are also armed with the highly effective composite bow.
Medium Infantry: A term that applies to units (e.g., Militia infantry) that, while not as well-equipped as their heavier counterparts, had weaponry and some body protection that was superior in effectiveness to that worn (or not worn) by Light Infantry.
Light Infantry: A generic term applied to foot units with little or no body armor, a light shield, and usually a spear and/or sword. Most of the Light Infantry in Cataphract are armed with bows.
Light Cavalry and Lancer Cavalry: For the most part, these are mounted archers noted for their mobility. That speed and mobility could be a major plus, as demonstrated by the effectiveness of Simmias and Phasis and the magnificent Hun and Herulian Light/Lancer Cavalry units.
Heavy Cavalry: This was the arm of decision for the Byzantine, Persian and Gothic armies. The Byzantine Cataphract was the ultimate combat system of this era. Heavy Cavalry trained in both the use of composite bow and lance were the backbone of Byzantine armies of this period. Their mobility coupled with local militia infantry could fend off larger more mobile Arab forces. Like Dragoons of the Napoleonic era, these units could be dismounted to supply a heavy infantry backbone to the infantry archer forces akin to the later English long bow system.
(2.5) Game Scale
Each point of Size denotes from 100-150 infantry (depending on their formation, rank depth and usage) or 100 cavalry. Thus, a typical Medium Infantry unit represents 700 men and a Cataphract Heavy Cavalry unit about 500 men. A combat unit has a frontage of about 50+ yards, or one hex. Each hex is approximately 70+ paces (yards) from side to side. Each game turn covers about 20 minutes of real time.
(2.6) Game Length
All battles consist of an indeterminate number of Game Turns. Most battles are fought until one side withdraws—so there is usually no need to keep track of how many turns have passed. Some battles, however, do keep track of time, so we've provided you with a Game Turn Track on the Rout Point Tracking player aid card.
Historical Digression: Veterans of CAESAR/CAESAR: CoG will find that the Byzantine battles/scenarios are shorter to complete than those of just 500 or so years earlier. The size of the armies was routinely around 10,000-15,000 men per side.
(3.0) The Sequence of Play
Players activate each of their leaders in the order determined by their Initiative Rating. When a leader is activated, he issues orders which enable units to move and conduct combat. After all leaders are Finished, play proceeds to the Rout and Reload Phase, and then to the Withdrawal Phase where each player checks to see if his army withdraws.
A. Leader Activation Phase
The player with the lowest-Initiative-rated leader—or Uncontrolled Line (11.3)—who has not yet been activated, activates that leader. If that leader wishes to issue a Line Command, he rolls—when necessary—for the ability at this point (4.33). Non-Momentum Trump attempts (5.41-42) may be made at this time.
B. Orders Phase
-
Movement and Missile Fire Segment a. For each Individual Order issued by the activated leader, the player may perform any one function listed in 5.22 with one unit; OR, b. For each Line Command issued, eligible combat units within range of the leader may Move and/or Missile Fire (5.23).
Opposing units capable of Orderly Withdrawal (6.5), Reaction Facing (7.14), and/or Reaction Fire (8.2) may do so throughout this segment.
-
Shock Combat Segment
After a leader has finished issuing orders, eligible units engage in Shock combat, using the following sequence:
a. Shock Designation: place Shock-No TQ Check markers per 7.33. The attacking player designates which units will be involved in each individual combat. b. The Charge (Pre-Shock TQ Check). c. Resolution of Leader Casualties d. The Clash of Spears and Swords (determine Superiority and Shock column) e. Resolve the Shock Combat f. Check for possible Collapse and Rout
C. Momentum Phase or Return to 'A'
The player, using the leader who was activated for the immediately preceding Orders Phase, may attempt a Momentum die roll to give that leader another Orders Phase (Phase "B"), or, play returns to Phase "A" for any leaders that have not been activated. If the player succeeds in the Momentum attempt, the opposing player may, if he wishes, attempt a Momentum Trump (5.42[2]).
D. Rout and Reload Phase
- Remove RALLIED markers.
- Rout Movement: Routed units must undergo Rout Movement (10.22).
- Reload Segment: Eligible missile units may get more missiles (8.18).
- Flip all "Moved" units and "Finished" leaders to their sides. Remove any FIRED markers.
E. Withdrawal Phase
Each player totals the Rout Points of all eliminated combat units and leaders to see if his army has reached its Withdrawal Level. If neither player's army withdraws, that Game Turn is concluded, and another Game Turn begins. There is no set number of Game Turns. The battle continues until one side's army withdraws.
(4.0) Leaders
Combat units cannot move or fire missiles without receiving orders from a leader (exception: Uncontrolled Advance 11.3). Those combat units that have received such orders during that Orders Phase, or that are within Command Range of that same leader, or that are executing an Uncontrolled Advance (11.3), may conduct Shock Combat. Each leader counter has two sides: "Activated" and "Finished." A leader who has not yet been or is now activated uses his Activated side. A leader that has concluded his activation is flipped to his Finished side.
The Front (Activated) side of a leader counter shows his Name, Rank, Command Range, Elite Indicator, and Initiative, plus—for Overall Commanders only—Strategy, Personal Combat, Charisma, and Line Commands.
(4.1) Leader Counters
Each leader possesses several ratings:
Command Range: Denotes his overall presence on the battlefield as well as the effectiveness of his abilities; the range in hexes over which that leader may exert his Initiative.
Initiative: Denotes his basic ability to control forces and make rapid decisions. Initiative is used to determine the order of leader activation and the chances of that leader being able to use Momentum. It also defines the number of Individual Orders that leader may issue per Orders Phase. The higher the rating the better the leader.
Elite Commander: Denotes a leader who can usurp the standard Initiative-based Orders Phase sequence; see 5.5.
Line Command: The boxed number to the right of the Initiative Rating indicates that, if eligible, that leader, instead of issuing a series of Individual Orders, may issue a Move and/or Fire orders to all units in that number of Lines (4.33). Contingent commanders (leaders marked with a "C" where the Line Command rating would be) may not issue Line Commands.
Strategy: For Overall Commanders only, facilitates the use of Line Commands by Subordinate Commanders.
Charisma: Denotes his ability to spur his troops on to greater efforts in combat. The rating is used to adjust the die roll on the Shock Combat Results Table in his favor for combat units with which he is stacked. It is also used to Rally units.
Design Note: This rating varies widely in CATAPHRACT. For the most part, Roman Commanders of this era had abandoned the up-front and personal style of hands-on leadership in favor of a more efficient, behind-the-lines command methodology. This enabled them to see—and, thus, control—more. Some of their opponents, such as the Goths still emphasized the traditional Alexandrian up front style of leadership.
Personal Combat: This rating is used to determine whether a leader is killed or wounded.
Movement Allowance: The number of Movement Points a leader may use in an Orders Phase. The MA, which is nine (9) for all leaders, is not printed on the counter. Leaders move as if they were Cavalry, although they never suffer Cohesion Hits.
(4.2) Leader Capabilities: Individual Orders
This section applies to all leaders in the game.
(4.21) A leader may give Individual Orders to any friendly units within his Command Range, which is measured using an unobstructed path of hexes equal to or less than the range, traced between leader and unit. Count the unit's hex, but not the leaders. A path is obstructed by hexes occupied by enemy units, a hex in an enemy Zone of Control (ZOC), or terrain a leader could not cross or enter. Friendly units negate enemy ZOCs for purposes of tracing order paths. All other paths are considered unobstructed. Command Ranges are calculated at the instant the order is given.
(4.22) An Individual Order allows a friendly unit to conduct movement and/or missile fire, etc. per 5.22. In each Orders Phase, a leader may issue a number of Individual Orders equal to his Initiative Rating. Once a leader can give no more Orders and cannot be activated again, flip him to his Finished side.
(4.23) A leader may give an Individual Order to move himself, which counts against the number of orders that leader may issue in that Orders Phase. A leader may also move—without expending an Individual Order—with any combat unit with which he is stacked and to which he gave an Individual Order. The leader must remain with the moving combat unit and end up in the same hex.
(4.24) A leader, other than the Overall Commander, who is in an enemy ZOC may not issue orders either to combat units or to himself and thus may not move out of that enemy ZOC unless and until he is moved out of that ZOC by an Individual Order from the Overall Commander (4.4). See also, 5.26.
(4.25) A leader who is "Finished" (5.15) may not issue Individual Orders. However, he may move, but only if ordered by an Overall Commander to do so.
(4.3) Leader Capabilities: Line Commands
This section applies to all leaders other than Contingent Commanders.
Design Note: Line Commands are handled somewhat differently in CATAPHRACT than in other games in the series. Experienced players should read this section and the Line Command Eligibility charts carefully and refrain from adding exceptions and conditions from prior games that are not there.
(4.31) A leader, instead of issuing any Individual Orders, may issue a Line Command to all the units in a Line (4.32), if he is able to do so (4.33). The units that may comprise "a Line" are listed in the Line Command Eligibility Chart for each scenario. Belisarius is the only leader who can issue 2 Line Commands. All eligibility requirements are determined at the instant the Line Command is issued. Furthermore, Belisarius can move with each line, but his total movement cannot exceed his movement allowance of '9' (see also 5.24).
(4.32) Line Composition
Infantry: For Infantry units to be eligible for a Line Command, they:
- must all be of the same Type/Class listed in that scenario's Line Command Eligibility Chart; and
- must be adjacent and either flank-to-flank or (but not "and") Front-to-Rear (see Facing, 7.1) to be in the same Line; and
- must all be within twice the leader's Command Range
Cavalry: For Cavalry units to be eligible for a Line Command, they:
- must all be of the same Type/Class listed in that scenario's Line Command Eligibility Chart; and
- must be adjacent or within one intervening hex of another unit in the same Line. This hex cannot be occupied by an enemy unit or a friendly unit not eligible to participate in that Line; and
- must all be within twice the leader's Command Range
Command Range is traced as for Individual Orders. Units in a Line do not have to stay together when they move, and all eligible units in range do not have to take part.
(4.33) Line Command Eligibility: A leader's ability to issue a Line Command depends on his position in the command hierarchy and the type of Orders Phase. The leader cannot be in an enemy ZOC.
Overall Commanders
The Overall Commander (OC) may issue a Line Command in any Order Phase.
Subordinate Commanders
A Subordinate Commander may issue a Line Command(s) in his Initial (non-Momentum) Orders Phase if:
- he is within his OC's Command Range and the owning player rolls a die, and that DR is the same as or lower than the OC's Strategy Rating. If it is higher, he may issue only Individual Orders; or
- he is outside his OC's Command Range and the owning player rolls a die, and that DR is a "0"; if the DR other than "0", the leader is Finished for the Game Turn.
The ability to issue a Line Command stays with that SC into any succeeding Momentum Orders Phases; the player does not need to roll again during the SC's activation. The SC is not required to issue a Line Command in any given Orders Phase; he may always issue Individual Orders instead.
Play Note: Just because the SC has the ability to issue a LC, doesn't mean he has to. The SC could roll for the ability in his Initial Orders Phase but issue IOs instead, then issue a LC in one and/or both Momentum Orders Phases. Note also that the LC die roll cannot be attempted in a Momentum Orders Phase.
In certain scenarios, Subordinate Commanders may be further restricted on the nationality/types of units that they may command. The leader can affect no other units in any way.
Example: At Callinicum, Cabades can only give Individual Orders and Line Commands to Persian units, and cannot be used to enable other units to shock.
Contingent Commanders
Contingent Commanders cannot issue Line Commands.
(4.34) A leader who has issued a Line Command may—not must—move as part of that Line Command. He does not have to stay with the line.
Design Note: Players will soon realize that Line Commands are a very efficient way to move large numbers of units. However, Line Commands do restrict what a leader may do. For example, a leader issuing a Line Command to move units may not rally units in that Orders Phase. Moreover, as a battle progresses, and the combat units become intermixed in their melees, it will become increasingly difficult to issue Line Commands to more than a few units.
(4.4) Overall Commanders
Overall Commanders (OC) are those leaders that command the entire army, as designated in each scenario. OC's function like other leaders except that, when activated, OCs may:
- leave enemy ZOCs by issuing an Individual Order to themselves
- issue Individual Orders to move other, friendly leaders once per leader per Orders Phase. If the leader to be moved starts in an enemy ZOC, it costs the OC two (2) Individual Orders to move that leader.
- replace an eliminated leader (4.63)
- issue Line Command(s) to any Line(s) in any Orders Phase.
An OC that issues a Line Command cannot do #1 - #3.
(4.5) Contingent Commanders
Contingent Commanders (CC) function like other leaders with respect to Individual Orders, with the exception that these orders may be issued only to those units in their command as noted by the command restriction keyword on their counter and can affect no other units in any way. Furthermore, Contingent Commanders may not issue Line Commands and may not Trump or use Momentum.
Series Note: In CATAPHRACT, Contingent Commanders are the leaders of barbarian mercenary bands employed by the Byzantines. Their use and function differ from the Contingent Commanders presented in ALEXANDER.
(4.6) Leaders and Enemy Combat Units
This section covers general rules relating to leader movement and enemy combat units. For specific rules for casualties during Shock see 9.14.
(4.61) Leaders may only enter an enemy ZOC if stacked with a friendly combat unit or if that ZOC is already occupied by a friendly combat unit. Like combat units, leaders must cease movement upon entering an enemy ZOC. A leader may leave an enemy ZOC only if he receives orders from the Overall Commander; see 4.4.
(4.62) The instant an enemy combat unit moves adjacent to a friendly leader at any time, or if an enemy combat unit is adjacent to a friendly leader after Shock combat, that friendly leader may immediately withdraw from 1 to 3 hexes, player's choice, away from the enemy unit. The hexes can be any the leader could enter during normal movement (6.25). The leader may withdraw whether he is alone in a hex or stacked with a friendly combat unit. If the leader is not stacked with a combat unit and does not withdraw—or cannot, because he is surrounded by enemy units, enemy ZOC, and/or impassable terrain—that leader is eliminated (captured/killed). A leader stacked with a combat unit that uses Orderly Withdrawal (6.51) may withdraw along with that unit.
(4.63) Replacement Leaders. All leaders, other than the Overall Commander, may be replaced when killed. This is done by having the OC issue an Individual Order to replace a fallen subordinate with a Replacement leader. Eliminated Contingent Commanders are simply placed back on the map. The OC does not have to be within range of any particular unit; simply place the Replacement leader (or returning Contingent Commander) in any hex containing a unit he is capable of commanding. The Replacement leader is considered "Finished" for that turn; he may not give orders—or initiate shock combat for units within range—until the next Game Turn. The number of Replacement leaders provided is a design-intent play limitation. If there are no Replacement leaders available, a dead leader may not be replaced. This, again, does not apply to a Contingent Commander. If an Overall Commander is eliminated, he is not replaced; the army continues without an OC.
Design Note: A single, "named" Contingent Commander counter represents more than one "man." The same may also be said of other named leaders in terms of their presence on the field. The replacement leaders for Subordinate Commanders have ratings similar to Contingent Commanders.
(5.0) Leader Activation & Orders
Combat units may move and fight only when ordered to do so by a leader. Leaders issue Individual Orders or Line Commands in the Orders Phase. Leaders may not issue any orders until they are Activated. Players may use the Momentum rule to give an activated leader up to two additional Orders Phases. They may also use the Trump rule to activate a leader sooner than usual.
An Important Note: For the sake of brevity, the word "orders" will also mean a Line Command (LC), unless the rule specifically uses the term Individual Order (IO) to distinguish it from a LC.
(5.1) How to Activate Leaders
(5.11) All leaders start the turn Inactive, and each has the opportunity to become Active and issue orders. After they complete issuing orders, they are then Finished.
(5.12) Each Game Turn starts with one player activating one of his leaders. Leaders are activated in the order of their Initiative rating, starting with the lowest rated leader. In case of ties, both players roll a die; high roll goes first, with players then alternating amongst the remaining, similarly-rated leaders. If two leaders on the same side have the same Initiative rating, the owning player decides which one goes first.
(5.13) Only Inactive leaders that have not previously been activated in that turn are eligible for activation, with the exception of Momentum (5.3) and Elite Commanders (5.5).
Example of Sequence of Leader Activation: At Callinicum, the Byzantine leaders Arethas and Longinus (Initiative 3) would activate first and second (Byzantine player's choice). As both players have leaders with Initiative 5, a high die roll decides who goes next. If the Persians win the roll, one of their two leaders with Initiative 5 would go, followed by one of the Byzantine's having Initiative 5, then the second Persian having Initiative 5, etc.
(5.14) A leader may be activated a maximum of three times in succession in a single Game Turn (using Momentum for the last two times). Exception: see the "succession" requirement with respect to Elite Initiative (5.5).
(5.15) A leader is Finished when any one of the following occurs:
- The leader has completed an Orders Phase and does not (or cannot) make a Momentum attempt
- The leader is Trumped by an enemy leader
- The leader fails a Trump or Momentum attempt
- A player declines to use that leader, i.e. he passes (but see 5.25)
When a leader is Finished, flip his counter over to so indicate. A Finished leader cannot undertake any further Orders Phases that Game Turn.
Example: At Tricameron, Martinus, one of Belisarius' subordinate commanders, starts his Orders Phase in an enemy ZOC. When it becomes Martinus' time to activate, he cannot issue Individual Orders or a Line Command. Martinus might as well use his Command Range to have some Byzantine units make Shock attacks (because he is about to be Finished anyway). When Belisarius gets an Orders Phase, he decides to move Martinus out of that enemy ZOC, but the Finished Martinus is not eligible to activate during the remainder of the turn.
Design Note: The ability of leaders in an enemy ZOC to allow units in their range that are already in contact with the enemy to Shock—even if that leader cannot do anything else—is more a function of the units' proximity to the enemy than the leader's ability, range, awareness, etc.
(5.27) After a leader has issued all the orders he wishes (or can), friendly units engage in Shock in the ensuing Shock Segment (9.1).
(5.28) After Shock combat has been completed, that Orders Phase is finished. Two things may now happen:
- The player may attempt a Momentum Orders Phase (5.3) for the leader who just finished the Orders Phase; or
- A new leader is activated, returning to Phase "A"
When all leaders are Finished, the players proceed to the Rout and Reload Phase.
(5.2) The Orders Phase
(5.21) When activated, a leader can give a number of Individual Orders (IO) (4.2) equal to his Initiative rating to units or, he can issue a Line Command(s) (4.3).
Example: Thus, when Belisarius is activated, he can either issue up to six Individual Orders or two Line Commands for that activation. He may choose to issue less (or none); he may not issue more in that Orders Phase.
(5.22) Each Individual Order allows the player to do one of the following:
- Move any one friendly unit. Missile units may fire at any time during their movement
- Conduct Missile Fire with any one friendly missile unit without movement
- Remove Cohesion Hits from one friendly unit (10.16)
- Attempt to Rally one friendly Routed unit (10.27)
- Replace one eliminated friendly leader (4.63)
(5.23) Each Line Command allows the player to move and/or missile fire with any/all friendly units in one Line. The units in the Line do not have to conduct the same action (some may move, others may fire without moving, while still others may both move and fire). A Line Command given to a non-bow armed infantry or cavalry unit may cause an Uncontrolled Advance to occur (11.3).
(5.24) Although a given combat unit may be ordered to move/fire more than once per Game Turn, it may not be ordered to move/fire more than once per Orders Phase (6.12). This restriction does not apply to leaders.
Example: At Dara, if a Cataphract unit is ordered to move by John, it may not be ordered by John to move again in that Order Phase. It may, however, be so ordered in a subsequent Orders Phase by, say, Belisarius, or even by John if he gets another Orders Phase through Momentum.
(5.25) Orders/Line Commands are not used to directly precipitate shock combat, which occurs in a subsequent segment. However, Individual Orders can be used for Missile Fire (8.1). Reaction Fire (8.2) does not require orders; it occurs in response to enemy actions.
(5.26) Any leader, other than the Overall Commander, occupying a hex in an enemy ZOC, or enters an enemy ZOC during an Orders Phase, may not issue orders (4.24). However, his Command Range may still be used to designate units to engage in Shock Combat in that segment of the Orders Phase (see 7.33), so he is not entirely useless. In addition, he may still use his Charisma ratings. He is not Finished simply because he is in an enemy ZOC; however, he is Finished—and unable to be activated—if he comes under 5.15, or, he has used his Command Range to allow units to engage in Shock, as above.
If, later in the Game Turn, the leader is no longer in an enemy ZOC, the player must activate him before any other leader. However, a leader so activated may not use Momentum.
(5.3) Momentum
Play Note: Momentum (and Trumping, below) are highly useful and powerful gambits, especially for the player with superior leadership.
(5.31) At the conclusion of the Orders Phase, the player may attempt to undertake an additional Orders Phase with the active leader who just completed issuing orders. To do so, that leader must pass a Momentum die roll, and he may not fall under any one of the following, restrictive situations:
- The leader is in an enemy ZOC, or was previously in an enemy ZOC (5.26)
- The leader was previously Trumped or Bypassed (5.44)
- The leader is a Contingent Commanders (4.5)
- The Leader is Finished (5.15)
(5.32) The player rolls the die and compares the result to the leader's Initiative rating. If the DR is the same or less than that rating, that leader starts another Orders Phase (Phase B); if higher than the rating, that leader is Finished.
Example: Thus, Belisarius would need a die roll of 0-6 to gain Momentum; a 7-9 would Finish him.
(5.33) Die Roll of Doom. If the Momentum die roll is a 9, the owning player immediately rolls again. If that second DR is a:
- 0 or 1, command paralysis occurs. That player may not activate any further leaders for the Game Turn – all his leaders are now Finished. His opponent is still eligible to activate his remaining eligible leaders.
- 2-8, the leader attempting Momentum is Finished.
- 9, no further leader activations may occur this turn; all leaders on both sides are Finished, and play goes directly to the Rout and Reload Phase.
(5.34) Momentum die rolls apply only to a leader who has just completed an Orders Phase. You may not apply Momentum to a leader who Finished several phases ago.
Exception: A leader first activated by the Elite rule (5.5), when activated again later in the turn may still roll for one additional Momentum.
Play Note: There is no Re-activation as in other games in the series.
(5.4) The Trump Option
Design Note: This is a game mechanic that is intended to simulate the effect of superiority in command. As such, it is likely to be used almost exclusively by the player with palpably better leaders (such as Belisarius). The "inferior" player will often find that, for him, its best application is when it backfires on his supposedly better opponent. To that extent, players should be aware that, simply because this option is available doesn't mean it should be used indiscriminately.
(5.41) Active Player Trump Option. The player whose turn it normally would be to activate his lowest rated leader may, instead, attempt to activate any other, inactive friendly leader that has a higher Initiative rating. To do this, the player must roll the latter's Initiative rating or less on the die. If successful, that leader is now activated; if unsuccessful, the originally designated leader is activated and the leader who attempted the Trump is Finished. Contingent Commanders may not make Trump attempts.
Example: At Dara, the Persian player, instead of activating Pitames, could attempt to activate Perozes by Trumping. If he rolled a 0-5 he would be successful; but on a 6-9 the Trump attempt fails, Pitames is activated and Perozes is Finished.
(5.42) Inactive Player Trump Options. The opposing player has two trump options, each usable under different circumstances.
1. Trumping the Trump: If—and only if—the active player is successful with his Trump (5.41), the opposing player then has the option of attempting to Trump that first trump activation with his own, inactive leader—if that leader has an equal or higher Initiative rating. If successful, this leader is immediately activated, and the trumped leader is Finished; if unsuccessful the initial trump-activated leader goes and the leader attempting the Trump is Finished.
Example: Using the example in 5.41, if the Persian player is successful in activating Perozes instead of Pitames, then the Byzantine player can now attempt to trump the trump by rolling for Belisarius. However, he rolls an 8, so Perozes remains activated and Belisarius is Finished for the turn.
2. Momentum Trump: If the active player succeeds in his Momentum attempt (5.32), the opposing player may attempt to trump in the same fashion as 5.42[1], above.
Example: At Tricameron, Gelimar has been successful with a Momentum attempt. Belisarius will have none of that and attempts to trump. He rolls a 3 and, instead of Gelimar going, it's now Belisarius' Orders Phase and Gelimar is Finished.
After the successfully-trumping leader has finished his Orders Phases(s), play reverts to the standard, lowest rated inactive leader-goes procedure.
(5.43) Each side is allowed only one trump attempt per leader activation.
(5.44) A leader who fails a Trump attempt or has been trumped by an opposing leader (5.42), is Finished. An inactive leader on either side who is passed over by a successful Trump—a Bypassed Leader—is still eligible for activation (he'll probably still be next in line as the lowest rated leader), but he cannot use Momentum. Use the Trumped/No Momentum markers to indicate this.
Player Note: The No-Momentum restriction means that if, at Callinicum, if Belisarius trumps his man A. John, not only is A. John Bypassed, but also Bouzes and the Persians Alamoundaras and Cabades as well. All these leaders would get only one Orders Phase. They could not attempt Momentum! This is an important consideration when one is formulating "game" tactics.
(5.45) A leader that successfully trumps must do something; issue an order to a unit to move, fire, recover, etc., or use his Command Range to precipitate a Shock attack.
(5.46) A leader that is in an enemy ZOC may attempt to Trump. However, if successful, he must obey 5.45, otherwise the trumping action is considered to have never occurred.
(5.5) Elite Commanders
Design Note: This rule simulates the marked superiority of certain commanders—such as Belisarius—especially in their ability to "get going" before their opposition.
(5.51) A player with an Elite Overall Commander (indicated by the triangle next to his Initiative rating) has the option to start each Game Turn with a single Elite Initiative (EI) Orders Phase. This EI Orders Phase may be undertaken by either the Overall Commander or by any one other friendly leader, regardless of Initiative Rating, as designated by the player. For that leader to use the EIO Phase, he must be within the OC's Command Range at the start of the Game Turn. On the first Game Turn, however, the player may give his EIO Phase to any friendly leader, regardless of location.
(5.52) The designated leader may not use Momentum to continue this EIO Phase. After the EIO Phase is completed, the chosen leader reverts to inactive, but not Finished, status. He has undergone only one Orders Phase for purposes of 5.14 and may be activated again, using normal activation rules.
(6.0) Movement
(6.1) Movement Allowances
Design Note: Movement Allowances simulate not only the time it takes a unit to move from point A to point B, but also its maneuverability relative to other, different-type units as well as the tactical doctrines applied to deploying those units.
(6.11) A combat unit's printed Movement Allowance is the basic allowance for a single order. A combat unit receiving an order may move up to its printed MA. Units may move less than the printed MA, unless part of an Uncontrolled Advance (11.3).
(6.12) There is no limit to the number of times a combat unit may move in a single Game Turn; however; a combat unit may move only once per Orders Phase.
Example: Thus, a line of cataphracts ordered by A. John to move in his initial Orders Phase may move again; but, to do so, it must wait for an order from either another leader or from A. John in a subsequent Momentum Orders Phase.
(6.13) After the first time a unit moves in a Game Turn, flip it to its "Moved" side. "Moved" units may use their full MA. However, each time a "Moved" unit is moved again, it incurs 1 Cohesion Hit (10.1). This hit penalty does not apply to Advances after Combat (9.2) or units using Orderly Withdrawal (6.52), or any involuntary movement other than an Uncontrolled Advance. Changing facing is movement for purposes of this rule, but Missile Fire alone is not.
(6.14) Leaders may move any number of times in a Game Turn or Orders Phase, but they may not exceed their 9 MA per Orders Phase; see 4.23. A leader must expend an order each time he moves. All other restrictions and allowances apply, including the ability of leaders to use Orderly Withdrawal before any opposing combat unit. A leader who has used his 9 MP in an Orders Phase is not "Finished"; he simply may not move again that Orders Phase, although he may still withdraw (4.62).
(6.15) Leaders move using Cavalry costs. Leaders have no facing and do not pay any cost to change facing.
(6.2) Terrain
Design Note: As with previous eras, because of the problems in moving tightly-packed formations, virtually all battles were fought on as flat and clear a piece of ground as could be found. Some care was also taken in using natural barriers, such as rivers, to secure flanks.
(6.21) A unit expends Movement Points (MP) for each hex it enters, per the Movement Costs Chart. For example, it costs 1 MP to enter a Clear hex but 2 MP to enter a Woods hex. Most units also pay extra Movement Points to move into a hex of different elevation. Units also pay movement point costs (and possible cohesion penalties) to change facing; see 7.1.
Play Note: Players should never underestimate the damage that rough and hilly terrain can do to a formation.
Example: A Heavy Cavalry unit at Taginae in hex 3823 would expend 2 MP to move into 3923 (1 MP for the broken hex and 1 MP to move to the higher elevation level).
(6.22) It didn't take much to disorder a formation that had to cross any type of terrain which wasn't open and relatively smooth. Certain units determined by Type incur Cohesion Hits whenever they enter or change facing in certain kinds of terrain—usually anything other than Clear—and/or change elevation (see the Movement Cost Chart). All Cohesion Hits incurred for movement and facing changes are applied the instant they occur. Leaders never incur Cohesion Hits.
Example: Using the example in 6.21, that HC unit would incur 1 Cohesion Hit for moving into the broken hex.
(6.24) A hex containing two types of terrain uses the "majority" terrain. Thus Hex 1503 at Callinicum, while it does contain some river, is a Clear hex in game terms.
(6.25) A moving unit must have enough MP to pay the terrain cost of entering a hex; if it doesn't, it cannot enter that hex. Moreover, certain hexes are impassable such as the City Walls on the Dara map; no unit may enter such a hex.
(6.26) Terrain also affects Shock combat results by adjusting the column under which the players roll to determine losses per the Shock Combat Results Table. Units in woods also gain some protection from enemy Missile fire (8.15).
(6.27) Rough Terrain: Woods and Broken hexes are considered Rough terrain hexes; all other hexes are Clear.
(6.28) The Movement Cost Chart. This chart gives the MP costs and Cohesion Hits for each type of unit moving into/across (or changing facing in) a specific type of terrain.
(6.3) Movement Procedures
(6.31) As a unit moves, it traces a path of contiguous hexes through the hex grid, paying the MP and Cohesion cost of each hex entered (6.28). One unit's movement must be completed before another can begin.
(6.32) A unit may be moved in any direction or combination of directions. However, a unit may only enter a hex which is to its front (7.11). For a unit to change direction, it must first change facing (7.12) by pivoting in the hex it occupies.
(6.4) Column Movement
Design Note: On the battlefield, formed infantry moved in a battle formation that would, in later centuries, be called "Line." They were capable, however, of using much looser, more mobile formation (in modern terms, "Column") for more rapid movement. In addition, because the units were not in an extended line that constantly needed dressing to be effective, the effects of movement upon a unit's "cohesion" were not as drastic.
Play Note: We have taken the opportunity to rewrite significant sections of this rule. While the changes are minor, the revised wording should address any issues in implementing the mechanics.
(6.41) On being given a move order, any infantry unit of a Disciplined army (11.2) that is not in an enemy ZOC may change to (or from) "Column" at the conclusion of its Movement. It costs 1 MP to change formation, either in or out of Column. For a unit to use Column Movement, a unit must start the Orders Phase In Column. Use the In Column markers to indicate this status.
(6.42) Units In Column increase their MA by 1. For some unit Types, the cohesion costs for certain terrain is reduced.
Example: Normally, a Heavy Infantry would incur 1 Cohesion Hit when crossing a Stream; there is no Cohesion cost for a HI unit In Column.
(6.43) Units in Column must face the hexside (not the vertex) and only the hex directly in front of them is frontal. The change in facing is affected when the change to (or from) Column status is announced. When changing formation from column to normal, adjust the unit's facing 30 degrees to the left or right (your choice) so that it faces a vertex.
(6.44) Units In Column move into either their front hex or the flank hexes adjacent to the front hex. To enter a front-flank hex, a unit is first faced toward the front-flank hex and then moved into the hex. There is no MP cost or cohesion penalty for making this facing change. To move into a flank or rear hex, the unit must change facing and pay the MP cost and any cohesion penalty to do so.
The facing diagram for a unit In Column shows six surrounding hexes labeled, going clockwise from the top: Front, Flank, Flank, Rear, Flank, Flank—i.e., only the single hex dead ahead is the Front, the hex directly behind is the Rear, and the four hexes to either side are all Flank hexes.
(6.45) Units In Column have their TQ ratings temporarily reduced by 2. Units in column may not Shock attack or Missile fire. They may move under orders and they may have Cohesion Hits removed through Recovery. If Shock attacked, the attacking unit is automatically Attack Superior, regardless of Position or Weapon system.
(6.46) If an In Column unit is Shock attacked, at the conclusion of that Orders Phase, the unit automatically goes back to its non-column formation (remove the IN COLUMN marker) formation at the cost of 1 Cohesion Hit, with the player adjusting the unit's facing 30 degrees to the left or right (owning player's choice) so that it faces a vertex.
(6.47) In Column units cannot use Orderly Withdrawal (6.5) or Reaction Facing Change (7.14). They cannot move through a friendly combat unit, nor may a friendly combat unit voluntarily move through an In Column unit. Routed units may move through In Column units—all stacking penalties apply.
(6.5) Orderly Withdrawal
Orderly Withdrawal (OW) is a form of retreat—reaction movement, as it were—carried out during the enemy's Movement and Missile Fire Segment in which faster and more maneuverable units can avoid getting entangled in Shock combat.
Design Note: Orderly Withdrawal is an extremely valuable maneuver, particularly when used by the bow armed Light Cavalry. Therefore, we have gone to great lengths to explain this rule; the extended example at the end should help clarify any (unintended) opaqueness. See 4.62 for OW rules for leaders.
(6.51) During an enemy Movement and Missile Fire segment, any friendly unit that is not in an enemy ZOC (7.2) may avoid contact with the moving unit the instant it moves within 2 hexes of the friendly inactive unit—or if it starts movement 2 hexes distant—if the friendly unit has a higher MA than the moving combat unit. To do this, the friendly unit withdraws up to a number of MP (not hexes) equal to the difference between the movement allowances away from the moving unit. "Away" means that the withdrawing unit must move into a hex that is further from the moving unit (as measured in hexes) than the hex it leaves. Withdrawal must occur the instant the enemy unit moves into (or starts its move at) 2 hex range (stop moving the unit temporarily), or the option is lost. Routed units and units In Column cannot use OW.
Example: A Saracen Light Cavalry unit (MA of 9) may not Withdraw uphill in the face of an advancing Byzantine Cataphract (MA of 8) because it would cost the Saracen LC 2 MPs to move so and it is only allowed 1 MP withdrawal move.
Play Note: Yes, it says within two hexes, so any (eligible) friendly unit can withdraw if an enemy unit moves within two hexes—even if that unit doesn't move in his direction. Thus, the friendly player must make his decision to withdraw before the moving enemy makes his full intentions clear!
(6.52) The withdrawing unit maintains its original facing throughout withdrawal at no facing change MP or cohesion cost. It does, however, pay any of the usual cohesion and movement costs for movement. At the completion of withdrawal, if it changes facing, it incurs any cohesion and movement costs inherent in such change. There are two possible additional penalty situations:
- After withdrawal, infantry units incur an immediate 1 Cohesion Hit
- If the withdrawing unit was being approached from a rear or flank hex, it incurs 1 Cohesion Hit before withdrawing. To be considered an approach from the rear, the moving unit must be adjacent exclusively to one of the two withdrawing unit's Rear hexes. If the moving unit is adjacent to both a Flank and Rear hex, it is a flank approach, not rear. The same principle applies for an approach from the front. This is cumulative with 6.72[1].
Example: In the diagram in the rulebook, a Persian LC being approached from the Rear incurs 1 Cohesion Hit for the withdrawal. The Persian LC may withdraw into the shaded hexes, all of which are "Away" from the approaching Armenian Cataphract.
Play Note: Orderly Withdrawal is a "retreat" in the face of an approaching enemy, long before that enemy can close. Therefore, the withdrawing unit can return to the original facing (with minimum cohesion cost) it had before the enemy approached. In play/game terms, you simply move the counter backwards.
(6.53) If a withdrawing unit incurs Cohesion Hits equal to or more than its TQ rating, it immediately Routs (10.21).
(6.54) A unit may withdraw an unlimited number of times during a Game Turn. The 6.52 penalties apply each time, however. For the purposes of Movement Allowances (6.1), no movement points are expended—and that includes leaders—and no orders are needed.
(6.55) A unit may not withdraw into an enemy ZOC, Woods, Marsh, River, or any hex into which movement would be prohibited. Stacking restrictions and penalties (6.6) apply during withdrawal.
(6.56) Cavalry units with B or C missile capability (only) may missile fire as it withdraws. The range is always treated as 2 hexes. The withdrawing unit is limited to one missile fire per triggering enemy unit per Orders Phase.
(6.57) Orderly Withdrawal takes place during the opposing player's Movement and Missile Fire segment. A unit may not withdraw in the Shock Combat segment (leaders are an exception, see 4.62). The moving unit may continue to complete its movement in the face of such withdrawal.
Example: At Callinicum, an Isaurian MI (MA=4) has moved from hex 1805 to 1905 placing it within two hexes of a Persian LC (MA=9) in hex which is facing toward the Persian retreat edge. The Persian player decides to withdraw with 5 MP to spend. The Persian LC incurs 1 Hit due to the rear approach and cannot missile fire because it lacks a LOS to the moving unit. The Persian LC moves to hex 2206 and then 2305 (2 MP) and in that hex expends 3 MP to change facing toward the oncoming enemy unit. The Isaurian continues its advance moving to 2006 and then to 2105. Once again the Persian LC as an opportunity to withdraw. This time the moving unit is within its LOS and range, so fires at range 2 before commencing its withdrawal. The Persian player decides to use only 1 MP and moves to 2405. The Isaurian MI expends its last MP to move 2206. The Persian LC can once again withdraw but cannot fire. He decides to remain in place since he can withdraw should the Isaurian MI be activated again before he has an opportunity to the leave the hex.
(6.58) Cavalry Line Withdrawal. Under certain circumstances, the owning player may have an entire Line of cavalry (as defined by 4.32) withdraw at the same time. Standard Orderly Withdrawal (OW) rules apply, but here, if an enemy unit approaches a unit in that Line, that entire Line may withdraw. All units in the Line must withdraw; the player may not pick and choose. In addition, once a single unit in the Line uses an individual OW, the Line is not eligible for line withdrawal.
Design Note: This is not a Line Command rule; it is a rule that allows mass withdrawal of cavalry, something which often happened. However, we define its use through the definitions for cavalry "lines".
(6.6) Stacking
Stacking refers to having more than one unit in a hex at any one time, whether during movement or at the completion of movement. There are two principals involved when considering stacking rules: Voluntary movement, which usually means combat units moving under orders or Orderly Withdrawal; and Mandatory movement, virtually all of which is rout movement. Basically, the rule is one combat unit per hex.
(6.61) A hex may contain, without penalty, one combat unit. Leaders and information markers do not count for stacking purposes. A hex may contain any number of leaders/markers.
(6.62) A unit may never move into or through a hex containing an enemy combat unit.
(6.63) The restrictions, allowances and Cohesion Hit penalties for moving through friendly units are all given on the Stacking Chart (6.65). The chart does not apply to leaders, which have no stacking restrictions. A Routed unit whose hex is moved through or stopped in is eliminated regardless of the circumstance.
(6.64) Combat units may enter a hex containing only a leader at no movement or cohesion cost. However, leaders pay +1 MP to enter a hex occupied by a combat unit.
(6.65) The Stacking Chart. The chart lists what type of unit is moving. However, the effects apply to both moving and stationary units, unless otherwise specified.
(6.7) Feigned Retreat (FR)
(6.71) Light Cavalry from certain tribes may use a tactic called Feigned Retreat. This enables defending units to retreat, drawing their attackers in pursuit away from their lines, and then turn on them, counter-attacking. Only the Hun and Visigoth LC, may use Feigned Retreat, and they may use it only against enemy cavalry and regardless of comparative MA.
Historical Note: Feigned Retreat was a favorite tactic of steppe tribes (Huns and Alans). The Visigoths appear to have picked up the tactic in their dealings with the Huns as they expanded westward in the late 4th century.
(6.72) Feigned Retreat may be used either:
- Defensively, when an enemy cavalry unit moves (or begins its move) within 2 hexes, or
- Offensively, as part of Harassment & Dispersal (8.35)
Feigned Retreat may not be used by a unit in an enemy ZOC, nor may it be used against a target that is in a friendly ZOC, nor in response to a Harassment & Dispersal Tactics (8.3) attack. Feigned retreat is voluntary.
Play Note: The Feigned Retreat is a reaction to an intended Shock attack by an approaching enemy. H&D is strictly a skirmish and missile fire attack.
(6.73) When a defending Hun or Visigoth LC unit has an enemy cavalry unit move within 2 hexes), or as part of a H&D attack (8.35), the owning player does the following:
- Announces that the unit is attempting Feigned Retreat
- Retreats the unit from 3 to 5 hexes (not less, not more), away (see 6.51) from the moving unit. If the path is blocked by enemy occupied hexes or enemy ZOC, it cannot use Feigned Retreat. The unit using Feigned Retreat must change its facing to reflect the direction in which it is heading (at no MP or Cohesion cost). All stacking rules apply.
- The enemy unit uses the FR Reaction die roll (6.74) to see if it must follow, using the path of hexes taken by the retreating unit regardless of how far it has moved that phase. The pursuing unit ignores enemy ZOCs but must stop if the path is blocked by an enemy unit. The defending player's units may not conduct Entry Reaction Fire at the pursuing unit, nor may the pursuing unit use Missile Fire against any unit other than the unit conducting the Feigned Retreat (see below).
- If the pursuing unit can move within two hexes of the retreating unit with a vacant hex in between, the retreating unit's player then rolls the die.
- If the DR is the same as or lower than the retreating unit's TQ, that unit may turn around at no cost and immediately either Missile Fire at the pursuer from its current hex or move 1 hex adjacent to the pursuer and either Missile Fire or Shock attack it; either one or the other, not both. The pursuer may not use Reaction Fire in either circumstance.
- If the DR is higher than the retreating unit's TQ, the Feigned Retreat has failed, and the pursuer may immediately move forward adjacent to the retreating unit and either Missile Fire or Shock attack (from the rear) the retreating unit.
Any Shock attack in #4 above is part of the Feigned Retreat, and is resolved immediately. Place a Shock-Must Check TQ marker on the attacking unit and resolve the combat using the normal sequence of steps described in sections 9.13 through 9.17.
The activity in #4 concludes the movement phase for the pursuing unit for that Orders Phase.
(6.74) Reaction to Feigned Retreat: The unit that triggered the Feigned Retreat (FR) must check to see if it has "swallowed the bait". The owning player rolls the die, comparing the DR to that unit's FR Reaction Rating, given in each scenario. If a unit is stacked with a leader, subtract one (–1) from the Reaction die roll.
- If the DR is higher than the FR Reaction Rating, the target must pursue (6.73[3]).
- If the DR is the same as or lower than the FR Reaction Rating, the target remains in place, even as the attacker using FR moves away as per 6.73 [2]. If this occurred during the target unit's Movement segment (as in 6.72, bullet #1), the unit may continue with its movement (but see 6.75), otherwise it remains in place.
If the reacting unit did not have a clear LOS into the hex from which the retreating unit started its retreat, there is no die roll and the effects in bullet #2 above apply.
If the unit is the target of a Harassment & Dispersal (8.3) attack, and, at the instant of the attack, is outside the Command Range of a friendly leader able to command the unit, that unit must pursue, as per 6.73[3]. There is no die roll.
(6.75) Feigned Retreats are conducted individually and concluded individually. If two or more defending units are eligible to use FR per 6.73, the defending player picks the unit to be resolved first. If the opposing unit does not pursue, the defending player picks the next eligible unit, etc., until either there are no more eligible units or until the moving player fails a reaction check and must pursue.
Play Note: Thus, Feigned Retreat may not be attempted against a unit that Must Pursue.
(6.76) FR may be used any number of times in a single turn by a single unit. However, units may not FR off the map.
Example of Feigned Retreat: The Hun LC unit attempts a Feigned Retreat during the Byzantine player turn. First it retreats 3 hexes (adjusting facing). Next the Byzantine player conducts a Reaction to Feigned Retreat die roll and rolls a 7 (a 0-5 was needed for no pursuit), forcing the Byzantine HC unit to pursue. After it moves 3 hexes, the Hun player conducts a Feigned Retreat die roll. He rolls a 7 (a 0-8 result was needed for success), which allows him to immediately turn the Hun LC unit around, move one hex, and conduct Shock combat.
(7.0) Facing & ZOCs
Design Note: This section includes some minor, although important, changes bringing it in line with recent updates in other games in the series.
(7.1) Facing
(7.11) All combat units, except those In Column (6.4), must be faced in a hex so that the top of the unit (the side with its name) faces into the vertex of the hex (between two hex sides, as below). The two hexes to the front are called the Front hexes; those to the side, the Flank hexes, and those behind, the Rear hexes. A unit may only move into a hex to its Front.
(7.12) In order for a unit to change its facing, it must pivot within its hex. It costs 1 MP for each vertex shifted.
(7.13) A unit that changes its facing in a Rough terrain hex (6.27) incurs 1 Cohesion Hit per vertex.
(7.14) Reaction Facing Change. Any unit may change facing one vertex per Orders Phase when an enemy unit moves adjacent to it, and this includes Advance after Combat (9.2). It may not do so if it is already in an enemy ZOC of another enemy unit. If the unit is Infantry, the owning player rolls a die after making the facing change. If the DR is higher than the unit's TQ rating, apply the difference (roll minus unit's TQ) as Cohesion Hits to the unit, with a minimum of 1 Cohesion Hit, regardless of the die roll. There is no die roll for Cavalry units. The inactive unit may conduct Entry Reaction Fire (if eligible) after the facing change and any required DR (8.21).
(7.2) Zones of Control (ZOC)
ZOC are those hexes, other than the hex occupied, over which units exert control, forcing enemy units to cease movement and to precipitate combat.
(7.21) Combat units exert a Zone of Control into their Front hexes. Routed units and leaders do not exert ZOCs.
(7.22) ZOCs do not extend into a hex into which movement is prohibited.
(7.23) A unit must cease movement the instant it enters an enemy ZOC. A unit that begins its movement in an enemy ZOC can move out of the enemy ZOC only if:
- it is a combat unit that can receive an order to move, has at least one unoccupied Front hex, and its printed MA is greater than the MA of any enemy unit exerting a ZOC on it; or
- the unit is the Overall Commander issuing 1 Individual Order to himself; or
- the unit is a leader who has been issued 2 Individual Orders by his OC.
(7.24) A unit leaving an enemy ZOC may immediately enter another enemy ZOC but would then immediately cease movement. Units leaving a missile unit's ZOC are subject to Retire Reaction Fire (8.22).
(7.25) A unit that begins the Movement and Missile Fire segment in the ZOC of an enemy unit in most situations cannot change facing. A unit may, however, use up to one half its MA (rounded up) in facing changes if all the following apply:
- the unit is in the ZOC of only one enemy combat unit, and
- there are no enemy combat units in the unit's ZOC, and
- the unit remains in the hex during that Movement and Missile Fire segment; it cannot use 7.23 bullet #1 to leave the ZOC
Design Note: Thus, a unit attacked from the flank/rear by a lone unit is no longer prevented from turning around to engage it in shock combat.
(7.26) If opposing units exert a ZOC into the same hex, they are both considered to control that hex.
(7.3) Shock Requirements
Whether a combat unit must attack an enemy unit depends both on its unit Type and if the unit moved, shock being a question of inertia more than weaponry.
(7.31) In the Shock Combat segment (9.1), all friendly "heavy" units—those whose Type is marked with a plus sign (+) on the Shock Superiority Chart—that moved adjacent to an enemy unit during the Movement and Missile Fire segment must Shock attack all enemy units in their ZOC. All other "light" units—no plus sign (+)—that moved adjacent to an enemy unit during the Movement and Missile Fire segment may choose to Shock attack all enemy units in their ZOC in the ensuing Shock Combat segment.
(7.32) The moving player places a Shock-Must Check TQ marker on top of each unit that either must Shock attack in the ensuing Shock segment, or that he chooses to Shock attack (7.31). These markers are placed the instant the moving unit moves adjacent, and before any Reaction Fire, to delineate which units will have to undergo a Pre-Shock TQ check (9.13).
Example: A Byzantine Heavy Cavalry Cataphract moving adjacent to Goth Light Infantry Archer has a Shock-Must Check TQ marker placed on it because it must attack. A Persian Light Cavalry unit moving adjacent to a Byzantine Light Infantry Archer unit does not have to shock attack; however, the moving player must state his decision on whether to do so as it finishes movement. If he wishes it to attack, he must place a Shock-Must Check TQ marker on top of the unit.
(7.33) Any unit issued Fire (only) orders or those simply within the activated leader's Command Range may choose to attack all enemy combat units in their (friendly) ZOCs. These units are given a Shock-No TQ Check marker in the Shock Designation step (9.11), to indicate they are going to Shock attack but do not have to make a Pre-Shock TQ check. See the introduction to 9.0.
(7.34) Routed units and those In Column cannot Shock attack.
(8.0) Missile Combat
There are two kinds of Combat: Missile and Shock. Missile combat occurs as part of—or instead of—movement at any point during the Movement and Missile Fire segment of an Orders Phase. Shock combat comes in its own segment which occurs after all orders have been issued and movement has been completed. A missile unit can participate in both types of combat during the same Order Phase.
(8.1) Missile Fire
Historical Note: The ubiquitous use of the composite bow during this period made missile fire a major force on the battlefield, a significant change from the days of Caesar.
Design Note: With the 2nd edition we have adopted the revised Missile Range and Results Chart introduced in the ATTILA module, hence some rather significant changes to the effects of composite bow fire.
Extended Historical Note: The missile denomination "C" includes not only the Hun composite bows, but most of the bows of the era, which ranged from Compound bows, to reinforced bows, to the composites. (The terms are designations used by Maenchen-Helfen; pp. 222-223). On p 228, M-H notes that archeological remains in Roman camps from Scotland to Egypt for this era show "... bows stiffened and reinforced like those of the Huns." He further notes that the Romans had been fighting the Parthians and Huns for some time and had had plenty of time to denote the effectiveness of the composite style. Remains of composite bows, he says, have come from graves from the British Isles to China, some as early as the 3rd century BCE. He does debunk Ammianus' laying the Huns missile effectiveness to "bone-tipped arrows," though. Nicolle, however, states that the Visigoths did not use these stronger composite bows. And that is why everyone in this game with a bow is a "C"-armed unit, except for the Visigoths.
(8.11) Units with Missile Capability (see sample units) may use Missile Fire. There are four types of missile units: Simple Bow (B), Composite Bow (C), Javelins (J), and the Throwing Axe (F). When given an order, an individual missile unit can fire at any time before, after, during—or instead of—movement. If a missile unit moves, it may only fire if it moved "forward" (closer to the target) immediately preceding the fire. Firing during movement does not cost any movement points but can affect accuracy (8.15). Each unit ordered may only fire once per Orders Phase.
Example: The Hun Light Cavalry unit may move four hexes forward, fire at an enemy four hexes away, and then use its remaining points to ride away.
(8.12) Missile Fire may occur as a result of an order as above (8.11), or as a reaction to enemy actions (8.2), or by using Harassment & Dispersal Tactic (8.3), or as part of an Orderly Withdrawal by Mounted Archers (6.56), or from a Feigned Retreat (6.7).
(8.13) A Missile unit may fire at any single target unit which is within its Missile Range to which it can trace a Line of Sight (8.14) which extends from its Front and/or Flank hexes. Missile units must each fire individually; they may not combine fire. Exception: See Rate of Fire (11.4).
(8.14) Line of Sight. A missile unit can only fire at an enemy target unit to which it has an unobstructed Line of Sight (LOS). A LOS is calculated by tracing a path of hexes between the center of the missile unit's hex to the center if the target unit's hex through the firing unit's Front or Flank hex sides. LOS is blocked by woods and combat units, unless they are in hexes at a lower elevation than both the firer and the target. LOS is also blocked if any part of a hex of higher elevation is between the two units. If the LOS goes down a hexside between blocking/non-blocking hexes, consider it blocked. Missile units, however, may always fire into adjacent hexes.
Exception: If the firing unit is an Archer (Class B or C), LOS is not blocked by a combat unit if the combat unit is closer to the firing unit than the target (halfway is not closer).
Play Note: While not a major problem in most of these battles, because of the flat terrain, LOS is often a cause of "player tension." We suggest that missile LOS rules be interpreted strictly, while LOS for Line Commands (4.23) be interpreted liberally. The former are trying to shoot at a target; the latter are simply trying to see if everyone is in place.
(8.15) Missile Fire Resolution: The Missile Range and Results Chart (MRRC) is used to determine the effect of missile fire. Each missile unit has a missile strength which varies with the range, as given on the chart. For each missile fire, the die is rolled. If the adjusted DR is equal to or less than the strength of the missile unit at that range, then the target unit receives 1 Cohesion Hit. Under certain circumstances as noted on the MRRC, the target unit receives 2 Cohesion Hits instead. If the adjusted DR is greater, there is no effect. All combat effects from missile combat are immediate and occur before any other unit is moved/fires. The following die roll adjustments are made, all cumulative unless noted otherwise:
- +1 if the target unit occupies a Woods hex
- +1 if the firing unit moved/will move. This does not apply to Throwing Axe (F) fire, Javelin (J) fire by infantry, or changing facing without leaving the hex
- +1 if the target unit Type is Heavy Infantry (HI)
- +3 if the target unit Type is Heavy Infantry (HI) and the firing unit is an archer (C or B armed) at a range of 1 hex (adjacent) through the target's Front hexside. This modifier is not cumulative with the preceding modifier.
Some additional modifiers applicable to individual scenarios are listed in those scenarios and on the MMRC.
Design Note: The Heavy Infantry benefit represents the heavier armor protection of such units. The penalty against adjacent bow-armed fire represents the fact that the lighter shafts of archers were most effective against the formidable shields and body armor of the heavy infantry when firing from above – an arced trajectory- into the body of troops; at point-blank, low-trajectory range, they could not do that. There is no penalty for moving infantry using javelins or throwing axes because they use movement to gain momentum for their missiles.
Example: At Taginae, an Armenian Cataphract fires at a Goth Heavy Cavalry unit at a range of 3 hexes. At this range, the composite bow missile strength is 4. The Byzantine player rolls a 1. The Goth HC receives 1 Cohesion Hit. If an infantry unit was firing, the result would produce 2 Cohesion Hits instead.
(8.16) Extended Range. When a missile unit fires at a target unit on a lower elevation, its range is increased by 1 hex (2 hexes if firing from a Dara Wall hex). When firing at extended range, the unit needs an adjusted die roll of 0 to inflict a Cohesion Hit. Composite bows inflict only 1 Hit at extended range.
(8.17) Missile Supply. Missile units may keep firing until they run out of missiles. Each different missile type has its own availability level:
- Bow-armed missile units (B and C) become "Missile Low" (i.e., are marked with a Missile Low marker) whenever there is an unmodified DR of 9 when resolving any missile fire, at which point place a Missile Low marker on the unit, indicating it has one shot remaining.
- Javelin-armed units (J) become "Missile Low" whenever there is an unmodified DR between 6 and 9 inclusive when resolving any missile fire, at which point place a Missile Low marker on the unit, indicating it has one shot remaining.
- Throwing Axe units (F) are one shot weapons. Place a Missile No marker after their first use.
- If any Missile Low" unit fires, flip the marker over to its Missile No side to indicate there are no missiles left to fire.
(8.18) Missile Reload: Any friendly "Missile Low" or "Missile No" unit may remove its Missile Low/No marker during the Reload Segment of the Rout and Reload Phase, bringing it up to full missile capability if:
- it is not in an enemy ZOC, and
- it is not in range and in LOS of an enemy unit that has missiles
(8.19) Leader Casualties: If there is a leader in a hex fired at, and the missile fire unmodified DR is a 0, there is a possibility that the leader has been hit. The owning player rolls the die. If the DR is a '1-9', nothing has happened. If the DR is a 0, a casualty has occurred. The owning player rolls the die again. If the DR is greater than the leader's Personal Combat rating, the leader has been killed, otherwise he is Wounded. Players may, if they wish, fire at a hex in which there is only a leader counter.
(8.2) Reaction Fire
Missile units may fire in reaction to certain enemy movements into (Entry Reaction) and out of (Retire Reaction) their ZOCs, and against enemy units that use Missile Fire against them (Return Fire).
(8.21) Entry Reaction. Whenever a friendly unit enters the ZOC of an enemy missile unit, and this includes entry because of Advance after Combat (9.2), that enemy missile unit may fire at the entering unit (range: 1 hex) before any further movement or friendly fire occurs. All effects from this missile combat occur immediately. Units that attempt a Reaction Facing change (7.14) may fire if the triggering unit is in its ZOC.
Exception: When friendly units are moving as a Line, all movement is completed before any Entry Fire takes place, and all Entry Fire takes place before any fire by any of the moved units. A reacting unit may fire at only one of the units in the Line that enters its ZOC. This exception does not apply to H&D fire (8.3).
(8.22) Retire Reaction. Whenever a friendly unit leaves the ZOC of an enemy missile unit, that missile unit, if it has a fire range of 2 or more hexes, may fire at the moving unit. Any results are applied before the unit moves. Retire Reaction Fire is always at a range of 2 hexes.
Exception: Routed units executing their initial rout move (10.21) do not trigger Retire Reaction Fire.
(8.23) Return Fire: Any inactive unit that is fired at, may fire back at the enemy unit that fired at it, after the active unit's fire is resolved. Return fire is not simultaneous. The inactive player cannot use Return fire if it used Entry Reaction Fire against that same firing unit. Furthermore, if the firing unit has an enemy unit in its ZOC it may not use Return Fire against a firing enemy unit outside its ZOC.
(8.24) Reaction Fire does not require an order; it does require that the missile units have enough missiles available to fire. A unit may perform Reaction Fire any number of times during enemy movement. See 6.56 for an important exception.
(8.3) Harassment & Dispersal Tactics
Design Note: This rule was introduced in the ATTILA module and replaces the Bow-Armed Cavalry rule in the 1st edition.
(8.31) Light Cavalry (LC) with any missile capability may use Harassment & Dispersal tactics (H&D) against any unit. H&D fire requires any type of move order, is movement for purposes of missile fire modifiers, and consumes the unit's entire MA.
(8.32) To use H&D, Light Cavalry (LC) must be within four (4) hexes of, but not adjacent to, the target and cannot be in an enemy ZOC. The unit must have a LOS to the target and be able to trace a path of hexes through its Front hexes (only) that is clear of any combat units and enemy ZOC unless that ZOC is adjacent to the target. The path may not be traced through a Rough terrain hex or across a Rough terrain hexside. It may cross a Stream.
(8.33) If the unit satisfies the conditions in 8.32 above, it may fire its missiles against the selected target without moving (on the map, that is). The procedure is:
- Note which unit is using H&D, then
- Note the target, as above, then
- Fire the missile as if they were being fired at 1 hex range (this is a moving attack).
The target unit may react (7.14). The target and any other friendly unit may use Entry Reaction Fire (8.21) if the path is traced through an adjacent hex in its arc of fire (8.13). However, all fire is treated as simultaneous in this situation.
Play Note: All of this occurs without physically moving the firing unit.
Design Note: Well, it is moving (to the target and then back to whence it came). We just eliminated the micromanagement. This rule simulates the ability of a light unit to close on a unit (around 30 yards), throw missiles, and then swiftly withdraw without getting entangled in Shock Combat.
(8.34) Impetuosity: If the target is infantry, and the infantry suffers a Cohesion Hit from the H&D fire, that player rolls the die:
- If the DR is the same as or lower than the infantry unit's printed TQ, nothing happens;
- If the DR is higher than the printed TQ, that unit must move 1 hex towards the LC unit that performed the H&D (adjust facing toward the firing unit before moving into the hex). If it can't, for any reason, move forward, it doesn't, with no further penalty.
Missile Fire Example (Dara): The Persian player has issued a Line Command to the four Saracen Light Cavalry. He decides to have Saracen Light Cavalry A H&D fire at Byzantine Auxiliary W tracing the path 2303-2204-2103 (A remains in its hex) and resolves the fire at 1 hex range. The strength is '6' with a +1 DRM for the moving attack. W reaction fires (Entry Reaction) with a strength of "8". The exchange of fire is simultaneous. The Persian player would like to goad Byzantine Numeri X to leave the line so has Saracen LC B H&D fire at X tracing the path 2305-2205-2105. The range, strength, and DRM are the same as in A's. Byzantine Auxiliary Y may reaction fire (strength 6) since the path to the target is traced through an adjacent hex in its firing arc. The fire is simultaneous. Byzantine Numeri X suffers a hit from A's fire, so must make an Impetuosity check. The DR is a '7', so it fails the check and must move 1 hex toward B. Both 2104 and 2105 are eligible, so the Byzantine player moves the unit to 2104 putting a bit of distance between itself and the two Persian units that have yet to move/fire. The Persian player decides to keep up the pressure so has Saracen C H&D fire on X. The range, strength, and DRM are again the same as in the other two attacks, but this time there is no reaction fire. Once again X is hit and fails its impetuosity check so must move to 2205. As much as the Persian player would like to H&D fire again at X, it is outside Saracen D's front arc so is prohibited from doing so. However, D could use regular missile fire. At range 3, the strength is "4" with no adverse DRMs. Alternatively. D could H&D fire at either Byzantine Auxiliary Y or the Thracian Cataphract Z. Tracing a path to 2106 it could fire at either but would incur reaction fire from both. A path through 2206 is blocked by X's ZOC, which would leave a path into 2107 as the only other choice. The Persian player decides to take the safe regular missile fire at X, rather than exchange fire with the Cataphract.
(8.35) Units using H&D against other cavalry may combine it with Feigned Retreat. When doing so, steps 6.73[1-4] are conducted. The retreat of the H&D unit, as per 6.73[2] is to the hex it already in, but, here, the H&D unit changes its facing, also as per 6.73[2]. The target of the H&D then advances to within two hexes of the firing unit as in 6.73 [3]. The unit conducting the H&D then resolves the FR per 6.73 [4]. The Feigned Retreat is conducted after resolving all fire precipitated by 8.33.
Play Note: A most interesting play tactic. Did wonders for the Huns and Mongols.
(9.0) Shock Combat
Design Note: This section is the heart of the game, and, thus, we have given it its own section in this edition. It is longer and more detailed than other sections and may, at first glance, appears somewhat daunting. Take heart: in practice/play, most of the mechanics become self-evident and, after a few trials, the resolution of shock will become second nature. We have included an Extended Example of Play at the end of the section to illustrate the key points.
Play Note: The Shock system relies on the interaction of the units' weapon types, armor protection, size, angle of attack and troop quality to produce a single result. While no factor is unimportant, the rating to pay closest attention to is the TQ, for that rating determines the ability of a unit to withstand the rigors of shield-to-shield ancient warfare.
(9.1) Shock Procedure
Shock combat takes place in the Shock Combat segment. Shock is part of a leader's Orders Phase, and all Shock engendered by that leader is resolved before the next leader may be activated or Momentum attempted.
IMPORTANT: Each Shock combat is conducted as a series of steps performed in sequence for all units participating in Shock combat—before the next step of Shock Combat is conducted. Thus, Step '9.13' is completed for all involved units, followed by Step '9.14' for all involved units, etc.
Play Note: We suggest undertaking each separate step from left to right, across the map. Players may use any system they wish to note what has happened up-and-down the lines of attack.
Design Note: It would be easier to resolve each separate combat as one "piece". However, to do so creates a "blitzkrieg" type of effect, wherein the attacker gets to choose which attacks he wants to do first so that he can achieve "break-throughs". Despite its simplicity, this would be so far from reality as to render the system—and the game—inaccurate. However, isolated shocks can certainly be resolved as a piece, if doing so would not affect other attacks.
(9.11) Shock Designation Segment. Place Shock-No TQ Check markers on non-moving units that choose to Shock per 7.33 (units that have moved will already have Shock-Must Check TQ markers). Only those units with Shock markers may Shock attack.
(9.12) The Basic Pre-Shock Procedure. Units that attack by Shock must attack all units in their ZOCs, unless that defending unit is being attacked by another, friendly unit in the current Shock Combat segment. The attacker designates which units will be involved in each, individual combat resolution, within the following restrictions:
- A unit may attack only once per Shock Combat segment
- A defending unit may be shocked attacked only once per Shock Combat segment
- A friendly unit may attack more than one unit, if the targeted defenders are all in the attacking unit's ZOC
- An attacking unit may not split its attack capabilities, although two (or more) units may combine to attack one defender
- If more than one unit is defending and/or attacking, total the Sizes
Other than the above restrictions, the attacking player may divide his attacks amongst his units as he sees fit.
Example: At Casilinum, the Heruli Lancer unit has moved adjacent to attack a Frank Berserker unit, thus both have Shock markers. Unfortunately, the poor Berserker is in the ZOC of one of the Heruli MI units that is in Command Range of the active leader. The Byzantine player may place a Shock No TQ Check on the MI unit and have it join in the attack, or simply do nothing and have the Heruli sit and watch.
An Overview of the Shock Combat Resolution Procedure
Sections 9.13 through 9.17 are descriptions of the sequence and procedure used to resolve Shock Combat. These steps are:
- Attacking units with a Shock-Must Check TQ marker and their defenders undergo a Pre-Shock TQ check (9.13)
- Check for leader casualties (9.14)
- Use Clash of Spears and Swords Chart to determine which column of the Shock Combat Result Table (Shock CRT) will be used (9.15)
- Determine whether terrain, leaders and/or relative strengths and capabilities will have any effect (9.16)
- Resolve the Shock using the Shock CRT (9.16)
- Check for Rout (9.17)
(9.13) The Charge: All units with a Shock-Must Check TQ marker and their intended targets undergo a Pre-Shock TQ check. Attacking units with Shock-No TQ Check markers—and their defenders—do not undergo this TQ check. If a unit is attacked by units with both types of Shock markers, the defender then checks TQ.
Exception: If all defending units are Routed, the attacking units need not make a check. The intended targets still do, and remember, Routed units have a TQ of 1.
The players roll a die for each of their units involved, all such checks being simultaneous:
If the DR is higher than a unit's TQ, the unit incurs Cohesion Hits equal to the difference between the DR result and its TQ:
- If a defending unit has accumulated Cohesion Hits equal to or greater than its TQ Rating, it immediately routs (10.2) and the attacking unit advances into the vacated hex where it may change its facing one vertex if desired, but only if it has no other enemy units in its ZOC. If such an advance would cause the attacking unit to incur Cohesion Hits that would cause it to rout, it advances (9.21) but does not rout, and the number of Cohesion Hits it has is set equal to its TQ minus 1.
- If an attacking unit has accumulated Cohesion Hits equal to or greater than its TQ Rating, it immediately routs (10.2), the defender(s) do not advance.
- If all attacking and defending units involved in the same combat would rout from their TQ checks, use the procedure in 10.15 to determine which units' rout.
After all Pre-Shock TQ checks, if at least one attacker and one defender in the same combat did not rout, that combat will move to the next Shock resolution step, otherwise that specific Shock combat is complete.
(9.14) Possible Leader Casualties. If a player has a leader stacked with a unit involved in the shock combat, he rolls the die for each such leader. If the die roll is a 0, the leader has been Wounded. The player then rolls a second time; if that die roll is greater than the leader's Personal Combat rating, the leader has been Killed instead. Killed leaders are immediately removed from play. If a leader is Wounded, he remains in play, but all his ratings are reduced by 1—to a minimum of 0. A leader who previously has been Wounded and is wounded again is, instead, killed.
(9.15) The Clash of Spears and Swords. The Clash of Spears and Swords Chart is now consulted. Cross-index the attacking unit's Type with the defending unit's Type and its orientation relative to the attacker to determine which Shock CRT column (prior to any adjustments) will be used to resolve the combat. If there is more than one Type of defending unit, the defending player chooses which unit will be used for the determination. Similarly, if there is more than one attacking unit, the attacking player chooses the attacking unit to be used in the determination.
(9.16) The Hand-to-hand Struggle. Players now determine the effect of any advantages either side has and then resolve the shock combat.
Step 1: Determine Superiority: There are two "types" of Superiority: Position Superiority and Weapon System Superiority. Either one side or the other may (but not must) gain superiority, either as: Attack Superiority (AS) or Defense Superiority (DS). In many instances there is No Superiority. Superiority is determined as follows:
(A) Position Superiority: The attacking unit generally has Position Superiority if its attack is through a defending unit's Flank or Rear hex. If more than one unit on either side is involved in the combat, the units chosen in 9.15 are used in the determination. An attack does not attain Position Superiority if the attacking unit is in the ZOC of an enemy unit that is in the attacker's Flank or Rear hex.
(B) Weapon System Superiority: If no Position Superiority is attained, the opposing units check their weapon class relationship (see the Shock Superiority Chart, 9.32) to determine if either weapon system is superior (either AS or DS) to the other. If more than one unit on either side is involved in the combat, the units chosen in 9.15 are used in the determination.
Play Note: Many different types of permutations and combinations are possible, in terms of unit types and multiple attack angles. The two precepts above should cover virtually all these possibilities. If they don't, try to attain a result that best fits in with the general principles.
Step 2: Determine Size Ratio Difference: Compare the total Size points of the attacking unit(s) to those of the defender(s).
For each level of Size Ratio Difference (SRD) greater than 1 to 1 a unit has, it receives a Shock CRT column adjustment of one in its favor. The attacker adjusts to the right, the defender to the left. Reduce all size ratios to a #–1 (or 1–#), rounding off as follows:
- If any attacker moved to affect the shock, round off in favor of the attacker! Thus a 5 Size unit attacking a 4 Size unit is 2–1; a 4-5 is 1–1 and a 2-5 is a 1–2.
- If no attacker moved, round off in favor of the defender. Thus a 5 Size unit attacking a 4 Size unit would be 1–1; but 4-5 is 1–2.
Example: Attacking at 11–5 yields a 3–1 ratio if the attacker moved and adjusts the Shock Table two columns to the right. If the attacker didn't move before attacking, 11–5 would be 2–1, and one column shift right.
Design Note: The "rounding off" reflects the advantage of "momentum."
Step 3: Adjust Columns and Resolve: To resolve shock, the attacking player starts from the base column on the Shock CRT (9.15) and adjusts that column for any SRD, unit, and/or terrain effects (all listed on the Shock CRT). He then rolls the die, adding to the DR the Charisma Rating of any one of his leaders involved in the Shock, and subtracting the Charisma Rating of any one defending leader involved (defending player's choice). If a leader was killed (9.14), that side suffers a reverse die roll modifier equal to the deceased leader's Charisma Rating. A newly Wounded leader uses his adjusted Charisma rating.
Play Note: Remember to use the "Charisma" Rating—not the Personal Combat rating.
Step 4: Apply Results: Results on the Shock CRT are Cohesion Hits for both attacker and defender. The # in parentheses is for the defender. The resultant Cohesion Hits are modified as follows:
- If the attacker was superior (AS), then double (2x) the defender's result.
- If the defender was superior (DS), then triple (3x) the attacker's result.
- If the attacker is a Light Cavalry Archer or Light Infantry Archer unit and the defender is Heavy or Medium Infantry unit, halve (½x, round down) the defender's hits. This reduction does not apply if the defender is Routed and is cumulative with bullet #1.
If more than one unit of the same player was involved in that combat, Cohesion Hits are distributed as per 10.13.
Design Note: The hit reduction when Light units are involved in Shock underscores their limited of shock capability versus the heavier infantry types.
(9.17) The Collapse. Players now determine which of those units involved in the Shock will rout by performing these steps:
- All units that have Cohesion Hits equal to or greater than their TQ rout (10.2). If all units in any one Shock combat would rout, first use 10.15 to determine which units' rout. If both players have units that rout from the same combat, the defender routs first.
- The players then roll a die for each of their involved units that have Cohesion Hits one less than their TQ (TQ minus 1) and are in an enemy ZOC. If the DR is the same or lower than the unit's TQ, remove one (1) of its Cohesion Hits. If greater, the unit routs (10.2).
- Attacking units required to advance (9.2) do so now. When using the optional Engaged rule (10.3), remove Engaged markers from any unit that rout moves or advances. If either all defending units or all attacking units rout moved, advanced, or were eliminated, remove all Engaged markers from the other side's involved units. If both attackers and defenders have units that remained in their hexes, place (or retain) Engaged markers on those units.
Play Note: We expanded on this section to make it clear who routs and when. The players should also keep the Shock Resolution sequence outlined in 9.12 foremost in their minds as they perform these steps.
Extended Shock Combat Example from the Battle of Callinicum
Shock Designation: Immortal Heavy Cavalry A thru C have moved to attack Byzantine units U thru Y. Since all Persian units are heavy types that moved adjacent to enemy units, they must Shock and so all receive Shock-Must Check TQ markers. As play moves to the Shock Combat segment, the Persian player has the opportunity to use his active leader to enable his units to Shock. The closer of the two, Persian Light Cavalry D, is within Cabades' Command Range so the player decides to have it Shock and gives the unit a Shock-No TQ Check marker.
Pre-Shock Procedure: The Persian player allocates his attacks. Persian HC A must attack both Byzantine MI U and Byzantine Cat HC V (9.12). Persian HC B will attack Byzantine MI W in the hopes of quickly routing the poor-quality Saracen infantry. He will have Persian HC C attack both Byzantine Cat HC X and MI Y. Persian LC D will attack Byzantine MI Z while Persian LC E watches.
The Charge: The players make Pre-Shock TQ Checks for the attacking units with Shock Must Check TQ markers and the defenders in those attacks. The Persian player rolls a 6 for A, while the Byzantine player rolls a 6 and 7 for units U and V.
Persian A is unaffected as is Byzantine V. Byzantine U incurs 2 Hits. In the next combat, the Persian player rolls 8 for Persian B (1 Hit) while the Byzantine player rolls 5 (1 Hit) for unit W. Next up, the Persian player rolls 2 for unit C (no effect) while the Byzantine player rolls 8 for unit X (1 Hit) and another 8 for unit Y (4 Hits). Byzantine MI Y has Hits in excess of its TQ, so it immediately routs and is moved 2 hexes toward the Byzantine retreat edge. Since Persian HC C has an enemy unit in its ZOC, it does not advance. Note that there is no TQ check for units D and Z.
Leader Casualties: The Persian player has a leader involved in one of the shock combats, so he makes a leader casualty check. He rolls a 0 so his leader has become a casualty. The Persian player rolls again, this time it's a 5 which is the same as his Personal Combat rating, so he is Wounded. His Charisma rating is now 4 rather than 5.
The Clash of Spears and Swords: The players now consult the Clash of Spears and Swords chart to determine the base column to be used on the Shock Combat Results Table. Persian attacks by A-C are frontal, so the players will use the Front section of the chart in their determination. For Persian A's combat, there is more than one Type of defender, so the Byzantine player gets to choose which to use. There is no advantage since both Types have 7 as the base column and neither Type has Superiority on the Shock Superiority Chart, so the Byzantine player goes with his HC unit V. Similarly, Persian HC B has 7 as the base column against Byzantine unit W with no Superiority. Persian C with only Byzantine HC X now involved, has 7 as the base column. Persian LC D, has a Flank attack against Byzantine MI Z, base column 6.
The Hand-to-hand Struggle: Persian HC A-C do not have Position Superiority, so the players check the Shock Superiority Chart to determine if either side has Weapons System Superiority. Here, none do. Persian LC D has Position Superiority, so will cause double the hits in the attack prior to any other modifications.
The players next determine the effects of the Size ratios of the opposing units on the combats. In the combat involving Persian HC A, the ratio is 7:12 – the sizes of the two Byzantine units are added together. Since the attacker moved into the attack, the ratio is rounded in the Persian players favor to 1:1! The ratio between Persian HC B and Byzantine MI W is 1:1 (both are Size 7), while the ratio between Persian HC C and Byzantine HC X is 7:5 which rounds up to 2:1 since the attacking unit moved to attack. Persian LC D and Byzantine MI Z's ratio is 1:1 (both are Size 7).
The players are now ready to resolve the Shock Combats starting from the left and moving to the right. The Persian A attack will be resolved on the 7 column (there are no shifts). The Persian player rolls a 6 which gives a "2(2)" result. Persian A incurs 2 Hits. Byzantine U and V each receive 1 Hit (U now has 3). For Persian B's combat, the Persian player rolls a 2 which on the 7 column (no shifts) gives a "2(2)" result. Persian B and Byzantine W each incur 2 Hits (now at 3 and 3 respectively). For Persian C's attack there is a one column shift to the right for the Size advantage (8 column), and a +4 to the die roll for the leader's adjusted Charisma (he is Wounded). The Persian player rolls a 6, modified to a 10, with a result of "2(4)". Persian C incurs 2 Hits while Byzantine X receives 4 Hits (now at 5). For the Persian D attack, the Persian player rolls a 7 for a "2(3)". The defenders Hits are doubled because Persian D is Attack Superior, however, when LC engage MI in shock, the hits against the MI are halved. The printed result will be used – 2 Hits for Persian D and 3 Hits for Byzantine Z (now at 5 Hits).
The Collapse: Both players now determine the effects of the Cohesion Hits on their units, starting with the Persian A's combat. Here Byzantine U is within one Hit of Rout and in the ZOC of the Persian A, so must check for rout. The Byzantine player rolls a 3 and hence the unit passes the check and has its hits reduced by one, down to 2. With Persian B's combat, Byzantine W is also within one Hit of Rout and in the ZOC of the Persian A, so the Byzantine player rolls again. This time the roll is 7, so Byzantine W routs. No checks are necessary for Persian C and Byzantine X, but in the case of Persian D's combat, Byzantine Z has hits in excess of its TQ so it immediately routs.
Moving to the last step 9.17[3], Persian B must advance into the hex vacated by Persian W. Likewise Persian D do so into the hex vacated by Byzantine Z, changing its facing by one vertex.
(9.2) Advance After Combat
(9.21) Attacking units and any leaders stacked with them must advance into any hex vacated by enemy units as a result of Shock combat (9.13, 9.17). However, attacking units do not advance into a hex vacated due to a Pre-Shock TQ Check (9.13) if they are also in the ZOC of another enemy unit. Advancing after combat does not require an order, but the advancing unit incurs all cohesion costs engendered by such a move. If the advance would rout (10.2) the moving unit, it advances and does not rout; the number of hits it has is set equal to TQ minus 1.
Design Note: This was a point, which both designers discussed for some time: the victorious unit that is just about at the end of its line. After much internal debate, we decided that the immediate intangibles of victory would be enough to keep the unit from disintegrating.
(9.22) Advancing units may change their facing one vertex upon finishing the advance, even if they are in an enemy ZOC. This section takes precedence over—and is an exception to—7.23.
(9.23) If there are more attacking units than vacated hexes, the unit(s) that had Superiority (if any) must advance. If no such unit(s), those with highest TQ must advance. If a tie, the advancing player chooses. If there were more vacated hexes than attacking units, the advancing player chooses the hex(es).
(9.24) The opposing player cannot use Orderly Withdrawal (6.5) in response to the advance but may change facing per 7.14 and/or use Entry Reaction Fire (8.21) if eligible.
Play Note: There is no advance for hexes vacated due to Missile Fire.
(9.3) The Combat Charts & Tables
(9.31) The Missile Range and Results Chart. This chart is used to determine the strength of a missile unit firing at a given range.
(9.32) The Shock Superiority Chart. This chart is used to compare the superiority (if any) of one type of unit compared to another, depending on which side is attacking or defending. Always read down the column—from the Attacker's point of view. Reading across, by row, gives a "false" result.
(9.33) Clash of Spears and Swords Chart. This chart is used to determine which Column will be used on the Shock Combat Results Table, subject to adjustments.
(9.34) Shock Combat Results Table. This table is used to resolve shock combat in terms of Cohesion Hits to both attacker and defender (10.11 and 10.12).
(9.35) The Cohesion Hit and TQ Check Chart. This summarizes when Cohesion Hits are applied and when TQ checks take place.
(9.36) Leader Casualty Chart: This is used to determine the severity of casualties to leaders from Missile Fire and from being involved in Shock combat.
(10.0) The Effects of Combat
Combat units incur cohesion "hits" from excessive movement and/or combat. Too many Cohesion Hits produce a rout. Routing units run away and head for their Retreat Edge (see specific scenario instructions). A routed unit can be rallied in certain circumstances.
(10.1) Cohesion
Cohesion is a measure of how organized and effective a unit is at any point during the battle. The loss of cohesion is measured in Cohesion Hits, which are applied against a unit's Troop Quality rating, sometimes automatically, sometimes after a die roll. The Cohesion Hit and TQ Check Chart summarizes when these hits occur.
(10.11) TQ Checks: The Cohesion Hit and TQ Check Chart gives the times during the game when a unit must undergo a TQ check. These instances have also been noted throughout the rules. A TQ check consists of rolling the die and comparing it to the unit's printed TQ rating, and applying the result given on the chart - usually one or more Cohesion Hits if the DR exceeds the rating. Note that Routed units have a TQ of 1.
(10.12) Cohesion Markers: Each time that a unit incurs a Cohesion Hit place a numeric marker, representing the total number of hits taken, on (or under) the unit counter.
Cohesion Hits do not affect a unit's combat strength or capabilities in any way, other than to show how close it is getting to falling apart. Thus, a unit with a TQ of 6 and 4 hits has the same combat effect as one with no hits. It is just more likely to rout.
(10.13) If there are multiple units involved in a single combat resolution, Cohesion Hits must be divided as equally as possible amongst these units, with any extra hits being given to the unit that was:
- used to determine Superiority;
- used to determine the Shock CRT column;
- player's choice.
This rule applies even if it means that a unit will rout.
(10.14) When a unit has absorbed Cohesion Hits equal to or more than its TQ rating, it automatically routs (10.2).
(10.15) If, during Shock resolution (9.13, 9.17), all attacking and defending units would rout, the following occurs:
- The attacker adds to his total hits, the number of Cohesion Hits—if any—that he would incur were he to Advance after Combat (9.2).
- All units on the side with the unit that has the greatest discrepancy between hits and TQ rating, rout (10.2). The units on the other side do not rout. The Cohesion Hits on all units on the side that did not rout are adjusted to the units' TQ minus 1. If the attacking side did not rout, the attacker Advances after Combat per 9.2. If the defending side did not rout, those units remain in place.
- If the difference between the hits and TQ is the same for both sides, the defender routs. The Cohesion Hits on all attacking units are adjusted to the units' TQ minus 1 and the attacker Advances after Combat (9.2). If one (or both) sides have more than one unit involved, and at least one unit has less Cohesion Hits than its TQ, then all units that did so, rout (10.2). The above sections apply only when all units would have routed.
Example: [Taginae] A Goth HC (TQ of 6) with 4 hits, attacks a Byzantine LI (TQ of 5), with 2 hits in clear, level terrain. The Shock Result is 2(3). Both units are at their rout threshold. An advance by the Goth HC would not cause a hit as the terrain is clear and level. The difference between the hits and TQ for both units are the same, so the defending Byzantine LI routs, and the Goth HC has its number of hits set to 5 (TQ minus 1) and advances into the hex vacated by the Byzantine unit.
(10.16) Recovery: During an Orders Phase, an Individual Order may be given to remove Cohesion Hits from a unit. 2 Cohesion Hits may be removed from a unit in Clear terrain provided it is not:
- adjacent to an enemy combat unit, or
- within range and LOS of an enemy unit that has missiles (this includes H&D fire) and is not Engaged.
Provided a unit is not adjacent to an enemy combat unit, 1 Cohesion Hit may be removed from a unit in Clear terrain regardless of the presence of non-adjacent enemy missile units. A player may not remove more than 2 Cohesion Hits per Orders Phase per unit.
Routed units and units that have Rallied (10.27) this Game Turn may not have Cohesion Hits removed.
Historical Note: The recovery of 1 Hit is a departure from the prior games in the series and can be retrofitted if so desired. The feeling here is that long range fire would have less of an impact on a unit's ability to recover its cohesion.
(10.2) Unit Rout and Rally
Play Note: This mechanic has been the cause of much player angst, so we have expanded on the procedure and added a detailed example of play.
(10.21) A unit that must rout move is immediately faced and moved 2 hexes towards its side's Retreat Edge as defined in the scenario rules for the battle. The unit must take the most direct path towards its Retreat Edge that is not blocked. A rout path is blocked by:
- an enemy occupied hex, or
- impassible hexes or hex sides, or
- an enemy ZOC unless occupied by a friendly unit
When given a choice of unblocked hexes, the unit will take the path of least resistance in the following order:
- Vacant hex not in enemy ZOC (even if terrain is Rough); then
- Friendly-occupied hex not in an enemy ZOC; then
- Friendly-occupied hex in an enemy ZOC
The routing unit will always enter '1' before '2', etc., always attempting to move closer to its Retreat Edge. If the potential paths have the same priority, the owning player chooses.
If both hexes in the direction of its Retreat Edge are blocked, the player adjusts the facing of the routing unit, in either direction, by one vertex at a time until the unit can move into an unblocked hex. If there is no such hex, the unit is eliminated.
After the retreat, place a Routed marker on the unit to indicate this status and remove any Cohesion Hit markers.
Design Note: Routing units have one thought in mind: getting out of the area as quickly as possible. If there are people standing in their way, that's their problem. Therefore, routs in ancient warfare often took other troops with them, especially if they were rear echelon troops of minimal value. While routing/retreating units usually move directly towards the rear of their lines, instances will occur where that is not feasible or even possible. In such instances, common sense (admittedly in short supply during many games), along with the knowledge that these units are trying to get away from the enemy, should guide your movements.
Example: (Casilinum) – At the start of the Collapse step, Frank A-C and E-F have all exceeded their TQ thresholds. Frank D is not in a Byzantine ZOC and has 1 Cohesion Hit. The Shock combats were resolved from bottom to top, so Frank F routs first. The hexes in the direct path to its retreat edge (hex row 19xx) are blocked by enemy units and ZOC, so it retreats around the Byzantine HC Z. Frank E is next. The unit reverses its facing and moves toward the retreat edge. Byzantine Z's ZOC blocks the move into the vacant hex 2208, so Frank E must move through the Frank D unit. The Frank player makes a TQ check for the Frank D unit; the DR is a 9, so the 4 hits are enough to reach its TQ threshold. The unit immediately rout moves its retreat edge. Frank C now retreats around the rear of Byzantine LC V. Next up is Frank B. Its direct path to the retreat edge is blocked so it must move first sideways into 2304 and then to 2204. Lastly, Frank A retreats. Its direct path is blocked by the Byzantine LN U and its ZOC, so it must now move through Frank B which is on the most direct path to the retreat edge. Hex 2304 though vacant is away from the retreat edge. Frank B is eliminated because regardless of the TQ die roll, it will incur 1 Hit. After these rout moves, the Byzantine units would advance into the vacated hexes.
(10.22) In the Rout Movement segment of the Rout and Reload Phase, all Routed units are moved their full, printed MA in the same direction and manner as in 10.21—even if they moved previously during the Game Turn. Routed units use normal movement rules, except that they may not enter enemy ZOCs unoccupied by friendly units. They do not incur Cohesion Hits from movement.
(10.23) A unit that either moves off the map (for whatever reason) or cannot complete its rout movement because of the presence of enemy units/ZOCs or impassable terrain is permanently removed from play and considered eliminated for Army Withdrawal purposes.
(10.24) The movement of routing units through or into other units is covered on the Stacking Chart (6.65). The main premise is that Routed units may move through a friendly unit but may not end its move stacked with one. If a Routed unit were to finish its rout movement in a friendly-occupied hex (including one in an enemy ZOC), instead, and per the chart, it continues one more hex (with penalties to the non-moving unit per the chart). The routing unit is eliminated if that hex is occupied by any unit, in an enemy ZOC, or is impassible terrain. If the hex is occupied by a friendly unit, that unit suffers the "Stopping In" penalties noted on the chart.
(10.25) If a leader is stacked with a routing unit, that leader may rout move along with that unit. He is otherwise unaffected by the rout.
(10.26) The effects of Rout are:
- Routed units have an automatic TQ of '1'. All other ratings are unaffected.
- Routed infantry missile units are automatically "Missile No". This does not apply to mounted missile units.
- Routed units may not receive or use orders other than Rally, nor may they fire missiles for any reason.
- Rout-moving units do not pay any cohesion penalties due to terrain effects.
- Routed units that incur any additional Cohesion Hits are immediately eliminated and removed from play.
(10.27) Rally: During an Orders Phase, a player may attempt to Rally a Routed unit provided that the unit is not in Rough terrain hex, not adjacent to an enemy unit, nor within range and LOS of a non-Engaged enemy missile unit that has missiles (this includes H&D fire).
An individual leader may attempt to rally a given unit only once per Game Turn. The limitation applies to the leader, not the unit, which may be rallied by another leader in that same Game Turn. To Rally a Routed unit the player rolls the die:
- If the DR is the same as or lower than the leader's Charisma rating, the unit is Rallied. Flip its Routed marker to its Rallied side. If the unit is Infantry, it now has hits equal to one-half its printed TQ, rounding down. If a cavalry unit, it now has hits equal to one-third its printed TQ, rounding down.
- If the DR is higher than the leader's Charisma rating, the unit is eliminated
Rallied units may not receive or use orders until the next Game Turn; however, they may be refaced at no cost in MP or Cohesion Hits when rallied. Rallied infantry missile units are "Missile No".
(10.3) Engaged (Optional)
(10.31) Units become Engaged due to Shock combat (see 9.17[3]). An Engaged marker is placed on each unit to indicate its status. Engaged units:
- may not move or change facing under any circumstances, and
- may not use Missile Fire, nor may they be the target of Missile Fire, and
- must, if Shock capable, receive a Shock No TQ Check marker in the Shock Designation segment (9.11) if within Command Range of the active leader that could command that unit
(10.32) Cavalry and Light Infantry units engaged with units whose MA is less than their MA, may retreat one hex maintaining their current facing, instead of receiving the Shock No TQ Check marker. That hex:
- must be vacant and one that the unit could enter by normal movement, and
- cannot be in an enemy ZOC, and
- cannot be adjacent to a unit with which the retreating unit is Engaged.
A Shock capable unit that cannot retreat must instead be given the Shock No TQ Check marker.
(10.33) An Engaged marker can be removed because of unit eliminations, advances, and rout moves during the Collapse (9.17) step, or at any time, if an Engaged unit finds itself with no enemy Engaged units in its ZOC and is not itself in the ZOC of an Engaged enemy unit.
(11.0) Special Rules
(11.1) Dismounted Cavalry
Cataphract HC type units may dismount and become Heavy Infantry (HI) unit if it is not within range and LOS of an enemy missile unit that can fire (this includes H&D fire) and at least 5 hexes from any enemy combat unit. During the Movement and Missile Fire segment, the unit expends its entire movement allowance and is replaced with the HI counter that has the same Name and ID#. The unit may be faced in any direction. Under the same circumstances a dismounted cavalry unit may re-mount using the same procedure. Dismount/mount may be conducted as part of a Line Command.
Design Note: The horses are kept somewhere safe and cannot be attacked, captured, eliminated, etc.
(11.2) Army Discipline
An army may be designated as either Disciplined or Undisciplined. Disciplined armies conform to the normal rules, but an Undisciplined army has some additional advantages and restrictions. The Byzantine and the Persian armies in CATAPHRACT are Disciplined. All other armies in CATAPHRACT are Undisciplined.
Design Note: Barbarian tribes, fought stand-up battles in a rudimentary manner. For the most part, barbarian tactics were a big rush designed to swiftly break the back of their opponent. Against another force of similar capability, the outcome would be determined by courage and individual fighting prowess or ferocity.
At the beginning of the scenario, all units in an Undisciplined army have a TQ which is 2 greater than its printed value. This advantage continues until the army's OC fails the following Undisciplined Army Check. Whenever a unit in the OC's army routs, the player rolls the die. If the DR is greater than the OC's Initiative, that Undisciplined army loses the +2 TQ adjustment for the remainder of the scenario (the DR is no longer necessary), otherwise it retains this advantage.
If the advantage is lost, units with Cohesion Hits equal to or greater than their TQ will immediately rout if the loss occurs in the Movement/Missile Fire segment. If it occurs during the Charge (9.13), the units rout after all Pre-Shock TQ checks have been made. If lost during the Collapse (9.17) resolution, resolve any routs during steps #1 and/or #2 where appropriate.
(11.3) Uncontrolled Advance
(11.31) Whenever an Undisciplined army uses a Line Command and moves non-bow-armed units more than 2 hexes closer to the enemy than where they started, that Line is considered in an Uncontrolled Advance. This Uncontrolled Line is treated as the lowest Initiative leader on the subsequent Game Turn and is ineligible for momentum rolls. If there is more than one Uncontrolled Line, the players alternate with high a die roll going first. Units that are conducting an Uncontrolled Advance must use their full movement allowance to move directly toward an enemy unit and engage that enemy unit in Shock combat. Once the advancing unit has engaged in shock combat it is relieved of its Uncontrolled Advance status. A unit can be part of an Uncontrolled Advance more than once per scenario.
(11.32) Whenever a Disciplined army uses a Line Command and moves non-bow-armed units more than 2 hexes closer to the enemy than where they started, the owning player must make a Leader Discipline Check. That player rolls the die. If the DR is equal to or less than the Initiative rating of the leader that issued the Line Command, the units remain controlled. If the die roll is greater than the leader's rating, then the units conduct an Uncontrolled Advance and follow the restrictions in 11.31.
(11.4) Rate of Fire
Any infantry unit armed with a composite bow (missile type C) that hasn't moved from its original setup hex at all during the scenario, can fire twice whenever it can fire. Missile supply is checked after each fire. These units need not fire at the same target. If the unit leaves its setup hex, even if it returns, it loses this capability.
Design Note: This rule reflects the greater accuracy and overall effectiveness of stationary infantry relative to other missile units in the GBoH series. It also reflects the pre-positioning of arrows within easy reach of the archer who is in his original position (ala Agincourt).
(11.5) Swords
Some Barbarian tribes were armed with a large, slashing sword, very unlike the old Roman gladius, which was more suited for stabbing, and which, in any case, had pretty much gone out of style. Most HI and MI were spear-armed by this time. This gave sword-armed troops—here the Huns, Alans, Saxons and some Burgundians—some advantages in certain types of in-fighting.
Historical Note: Huns? Yes, according to David Nicolle, the Huns were noted for the use of their long swords both mounted and on foot. They, and other steppe tribes, such as the Alans, picked up the habit from their dealings with the Sassanid Iranians. Maenchen-Helfen seems to want to attribute similar swords to the Ostrogoths, but his notes/writings on that subject are a bit garbled, and not definitive.
To represent this, in game terms, all sword-armed infantry—noted with a boxed S on the counter—are considered to be wielding such swords. Sword armed units are Attack Superior against any infantry unit that has a flank hex that is neither occupied by another friendly unit, nor in the ZOC of another friendly unit.
(11.6) Cheiroballistra
Historical Note: There is no hard evidence that either Aetius or Arnegisclus had any field artillery; then again, there is no evidence that they did not. Marsden, and various archeological sources, seem to indicate that battle artillery was still in use mid-5th century. Prof Hugh Elton opines that it is not likely that Aetius would have had any, given the circumstances of his arrival.
It is also possible that the use of the rather position-bound and slow-firing artillery pieces did not serve much purpose against fast-moving cavalry. It is our guess that the less infantry-oriented the armies became, the less valuable such pieces, which were defensive at best and best used against slow-moving foot, were. The game's artillery of choice is the Cheiroballistra, an advanced, and very effective, version of the arrow-shooting weapons, such as the Scorpio.
(11.61) Cheiroballistra have built-in crews with a TQ rating and are treated as Light Infantry (LI) for movement and when defending in Shock combat or against missile fire. Cheiroballistrae may not Shock attack and their only offensive combat capability is to missile fire.
(11.62) A Cheiroballistra is in either Fire or Move mode. It requires an Individual Order from any friendly leader or a Line Command to a combat unit stacked with it to change its mode. A Cheiroballistra in Move mode cannot fire, and conversely, cannot move in Fire mode. A Cheiroballistra that has had its mode changed to Move cannot move in that Orders Phase, nor can a Cheiroballistra that has had its mode switched to Fire, fire in that Orders Phase. A Cheiroballistra unit in Move mode requires an Individual Order from any friendly leader or a Line Command to a combat unit stacked with it to move. Cheiroballistra units do not need orders to fire (see 11.65 below).
Play Note: The front side of the counter shows the Cheiroballistra in Fire mode; the reverse side in Move mode.
(11.63) Only one Cheiroballistra unit may occupy any one hex. One infantry unit (as designated in the scenario) may stack with a Cheiroballistra unit without penalty to either unit. While so stacked, the artillery unit does not count as a unit for Shock purposes or provide any defensive capability to such attack or defenses. Any Cohesion Hits taken by that stack are absorbed by the "protecting" infantry. A Cheiroballistra may fire regardless of its position in the stack. All other stacking rules apply.
(11.64) Cheiroballistra units have no facing; they may move or fire in any direction, regardless of the direction the actual counter is pointed. All Shock attacks against Cheiroballistra units alone in a hex are considered frontal.
(11.65) Active Fire: Cheiroballistra may fire offensively twice per Game Turn (not Orders Phase) during any friendly Orders Phase. They do not need an order to fire and can fire at any time during the active player's Movement/Fire segment, no more than one shot per phase. The first time a Cheiroballistra unit fires, place an Active Fire Once marker on it. The second time it fires, flip the marker to its Active Fire Finished side. A Cheiroballistra that fires cannot do anything else in that Orders Phase.
(11.66) Reaction Fire: Cheiroballistra may fire twice per enemy Orders Phase at any time during the enemy Movement/Missile segment—and we mean "any"; they may fire even during enemy movement! The firing player simply says, "I'm firing my Cheiroballistra", or words to that effect. The first time the Cheiroballistra unit fires, place a Reaction Fire Once marker on it.
The second time it fires, flip the marker to its Reaction Fire Finished side. Cheiroballistra, however, cannot use any type of ordinary Reaction Fire (8.2).
(11.67) Cheiroballistra incur and recover Cohesion Hits as any other unit. A Cheiroballistra that routs is immediately eliminated.
(11.7) Roman Shield Wall
This rule is used only by Roman and Byzantine HI or MI units.
(11.71) The instant any Roman HI or MI unit is fired upon, through its frontal hex sides, by an enemy unit at a distance of 2 hexes or more (and this includes all H&D fire)—i.e., the units are not adjacent—that unit may choose to go into Shield Wall before resolving the effects of that fire. There is no cost in MP or cohesion cost to do so, and no orders are required.
(11.72) If one unit in a line of adjacent HI/MI, in which each such unit is adjacent through their flank hex sides, goes into Shield Wall, all units in that line are automatically in Shield Wall.
Example: [Catalaunian map] Roman HI and MI stretching from 2113-2119 are in a line eligible to all go into Shield Wall. Frankish units in 2120-22 would be in the same "line" but are not eligible for Shield Wall. A Roman HI in 2016 would be adjacent to the Roman unit in front of it, but would not be eligible, as it is not adjacent by flank.
(11.73) Shield Wall has the following effects:
- Units firing at a unit in Shield Wall have three (+3) added to that die roll, regardless of the weapon firing. However, units in Shield Wall do not receive the either the +1 or +3 modifiers for Heavy Infantry.
- Units in Shield Wall may not Move or Fire (even Reaction Fire) until the Shield Wall is removed (11.74)
- Units in Shield Wall that are the target of Shock attack are automatically out of Shield Wall and defend normally
(11.74) Shield Wall may be voluntarily removed only when the units in that line are activated by Line Command and all units in that Line must leave Shield Wall or none may. It costs 1 MP (no cohesion penalty) to leave Shield Wall.
(11.8) The Champion Challenge
(11.81) In the Dara and Taginae scenarios, each side has a "champion." Each champion has two ratings: Fight and Stamina. The former is used to resolve a round of individual combat; the latter determines what the effects that combat have on the champion.
A sample champion counter is illustrated with its Fight rating on the left and Stamina rating on the right.
(11.82) The Champion Challenge is played in rounds, each round consisting of one die roll by each player. The Challenge ends when one of the champions has been killed.
(11.83) In each round, each player rolls one die, to which he adds his champion's Fight rating.
- The champion with the lower adjusted roll incurs 1 hit
- If the lower adjusted DR is one-half or less than the higher, the unfortunate champion incurs 2 hits
- If the lower adjusted DR is one-third or less than the higher, the unfortunate champion incurs 3 hits
(11.84) When a champion has accumulated more hits than his Stamina rating, he has been killed. His opponent is the winner.
(11.85) The winning player gains the following advantages, all applying to the first Game Turn only:
- He may start the turn, after any Elite Orders Phase, by activating any one leader, regardless of his Initiative Rating. The leader may use Momentum.
- All units on the winning side subtract one (-1) from all TQ-related die rolls.
(12.0) Army Withdrawal and Victory
Design Note: The Army Withdrawal levels in the scenarios reflect the realities of each army's capabilities. Play balance may be adjusted by changing those levels, although this is something that should not be done until you are familiar with both the game and your opponent.
A player wins by causing his opponent's army to withdraw. An army will withdraw when it has accumulated Rout Points equal to or greater than its Withdrawal Level as given in the scenario. In the Withdrawal Phase, each player totals the number of Rout Points (RP) he has accumulated from his eliminated units—this includes combat units that have Routed off the map.
(12.11) A combat unit is worth RPs equal to its printed TQ; ignore Army Discipline and other such temporary adjustments. Eliminated leaders are worth five times (5x) their Initiative rating in RPs.
(12.12) If a player's army Rout Point total is the same or higher than the Army Withdrawal Level, that army Withdraws, and that player has lost the battle. If both sides reach or exceed their Withdrawal Level at the end of the same turn, the player with the least number of RP above that level wins (but just barely). If both sides are the same, it's a draw.