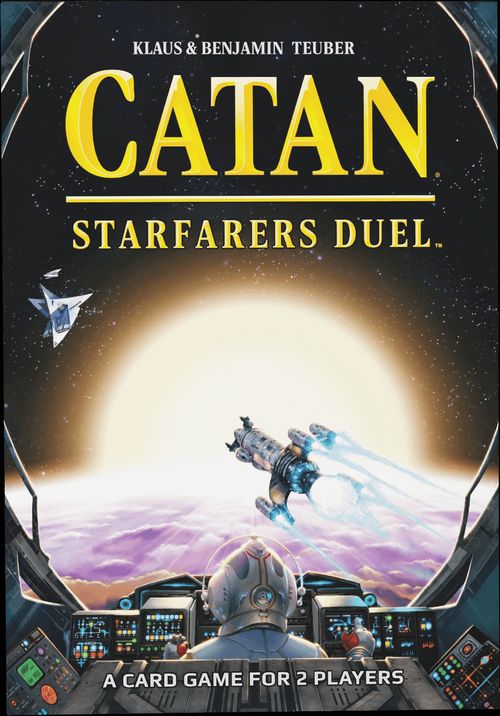
Catan: Starfarers Duel
Catan: Starfarers Duel Rulebook
Table of Contents
Table of Contents
Rulebook
New to CATAN – Starfarers Duel? We have several ways for you to learn this exciting game of space exploration.
The Training Missions Guide teaches the rules through a series of five scenarios designed to introduce new rules at a digestible pace. Each scenario builds on the previous one until you know all the rules.
The Rulebook presents all the rules in one place for those players who would like to jump into the full game from the start.
The Overview sheet summarizes the cards, modules, and icons in the game.
Objective
Cleverly navigate your starship through the depths of alien space. Establish colonies and trading posts and defy pirates to reach 10 victory points (VPs) and win the game.
Setup
Before Your First Game
Assemble Your Starship
Assemble the 6 dials using the plastic rivets, as shown. Make sure that you put the dials in the matching, colored spaces on the starship (see illustration). You may choose to display the icon on the dial or not; it does not impact game play.
Before Each Game
Your Starship
Assemble the 4 sections of your starship as shown at the top of page 3 and place it in front of you. Section 1 contains cargo bays for your resources.
Ore, fuel, carbon, food, and trade goods are all considered resources.
- Set the trade goods dial to one to show that you start the game with 1 trade good. You do not have any other resources at the beginning of the game, so set the remaining resource dials to zero.
- The second section of your starship contains the lab. Set the dial to one to show that you start the game with 1 tech. Tech is not considered a resource.
Note: When you buy or receive resources or tech during the game, rotate the appropriate dial to the right (clockwise) by that amount.
When you sell or lose resources or tech, rotate the appropriate dial to the left (counterclockwise) by that amount.
- Take 2 colony ships and 2 trade ships. You start the game with 1 colony ship and 1 trade ship, so place one of each type of ship in your hangar. Place the two remaining ships, cost side up, next to your starship.
- Each player takes one set of level 1 modules of their player symbol. Secretly choose two of the 6 modules and place them active side up on two of the free spaces in your starship. These are your active modules at the start of the game.
- Place the other 4 modules, cost side up, on the remaining empty spaces in your starship. You must build them before you may use their functions.
- Take 3 level 1 boosters and 3 level 2 boosters. Each of you starts the game with 2 active level 1 boosters. Insert them into the engine of your starship as shown in the picture. Place the remaining boosters next to your starship.
- Take 3 level 1 cannons and 3 level 2 cannons. Each of you starts the game with 2 active level 1 cannons. Insert them in the nose cone of your starship as shown. Place the remaining cannons with the set-aside boosters.
Here is an example assembled starship. The face-up modules may be different depending on which ones you have chosen.
The starship is made up of Section 4, Section 3, Section 2, and Section 1 (nose cone), with the engines at the rear (Section 4) and the nose cone at the front (Section 1).
The Cards
Sort the cards by the card back.
- The cards with the player symbols on the back are starting colonies. Take the card with your player symbol and place it face up in your player area below your starship. (Sun player and Moon player each have their own starting colony card; front of card shows the colony, back of card shows the ship launching.)
- Place the sector board in the middle of the table between the two starships. Leave enough space between the sector board and each starship for a row of cards.
The other cards with the starship on the back are sector cards. Turn these cards over and separate them into five stacks according to the symbol in the lower left corner (I, II, III, IV, no symbol). Shuffle each stack separately.
- Create the reserve deck: Place stacks I, II, III, and IV face down on top of each other, in order, with the IV cards on the bottom and the I cards on top. Place the reserve deck face down next to the sector board.
Create the starting sectors: Take the final stack. Divide it into 4 facedown stacks of 9 cards each. Place these stacks on the four spaces of the sector board.
- The cards with the Starfarer on the back are the mission cards. Take cards 1-15. Shuffle them and place the deck face down next to the sector board. Reveal the top 3 cards and place them face up as shown on page 4. Place any remaining mission cards back in the box.
- Place the 2 special point cards, "Friend of the People" and "Hero of the People," within reach.
Remaining Game Pieces
Place the remaining pieces within easy reach of both players:
- The 6 level 2 modules;
- The orange and blue dice;
- The supply of astro coins;
Decide who will be the starting player. The starting player receives 22 astro, and the other player receives 25 astro.
(The rulebook includes a full labeled diagram of the completed setup: the two players' starships face each other with a flight path space between each starship and the sector board; the sector board with its 4 numbered sectors sits in the middle; and the remaining sector cards, mission cards, special point cards, level 2 modules, dice, astro coin supply, colony cards, and spare ships/boosters/cannons are laid out within reach, matching the numbered setup steps above.)
Turn Overview
On your turn, complete the following phases, in order.
- Start of Turn — Roll the orange die to determine production and flight speed.
- Production phase — Colony planets produce resources this turn based on the orange die result.
- Flight phase — Choose a space sector to visit and explore a number of sector cards based on your flight speed.
- Trade and Build phase — Trade with your established trade stations and expand your starship.
- End of Turn — At the end of your turn, pass the orange die to your opponent. It is now their turn.
Start of Turn
Roll Dice
On your turn, roll the orange die. The result determines which of each player's colony planets produce. It also determines how far your starship may travel this turn.
Production Phase
Colonies
The colonies in front of each player that match the number rolled are eligible to produce a resource. Only one of your colonies may produce each turn. If you have multiple colonies with the same die number, choose one of them to generate a resource. Add the selected resource by rotating the appropriate dial. Each turn, you may change which eligible colony produces resources.
Storage capacity
Normally you may only store 2 resources in each cargo bay. The level 1 Storage module allows you to store 3 resources. The level 2 Storage module allows you to store 4 resources. Any extra resources may not be stored.
Example: You own the colonies shown and roll a 2. Now you must decide whether your ore or carbon colony will produce. You choose the ore colony and rotate the ore dial from 1 to 2. If you had rolled a 1, the fuel produced in your fuel colony would have been ignored. To store the additional fuel, you would need to upgrade your Storage module to level 2.
Production Module
Each player with an active Production module that matches the number rolled produces 1 trade good. Rotate your dial to add 1 trade good.
Trade goods are also limited by your storage capacity, as described in "Colonies – Storage capacity" above.
Science Module
Each player with an active Science module that shows the number rolled receives 1 tech. Rotate your dial to add 1 tech.
The lab may always hold up to 4 tech.
Flight Phase
The 4 stacks of cards on the sector board represent 4 different space sectors. At the beginning of your Flight phase, you must choose one sector to explore.
When you explore a sector, your opponent takes that stack and reveals cards one by one. Based on the card, you either keep flying, take a flight action, or encounter a pirate.
Calculate Flight Speed
Your flight speed determines the maximum number of sector cards you may visit during your turn.
Flight speed = base speed + orange die.
Your base speed is equal to the power of your boosters. Level 1 boosters add +1 to your base speed. Level 2 boosters add +2.
Example: You have two level 1 boosters and one level 2 booster, so your base speed is four. You rolled a two at the Start of Turn giving you a flight speed of six (4+2=6). So, you may explore up to 6 sector cards.
Explore a Sector
Choose a sector stack to explore. Your opponent picks up that stack and secretly looks at the top card. If it's a pirate, they keep the card secret (see "Pirates" on page 8).
If it is not a pirate, they place the card face up in the empty area between the sector board and your starship.
Now you may choose to take an action or move on to the next card. If you take an action, rotate the card slightly. This way, the number of actions you have taken may be easily tracked. The actions you may perform are described later (see "Flight Phase Actions" on page 6). If you move on, you may not take an action on that card this turn.
Until your Flight phase ends, your opponent will continue to look at the next card, resolving pirates or placing the card face up on the table. Each new card is placed next to the previous card to form a row that shows your flight path.
Ending the Flight Phase
Your flight ends when:
- Your opponent reveals a number of cards equal to your flight speed; OR
- You perform two actions (or three actions with the level 1 Command module or four actions with the level 2 Command module); OR
- You lose a battle against a pirate; OR
- You voluntarily end your flight.
When your flight is over, your opponent collects all the cards in your flight path and shuffles them together with any remaining cards of this sector stack. They then put the stack, face down, back in its place on the sector board.
Example: Your flight speed is six. So, you may explore up to 6 cards. You decide to explore the second sector stack. Your opponent takes the cards in hand and reveals the first one. You decide to take a flight action and rotate the card. After you complete the action, your opponent reveals the second card. Here you decide not to take any action. Then your opponent reveals the third card, and you decide to take another flight action. Since this is your second action and you haven't built the Command module, your Flight phase ends.
Flight Phase Actions
Depending on the card, the following actions are possible:
- Buy or sell resources and tech (at trade planets and outposts with ↔ & ➡).
- Establish a trade station (at trade planets and outposts with a [⇄] icon).
- Establish a colony (at planets with a [⚙] icon).
- Complete a mission (at target planets).
Buy or Sell Resources and Tech (↔ & ➡)
At trade planets
When you explore a trade planet (with a ↔ icon), you may buy or sell the resource or tech shown.
When you buy 1 resource or 1 tech, return the number of astro indicated to the supply. You may buy as many resources or tech as you may store and that you can afford.
When you sell 1 resource or 1 tech, you receive the number of astro indicated from the supply. You may sell up to the number of resources or tech you have stored.
Buying and selling from trade planets always counts as one action, regardless of how many resources you buy or sell when you explore the card.
At outposts
Outposts with the ↔ icon allow you to buy or sell tech or any resource of your choice as indicated. Outposts with the ➡ icon only allow you to buy as indicated.
Finally, outposts restrict the number of times you may perform that trade (1x or 2x). Trading at an outpost always counts as one action, regardless of whether you trade 1x or 2x when you explore the card.
Establish a Trade Station [⇄]
You may establish a trade station on planets or outposts with a [⇄] (trade icon) if you have a trade ship in your hangar.
Spend your trade ship by removing it from the hangar and returning it to your supply. Then take the planet or outpost card you have just discovered from your flight path and place it in your player area. You may use the card's ability starting in your next Trade and Build phase.
Every trade station displays 1 Friendship icon, which can be gathered for a VP.
Refill the sector stack
A sector stack must always have 9 cards. Establishing a trade station removes a card from the sector stack so you must replace it. Take the top card of the reserve deck and place it face up in your flight path in place of the removed card. Rotate it slightly to indicate that you took an action at that point in your flight path.
If you do not establish a trade station, you may still buy or sell resources as normal (see "Buy or sell resources or tech" on page 6). Leave the planet or outpost in your flight path as usual so that it returns to the sector stack at the end of your Flight phase.
Friend of the People
The first player to collect three friendship icons receives this card. It is worth 1 VP. The card is always given to the player with the most friendship icons (if they have at least three).
Important: If both players have the same number of friendship icons, the card is set aside and no VPs are awarded until one player has the most.
Establish a Colony [⚙]
You may establish a colony on planets with a production icon [⚙] if you have a colony ship in your hangar.
Spend your colony ship by removing it from the hangar and returning it to your supply. Then take the planet card you have just discovered from your flight path and place it in your player area. You may use the card's ability starting in the next Production phase.
Colony planets are worth 1 VP as shown by the VP icon.
Refill the sector stack
Place a card from the reserve deck at the point in your flight path where the colony planet was located and rotate it, as described under "Establish a trade station."
Asteroid Fields
No actions may be taken on an asteroid field in the flight path. It does count toward the number of sectors you may explore with your flight speed.
Complete a Mission
The planets Andromeda, Kassiopeia, Perseus and Mestor are the target planets for missions from the Galactic Council.
Mission cards show you the combination of resources, tech, and/or astro needed to complete the mission for that planet. They also show the reward(s) for completing the mission.
(Each mission card shows the planet name at top, the mission requirements, a mission number in the lower left corner, and the reward in the lower right corner, next to the VP icon.)
When your opponent reveals a target planet, and you can meet the mission requirements for that planet, you may choose to complete that mission. Spend the listed resources, tech, and/or astros (put them in the supply). Then receive the reward shown on the mission card. The reward might be one-time rewards (resources, tech, astros from the supply) and/or ongoing rewards (VP icons, friendship icons, fame icons). Take the completed mission card and place it in your player area so that the ongoing rewards are clearly visible.
Example: Your flight path reveals the target planet Perseus. Mission card 13 is available showing that 2 ore and 1 tech must be delivered to Perseus. You have both and choose to complete the mission. Reduce your ore supply by 2 and your tech by 1. Take your one-time reward of 7 astro from the supply and place the mission card face up in your player area with the fame icon clearly visible.
If there are multiple mission cards with the same target planet at the beginning of your Flight phase, you may choose to complete any number of these missions, in any order, with each one counting as a separate action.
Once you complete a mission, immediately turn over a new mission card from the deck so that there are always 3 missions available. If the new card shows the same planet as the mission card you just completed, you may NOT complete it in your current Flight phase.
Pirates
During your flight you might also encounter pirates! These unpopular troublemakers demand protection money to let you continue flying undisturbed.
If your opponent draws a pirate card during your Flight phase, they keep it secret and ask how you would like to respond to the pirate's request. You may pay 3 astro and continue your flight. Otherwise, you must fight the pirate.
Once you decide, your opponent places the card face up in your flight path. Encountering a pirate does not count as an action.
Fight the pirate
To fight a pirate, you have to compare combat strengths by rolling the combat die. You roll first, then the pirate.
Combat strength = base strength + the result of your blue die roll.
Your base strength is equal to the power of your cannons. Level 1 cannons add +1 to your base strength. Level 2 cannons add +2.
Example: You have two level 1 cannons and one level 2 cannon, so your base strength is four. You rolled a three on the blue die giving you a combat strength of seven (4+3=7).
Your opponent takes the part of the pirate. They roll the blue die and add the pirate's cannons (shown on the upper right corner of the card) to calculate the pirate's combat strength.
If your result is greater than or equal to the pirate, you win the fight! Otherwise, the pirate wins.
Example: The pirate has a base strength of 2. You opponent rolled a one on the blue die giving the pirate a combat strength of three (2+1=3). Yours was 7 (above). You win the combat and earn the rewards shown on the pirate card.
You defeat the pirate
When you defeat a pirate, you receive one resource of your choice as an immediate, one-time, reward. You also gain the ongoing fame icon reward shown on the card. Place the pirate card in your player area so the fame icon(s) are visible.
Refill the sector stack
Place the top card from the reserve deck face up in your flight path. An encounter with a pirate does not count as an action. Therefore, do not rotate the new card from the reserve deck. You may not take an action with the new card.
Your flight continues with your opponent drawing the next card from the sector stack.
The pirate wins
If the pirate wins, your Flight phase ends immediately. You suffer the consequences shown on the card. Leave the pirate card in your flight path.
If the pirate destroys a booster, you must remove a level 1 booster or replace a level 2 booster with a level 1.
If the pirate destroys a cannon, you must remove a level 1 cannon or replace a level 2 cannon with a level 1.
If the pirate destroys a module, you must either remove a level 2 module (exposing the active level 1 module beneath) OR deactivate an active level 1 module. You may not deactivate the level 1 module under an active level 2 module.
Hero of the People
The first player to collect three fame icons receives this card. It is worth 1 VP. The card is always given to the player with the most fame (if they have at least three).
Important: If both players have the same number of fame icons, the card is set to the side and no VPs are awarded until one player has the most.
Trade and Build Phase
On your turn, you may trade and build in any order as often as you want, as long as you have the resources to do so.
Trade
On your turn you may visit up to 2 of the trade stations in your play area to buy or sell resources and tech. You may not visit the same trade station twice in one turn.
- Trade on your planets: You may buy as many resources/tech as your cargo bays may hold. You may sell as many resources/tech as your cargo bays have in stock.
- Trade on your outposts: Trade stations may have additional restrictions, indicated by the direction of the arrow and number of uses (1x or 2x).
Example: You have 2 carbon in your cargo bay and need 1 ore. You have 3 trade stations in your player area (1 ore planet, 1 fuel planet, and 1 Merchant outpost).
Use your Merchant outpost two times. Rotate your carbon dial from two to zero and take 6 astro from the supply.
Use your ore trade station one time. Buy 1 ore for 3 astro, keeping 3 astro for future purchases. Since you have visited 2 of your trade stations, you are not allowed to visit the fuel trade station.
Build
On your turn, pay the listed resources for the item you wish to build. The cost is shown on the back of the item.
Ships
Colony ship: 1x ore, 1x fuel, 1x food
Trade ship: 1x ore, 1x fuel, 1x trade good
To build a colony ship or a trade ship, at least one of the two slots in your hangar must be free. After paying the resources, take a colony or trade ship from your player area and place it in an empty slot in your hangar.
You may have 2 colony ships, 2 trade ships, or 1 of each in your hangar, but never more than 2 ships total.
Boosters
Level 1 booster: 2x fuel
To build a booster, at least one of the three booster slots must be free. After paying 2 fuel, take a level 1 booster and attach it to the engine of your starship.
Level 1 boosters may be upgraded to level 2 boosters.
Level 2 booster: 2x fuel, 1x tech, 1x level 1 booster
Pay 2 fuel and 1 tech. Remove a level 1 booster from your starship and replace it with a level 2 booster.
Cannons
Level 1 cannon: 2x carbon
To build a cannon, at least one of the three cannon slots must be free. After paying 2 carbon, take a level 1 cannon and attach it to the nose cone of your starship.
Level 1 cannons may be upgraded to level 2 cannons.
Level 2 cannon: 2x carbon, 1x tech, 1x level 1 cannon
Pay 2 carbon and 1 tech. Remove a level 1 cannon from your starship and replace it with a level 2 cannon.
Modules
Level 1 module: 1x ore, 1x carbon, 1x food
After paying 1 ore, 1 carbon, and 1 food, you may activate (turn over) any facedown module on your starship. You may use this module's ability immediately.
You can find a detailed description of the individual modules on the Overview sheet.
Level 2 module: 1x ore, 1x carbon, 2x food
Any active level 1 module may be upgraded to its level 2 version. Level 2 modules increase level 1 benefits and are also worth 1 VP. There is only one of each level 2 module, so only one player may upgrade to a particular level 2 module at a time.
Pay 1 ore, 1 carbon, and 2 food. Take the module from the level 2 module stack and place it face up on top of your active level 1 module.
Example: You already own the level 1 Science module. You pay 1 ore, 1 carbon, and 2 food and take the level 2 Science module from the level 2 modules stack. You place it on top of the level 1 Science module. From now on, if you roll a 2 or a 3 in the Production phase, you gain 1 tech.
End of Turn
If you have not won, pass the dice to your opponent who begins their turn with the Start of Turn phase.
Winning the Game
The game ends immediately if you have at least 10 VPs during your turn. You win, impressing the Galactic Council and are offered a seat on the council!
Advice from the Galactic Council
Forgot to replace a card in the flight path?
Before shuffling a sector stack, it is always best to check if it has 9 cards. If it does not, add card(s) from the top of the reserve deck. Both players may look at the added card(s) before shuffling the sector stack.
Balanced game experience
When an experienced player plays with a beginner for the first time, the experienced player will usually win. To give the newer player an improved chance, here are some suggestions for balancing the gameplay:
- The beginner receives 30 astro during setup; the experienced player only 20.
- The beginner starts the game with 3 level 1 boosters instead of 2.
Variant
If you want a greater sense of exploration in your game, try this variant. When you add cards to the flight path from the reserve deck, place these cards face down so that they may be discovered on the next flight through that sector.
Dear Starfarers
Klaus, Benjamin, and Guido Teuber testing the first CATAN prototype.
At this moment, you are looking at the rulebook of a new game edition. The original game was released over 20 years ago and holds a very special place in my heart. Back then, my father Klaus Teuber included the following acknowledgement in that rulebook's afterword:
"The author thanks all testers of the game rules. He also thanks Claudia, Guido, and particularly Benni (the latter of whom the author could beat only six times in about 30 test-games) for their patience, critique, and suggestions."
During that period, I was a teenager who greatly enjoyed time spent at the game table with my father. My "critiques and tips" made me feel like my dad and I had contributed to the game development in equal parts. Throughout the years, I've come to learn that creating a game requires much more than just a few playtests. My father patiently shared his many insights on game development with me during the past 20 years.
Unfortunately, my dad passed away on April 1, 2023, after a short and serious illness. It is a small consolation that we were able to finalize the development of this new edition before his passing. I am grateful for the many delightful hours we spent together on this project.
My dad always said, with a twinkle in his eye, that game authors rarely win their own games during the development process. He reasoned that authors are too busy with finding flaws and rough edges, refining them, and thereby improving game play. In response, I would jokingly counter that one might always come up with reasons to excuse a poor game-play performance.
In the end, of course, my father was proven right. After our joint development of this new edition each of us had won about half of all the test games. I will always be grateful to my dad for everything he taught me.
Playing connects us as human beings. In this spirit, I wish all of you many wonderful moments on your shared journey through the world of CATAN.
Warm regards,
Benjamin Teuber
We dedicate this game to the warm memory of the late Klaus Teuber, who sadly passed over the bright horizon as we finished development. We all lost a kind and gifted pioneer who departed far too soon, leaving a great legacy of family, fellowship, and non-violent storytelling. Klaus left this world far better than he found it. His was a creative and giving life. His many and varied game designs—most especially CATAN—changed game culture and changed the way the broader world accepts gaming. He ignited a cultural evolution. We've been blessed to have shared Klaus' ever-curious road for a time. We'll miss him always. We'll celebrate him always. He'll be with us every time we share joy through a good game.
–Pete Fenlon, CEO of CATAN Studio