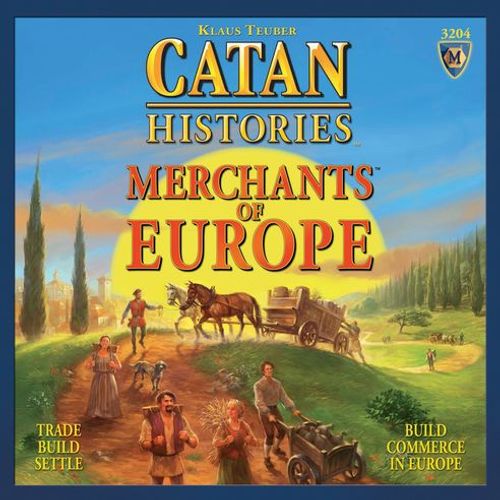
Catan Histories: Merchants of Europe
Catan Histories: Merchants of Europe Rulebook
Table of Contents
Table of Contents
Game Components
1 Game Board:
- Full game board showing all of Europe (marked with a ship)
- Short game board without Western Europe (marked with a whale)
120 Game Cards: 95 resource cards (19 each of 5 resource types), 25 development cards.
2 Punch-Out Sheets with:
- 40 goods tiles
- 68 coins (52 of value 1, 16 of value 3)
- 15 number chips
- 4 building costs overview cards
185 Wooden Game Pieces:
- 120 trade routes (30 each in 4 colors)
- 48 trading posts (12 each in 4 colors)
- 8 caravans (2 each in 4 colors)
- 8 merchants (2 each in 4 colors)
- 1 robber (black)
2 Card Holders.
2 Dice.
The Game Board
The game board shows Europe, made up of five different types of terrain, each of which produces a specific resource.
- Forest (forest and mountain-forest) produces lumber.
- Pasture (pasture and mountain-pasture) produces wool.
- Fields produce grain.
- Mountains produce ore.
- Salt gardens produce salt (both from the sea and from mountains).
The edge where 2 terrain hexes meet is called a route. The point where 3 terrain hexes meet is called an intersection.
Intersections marked with a brown or purple hexagon represent city spaces: the purple city spaces are already occupied by trading posts during the starting setup.
Some terrain hexes show a round chip space in the middle without a number. Five of these chip spaces are marked with a dotted circle. Some city spaces along the coast show gold coins – founding a trading post there yields as much gold as coins are shown. Warehouse spaces hold your goods tiles, and each warehouse space may also hold a trading post once its goods tile has been removed.
Game Setup
- Before playing for the first time, carefully punch out all of the pre-punched pieces from their cardboard frames and set them next to the game board.
- Place the game board in the middle of the table. If this is your first game, lay it out with the Short Game side up (with the whale in the sea to the left, without Western Europe). If you have already played the Short Game, you may choose to play it again, or to play the longer Full Game on the other side of the board, marked with a sailing ship.
- Some terrain hexes on the board show a round chip space in the middle without a number. Five of these chip spaces are marked with a dotted circle. Distribute the five similarly marked number chips (from the punch-out sheet) onto these spaces, matching chip colors to space colors.
- Place the remaining ten number chips face down on an open sea area.
- Shuffle the development cards and place them as a face-down stack in one of the compartments of the card holder.
- Sort the resource cards by their five types and place the resulting five stacks face up in the free compartments of the card holder. They serve as the resource supply during the game.
- Place the card holders next to the game board.
- Place the black robber piece on any terrain hex without a number or number chip.
- Each player receives 3 gold (3 coins of value 1). Place the remaining coins next to the game board.
- Place the goods tiles next to the game board.
- Each player also takes a building costs overview card and takes the following game pieces in their color:
- 30 trade routes
- 2 caravans
- 2 merchants
- Trading posts – the number depends on the number of players and the game board side chosen (see Short Game Setup below).
Short Game Setup
If this is your first time playing, or you don't have much time, play with the side of the board that omits part of Western Europe.
Warehouse setup for the Short Game:
- In a 3-player game, each player receives 8 trading posts and 6 goods tiles. Each player places their 6 goods tiles on the warehouse spaces in their warehouse – one on each space, starting from the bottom. The bottom 5 tiles each also receive 1 trading post; the topmost tile remains without a trading post. The remaining 3 trading posts are placed during the starting setup.
- In a 4-player game, each player receives 7 trading posts and 5 goods tiles. Each player distributes their 5 goods tiles onto the spaces in their warehouse, with the last tile on the topmost space. Each goods tile also receives 1 trading post; the topmost tile remains without a trading post. The remaining 3 trading posts are placed during the starting setup.
- Any unused goods tiles and trading posts are returned to the game box.
- Setup for the Full Game is found in the Appendix on page 10.
Starting Setup for the Short Game
If you are playing the Short Game for the first time, use the fixed starting setup. From your second game on, use the variable starting setup. Those rules are found in the Appendix on page 10.
- Each player places their 3 trading posts, 1 trade route, and 1 caravan as shown in the illustration on the next page.
- Players receive the following starting resources:
- Red: 1 lumber, 1 grain, 1 salt
- Blue: 1 salt, 1 wool, 1 ore
- White: 1 lumber, 1 grain, 1 wool
- Orange: 1 ore, 1 salt, 1 grain
- Even in a 3-player game, place the trading posts of the unused fourth color as shown in the illustration – but without its trade route or caravan. Trading posts of the unused color are neutral. They produce no income during the game, but goods tiles may be delivered to them.
Quick Game Overview
The starting player begins the game with their first turn. The other players then follow in clockwise order. A turn consists of the income phase and the action phase.
Income Phase (for details, see p. 5)
Roll the dice! If you roll a 7, you activate and move the robber. Any other roll determines the resource income and the distribution of resource cards to the players. After that, move on to the action phase.
Action Phase (for details, see p. 6)
As long as you can pay the necessary resources, you may perform the following actions as often as you like, and in any order:
- Trade: You may trade resources with your fellow players and/or with the resource card supply.
- Build – buy – open a route: You may recruit merchants using your resources, and set up caravans and open trade routes. You may also buy development cards.
- Move a merchant and build a trading post: Pay 1 grain card to move one of your merchants up to 3 intersections. If your merchant's move ends on an open city space, you must exchange the merchant for one of your trading posts (i.e., the merchant founds a settlement).
- Move a caravan and deposit a goods tile: Pay 1 salt card to move one of your caravans up to 3 trade routes. If your caravan reaches, during its move, a fellow player's trading post (or, in a 3-player game, a neutral trading post) that does not yet hold a goods tile, you may deliver a goods tile there (slide it under the trading post).
- Play a development card: You may play 1 development card per turn – but not a card you bought during that same turn.
The Rules in Detail
Income Phase
Begin your turn by rolling both dice. (Note: you have the option to play the "Mounted Lancer" development card before rolling the dice.) Depending on the total of the two dice, one of two cases occurs:
You roll a 7, and move the robber.
If you roll a 7, no player receives resources, and there is no compensation payment in gold either (see the right-hand column below). Instead, the robber strikes:
- Loss of resources: Every player who holds more than 7 resource cards must choose half of them (rounded down) and return them to the supply. For example, if you have 9 cards, you must give up 4 of them.
- Move the robber: As the player who rolled the 7, you must move the robber to any other terrain hex with a number.
- Steal a resource: You may then take 1 resource card from a fellow player who has a trading post on the terrain hex now occupied by the robber. Draw the card from that player's face-down hand and add it to your own. If 2 or more players have trading posts on that terrain hex, you choose which of them to steal a card from. If no one has a trading post on that terrain hex, you get nothing.
You do not roll a 7: terrain hexes produce resources for all players.
- Every player who has a trading post on a hex showing the rolled number takes 1 resource card of that hex's type for that trading post.
- If you have 2 or 3 trading posts on the same terrain hex, you receive 1 resource card for each trading post.
- Resource blockade: If the number rolled belongs to a terrain hex occupied by the robber, the owners of trading posts adjacent to it receive no resources for that terrain hex.
Keep your resource cards face down in your hand. Your fellow players may always ask how many resource cards you hold, but not which types they are.
Resource shortage: If the supply does not have enough resource cards of a given type to give every entitled player their due amount, no player receives any cards of that type this turn.
Compensation payment in gold: If you did not receive any resources, take 1 gold as compensation. This happens when the terrain hexes where you have trading posts produce no resources – either because they don't match the number rolled, because a terrain hex is occupied by the robber, and/or because of a resource shortage. This applies to all players.
Example: A "5" was rolled. The Blue player has a trading post on the pasture hex near Lyon. He receives 1 wool. The Orange player and the Red player each have a trading post on the rolled field hex (Köln and Nürnberg), so both receive 1 grain each. The White player received no resource and takes 1 gold from the supply as compensation.
Action Phase
On your turn, you may perform the following actions in any order, and more than once, as long as the stated conditions are met:
1) Trade
On your turn, you may trade with your fellow players, exchange resources with the supply, and/or buy 1 resource of your choice for 2 gold.
Trading with fellow players: On your turn, you may trade resources and gold with your fellow players. You may tell them which resources you need and which resources you are willing to give up for them. You may also listen to your fellow players' offers and make counter-offers.
Important: your fellow players may only trade with the player whose turn it is. They may not trade among themselves.
Buying a resource for gold: For 2 gold, you may buy any resource of your choice. Return the 2 gold to the supply and take 1 resource card from the supply.
Important: a player may buy at most 2 resources for gold on their turn.
Trading resources with the supply: You may return 3 identical resource cards to the supply and take 1 resource card of a different type, or 1 gold, in exchange.
Note: you may not trade resources of the same type (e.g., 3 ore for 1 ore).
2) Build and Buy Development Cards
To recruit a merchant, set up a caravan, open a trade route, or buy a development card, you must return specific combinations of resource cards to the supply. You then take the corresponding game piece from your personal supply and place it on the board, or draw the top development card from the stack and place it face down in front of you.
As long as you can pay the building costs, you may buy and build as often as you like on your turn.
Note: if you have no more trade routes left in your personal supply, you cannot place any more. Plan the layout of your trade route network carefully.
A) A development card costs: 1 wool and 1 salt
To buy a development card, you must return 1 wool card and 1 salt card to the supply. Draw the top development card, look at it, and then place it face down in front of you.
Important: you may not play a development card in the same turn in which it was bought. You may play at most 1 development card per turn.
B) A merchant costs: 1 wool, 1 grain, 1 lumber
To recruit a merchant, you must return 1 wool, 1 grain, and 1 lumber card to the supply. Place your new merchant next to any trading post of yours. If you already have both merchants on the board, you may remove one and place it again – this costs you the usual resources.
C) A caravan costs: 1 ore, 1 lumber, 1 salt
To set up a caravan, you must return 1 ore, 1 lumber, and 1 salt card to the supply. You must place your new caravan next to one of your trade routes that borders directly on one of your trading posts. If you already have both of your caravans on the board, you may remove one and place it again: you then pay the usual resource cost. Important: the trade route next to which you place your caravan must border one of your trading posts, and it must be your own trade route.
D) A trade route costs: 1 ore and 1 lumber
To open a trade route, you must return 1 ore card and 1 lumber card to the supply. Place the trade route piece on the route, which thereby becomes an opened "trade route." Each new trade route must border one of your trading posts or one of your existing trade routes.
Important: enemy trading posts do not block the opening of trade routes. If your trade route reaches a fellow player's trading post, you may place another trade route on a free route on the other side of that trading post (if you pay the building cost).
Trade routes bring in gold:
-
If a trade route connects an "isolated" city space to another city space for the first time, you – and possibly your fellow players – may receive gold. A city space is "isolated" if it is not connected to any other city space by trade routes.
Important: it does not matter whether a city space is occupied by a trading post or not.
-
First determine the shortest path (the number of consecutive trade routes) connecting the previously isolated city space to another city space. If there is more than one shortest path, the player whose turn it is decides which of these paths is chosen.
-
Every player who has a trade route along this shortest path receives gold: 1 gold for each trade route they own along it.
Example: In the illustration above, the Red player opens the trade route marked with the black line. This connects the city space of Torino (Turin) to another city space for the first time – Venezia (Venice). The connecting path is 3 trade routes long. Red receives 1 gold for their trade route, and the Blue player receives 2 gold for their two trade routes. Now Red connects the upper Blue city (Bern) to other cities for the first time with another trade route. The shortest path is 2 trade routes long. Red receives 2 gold for this. The longer path from Venezia to Bern receives nothing.
Double arrow on routes: If you open a route marked with a double arrow as a trade route, you may immediately place another trade route for free. This trade route must be adjacent to the trade route you just opened.
Example: In the illustration above, the Blue player wants to connect Kaliningrad (Königsberg). They open a route marked with a double arrow with their first trade route, and may immediately open the second route to Kaliningrad for free. Blue receives 3 gold for connecting Kaliningrad for the first time.
3) Move a Merchant and Build a Trading Post
a) Moving a merchant
You move your merchant from intersection to intersection. For each grain card you return to the supply, you may move one of your merchants up to 3 intersections. For example, if you pay 3 grain, your merchant's movement range is 9 intersections, meaning you may move your merchant up to 9 intersections in one turn.
The following rules apply:
- Your merchant's move may not end on an intersection where another merchant or a trading post already stands. However, you may move your merchant past another merchant or past a fellow player's trading post. Trade routes likewise do not block your merchant's movement.
- You do not have to move a merchant the full distance allowed by the grain you paid. If you move it a shorter distance, the unused portion is forfeited.
- You may not split the distance covered by 1 grain (3 intersections) between your two merchants. For example, you may not pay 1 grain to move one merchant 2 intersections and the other 1 intersection. However, it is possible to pay 2 grain to move each of your two merchants up to 3 intersections.
Example: The White player is on the move. He has recruited a merchant and placed it at Praha (Prague). To improve his salt income, he wants to move it to Kaliningrad. Unfortunately, White has only 1 grain. He moves his merchant 3 intersections to the intersection east of Wroclaw (Breslau). On his next turn – provided he has acquired a grain – he could then move his merchant on to Kaliningrad and found a trading post there.
Example: The Blue player is on the move, and thwarts White's plan. Blue buys 1 grain for 2 gold, moves his merchant to Kaliningrad, and founds a trading post there. He returns his merchant to the supply. Because of this trading post, a number chip must be placed on the empty chip space. Since only 1 white face-down number chip remains, Blue must reveal the chip – an 11 – and place it on the salt garden.
b) Building a trading post
If your merchant's move ends on an open purple or brown city space, you must immediately replace it with a trading post (i.e., the merchant settles there). Return the merchant piece to your supply, take a trading post from your warehouse, and place it on the city space. This conversion of a merchant into a trading post costs no additional resources. If you do not want this conversion to happen, you may not end your merchant's movement on an intersection with an empty city space.
-
Releasing a goods tile: When you build a trading post, you take the game piece from your warehouse. This frees up a goods tile in your warehouse. Only now is this goods tile available to be delivered to a fellow player's trading post.
-
Coastal cities: If you build a trading post on a city space along the coast that shows gold coins, you receive as much gold as coins are shown.
-
Placing and moving number chips: If your newly built trading post borders a terrain hex without a number, you must choose one of the face-down number chips (on the sea area) and place it on that hex's chip space. The number chip must match the color of the terrain hex's chip space. If there is no more face-down number chip of the matching color left on the sea, you must move an already-placed number chip instead. Take any number chip of the matching color from another terrain hex and place it on the empty chip space.
Important: if your new trading post borders two or even three terrain hexes without a number, you may still only place a new chip on one of these terrain hexes.
Example: (A) Red has recruited a merchant in Budapest. He sends it to Beograd (Belgrade) and builds a trading post there. Beograd borders two terrain hexes that still lack a number. The two face-down number chips for mountains have already been placed on other terrain hexes; for fields, there is still a face-down chip available. (B) Red chooses the mountain hex. He moves the 9 chip onto the mountain hex, which reduces his fellow players' ore income – and, of course, improves his own.
4) Move Caravans and Deposit Goods Tiles
a) Moving caravans
You move your caravans from trade route to trade route. You may never move a caravan onto or across an unopened route. For each salt card you return to the supply, you may move one of your caravans up to 3 trade routes. For example, if you return 3 salt, you may move one of your caravans up to 9 trade routes in one turn.
The following rules apply:
- Next to each trade route, at most 2 caravans belonging to any players may stand – one to the left of the trade route, one to the right. Your caravan's move may therefore not end on a trade route already occupied by 2 caravans. However, you may move it past a trade route already occupied by 2 caravans.
- You may not split the distance covered by 1 salt (3 trade routes) between 2 caravans. For example, you may not pay 1 salt to move one caravan 2 trade routes and the other 1 trade route. However, it is possible to pay 2 salt to move each of your two caravans up to 3 trade routes.
b) Pay to use foreign trade routes
If, on your turn, you move one of your caravans onto or across one or more of a fellow player's trade routes, you must pay that player 1 gold for the "right of use." This 1 gold is a flat fee that entitles you to use as many of that player's trade routes as you like with that caravan during your current turn.
However, you must pay this fee to every player whose trade routes you use. The following applies:
- If you use the same fellow player's trade routes with your second caravan, you must pay them 1 gold again.
- You must pay this fee every turn in which you use your fellow players' trade routes.
- If one of your caravans is already standing on a fellow player's trade route at the start of your turn, you do not owe them gold as long as you do not move that caravan. If you move on without using their trade routes again, you likewise owe them no gold.
Example: The Blue player equipped a caravan on his last turn and placed it on his trade route next to Bern (A). Blue now opens a trade route to Bruxelles (Brussels). Then he pays 1 salt, moves his caravan 1 step to Paris, and deposits a goods tile there (sliding it under the Orange player's trading post) (B). He then moves his caravan a 2nd step across the newly opened trade route to Bruxelles, and deposits his second goods tile at the White player's trading post (C). Finally, he moves his caravan a 3rd step onto the White player's trade route, and deposits his third goods tile at the Orange player's trading post (Köln) (D). Blue must now pay 1 gold to the White player for the use of their trade route.
c) Depositing goods tiles
If you move one of your caravans onto a trade route directly adjacent to a fellow player's trading post – or, in a 3-player game, to one of the 3 neutral trading posts – you may deposit one of your free goods tiles there (sliding it under the trading post). The following conditions must be met:
- There must not already be a goods tile under the trading post.
- You must have a free goods tile in your warehouse that is no longer occupied by a trading post.
- The trading post must belong to a fellow player: you may not deposit a goods tile at your own trading post or at an undeveloped city space.
To be able to deposit more goods tiles, you must build trading posts – each time you build a trading post, the goods tile beneath it is freed and becomes available for you to deposit.
Important: depositing a goods tile is free, and you may then continue moving your caravan afterward (even in the opposite direction) – provided you have paid enough salt.
5) Playing Development Cards
On your turn, you may play one (only one) development card. You may play the development card in the income phase, before you roll the dice, or at any point during your action phase. However, you may not play a development card in the same turn in which you bought it.
After playing the development card, follow the instructions printed on the card. Then discard the card. Discarded development cards form the discard pile. When all development cards have been used, the discard pile is shuffled and becomes the new development card stack.
Winning the Game
Once you have deposited all of your goods tiles, the game ends and you have won.
Appendix
Setup for the Full Game
-
In a 3-player game, each player receives 12 trading posts and 10 goods tiles. Each player places their 10 goods tiles on the warehouse spaces in their warehouse, starting from the bottom. The bottom 9 tiles each also receive 1 trading post; the topmost tile remains without a trading post.
Each player sets aside 3 trading posts, to be placed during the starting setup.
-
In a 4-player game, each player receives 10 trading posts and 8 goods tiles. Each player distributes their 8 goods tiles onto the spaces in their warehouse, starting from the bottom, with the last tile on the topmost space. Each goods tile also receives 1 trading post; the topmost tile remains without a trading post.
Each player sets aside 3 trading posts, to be placed during the starting setup.
The Variable Starting Setup
If you have already played the Short Game once, you should play with the variable starting setup from your second game onward. The Full Game is always played with the variable starting setup.
Each player places 3 trading posts, 1 trade route, and 1 caravan. In a 3-player game, each player additionally places 1 trading post of the unused color.
Important: during the starting setup, only purple city spaces may be occupied with trading posts.
Determine turn order: The oldest player begins and rolls both dice. The other players follow in clockwise order. Whoever rolls the highest total begins the starting setup, and later the game itself.
Note: if several players roll the same highest total, the roll is repeated until it is clear who takes the first turn.
Placing starting trading posts: The starting player chooses one of the purple city spaces and places one of their trading posts there. The other players do the same in clockwise order. Then, the player who placed a trading post last places their second trading post. The remaining players then place their second trading post in counterclockwise order. Starting again with the starting player, each player places their third trading post, and the other players again follow in clockwise order.
Placing neutral trading posts in a 3-player game: In a 3-player game, the player who placed their third trading post last also places a trading post of the unused (neutral) color on a purple city space. The other players follow in counterclockwise order and likewise place a neutral trading post on a purple city space.
Placing a trade route and a caravan: The player who placed their third trading post last places one of their trade routes on a route bordering any one of their three trading posts. Next to this trade route, they place one of their caravans. The other players proceed the same way in counterclockwise order.
Important: during the starting setup, no player is allowed to place their trade route so that it connects two isolated city spaces to each other.
Distributing starting resources: Each player now receives their starting resources for their most recently placed trading post: for each terrain hex bordering this trading post, they receive the corresponding resource card.
Basic Strategy Tips
Secure your resources
In the early phase of the game, it is important to increase your resource income. You should therefore recruit merchants early and send them to open city spaces. When doing so, you should build your new trading posts on terrain hexes that produce the resource type you would like more of.
For example, if after the founding phase you have no trading post on a pasture hex, you will receive no wool. In that case, you should send your first merchant to a city space bordering a pasture hex.
Over the course of the game, the number chips migrate to the terrain hexes that still lack number chips. You should therefore keep track of which terrain hexes will stop producing resources, and when this will happen. Try to build new trading posts early enough to offset this drop in resource income.
When you found a new trading post with one of your merchants, also keep in mind that on average, 6 and 8 are the most frequently rolled numbers. Dice probability decreases in the order 5 and 9, 4 and 10, 3 and 11. The numbers 2 and 12 are rolled least often.
Earn gold by building trade routes
With gold, you can buy urgently needed resources and use your fellow players' trade routes to move your caravans and deposit goods tiles. Gold is therefore very valuable. You should not squander it, but use it only when it is truly important.
One way to earn gold is to connect isolated city spaces to other city spaces via trade routes. If a fellow player's trading post stands on one of these city spaces, this also gives you the opportunity to move your caravan to that city and deliver your goods there.
You can also earn gold by building trading posts in certain coastal cities.
Some strategic planning for trading posts and trade routes
If all of your trading posts are concentrated in one area, you make it easy for your fellow players to deliver goods tiles to your trading posts. If, on the other hand, you spread your trading posts out, you make it harder for your fellow players to deliver goods. With spread-out trading posts, you also have more opportunities to reach your fellow players' concentrated settlement areas and deliver your own goods tiles there.
If you connect your trading posts to each other with trade routes, you may indeed receive gold, but you also make it easier for your fellow players to deposit goods tiles at your trading posts. Remember that your fellow players can deposit goods at your trading posts, but you cannot.
With the founding of a new trading post, you gain access to new goods. These goods may be furs from the north, wine from the south, or cloth from Flanders. Since the true variety of goods traded across Europe would be beyond the scope of the game, the goods tiles serve as a symbol for lucrative trade goods of all kinds.
You bring goods tiles to cities with trading posts belonging to your fellow players using your caravans – that is, to cities where there is demand for your goods. Naturally, in the Middle Ages, the transport of goods took place both by water and by land. Your caravan therefore represents both the cogs sailing the seas and the rafts and barges on the rivers, as well as the trains of long-distance merchants traveling poorly maintained roads.
The transport of goods was a risky undertaking in the Middle Ages. At sea there were pirates, and on land roads there were robber knights and bandits lying in wait for rich plunder. Among the building costs for a caravan, ore represents the arming of the cogs and caravans, while lumber is needed to build the means of transport. And why is salt the third component of the building cost? Salt was one of the most important – if not the most important – trade goods of the Middle Ages. Salt therefore symbolically stands for the everyday goods that a caravan or cog carried along – goods without which building a caravan would have made no sense at all.
In the Middle Ages, Europe had only a few paved roads left over from Roman times. As a rule, trade routes were unpaved natural paths, along which the ox-drawn carts of merchants made their way, more badly than well.
That is why in this game you do not build roads, but open trade routes. Opening trade routes, and choosing the best trade route, was certainly no easy undertaking. Along the way, a caravan had to pay tolls so that the local territorial ruler would provide mounted escorts for protection against robbers; customs duties had to be paid, and lodging for rest had to be available. Tolls and duties were also charged on river and sea journeys. Merchants without a feel for the best trade route were doomed to fail from the start.