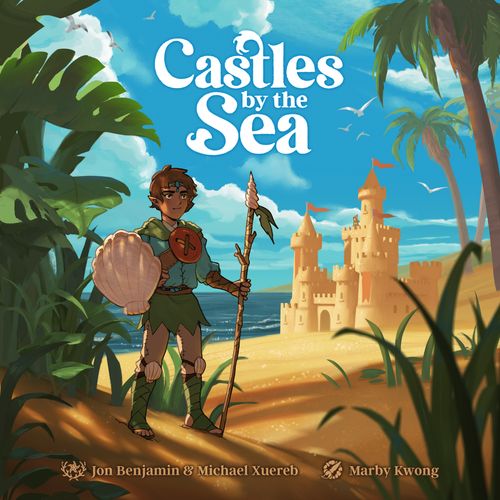
Castles by the Sea
Castles by the Sea Rulebook
Table of Contents
Table of Contents
Each Turn, You'll...
- Gather Sand blocks.
- Build your Sand blocks and Castle cards.
- Place figures and structures on or next to blocks you've built.
- Score sand dollars for every piece you have out on the board.
- Move and activate Hazards, which can wreak havoc on the board!
You'll need to get as many pieces as you can onto the board each turn in order to win, but you'll have to build around other players and evade the ever-present Hazards. Only the cleverest and bravest Shoreling will lead their people to victory.
Components
- 4 Board Edge pieces
- Tide pool tile & 12 Sandy tiles
- 20 Five Sand Dollar tokens
- 30 One Sand Dollar tokens
- 10 Ten Sand Dollar tokens
- First Player Marker
- Turn Board & Marker
- 36 Hazard Cards (6 types)
- 6 Hazard Pucks (1 per type)
- 8 Seaweed tokens
- 4 Player Mats (1 per kingdom)
- 50 Wooden Sand blocks (natural color)
- 8 Wooden Stone blocks (gray color)
- 48 Double-sided Player cards (12 cards per kingdom)
- 26 Castle Cards
- 40 Wooden Player pieces (10 per kingdom)
The Kingdom colors are Seaglass, Shellfolk, and the other kingdoms represented by the player mats and matching pieces.
Set Up
The Beach Board
Begin assembling the Beach board by constructing the interlocking frame. The frame pieces can fit together in any order.
For 4 players: Find the central tide pool tile and the eight tiles that do not show a player count icon. Place the eight 4-player tiles randomly in the board frame with the tide pool tile in the center.
For 3 players: Find the central tide pool tile and the eight tiles with three pips in the corner. Place the eight 3-player tiles randomly in the frame with the tide pool tile in the center. (Note that the 3-player tiles must be placed in the board frame such that their "tide pool" edges and corners are facing inward toward the center tile.)
For 2 players: Find the central tide pool tile and the eight tiles with two pips in the corner. Place the eight 2-player tiles randomly in the frame with the tide pool tile in the center. (Note that the 2-player tiles must be placed in the board frame such that their "sandy" edges are facing outward from the center tile.)
The 2 Player and 4 Player setup use the same tide pool tile side.
Once assembled, place the Stone blocks on any location on the board that has a stone depicted. Likewise, place the Seaweed tokens on any location on the board with seaweed depicted.
Turn Board and Hazards
Place the Turn board between two players and place the turn marker on the turn spot corresponding to the number of players in the game (as indicated by the player count icons). Randomly select three Hazards from the six available. Take the puck and six-card deck for each of the chosen Hazards and put the rest back in the box.
Then separate the three Hazard decks by Hazard type and shuffle each deck. Place the decks face down in a row under the Turn board.
Randomly assign each Hazard puck to a different edge of the board, placing each on a different icon.
Supply
Place the supply of Sand blocks within easy reach of all players. Do the same for the Sand dollar tokens.
Note: Sand dollars are not a limited resource; if you run out of tokens, find a suitable substitute for use.
Players
Each player should pick a Kingdom and take the player mat and the player pieces that match the Kingdom's color. The mat should be placed on the table in front of them.
Players should then take the matching Player cards for their Kingdom. There are 3 types of structure and 3 types of figure cards in the base game. The players can decide together which variations to use, or choose randomly, as long as every Kingdom is using the same set of Player cards. Suggested combinations are listed under Suggested Player Piece Combinations. (Try the Basic set for your first game.) Once the variations are decided, each player should array their version of the chosen cards faceup in a row directly above their player mat.
Additionally, each player should be dealt 3 Castle cards from the Castle card deck, which are kept hidden from the other players.
Note: Some Player cards do not use all the player pieces. For example, the Thief uses one figure. The unused pieces during setup are removed from the game and returned to the box.
Example of the Seaglass Kingdom setup using the recommended Player cards for the first game: Arch, Tower, Door, Princess, Archer & Guard, plus 3 random Castle cards, which are hidden from other players.
First Player
The first player will always be the person with the Turn board to their right. During the game, when play passes from the last player to the first player, the first player should move the turn marker one space forward on the Turn board.
Player Card Breakdown
Each Player card is broken down as follows:
- Type — Player card type and associated player piece.
- Card Name — Card and piece name.
- Kingdom — The kingdom the card belongs to.
- Rewards Box — Holds player pieces and specifies sand dollar rewards for placed pieces.
- Special Rules — See the individual Player card Glossary for more details.
- Placement Diagram — Placement requirements and spaces that must be kept clear either for the turn the piece is placed, or permanently:
- A space marked as must be empty for the full turn the piece is placed can become occupied on future turns.
- A space marked as must be empty when the piece is placed and must remain empty permanently may never be built or placed in by any player.
- Piece restrictions may be satisfied by empty spaces off the edge of the board or in the tide pool.
- Placement Rules — Placement rule reminders. See the individual Player card Glossary for more details.
Block refers to Sand blocks and Stones. Piece refers to structures and figures. Adjacent is orthogonal (shared faces, not shared edges).
Player cards have a different variation on the front and back.
Game Play
In every round, each player takes a turn, beginning with the first player and proceeding clockwise around the table. Once all players have taken a turn, the Turn marker depicting the sun is moved one spot to the right, and then the first player takes their next turn. The regular rounds are over after the last player takes their turn, when the marker is on the rightmost spot on the Turn board.
Player Turn
On your turn, perform the following steps in order:
- Gather — reclaim destroyed pieces and gain Sand blocks;
- Build — put some or all of your Sand blocks on the board;
- Place — place any number of your pieces on the board following the placement rules for each piece and complete any relevant piece effects;
- Score — collect sand dollar rewards for pieces not on their cards;
- Hazard — move one Hazard and flip the other two Hazards.
Castle cards may be declared and scored immediately upon satisfying their requirements during your turn.
When you're finished, the player to your left begins their turn.
Example: The Seaglasser player begins their turn. During the Gather step, they gain the 3 standard blocks PLUS 1 more bonus block earned from the three destroyed pieces they have from the previous turn. If they had had one more destroyed piece, they would have received 2 bonus blocks.
1. Gather
During the gather step, you'll take 3 Sand blocks from the supply and add them to your player mat.
You'll also take any of your pieces destroyed in the previous turn and return them to their cards. When doing so, you'll gain one Sand block for every two destroyed pieces, up to the maximum of 5, rounding down (e.g., 1 destroyed piece will give you 0 bonus Sand blocks, while 4 destroyed pieces would give you 2 Sand blocks).
2. Build
During this step, you may put any number of Sand blocks stored on your player mat on the board.
All Sand blocks built on your turn must form a connected group. Each Sand block built (beyond the first) must touch a face of at least one other Sand block you've built this turn. Touching edges do not count.
The first Sand block built each turn may be put anywhere on the board. You do not need to build next to your already placed pieces or Sand blocks. Every block built after that must be touching another block you built this turn.
Your Sand blocks don't need to be connected to blocks you built on a previous turn. You can even build on a new tile or on blocks that an opponent built.
Sand blocks can be built on top of Stones or other Sand blocks, but cannot be built on top of any player's pieces (noted by their colored rooftops).
If the supply lacks sufficient Sand blocks, you may take the missing Sand blocks from anywhere on the board, removing only Sand blocks which do not have anything on top of them. Any Sand blocks you don't build may be stored on your board for a future turn.
Note: If you place a Sand block or a player piece on a space with a Seaweed token, collect it. Seaweed tokens are worth 2 sand dollars during end game scoring.
Examples of legal and illegal builds:
- A legal build! All blocks were built touching the face of a previously built block.
- An illegal build. The third block face is not touching another block.
- A legal build! Even though the third block was built on top of a stone, it's still touching the second block.
- An illegal build. The block built on top of the stone does not share a face with another block.
3. Place
Once you've built, you now have the opportunity to place your Player pieces on the board. Each piece has specific requirements that must be met in order to place it. There is no limit to the number of pieces you can place on your turn; however, each must have their requirements met.
Every piece has one common requirement (the Golden Rule): When placed, each piece must be connected to a block you've built this turn.
The requirements for each piece, as well as the rewards they provide, can be found in the Player card Glossary. Examples of piece placements can be found in the Player card Glossary as well.
Golden Rule: When placing pieces, always remember that every piece you place must be connected to a Sand block that you built this turn. Even though each piece has its own rules and restrictions on how and where it can be placed, they must always be placed on or next to a Sand block you just built, depending on the piece. Because of this limitation, you will need to be clever and plan your placements ahead of building!
Castle Cards
While you are building and placing, keep an eye on your Castle cards. These three cards provide opportunities to score points separately from your pieces! But plan wisely: You can only score 2 of your 3 cards during the game.
Castle cards may be Sand block patterns or placement objectives.
Scoring Castle Cards: During your Build and Place steps, you may play a Castle card immediately after:
- You place the final block to complete a Sand block pattern, or
- You meet the requirements of a text-based card.
Sand patterns can only include Sand blocks and Stones, not structure pieces. Place the Castle card face up next to your player mat and add its value to your score. You may only score 2 out of your 3 Castle cards during the game. For more on Castle cards, see the Castle Cards section below.
Example: John has both his Towers, a Door, a Princess, an Archer and a Guard on the Board. During scoring he receives 7 sand dollars from the uncovered reward boxes on his Player cards.
4. Score
Each piece you've placed on the board, either this turn or on previous turns, will earn you a sand dollar reward. Rewards are easy to determine by looking for the empty reward boxes on the summary cards in front of you and in text boxes with the "Score" keyword.
5. Hazards
At the end of your turn, you are required to do the following, in order:
- Choose any one Hazard and move it one board edge in a clockwise direction. The Hazard may be placed in any unoccupied location on the new board edge.
- Flip the other two Hazards. For each deck, turn the top card of the deck face up and place it next to its deck. (If playing a 4-player game, flip just one Hazard instead of two.)
Immediately after a card is flipped, if the total number of Alert icons on all the revealed cards for a Hazard is 3 or more, that Hazard triggers.
Each Hazard behaves in a unique way that removes pieces from or otherwise damages the players' sand castles. Refer to the Hazard card back and the Hazard Glossary below to learn what happens when each Hazard triggers.
After a Hazard triggers in this way, it moves in a clockwise direction to the next unoccupied location with the same icon (wave, shovel, or shark). Shuffle all of its Hazard cards face-down and place them back in the proper spot beneath the turn board, available to be flipped again.
Example: At the end of Kara's turn, she decides to move the Terror Hazard puck and flip the Dragon. There are already two Alert icons showing in the Dragon's Hazard pile, so just one more Alert icon is needed to trigger the flying beast. Her flip reveals two more Alert icons, taking the number of Alert icons to four. Three or more is all that is needed, so the Dragon triggers, removing all blocks and pieces from the top two levels of the sand castles in that lane.
Keep these points in mind when triggering a Hazard:
- "Piece" refers to each player's structures and figures.
- Hazards do not remove Stones or seaweed.
- Removed Sand blocks return to the general supply.
- Removed pieces are placed in their owner's destroyed area.
Example: The Shellfolk player decides to move the Giant during their Hazard step. They may move the Giant to any open space on the next board side (moving clockwise). In this case, the Terror occupies the middle space, leaving only the shark and the wave spaces as possible options. After moving the Giant, they will then flip cards for the other two Hazards.
Hazard Cards: There are six cards in each Hazard deck. Each Hazard card back features the name of the Hazard and a diagram of the Hazard's effect when triggered. Each Hazard face shows the card art and between zero and 3 Alert icons at the top.
As Hazard cards are flipped, arrange them so the Alert icons are showing. When 3 or more icons are visible, the Hazard triggers!
Each Hazard card shows:
- Hazard — Name.
- Diagram — Visual example of what the Hazard does when triggered.
- Ability — The ability of the Hazard when triggered. Hazards trigger when 3 or more alert icons are visible in the face-up pile.
- Alert Icons — Can have 0-3 icons.
End of the Game
Special Round
After the final round, there is a special round before the game ends. The special round proceeds as follows:
In turn order, each player moves one Hazard and flips the other two Hazards (or choose one of the two non-moved Hazards to flip in a four-player game). Resolve Hazards that are triggered as normal.
After ALL players have completed their turn in the special round, return all destroyed pieces to their cards, collecting Sand blocks for them as normal, then score one final time.
The last player has completed their turn when the turn marker is on the last spot on the turn board. The game is over, but first each player must go through the special round in order, moving one Hazard and flipping the others.
Determine a Winner!
Whoever has collected the most sand dollars wins the game! Don't forget to add in sand dollars from gathered seaweed tokens and completed Castle cards. If more than one player is tied with the most sand dollars, the tied player with the most saved Sand blocks wins. If still tied, then the highest-scoring players share the victory!
Example: In a tied game, the player with the most saved Sand blocks is the winner. With 39 sand dollars collected over the course of the game, 4 more sand dollars from seaweed, and 10 from completed Castle cards, this player has 53 points total.
Terminology
- Piece — Any structure or figure (not Sand blocks).
- Figure — Any Princess, Archer, Guard (or other figure type).
- Structure — Any Arch, Tower, Door (or other structure type).
- Tile — The nine pieces that make up the game board.
- Square — Individual squares that Sand blocks and pieces can be placed in.
- Adjacent — Touching sides orthogonally.
- Pillar — A stack of at least two blocks, used for pieces like the Arch and the Princess.
- Wall — A block with nothing on top of it adjacent to a different block, used for pieces like the Guard and the Tower.
- Line of Sight — In an orthogonally straight line, on the same level, with no block or piece in the way. Used for pieces like the Hunter and Window.
- Lane — The three tiles in a row or column of the board.
- Threatened — A tile is threatened by a Hazard if it's highlighted in red on that Hazard card's diagram. Most Hazards threaten the entire lane they are adjacent to.
Glossary — Player Cards: Structures
Legend for the placement diagrams below: a space that must be empty for the full turn the piece is placed can become occupied on future turns; a space that must be empty when the piece is placed and must remain empty permanently may never be built or placed in by any player. A generic figure can be any type and color, including your own.
The glossary uses the Seaglass Kingdom (Teal) cards as examples for Kingdom-specific cards like Player cards. However, all cards regardless of Kingdom have the same abilities and requirements.
Arch
Recommended to use for the first game.
Placement: The Arch must be placed between two pillars (stacks of blocks at least two blocks high). One of the pillars must contain a Sand block you just built, and that Sand block must be touching the Arch. The two faces must be kept permanently empty.
Scoring: Gain 2 sand dollars when the Arch is not on its card.
Monument
Placement: The Monument must be placed on top of two blocks, at least one of which you must have just built. The spaces directly adjacent to the Monument on every side must be empty on the turn it is placed.
When placed: Instantly score 3 sand dollars.
Scoring: Gain 1 sand dollar when the Monument is not on its card.
Tower
Recommended to use for the first game.
Placement: The Tower must be built on a Sand block you just built with two empty walls (blocks or pieces with nothing on them) adjacent to it. The open walls may be opposite each other or next to each other. The Tower must always have at least two open walls adjacent.
Scoring: Gain 1 sand dollar per Tower not on its card.
Outpost
Recommended for advanced players.
Placement: The Outpost must be placed on a Sand block you just built, with all four sides of the Outpost permanently kept empty. It cannot be placed in a tile with any friendly structures, including other Outposts.
Scoring: Gain 1 sand dollar per Hazard threatening the tile this piece is in.
Door
Recommended to use for the first game.
Placement: The Door must be placed between two blocks, one of which must have been built this turn. Both faces must be permanently kept open.
Scoring: Gain 1 sand dollar per Door not on its card.
Window
Recommended for advanced players.
Placement: The Window must be placed on top of a block, with blocks adjacent to either side of it. You must have just built either the block it is on or one of the blocks adjacent to it. The two faces must be kept permanently empty.
Scoring: Gain 2 sand dollars per Window not on its card and an additional 1 sand dollar for each Player piece in line of sight of the window faces.
Aqueduct
Placement: The Aqueduct must be placed adjacent to a pillar of blocks containing at least one Sand block you just built, and that Sand block must be touching the Aqueduct. The other three sides of the Aqueduct must be empty on the turn it is placed. Two Hazards must be threatening the Aqueduct when it is placed.
When placed: Move one Hazard threatening this piece.
Scoring: Gain 2 sand dollars when the Aqueduct is not on its card.
Bridge
Recommended for advanced players.
Placement: The Bridge must be placed adjacent to a pillar containing at least one Sand block you just built. The two faces of the Bridge must be empty when it is placed. The Bridge must be placed across two tiles, each tile containing at least one figure.
When placed: Switch the location of two figures. Each figure must be from a different tile the Bridge is in.
Scoring: Gain 2 sand dollars when the Bridge is not on its card.
Watchtower
Placement: The Watchtower must be placed on a Sand block you just built with exactly three spots adjacent to that Sand block empty when it is placed.
When placed: Choose one revealed Hazard card and return it to the top of its deck. Do not shuffle the Hazard deck.
Scoring: Gain 1 sand dollar per Watchtower not on its card.
Keep
Recommended for advanced players.
Placement: The Keep must be placed on a Sand block you just built, in a tile without a friendly Keep. All four sides of the Keep must be kept permanently empty.
Special Ability: Enemy structures may not be placed in the tile this piece is in.
Scoring: Gain 1 sand dollar per Keep not on its card.
Tunnel
Recommended for advanced players.
Placement: The Tunnel must be placed adjacent to two blocks, one of which you just built, with only one of the two faces covered. The other must be permanently clear. The other block can be on either side of the Tunnel. The Tunnel cannot be placed in a tile with a friendly Tunnel.
Special Ability: When a Hazard affects a tile with a Tunnel, it also affects the tile with the other friendly Tunnel in the same way.
Scoring: Gain 1 sand dollar per Tunnel not on its card.
Prison
Recommended for advanced players.
Placement: The Prison must be placed adjacent to three blocks, one of which you just built, with one of the faces kept permanently clear. The Prison cannot be placed in a tile with a friendly prison.
Special Ability: Enemy figures may not be placed in the tile this piece is in.
Scoring: Gain 1 sand dollar per Prison not on its card.
Glossary — Player Cards: Figures
The glossary uses the Seaglass Kingdom (Teal) cards as examples for Kingdom-specific cards like Player cards. However, all cards regardless of Kingdom have the same abilities and requirements. A generic enemy figure can be any type and color that is not your own.
Princess
Recommended to use for the first game.
Placement: The Princess must be placed on a pillar, on a Sand block you just built. There cannot be any pieces adjacent to the Sand block the Princess is placed on.
Scoring: Gain 2 sand dollars when the Princess is not on its card.
Wizard
Recommended for advanced players.
Placement: The Wizard must be placed on a pillar that is at least three blocks high, on a Sand block you just built, with no other Wizards in the tile.
Scoring: Gain 3 sand dollars minus 1 sand dollar for every Hazard threatening the tile this piece is in during the scoring step.
Archer
Recommended to use for the first game.
Placement: The Archer must be placed on a Sand block you just built. They must be placed adjacent to a block.
Scoring: Gain 1 sand dollar per Archer not on its card.
Thief
Recommended for advanced players.
Placement: The Thief must be placed on a Sand block you just built. They must be placed adjacent to a block. The Thief may be placed in the pink blocking areas of enemy structures.
Scoring: Gain 1 sand dollar per enemy structure in the same tile as your Thief.
Guard
Recommended to use for the first game.
Placement: The Guard must be placed on a Sand block you just built. They must be placed adjacent to an empty wall.
Scoring: Gain 1 sand dollar per Guard not on its card.
Duelist
Recommended for advanced players.
Placement: The Duelist must be placed on a Sand block you just built. They must be placed adjacent to an empty wall or an enemy figure.
When placed: Destroy one adjacent enemy figure of your choice.
Scoring: Gain 1 sand dollar per Duelist not on its card.
Witch
Placement: The Witch must be placed on a pillar that is not the highest pillar in the tile, on a Sand block you just built.
Special Ability: Before a Hazard would trigger in a tile the Witch is in, you may move the Witch to another pillar anywhere on the board.
Scoring: Gain 2 sand dollars when the Witch is not on its card.
Sorceress
Placement: The Sorceress must be placed on a pillar that is at least two blocks high, on a Sand block you just built. There cannot be any pieces adjacent to the Sorceress when she is placed.
When placed: Destroy all figures, including your own, that are adjacent to the pillar the Sorceress is on.
Scoring: Gain 2 sand dollars when the Sorceress is not on its card.
Ranger
Placement: The Ranger must be placed on a Sand block you just built. They must be placed adjacent to a block. The Ranger may not be placed in a tile with friendly figures in it.
When Destroyed: Reveal a card from the top of any Hazard deck. If this reveals a third alert icon, trigger the Hazard.
Scoring: Gain 1 sand dollar per Ranger not on its card.
Hunter
Placement: The Hunter must be placed on a Sand block you just built. They must be placed adjacent to a block.
When placed: For each orthogonal line-of-sight of the Hunter: If the first thing encountered is an enemy figure, destroy that figure.
Scoring: Gain 1 sand dollar per Hunter not on its card.
Captain
Recommended for advanced players.
Placement: The Captain must be placed on a Sand block you just built. They must be placed adjacent to an empty wall or a friendly figure. They may not be placed in a tile with a friendly Captain.
Scoring: Gain 1 sand dollar per Captain not on its card, plus 1 sand dollar if the Captain is in a tile with at least one other friendly figure.
Prince
Recommended for advanced players.
Placement: The Prince must be placed on a Sand block you just built. He must be placed adjacent to an empty wall that must be permanently kept open.
When placed: This turn, Hazards do not destroy friendly figures or the Sand blocks under them.
Scoring: Gain 1 sand dollar per Prince not on its card.
Video Rules
For video rules and updated FAQs, visit BrotherwiseGames.com/castles-rules!
Family Mode
The core multiplayer mode for Castles by the Sea is competitive play, as described in this rulebook. If you're playing with less experienced gamers and would like to try a cooperative mode, you can use Family Mode. Download the rules at BrotherwiseGames.com/castles-family!
FAQ
When I move a piece, do I have to follow all the placement rules for it? No, moved pieces do not have to follow build rules, unless stated otherwise. The Witch must still be placed on a pillar, as stated on her card.
When one of my pieces with a "place" ability is moved, such as with the Bridge, does the ability trigger? No. Place abilities only work when the piece is placed from its card.
Can I use structures to fulfill build requirements? For piece placements, yes! Any Sand block (except for the Sand block under the piece) may be substituted with a structure. For example, a Tower could provide the cover block for an Archer, as long as the Tower still had its two open walls.
For Castle cards, no. Only Sand blocks and Stones can be used to complete the Castle cards with build templates.
What happens if a piece has its permanent build requirements destroyed or affected by Hazards? If a Hazard such as the Sandstorm places a Sand block into a location that is supposed to be kept permanently empty, that is legal.
If a piece like the Tower loses one of its two permanently empty walls, no additional pieces or blocks can be placed adjacent to the Tower until it has two empty walls again.
If multiple pieces would trigger their Destroy effects at once, what order do they go in? If multiple pieces would trigger at once, proceed in player order around the table, starting with the player whose turn it is. Each player completes all their pieces that need to act before moving to the next player. If one of the pieces' actions causes another piece to trigger, such as a Ranger triggering a Hazard and destroying another Ranger, complete their effect when that player's turn in the trigger order is reached. Continue around the table until all trigger effects are complete; this may take several cycles.
Card Specific FAQ
Aqueduct When moving the Hazard, follow normal Hazard rules, as if you were moving it during your Hazard step. During the Hazard step, you may move or flip the Hazard you moved with the Aqueduct as normal.
Bridge Figures may be moved into spots that do not fulfill their placement requirements.
Tower If a Hazard removes one of the Towers' walls, no additional adjacent walls can be filled until the Tower has two empty walls again.
Outpost The Outpost does not produce any points if not targeted by any Hazard. The most points possible for an Outpost to produce in a turn is 3.
Keep If enemy structures are already in the tile before the Keep is placed, they are unaffected.
Window The maximum number of points a single Window can score is 4. The Window may be placed on or adjacent to a Sand block you placed this turn.
Tunnel The tunnel-connected tile is affected simultaneously. A tile connected to a Hazard by Tunnels does not count as being in that Hazard's "lane" for the effects of pieces like the Outpost.
Friendly and enemy Tunnels can chain together. Greatclaw, Giant, and Sandstorm: Complete the effect in the connected tile like normal. Dragon: Include the connected tile when measuring the two tallest levels. Meteor and Terror: If the tile with the original Tunnel is cleared, clear the tile with the second Tunnel as well.
Prison If enemy figures are already in the tile before the Prison is placed, they are unaffected. Enemy figures may still be moved by other pieces into tiles with friendly Prisons.
Wizard The Wizard scores a minimum of 0 points.
Witch The Witch may move from a Hazard that would not remove her, like the Sandstorm.
The Witch may only move once for each Hazard, but may move multiple times in a round if multiple Hazards trigger. If there are no legal spaces for the Witch to move to, she cannot move, and may be destroyed by the Hazard.
Thief The Thief may not be placed in the pink blocking areas of friendly structures or any figures. Newly built enemy structures cannot ignore the Thief when being placed. This piece can be worth 0 points.
Ranger A Ranger cannot reveal a card from a Hazard that has already triggered this turn. This is not an optional ability. If there are any valid Hazard cards to reveal, the Ranger must reveal it.
Hunter The Hunter can remove a maximum of three figures.
Captain Worth a maximum of two points per Captain.
Castle Cards
Castle cards provide alternative ways to score during the game. Some, like Barricade, are fulfilled by placing the last block needed to build the shape represented on the card. Others, like Ambush, require an arrangement of pieces on the board or a special order of piece placement.
Any Castle card may be scored the moment its requirements have been satisfied (generally during the Build or Place steps). Just place the card on the board, showing how you have satisfied its requirements, and include its sand dollar value in your total at game end. You may only score two Castle cards in this way, discarding the third after completing the other two.
On a card that has a Sand block build objective, like Barricade, Sand blocks and Stones can be used to fulfill the requirements, but not structures. The white blocking areas must be empty when the card is completed.
When building cards like Gate, you'll have to plan ahead. These separate pillars can't be built on the same turn!
When playing Cage the Beast, your pieces can be on top of Sand blocks, as long as they're stacked on the four squares adjacent to the stone.
You can still build Sand blocks before playing Deep Study, as long as you place no figures or structures.
Example: Anna has the Barricade Castle card in her hand. During her Build phase, she manages to complete the pattern, making sure to leave one side clear. She plays the Castle card face up; it is worth 3 sand dollars at the end of the game.
Suggested Player Piece Combinations
There are practically limitless combinations of pieces to use in Castles by the Sea. We've suggested 10 possible combinations of pieces and Hazards below. You may select one of these (or roll a die to randomly select one), or pick your own combination of pieces to play with. Note that every player should use the same pieces, regardless of which combination you choose.
- Basic: Arch, Tower, Door, Princess, Archer, Guard — Hazards: Terror, Giant, Dragon
- Storm Watchers: Aqueduct, Outpost, Door, Wizard, Archer, Guard — Hazards: Dragon, Cataclysm, Sandstorm
- Starfish-Crossed Lovers: Monument, Tower, Window, Princess, Archer, Prince — Hazards: Giant, Cataclysm, Dragon
- Crabs and Robbers: Arch, Tower, Prison, Sorceress, Thief, Captain — Hazards: Greatclaw, Cataclysm, Terror
- Hurricane Season: Arch, Tower, Tunnel, Witch, Ranger, Guard — Hazards: Sandstorm, Dragon, Giant
- Grimm on the Beach: Bridge, Watchtower, Door, Sorceress, Hunter, Guard — Hazards: Dragon, Giant, Greatclaw
- Coastal Warfare: Bridge, Tower, Door, Princess, Hunter, Duelist — Hazards: Sandstorm, Dragon, Cataclysm
- Seashore Zoning: Arch, Keep, Prison, Princess, Ranger, Guard — Hazards: Terror, Greatclaw, Dragon
- Distant Shores: Monument, Outpost, Tunnel, Princess, Ranger, Guard — Hazards: Terror, Cataclysm, Sandstorm
- Buried Treasure: Monument, Outpost, Window, Wizard, Thief, Captain — Hazards: Cataclysm, Sandstorm, Greatclaw
Glossary — Hazard Cards
The Dragon
The Dragon swoops down from above, tearing away the top two layers of pieces and Sand blocks from the entire lane it threatens.
The Dragon never removes pieces or Sand blocks on the lowest level of the castle, even if the castle is only one or two Sand blocks high.
Effect: Remove all pieces and blocks from the top two layers. The bottom layer is never removed.
The Giant
The Giant plucks hapless Shorelings from their homes in the castle, carrying them away to unknown fates.
Remove ALL figures in the lane the Giant threatens.
The Terror
A giant hairy beast that digs at the sand castle, destroying it with abandon.
The Terror threatens just the tile it is adjacent to and removes all pieces and Sand blocks from that tile before getting distracted and running off down the beach.
Effect: Remove all pieces and Sand blocks from the closest tile in the lane.
The Meteor
Despite the best efforts of Shoreling astronomers, the Meteor is unpredictable and terrifying. It strikes without warning, destroying everything it hits.
When the Meteor triggers, roll the Meteor die. Counting away from the Meteor puck's location, the Hazard strikes the indicated tile, removing all pieces and Sand blocks there.
Effect: Roll the Meteor die. Remove all pieces and Sand blocks from the rolled tile.
The Sandstorm
When the winds blow just right, a sandstorm strikes! Sandstorms can overwhelm even the best built castles, burying structures and collapsing architecture.
Replace all structures in the targeted lane with a matching number of Sand blocks (e.g., four blocks replace a piece), and add one Sand block on top of every other open Sand block or pillar of Sand blocks in the lane.
Effect: Add a Sand block on top of every open Sand block and stone in the lane. Replace all structures with Sand blocks.
The Greatclaw
While most of the Shoreling kingdoms have domesticated shore crabs for transport and heavy lifting, none have yet to tame their deadlier cousins, the Greatclaw. Surly and quick to anger, Greatclaws will dash forth from their hidden lairs, tearing down any castle built nearby.
When the Greatclaw triggers, remove all structures and Sand blocks, along with anything on them, from spaces in the targeted lane that are adjacent to all Stones in the targeted lane.
Effect: Remove all Sand blocks and pieces in squares adjacent to stones.
Solo Challenges
In addition to your total score, attempt the following challenges during your games. Each challenge must be completed entirely within one game. How many games does it take you to complete all of these?
- Sandcastle Purist: Score above 65 without completing any Castle Cards.
- Overachiever: Complete 6 Castle Cards.
- Beachcombing: Pick up every Seaweed token on the board.
- Conquer the Beach: Occupy every tile on the board with your pieces.
- The Fall of an Empire: Have all of your pieces on the board, and then have all of them destroyed by Hazards in a single Hazard step.
- Forgotten Kingdom: Score above 50 with no pieces left on the board at the end of the game.
- Good Boy (requires The Terror): Have no pieces removed by the Terror in the entire game.
- Rapunzel (requires Princess): Place the Princess on a Sand block at least 4 blocks high.
- Fe-fi-fo-fum (requires The Giant): Have all your figures removed by the Giant in one round.
- Defense Tower (requires The Dragon): Have only Sand blocks removed by the Dragon from a lane that has your pieces in it.
- Protection (requires Prince): Save 3+ figures from Hazards with the Prince.
- Fairy Tale Place the Prince adjacent to the Princess.
Solo Rules
Castles by the Sea is playable as a solo experience where your goal is to place as many of your pieces as possible on the board, and keep them there as a trio of Hazards threatens to tear them down. You should be familiar with the standard rules of Castles by the Sea before beginning solo play. Solo mode play is quite similar to multiplayer play, with key changes to Castle cards and the Hazard round.
Setup
Set up the board as you would for a 2-player game. Use the two-dot Tiles, placing Stones and seaweed tokens. You may use any three of the Hazards. Place the three Hazards at random spots around the board edge.
Place the turn marker on the 2-player spot on the turn board (left-most space).
You may use any combination of the player pieces except the following: Keep, Prison, Sorceress, Thief, Hunter, Duelist, Pirate (Riptide Expansion).
Remove the following Castle Cards from the Castle Deck: Good Friends, Lead the Way, Wind Tunnel, Gate.
Then draw 2 Castle cards to start with.
Game Play
Each round, gain Sand blocks, build, and place pieces as in a normal game.
You may complete or discard one Castle card per round. If you do either, at the end of the round draw 1 Castle card. You may complete a maximum of 6 Castle cards throughout the game, only scoring one per round.
During the Hazard step of each round, instead of following the normal Hazard rules, all three Hazards will move. Flip a card for every Hazard, then move each Hazard a number of tile spaces around the board (clockwise) equal to the number of alert icons on the revealed card. Note that each side of the board has three tile spaces, so revealing only one or two alert icons might result in a Hazard staying on the same side of the board, but moving one or two spaces clockwise. If the Hazard reveals a card with no alert icons, do not move the Hazard.
When moving, skip any space occupied by another Hazard, not counting that space as part of the Hazard's movement. After movement, if the Hazard has three alert icons revealed, trigger the Hazard and resolve its effects. However, do not move the Hazard to the next matching symbol after triggering it. After triggering, simply shuffle the cards for that Hazard back into a deck.
Score as normal each turn, collecting sand dollars for your pieces on the board. After the sixth round, complete the Hazard step once, then score again. The game is then complete.
Scoring
Compare your score to the following chart to see how you did:
| Score | Rank |
|---|---|
| Under 40 Points | Sandbox Fun |
| 40-49 Points | Shorely Improving |
| 50-59 Points | Making Waves |
| 60-69 Points | Guardian of the Sand |
| 70-79 Points | Outstanding Among Your Piers |
| 80-89 Points | Master Artisand |
| 90+ Points | Lord of the Beach |