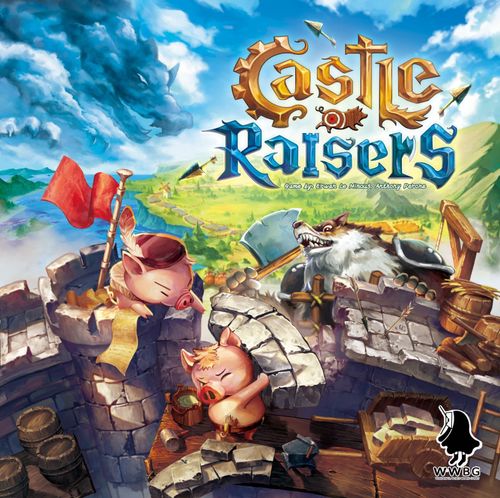
Castle Raisers
Castle Raisers Rulebook
Table of Contents
Table of Contents
Components
- 1 Piggy game board
- 1 Village board
- 4 Castle player boards
- 13 Threat cards (cooperative/solo)
- 1 Mother Pig first player token
- 8 Help cards (4 competitive; 4 cooperative/solo)
- 1 Cloth bag
- 1 Scorepad
- 32 Fortification tiles
- 48 Wall tiles (16 Age I (straw); 16 Age II (wood); 16 Age III (stone))
- 32 Village tokens (8 of each color: yellow, blue, red, green)
- 92 Wolf tokens (32 soldiers; 10 soldiers with ladders; 30 archers; 20 vicious wolves)
- 30 Attack tokens
- 32 Arrow tokens
- 32 Prestige tokens
All tiles and tokens are limited. If a player cannot take one when an ability has been activated because the supply is empty, the corresponding effect cannot be resolved and is skipped.
Setup
The following "Setup," "How to Play," etc. are for competitive mode, which is suggested for your first game. For cooperative (including solo) mode, see "Cooperative/Solo Mode" below.
- Set up the Piggy game board, using the competitive side, by first sorting the Wall tiles by age (I, II, and III). Mix the tiles and place them face down in their three respective stacks. Place the stack of Age I tiles on the board where indicated.
- Set up the Village board by first sorting the Village tokens by color (yellow, blue, red, green). Mix the tokens and place them face down in their four respective stacks. Reveal the first 2 tokens of each color and place them face up where indicated.
- Mix the Attack tokens face down. Place the Attack tokens, Fortification tiles, Arrow tokens, and Prestige tokens within reach.
- Place the Wolf tokens in the cloth bag and place it within reach.
- Each player randomly takes and sets up a Castle player board:
The positions of the starting five icons on the castle wall of each board differ, creating light asymmetry. If desired, boards may be chosen starting from the last player and going counterclockwise.
- a. The player who last heard "The Three Little Pigs" fable is the starting player (or choose randomly) and receives the Mother Pig first player token.
- b. Starting from the last player and going counterclockwise, each player chooses 1 faceup Village token and places it on the starting semi-transparent location of their Castle board (the starting location for the first Village token). Village tokens are replenished only after each player has taken one.
- c. Each player draws 6 random Wolf tokens from the bag and randomly places 2 in each of the three regions (forests, farmlands, and sea) outside their castle.
- Each player takes a help card as needed. The Threat cards are only used in cooperative/solo mode and can be returned to the box.
Goal
Over the course of three ages, players choose Wall tiles and stack them on previously placed ones on their Castle board. As icons are covered, players activate abilities that fortify their castle, dispatch wolves to attack other players, defend against attacking wolves, or establish prestige, actions which score victory points. The player with the most points wins—but be warned, only the highest walls and best-placed defenders can keep the wolf army at bay!
How to Play
Castle Raisers consists of three ages, each of which includes two phases:
- Drafting a Tile and Activating Abilities (four rounds)
- End of Age
Drafting a Tile
Reveal the top 4 Wall tiles of the current age and place them face up on the Piggy board where indicated.
Starting with the player with the Mother Pig, on your turn choose 1 of the remaining faceup Wall tiles. The first player always has four tiles from which to choose (except in solo mode).
In a 2-player game, the player with the Mother Pig first chooses 1 Wall tile to place and then discards 1 tile, returning it to the box. The second player thus only has 2 tiles from which to choose.
If there are any [Dispatching Wolves] icons on the Wall tile that is discarded or on the fourth tile not chosen by the second player, the wolves immediately attack (see "2-Player Game: Wolves Attack").
Then place the tile on your Castle board according to the following rules: the tile must (a) overlap and (b) lay flat with two tiles underneath. Tiles do not need to be adjacent to other tiles, and players do not need to finish a previously started level of the wall before continuing to the next. For your first tiles, they must be placed on top of a boundary line on the Castle board, overlapping two different portions of the wall's foundation (see examples).
For the ability icons on the Castle board or Wall tiles that have been covered by the newly placed tile, you finally must activate their respective abilities (see "Abilities"). If two abilities are activated, you may resolve them in any order.
Moving clockwise, the next player then chooses and places their Wall tile, activating any abilities. After each player has placed one tile, the round ends.
In a 2 or 3-player game, the remaining faceup Wall tile is returned to the box; in a 4-player game, each tile is placed. The next 4 tiles of the current age are revealed and placed face up. Play continues until there are no more Wall tiles (four rounds), which triggers "End of Age."
Abilities
Receiving word of the looming Wolf army, the little pigs quickly abandoned their brick houses in favor of castles—structures so grand in scope that their walls stretched to the three regions.
Important concept: Castle boards are divided into three sections. Each section consists of a region outside the castle, a portion of the wall, and an area inside the castle. When resolving the five abilities, their effects, as well as certain "Game End" scoring conditions, are largely restricted to the section in which they have been activated or placed.
Settling Villagers [Settling Villagers icon]
Safety in numbers, the most astute of the little pigs reasoned—not to mention more pigs who can lend a hoof.
When covered by a Wall tile, the player chooses one Village token (a faceup token or facedown one from the top of a stack) from the Village board and places it on any empty location in your castle. It is immediately replenished by one from its corresponding stack if possible. A Village token can be placed on any location regardless of section; in other words, it does not need to be placed in the same section as the covered [Settling Villagers icon].
Each Village token has two icons: (a) the top is an ability icon that matches those on the castle wall, strengthening the corresponding action; (b) the bottom is a scoring condition. Colored markers in the manual assist players in distinguishing the colors of the Village tokens for scoring conditions.
A. Village tokens strengthen the action of the same icon covered on the castle wall by a Wall tile, but only those in the same section where the Village token has been placed. A Village token placed on the border of two sections affects both sections.
Each Castle board, however, starts the game with 1 each of [Defender], [Dispatching Wolves], [Fortifying the Walls], and [Establishing Prestige] in the middle area, which count as being in and affecting all three sections.
For example, the number of ability icons in each section of Milo's Castle board are as follows:
- Top section (forests): 2, 2, 1, and 2 (one count for each ability icon type shown)
- Bottom left (farmlands): 1, 1, 1, and 1
- Bottom right (sea): 2, 1, 2, and 2
B. Scoring conditions are only scored at "Game End": A Village token placed on the border affects both sections and is thus scored twice, once in each section.
- Colored Village scoring condition (/3 on each of yellow, blue, red and green): Scores X points for each Village token of the color indicated that has been placed in the same section as this scoring condition.
- Empty locations (/4): Scores X points for each empty location (no Village token) that is in the same section as this scoring condition. An empty location on the border meets this scoring condition.
- No Wolf tokens enter (/10): Scores X points if no Wolf tokens enter the castle in the same section as this scoring condition.
- Attack tokens (/2): Scores X points for each Attack token that was placed where indicated in the same section as this scoring condition.
- Prestige tokens (/1): Scores X points for each Prestige token that was placed where indicated in the same section as this scoring condition.
- Wall levels (/2): Scores X points for each level of the highest portion of the castle wall in the same section as this scoring condition.
For example, Milo chooses and (a) places his Wall tile, activating [Settling Villagers]. He chooses a faceup Village token and (b) places it on an empty border location (note that he did not need to place the token in the same section as the covered [Settling Villagers]). The newly placed [ability icon] and scoring condition now affect both sections. Milo immediately (c) replenishes the Village token from the corresponding stack.
Establishing Prestige [Establishing Prestige icon]
The haughtiest of the little pigs sought to erect monuments and statues in their image, establishing a level of prestige that would be remembered in children's fables for millennia to come.
When covered by a Wall tile, the player first takes the Mother Pig (if you already have it, this effect is skipped). Then take 1 Prestige token for each [Establishing Prestige] in the same section as the ability icon that has been covered. Place all Prestige tokens in that same section where indicated. The Mother Pig may change hands several times in the same round.
Each Prestige token scores 2 points at "Game End" and meets certain scoring conditions, such as the Prestige token condition (/1).
For example, Milo chooses and (a) places his Wall tile, activating [Settling Villagers] and [Establishing Prestige] (note that he may choose the order). He first (b) places his Village token, which immediately affects both sections, and replenishes the Village token. Milo then (c) takes the Mother Pig from Coco. He finally counts the number of [Establishing Prestige] in the same section as the activated ability, of which there are now two, and (d) places two Prestige tokens where indicated.
Fortifying the Walls [Fortifying the Walls icon]
"Are we so vain that we cannot learn from past failures?" mused the most robust of the little pigs, as they added yet another stone to the already impressive fortress.
When covered by a Wall tile, the player takes 1 Fortification tile for each [Fortifying the Walls] in the same section as the ability icon that has been covered. Then place all Fortification tiles on your Castle board according to placement rules (see "Drafting a Tile"). Fortification tiles do not cover and thus do not activate ability icons, instead further raising your castle. A Fortification tile can be placed on any portion of the wall regardless of section; in other words, it does not need to be placed in the same section as the covered [Fortifying the Walls].
The highest portion of your castle wall scores 5 points for each level and repels Wolf tokens at "Game End," as well as meeting certain scoring conditions, such as the Wall levels condition (/2).
For example, Milo chooses and (a) places his Wall tile, activating [Fortifying the Walls]. He counts the number of [Fortifying the Walls] in the same section as the activated ability, of which there are two. He then (b) places two Fortification tiles.
Dispatching Wolves [Dispatching Wolves icon]
Seeing the walls of their siblings' castles rising to unrivalled heights, the slyest of the little pigs cut a deal with the wolf army to blow their castles in.
When covered by a Wall tile, the player takes and reveals 1 random Attack token, which shows one of the three regions. Each other player starting from the player to left draws 1 Wolf token for each [Dispatching Wolves] in the same section as the ability icon that has been covered. Each other player places their drawn Wolf token(s) in the region shown on the Attack token. Finally, the player who took the Attack token places it in the same section as the covered icon where indicated. If two [Dispatching Wolves] are activated on the same turn, each action must be resolved separately. The player reveals one Attack token and each other player takes turns drawing and placing Wolf tokens; and then repeat a second time. Reminder that all tiles and tokens are limited. If the bag is empty, the player currently drawing Wolf tokens places as many as they can, whereas any other players waiting to draw simply skip this effect.
Each Attack token scores 3 points at "Game End" and meets certain scoring conditions, such as the Attack token condition (/2).
For example, Milo chooses and (a) places his Wall tile, activating [Dispatching Wolves] and [Fortifying the Walls]. He first (b) takes and reveals 1 Attack token, which shows the forests region, then placing the token where indicated. After counting the number of [Dispatching Wolves] in the same section as Milo's activated ability, of which there is one, Howard (sitting to his left) (c) draws one Wolf token and places it in her forests region; Coco and Wei do the same. Finally, Milo (d) places two Fortification tiles.
2-Player Game: Wolves Attack
In a 2-player game, the player with the Mother Pig first chooses and places 1 Wall tile, activating all abilities; and then chooses and discards 1 tile, limiting the number of choices for the second player.
If there is one or two [Dispatching Wolves] on the Wall tile that is discarded, the wolves attack before the second player chooses and places their Wall tile. After the second player activates all abilities, if there is one or two [Dispatching Wolves] on the last remaining Wall tile that is returned to the box, the wolves likewise attack. Both attacks are resolved in the same way:
Any player first takes and reveals 1 random Attack token. Both players, starting from the player without the Mother Pig, then draw and place Wolf tokens (1 token for Age I; 2 tokens for Age II; and 3 tokens for Age III) in the region shown on the Attack token. Finally, the Attack token is mixed back into the supply.
For example, Howard, who has the Mother Pig, chooses and (a) places her Wall tile, activating [Settling Villagers]. She first places one Village token. Howard then (b) discards a Wall tile, which has one or more [Dispatching Wolves]. Howard (c) reveals one Attack token, which shows the farmlands region, and both Coco and Howard (d) draw and place one Wolf token, because it is Age I, in their farmlands. The Attack token is finally mixed back into the supply.
Coco chooses and (a) places her Wall tile, activating [Dispatching Wolves]. This causes her to first dispatch one Wolf token to Howard's sea region. Coco (b) returns the last Wall tile, which also has one or more [Dispatching Wolves]. Coco then (c) reveals one Attack token, which shows the sea region, and both Howard and Coco (d) draw and place one Wolf token. The Attack token is finally mixed back into the supply.
Defending the Castle [Defender icon]
It was high time that the pigs stood up to their natural enemy, and armed with their boiling soup of lore, the bravest of the little pigs waited atop the parapet.
When covered by a Wall tile, the player pours 1 cauldron of boiling soup for each [Defender] in the same section as the ability icon that has been covered, allowing you to defeat and remove attacking Wolf tokens surrounding your castle.
When pouring, the player may only defeat attacking Wolf tokens in the same section as the covered icon. 1 cauldron can defeat 1 [Soldier], 1 [Soldier with ladder], or 1 [Archer]; whereas 2 cauldrons are needed to defeat 1 [Vicious wolf]. Defeated Wolf tokens are removed from the Castle board and returned to the bag.
You may distribute the number of cauldrons and target Wolf tokens as you see fit. However, the 2 cauldrons needed to defeat [Vicious wolf] must be poured during the same ability activation; in other words, you may not pour 1 cauldron, wounding it, and then defeat it with a later action. If two [Defender] are activated on the same turn, each action must be resolved separately. Two actions each pouring 1 cauldron may not be used together to defeat 1 [Vicious wolf].
Repelling Wolf tokens may affect the number of Wolf tokens that enter your castle at "Game End" and meets certain scoring conditions, such as the "No Wolf tokens enter" condition (/10).
For example, Milo chooses and (a) places his Wall tile, activating [Defender]. He counts the number of [Defender] in the same section as the activated ability, of which there is one. He then (b) pours one cauldron in the sea region. Seeing that there is one [Vicious wolf] that requires two cauldrons to be defeated and one [Archer or Soldier] that requires only one, Milo removes the [one-cauldron wolf], returning it to the bag.
For a more complex example, in a different game, Howard chooses and (a) places her Wall tile, activating two [Defender]. She counts the number of [Defender] in the same section as the activated abilities, of which there are three for each. Noting that the two actions must be resolved separately, she cannot defeat the three [Vicious wolf] by pouring three cauldrons twice; instead, she may decide from the following:
(1) First pour three cauldrons to defeat one [Vicious wolf] and one [one-cauldron wolf]; and then pour three cauldrons to defeat one [Vicious wolf] and one [one-cauldron wolf].
(2) First pour three cauldrons to defeat two [one-cauldron wolves] and one [Vicious wolf]; and then pour three cauldrons to defeat one [Vicious wolf] (one cauldron is "wasted").
Howard then decides to do the first option, (b) pouring three cauldrons twice in the sea region. She removes two [Vicious wolf], one [wolf], and one [wolf], returning them to the bag.
End of Age
Under the light of the moon, skirmishes break out—the stoking of the pig defenders' fires and the spanning of the wolf archers' bows as they answer in kind.
After the four rounds of drafting Wall tiles of each age, two End of Age effects are resolved in the below order:
-
[Defender, visible on Wall tiles]: Each visible [Defender] on your castle Wall tiles pours 1 cauldron of boiling soup for each [Defender] in the same section as the visible ability icon.
Identical to "Defending the Castle," when pouring, the player may only defeat attacking wolves in the same section as the visible icon. Also, you may distribute the number of cauldrons and target Wolf tokens as you see fit; however, each visible [Defender] is resolved separately.
-
[Arrow]: For each attacking [Archer] still surrounding your castle, regardless of section, take 1 Arrow token and place them near your Castle board. Each Arrow token is -1 points at "Game End" scoring.
After the End of Ages I and II, players place the stack of Wall tiles of the next age on the Piggy board and then continue play, revealing the top 4 Wall tiles. The player with the Mother Pig starts the round.
After the End of Age III, players first resolve the above two effects as normal and then move to "Game End."
For example, at the End of Age I, Milo (a) has one visible [Defender] on his Wall tiles (bottom right section), which pours one cauldron. The only attacking wolf is [Vicious wolf], so it cannot be defeated and remains.
Three attacking [Archer] surround Milo's castle, so he (b) takes three Arrow tokens.
Game End
Howls are heard from every direction as the final assault begins. The little pigs look to their castles expectantly, some with confidence and others just feigning it.
After the End of Age III, "Game End" is triggered and each player scores the following (a scorepad is provided):
[Wolf assault]: The wolf army assaults each player's castle! Count the number of Wolf tokens, regardless of type, in each region, and compare that number to the highest portion of the castle wall in each corresponding section. Each level repels 1 Wolf token, which may be placed off to the side. Any remaining tokens enter the castle.
However, if there are [Soldier with ladder] in a region, all Wolf tokens (including [Soldier with ladder]) in that same region enter the castle regardless of the height of the castle wall.
Each section is scored separately:
- The player with the highest number scores -10 points;
- the second highest scores -5 points;
- and third and fourth score 0 points.
If there is a tie for the highest, all tied players score -10, and all others score 0. If there is a tie for second, the highest scores -10, all tied players score -5, and any others score 0. If no Wolf tokens enter, the player(s) score 0 even when tied for the highest or second.
In a 2-player game, the player with the higher number scores -10 points, and the lower scores -5. If tied, both players score -10. If no Wolf tokens enter, the player(s) score 0 as normal.
[Arrow]: Each Arrow token scores -1 points.
[Prestige token]: Each Prestige token, regardless of section, scores 2 points.
[Attack token]: Each Attack token, regardless of section, scores 3 points.
[Wall levels]: Count the number of levels of the highest portion of your castle wall, regardless of section. Each level scores 5 points. To be "highest," the level does not have to be completed.
[Village tokens]: Score each Village token (for scoring conditions, see "Settling Villagers"). Reminder that each Village token only affects and scores the section in which they have been placed, with those on the border scoring for each section.
The player with the most Prestige points wins! In the case of a tie, the player with the fewest Wolf tokens still surrounding their castle wins; and if still tied, the victory is shared.
Scoring Examples
(1) For Wolf tokens on Milo's board:
- Top section (forests): 0 Wolf tokens and 5 levels = 0 enter
- Bottom left (farmlands): 7 Wolf tokens and 5 levels = 2 enter
- Bottom right (sea): 4 Wolf tokens and 6 levels = 4 enter (because of [Soldier with ladder])
(2) For Village tokens:
- Top: /3 = 0 pts.; /3 = 3 pts. (one yellow Village token on the border)
- Bottom left: /4 = 4 pts. (one empty location)
- Bottom right: none
- Borders: Prestige (/1) = 2 + 9 pts. (two Prestige tokens in the top and nine in the bottom left); /10 = 10 + 0 pts. (no Wolf tokens enter in the forests, but four enter in the sea); /4 = 4 + 8 pts. (one empty location in the bottom left and two in the bottom right)
In this 4-player game (Howard's and Coco's boards not shown), in the forests, all four players had no Wolf tokens enter, so Milo and Wei both score 0 pts.; in the farmlands, Howard and Coco both had five tokens enter compared to Milo's two, so Howard and Coco both score -10 pts., with Milo scoring 0 pts; and in the sea, Milo had four tokens enter compared to Howard's zero, Coco's three, and Wei's zero, so Milo scores -10 pts. and Coco scores -5 pts.
(1) For Wolf tokens on Wei's board:
- Top section (forests): 3 Wolf tokens and 6 levels = 0 enter
- Bottom left (farmlands): 2 Wolf tokens and 3 levels = 0 enter
- Bottom right (sea): 3 Wolf tokens and 5 levels = 0 enter
(2) For Village tokens:
- Top: Attack (/2) = 4 pts. (two Attack tokens); Prestige (/2) = 4 pts. (two Prestige tokens)
- Bottom left: none
- Bottom right: /5 = 5 pts. (no Wolf tokens enter in the sea); one Village scoring condition = 3 pts. (one red Village token on the border)
- Borders: Attack (/2) = 4 + 0 pts. (two Attack tokens in the top and none in the bottom left); /3 = 3 + 3 pts. (one yellow Village token in the top and one in the bottom right); Prestige (/2) = 2 + 6 pts. (one Prestige token in the bottom left and three in the bottom right)
Cooperative/Solo Mode
The threat is too much for a lone little pig to handle! Only by cooperating under one roof can they save their hides—not by the hairs on our chinny chin chin!
The cooperative/solo mode of Castle Raisers plays very much the same as the competitive mode, with the only differences being: (a) Threat cards, (b) how the wolves are dispatched, (c) [Establishing Prestige] and [Dispatching Wolves] abilities, and (d) scoring the Wolf tokens entering the castle. Only the differences are detailed here, with the identical aspects being covered more concisely.
Setup
Setup is identical to that of competitive mode with the following additions:
- When setting up the Piggy game board, use the cooperative/solo side.
- After mixing the Attack tokens, randomly place X face down near the Piggy game board, with X being: 2 tokens for one player, 4 for two, 6 for three, and 7 for four. Then draw and place 3 random Wolf tokens for each Attack token, placing them in line face up. In the beginning of Age II, place 4 random Wolf tokens; in Age III, place 5.
- Each player draws one (or more) random Threat card (see "Goal and Difficulty").
Goal and Difficulty
To achieve victory, players at the end of the game must achieve both of the following:
A. Meet the conditions on the Threat cards of each player. The condition only affects the player who has drawn the Threat card. For your first game, it is suggested that each player draw 1 Threat card. To lower the difficulty, any number of players may choose not to draw a card; to raise the difficulty, any number of players may choose to draw 2 (or more).
B. Have a total score (scores of each player added together) higher than that of the wolves:
- 1-player: 80 pts.
- 2-player: 160 pts.
- 3-player: 240 pts.
- 4-player: 320 pts.
Threat Cards FAQ
- Disoriented: If a stack of Village tokens is empty, you cannot choose that color of token.
- From All Sides: Wolf tokens being repelled by the castle wall at "Game End" does not meet this condition. Also, for higher difficulties, if you have already drawn "They're in the Walls" (11), discard and draw again.
- Out of Range: At "End of Age," you still take 1 Arrow token for each attacking [Archer] as normal.
- Iconoclast: Fortification tiles do not cover icons, thereby leaving them "visible."
- Strong Hides: When resolving "Dispatching Wolves" [Dispatching Wolves], you may still remove [Vicious wolf] as normal.
- Towering: To be "highest," the level does not have to be completed.
- Coming by Land: If the Attack token that shows the forests or farmlands region has no Wolf tokens, you still must draw 1 additional Wolf token.
- Crumbling Foundation: To be "highest," the level does not have to be completed.
- They're in the Walls: Wolf tokens can only enter your castle according to game rules, namely using ladders or having more tokens than levels of your castle wall; in other words, you cannot let them in. Also, for higher difficulties, if you have already drawn "From All Sides" (2), discard and draw again.
- Isolated: At "Game End" scoring, you may still score border locations as empty locations.
How to Play
Communication: Players may discuss as much as you would like. Any information on the Castle boards is open, including Threat cards. The player whose turn it is, however, has final say over their action.
Cooperative/solo mode consists of three ages, each of which includes two phases:
- Drafting a Tile and Activating Abilities (four rounds)
- End of Age
Drafting a Tile
The drafting, placing, and discarding of Wall tiles in cooperative mode are identical to those of competitive mode.
In solo mode, however, only reveal the top 3 Wall tiles (discarding 1) of the current age, limiting the number of choices.
Abilities
The abilities are identical to competitive mode except for changes to "Settling Villagers" and "Dispatching Wolves," indicated with Orange borders (in the printed rulebook). The "Establishing Prestige" ability also has an additional step, below.
Settling Villagers: The player chooses one Village token (a faceup token or facedown one from the top of a stack) and places it on any empty location. It is immediately replenished. Reminder that a Village token can be placed on any location regardless of section.
Establishing Prestige: The player first takes the Mother Pig. Then take 1 Prestige token for each [Establishing Prestige] in the same section as the ability icon that has been covered. Place all Prestige tokens in that same section where indicated.
Finally, choose and reveal 1 of the Attack tokens placed with Wolf tokens during "Setup," showing into which region the Wolf tokens will approach at "End of Age." [Establishing Prestige] inside the castle do not affect this ability; in other words, each activation only reveals 1 token.
For example, in this 2-player game, Coco chooses and (a) places her Wall tile, activating two [Establishing Prestige], which are resolved separately. She first activates the one in the top section. Coco (b) takes the Mother Pig and counts the number of [Establishing Prestige] in the same section as the activated ability, of which there are two, (c) placing two Prestige tokens. She then (d) reveals one Attack token. Coco finally activates the second one in the bottom left, keeping the Mother Pig, (e) placing one Prestige token, and (f) revealing one Attack token.
Fortifying the Walls: The player takes 1 Fortification tile for each [Fortifying the Walls] in the same section as the ability icon that has been covered. Then place all Fortification tiles according to placement rules. Reminder that a Fortification tile can be placed on any portion of the wall regardless of section.
Dispatching Wolves: The player first takes 1 random Attack token from the supply and places it in the same section where indicated. Then choose 1 Wolf token—namely those placed with the Attack tokens during "Setup"—for each [Dispatching Wolves] in the same section as the ability icon that has been covered. Chosen Wolf tokens are removed and returned to the bag, decreasing the number of Wolf tokens that will approach at "End of Age." Unlike "Defending the Castle," each [Dispatching Wolves] removes 1 Wolf token regardless of type (including [Vicious wolf]). Also, the player may remove Wolf tokens from any Attack token as you see fit.
If the last Wolf token of an Attack token is removed, the Attack token remains; in other words, it is not mixed back into the supply or returned to the box.
For example, Coco chooses and (a) places her Wall tile, activating [Dispatching Wolves]. She first (b) places one Attack token from the supply. Coco then counts the number of [Dispatching Wolves] in the same section as the activated ability, of which there are two. Finally, she (c) removes one [wolf] from the first line and one [wolf] from the fourth line, returning both Wolf tokens to the bag.
Defending the Castle: The player pours 1 cauldron for each [Defender] in the same section as the ability icon that has been covered (for pouring cauldrons, see "Defending the Castle" above). Reminder that only Wolf tokens in the same section as the covered icon may be defeated.
End of Age
After the four rounds of each age, three "End of Age" effects are resolved in the below order, with (2) and (3) being identical to competitive mode:
-
[Attack tokens with Wolf tokens]: Starting from the player with the Mother Pig, each player first chooses 1 of the Attack tokens placed with Wolf tokens during "Setup," revealing one of the three regions. Any remaining Wolf tokens in line with the chosen Attack token are immediately placed in the corresponding region. After each player has chosen 1 token, the first player starts again, with each player choosing a second and placing any Wolf tokens. Finally, the Attack tokens are mixed back into the supply. In a 4-player game, there are 7 Attack tokens, so the last player only chooses 1 token.
If an Attack token has no Wolf tokens (because of "Dispatching Wolves"), the token may still be chosen by a player. No wolf tokens would then be placed.
-
[Defender, visible on Wall tiles]: Each visible [Defender] on your castle Wall tiles pours 1 cauldron for each [Defender] in the same section as the visible ability icon.
-
[Arrow]: For each attacking [Archer] still surrounding your castle, regardless of section, take 1 Arrow token.
After the End of Ages I and II, players place the stack of Wall tiles of the next age, revealing the top 4 (or 3 for solo after discarding 1) Wall tiles, and place the Attack tokens based on player count with their Wolf tokens (4 Wolf tokens for Age II and 5 for Age III). The player with the Mother Pig starts the round.
After the End of Age III, players first resolve the above three effects and then move to "Game End."
For example, at the End of Age I, for Coco (a) chooses the second Attack token, revealing the farmlands, and places the three Wolf tokens; and Wei (b) chooses the first, revealing the sea, and places the three tokens. Coco then (c) chooses the fourth, already revealed as the farmlands, and places the three tokens; and Wei (d) chooses the third, already revealed as the sea, and places the three tokens. The four Attack tokens are mixed back into the supply.
Continuing to the Defender and Arrow effects, Coco has two visible Defenders (one in the top section and one in the bottom left), which pour two cauldrons each. In the top, she must (a) defeat one [Vicious wolf] because of her Threat card "Strong Hides"; and in the bottom left, (b) defeats two [wolves]. Finally, there is now one attacking [Archer], so Coco (c) takes one Arrow token.
Wei has three visible Defenders (one in each section). In the top, there are no Wolf tokens, so the two cauldrons cannot be used; in the bottom left, Wei pours the three cauldrons to (d) defeat one [wolf] and one [wolf]; and in the bottom right, he pours one to (e) defeat one [wolf]. Finally, there are now three attacking [Archer], so Wei (f) takes three Arrow tokens.
Game End
After the End of Age III, "Game End" is triggered. Each player first checks if they have met the condition on your Threat card(s). If any player has not, the game has been lost; if all players have, then score the following (a scorepad is provided):
[Wolf assault]: Count the number of Wolf tokens, regardless of type, in each region, and compare that number to the highest portion of the castle wall in each corresponding section. Each level repels 1 Wolf token, which may be placed off to the side. Each remaining token enters the castle and scores -3 points. Reminder that if there are any [Soldier with ladder], all Wolf tokens enter.
[Arrow]: Each Arrow token scores -1 points.
[Prestige token]: Each Prestige token, regardless of section, scores 2 points.
[Attack token]: Each Attack token, regardless of section, scores 3 points.
[Wall levels]: Count the number of levels of the highest portion of your castle wall, regardless of section. Each level scores 5 points. Reminder that to be "highest," the level does not have to be completed.
[Village tokens]: Score each Village token (for scoring conditions, see "Settling Villagers"). Reminder that each Village token only affects and scores the section in which they have been placed, with those on the border scoring for each section.
If the total score of all players is higher than that of the wolves (and all Threat card conditions have been met), you win!
- 1-player: 80 pts.
- 2-player: 160 pts.
- 3-player: 240 pts.
- 4-player: 320 pts.
Scoring Example
(1) For Wolf tokens on Coco's board:
- Top section (forests): 0 Wolf tokens and 4 levels = 0 enter
- Bottom left (farmlands): 8 Wolf tokens and 4 levels = 4 enter
- Bottom right (sea): 0 Wolf tokens and 5 levels = 0 enter
(2) For Village tokens:
- Top: Prestige (/2) = 2 pts. (two Prestige tokens)
- Bottom left: none
- Bottom right: one Village condition = 0 pts.; /3 and /10 = 10 pts. (no Wolf tokens enter)
- Borders: Prestige (/2) = 4 + 2 pts. (two Prestige tokens in the top and one in the bottom left); /10 = 10 + 10 pts. (no Wolf tokens enter in the forests and in the sea); /3 = 0 + 3 pts. (no blue Village tokens in the bottom left and one in the bottom right)
(1) For Wolf tokens on Wei's board:
- Top section (forests): 0 Wolf tokens and 4 levels = 0 enter
- Bottom left (farmlands): 0 Wolf tokens and 3 levels = 0 enter
- Bottom right (sea): 4 Wolf tokens and 4 levels = 4 enter because of [Soldier with ladder].
(2) For Village tokens:
- Top: /10 = 10 pts. (no Wolf tokens enter); /3 = 0 pts.
- Bottom left: /5 = 5 pts. (no Wolf tokens enter); /4 = 8 pts. (two empty locations on the borders)
- Bottom right: /4 = 8 pts. (two empty locations on the borders); /1 = 5 pts. (five Attack tokens)
- Borders: none
Coco and Wei both met the conditions on their Threat cards, namely following the additional rules. But unfortunately, their total score of 140 pts. does not exceed 160, and the game has been lost.
Icon Reference
Wall Tiles
Ability is activated when covered.
- [Settling Villagers]: Place 1 Village token on any empty location.
- [Establishing Prestige]: Take the Mother Pig. Then take and place 1 Prestige token where indicated for each [Establishing Prestige] in the same section. Coop/Solo: Also, reveal 1 Attack token placed during "Setup."
- [Fortifying the Walls]: Place 1 Fortification tile for each [Fortifying the Walls] in the same section.
- [Dispatching Wolves]: Reveal and place 1 Attack token where indicated. All other players draw and place 1 Wolf token for each [Dispatching Wolves] in the same section of the player whose turn it is. Wolf tokens are placed in the same region as the revealed Attack token. In a 2-player game, both players are also attacked if a discarded Wall tile has [Dispatching Wolves]. Coop/Solo: Instead, take and place 1 Attack token where indicated. Then remove 1 Wolf token placed during "Setup" for each [Dispatching Wolves] in the same section.
- [Defender]: Pour 1 cauldron for each [Defender] in the same section.
Castle Board
- [Starting icons]: The starting four icons are in and affect all three sections.
- [Starting Village location]: Location for starting Village token.
- [Prestige location]: Indicated place for Prestige tokens.
- [Attack location]: Indicated place for Attack tokens.
Village Tokens
Reminder that only scored in the section in which it is placed.
- Colored /3 tokens: Each indicated Village token X pts.
- /4: Each empty location, incl. border location, X pts.
- /10: No Wolf tokens enter X pts.
- /2 (Attack): Each Attack token X pts.
- /1 (Prestige): Each Prestige token X pts.
- /2 (Wall): Each level of the highest portion of castle wall X pts.
Piggy Board
(A) Gameflow:
- [Drafting icon]: "Drafting a Tile and Activating Abilities" phase.
- [Wolf tokens x3] (Coop/Solo only): Wolf tokens to be placed with Attack tokens.
- [Moon]: "End of Age" phase.
- [Arrow into bar]: "Game End" scoring.
- [Attack tokens by player count] (Coop/Solo only): Attack tokens to be placed based on player count.
(B) End of Age:
- (Coop/Solo only): In turn order, each player chooses 1 Attack token placed during "Setup." Any Wolf tokens in line are placed in the same region as the Attack token. Repeat a second time.
- [Defender, visible]: Each visible [Defender] on castle Wall tiles pours 1 cauldron for each [Defender] in the same section.
- [Arrow]: Take 1 Arrow token for each [Archer] surrounding the castle.
(C) Game End:
- (Competitive only): Player with the highest number of Wolf tokens that entered -10 pts.; second highest -5 pts. Score each section separately.
- (Coop/Solo only): Each Wolf token that entered -3 pts.
- [Arrow]: Each Arrow token -1 pt.
- [Prestige]: Each Prestige token 2 pts.
- [Attack]: Each Attack token 3 pts.
- [Wall levels]: Each level of the highest portion of castle wall 5 pts.
- [Village tokens]: Score Village tokens.