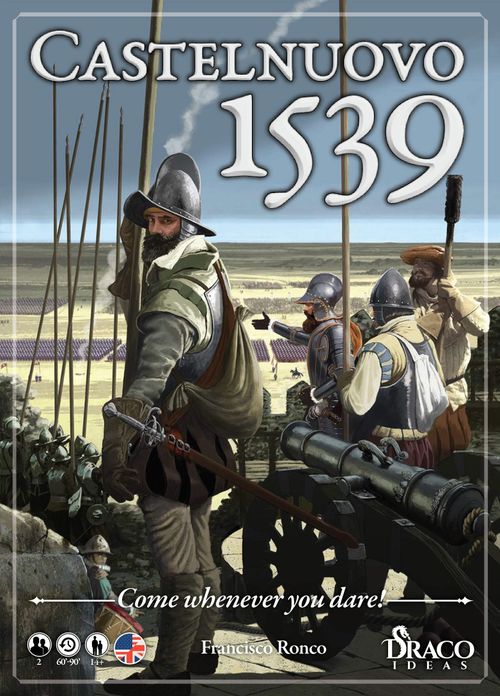
Castelnuovo 1539: Come whenever you dare!
Castelnuovo 1539: Come whenever you dare! Rulebook
Table of Contents
Table of Contents
1. Introduction
The Ottoman side must either take control of the key points of the fortress or eliminate all Spanish forces. The Spanish player will have to make sure that they pay a very high price for their victory... There is no other way out.
Game: 2 players, 60-90 minutes, ages 14+.
2. Game Components
- 1 Game board (74 x 54 cm).
- 16 Six-sided dice: 8 Red and 8 Green.
- 72 Command cards, 36 per side.
- 1 Sticker sheet for the wooden blocks: 2 pairs of matching stickers for the square Ottoman Casualties and Civilian blocks, 1 sticker for each of the remaining square blocks, and 2 twin stickers for each circular block.
- 1 Rulebook with historical commentary (A4).
- 2 Player Aid sheets (A4).
- 56 Wooden square blocks. Blocks represent Spanish or Ottoman companies: 22 in red for Spanish units (including the Italians); 32 in green for Ottoman units; 1 green block with a sticker on both sides, to be used with the Civilians card; 1 green block, with crescent moon stickers on both sides, to be used in the Casualty Track printed on the board.
- 8 Round wooden pieces: where you will apply the Fleet and Leader stickers to both sides of the discs of both armies: 3 red and 5 green.
- 13 Red wooden pieces, which represent the Walls, i.e. the fortification level of each section of the Fortress.
- 8 Red angular wooden pieces. Each of them represents 1 of the 2 Resistance points that each Bastion has.
- 5 Wooden cannons, 2 red and 3 green, representing the Artillery Batteries of both sides.
- 6 Red wooden cubes representing the Chevaux-de-Frise.
- 15 Green wooden pieces representing the Ottoman Trenches.
2.1. Game Board
The board represents the fortified city of Castelnuovo and its surroundings. It is divided into areas to regulate the movement and positioning of the blocks. There are four types of areas:
- The city areas are outlined in red with a dotted line of city Walls around their perimeter.
- The four inner areas of the city, in purple. When the game mentions the Fortress, it is referring to these 4 areas of the city and the walls surrounding them.
- The clear terrain, in white.
- The rough terrain, outlined by a white dotted line.
Each area of the map has a height level value printed on it, indicating the height at which it is located: 0 is the lowest, the sea level; and 4 is the highest, mountain level. This affects the shooting of firearms. In addition, other terrain features are printed on the board: the coastline, which separates the sea areas from the land areas, and the city's fortifications, which have spaces to place the Walls.
In addition, the three areas with Resistances of 2 and 3, marked with a star, are the areas that the Ottoman army must occupy at the end of any round to win.
Resistance points: The areas containing the Walls and towers of Castelnuovo have spaces to place the Walls, with Resistance values of 1, 2, and 3. In addition, the Spanish will have 4 Bastions with a Resistance of 2.
This Resistance decreases with every hit by an artillery barrage. To mark the current Resistance level, place that number of wooden pieces on the area. If an area has 3 Resistance points and takes a hit, remove one wooden piece, leaving only 2, indicating that the Resistance points have dropped.
When there are no more Resistance points in the area, the enemy can enter it and engage the defending units in combat. When a Bastion reaches 0 Resistance, you should turn the last piece to the side as a reminder, as there are cards that allow you to rebuild it.
In a Fortress area or Bastion, as long as there are Walls there:
- In the Fortress, you can attack the position from inside the city or from adjacent Wall areas.
- You cannot attack this area from the outside unless there are no blocks defending it, so all your movement will be spent climbing the walls and entering the Bastion or Fortress.
2.2. Command Cards
Both players have their own deck of Command cards, from which they draw cards into their hands throughout the game. As you play and discard them, a face-up discard pile is created for each side, which you can look at during the game.
Units can only move and combat when you play Command cards to activate them. There are 5 types of cards in different colors, to distinguish them: Action, Order, Combat, Reaction, and Immediate Effect Event.
Some Command cards belong to two categories and you can play them as one or the other, but not both.
See the Command Cards section (chapter 8) for a detailed description of these cards and how to use them.
2.3. Dice
Use the six-sided dice to resolve combats and some other effects. After applying any modifiers to the dice, results of 5 and 6 are considered successful hits.
2.4. Units
The wooden blocks represent the different units in the game.
Stick the stickers (see 10.1) on one side of the square blocks or, in the case of the round discs representing the Fleets and Leaders, stick the matching stickers on both sides. The Turkish units and Leaders go on the green blocks, while the Spanish (and Italian) on the red ones. These pieces represent the infantry, cavalry, and naval units of each side.
Unit types: Ottoman Janissaries, Azab (casualties return to the game) and Sipahi cavalry (casualties return to the game); Spanish Arquebusiers, Pikemen and Albanian Cavalry (Stradioti); Fleets (they count as Artillery Batteries); Leaders (Fco. Sarmiento, Agi, Ulamen, Barbarossa). Each Spanish block shows the Captain's name, a Flag, the current Strength level, and (Arquebusiers) a +1 modifier.
Each infantry and cavalry sticker has a central icon with groups of dots printed on its sides (from 1 to 4). Some blocks have only 2 or 3 dotted sides, since not all units have the same combat Strength. According to how they are placed, the number of dots at the top of the block represents the current Strength of the unit. Naval units do not have dots, as they are used in a different way to infantry and cavalry units.
The Spanish units include the name of the captain of the company they represent, for historical reference; it has no effect in the game.
All blocks start the game at full Strength. Each time a block receives one or more hits, rotate it counterclockwise so that the top of the block shows the Strength it has left. When a Spanish block loses its last Strength point, remove it from the game permanently. The same happens with the Turkish Janissary blocks. Eliminated Ottoman Azab and Sipahi cavalry blocks return to the game at the end of each round, during the Reinforcement Phase, in land areas containing any of their Leaders (who are not in the Fleet), or adjacent to them if the area contains no enemies.
Place your blocks vertically on the map, with the sticker facing you, so that your opponent cannot see the identity and strength of any of your units.
After playing a card, the maximum number of blocks you can group in a single land area on the map is 3, but Leaders are not taken into account. As long as this limit is met at the end of the action, you may cross through allied units. There is no limit to the number of blocks that can occupy a sea area.
Arquebusier blocks have a +1 printed on them as a reminder that they have a +1 bonus to their combat roll.
NOTE: In this rulebook, "Turks", "Turkish" and "Ottomans" are used interchangeably to refer to all units, while the names Azab and Janissaries refer to specific types of units on the Ottoman side.
2.5. Wooden Markers
They represent Artillery Batteries, Siege Trenches, Bastions, Chevaux-de-Frise, and Walls.
Some are initially placed on the board, while others are added by playing cards.
There can only be 1 Trench and Battery marker per area at any given time, any number of Chevaux-de-Frise (cubes), 1 marker per Bastion level (max. 2), and from 1 to 3 depending on the level of the Walls in Castelnuovo.
2.5.1. Fleets
Fleet blocks cannot leave the sea areas and count as Artillery Batteries for all purposes when playing Bombardment and Friendly Fire cards.
In the introductory scenario (see 9.2), the Spanish and Venetian fleets are present, and in the main scenario, two wooden discs represent the Turkish fleet.
The function of these units is to represent the use of galleys as artillery platforms to support the land forces, and to provide the opportunity to perform some landing operations with the ground troops.
These discs are placed horizontally, unlike the other blocks. This way their presence is not hidden from the opponent.
Once placed, they do not move during the game.
2.5.2. Leaders
They represent the most relevant Leaders involved in the battle. Some provide bonuses to the units they escort, but all are essential, as eliminating an Ottoman Leader increases the Ottoman Casualties by one, bringing the Spanish player closer to victory.
Leaders must always have blocks of their side present there, and do not take up space in terms of the 3-block limit per area. They cannot be alone, nor can there be more than 1 Leader in an area, except in a Fleet or in combat against an enemy Leader.
Leaders Agi and Sarmiento grant benefits to the dice rolls of the units they escort.
- Agi to the die rolls of the Janissaries.
- Sarmiento to all Spanish units in his area.
They do not have to accompany specific units, they can move with any unit in the area they are in, or they can stay there with units other than the ones they originally went with.
But they must perform the full movement with the units they started moving with, you cannot drop or pick up a Leader during the movement. You can move units from where the Leader is without taking the Leader with them, but some units will need to stay behind so the Leader is not alone in the area.
If all blocks accompanying the Leader are eliminated, the Leader is eliminated as well.
2.5.3. Artillery Batteries
Both players have Artillery Batteries, which represent these important siege pieces. They allow you to play cards that fire from a distance. There cannot be more than one of these Batteries in a single area of the map.
The Spanish player's Artillery Batteries are placed at the beginning of the game and cannot be moved. The Ottoman player can install an Artillery Battery when building Trenches with any cards that allow it. They can also move the Batteries through areas connected by Trenches using those same cards (see 8.2.2).
2.5.4. Siege Trenches
Siege Trenches protect the Ottomans from Spanish fire and Arquebusiers in combat, but not from Bombardments. They also provide spaces in which to place your own Artillery Batteries (see 8.2.2). Additionally, in the case of a tie during combat in an area defended by the Ottomans and containing Trenches, they would win the battle and force the Spaniards to retreat (see 7.5).
2.5.5. Bastions
Used by the Spanish, they are placed at the beginning of the game and function similarly to the Walls and towers of Castelnuovo's fortifications.
Once placed, Bastions cannot be moved and remain on the board even if their Resistance drops to 0. If this happens, place any marker as a reminder that it was there, in case you rebuild them later by playing a card. The Ottoman can only destroy them with artillery Bombardment or, if they enter them, by spending Trench points of the cards.
Bastions do not provide defense to the Ottoman player, as they are not designed to provide protection from the city. In addition, a Bastion that has not been demolished prevents the construction of a Trench.
2.5.6. Walls
They are positioned like Bastions on the outer edge of the Fortress surrounding the city of Castelnuovo. Place as many Wall markers as the Resistance level indicated in each area.
2.5.7. Chevaux-de-Frise
Deploy them by using Spanish player cards, as they provide protection in combat, but only for defense. There is no limit to the number of these that you can place in the same area.
Each of them protects a Spanish block from 1 hit from Turkish troops in combat. They are only eliminated if the Ottomans occupy the area and there are no Spanish blocks there.
In the event of a draw, if the Spanish player is defending an area containing Chevaux-de-Frise, they win the battle and force the Ottomans to retreat.
2.5.8. Ottoman Casualties
The Casualty Track, printed on the board, is used to keep track of the number of blocks lost by the Ottoman player, as well as the Leaders and the number of Assault Rounds the Ottomans have called. A marker (the green block with crescent moon stickers) is placed on the track.
3. Goal of the Game
The objective of the game varies depending on the side and the scenario being played. Castelnuovo 1539 includes two scenarios:
Introductory Scenario: depicts the Holy League's conquest of Castelnuovo. The objective of the Spanish player in the first scenario is to occupy the three areas of the Castelnuovo Fortress marked with white stars. The Turkish player wins if the Christians fail to achieve their goals. This scenario is described in 9.2.
Main Scenario: depicts the siege of the Spanish garrison by the Turkish forces. In this scenario, the goal of the Turkish player is to eliminate ALL Spanish blocks or to occupy the three areas with Resistance 2 and 3 in the Fortress, marked with a white star, at the end of the round. The Spanish player wins if the Ottoman Casualty Track reaches space 12.
The Casualty Track advances one space for each Ottoman block that loses all its Strength and is removed from the board, for each eliminated Leader, and for each Assault Round declared by the Ottoman player.
There can be no ties in this game; there is only one winner in each game.
The game has no time limit for the Turks to take the fortress and their forces are endless.
4. Game Setup
Below you will learn how to set up the game for the Main Scenario, as well as the general rules. (See 9.2 for the Introductory Scenario.)
- Place the game board between both players. The Spanish player sits on the sea side (South), while the Turkish player sits on the land side (North).
- Take the blocks of your color and place them at full Strength with the stickers facing you. Place your unit blocks on the map as indicated by each scenario, keeping in mind the grouping limit of 3 blocks per area, except in naval areas.
- Take a Player Aid sheet.
- Place the Ottoman Casualty marker in space 0 of the Casualty Track on the map.
- Set aside the Turkish Siege Trenches and Battery markers, as well as the Spanish Chevaux-de-Frise.
- Set aside the "Civilians" and "Storm" cards from the Ottoman deck. They are added to the Turkish deck when it is depleted. Take your army's deck and shuffle it.
- Then, draw 4 cards.
- Placing markers: the Spanish player places the 4 Bastions (a total of 8 markers) in areas other than the Castelnuovo Fortress. Place the Batteries in the Bastions or in Wall spaces (red areas). Also place your Units (1 cavalry, 6 pikemen, and only 8 arquebusiers, without "Juan Pérez"), and the Leader Sarmiento, in any area on the map.
- The Ottoman starts the first round with 1 Fleet and 4 Azab Infantry blocks, which must be placed in any sea area.
Starting the Game
Once the game is set up, each Round you will play cards from your hand in your respective Action Phase, starting with the Ottoman player.
As soon as you pass in your phase, both players replenish their hand of cards until they have 4 cards if it is a Siege Round, or 7 cards if it is an Assault Round. After you have both played your Action Phase, there is a Reinforcement Phase.
Continue playing until the Ottoman side has suffered enough casualties for a Spanish victory (12), or until the Ottoman player either controls the required areas at the end of the Spanish player's Action Phase, or eliminates all Spanish units, resulting in a Turkish victory.
You do not need to keep track of the number of turns played, as this is not relevant and there is no limit.
5. Game Sequence
Each round has 3 phases:
- Ottoman Action Phase.
- Spanish Action Phase.
- Reinforcement Phase.
There are two types of rounds. The Ottoman player chooses the type of Round during the Reinforcement Phase.
Siege Rounds represent 3 or 4 days of real time, and both players refill their hands with 4 cards at the end of each player's Action Phase. The first round of the game is always a Siege Round on the Main Scenario.
Assault Rounds represent only 1 day of combat, and each player will have a 7-card hand in each Action Phase. Each time the Ottoman player declares an Assault Round, the marker on the Ottoman Casualty Track advances one space.
5.1. Action Phase
In Castelnuovo 1539, you also draw cards during your opponent's Action Phase. When you finish an Action phase, you draw new cards, so try to use as many cards as you can in each Action phase, unless you want to save a specific card.
During your Action phase, you can do one of these two actions:
1- Play cards. Until you run out of cards in hand, or until you decide to pass. You may not discard cards without using them first.
You may play Orders or Action cards during your Action Phase, in addition to any Combat cards you wish to play while resolving combat.
During your opponent's Action Phase, you may play Reaction cards from your hand and support your troops with your own Combat cards.
Each Reaction card has a condition that enables its use, as described below.
2- Rest. You do not play any cards and may discard any cards you wish. If the Ottoman player is resting, the player also places all of their Azab and Sipahi blocks on the board at full Strength (4 points). This can only be done during a Siege Round.
Round type selection. At the end of the Spanish Action Phase, before drawing any cards, the Turkish player chooses which type of round to play next: Siege or Assault. If you play a Siege Round after an Assault Round, and you have more than 4 cards in your hand, do not draw any new cards from your deck, and discard down to 4 cards. In this case, choose which cards to discard.
Draw cards. At the end of any Action Phase (because the active player runs out of cards or passes), BOTH players replenish their hands by drawing new cards from their respective decks, up to the limit allowed by the type of round played:
- 4 for a Siege Round.
- 7 for an Assault Round.
If your deck runs out of cards, form a new deck with your discard pile and shuffle it.
Playing a Command card (example): The Ottoman player, in their Action Phase, first plays a "Bombardment" card against an area with a single Spanish block. They roll 4 dice, as indicated on the card, and get the following results: 1,3,5,6. From two areas away, they hit with results of 5 and 6, so they land 2 hits in that area and lower its Resistance to 0. Now the Infantry blocks can storm the breach. To do this, the Ottoman player plays another Command card, this time an ACTION card, and activates the two blocks in the Trenches next to the Artillery Battery. These have 2 Movement points and can use them to move to the clear area in front of the walls and enter the collapsed area, triggering a combat that must be resolved immediately.
5.2. Reinforcement Phase
The Turkish Army and Navy enter the battle gradually, so the Ottomans receive reinforcements on turns 1 and 2. In addition, each turn, they recover any blocks that were eliminated, except for Janissary blocks.
End of turn 1: the forces led by Barbarossa arrive in ONE sea area of the Ottoman player's choice, other than the one occupied by the previous fleet:
- Leaders Barbarossa and Agi.
- 6 Azab.
- 10 Janissaries.
- 1 Fleet.
End of Turn 2: Ulamen arrives with 6 Azab and 6 Sipahi blocks. He enters from the north side of the map, so place the blocks in the areas along that edge of the map, always respecting the limit of 3 of your blocks per area. Place the Leader with any of the deployed groups.
Return all Turkish Azab and Sipahi (Cavalry) blocks that were eliminated in the previous round to the board at full Strength (however, they still count on the Casualty Track), in a land area with no enemies where there is a Turkish Leader (not in the Fleet) or adjacent to him.
The Janissaries cannot recover, once eliminated they are permanently out of the game.
6. Movement
Units and Leaders move using Action cards, which allow you to move a group of 1 to 3 units that are in the same area to one or more areas. Your activated Infantry units have 2 movement points, and your Cavalry has 4 points.
Moving into a clear terrain area costs 1 movement point, and moving into a rough terrain area (marked with white dotted lines) costs 2. Ottoman cavalry blocks only have 2 movement points if they enter a Bastion or Fortress area at any time during their activation, i.e. they dismount to do so.
You can move your units freely, in groups or individually.
You can move in different ways, so you can start a battle by entering areas occupied by the other player with your units, and you can simply move others without passing through areas occupied by your opponent. You can move through your own units, but at the end of the action, each area must have no more than 3 friendly units.
If units enter a land area containing enemy units, a battle immediately occurs.
When you activate a group of units in an area, they can move sequentially. If the first group of units initiates combat, that combat must be resolved before the next group of units can move or engage in further combat. This continues until all units have moved. If there is both Infantry and Cavalry, the faster-moving Cavalry can outrun the Infantry.
Walls and Bastions
Walls and Bastions prevent access from the outside. Therefore:
- As long as there are defending units in the area and there are Resistance points left, the attacking blocks cannot storm it, since units cannot enter a Wall or Bastion area that is still standing and contains at least one defending block.
- The area must be bombarded with artillery until its Resistance is reduced to 0 in order to attack it.
- A Wall area can be attacked from an adjacent Wall area or from inside the Fortress.
- If there are no defenders occupying the area, enemy units can move into it, but only if they are adjacent to it when you activate them and spend their movement to enter the area (i.e. moving to climb the Wall or Bastion uses all of their movement points).
- Spanish units may move in and out of Wall areas and Bastions without any movement penalty.
- When inside the Fortress, Ottoman units may also move out normally, either while retreating or with a regular movement.
The Ottoman player may also play their Action cards to build Siege Trenches instead of moving/attacking, but only during Siege Rounds.
Landings
Some of the ground troops start the game or arrive as reinforcements by sea, so they are initially placed in a sea area, not a land area. From these sea areas, units can only be moved to an adjacent land area that has no enemy blocks, in groups of up to 3 blocks, using Action cards ("Attack" or "Counterattack"), or "March". Landing costs one movement point, leaving the units with 1 additional point to move.
Units cannot land in areas occupied by enemy blocks. Once on land, Infantry blocks cannot return to a sea area, nor can they retreat to it.
7. Combat
A combat is resolved as soon as one or more activated units enter an area occupied by enemy units, and all units present engage in the battle. It can be triggered by playing an Action card in your own phase, or a "Counterattack" card in the opponent's Action phase.
7.1. Combat Sequence
The attack is resolved in the following order:
- The attacker may play face-down Combat cards without revealing them. You may play more than one of these cards. If the Spanish player starts combat by playing the "Camisado" (Encamisada in Spanish) Action card, the Spanish Player may not play any Combat cards, as indicated below.
- The defender then decides if and how many Combat cards to play, which are also played face down.
- In both cases, multiple identical cards may be played for accumulating effects.
- Reveal the units and Combat cards of both sides.
- Simultaneously resolve the Combat cards and the resulting dice rolls, and apply the hits.
- Combat between units is resolved as described below.
7.2. Combat Between Units
It is not simultaneous, but follows an order in which hits are rolled and applied according to the units and defenses present.
If a unit has priority, it rolls first, and the opponent takes hits first before rolling its own attacks.
7.3. Combat Resolution Priority
To better understand these priorities, two aspects of the units in the battle must be taken into account:
- Cavalry: the mobility advantage they bring to the fight disappears due to the presence of Walls and Bastions, so in these cases cavalry units fight as Azab, i.e. Infantry.
- Pikemen: their pikes only provide an advantage against Cavalry, keeping them at a distance and forcing them to attack last, but if there is no Cavalry present, Pikemen are considered Infantry.
The attack rolls and damage application are performed in the following order, each step must be completed before moving to the next:
- Pikemen go first if enemy Cavalry is present and they are fighting in clear or rough terrain.
- Cavalry, if no opposing Pikemen are present and the battle is fought in clear or rough terrain.
- Arquebusiers.
- Infantry, all simultaneously: Janissaries; Azab; Cavalry, if the combat takes place at the Fortress or a Bastion; Pikemen, if there is no opposing Cavalry.
- Cavalry, only if there are opposing Pikemen in clear or rough terrain.
NOTE: Some unit types appear multiple times in this list, even though they only attack once, in the order in which the condition is met.
To make the attack, each block rolls as many dice as its current Strength points.
Apply any Unit, Leader and Combat card bonuses to the dice roll, all of which are cumulative.
You land a hit for every 5 or 6 result you get, after applying the appropriate modifiers.
REMEMBER:
- Turkish Leader Agi adds +1 to the combat dice rolls of all Janissary blocks in his area.
- Spanish Leader Fco. Sarmiento (the Maestre of the Tercio) adds +1 to the combat dice rolls of all blocks grouped with him in all circumstances: in combat, camisado attacks, or returning arquebus fire.
7.4. Casualties and Combat Results
The total number of hits inflicted is affected by the presence of Trenches and Chevaux-de-Frise:
- If the area contains a Siege Trench, the Ottoman player ignores the Spanish player's first 2 hits.
- The Spanish player ignores 1 hit per Chevaux-de-Frise in the area.
Neither the Chevaux-de-Frise nor the Trenches take damage from these hits.
Each hit is converted into one Strength point lost by a unit. The owner of the units decides which of the units in the battle will suffer the damage.
The only times damage must be applied to Cavalry first are:
- Spanish Pikemen hits are always applied to Ottoman Cavalry units if they are not fighting in a Bastion or the Fortress (because they have dismounted).
- If there are Cavalry units on both sides, the hits caused by the opposing Cavalry are applied first, if they are not fighting in a Bastion or the Fortress.
In either case, any excess will be applied to the remaining units at the owner's choice.
Note that in a Spanish Camisado, the Turks must take ALL the casualties (at the Spanish player's choice) suffered BEFORE making their own attack roll.
The side that receives the most hits (after subtracting the effects of Trenches and Chevaux-de-Frise, if any) is declared the losing side.
In the case of a tie, the defender wins the combat if they have their own Trenches or Chevaux-de-Frise in the area, otherwise the attacker wins.
Each Ottoman unit or Leader eliminated in combat increases the Casualty Track by 1, although units other than Janissaries or Leaders may re-enter the map at a later time.
Example: Playing Command Cards
The Ottoman player, in their Action Phase, first plays a "Bombardment" card against the area containing a single Spanish block. They roll 4 dice, as indicated on the card, and get the following results: 1,3,5,6. From two areas away, they hit with results of 5 and 6, so they land 2 hits and reduce its Resistance to 0, allowing the Infantry blocks to start attacking the breach. To do this, the Ottoman player plays an "Attack" card, and activates the two blocks in the Trenches next to the Artillery Battery. These have 2 Movement points and can spend them to move to the clear area in front of the walls and enter the collapsed area, triggering a combat that must be resolved immediately.
Example: Reaction
Continuing with the previous example, once the two Ottoman blocks have moved one area, the Spanish player temporarily halts the Ottoman movement to react: first, they play an "Arquebusiers" Reaction card, which allows them to reveal any Arquebusier block adjacent to the area into which the blocks that triggered the reaction have just moved, and immediately fire at those blocks. The Spanish player reveals two Arquebusier blocks in the adjacent area and rolls 6d6 (each block has 3 Strength), hitting with results of 4, 5, and 6, thanks to the +1 bonus marked on the blocks. They have an additional +1 bonus due to the 1-level height difference. They roll 1,2,4,5,5,6 and deal four damage points to the Ottoman blocks. The Ottoman player distributes them as they see fit, lowering the Strength of each block by 2. The Spanish reaction does not stop there, and they also play a "Friendly Fire" card, since the area the blocks moved into is between an Ottoman Artillery Battery and the Spanish blocks.
They roll 2d6 against each block, inflicting 1 additional hit for each result of 4, 5, and 6 (because they are adjacent). They roll 1 and 3 against one block and 2 and 5 against the other, subtracting one point from the latter. The Ottoman player now resumes their movement with the remaining movement point. Knowing that the block in the breach is probably not an Arquebusier, since it did not fire earlier, they decide to take a chance and attack the ruins of the Sea Castle (Forte Mare), initiating a combat that must be resolved immediately. The Spanish Arquebusier blocks remain face-up for the rest of the current Action Phase, as they can fire again at any Ottoman block that moves or retreats adjacent to them without having to use another Reaction card.
Example: Combat (1)
Following the previous example, the brave Azab attack Forte Mare, and first the attacker plays a Combat Support card face down. Then the Spanish player does the same. Both reveal their blocks and played cards and apply the effect of both Combat Support cards simultaneously. The Turkish player rolls 3d6 and hits with 5 and 6, getting 1, 2, and 5, so the Spanish Pikemen lose 1 Strength and now have 2 Strength. The Spanish player rolls 4d6 and gets only 1 hit with results of 1, 2, 2, and 5 (hits with 4, 5, and 6). The Azab block with 2 Strength is reduced to 1 Strength.
Since the troops present are Azab and Pikemen, both sides roll all their dice simultaneously. The Turkish player rolls 2d6 and gets no hits, the Spanish player also rolls 2d6 and lands one hit. One Azab block is eliminated. The other has to retreat back to where it came from, but the fierce Spanish Arquebusiers are waiting to finish them off. The Turkish player has lost two blocks and must advance two spaces on the Casualty Track. Now the Spanish player can counterattack.
Example: Combat (2)
In this battle, different types of troops interact with each other, and you will see how the dice roll sequence works. Let's assume that no Combat Support cards have been played.
The Spanish Pikemen roll first, since there is Turkish Cavalry present, landing 1 hit (results of 2, 4, and 5, where 5 is a hit), which is applied immediately. Then the Spanish player rolls again, this time for the two Arquebusier blocks, which also get +1 to each die rolled. The devastating 6d6 roll (2, 3, 4, 4, 6, and 6) inflicts 4 hits on the Turks, who distribute them among their blocks to avoid losing any.
Finally, the Ottoman player rolls for all of their blocks (technically, the Cavalry would attack after the Infantry, in fourth place, but since the Spanish player has already rolled all of their dice and it does not matter, the Ottoman player rolls them all at the same time). In total, the Ottoman has 5 Strength points left, so they roll 5d6 and land 2 hits (1, 2, 2, 5 and 6). The Spanish player assigns them to the Pikemen and remains in the area. The Turkish player takes 5 hits and must retreat. They did not lose any blocks, so the Casualty Track does not advance. The Turkish player can now counterattack.
7.5. Retreat
The losing side must retreat from the area where the combat took place. The Attacker must return to the area from which it entered.
The retreating area must either be empty or occupied by friendly units, but it must never be in the sea. It may not contain any enemy units. After retreating, check that the maximum number of your units in the area has not been exceeded; eliminate any excess units (or Leaders), of your choice.
If the defender is the one who has to retreat, they retreat to an adjacent area that meets the following conditions:
- A. If possible, the retreating area should not be adjacent to the attacker's entry area. Therefore, first retreat to an area that is not adjacent to the area from which the attackers entered the combat area. Retreating defenders CANNOT retreat to the area from which the attackers came.
- B. Units that cannot retreat are eliminated. If no unit can retreat and there is a Leader in the area, eliminate the Leader as well. Your Leader is also eliminated if he has to retreat into an area where there is already a Leader of your side.
- C. Retreating units can retreat to different areas, they do not have to all retreat to the same one.
- D. An Ottoman retreat allows the Spanish player to fire with Arquebusiers that are face-up on the map and/or play the "Arquebusiers" Reaction card.
REMEMBER: If a Turkish Leader is eliminated during the game, it counts as an eliminated unit and the Casualty Track advances one space for each Ottoman Leader eliminated.
When Spanish units retreat, any Chevaux-de-Frise in the area are also removed from the map. Similarly, if an Ottoman Siege Trench is in an area with Spanish units and no Ottoman units, remove it from the map.
Permanently remove from the game any of your side's Artillery Batteries that remain in an area occupied only by the other side's units.
7.6. Camisado
It is explained in 8.1.2.
8. Command Cards
During the Action Phase, the Active player will play cards from their hand to give orders to their units, gain advantage in combat, etc.
The Active player can also play certain cards during the Inactive player's Action Phase if the Reaction card condition is met, such as "Counterattack", which allows the Inactive player to move and attack with friendly units after resolving Combat during your opponent's Action Phase.
To play a card, place it face-up in front of you and declare the intended Order or Action. All actions allowed by a played card must be completed before playing a new card.
Once an Activation is completed and any enemy Counterattack is resolved, the Active player may resume playing Command cards and resolving their effects until their hand is empty or they choose to pass, which ends their Action Phase.
Combat cards can be played by both sides during a battle, with no card limit, first the attacker and then the defender, by placing them face down if the requirements that some of them have are met (remember that the Spanish player cannot play Combat cards if the combat was started by playing a "Camisado" card).
The Event card is activated immediately when the Ottoman player draws it. It does not go into their hand, nor does it count towards their hand size. After applying its effect, draw another card instead.
Any unit or group of units can act more than once in the same turn, you just need to play Command cards to activate them as many times as you want.
Some cards are of two types, such as Order and Reaction. They can be played as either. The player decides which effect they want to use when they play them.
IMPORTANT: In an Assault Round, the Turkish player may not play any trench-building effects from cards, nor may the Spanish player play any "Camisado" or "Repairs" cards.
8.1. Action Cards
8.1.1. Attack (16 Ottoman / 16 Spanish)
This is the most commonly used card, and the one that allows the Active player to attack areas where enemy units are present. Move a group of units (from 1 to 3), with or without a Leader, that are in the same area. Units activated in this way have 2 movement points if they are Infantry and 4 if they are Cavalry (see 6. Movement).
If units enter an area with enemy units, they must stop moving and a Combat will start.
The Ottoman player may also use these cards to place Siege Trenches on the map, instead of using them to move units, but only during Siege Rounds.
8.1.2. Camisado (2 Spanish, Spanish player only)
This Action card can be used as a normal attack or, during a Siege Round, to make a special attack, the Camisado.
The Spanish player selects a group of Spanish units, which may include the Leader Sarmiento. The units can attack an area that is a maximum of 2 areas away from the selected group.
A combat is immediately fought with some peculiarities:
- A. The Spanish player is always the attacker, and when playing the card, they must choose an area where they have units and another one with Ottoman units that is no more than 2 areas away from the area with their blocks, regardless of whether the target area also contains other blocks, Spanish or Ottoman. The Spanish blocks do NOT MOVE.
- B. The Spanish player may not play Combat cards, but the Ottoman player may.
- C. All Spanish dice have an additional +2 bonus, which may be added to any Spanish unit and Leader modifiers.
- D. The Spanish player rolls all their dice first and assigns the hits to the Ottoman units, then chooses which units suffer the damages. This allows the Spanish player to concentrate hits rather than hits being dispersed. Apply them immediately.
- E. The Ottoman player then rolls the dice with any remaining units and assigns the resulting casualties to the Spanish player, who chooses which of their units suffer those casualties.
- F. After the battle is resolved, any surviving Spanish units return to their initial position. The Ottomans, however, as in a regular Combat, must retreat if they have suffered more casualties. Since the Spanish do not occupy the position, no Ottoman Trenches or Batteries are removed.
- G. The Ottoman player may play a "Counterattack" card after the combat is resolved.
8.2. Order Cards
They allow you to perform various actions, such as moving units with the "March" card, or reducing the resistance of Walls and Bastions with "Bombardment". They are described below.
8.2.1. March (2 Ottoman / 4 Spanish)
Allows you to move a group of units from a single area up to 4 movement points, through areas with no enemy units, which prevents the Active player from starting a battle. Leaders cannot be dropped or picked up along the way. It also allows units to disembark, by spending 1 of the 4 movement points granted by March.
The Ottoman player may also use these cards to place Siege Trenches on the map, instead of using them to move, but only during a Siege Round.
8.2.2. Siege Trenches and Artillery Batteries
The Ottoman player may build trenches in which to place Artillery Batteries and to protect their Infantry in combat from the enemy and Arquebusier fire, but not from artillery bombardment.
When the Ottoman player plays one of these cards that grant Trench Points, place an Ottoman Trench marker in a clear area for 1 point or in a rough area for 2 points. The Ottoman player can also play two cards simultaneously and add their values.
Place the Trenches in areas where there is an Ottoman unit. There can only be 1 Trench per area. Once placed, it cannot be moved.
Inner city areas cannot contain Trenches.
Also, the Ottoman player cannot build a Trench in an area with a Wall or Bastion that has more than 0 Resistance; instead, the Ottoman player may destroy 1 Resistance point for each point spent as long as there are Ottoman units in the area. Once the resistance of the Wall or Bastion reaches zero, they can build a Trench there as if it were a clear area.
Artillery Batteries. Each Command card used by the Ottoman player to build Siege Trenches also allows them to place a new Artillery Battery on the map.
Instead of placing a new Artillery Battery, the Ottoman player may choose to move a Battery already on the map into an existing Siege Trench. This movement must be made through areas that contain Trenches, so the Artillery Battery may move through several areas. The only condition is that the Battery may only move through areas where Ottoman trenches have been built.
If a Spanish unit ends its movement in an area with an Ottoman Trench and there are no enemy units in it, the Trench is destroyed.
The same happens if Ottoman blocks are pushed out of a Trench area by the Spanish in combat. The destruction of a Trench or Artillery does not advance the Ottoman Casualty Track.
8.2.3. Bombardment (3 Ottoman / 5 Spanish)
This card allows the Active player to attack an area occupied by enemy units: roll 4d6 for the Ottoman card and 3d6 for the Spanish card. The player must choose a Battery or Fleet as the source of the bombardment.
The result required to hit depends on the distance from the Artillery Battery or Fleet to the target in a land area:
- 1 area: add +1 to your rolls.
- 2-3 areas: every 5 or 6 is a hit.
The hit roll is also affected by the height of the area in which the Battery or Fleet is located:
- If the area occupied by the Artillery Battery or Fleet is lower than the area occupied by the target, subtract -1 from each die for each height level difference.
- On the other hand, if it is higher, add +1 regardless of the height level difference.
Walls, even collapsed ones, block Bombardment of inner areas. Trenches do not provide protection from Bombardments.
If the enemy is in an area with Walls or Bastions built by the Spanish, the hits first remove Resistance points from the fortifications, and if there are any hits left, the owner of the units distributes them as they wish among their units in the area.
There must be a clear line of clear terrain or sea areas from the Artillery Battery or Fleet to the target area, through the shortest route. Rough terrain, Walls, and city areas prevent using Bombardment through them.
Other game elements such as the presence of units, Spanish Bastions, Artillery Batteries or Siege Trenches do not affect the line of fire.
If the Spanish player draws this card but does not have any Artillery Batteries, they may discard it and draw another card.
8.2.4. Civilians (1 Ottoman)
This is an Order card that allows the Ottoman player to place the green block with the Civilians sticker in any of the 3 target areas.
Until the end of the game, the area you place this block in is considered occupied by the Ottomans.
No Spanish unit can enter or leave that area for the rest of the game. Those units cannot make Camisado attacks, but may use the "Arquebusiers" card since it is a ranged attack, as well as Bombardments.
This card does not start in the Ottoman deck, it is added when the discard pile is first shuffled to rebuild their deck. Remove it from the game once it has been played.
8.2.5. The Bishop (1 Spanish)
This Order card allows the Spanish player to recover up to 3 Strength points of blocks that have not been eliminated. You can distribute these 3 points any way you want.
8.2.6. Repairs (2 Spanish)
During Siege Rounds only, it allows the Spanish player to repair up to 2 lost Resistance points in one or two areas with Walls or Bastions that are not occupied by Ottoman blocks, whether or not there are Spanish units there at the time of play.
8.3. Combat Cards
These cards can only be played at the beginning of a combat.
REMEMBER: During a battle triggered by playing a "Camisado" card, the Spanish player may not use this type of card.
The attacker plays Combat cards first, face down, followed by the defender, who also plays them face down.
Once the defender has played their cards, the attacker may not add or remove any cards for that combat.
A player can play as many cards of the same or different name as they have, and their effects are cumulative.
The effects of any rolls caused by Combat cards are applied before the units engage in combat, so it is possible for one side's units to be eliminated before they actually fight. In any case, the effects of both sides' Combat cards are resolved simultaneously, and their hits are applied at the same time, before rolling the dice for the surviving units.
8.3.1. Volley (3 Ottoman)
Allows the Ottoman player to hit with a +1 to all Janissary dice rolled in combat.
Only this type of unit benefits from the modifier, not the Azab or Sipahi.
It can only be played in combat if there is at least one block of Janissaries. It can be used in both offense and defense.
If there are no Janissary points left to roll at the time of use, the bonus is lost.
8.3.2. Fire Devices (3 Ottoman / 3 Spanish)
This Combat card allows the player to roll 3d6 against enemy units at the start of Combat, when the card is revealed.
Any result of 5 or 6 counts as 1 hit, to be assigned at the opponent's discretion.
It can only be played in areas that contain, or are adjacent to, Walls or Bastions built by the Spanish player.
8.3.3. For the Faith (3 Ottoman)
This card can only be played in combat if there is at least 1 Azab unit. When used, all dice rolled by Azab units (not Janissaries or Sipahi) in combat have a +1 bonus to hit, but at the end of the battle, the Ottoman player must eliminate 3 points of Strength from the Azab units.
It can be used in both offense and defense. If there are no Azab points left to roll at the time of use, the bonus is lost.
It can also be used as an Order card to place 1 Trench on the map and/or move 1 Artillery Battery.
8.3.4. Mine (1 Spanish)
This Combat card allows the Spanish player to roll 4d6 against Ottoman units in a combat that takes place in or adjacent to areas with Spanish-built Walls or Bastions. It can only be used for defense.
8.3.5. Chevaux-de-Frise (2 Spanish)
It allows the Spanish player to place a Chevaux-de-Frise cube in a Wall area or a Bastion. Each cube allows the Spanish player to ignore 1 hit in combat.
They are not destroyed by absorbing the hit. In addition, if a combat is tied in an area with these cubes, the Spanish player wins the battle.
They can only be used for defense and must remain in the area once placed. If the Ottomans occupy an area with Chevaux-de-Frise and no enemies, the cubes are automatically destroyed.
There can be more than one in each area.
8.3.6. The Beat of the Drum (1 Spanish)
Allows the Spanish player's Pikemen units, but not the Arquebusiers, to hit with +1 on all dice rolled in combat.
This card can only be used in combat if there is at least one Pikemen unit. If there are no Pikemen points left to roll at the time of use, the bonus is lost.
It can be used in both attack and defense, and in any type of area on the board.
8.4. Reaction Cards
You can play them during your opponent's Action Phase if the condition on the card is met. You can only play one Reaction card of each type after the effect that triggers it.
8.4.1. Counterattack (12 Ottoman / 8 Spanish)
It is a dual-use card. As a Reaction, you can use it immediately after resolving combat or a "Camisado" attack in your opponent's Action Phase. It allows the Inactive player to interrupt the opponent's turn as if the Inactive player had played an "Attack" card.
The Inactive player can activate any group of units, not just the one that was just attacked, move them immediately after the enemy's attack ends, and if the units enter an area with enemies, start a Combat.
An Active player can also play it during their turn, as an "Attack" Action card.
8.4.2. Arquebusiers (3 Spanish)
This is a Reaction card that the Spanish player may use whenever an Ottoman unit enters an area adjacent to any Arquebusier unit. This card allows the Spanish player to reveal any Arquebusier units they choose (from one or more areas) to fire at an adjacent area that the Ottoman units have just entered, rolling the dice immediately with all appropriate modifiers (including the presence of Sarmiento) against the Ottoman units, who cannot fire back. As in combat, the Trenches absorb two points of damage, which are subtracted from the total damage received from the shots.
Arquebusiers cannot fire into such an adjacent area if combat is about to start there due to the presence of their own units. However, they can fire at the enemy if they retreat to an adjacent area.
The Spanish Arquebusier blocks are revealed and cannot move for the rest of the Action Phase. They may fire again at any other Ottoman unit that moves into an adjacent space, without having to play another card. These shots normally hit with a result of 4, 5, or 6 (note that Arquebusier units have a +1 bonus to hit, and if Sarmiento is in their area, they get another +1).
Also take into account the Trenches, as well as the heights of the areas occupied by the Arquebusiers firing and the Ottoman units receiving the shots. However, if any of these areas are within the city, there are no higher areas. Subtract -1 from the dice rolled by an Arquebusier unit for each level lower than the height of the area occupied by the Ottoman blocks; add +1 to the dice rolled by a block that is higher than the area occupied by the Ottoman blocks.
However, your revealed Arquebusier units may not move during this Action Phase while they are revealed. However, they may retreat if they lose a combat after being attacked, and remain revealed.
8.4.3. Friendly Fire (2 Spanish)
The Spanish player may use this card whenever an Ottoman unit moves into an area that is in the line of Ottoman artillery fire against potential Spanish targets, i.e. any area that Ottoman artillery could fire into or through. The Ottomans roll 2d6 for each Ottoman unit, losing 1 Strength for each 5 or 6 rolled. If there are Spanish units in the area where the Ottomans moved, resolve "Friendly Fire" first, then combat as usual.
8.5. Event Card
It takes effect the moment the Turkish player draws it from the deck.
8.5.1. Storm (1 Ottoman)
When the Ottoman player draws this card, reveal it and draw another card to replace it.
It is triggered once and removed from the game after that. The effect of this card is that during the next Action Phase, none of the following cards can be played: "Fire Devices", "Bombardment", "Volley", "Arquebusiers", and "Mines". This card affects the following phase and can negatively affect both players, depending on which phase it is drawn.
9. Scenarios
9.1. Main Scenario: Castelnuovo 1539
This is the main scenario of the game, described throughout the rulebook. A summary is provided below.
Setup
A. The Spanish deploy the leader Sarmiento, 6 Pikemen blocks, 8 Arquebusier blocks (excluding the Juan Pérez block), 1 Stradioti (cavalry) block, 4 Bastions, and 2 artillery batteries. Bastions must be deployed in areas that are neither city areas nor part of the walls of Castelnuovo. The Spanish may place all blocks and Artillery Batteries in any positions of their choice.
B. After the Spanish setup, the Ottomans deploy a fleet in any Sea Area and 4 Infantry (Azab) blocks.
At the end of the first round, during the Reinforcement Phase, place a new Ottoman fleet in a different sea area adjacent to the previous one with 6 Infantry (Azab) blocks, 10 Janissary blocks, and the leaders Barbarossa and Agi.
At the end of the second round, during the Reinforcement Phase, also deploy 6 additional Infantry (Azab) blocks and 6 Cavalry blocks led by Ulamen in areas along the upper edge of the map, further inland, without exceeding the limit of three blocks per area.
9.2. Introductory Scenario: The Holy League Captures Castelnuovo, October 26, 1538
Introduction. This scenario is simpler and shorter than the main one, helping you get familiar with the rules and tactics for attacks and counterattacks, such as climbing walls when there are no defenders and there are no breaches. Use the general rules of the game with the specific exceptions indicated below. No Combat Cards are used, and it lasts only 2 turns.
This assault took place the year before the main scenario. In it, Christian troops of the Holy League stormed the Ottoman-held city of Castelnuovo.
Setup
A. The Ottomans deploy first: 6 Azab blocks and 2 Sipahi blocks (each with 4 Strength points), placed in Wall areas within the city.
The Ottoman player starts with a hand of: 1 "March" card, 2 "Attack" cards, and 1 "Counterattack" card.
B. The Christian player deploys after the Ottoman setup, in two different sea areas:
- Venetian fleet and 6 Italian blocks (Tercio of Spínola).
- Spanish fleet and the following blocks: 6 Spanish Arquebusier blocks (must include Juan Pérez and may not include P. de Sotomayor), 3 Pikemen blocks, and Sarmiento.
The Christian player starts with a hand of: 1 "March" card, 1 "Bombardment" card, and 2 "Counterattack" cards.
The grouping limit for both sides is 2 blocks per area, instead of 3 as in the Main Scenario.
Unlike the main scenario, the Christian player plays the first round, followed by the Ottoman. The scenario lasts for 2 rounds: the first is a Siege Round (with 4 cards) and the second is an Assault Round (with 7 cards). Each player's deck will contain only "March", "Attack", and "Counterattack" cards, in addition to the ones in hand at the beginning.
The Christian player wins by occupying all objective areas or eliminating all Ottoman blocks. In any other case, the Ottoman player wins.
Special blocks for this introductory scenario: in addition to the units you already know: Juan Pérez, Tercio of Spínola (both with +1), the Spanish fleet and the Venetian fleet.
10. Appendices
10.1. How to Apply the Stickers to the Blocks
The sticker sheet shows which type and color of block you should stick each sticker on. Some blocks only have stickers on one side, while others have them on both sides, like the Leaders, Fleets, Civilians and Casualty markers. (Counts per sticker are shown on the rulebook page: e.g. 10 / 6 / 16 Ottoman unit stickers, Agi, Ulamen, Barbarossa and Sarmiento on both sides, 2 Spínola, 5 other pieces.)
10.2. Designer Notes by Francisco Ronco
Given the excellent design that "Santa Cruz 1797" ended up being, I couldn't let this game system and the experience that goes with it run out of steam. Another publisher (NAC Wargames) has already released another descendant of "Santa Cruz 1797" with even more weight and depth: "Von Manstein's Triumph". Early on, I started thinking about other ways to translate the system. I usually design game series to make it easier for players to access new products. In this case, it is not a series, but a "family", because the game you hold in your hands shares a certain similarity with its predecessors: "Santa Cruz 1797" and "Von Manstein's Triumph". All these games share a certain commonality of components (blocks, zonal board, card engine) and are different enough so that it doesn't feel like a repeat of the experience when switching from one to the other.
From the beginning, my idea was to make a game that would look as close as possible to the original design and offer the same experience of a "desperate battle", which is what we in Bellica Third Generation call this "family". A desperate battle because of the conditions and the context in which it takes place.
It would be difficult to find a more desperate battle than the one fought by Sarmiento and his Tercio, who voluntarily faced the clash of battle rather than accept uncertain terms of surrender, and they proved that they did not want to trade their honor for the money and freedom Barbarossa offered them. This is why the battle is set up as a countdown, the Turkish player must occupy the fortress before the Spanish inflict enough casualties to make it a Pyrrhic victory. We will never truly know the reality of Turkish casualties. Doria, in his letter to Charles V, put the number of casualties at 3,000-4,000, while the survivors and the chronicles spoke of tens of thousands of Turkish dead. And this is the desperate nature of it: the Spaniards cannot win. Their victory consists in killing and killing a lot. The Turks have an inexhaustible number of troops, on the scale of the game, and all the time in the world. The siege will be a success, but at what cost? This is the perfect framework for the family of games to which "Castelnuovo 1539" belongs.
The game is tactical because of the scale of the terrain and the units used, so players maneuver companies and groups of companies around the board. Coordination is impossible in this game because the means of communication of the time did not allow it beyond having a plan for a given turn (hand of cards) and executing it as best you can (or as well as the opponent allows). As I mentioned in the historical and design notes scattered throughout the rules, the Turks did not stop firing their cannons at the breaches and walls, even when their own men were climbing them, causing casualties among them... You have to know which blocks to send to which mission: in the open field, the cavalry is king, but the pikemen are an issue, and the arquebusiers are always deadly and decisive, the janissaries, when led by their captain and/or playing a "Volley" card, also tend to take their toll in Spanish blood.
The game is also intended to be a twist on its earlier "desperate" brethren, being a siege simulation. The 16th century siege warfare has its peculiarities and these have been modeled in the game through the distinction between "Siege" and "Assault" rounds, the presence of artillery batteries, the obsolete medieval fortifications of the city and the modern earthen fortifications built by the Spanish to reinforce them, the construction of siege trenches and their usefulness in reducing the casualties of the besiegers... A well-played and balanced game will leave a spectacle of siege lines forming a tight belt and getting closer and closer to the city, bastions and walls demolished by the Ottoman batteries, and breaches where the close-range clashes that will ultimately decide the outcome are concentrated. We also include the famous Spanish "camisado" attacks (encamisadas in Spanish), and once you master the rules, you will see that fortresses were not defended passively, but rather part of the secret of their resistance was in an active defense that made sorties, hindered the work of the attackers, destroyed some artillery batteries and did not give them rest or tranquility.
10.3. Notes for Spanish Players
In the main scenario, the first thing you should keep in mind is that you cannot "win" the battle.
That is, your forces are vastly outnumbered, the fortress you are defending is rickety, and nothing and no one is coming to your aid from the outside. The Ottomans have all the time in the world to destroy you. It is with this determination that great deeds are forged, and that is what this game is all about. There is no way for you to "win" conventionally, nor will any relief force arrive, so you must take your position and understand that your victory is to make the enemy pay dearly for the recovery of Castelnuovo. The victory conditions of this game are unusual for your side: your mission is to eliminate enemy units and leaders. Your forces are the garrison of an old-fashioned medieval castle, which you have upgraded by adding a few cannons and building external earthen fortifications. But being besieged and on the defensive does not mean being passive; in fact, if you want to win the game, you have to be aggressive and very active. The Ottoman player has more troops than they can use or mobilize with their cards, they also have to break through the walls and bastions to be able to take the city and destroy your troops, for which they have to open and expand siege trenches, and place artillery batteries, this takes time and you have to use that time to make sorties and eliminate as many blocks as possible. For this task, your ultimate weapon is the "Camisado" card, which not only allows you to deal a lot of damage, but also to decide which Ottoman units will suffer it, making it much easier to eliminate enemy blocks (and thus advance the Ottoman Casualty Track) and, combined with a few assaults, can bring great benefits by eliminating several Ottoman blocks in the same Action Phase.
Be reactive, try to always have "Counterattack" cards in hand, as a group of Ottoman blocks engaged in combat and damaged is an ideal target for an immediate counterattack that can eliminate some of them. Given the large amount of Strength that three Ottoman blocks can concentrate (12 points), it is advisable to concentrate the use of your "Bombardment", "Arquebusiers", "Friendly Fire", "Fire Devices" and "Mines" cards; try to eliminate blocks, not just damage them, because, except for the Janissaries, each damaged block can be recovered at full Strength in a Turkish rest turn.
Sarmiento and three blocks of arquebusiers are the perfect weapon, your arquebusiers will always fire first and deal damage before the Turks return fire. But, if you leave the fortress, you better take two blocks of arquebusiers and one of pikemen, in case the Turkish cavalry appears...
Do not expect many of your blocks, or Sarmiento himself, to survive the game. You will not win by protecting your blocks, but by eliminating those of your opponents. Be aggressive and destructive.
Your artillery and cavalry have limited use, but they can be very useful in certain circumstances. Think carefully about where to place them in the initial deployment, as well as the four bastions, which can add depth to your defenses by forming a line in front of the weak medieval wall.
10.4. Notes for Ottoman Players
As Admiral of the Turkish fleet and commander-in-chief of the operation to retake Castelnuovo, you have a lot of troops at your disposal. In fact, some of the blocks that make up your army are meant mainly to instill fear and emphasize your superiority over the infidels, rather than to actually intervene in the game: you will not be able to play enough cards to use all the blocks at your disposal. But you don't need them. With your loyal janissaries and some groups of Azab and Sipahi, you can put the Spanish to the sword.
Your superiority in all fields is manifest and you have time on your side, for no relief force will appear in your rear. Be methodical and carry out a siege according to the rules of the art of war: dig trenches, extend them, set up batteries, batter the enemy's walls, create breaches and then storm them. This is the procedure. Launching an attack too early can only lead to unnecessary casualties and dishonor before the Sultan. However, although the art of siege warfare is time-consuming, you should not wait too long, for each siege round you call will give the Spaniards an opportunity to launch a "Camisado" attack, the famous night raids that the Spanish soldiers were so fond of. There are two of these cards in the Spanish deck, once played you can rest easy until the Spaniards reshuffle their deck, but each of these cards will most likely cost you at least 1 block (2 if they were not entrenched). Digging trenches should be one of your first tasks, as you need to protect your blocks; in the open field, they are an easy target for attack: the Spanish can play "Camisado" attacks and launch assaults in their turn, slaughtering your soldiers. Once you have protected your blocks with trenches, you must plan your advance and bring your trenches and batteries closer to the Spanish fortifications so that you can breach them. Once there are open breaches, it is necessary to take the city and its towers by assault, because the Spaniards will not surrender the easy way. Your combat cards are good, but you must take into account the handicap that the Spanish arquebusiers will always shoot first, and you will have to deduct these casualties from your troops before you can return fire. A piece of advice: always try to attack with three blocks at full strength, and do not end a turn with an assault, because in addition to damaging your troops, you will give the Spanish the opportunity to end their phase with a counterattack and then attack you as much as they want in their own phase, which will certainly cost you blocks and advance your Casualty Track. Not good.
A very effective strategy is to combine three types of operations: an assault round, in which you take a section of the wall or some part of the city, a siege round, to entrench yourself in the conquered positions and a rest turn to replace the casualties suffered by the attacking Azab and Sipahi. The Janissaries are much better troops (Agi's bonus and your "Volley" cards can be decisive), but they are also vulnerable to Spanish counterattacks because they do not recover from the casualties they suffer. You must limit their participation and exposure to danger if you want to win the game.
There is no hurry, but the siege cannot last forever or it will cost you your prestige with the Sultan. The initiative is on your side, and even if the Spaniard is very active and aggressive, you must develop your siege plan as you see fit, without getting carried away by the enemy's provocations or gambits. Encircle the fortress as much as you can to prevent the Spanish from concentrating their forces in one sector of the fortifications, so that you can overwhelm them.
A tip for both players: Use your cards, the more the better, as you will replenish your hand during both your opponent's turn and your own. Do not hold back unless you are saving cards for a specific purpose or for a quick attack.