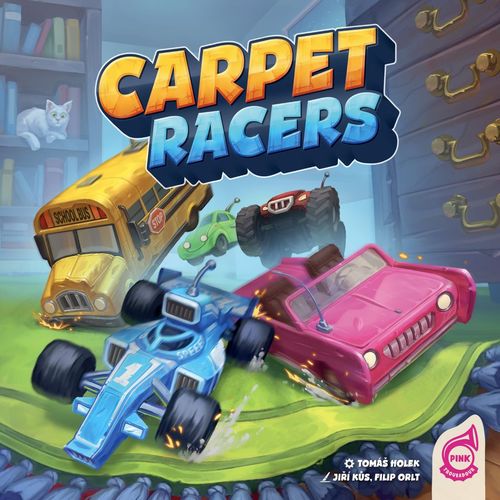
Carpet Racers
Carpet Racers Rulebook
Table of Contents
Table of Contents
Components
- 5 car models
- 45 cards
- 5 car markers
- 4 help cards
- 1 game board
- 5 chip tokens (2 sets) (a spare set is included to replace lost tokens)
- 5 controller docks and 5 controllers
- 65 boost tokens (13 for each color)
- 24 stop tokens
- 20 stretch tokens (only for playground mode)
- 20 clue tokens (4 for each type)
- 32 trap tokens
- 5 progress tokens
- 1 catapult die (only for playground mode)
Game Setup
-
Place the game board in the center of the table with your chosen side face-up. For your first game, we recommend using the side with the living room track.
-
Place a controller, with their matching docks and their stack of matching clue tokens, in front of each player.
-
Place the remaining controllers with their matching docks and their stack of matching clue tokens near the game board.
Always play the game with all five controllers, regardless of the number of players.
-
Place all 5 car markers in the first column of the lap table.
3 Players: Place all 5 car markers in the 1st lap column of the lap table. A race with 3 players has only two laps.
-
Place each car model on the starting space in any order.
-
Shuffle the cards and deal 3 cards to each player. Place the remaining cards face down next to the board.
-
Place the boost tokens and stop tokens next to the game board to form a supply.
-
Shuffle the trap tokens and place one face down on the pizza box and one on each of the yellow outlined spaces (6 tokens in total).
-
Place a face-down trap token on the leftmost space of each controller dock. You may look at your dock's trap.
-
Place the remaining trap tokens face down in the lower-left corner of the board to form a supply.
-
Each player places a progress token matching their controller on the lowest space of the progress track.
Setting up controllers
Shuffle one set of chip tokens (5 total tokens, each showing a different car). Insert a random chip token face down into each controller and close the controller.
Be sure to avoid looking at which car is shown on a chip token, as they determine the secret identity of the cars.
Each controller operates one of the five cars, but no one knows which car belongs to their controller.
Until the end of the game, do not look inside your own controller.
Note: All 5 controllers need a chip token. The controllers without a player act as automated racers.
Initial Information
Before the game begins, each player looks at the chip token inside the controller of the player to their right. Only look inside another player's controller. Skip the automated racer's controller if there is one next to you.
Open their controller, flip the chip token inside and look at which car is shown on the chip tile without revealing it to another player.
Place the clue token of that player's controller in the first slot of your controller's dock as a reminder that you can look at the chip token in their controller at any time during the game.
Example: Thomas (brown) is sitting to the right of Anna (orange), so Anna looks inside the brown controller. They open it, flip the chip token, and see that Thomas controls the yellow bus. As a reminder, Anna takes a purple clue token and places it in one of the three slots on their controller dock.
You are now ready to begin the race.
Gameplay
The starting player is the one who most recently replaced batteries. If you are not sure, randomly choose the first player. Players then take turns in clockwise order until the game ends. The game ends immediately when the first car enters its 4th lap.
Turn Structure
During their turn, a player plays exactly one card.
Player cards contain the following information:
- Number of moves
- Cars you move this turn
- Card effect
- Tires – only some cards have this part (the bottom of some cards has a red or blue tires symbol)
After playing a card, resolve the following steps in order (summarized on the help card).
1) Move
Move the two cars shown on the card you played. Any car can be moved by any player, regardless of which controller they operate. The total number of spaces moved between the two cars must equal the value on the card.
The total number of spaces may be distributed between the two cars in any way you choose, but both cars must move at least one space. When a grey car is shown, you choose the second car to move this turn.
The total number of spaces moved must match what is shown on the card, and a car can never move backwards.
Example: Anna plays the card shown. The total movement between the two cars must equal 4. They must move the yellow car, but they get to choose the second car to move as indicated by the grey car. They choose red as the second car and decide to move both cars two spaces each.
Lap Markers
Any time a car passes the starting line, move the corresponding car marker one space forward on the lap table. Refer to the table to know which lap a car is currently on.
Near the start of the game, remember to move the car markers after they cross the starting line to indicate they have entered the first lap.
Example: After the yellow car passes the starting line, it has finished another lap, so Anna moves the yellow car marker to the second column on the lap table.
2) Traps
After you have moved both cars, check whether any car you moved ended on a space with a trap. Flip the trap token and resolve its effect.
If multiple traps are triggered, resolve them in any order, but fully resolve each trap before flipping the next one.
Passing over a trap does not trigger it. A trap only affects the active player, regardless of which car triggered the trap.
Discard resolved traps to a discard pile. If the supply runs out, reshuffle the discard pile to form a new supply of face-down tokens.
Example: Anna ended the red car's movement on a space with a trap. They flip the token, resolve its effect, and discard it before continuing with the next step of their turn.
Trap Tokens
Trap tokens are placed on the track and represent a variety of risks you may drive a car into.
If you gain the trap bonus as a card effect or from a track bonus, you must choose between gaining or setting a trap.
When you gain a trap, draw one token from the supply, look at it, and place it face down on an empty space of your controller dock.
When you set a trap, place one from your controller dock on the same space as one of the cars you moved this turn. When setting two traps, you may place each one on different spaces or both on the same space. You may only choose spaces where the cars you have just moved ended.
As indicated on your controller dock, you may have a maximum of three trap tokens at any time. You can't gain a new trap when your dock is full.
Each track space may contain a maximum of two traps at any time. You may choose to not set a trap when you gain a trap bonus.
Example: Anna gains a bonus to set two traps. They moved the yellow and red cars this turn, so they may place a trap token on each car's space or both on the same car's space.
3) Track Bonuses
After resolving the traps, check whether any car you moved ended on a space with a track bonus (i.e., a space marked with a yellow stripe along their edge). A space can only provide its track bonus once per turn even if both cars end their movement on the same space. If you stop at two different spaces with a track bonus, resolve them in any order.
There are four types of bonuses on the track:
- Advance one space on the progress track and gain the progress track's bonus.
- Gain one boost.
- Gain a new trap or set a trap (see "Trap Tokens" above).
- Secretly look at any trap on the game board (leave the token face down).
Example: The red car ended on a space with a progress track bonus. Anna advances their progress token one space on the progress track. The progress track bonus indicates Anna may gain a new trap token or set a trap token from their controller dock.
Progress Track
As you advance along the progress track, you will gain different bonuses to help you deduce which car each controller operates, including the magnifying glass.
When you reach a magnifying glass on the progress track, you may immediately look at the chip token inside any controller other than your own. Place the clue token of that controller in the next slot of your controller's dock.
There are three slots on the top of your controller's dock indicating you can look into a maximum of three controllers. You start the game with one and the progress track lets you possibly gain two more during the game.
During the game, you are able to look into three other players' controllers in total. That means you won't be sure until the end of the game which car you control.
Once you have a controller's clue token in your dock, you may look inside that controller at any time during the game.
Boosts
Boosts you collect may bring your car into first place when the game finishes. At the end of the game, you will move the car you control an extra space for each boost token in your supply that matches the color of your car.
Boosts collected by an opponent may indicate which car they think they control. Boosts are public information and must remain visible.
Each time you gain a boost, choose one of boost tokens from the supply and place it in your supply next to your controller. Sort the boost tokens in your supply based on color.
You may also gain stop tokens that counteract the effect of boost tokens. At the end of the game, each stop token will move your car backwards by 1 space.
Stop tokens are gained from triggering specific traps. Place any new stop token next to the boosts in your supply.
4) Card Effect
After resolving movement, traps, and track bonuses, gain the effect of the card you played this turn. Card effects include those found on track bonuses in addition to the three following effects.
- Gain any two boosts.
- Gain one boost. Also, gain a new trap OR set a trap on the game board.
- Gain one trap and set one trap (in any order) OR gain two new traps OR set two traps.
Some trap tokens prevent you from resolving the effect of the card you played this turn.
5) Tires
If there is a tires symbol on the bottom of the card you played this turn, place a random trap token from the supply on each space surrounded by tires matching the color of the tires on the card.
If either space already has two traps, do not place a third trap on that space.
Example: Thomas plays a card with a tires icon. Neither blue tire space has the maximum of two traps, so Thomas adds a random trap token from the supply on each blue tire space.
6) New Cards
After fully resolving the card you played this turn, discard it. You may also discard an additional one from your hand. Place all discarded cards in the discard pile.
At the end of your turn, draw cards until you have reached your hand limit (initially 3 cards). If the draw pile is empty, shuffle the discard pile to form a new draw pile.
Some trap tokens prevent you from drawing any new cards at the end of the turn the trap was triggered.
In the unlikely event your hand is empty at the end of your turn, draw one card.
The bonus of the fifth space on the progress track raises your hand limit to four cards.
Example: After Claire plays a card with a controller icon, they advance their progress marker to the fifth space of the progress track to increase their hand limit to four cards. At the end of their turn, Claire chooses to discard an additional card after discarding their played card. Then, they draw cards until they reach their new hand limit of four cards.
Track Detour
Both sides of the game board have a space with a dividing arrow leading to a track detour. See the dividing arrows on the track. When moving a car past that space, the active player chooses which path the car takes.
End Of the Game
After a car marker is moved to the checkered-stripe column in the lap table, the game ends immediately after the current player's turn.
At the end of the game, each player performs the following steps.
- Open your controller to reveal which car you control.
- Move your car an extra space forward for each boost token in your supply that matches the color of your car.
- Move your car backwards one space for each stop token in your supply.
The player whose car is farthest ahead wins! In case of a tie, resolve the following tie breakers in order:
- The tied player with the most boost tokens matching their car's color wins.
- The tied player with fewer stop tokens wins.
- Each tied player shares the victory.
If a car is on the detour path, count the spaces from the finish line for each car to check which is the farthest ahead.
Example: Anna crossed the finish line with a red car! After their turn, the game ends immediately. Each player now reveals which car they control and adjusts its final position based on the number of boost and stop tokens in their supply.
- Oh no, they guessed wrong. The blue car token is in their controller, not the red one. They have two blue boosts, so they move the blue car two spaces forward.
- Thomas controls the green car. They collected six green boosts, so they move it forward six spaces to pass the first place red car!
- The remaining cars stay on the same space, because the players who controlled them did not collect boosts matching their car's color.
At the end of the game, the green car is the furthest, so Thomas wins.
Playground Mode
The back side of the game board has a garden motif which includes a catapult.
When playing the playground mode, follow the game setup instructions as normal. In addition, place the stretch tokens and catapult die next to the game board.
The game is played in the same way as the normal mode, but this track includes the catapult and a new type of bonus.
The stretch token bonus on the race track and on the progress track allow you to take a stretch token from the supply. Each player may have an unlimited number of stretch tokens.
The progress track is located on the bottom of the board and provides different bonuses.
The catapult adds a step to a player's turn if one of the cars they moved ends its movement on the catapult space. When a car reaches the catapult space, it must end its movement and the remaining movement must be used for the second car. If both cars reach the catapult space on the same turn, forfeit any remaining movement from the card played this turn.
Traps cannot be placed on catapult spaces or sandcastle spaces.
3.5) Catapult
After resolving track bonuses and before resolving your card's effect, fire the catapult if any cars ended their movement on the catapult space.
Roll the catapult die and move the car a number of spaces (i.e., sand castles) into the sandbox as shown on the die. You may jump further by spending stretch tokens (1 per additional space). You may spend any number of them, but the furthest possible landing space is the fifth sand castle.
Gain the bonus from the sand castle that the car landed on.
If the second car is also on the catapult space, repeat the previous procedure. Any number of cars may share the same position on sandground spaces.
A car only needs to move one space to leave the sandpit and reenter the track, regardless of where it landed.
Example: Jane moved the red car two spaces. They move the yellow car the remaining three spaces, because the red car must stop on the catapult space. Jane gains a stretch token as a track bonus from the yellow car. Next, they roll the catapult die for the red car. Unfortunately, they only rolled a 1. Normally, the red car would land on the sand castle that adds two stop tokens to Jane's supply. By spending two stretch tokens, they can change the die value to 3 so the red car lands on the sand castle that provides a boost token instead.
Icons
- Advance one space on the progress track and gain the depicted bonus.
- Gain one boost token.
- Gain a new trap from the supply or set a trap from your dock (see "Trap Tokens" above).
- Secretly look at any trap token on the racetrack and return the token face down.
- Gain two boost tokens.
- Gain one boost token. Also gain a new trap OR set a trap from your dock on the game board.
- Gain one trap and set one trap (in any order) OR gain two new traps OR set two traps.
- Increase your hand limit to four cards.
- Look at the chip token in any controller other than your own. Place that controller's clue token in the next slot of your controller dock.
- Gain one stretch token.
- Gain one stop token.
- Gain one boost token.
- Discard one boost token. Ignore if none are in your supply.
- Advance one space on the progress track and gain the depicted bonus.
- Do not resolve the effect of the card you played this turn.
- Do not draw any new cards this turn.
Turn Structure Summary
- Move – Play a card and move both cars shown at the top of the card. The total number of spaces moved must equal the value on the card.
- Resolve traps – If a car ended its movement on a space with a trap token, flip the trap token, resolve its effect, and discard the token.
- Track bonus – Gain the track bonus for any space a car ended its movement on this turn.
- 3.5) Catapult – Playground mode only: If a car is on the catapult space, roll the die, and move the car to that sand castle.
- Card effect – Resolve the card's effect.
- Tires – If there is a tire symbol on the bottom of the card, place a random trap token from the supply on the two spaces matching the tire symbol.
- New cards – You may discard one card before drawing cards until you reach your current hand limit.