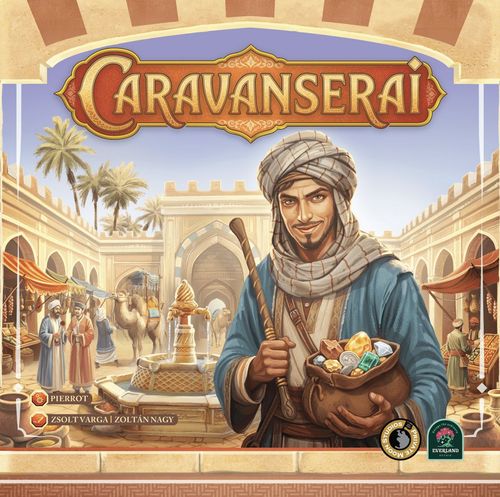
Caravanserai
Caravanserai Rulebook
Table of Contents
Table of Contents
Game Setup
The Game Board and the Common Supply
- Game board and scoring board: Place the two boards side by side in the middle of the table.
- The Fountain: Affix the stickers, then place the Fountain in the centre of the game board (arrows may point in any direction).
- Minor Orders (16): Shuffle the red cards and place the deck face down on the Red Gate.
- Ability cards (2x16): Separate the turquoise and purple cards into two decks and put them face down next to the Blue Gate. Then flip over 5 cards of each.
- Major Orders (32): Take out the cards with a value of 11 and 12 from the yellow deck and shuffle them, then flip and place one randomly on each of the four towers in the corners of the Caravanserai. Shuffle the remaining cards back into the deck and place it next to the board.
- Goods & merchant stalls: Assemble the Stock Tray as shown in Figure 1 (see "Assembly of the Stock Tray"), then fill each compartment with the corresponding goods. Then place the appropriate goods on the stalls: 5 pieces of bronze and amber, 4 pieces of silver and emerald, and 3 pieces of gold and diamond.
- Caravan tiles: Shuffle the A and B decks of caravan tiles separately. Then randomly draw 3 tiles from the corresponding deck to the areas marked A and B, with the number 1 on the tile pointing towards the inside of the courtyard. Place the rest of the tiles face down next to the board, within reach.
Players' Setup
- Each player chooses a colour and takes the corresponding personal board, player figure, wealth marker, die and player aid card, as well as 6 grey limit markers, 1 yellow coin marker, 1 red credit marker, and chooses 1 piece of emerald or silver. Everyone places their player figure at one of the two entrance gates.
- Place all wealth markers in the starting space (0) of the scoring board.
- Place the die in the dedicated space on the right side of your personal board.
- Place one limit marker in spaces 4, 5 and 6 of both the purse track on the right side and the credit track on the left side of the personal board.
- Put the yellow coin marker on space #2 of the purse track (everyone starts the game with 2 dirhams).
- Put the red credit marker on space 0 of the credit track (you have no credit at the beginning of the game).
- Place the silver or emerald in one of the 7 storage slots at the top of your personal board.
Roll the dice to select a starting player, and let the game begin!
Objective of the Game
As a stable boy working in the Caravanserai, you will try to earn a small profit by trading with passing travellers and cleverly exploiting your modest starting opportunities. Sometimes you will need to borrow money to carry out your actions, but fortunately, serving local merchants will earn you enough to invest more, in addition to paying off your debt. The first player to reach 32 dirhams (wealth points) on the scoring board triggers the final round, then the game ends.
A Player's Turn
In your turn, you have 2 moves and 2 actions:
- MOVEMENT (mandatory) - Before you can resolve an action, you must move. You can move 1, 2 or 3 spaces in any direction, but you cannot move to the same space twice or back to the starting point. Multiple players can stop on the same space, but you must jump over (and ignore) any occupied space when you move. Once in your turn you may decide to roll the die. In this case, however, you cannot move more steps than you roll.
- ACTION (optional) - In the Caravanserai, each space offers an action. You may resolve the action if you stop there. Optionally, you can perform up to two actions in your turn, both of which must always be preceded by a move (but you can choose to move twice without doing any actions). Activities not related to a specific space do not count as an action (e.g. expanding your purse track).
The effects of ability cards: Some ability cards can override the rules for the players who hold them (see the Cards section).
Example of a turn:
- Movement and action: You (the orange player) take 3 steps to do a Trade action (on the way, you jump over the space occupied by the purple player).
- Movement and action: Still in this turn, you need 4 steps to get to the pavilion, so you roll the die. The result is 5 which allows you to reach that space and stop beside the green player. Here you may do an Exchange action.
Actions
Borrow Money
At the two Money Changer stalls, you can borrow as much money as your creditworthiness allows (the number of free spaces on your credit track). You don't have to use up your entire credit limit, but the amount you can borrow will also depend on the number of free spaces on your purse track!
You can only repay your debt by completing Major or Minor Orders (see "Steps following the completion of orders").
Your creditworthiness will increase when you complete an Order (regardless of whether or not you had any debts to repay).
An example of borrowing: You have 0 money, your creditworthiness is 3, and the size of your purse track is 4; this allows you to borrow 3 dirhams.
- First, place the credit marker in the leftmost free space of the credit track.
- Mark the same amount on your purse track.
Increase your creditworthiness by completing Minor and Major Orders.
Purchase Goods
Each merchant stall sells one of the 6 types of goods, as displayed.
The price of the goods is fixed and is shown on every merchant stall, as well as in the top left corner of the personal boards. You can buy more than one of the goods; however, the merchants have a limited quantity (5, 4 or 3 units), and they will only replenish their stock after your action if you buy them all.
- Bronze / Amber = 1 dirham
- Silver / Emerald = 2 dirhams
- Gold / Diamond = 3 dirhams
The capacity of your storage: When your storage is full, you can discard items to make room for newly acquired goods. This also means that if you receive goods out of turn (e.g. through another player's action) and you don't have enough space, you can replace existing goods with the new ones.
Expand your purse track in your turn by unlocking any number of slots for 1 bronze or 1 amber per slot.
Trade Goods
You can convert goods by trading them with travellers at the 6 rest areas.
The items they currently offer are displayed on the caravan tile at the given space: you may convert the goods in the dark half of the tile (1) for the goods in the light half (2). When making a Trade action, return the goods to be converted into the common supply, and take the new ones from there.
You may convert as many goods as you are able to within a single Trade action. (The value of the goods received is always 1 dirham more than the value of the goods handed over.)
When you have finished the Trade action, rotate the caravan tile to the left, to the next number in line (3). After the third rotation (4) discard the tile and draw a new one from the appropriate (A or B) deck.
Sell Goods
At the Blue Pavilion inside the courtyard, you can sell any number of goods at the prices indicated. But you cannot purchase anything at this pavilion.
Exchange Goods
The White Pavilion allows you to exchange goods of the same value in any quantity, based on the chart shown here.
Take an Ability Card and/or Rotate the Fountain
Ability cards: When stopping at the Blue Gate, you may buy one of the face-up ability cards in exchange for the goods shown at the bottom of the card. The arrows on the Fountain have no effect on the cards here.
Rotate the Fountain: In the same space, you can also rotate the Fountain clockwise by 1 unit.
! You cannot hold more than one ability card of the same type (x4-x9; y2-y3; y6-y7)! See the Cards section for card details.
Complete a Major Order
In the spaces at the feet of the towers, you can pick up a Major Order card if you have all the goods shown on it. To complete the requirements of the card, pay these items into the common supply and take the card.
The number on the card indicates the amount you earn when completing the order. However, the revenue is subject to the position of the arrows on the Fountain:
- +2, if a green arrow is pointing in that direction.
- -1, if a red arrow is pointing in that direction.
Then, follow every step applicable to the completion of orders (see "Steps following the completion of orders").
! The colour of the frame on the Major Order cards will be important at the end-of-game scoring (see "End of the Game").
Take a Minor Order
At the Red Gate you can take Minor Orders and fulfil them to receive the indicated amount in dirhams.
Draw 2 Minor Order cards, and keep one (return the other to the bottom of the deck). Which card you choose depends on the following:
If you don't have all the required goods for any of the cards: Choose one and complete it later. Place the card face up to the left side of your personal board, visible to everyone. You will not need to return to the Red Gate to complete the order, nor will it cost you an action. The arrows on the Fountain have no effect in this case. However, until you fulfil this Minor Order, you cannot complete another Minor or Major Order.
If you have all the goods required by one of the cards drawn: You must choose that card and complete it immediately. In this case, your earnings may be affected by the red or green arrows on the Fountain pointing to this gate (-1 or +2 dirhams). If you can meet the requirements of both cards, you can choose either of them.
To finalise a Minor Order, follow steps 1-4 under "Steps following the completion of orders", then move the completed card to the right of your personal board, leaving it face up.
! Each player can collect up to three Minor Orders (max 3)!
Steps Following the Completion of Orders
Steps 1-4 apply to both Major and Minor Orders; steps 5 and 6 apply to Major Orders only.
- Deduct the amount of your unpaid debt from the revenue, then move your credit marker to the 0 position.
- Next, you may use the rest of the proceeds to fill your purse track up to the limit.
- Add the remaining amount as points and advance your wealth marker on the scoring board accordingly.
- Remove the next grey limit marker from your credit track; your creditworthiness will increase from the next round.
- Choose one of the ability cards on display, or draw one from any of the decks. All the other players should receive the goods shown at the bottom of the chosen card. Take the chosen ability card (see the Cards section for a description of its effect). Draw another card from the corresponding deck to fill the space.
- Rotate the Fountain clockwise by 1 unit.
Note: in the rare case that the common supply is low of the goods on the ability card, use the supply available at the merchant stalls. If still insufficient, players should take the remaining items in turn order, starting from the next player.
End of the Game
When a player reaches or surpasses 32 dirhams (points) on the scoring board, all other players have one more turn, then the game ends.
Add the following to your points achieved on the scoring board:
- From the money left on your purse track, first deduct your unpaid debts. Add the remaining amount as points on the scoring board. If the result is negative, it counts as minus points.
- Add up the end-of-game points on your ability cards.
- Scoring colour combinations for Major Orders:
- Set of 4 identical or 4 different colours: 9 points
- Set of 3 identical or 3 different colours: 5 points
- 2 cards of identical colour: 2 points
- No points are earned for 2 cards of different colour.
- ! A Major Order card can only be part of 1 set.
In case of a tie, the player with more goods left on their personal board wins. If there is still a tie, the basic value of the remaining goods will decide the contest. If the tie remains, the players share the victory.
Cards
Continuous Abilities
Cards used throughout the game to provide ongoing effects.
- (x1) During the game, you may roll the die for every move.
- (x2) During the game you can move up to 4 steps instead of 3.
- (x3) Each time when you use a die, you can re-roll it 1x.
- (x4-x9) During the game, the goods on the card cost you 1 dirham less. But you can only use the discount twice at a time at the stall. (Hold max. 1 of these cards.)
- (x10) When you take a Minor Order, you can choose from 3 cards instead of 2.
- (x11) Before completing a Major Order, you may rotate the Fountain 1 unit.
- (x12) When completing a Major Order, you are always paid as if the Fountain's green arrow pointed to the tower (+2 dirhams).
- (x13) During the game, you can buy one type of precious metal (bronze, silver or gold) from any precious metal merchant (up to the stock available at the original merchant's stall).
- (x14) Every time you do a Trade action, you can take +1 bronze from the common supply.
- (x15) In addition to your main actions, sell up to 2 items once in a turn (the same way as at the Blue Pavilion).
- (x16) In addition to your main actions, exchange up to 2 items once in a turn (the same way as at the White Pavilion).
- During the game, you can buy one type of gem (amber, emerald or diamond) from any gem merchant (up to the stock available at the original merchant's stall).
End-Game Abilities
Cards that provide additional points for end-game scoring (Max 12 points per end-game ability card).
- (y1) At the end of the game, you get 1 dirham for each of your completed Major and Minor Orders.
- (y2-y3) At the end of the game, you get 1 dirham for each occurrence of the icon on this card (silver/emerald) on your completed Minor and Major Order cards. (Hold max. 1 of these cards.)
- (y4) At the end of the game, you get 2 dirhams for each of your Major Orders.
- (y5) At the end of the game, you get 2 dirhams for each of your completed Minor Orders.
- (y6-y7) At the end of the game, you get 2 dirhams for each occurrence of the icon on this card (gold/diamond) on your completed Minor and Major Order cards. (Hold max. 1 of these cards.)
- (y8) At the end of the game, you get 3 dirhams for each of your turquoise ability cards.
- (y9) At the end of the game each limit marker removed from your personal board is worth 1 dirham.
- (y10) At the end of the game all remaining units of metal on your personal board will be worth 2 dirhams each.
- (y11) At the end of the game all remaining gems on your personal board will be worth 2 dirhams each.
- (y12) At the end of the game draw a Minor Order. You get half of the card's value in dirhams (rounded up).
- (y13) At the end of the game, each of your remaining coins is worth 2 dirhams.
Assembly of the Stock Tray
Figure 1 (Base Game) and Figure 2 (Opium & Chapman Expansions) show the assembly of the Stock Tray (diagrams only).
Expansions
All Caravanserai expansions are fully compatible with the base game and all other expansions. The overall objective of the game remains the same. Any combination of expansions may be used, including all of them together.
End game and difficulty: When playing with one or more expansions, the endgame threshold is increased from 32 to 50 points - unless the rules state otherwise. You may, however, choose a different threshold to adjust the game's difficulty and length. The recommended thresholds are 32 and 50 points.
Multiple actions caused by effects: Certain expansion effects may allow you to perform multiple actions (2-3) on a single space. In this case, you may resolve them in any order.
Stock Tray expansion: When using the Opium or Chapman expansion, add the corresponding compartment to the Stock Tray, as shown in Figure 2.
Solo and asymmetric variants: The game also offers special variants. To play solo, you need the Anahita expansion, while the Chapman expansion introduces asymmetric gameplay.
Dervish Expansion
The wise Dervish spends his days in the shade of the Blue Gate. Whenever someone passes by, he strikes up a conversation. At times, it is nothing more than empty chatter. Yet at others, he gives valuable advice.
The Dervish expansion introduces a new character to the Caravanserai game: the Dervish miniature, along with a deck of 24 cards.
Setup
- Shuffle the cards thoroughly and place them face up on the Blue Gate.
- Set the Dervish miniature on the space in front of the gate.
- Place the end-game marker on the scoring board to indicate that the modified end-game threshold will be 50 dirhams (points).
Rules
The Dervish functions like a standard figure in the game. Although he does not move, you may jump over him or choose to stop on the same space. The Dervish and the new card deck are closely linked:
- If you jump over the Dervish, he immediately changes the subject: discard the top card of the deck, revealing a new one.
- If you stop on the same space as the Dervish, you may take the top visible card from the deck - unless it is an empty chatter card showing a speech bubble. However, you can only take the Dervish card if you do not already have an unused one. In other words, a player may only hold one Dervish card at a time.
- When taking the card, place it next to your player board, and discard it after use. You may use the Dervish card on your next turn (i.e. after all other players have taken their turns). This does not count as a separate action.
- If the deck runs out, reshuffle the discarded cards to form a new draw pile.
Dervish Card Effects
- Gain 1 bronze.
- Gain 1 amber.
- Gain 1 dirham.
- Once: re-roll the die.
- Once: move 1 additional space.
- Once: ignore the Fountain's effect.
- Once: you may choose from 3 red cards.
- Buy 1 silver or 1 emerald for 1 dirham.
- Swap two Major Order cards on the game board.
- Exchange 1 silver for 1 gold.
- Exchange 1 emerald for 1 diamond.
- Exchange 1 amber for 1 emerald.
- Exchange 1 bronze for 1 silver.
- Rotate the Fountain once.
- Use the ability of any caravan tile, regardless of your location (the tile rotates).
- Your current debt is paid off.
- Empty chatter (speech bubble; no effect).
Opium Expansion
The Opium expansion introduces a number of alternative options and new ways to score points, while the objective of the game remains the same as in the Caravanserai base game.
These foreign currencies can not only be exchanged for dirhams to make a profit, but can also be used to trade with the Opium Dealer, who has appeared in the Caravanserai. Opium is a highly sought-after commodity which may replace up to three other goods when fulfilling an order.
Previously, the only function of Money Changers was lending to the stable boys. From now on, they will also exchange the currencies of foreign caravans at fixed rates. In addition, caravans can now also pay in cash for the goods you trade at caravan tiles - but only in their own currency.
The presence of the Opium Dealer's figure can also make moving around the Caravanserai easier. But beware; your opium may be confiscated in an Inspected Area!
Setup
- Shuffle the currency tokens separately by type (solidus and drachma tokens). Place one of each type face down on the board: a drachma token above the B caravan tiles and a solidus token above the A caravan tiles. Keep the remaining tokens beside the board, face down.
- Place the purple exchange-rate board at the purple-striped Money Changer's stall, and the yellow exchange-rate board at the yellow-striped one.
- Place the Opium Dealer figure on the space in front of the Red Gate, and the player aid tile nearby. Place the Inspected Area marker on the space opposite the Opium Dealer (initially at the Blue Gate). This space is watched by the authorities.
- Add the extra opium compartment to the Stock Tray, as shown in Figure 2. Take a number of opium markers equal to twice the number of players and place them in the new compartment. Return the rest to the box.
- Place the end-game marker on the scoring board to indicate that the modified end-game threshold will be 50 dirhams (points).
- Shuffle the new turquoise and purple ability cards into the corresponding decks. If you are also using the Dervish expansion, shuffle the new grey cards into the Dervish deck.
Rule Changes
Caravan tiles and currency tokens. Whenever you trade goods at a caravan tile, instead of the items shown on the tile, you may choose to take the currency token next to it as payment for the goods you offer: a solidus token for type A conversions and a drachma token for type B conversions. Then rotate the caravan tile as described in the base game.
- As in the base game, you may perform the conversion offered by a caravan tile multiple times during a single action. The tile is still rotated only once. However, during that same action you may take only one currency token from that caravan tile.
- Whenever a player takes a currency token, immediately draw a new token at random to that caravan tile.
- Whenever a caravan tile becomes exhausted and is replaced, also replace the currency token next to it with a new one drawn from the corresponding pile.
- ! You may never hold more than 3 currency tokens in total, regardless of their type.
Money Changers. The Money Changers continue to offer loans as described in the base game, to be repaid only by completing Major Orders. However, now you may also use their primary function: currency exchange. One Money Changer handles solidus transactions, the other drachma transactions. Each has a fixed exchange-rate board displayed at their stall. They only exchange foreign currency worth 6 or more units, so they will not exchange a single currency token. To make an exchange, hand over 2 or 3 tokens of the same currency with a total value shown on the exchange-rate board, and receive the amount indicated in dirhams.
The dirhams gained this way must be used as follows:
- First, refill your purse to its current maximum capacity.
- Then advance your wealth marker by the value of any remaining dirhams.
! Loan repayments may not be made from this income.
The Opium Dealer
The Opium Dealer enters the game on the space in front of the Red Gate. Like any other figure on the board, he may be jumped over. However, if you stop on his space to trade with him, you must then roll the die and move the Opium Dealer clockwise around the Caravanserai board by the number rolled (using only the outer spaces). Also, move the Inspected Area marker by the same number of spaces, so that it once again marks the space opposite the Opium Dealer. (Moving the player aid tile together with the Opium Dealer is optional.)
You may trade with the Opium Dealer only if you stop on the space he occupies. He gives you 1 opium for 2 currency tokens of any value, which must be of different types (1 solidus token and 1 drachma token). (Return the currency tokens to their respective piles beside the board, and take the opium from the common supply.)
! The supply of opium markers is limited according to the number of players. Once an opium marker has been used, it is never returned to the supply.
Once all opium markers (for the current player count) have been taken, the Opium Dealer leaves the Caravanserai and takes no further part in the game.
The Inspected Area
The Inspected Area is always located directly opposite the Opium Dealer, marked with the marker tile. It moves (clockwise) only when the Opium Dealer is moved.
If you move onto the Inspected Area while carrying opium, you are penalised. You must either surrender all your opium or pay 2 dirhams for each opium marker to avoid confiscation.
! The Inspected Area has an effect only when a player moves onto that space. If the marker is moved to a space already occupied by a player, nothing happens.
Order Cards
When fulfilling an order, 1 opium may replace any 3 goods, regardless of their value or combination, but only 1 opium may be used to complete a single order.
- Major Orders: You may use 1 opium for 3 of the required goods, but all remaining goods (1-3) must still be paid as normal to complete the order.
- Minor Orders (red card): Since each Minor Order requires exactly 3 goods, any Minor Order can be completed using an opium. If you already possess an opium when taking a Minor Order, draw only one card from the deck. You must complete it immediately by discarding the opium. Also, apply the effect of the Fountain as usual.
Used opium markers are removed from the game rather than returned to the common supply.
End of the Game
The final round of the game is triggered when the first player reaches 50 dirhams (points) on the scoring board.
At the end-game scoring, any remaining currency tokens and opium markers are worth no points, unless stated otherwise by an ability card.
Opium Expansion Card Effects
Continuous abilities
- (x19) Once per turn, you may move the Opium Dealer (and the Inspected Area) 1 or 2 spaces in either direction.
- (x20) You may buy opium from the Opium Dealer for 2 currency tokens of the same type.
- (x21) The Money Changer always pays you 2 more dirhams for solidus exchanges.
- (x22) The Money Changer always pays you 2 more dirhams for drachma exchanges.
End-game abilities
- (y18) Gain 9 points if you have at least 1 opium at the end of the game. (This bonus may only be scored once.)
- (y19) During end-game scoring, you may spend 1 opium to take 2 (!) purple ability cards. (The ability card balance rule has no effect.) Resolve both immediately.
- (y20) Each remaining solidus token is worth 3 points, regardless of its face value (maximum 9 points).
- (y21) Each remaining drachma token is worth 4 points, regardless of its face value (maximum 12 points).
For use with the Dervish expansion
- Pay 1 silver or 1 emerald to draw 1 solidus token from the supply beside the board.
- Exchange 1 solidus token for 1 random drachma token drawn from the supply outside the board.
- +2 neutral ("empty chatter") cards.
Anahita Expansion
The Anahita expansion brings two new characters into the Caravanserai. A unique feature of this expansion is that it introduces a solo mode to the game.
The Arbab makes things harder for the stable boys, while his daughter, Anahita, offers them assistance. The two characters always appear together. Although the objective of the game remains unchanged, with the Anahita expansion the end of the game is no longer triggered by achieving a fixed score, but by reaching a position that varies from game to game.
As the Arbab makes his rounds through the courtyard, he limits the players' options, while his beautiful daughter makes their task easier through the use of favour tokens.
The Anahita expansion significantly changes the dynamics of the game, and it is recommended primarily for experienced Caravanserai players.
Setup
- Place Anahita's figure next to either pavilion in the centre of the game board.
- Place the Arbab's figure at the Red Gate (2a). Then, one player rolls the die and moves the Arbab clockwise by the number rolled (2b). Place the starting point marker on the space where he stops (this is where he leaves his caftan) (2c). The Arbab immediately performs his action related to that space - see the details later.
- Unless you are playing in solo mode, remove the re-roll ability card (a10) from the Anahita deck.
- Then draw three cards without looking at them and place them face down next to the board. Return all remaining cards to the game box without looking at them.
- Each player then receives the following number of favour tokens: 7 in a 4-player game, 9 in a 3-player game, 11 in a 2-player game. Place any remaining tokens next to the game board.
- (+1) When playing with the Dervish expansion, shuffle the 3 Dervish cards into the Dervish deck. (One grants +1 favour token for free, while the other grants +2 for the cost of 1 dirham.)
Gameplay
- Round 1: The Arbab's movement has already been resolved during Setup. Players take their normal turns.
- Round 2 and beyond: Each round begins with the Arbab's walk, during which he moves exactly 6 spaces clockwise.
When the Arbab completes his 3rd full circuit around the Caravanserai courtyard and returns to the starting point (the space where he left his caftan), he triggers the final round of the game. At the end of that round the scoring phase begins. (See the Arbab's actions later.)
Anahita's figure is available to all players. You may move her on the board by spending favour tokens, and she can perform actions on your behalf at the destination. In addition, Anahita is a quick learner: she can acquire new abilities that may come in useful during the game.
The Arbab
The Arbab always moves at the beginning of the round, exactly 6 spaces clockwise, and never jumps over another figure. During his movement, he performs two actions: the first action on the 3rd space, and the second on the 6th space, where he stops. The Arbab blocks the space he occupies: no figure may move onto that space, but the Arbab may still be jumped over, like any other character.
The Arbab's actions on specific spaces:
- When he reaches a caravan tile, he rotates it one unit. (If this exhausts the tile, replace it immediately.)
- At any merchant stall, he removes 1 piece of the corresponding goods (return it to the common supply).
- At the Money Changers, he places 2 favour tokens on the stall. The next player to visit that location may take 1 of them, as long as it is available.
- At the towers, he turns the displayed Major Order card face down. It remains inactive until the Arbab turns another Major Order card face down at a different tower. The previous card is then turned face up and becomes available for completion again.
- At the Blue Gate, he rotates the Fountain 1 unit clockwise, then discards the top Dervish card (if playing with the Dervish expansion). Next, he discards the two outermost ability cards on display (one purple and one turquoise). Refill the display immediately.
- At the Red Gate, he draws the top three cards from the red deck, reveals them, and places them face up side by side on the Red Gate. All remaining red cards are removed from the game permanently.
- The Arbab never moves to either of the two central pavilions.
The Arbab's encounter with other characters:
- If he moves to a space occupied by a stable boy, that figure must immediately move to one of the adjacent spaces.
- If he moves onto the space occupied by Anahita, roll the die and move her figure clockwise by the number of spaces shown.
- If he encounters the Dervish (Dervish expansion), discard the top card of the Dervish deck (see the Blue Gate action above).
- If he encounters the Opium Dealer (Opium expansion), he permanently removes one opium marker from the game.
! When the Arbab returns to his starting space (marked with the starting point marker), he no longer performs an action, and the final round of the game is triggered.
Anahita
At the start of the game, Anahita waits at one of the two central pavilions. She is always ready to lend a helping hand - you simply need to ask her for a favour. Each player has a limited number of favour tokens for this purpose, depending on the player count.
During your turn, you may discard any number of your favour tokens to ask Anahita to move the same number of spaces. She then moves according to your request (following the usual movement rules) and performs the standard action of the space where she arrives at. (She must move before taking the action!)
You may ask Anahita for help more than once during your turn. You may move her before your first move and between your two moves, as many times as your favour tokens allow. However, once you have completed your second move with your stable boy, your turn ends and play passes to the next player.
Over the course of the game, Anahita may acquire 3 extra abilities. Whenever you ask Anahita for a favour, you may use one of them (only one at a time). To unlock the new abilities, place the discarded favour tokens beside the three so far face-down ability cards. Once the required number of favour tokens (depending on the number of players) has been collected beside the first card, it may be turned face up. After collecting the required additional number of tokens, the second card is also activated, and later the third in the same way. From then on, whenever you ask Anahita for a favour, you may use one (!) of her available abilities of your choice.
! Some abilities may only be used if Anahita ends her movement on a specific space. Certain other abilities are not related to a specific action; however, these can only be used when you assign a task to Anahita.
To activate the ability cards, the following number of favour tokens must be collected:
| Players | Card 1 | Card 2 | Card 3 |
|---|---|---|---|
| 4 players | 6 | +8 | +10 |
| 3 players | 5 | +7 | +9 |
| 2 players | 4 | +6 | +8 |
! Anahita will not do business with the Opium Dealer. She may move onto the space occupied by the black figure and perform that space's standard action, but she may not buy opium there. (When playing with the Opium expansion.)
Anahita's Ability Cards
- (a01) Buy 2 ambers or 2 bronzes for 1 dirham (at the corresponding stall).
- (a02) Buy 1 silver for 1 dirham (at the corresponding stall).
- (a03) Buy 1 emerald for 1 dirham (at the corresponding stall).
- (a04) Buy 1 gold for 2 dirhams (at the corresponding stall).
- (a05) Buy 1 diamond for 2 dirhams (at the corresponding stall).
- (a06) Rotate the Fountain 1 unit in either direction.
- (a07) Restock any merchant stall with 1 item (when Anahita visits that stall).
- (a08) Complete an order with 1 less amber or bronze.
- (a09) When taking out a loan, gain 1 additional dirham beyond the amount added to your debt.
- (a10) Re-roll 1 die once. (This card is used in solo mode only.)
- (a11) Anahita may move onto the Arbab's space and perform her action. (The ability remains available throughout the game.)
- (a12) If the Arbab moves onto Anahita's space, she doesn't have to move away, and the Arbab performs no action there. (The ability remains available throughout the game.)
For use with the Dervish expansion (Anahita Dervish cards):
- Gain 1 favour token.
- Buy 2 favour tokens for 1 dirham.
Chapman Expansion
A group of travelling traders - crafty chapmen - have arrived in the courtyard of the Caravanserai. Their packs contain magnificent, glittering rubies - or so it seems. They are in fact glass replicas, which they try to slip into the merchants' stock.
The red stones are not too popular among customers, but the stable boys quickly recognise the business opportunity they present. These imitation rubies can be crafted into beautiful pieces of jewellery (brooches), but they also provide players with remarkable flexibility: to modify their movement, challenge fortune, or even learn the secret tricks of other players.
As a special feature, the Chapman expansion also offers an asymmetric game mode.
Setup
- Place the end-game marker on the scoring board to indicate that the modified end-game threshold will be 50 dirhams (points).
- Prepare the Chapman figures and the ruby markers according to the number of players, as shown below.
- Add the extra ruby compartment to the Stock Tray (see Figure 2), then place the 20 ruby markers in it as a common supply.
- Shuffle the Chapman deck, then follow the setup instructions for the appropriate number of players:
- 2 players: 3 Chapman figures. Draw 3 Chapman cards. Place 1 Chapman figure at each merchant stall indicated by the cards, and place 1 ruby marker beside the regular goods they offer. Then shuffle the deck again and place it face down beside the board.
- 3 players: 2 Chapman figures. Draw 2 Chapman cards. Place the 2 Chapman figures and 1 ruby marker at the indicated merchant stalls. Then place 1 ruby marker from the common supply at each remaining merchant stall. Shuffle the deck again and place it face down beside the board.
- 4 players: 1 Chapman figure. Draw 3 Chapman cards. Place 1 ruby marker beside the regular goods of each indicated merchant stall. Place the only Chapman figure used in the game at the merchant stall shown on the third card drawn. Shuffle the Chapman deck again and place it face down beside the board.
Ruby limits: The gold and diamond merchant stalls may each hold up to 2 ruby markers, while every other merchant stall may hold only 1 ruby marker during the game. If the same merchant stall is drawn more than once during setup (in a 2- or 3-player game), 2 or even 3 Chapmen may be placed at that stall, but for ruby markers, the given limits must be strictly respected.
- Dealing the Ruby Brooch collector cards: Each player receives a double-sided Ruby Brooch card and chooses which side to use at the start of the game.
- Side A: This side has room for 3 rubies. When it is full, choose one of the following rewards: 6 points on the scoring track, OR 1 ability card of your choice taken from the display. (The other players get no compensation.)
- Side B: This side has room for 4 rubies. When it is full, choose one of the following rewards: 8 points on the scoring track, OR 1 opium, OR 2 favour tokens. (Opium and favour tokens are available only when playing with the Opium and/or Anahita expansions.)
Rule Changes
1. How to acquire rubies? Whenever you buy goods from a merchant stall that has one or more rubies, you must also take a ruby together with the purchased goods (if there are 2 rubies, you must take both).
Place the acquired ruby marker immediately on your Ruby Brooch card. As soon as the brooch is filled (with 3 or 4 rubies), you immediately receive the chosen reward; then return the ruby markers to the common supply, and flip over the card to begin collecting a new brooch on the other side.
- Once the brooch is completed, you must immediately claim the chosen reward. No rubies on it may be spent for any other purpose afterwards.
- Points gained directly from a completed brooch cannot be used to repay a loan or add dirhams directly to your purse.
2. How to use rubies? During your turn, you may spend the ruby markers currently on your incomplete brooch card to perform the following special actions. (Return the spent ruby markers to the common supply.)
Extend movement or re-roll: Discard 1 ruby either to extend your move by 1 space, OR to re-roll the die once. These effects may be freely combined during the same turn.
Example: You want to move 5 spaces, but roll only a 2. You may decide to discard 1 ruby to re-roll the die. If the second roll is a 4, you may discard another ruby to gain the remaining +1 movement and reach your intended destination.
! You may not discard two ruby markers at once to gain a fixed +2 movement.
Purchase discount: By discarding 1 ruby, you may cover up to 1 dirham of the cost of a purchase. However, a purchase may not be paid for entirely with rubies. A ruby marker may not be used to add cash (in dirham) directly to your purse. Only 1 ruby may be used this way during a single purchase.
Copy an ability card: Once per turn, you may discard 2 rubies to copy and use the effect of a continuous (turquoise) ability card that is still available in the common display, OR already owned by another player. If you copy a card from the display, return both rubies to the common supply. If you copy a card owned by another player, return one ruby to the common supply and give the other to the owner of the copied card. (The other players get no compensation.)
The Chapmen's Movement
Whenever you buy goods at a merchant stall where one or more Chapmen are present, you must move those figures after completing the purchase.
- Draw the top card from the Chapman deck.
- Move the Chapman figure to the merchant stall shown on the card.
- At the new location, the Chapman places 1 ruby beside the stall's regular goods, provided that the stall has not yet reached its ruby limit (2 for the gold and diamond merchants, 1 for all others). If the limit has already been reached, no ruby marker is placed.
Multiple Chapmen at one stall (2-3 players): If more than one Chapman figure is present at the merchant stall, you must move all of them separately, drawing a new Chapman card for each figure.
Remaining at the same stall: If the drawn card shows the Chapman's current location, the figure is not moved. However, the Chapman places another ruby there, if the limit allows.
Jumping over: Chapman figures may be jumped over during the movement phase.
Special movement rules by player count:
- 3-player game: Whenever a Chapman moves to either the gold or the diamond merchant, the ruby supply at that stall is immediately replenished to 2 rubies (if possible).
- 4-player game: Whenever the single Chapman figure is moved, always draw 2 Chapman cards. The Chapman places 1 ruby at each of the two indicated merchant stalls (subject to the applicable limits), but the figure itself moves only to the stall shown on the second card, and stops there.
Changes to Base-Game Ability Cards
If you have the ability allowing you to buy any precious metal from any precious metal merchant, or any type of gem from any gem merchant, you may also take a ruby if it is available at the merchant stall where the purchased goods originate.
End of the Game
The final round is triggered when the first player reaches the increased 50-point threshold.
At the final scoring, any ruby markers remaining on an incomplete Ruby Brooch card are worth 0 points (they are lost), unless stated otherwise by an ability card.
Interaction with the Anahita Expansion
If you are playing with both the Chapman and Anahita expansions, the Arbab interacts with the Chapmen as follows:
- If, during his walk, the Arbab reaches a merchant stall where a Chapman is present and there is also at least one ruby there, he ignores the ruby but immediately sends the Chapman away. Draw a Chapman card and move that Chapman to the indicated merchant stall, following the normal rules.
- If the Arbab reaches a merchant stall that holds one or more rubies but no Chapman is present, the stern overseer confiscates one ruby from that stall. Return it to the common supply.
Chapman Card Effects
Continuous abilities
- (x22) Once per turn, you may discard 1 ruby to exchange it immediately for 1 bronze, amber, silver or emerald marker of your choice. This ability may be used only once per turn (you may not discard 2 rubies to gain 2 goods).
- (x23) Whenever you trade (convert) goods based on a caravan tile, you may also hand in 1 ruby together with the required goods. In return, you immediately gain 3 dirhams on your purse track. These dirhams may not be converted directly into points.
End-game abilities
- (y22) At the end of the game, you may discard 1 remaining ruby to choose one available purple ability card from the display. The points awarded by that card are doubled, up to a maximum of 12 points.
- (y23) At the end of the game, each unused ruby remaining on your incomplete Ruby Brooch card is worth 3 points.
For use with the Dervish expansion
- Gain 1 ruby from the common supply.
- Move one Chapman to any merchant stall of your choice. After this special movement, the Chapman does not place a ruby at the new location.
Partner Mode (Asymmetric Variant)
The Partner Mode is an advanced tactical variant that requires the base game together with all four expansions. During setup, each player chooses one permanent partner from among the inhabitants of the Caravanserai (the Dervish, the Opium Dealer, Anahita, or the Chapmen). Throughout the game only that player may benefit from the unique features of that expansion.
Partner Mode Setup
Prepare the game largely as for a standard 2-player game, with the following changes:
Dervish partner
- Remove all Dervish cards that refer to another expansion, but leave the neutral "empty chatter" cards contributed by those expansions in the deck. Place the remaining Dervish deck face down at the Blue Gate.
- As the Dervish partner, you do not obtain Dervish cards in the usual way. At the beginning of the game, draw 5 cards from the shuffled Dervish deck into your hand (and keep them hidden). During your turn (your two moves) you may play 1 Dervish card from your hand.
- If your hand runs out, or you wish to refresh your hand, you must return to the Blue Gate. There, discard all "empty chatter" cards remaining in your hand (and only those cards), then draw from the deck until you once again have 5 cards in hand. If the draw deck runs out, shuffle the discard pile, including the "empty chatter" cards, to form a new draw deck.
Opium Dealer partner
- Remove all ability cards belonging to the Opium expansion from the base turquoise and purple decks. The turquoise cards are instead given to the Opium Dealer player.
- The abilities of these cards are available from the beginning of the game but may each be used only once. After use, turn the card face down. Multiple cards may be used during the same turn.
- The purple Opium ability cards are removed from the game.
- Additionally, at the start of the game, the Opium Dealer player may take any goods worth a total of 2 dirhams, in addition to their chosen silver or emerald (e.g. 1 silver, 1 emerald, 2 bronze, 2 amber, or 1 bronze and 1 amber). This does not reduce the player's normal starting capital of 2 dirhams.
Anahita partner
- This player begins the game with 11 favour tokens.
- Remove Anahita ability cards 10, 11, 12, 15 and 16 from the deck; then place 4 random cards beside the board, instead of 3.
- Reveal the first card immediately; its ability is active from the beginning of the game. The remaining three cards are unlocked by spending 2, then +3, then +4 favour tokens, respectively.
Chapman partner
- Remove the Chapman expansion's four unique ability cards from the base ability decks. The Chapman player places them face up in front of themselves immediately. During the game, that player may also choose from these ability cards when stopping at the Blue Gate, or as the reward for completing an order. In the first case, the cost of the card must be paid as usual. If it is chosen as a reward, the other players receive the goods shown as its cost, as normal.
- Always 3 Chapman figures are used in this game mode.
- The Chapman player begins the game with 1 ruby and places it on the chosen side of their Ruby Brooch collector card.
Starting Positions
At the beginning of the game, players do not start at the gates as usual, but on the space occupied by their chosen partner:
- Dervish partner: the Blue Gate space.
- Opium Dealer partner: the Red Gate space.
- Anahita partner: either of the central pavilion spaces (where Anahita is standing).
- Chapman partner: the space at any merchant stall where a Chapman is present.
The Arbab's Role and the End of the Game in Partner Mode
Using the Arbab in this game mode is optional.
If the Arbab is used: He moves exactly as described in the Anahita expansion. However, he performs none of his usual actions; he simply blocks the space he is occupying. His encounters with other characters apply according to the relevant expansion rules (see Anahita and Chapman). In this version, the game lasts a fixed number of rounds, ending when the Arbab returns to his starting space.
If the Arbab is not used: The final round of the game is triggered when the first player reaches a predetermined score. The recommended minimum is 50 points, but experienced players may use a 56-point threshold in Partner Mode.
Solo Mode
To play Caravanserai in solo mode, you need the Anahita expansion. The solo mode may also be combined with all existing Caravanserai expansions.
Setup
Set up the game in much the same way as in multiplayer mode. The differences are listed below:
- Use only one player board, following the usual setup.
- Take 18 favour tokens and place the rest beside the game board.
- At the Red Gate, draw 3 Minor Order cards (red) at random from the shuffled deck and place them face up side by side. Return the rest of the cards to the game box.
- Roll all the dice (all 4 colours) and place them beside your player board with the rolled values facing up.
- From the turquoise ability cards in the base game, remove cards x1, x2, x3 and x10. These are the cards related to movement and Minor Orders. Then shuffle the new ability card (re-roll - a10) into Anahita's deck.
- If you are using the Dervish expansion, remove the Dervish card that allows you to choose from 3 Minor Order cards. Then, shuffle the 3 additional Dervish cards from the Anahita expansion into the Dervish deck.
- Position the Arbab figure according to the multiplayer setup rules (he immediately performs an action).
- If you are using the Opium expansion, follow its usual setup, but in solo mode only 2 opium tokens are used.
- If you are using the Chapman expansion, follow its setup instructions for 2 players. The Arbab also removes a ruby from the merchant stalls, if there is any.
General Changes to the Base Rules in Solo Mode
- You may move your stable boy only by using the dice, and choosing one of the pre-rolled dice values as movement limit. Once all four dice have been used, roll them all again.
- Goods are never replenished at the merchant stalls once they have run out. Instead, whenever you complete a Major Order, the goods shown on the ability card you choose as your reward are used to refill the corresponding merchant stalls, up to their normal limit.
- Each time, when you have moved your stable boy using a selected die (and completed the corresponding action), the Arbab moves, but only 3 spaces. (As in the multiplayer game, the final round is triggered when he returns to his starting space.) However, while you are moving Anahita (even multiple times in succession), the Arbab remains where he is.
Changes to the Arbab's Actions
The Arbab always moves exactly 3 spaces, then stops, and performs his action applicable to the space.
- At the towers, the Arbab doesn't simply turn the Major Order cards face down - he removes them from the game permanently. Immediately replace each discarded card with a new one.
- At the Red Gate, the Arbab discards one Minor Order card: shuffle the three cards, choose one at random to discard, then put the remaining cards back to the Red Gate. As a result, the Minor Order display may run out.
- At the Blue Gate, the Arbab discards only one of the available ability cards. You choose which of the two outermost cards is discarded. Then slide the remaining cards outward before refilling the display. You receive the goods shown as the cost of the removed card from the common supply.
The final round begins when the Arbab returns to his starting space. You then have one final turn, during which you may make one move with your stable boy (using a die) and any number of moves with Anahita (by spending favour tokens). Scoring is then carried out as usual.
Anahita's Abilities
Unlock Anahita's first ability card after spending 3 favour tokens, the second after spending 5 additional favour tokens, and the third after spending 7 additional favour tokens.
Can you beat your own high score in the next game?