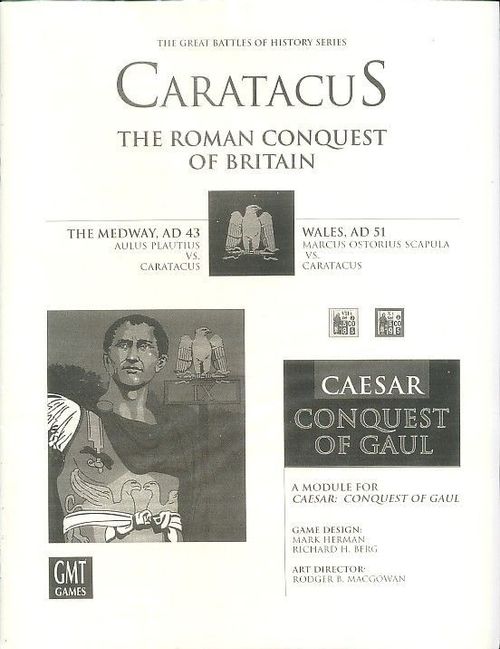
Caratacus: The Roman Conquest of Britain
Caratacus: The Roman Conquest of Britain Rulebook
Table of Contents
Table of Contents
Components
Counters: the 40 counters of this module must be supplemented by the counters from CAESAR: CONQUEST OF GAUL (CoG). CoG is therefore required; the module alone is not sufficient. The rules list the counters from the module and those from CoG separately.
Map: the Medway map follows the views of John Peddie (see below) on the most probable crossing point. Nobody can say exactly where in Wales Caratacus fought his last battle. Peddie reasonably suspects it was the fortified hill of Caersws and gives us an idea of the terrain, which we supplemented with the details from Tacitus' Annals.
Unit abbreviations are kept as they appear in the German-language text (for example CH = chariots, LI = light infantry, SK = skirmishers / Plänkler). Other abbreviations are likewise kept as printed.
Corrections to CoG Components and Rules
These corrections must be applied to CoG.
Counters
- We forgot the counter for Legates who have passed. An upside-down eagle marker can serve as a substitute.
- The markers for a predetermined retreat have no function, because there is no rule for it.
- Roman SK correctly have no reverse side.
Changes to Rules
4.1 Ability for line command, first sentence: refers to section 4.3, not to 4.25-7). Also, the section on tribal chiefs has nothing to do with it (references to it are to be struck out). These are dealt with in 4.5.
4.62 The leader is removed from the game only if he is alone on the map.
6.98 Cohorts of one legion together in the same hex have no plus-1 modifier to the die roll in a troop quality test.
10.46 This rule must be distinguished from rule 10.43. 10.43 uses only Influence (Ausstrahlung) to rally units. 10.46 uses only the Rally/Hit table (which, we admit, unfortunately is missing ... but see below). In the example, Initiative is mentioned in error instead of Influence.
British chariots: British LI on chariots may not seek melee. To do so they must dismount. LI may move on mounting or dismounting, and add together the movement points of their old and new status.
Additional Rules
7.15 Change of facing as a reaction. Each unit (except units in enemy ZOC) may change its facing by one angle per phase as soon as an enemy moves right up to it. After the change of facing, a die is rolled (for foot troops only). If the number rolled is higher than the cohesion value, the difference counts as the number of hits.
Changes to Lists
Cohesion hits and troop quality list: for type D, the plus 1 for Influence does not apply.
Movement cost list: (2) does not apply to the cost of changing facing.
Stacking - Reference Lists (Zusammenstehen)
Basis: British units on chariots (LI + CH) count as one unit.
Cohorts of different legions: if a cohort flees through a cohort of another legion, only the standing unit takes a hit.
Rally/Hit Table [10.46] (missing from CoG)
The Rally/Hit table [10.46] is missing from CoG. (It exists in DIE GREAT BATTLES OF JULIUS CAESAR: DIE CIVIL WARS, TCW.) Here it is:
Rally/Hit Table [10.46]
| Die roll | Printed troop quality 3-5 | Printed troop quality 6-9 |
|---|---|---|
| 0, 1 | 1 | 1 |
| 2-5 | 2 | 2 |
| 6, 7 | 2 | 3 |
| 8, 9 | 3* | 4 |
Notes:
- If a unit is already weakened, add +2 to the die roll.
- * A unit of troop quality 3 continues to flee.
Rules Changed for This Module
4.52 CH (also with LI) are handled as a separate group for the purposes of activation. The Britons therefore have three different groups: CH, foot, and mounted.
10.45 There are no camps. Rallying is done by a leader or by an eagle marker. This also means that points 2 and 3 of 10.32 (direction of retreat) fall away.
Movement cost list: the movement cost list on the last page of this booklet applies (see the Movement Cost Table below).
Invalid CoG Rules
The following CoG rules do not apply in this module:
- 6.4 Movement in marching column
- 6.7 Camps
- 6.8 Barbarian Impetuosity [b]
- 8.5 Barbarian Ferocity [b]
- 10.5 Pursuit by cavalry
a The Romans do not use a real proconsul/legate system [4.21]. The mechanics, however, are the same.
b The Britons are mobile guerrillas who strike and run away, rather than ordinary Gallic berserkers.
Scenario 1: The Battle of the Medway
Aulus Plautius against Caratacus. Kent, AD 43.
Background
The invasion force of Emperor Claudius (four legions, cavalry, and auxiliaries under Aulus Plautius) landed in AD 43 in what is now Kent. The Britons under Caratacus, who had been warned of the coming invasion, gathered their main army north of the River Medway while harassing the advancing enemy with small attacks. Peddie estimates the total at 150,000 men, half of them Catuvellauni, whose chieftain was Caratacus. Followers of Delbrück will sneer, but all sources agree that the Britons outnumbered the Romans, and Plautius must have had about 35,000-40,000 men (in total, though not all of them were on the battlefield).
Plautius first took Durovernum (Canterbury) and, despite British attacks, occupied the territory of the Atrebates and Cantiaci south of the Thames. His next target was Camulodunum (Colchester), capital of the Catuvellauni, north of the Thames. Access to that river was controlled by the River Medway, behind which Caratacus assembled his army.
Caratacus did not believe Plautius could bridge the Medway. But Plautius had brought Batavians in legion strength, specialists in crossing rivers. The Britons were massed beyond the river, and Plautius chose a double envelopment across it. He had the Batavians cross the river on the right of the Roman line, and on the left flank, upstream, Legion II Augusta attempted the same, less successfully. Legion XIV Gemini held the centre, pinning the enemy across the river, and was reinforced from the south by Legion XX Valeria.
The Batavians crossed the river unnoticed, moved north, and blocked Caratacus' line of retreat across the Thames. They were attacked there by a large number of Britons on chariots. This drew Caratacus' attention away from his right flank, where Legion II Augusta, which had only just crossed the river, was attacking. The Romans were surprised by how stubbornly the light but numerous British army defended itself, supported by many foot troops armed with huge, heavy swords. The battle lasted two days, and the Britons withdrew northward in good order. Caratacus was able to save the bulk of his army and regroup beyond the Thames.
British Forces
The British "army", if it can be called one, was a loose gathering of tribal warriors held together only by the person of Caratacus. These are light troops, very mobile but lightly (practically not at all) armoured. The British EI had huge swords (see below).
The Britons have the following units from CoG:
- British CH (1-22)
- British LT (1-22)
- British LC (1-4)
- Leaders Taximagulus, Cingetorix, Segovax [a]
The Britons have the following units from the module:
- Leaders Caratacus (OC) and Togodumnus [b]
- British LT (23-30)
- British LC (5-8)
- British BI (1-20)
a These are the chieftains of the Trinovantes, Atrebates, and Cantii.
b The only identified British leader on the battlefield is Caratacus, the (not uncontested) chieftain of the Catuvellauni. Togodumnus, partner of Caratacus, was killed before or during the Medway battle. This is hard to establish, so we kept him in the game.
Roman Forces
The following are all taken from CoG:
- Legions VII, VIII, and IX with eagle markers and catapults [a]
- 4 Gallic RC
- 4 Gallic LN
- 3 Cretan archers
- 4 Balearic slingers
- Nameten BI (4-7) [b,d]
- Nameten LI (1-2) [b]
- Cohorts 8 and 9 of Legion X [b]
- Cohorts 8 and 9 of Legion XII (Vet) [b]
- Cohorts 2 and 3 of Legion XIV [b]
- Legion XIV Aquila (stands for the Batavian Legion) [b]
The Roman player uses the following leaders from the module (assignment to legion by name in game / historical name):
- Plautius (OC), Vespasian (VII / II Augusta), Publius Ostorius Scapula (VIII / XIV Gemini) [c], Hosidius Geta (IX / XX Valeria), Cnaeus Sentius (Batavians), and Didius Gallus (cavalry)
a These legions were actually present (II Augusta, XIV Gemini, and XX Valeria), and all were obviously of the highest quality. Plautius also had Legion IX Hispana, but its task was to secure the rear.
b These units formed the "Batavian Legion" under Plautius and were at least half made up of cohorts from legions that had gaps in their strength. The Nameten are the actual Batavians, experts in crossing rivers. The Batavians have no catapults.
c The counter represents Publius and Marcus Ostorius Scapula, father and son.
d Important: the Nameten BI, disguised as Batavians, are treated like MI, not like BI.
Setup
The Britons set up first. Their army is deployed as follows:
- All CH, each together with an LI in the same hex, within five hexes of 4507, and all on terrain level 2.
- All other LI and all BI within 4 hexes of 4513.
- British cavalry on terrain level 2 within a radius of 2 hexes of each non-chariot unit.
- Leaders are placed freely.
The Roman player sets up his units as follows:
- Legion VII (Vespasian, legion commander), one archer/SK, one slinger/SK, two RC, and the legion's catapult unit within two hexes of 5601.
- Legion VIII (Ostorius Scapula), one archer/SK, one slinger/SK, two RC, and the legion's catapult unit within two hexes of 3901.
- Plautius, the four LN cavalry, and Didius somewhere south of the Medway.
Roman Reinforcements
The Britons receive no reinforcements. The following Roman legions come into play as follows:
- Sometime in turn one: the Batavians (the Roman units marked with a [b], and Cnaeus) enter between hexes 2805 and 2807. All Batavian cohorts already have one hit; the Nameten do not.
- Turn 4: Legion IX (XX Valeria), commander Hosidius Geta, one archer/SK, one slinger/SK, two RC, and the legion's catapult unit enter over any terrain level 2 hex along the southern part of the map (3800-5200).
Terrain
The Medway was not an easy river to cross, so Plautius took the Batavian "Legion" with him.
- No unit may enter a river-only hex such as 4604.
- All non-skirmisher (SK) units pay one extra point (in addition to other terrain costs) to cross the river, for example from 5703 to 5804, and take two hits. (The German text reads "und bekommen zwo Treffer ab" at this point, which is not clearly connected to the sentence; transcribed as printed.) Thus a cohort moving from 5703 to 5804 pays three movement points, because the level 1 terrain is marshy (more on this below).
- SK units cross the river without hits that affect cohesion.
DESIGN NOTE: The Batavians were good at crossing rivers, so this whole group takes no hits during setup. (This design note conflicts with the Roman Reinforcements entry above, which says all Batavian cohorts already have one hit. Both are transcribed as printed.)
The terrain levels do not only mean differences in height but also different types of ground.
- Level 1 is marshy (but not swamp like hex 3527).
- Levels 2 and 3 are open ground. (Well, level 2 is sand and chalk, but we do not want to go that far in a game.)
Initiative
Rome begins with a command, one legion of its choice, then continues as usual.
British Leaders
The Britons have two overall commanders (OC): Caratacus and Togodumnus. Only they are activated. Their subcommanders are activated under 5.12. If Caratacus is activated, he can activate all units of TWO subcommanders within his range. If a subcommander is out of range, he cannot be activated. Togodumnus can activate only ONE subcommander.
An OC activates units only through their subcommanders and has only one range. An OC may attempt Trump and Momentum, but one of his subcommanders cannot be activated a second time in one turn.
The other three leaders (Taximagulus, Cingetorix, and Segovax) each command one type of unit:
- LI and chariots
- BI
- cavalry
They use commands and ranges for lines under 4.53. They are not entitled to Trump and Momentum.
British Swords
HISTORICAL NOTE: Many Britons had large, sweeping swords, quite unlike the Roman gladius (short sword), which was better suited to thrusting. These weapons were very effective in single combat. "In close combat in dense bunches, which the Romans practised and sought" (John Peddie, Conquest: The Roman Invasion of Britain; translated back from the German, as the English wording was not available) — this advantage was nullified.
In the game, all British BI have these great swords and are superior in attack when their Roman opponent has a flank with no Roman unit or ZOC on it.
Roman Catapults
Catapults cannot cross the Medway.
Retreat
Romans (except legionaries) retreat toward the river (not to an eagle marker). If they are at the river and must move onto a river hex, they are removed from the game. Batavians are legionaries and retreat to the eagle of Legion XIV Aquila.
The Britons retreat toward the Thames, to hexes 2828-3127.
Victory
Caratacus tries two things: 1. to inflict losses on Plautius, and 2. to withdraw in good order to the Thames (in the north of the map).
The Britons win by collecting victory points (VP). When they have 35 together, they win. They earn points as follows:
- 1 VP for each LI, BI, or cavalry unit that does not leave the map in flight through hexes 2828-3127.
- 1 VP for each weakened Roman unit on the map.
- 2 VPs for each enemy unit removed from play or in flight.
At least 10 VPs must come from the state of the Roman troops. Merely escaping over the Thames to picnic in London is not enough!
Rome wins at the end of a turn in which the Britons have 80 flight points together, or when no Britons remain on the map (and they have not won).
Flight Points
As in CoG, with the special feature that Caratacus, as the only leader, has a value of 10 flight points.
Scenario 2: Caratacus' Last Battle
Marcus Ostorius Scapula against Caratacus. Wales, AD 51.
Background
Caratacus was hunted for almost ten years through the southern half of the island, and he chose to make his last stand on a fortified hill in Wales that cannot be identified with certainty. Legion XIV Gemini under Marcus Ostorius Scapula was given the task. Caratacus sat on top of the fortified hill, surrounded by stone walls. The Romans fought their way slowly and laboriously up to the top of the hill in testudo formation, killed most of the Britons there, and scattered the rest. Caratacus fled into the deceptive safety of the arms of Cartimandua, queen of the Brigantes, who immediately handed him over to Scapula. He was shipped to Rome as the high point of the victory procession.
Play Time and Balance
Play time: a simple scenario, without activation and command rules, playable in one to two hours.
Balance: the Romans suffer some hits marching uphill against the Britons. To raise the tension, rallying instead of at the eagle markers should be allowed only through Scapula. In the opinion of the test players, this produced a balanced game.
British Forces
What remained of Caratacus' army, in our view:
- 15 LT (7-21) (from CoG)
- 10 BI (1-4, 15-20) (included in the module)
- Caratacus (in the module)
Note: British BI have British swords (see the Medway).
Roman Forces
- Legion VIII with catapult and eagle markers (represents Legion XIV Gemina) (CoG)
- 2 SK Cretan archers (CoG)
- 2 Helvetian LI-J (1-2) (CoG)
- 2 Gallic RC (CoG)
- Scapula (in the module)
British Setup
The Britons stand on any hexes of terrain level two and higher. (In fact they did not stand on the crest to the left of the main hill, but this is permitted.)
Roman Setup
All Romans enter the battlefield over hexes 1000 to 1028. They must cross the brook to do so.
Changes to the Basic Rules
Command and activation rules are dropped. The players alternate turns: first the Roman player (who moves all the units he wants), then the Briton. No Trump, no Momentum. All units are always under command. Leaders can rally only with their Influence, according to the rules for that. The Romans rally at the eagle markers under 10.44.
Terrain
The special feature of the terrain (which exists in no other game of the series) is the walls, very probably simply heaped stones. A defender behind them is protected against close-combat superiority under the table of the same name (this does not apply to superiority by position). So a cohort in hex 1513 is not close-combat superior to a LI in hex 1614, unless it is so by position.
Walls do not protect (and do not change the die roll) against fire. They do not block line of sight (LOS).
Terrain levels 4 to 6 are steep slopes.
Stones Thrown by the Britons
All British LI are slingers.
Testudo (Latin: testudo)
Roman cohorts may form the testudo. They do so especially during sieges and when fired on from above, as here. The state may be marked with testudo markers from TCW or with the Veneti ships from CoG.
It costs a cohort 2 MP to form the formation (the marker is then placed on top), and dissolving it costs 1 MP. A unit cannot form and dissolve the testudo in the same turn. A unit in testudo formation:
- has a movement allowance of 3 (or 1 hex, whichever is greater);
- has its troop quality (TQ) raised by one;
- may neither practise melee nor fire;
- receives two added to its fire die roll;
- if it enters melee, receives TWO hits in addition to the result of the melee result table, and is no longer in testudo formation.
All other influences on the die roll and adjustments remain in effect.
Direction of Retreat
The Britons retreat uphill and from there off the map entirely. If they do not observe the eagle-marker rule, the Romans retreat toward the brook.
Victory
Marcus Ostorius Scapula tries to annihilate Caratacus. Caratacus wants to inflict losses on the Romans and survive. That means Scapula must kill or scatter the Britons before he suffers too many losses (fewer than 100 flight points). So ...
The Romans win if they sweep the Britons off the map or put them to flight before the Britons reach the level of flight points that triggers their own flight.
The Britons win if the Romans reach their flight level of 30 flight points before all Britons have fled or left the game.
(The text gives both a 100-flight-point limit on Roman losses and a 30-flight-point Roman flight level. Both are transcribed as printed.)
Flight Points
As in CoG, but leaders count for nothing.
Game Note
Historical reality was that Caratacus had no chance of shaking off the Romans.
Historical Sources
Peddie, John, Conquest: The Roman Invasion of Britain. Smurthwaite, David, The Complete Guide to the Battlefields of Britain. Tacitus and Dio Cassius.
Tables
Movement Cost Table [6.2]
Transcription caveat: in the source PDF the movement cost table's rows, column headers, and cell values are printed as separate blocks, and the cell-to-terrain alignment is not preserved. The values below are listed in the order they appear in the source; they could not be matched to their rows and columns with confidence. Verify against the English original (or the CoG movement cost table, as amended) before relying on this table.
Notes:
- NA = forbidden (verboten).
- a: units not named suffer no hits from movement.
- c: all foot troops (except cohorts and skirmishers), all cavalry, and all chariot units pay one MP per angle for turns. Cohorts turn any distance for 1 MP, and skirmishers turn at no MP cost (under 7.12 and 7.13).
- e: uneven terrain is woods and swamp.
Terrain types, field: flat (eben); woods (Wälder); marshy (sumpfig, level 1); swamp (Sumpf); all river (Medway).
Hexside: brook (Bach) (Wales); wall (Mauer); gradual rise (allmählicher Anstieg); steep rise (steiler Anstieg); gradual descent (allmählicher Abstieg); steep descent (steiler Abstieg).
Printed block after the terrain labels: 2 / 0 / NA, followed by the line "Movement forbidden to all land units" (Bewegung allen Landeinheiten verboten).
Printed modifier column: +1 / +1 / ÷1 / +1 / +0 / +0.
Printed value grid (3 columns, 3 rows):
| 0 | 0 | 0 |
| 0 | 1 | 1 |
| 0 | 1 |
Printed value grid (3 columns, 6 rows):
| 0 | 1 | 1 |
| 0 | 1 | 2 |
| 0 | 0 | 0 |
| 1 | 1 | 2 |
| 0 | 0 | 0 |
| 0 | 1 | 1 |
Turning:
- Turn (per angle): 1 [c], 0, 0, 0
- PLUS turning in uneven terrain (per angle): 0, 0, 1, 1
Cohesion-hit and movement-cost block for entering/crossing (headed "Zusammenhaltstreffer [a] beim Betreten/Überqueren", columns LI/BI and CH/Reiterei): printed MP costs for entering/crossing 1, 2, 2, 2, 1.
Rally/Hit Table [10.46]
Identical to the table under "Rally/Hit Table [10.46]" in the CoG corrections above.
Printed die-roll/troop-quality values: 0,1 → 1 / 1; 2-5 → 2 / 2; 6,7 → 2 / 3; 8,9 → 3* / 4 (for printed troop quality 3-5 / 6-9).
Notes: if already weakened, +2 to the die roll. * A troop of quality 3 continues to flee.