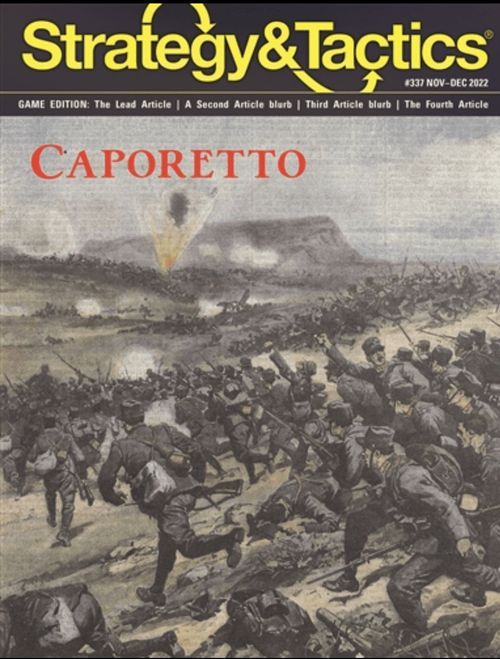
Caporetto: The Italian Front 1917–1918
Caporetto: The Italian Front 1917–1918 Rulebook
Table of Contents
Table of Contents
- Errata and Notes to Players
- 1.0 INTRODUCTION
- 2.0 COMPONENTS
- 3.0 SET UP
- 4.0 SEQUENCE OF PLAY
- 5.0 VICTORY CONDITIONS
- 6.0 RANDOM EVENTS
- 7.0 MOVEMENT
- 8.0 STACKING
- 9.0 ZONES OF CONTROL (ZOC)
- 10.0 MORALE
- 11.0 COMBAT
- 12.0 ADVANCE AND RETREAT
- 13.0 REINFORCEMENTS, REPLACEMENTS, AND WITHDRAWALS
- 14.0 SUPPLY
- 15.0 HEADQUARTERS
- 16.0 ARTILLERY, AIR, AND NAVAL SUPPORT
- 17.0 OPERATIONAL PAUSE
- 18.0 DESIGNERS NOTES
- 19.0 OPTIONAL RULES
- Charts and Tables
Errata and Notes to Players
Note to Players: Please note the following counter and map errata:
- Austro-Hungarian 1st Cavalry Division is a GT 5 reinforcement and should be marked with R5 in the upper right corner.
- Austro-Hungarian 64th Infantry Division is an at-start unit, and the R3 designation on the reverse (reduced) side of the counter should be disregarded.
- Italian 7th Infantry Division reverse (reduced) side attack and defense factors should be 2 and 3, respectively.
- The stacking limit for units in Marsh hexes is 2.
- The Pusteria Valley designation in hexes 3510–3511 should be white.
- The town of Vittorio Veneto (hex 2511) should be Vittorio.
Note: The insert's instruction for removing the rules from the magazine and the Decision Games copyright line are not reproduced.
1.0 INTRODUCTION
Caporetto: The Italian Front 1917–18 is a simulation of the last year of the Italian Front, from the Central Powers' offensive of the Fall of 1917 until the end of the war in October 1918. In this game, both players command powerful but relatively fragile forces: the armies of Italy and Austria-Hungary that, in the last year of the war, were at the end of their tether.
1.1 Game Scale
Each game turn represents 1 month. Each hexagon is 10 kilometers from side to opposite side. Units are divisions, brigades or equivalents.
2.0 COMPONENTS
A complete game of Caporetto includes a 22×34-inch game map, rule set, and a sheet of 228 9/16-inch counters. Players must provide one six-sided die (1d6) to resolve combat and other random game issues, and an opaque container for use with Random Events markers.
2.1 Map
The map shows the Italian front boundaries as they were in 1917. The national boundaries (white lines) depict the 1914 border. The yellow line depicts the frontline in late October 1917. A hexagonal grid has been superimposed over the terrain features on the map to regularize the movement and positioning of the playing pieces. The hexagons are called "hexes" in the game rules.
2.2 Counters
The counters are referred to as "units" for military forces and "markers" for informational pieces. There are three types of counters: combat units, support units, and markers.
2.3 Combat Units
Front: Unit # or Name, Unit Size, Number of Steps, Unit Type Symbol, Attack Factor, Movement Factor, Defense Factor. Back (reduced).
2.3.1 Unit Types
- Infantry
- Assault Infantry (infiltration capable)
- Army HQ Front (support)
- Mountain Infantry
- Cavalry
- Headquarters (HQ)
- Army HQ Back (movement)
2.3.2 Unit Sizes
- XXXX: Army
- XX: Division
- XX: Gruppe
- X: Brigade
- III: Regiment
2.3.3 Nationalities and Abbreviations
Austria-Hungary
- Bk: Bosniak
- Ed: Edelweiss
- Geb: Gebirgs (Mountain)
- GR: Gruppe Riva
- H: Hónved (Hungarian Army)
- Is: Isonzo
- KJ: Kaiser Jäger (Kaiser Light Infantry)
- K-u-K: Kaiserlich und Königlich (Imperial and Royal)
- L: Landsturm
- Ry: Rayon (Defensive Area)
- Sch: Schutzen (Austrian Army)
Germany
- AK: Alpenkorps (Alpine Corps)
- Jgr: Jäger (Light Infantry)
Italy
- Alp: Alpini (Mountain Troops)
- Ard: Arditi (Assault Infantry)
- VG: Venezia Garrison
Czech
- CL: Czech Legion
France
- C: Chasseurs (Light Infantry)
Great Britain
- BFI: British Forces in Italy
- SM: South Midland
2.4 Support Units
Support units are Artillery (front & back), Naval, and Air (front & back).
2.5 Markers
Morale; Casualties (front & back); Replacement Points; Out of Supply; Game Turn (front & back); Random Events (front & back).
2.6 Charts and Tables
These include a Terrain Effects Chart (TEC) and Terrain Key, Game Turn Record Track (GTRT), Casualty Track, Combat Results Table (CRT), Morale Table, Morale Track, Replacements Chart, Withdrawals Chart, and Random Events Chart.
3.0 SET UP
3.1 General
Set up according to the following general rules. The Allies set up first, followed by the Central Powers.
Important: Allies refers to Italian, British, French and Czech units. Central Powers refers to Austro-Hungarian and German units.
3.2 Allied Setup
- Initial Forces
- a) 1st Army: Deploy on frontline hexes from hexes 3099 to 2304: 1st Army HQ, 14 infantry divisions, 2 Alpini regiments.
- b) 4th Army: Deploy on frontline hexes from hexes 2405 to 3311: 4th Army HQ, 6 infantry divisions, 2 Alpini regiments.
- c) 2nd Army: Deploy on frontline hexes from hexes 3412 to 2520: 2nd Army HQ, 26 infantry divisions, 2 Alpini regiments.
- d) 3rd Army: Deploy on or within one hex of the frontline from hexes 2420 to 2319: 3rd Army HQ, 9 infantry divisions. Both frontline hexes must be occupied by at least two Italian divisions.
- e) Venezia Garrison (VG): Venezia (hex 1911)
- GHQ Reserve Units: All 11 GHQ reserve units (units with a white triangle in the upper right corner) must deploy within 6 hexes of frontline hexes.
- Morale: Place the Italian morale level at −1 on the Morale Track.
- Random Events: Place "A" random events in an opaque container. Place "B" random events in the box for Game Turn (GT) 7 (April 1918) of the GTRT (6.0).
- Support Markers: Place all Allied air and artillery support units aside. All Italian support units are available on GT 1; British and French support units are available on GT 3 (16.0).
- Reinforcements: Place all reinforcement units (reinforcement units have a turn number in their upper right corners) in the corresponding box of the GTRT.
Important: The Allies may choose which divisions/regiments deploy with the various armies. All units must deploy on the Allied (southern/western) side of the frontline and must observe stacking limits unless employing optional rule 19.5.
3.3 Central Powers Set Up
- Initial Forces
- a) Army Group Conrad: Deploy on or within one hex of the frontline from hexes 3299 to 3317: 10th and 11th Army HQ, 9 Austro-Hungarian infantry divisions, 4 mountain brigades, Gruppe Rive, Rayon I, Rayon II.
- b) Army Group Archduke Eugen: Deploy on or within one hex of the frontline from hexes 3218 to 2320: 1st and 2nd Isonzo HQ, 14th Army HQ, 27 Austro-Hungarian infantry divisions, 7 German infantry divisions.
Important: Assault infantry divisions are treated as regular infantry divisions for deployment. The Central Powers may choose which Austro-Hungarian divisions deploy with either army group. All units must deploy on the Central Powers (northern/eastern) side of the frontline and must observe stacking limits unless employing optional rule 19.5.
- Morale: Place the Austro-Hungarian morale level at 0 on the Morale Track.
- Support Units: Place all German and Austro-Hungarian air, naval, and artillery support units aside; they are available on GT 1 (16.0).
- Reinforcements: Place all German and Austro-Hungarian reinforcement units in the corresponding boxes of the GTRT.
3.4 Hex Control
Control of hexes is attributed to the last player that entered that hex.
4.0 SEQUENCE OF PLAY
Every game of Caporetto is divided into 13 game turns. Each complete Game Turn (GT) is divided into two Player Turns. Play is initiated by the Central Powers Player Turn, followed by the Allied Player Turn, with these comprising one complete GT. Both player turns are further divided into a series of sequenced phases. Every action taken by a player must be carried out in the appropriate phase of his own player turn.
4.1 The Turn Sequence
Each GT consists of the following phases, which are conducted in the order as given.
Important: GT 1 begins with the 1st Combat Sub-phase for the Central Powers.
- Random Events Phase: A Random Events Marker is drawn from the pool and results are applied (6.0).
- Reinforcement Phase: Both sides receive any reinforcements scheduled for that GT. Reinforcements scheduled for entry are placed in the GTRT (13.0).
- Replacement Phase: Both sides use their respective amount of Replacement Points (RP) to rebuild/replenish units (13.0).
- Withdrawal Phase: Both sides, starting with the Central Powers, withdraw units as determined by Random Events (6.0) or by the Withdrawal Schedule (13.0).
- Strategic Movement Phase: Both sides, starting with the Allies, can perform strategic movement (7.12).
- Operations Phase:
- a) Central Powers Segment
- 1st Combat Sub-phase
- Infiltration Sub-phase
- 2nd Combat Sub-phase
- Movement Sub-phase
- Supply Sub-phase
- b) Allied Segment
- 1st Combat Sub-phase
- Infiltration Sub-phase
- 2nd Combat Sub-phase
- Movement Sub-phase
- Supply Sub-phase
- a) Central Powers Segment
Important: Allies may not conduct an Infiltration Sub-phase until GT 3 when the first Allied (French) assault infantry units arrive.
- End of Turn Phase:
- a) Determine Morale Loss (10.3).
- b) Return Austro-Hungarian and Italian Casualty markers to 0 on the Casualty Track.
- c) Determine Victory Conditions (if last GT) (5.2).
5.0 VICTORY CONDITIONS
The game can be won either by VP at the end of the last GT or by Sudden Death.
5.1 Venezia (Central Powers Sudden Death Victory)
- The Central Powers achieves a Sudden Death Victory if Venezia (hex 1911) is captured on GTs 1 or 2.
- If Venezia is captured on any subsequent GT, the Central Powers player rolls 1d6; if the result is 5–6: the Central Powers achieve a Sudden Death Victory. A +1 die roll modifier (DRM) is applied if Italian Morale is −3 or lower (10.0).
Important: This is a onetime event—if the die roll fails, the Central Powers player cannot roll again in subsequent turns.
- The Allies can never win a Sudden Death Victory.
5.2 Victory Points
At the end of GT 13 (October 1918) each side counts the number of VP hexes which they control. To be considered "controlled" the unit(s) occupying the VP hex must be able to trace supply to one of their respective supply source hexes (14.2).
- Add 1 to the Allied VP total if Austro-Hungarian morale is −3 or lower.
- Add 1 to the Central Powers VP total for each Italian Mobilization (13.2.1).
5.3 Victory Conditions
After totaling VP and applying any modifiers:
- If the Allied VP total is 8 or more than the Central Powers total: then the Allies win.
- If the Allied VP total is less than 8 or more than the Central Powers total: then the Central Powers win.
Editor's note: the printed condition in the last bullet reads "less than 8 or more than the Central Powers total," as in the source; the second condition appears to have been intended as "less than 8 more than" (i.e., fewer than 8 points ahead). Transcribed as printed; flagged for review.
6.0 RANDOM EVENTS
Random Events depict a variety of real-world and chance incidents which could (and historically did) impact the campaign.
6.1 General
There are two sets of Random Events—"A" Events for GT 1 through 6, and "B" Events for GT 7 through 13.
6.2 Event Selection
- During setup, place "A" events in an opaque container. At the beginning of each GT, either side randomly pulls one event marker. Check the Random Events Chart for the selected marker and apply effects.
Exception: An Event Marker is not played for GT 1.
- Certain markers may only be played once and are removed from play after being picked. These markers are noted on the Random Effects Chart.
- At the beginning of GT 7, "A" events are removed from the pool and "B" events are added prior to selecting a marker for that GT.
7.0 MOVEMENT
During the friendly Movement Sub-phase, as many units as desired may be moved up to the limits of their respective Movement Factors.
7.1 General
Each unit has a movement factor (MF) printed on it. Units are moved tracing a path of contiguous hexes until all movement points (MP) are expended or the owning player decides to cease moving the unit, whichever comes first. As each unit enters a hex it pays one or more MP from its MF. Consult the Terrain Effects Chart (TEC) printed on the map sheet for specific movement costs.
7.2 Restrictions
Unused MP may not be accumulated from GT to GT, nor may they be transferred from one unit to another.
7.3 Minimum Movement
All units may move at least one hex per Movement Sub-phase. However, units may never enter an enemy occupied hex or prohibited hexes.
7.4 Enemy Zones of Control (EZOC)
Units must stop movement when entering an EZOC and may not move any farther during the Sub-phase. Units that begin the Movement Sub-phase in an EZOC may not move.
7.5 Infiltration
Assault infantry units may move from one EZOC to another during the Infiltration Sub-phase (11.8). Assault infantry units may also move up to their full MF during the Movement Sub-phase even if they conducted infiltration movement.
7.6 Advance/Retreat after Combat
Advance and/or retreat after combat are considered combat results. As a result, MP are not expended for this type of movement (12.0).
7.7 Terrain
- To enter any given hex a unit must spend the number of MP designated by the TEC for the kind of terrain in it. When the TEC calls for a movement point expenditure to cross a hexside, such as a river, that cost is in addition to the cost for entering the hex.
- If there is more than one terrain type in a hex, use the highest single movement cost from among all the terrain involved.
7.8 Railroads and Bridges
- A unit which moves from one railroad hex directly into an adjacent railroad hex through a hex side traversed by that railroad expends one half (½) MP per hex entered regardless of other terrain in the hex.
- A river hexside crossed by a railroad is considered a bridge hex. Bridges negate the effects of rivers on movement for units crossing such hexsides but only if both hexes across are under friendly control. Bridges are indestructible for game purposes.
7.9 Alpine Terrain
Entering Alpine terrain costs the entire MF of a given unit. Only mountain units can enter alpine terrain hexes. Lines of Supply may not be traced through Alpine hexes (14.0).
7.10 River & Lake Hexsides
Units pay the movement cost of other terrain in a hex when crossing a river or lake hexside. That cost is in addition to the cost of entering the next hex.
7.11 Weather
- In winter turns (marked on the GTRT) movement costs change for certain types of terrain.
- a) Alpine Terrain: Impassable for all units including mountain units.
- b) Mountain Terrain: Movement costs are doubled for all units.
- c) Rivers: Movement costs for crossing rivers are doubled. HQ can only cross rivers across bridged hexsides (7.8).
- When the Torrential Rain Random Events marker is picked, movement costs are doubled in clear, marsh, and rough terrain hexes (6.0).
7.12 Strategic Movement
Both sides may move a limited number of units each GT via strategic (intra-theater) movement.
- During the Strategic Movement Phase, both sides, starting with the Allies, may move units from one friendly controlled hex to another. The unit is simply moved across any number of friendly controlled hexes to another friendly controlled hex. The moving unit cannot be in an enemy zone of control (EZOC) at the beginning of the move, but may end the move in an EZOC.
- Units may not use strategic movement to move to a hex in which they would otherwise be OOS (14.1).
- The Allies may move up to five units of any type, including HQ, via strategic movement.
- The Central Powers may move up to four units of any type, including HQ, via strategic movement.
8.0 STACKING
Having more than one friendly unit in a hex at the same time is called stacking. Stacking limits vary by terrain type and are listed on the TEC in terms of units. Each unit in the game, no matter its nominal organizational size, is considered a single unit for stacking purposes.
8.1 Stacking Limits
- Stacking limitations apply for all units of both sides at the end of each Movement and Combat Sub-phase.
- Friendly units may move through hexes occupied by other friendly units at no extra cost, but may never enter a hex containing an enemy unit or stack.
- There is no limit on the number of friendly units that may pass through a single hex or cross a single hexside in one Movement Sub-phase.
- If a hex is overstacked at the end of any Movement or Combat Sub-phases, excess units must be eliminated by the owning player.
8.2 Free-Stacking Units
Artillery, air, and naval support units have no stacking values. Such markers may be added to any hexes as long as the particular rules for their use are observed. Also, under certain circumstances, friendly air units may be placed in the same hexes as enemy units, and vice versa (16.8).
8.3 Stack Movement
To move as a stack, units must begin their movement already stacked. Units are not required to move together if they started the Movement Sub-phase in the same hex. In such situations, those units might be moved together, individually, or in smaller sub-stacks. Stacks move only as fast as the slowest unit in the stack.
8.4 Splitting Stacks
A moving stack may halt temporarily to allow a unit or sub-stack to split off and move away on a separate course. The units left behind in the original stack may then resume their own movement, even splitting off other units and sub-stacks. Once a unit or stack starts moving, its movement must be completed before that of another unit/stack is begun.
8.5 Joint Stacking
- All Central Powers units (German and Austro-Hungarian) may stack together.
- Allied units of different nationalities cannot stack together.
Exception: The Czech unit may stack with Italian units.
8.6 German 14th Army HQ
German and Austro-Hungarian units adjacent to the German 14th Army HQ in support mode increase their stacking limits in clear and rough terrain (15.1.2).
9.0 ZONES OF CONTROL (ZOC)
The six hexes immediately surrounding a unit's hex constitute that unit's zone of control (ZOC). Hexes into which a unit exerts a ZOC are called controlled hexes. ZOC stop enemy movement and block enemy supply lines. ZOC also affect retreats after combat.
9.1 Units Possessing a ZOC
All units exert a ZOC at all times, regardless of the phase or GT. EZOC are not negated by other units, enemy or friendly. A unit's ZOC does not extend into hexes for which that unit is prohibited from entering.
Exception: EZOCs can be ignored by assault infantry units during the Infiltration Sub-phase (11.8).
9.2 Multiple ZOC
Both friendly and enemy units may simultaneously exert ZOC into the same hexes. If a given unit is in an EZOC, that enemy unit is also in its ZOC.
10.0 MORALE
Certain combat events, the conquest or loss of key cities and random events may increase or decrease the morale of the Italian or the Austro-Hungarian armies.
10.1 Who's Affected by Morale
- Morale only affects Italian and Austro-Hungarian forces. German, British, Czech, and French units are unaffected by the morale rules.
- Mixed stacks of German and Austro-Hungarian units are not affected by morale.
10.2 Step Losses
Players must keep track of the steps lost by the Italian and Austro-Hungarian units during each turn, using the Austro-Hungarian and Italian Casualty Markers and the Casualty Track on the map.
- When defending Italian or Austro-Hungarian units suffer a step loss, move the corresponding Casualty Marker on the Casualty Track to reflect the number of lost steps.
- Step losses absorbed as retreat after combat do count for morale purposes.
- Attacking units cannot opt to retreat in lieu of absorbing a step loss.
10.3 Morale Track Levels
- The morale level of the Italian and Austro-Hungarian armies is expressed as a DRM corresponding to the respective Morale Track.
- At the end of each GT, check the steps lost by both Austro-Hungarian and Italian units.
- If the Casualty Marker for a side reaches 8 or more: that side loses 1 Morale Level point.
- If it reaches 12 or higher: that side loses 2 Morale Level Points.
- Move the corresponding Morale Marker the appropriate number of spaces on the Morale Track.
- Morale can never be higher than +2 nor lower than −4.
10.4 Morale Table
Defending Italian or Austro-Hungarian units may attempt to retreat in lieu of absorbing a step loss.
- When a CRT result produces a step loss for defending Italian or Austro-Hungarian units, the owning side may roll 1d6, apply the DRM based on the appropriate morale level indicated on the defending unit's Morale Track, and apply the results per the Morale Table as shown on the map.
- Opting for retreat in lieu of a step loss is always voluntary.
- Stacks containing assault infantry units always have a +2 morale DRM regardless of their nationality's current morale level.
- A successful retreat result negates only one step loss regardless of the number of losses dictated by the CRT.
- Italian or Austro-Hungarian units may never attempt to retreat when an "E" result occurs; all units are eliminated.
Example: The Italians incur 8 step losses during a GT. The Italian morale level was 0 but is reduced to −1 as a result of the step losses. During the subsequent GT the Italians roll 1d6 when attempting a retreat. A 3 is rolled (−1 DRM for Morale) resulting in a 2, which results in Surrender on the Morale Table. This die roll is made only if Italian units are attempting to retreat. If all step losses are absorbed, there is no need to for a die roll.
10.5 Capturing VP Hexes
- When Allied units enter a VP hex, increase Italian morale by 1.
- When Central Powers units enter a VP hex, increase Austro-Hungarian morale by 1.
10.6 Morale Combat Shift
- When morale is −2 or below, all attacks receive one odds column shift to the left (1L) on the CRT. When enemy morale is −3 or lower, attacks against enemy units also receive a +1 DRM.
- Joint attacks by British, French, and/or Czech units with Italian units affected by negative morale modifiers are subject to the 1L odds column shift.
- Joint attacks by German and Austro-Hungarian units not stacked together are also subject to the 1L odds column shift, although attacks by German and Austro-Hungarian units stacked together are not subject to this shift, nor do attacks against a joint German/Austro-Hungarian stack receive a +1 DRM (10.1).
11.0 COMBAT
Combat takes place between opposing units during the Combat Phase of every GT. Attacking is always voluntary in both Combat Sub-phases.
11.1 Combat Sub-phases
In Caporetto, there are two combat Sub-phases. During the first Combat Sub-phase, some, none, or all units can attack. The first Combat Sub-phase is followed by the Infiltration Sub-phase (11.8). The subsequent second Combat Sub-phase mirrors the first in that some, none, or all units can attack.
Important: An assault infantry unit does not need to attack during the first Combat Sub-phase to be able to infiltrate during the Infiltration Sub-phase.
11.2 Multiple Attackers
- An enemy-occupied hex may be attacked in one Combat Sub-phase by as many units as can be brought to bear from one, some, or all of the surrounding hexes. Attacks against a single hex from three sides or more receive a +1 DRM.
- German and Austro-Hungarian units may conduct joint attacks as may Allied units of all nationalities; however, Allied units may not stack together (8.5).
11.3 Indivisibility of Units
Units cannot divide their attack or defense factors between multiple combats in a single Combat Sub-phase. In addition, units cannot attack nor be attacked more than once in a Sub-phase.
11.4 Attack Sequencing
There is no limit on the number of attacks that may occur during a single Combat Sub-phase. Attacks do not need to be declared in advance and are resolved in the order chosen by the attacker as long as the resolution of one attack is completed before that of the next is begun.
11.5 Stacks Attacking
Units in a stack are not required to participate in the same attack. Some might attack into one hex, while others attack other hexes, or don't attack at all.
11.6 Fog of War
Neither player may look beneath the top unit of enemy stacks until the odds are computed. Once the odds are known, the attack may not be called off.
11.7 Combat Result Table
The CRT determines combat results in terms of step losses for both attacking and defending units, or elimination of all defending units.
11.7.1 Combat Results
- In the CRT, the numbers signify the number of steps each side must eliminate from their forces involved in that battle. The number to the left of the slash is the attacker's combat result, while the number to the right is the defender's. An "E" result causes the elimination of all defending units.
Example: At 2:1 odds, on a roll of two, the combat result is 3/1. The attacker force would eliminate 3 steps (not units) from the units involved, while the defending force would eliminate 1 step.
- Attacker losses are always removed before defender losses in each battle.
- Losses can be distributed among all types of ground units as the owning player sees fit, but no unit may be eliminated until every two-step unit involved in the combat, even those attacking from different hexes, has absorbed a step loss.
- Assault Infantry units must suffer the first step loss in any attack in which they participate with non-Assault Infantry units.
11.7.2 Combat Modifiers
The odds obtained in the odds calculation process may be modified, or shifted, via several methods.
- Artillery, air, and naval support units provide shifts to the odds column to the right, in favor of the attacker (16.0).
- Concentric attacks (attacks from three sides or more against a single defending hex) receive a +1 DRM.
- Terrain in the defender's hex provides shifts to the odds column to the left, in favor of the defender.
Important: The 1L shift for defending across a river only applies if at least half of the total attacking factors are attacking across the river.
- Events on the Random Events Chart may provide DRM for combat results.
- All applicable modifiers are cumulative and their effects are applied before the die is rolled to obtain the combat result.
Important: On GT 1, all Central Powers attacks receive one odds column shift to the right (1R) on the CRT. This is in addition to any other 1R shifts in effect on GT 1 (16.5).
Historical Note: This simulates that the Italians were "in offensive mode." The Comando Supremo (Italian High Command) didn't expect a major Central Powers offensive.
11.8 Infiltration
During the Infiltration Sub-phase, assault infantry units may conduct special movement.
- A unit or stack of assault infantry units that begin the Infiltration Sub-phase in an EZOC may move one hex to another EZOC.
- A unit or stack of assault infantry units that did not begin the Infiltration Sub-phase in an EZOC may move up to half of their MF (round up reminders). They must stop when entering an EZOC.
Important: Assault infantry units can perform advance after combat followed by a second hex if defending units are eliminated followed by infiltration (move from EZOC to EZOC, or up to half their MF), then execute a second Combat Sub-phase. Also, see 15.2 for an exception regarding HQ units.
Example: Hex 2718 is defended by an Italian 3-4-8 Infantry Division. There are Italian divisions at 2618 and 2817. German and Austro-Hungarian units attack hex 2718 from hexes 2818, 2819 and 2619. The Italian division is eliminated and three Austro-Hungarian divisions advance into hex 2718. Two of these divisions are assault infantry divisions. During the Infiltration Sub-phase, these two divisions move from 2718 to 2717 (from EZOC to EZOC). During the second Combat Sub-phase, the Austro-Hungarian units at 2717, 2718 and 2619 attack the Italian unit at 2618. The attack results in the Italian unit being eliminated, and one, some or all attacking units may advance into hex 2618.
12.0 ADVANCE AND RETREAT
Units may advance after combat as a result of a hex being vacated by the elimination or retreat of all defending units. Units may also opt to retreat after combat to absorb a step loss.
12.1 Advances
- When an enemy hex is emptied by retreat or elimination of all defending units, some or all attacking units may advance into the vacated hex. (Exception: 15.2)
- If assault infantry units participate in the attack, they can advance after combat, then move a second hex even if it is in an EZOC (11.8).
12.2 Retreats
Units and stacks that suffer one or more step losses may retreat after combat to absorb one step loss.
- Before retreating, all-Italian and all-Austro-Hungarian stacks, as well as individual Italian and Austro-Hungarian units not in a stack, must roll on their respective Morale Tables. Add the current Morale Level modifier and apply results (10.3).
Example: Three Italian divisions attack an Austro-Hungarian unit at 3/1 odds. The final result is 1/2. The Italian units absorb one step loss, and the Austro-Hungarian unit rolls for morale. The current Austro-Hungarian morale level is at −1. The die roll is 5, with a −1 die roll modifier resulting in a modified die roll of 4, so the result is NE (No Event). The Central Powers player can distribute losses as they see fit.
- Units may not retreat into an EZOC unless the hex is occupied by at least one friendly unit.
- Units may not retreat if all available retreat paths would result in overstacking (8.0).
13.0 REINFORCEMENTS, REPLACEMENTS, AND WITHDRAWALS
Both sides receive reinforcements, can replenish and rebuild units, and must withdraw units from the game.
13.1 Reinforcements
- Reinforcements enter the game on the GT indicated by the number in the white circle in the upper right corner of the counter.
- Reinforcements are placed in a supply source hex (14.2) during the Reinforcement Phase on their GT of arrival. Reinforcements may conduct movement, to include Strategic Movement) and combat normally on their GT of arrival.
- Reinforcements may be overstacked on the entry hex upon arrival, but must move in observance of stacking limits (8.1).
13.2 Replacements
- All eliminated units can be rebuilt with RPs. They may return to play at full-strength (two steps) or depleted (one step). Two-step units that have suffered a step loss may also be replenished with RPs.
- RPs for all nationalities are received each GT during the Replacement Phase. RPs for each nationality may only be used to rebuild/replenish units of that nationality.
Example: German RPs may only be used to rebuild/replenish German units.
- The cost for replacing eliminated units or replenishing depleted units is 1 RP per step loss. The cost to replace an eliminated HQ unit is 2 RP.
- Rebuilt units return to play as if they were reinforcements (13.1). To be replenished, a regular unit must trace a line of supply to a supply source hex (14.2).
- RP may not be accumulated from GT to GT. Unused RP are forfeited.
13.2.1 Italian Mobilization
During the Replacement Phase, the Italian player may declare a General Mobilization to cover losses.
- Roll 1d6: 1–3: add 4 extra Italian RP for that GT. 4–6: add 6 extra RP.
- General Mobilization cannot be declared prior to GT 3.
- A second mobilization cannot be declared until at least two GTs after the initial mobilization.
Example: if the first mobilization was declared on GT 3, a second mobilization cannot be declared until GT 5 at the earliest.
- No more than two General Mobilizations may be declared per game.
- Each General Mobilization decreases Allied VP by one (5.2).
13.3 Withdrawals
- On certain GTs, both the Allies and Central Powers must withdraw units. Withdrawal GTs are printed on the GTRT, and specific units to be withdrawn are indicated on the Withdrawals Chart. Random Events also determine the withdrawal of certain units.
- During the Withdrawal Phase, units to be withdrawn are simply removed from the map. A depleted division may be used to satisfy a withdrawal requirement, but a unit being withdrawn must be able to trace a line of supply (14.1).
- If a specific unit has been eliminated prior to the GT in which it was to be withdrawn, the withdrawal requirement is ignored.
Example: If the German 14th Army HQ is eliminated prior to its scheduled GT 5 withdrawal, the withdrawal requirement is ignored.
- Units which have been withdrawn cannot be replaced (13.2).
14.0 SUPPLY
Supply is needed in order to be able to move and fight at full effectiveness.
14.1 Lines of Supply
Units trace lines of supply (LOS) to supply sources.
- To be judged in supply a unit must be able to trace a LOS of any length to a friendly supply source hex, marked on the map with a logistic symbol.
- The LOS must be clear of enemy units and EZOC. Terrain does not block LOS. (Exception: 7.9)
Important: EZOC are not negated by the presence of friendly units.
14.2 Sources of Supply
- Central Powers units trace LOS to any of the three supply sources marked on the Central Powers side of the front line.
- Allied units trace LOS to either of the two supply sources marked on the Allied side of the front line. In addition, all western map edge hexes, on the Allied side of the front line, are considered supply sources.
14.3 Out of Supply
Supply is checked during the Supply Sub-phase at the end of each player segment during the Operations Phase. Units judged to be Out of Supply (OOS) during this Sub-phase are marked with an OOS marker. This marker is withdrawn in subsequent turns if the unit is again in supply. Units out of supply are affected as follows:
- Movement, attack and defense factors are halved (rounded down)
- Attacks against OOS units receive a +2 DRM
- Cannot receive artillery or air support
- Cannot receive replacements
- OOS HQ cannot provide support (15.0)
15.0 HEADQUARTERS
Headquarters (HQ) units represent concentrations of artillery support, as well as the logistical centers of their respective armies.
15.1 HQ Functions
HQ units have two sides: support and movement. At the beginning of each player turn, the owning side determines the mode for each HQ. If in "movement" mode, the HQ may use their movement factors to move. If in "support" mode, the HQ may provide support to units within three hexes and may move up to 2 hexes.
15.1.1 Movement Mode
HQ in movement mode have an MF of 6. HQ in movement mode can use railroad movement. On turns when a HQ unit is in movement mode, it cannot provide artillery or air support.
15.1.2 Support Mode
- HQ in support mode can provide artillery and air support to friendly units within 3 hexes, and have an MF of 2. HQ in support mode may also move via Strategic Movement (7.12).
- There is no limit to the number of support units a single HQ unit may provide in a GT.
- The German 14th Army HQ unit increases the stacking limit by one unit for all adjacent German and Austro-Hungarian units in clear and/or rough terrain hexes.
Example: 5 German or Austro-Hungarian units could stack in a clear terrain hex if they were adjacent to 14th Army HQ as opposed to 4 units if they were not adjacent.
15.2 Supply and Combat
- HQ units trace supply like normal units. OOS HQ units cannot provide air or artillery support.
- HQ units have no combat factors and are automatically eliminated if caught alone in an EZOC. A HQ unit may be eliminated during infiltration movement or advance after combat after an E result on the CRT (11.0).
- If a regular infantry or cavalry unit comes into contact with a HQ unit while advancing after combat, the HQ unit is eliminated but the regular infantry or cavalry unit may not advance into the hex vacated by the HQ unit. Assault Infantry units, however, may advance into the hex vacated by the HQ unit.
- Assault infantry units which did not begin the Infiltration Sub-phase in an EZOC, but come into contact with a lone HQ unit while conducting infiltration movement, eliminate the HQ unit but do not need to stop; the unit(s) may continue to move up to half of their MF or until entering the EZOC of a non-HQ unit.
16.0 ARTILLERY, AIR, AND NAVAL SUPPORT
Artillery, air, and naval support units can provide defensive or offensive support to friendly units.
16.1 Using Support Markers
- When resolving regular combat, both sides must announce if they are going to use artillery, air, or naval support units to add or decrease odds shifts to the CRT. The attacker must announce first if, and how many, artillery, air and/or naval units they plan to use. The defender then announces if, and how many, support units they will use.
- Support units may only be used once per Operations Phase.
Example: An artillery unit used in the first Combat Sub-phase may not be used again during the second Sub-phase.
16.2 HQ Units
- There is no limit to the number of support units which may be employed in a single attack provided the attacking units are within range of a HQ unit in support mode (15.1.2).
- Units receiving more than one support unit must be within range (within 3 hexes) of a friendly HQ in support mode. Attack or defense operations not within range of a friendly HQ receive only one support unit.
16.3 Procedure
Roll one die for each support unit involved. The following DRM are then applied:
- German, British, and French units automatically receive a +1 DRM.
- On GT 1 and 2, Italian units automatically receive a −2 DRM.
- All nationalities receive a +1 DRM if air recon was successfully employed (16.8).
- On a modified die roll of 3–6: the support unit provides a 1R column shift on the CRT for attacking units, and a 1L shift for defending units. A modified die roll of 1–2: results in no odds shifts.
Important: On GT 1 and 2 a die roll is not required for German support units; all German support units are automatically employed.
- Odds column shifts are cumulative based on the number of successfully employed support units.
Example: Three Austro-Hungarian artillery units are placed in support of an attack, and one Italian artillery unit is placed in support of the defending Italian units. All are successfully employed based on the die rolls for each unit, so the Austro-Hungarian attack would receive a 2R shift on the CRT.
16.4 Joint Support
- Italian support units can only provide support to Italian or Czech units.
- French support units can provide support to Italian or French units.
- British support units can provide support to Italian or British units.
- German and Austro-Hungarian support units can provide support to units of both nationalities.
16.5 Bruchmüller's Feuerwaltz
- On GT 1, all Austro-Hungarian artillery units, as well as the Austro-Hungarian naval unit, firing within 3 hexes of 14th Army HQ do not need to roll for employment and automatically generate a 1R shift for any attack they support.
Important: This is in addition to the GT 1 and 2 die roll negation for German support units (16.3).
- In addition, an attack supported by two or more German artillery units receives an additional 1R shift on GTs 1 and 2.
Example: Two German artillery units supporting a GT 1 attack would add three column shifts to the right.
16.6 Gas Attack on GT 1 and 2
On GT 1, German artillery-supported attacks receive a +3 DRM on the CRT, in addition to the odds columns shifts in 16.5. On GT 2, German artillery-supported attacks receive a +2 DRM on the CRT.
Historical Note: This simulates the massive bombardment, or "fire waltz" (Feuerwaltz) developed by Colonel Georg Bruchmüller. The bombardment also used a combination of gas types that rendered the Italian gas masks ineffective.
16.7 Naval Gunfire Support
The Austro-Hungarian navy unit may be used to support attacks by German and/or Austro-Hungarian units against Allied units within 3 hexes of a coastal hex. The employment procedure is the same as in artillery/air support.
Example: Austro-Hungarian forces attack Italian units in hex 2515. This hex is within three hexes of a coastal hex, so the navy unit may be employed to provide support (based on availability per the die roll).
16.8 Air Recon
Player can use their air units to provide air recon instead of support.
16.8.1 Procedure
Flip the air unit to the recon side and place it over an enemy unit or stack. The enemy player can use one or more available air support units to contest air superiority over that hex. If contested, each side rolls 1d6 per air support unit involved, with German, French and British aircraft receiving a +1 DRM.
- If the side attempting the recon rolls the higher die: then the recon is successful and any attacks in that hex receiving artillery support receive a +1 DRM. The enemy air unit cannot be used again that GT.
- If the contesting side rolls the higher die: then the recon was unsuccessful and no benefit is accrued to any ground attacks in that hex. The enemy air unit may not be used again during the GT.
17.0 OPERATIONAL PAUSE
At the beginning of a given GT, prior to the Random Events Phase, sides may execute an Operational Pause.
Important: An Operational Pause may not be declared by either player on GTs 1–2.
17.1 Procedure
- At the beginning of a GT, either or both sides may announce an Operational Pause. The side(s) conducting an Operational Pause rolls 1d6:
- 1–3: that side's forces receive +1 on the Morale Track.
- 4–6: no increase in the Morale level is unchanged.
- At the beginning of the next GT, during the Reinforcement Phase, that same side again rolls 1d6:
- 1–3: that side's forces receive an additional RP, representing wounded returning from hospitals, stragglers, etc.
- 4–6: results in no additional RP.
17.2 Effects of An Operational Pause
The effects of an Operational Pause remain in effect only for GT in which the pause is declared. A side conducting an Operational Pause incurs the following effects:
- Units cannot conduct more than 2 attacks, combined between both Combat Sub-phases, during that GT. Units may, however, defend normally.
- Assault infantry units may conduct Infiltration (11.8).
- Units can spend no more than half of their MF (rounded up).
- Air recon missions may be performed.
- No more than two artillery support units, irrespective of nationality, can be used either offensively or defensively.
18.0 DESIGNERS NOTES
Both players control two fragile armies, worn out after two years of all-out war. The Central Powers player has an initial advantage, and must exploit it to the full during the first turns to cause as much damage as possible.
The Orders of Battle
The Italian Alpini Groups are rated as regiments (they were groupings of 2–3 battalions, without organic support units).
Many independent units and brigades (in particular Austro Hungarian) have been included within the Divisional order of battle. Since these were rather weak units, their inclusion in the Order of Battle would have cluttered the map and made the Austro-Hungarian army stronger than it was historically.
The −2 DRM for Italian artillery support on GT 1 simulates both that the Italians were deployed for the offensive and the fog and other factors which prevented Italian artillery from operating effectively.
The artillery and air support limit for attacking units not within range of an HQ unit represent the maximum number of support that corps-level HQ units (not represented in the game) could handle. The CRT, as could be expected from a WW1 game, is brutally attritional.
Towards the second half of the game, the Italian player receives extra HQ units. These are useful to provide, at any moment, multiple artillery support along the front (units not within 3 hexes of HQ units only receive 1 support marker on the attack or in defense).
The optional game has a free setup. This allows the CP player to explore other possibilities than to attack along the Isonzo: there are also the possibilities of attacking along the Carnic Alps, or a strike from Trento towards the Po River Valley. The historical scenario provides the initial setup for late October 1917.
19.0 OPTIONAL RULES
19.1 Italian GHQ Reserves
On GT 1, before moving a GHQ Reserve Italian unit (units marked with a white triangle in the upper right corner), roll the die: On a die roll of 1–3: the unit cannot move that turn. If an enemy unit is adjacent to the reserve unit being activated, a +2 DRM is applied.
Historical Note: Historically, the Italian high command was reluctant to release army level reserves during the Caporetto counteroffensive.
19.2 Lake Garda Movement
The Italians may move up to one division per turn across Lake Garda from hex 2100 to 2001 (Garda). This occurs during the Movement Sub-phase at a cost of 2 MP. Units crossing the lake may move normally both before and after the crossing.
19.3 Trieste Raid
On GT 13, the Italians may attempt a raid to conquer Trieste (hex 2120).
- Select any Italian division and move it to hex 2221.
- If there are Central Powers units in Trieste, the division may launch an attack with a 1L odds shift (in addition of any other applicable shifts).
19.4 Dominant Terrain
Artillery-supported attacks against hexes adjacent to friendly-controlled dominant terrain (Monte Tomba (hex 2508), Monte Grappa (hex 2408), Monte Pasubio (hex 2303), and Monte Baldo (hex 2101)) receive a +1 DRM.
19.5 Free Setup
Instead of following set up rules (3.0), both sides are free to deploy at-start available units as they see fit along their respective sides of the frontline.
- The Allies must deploy first.
- At least one Italian unit must deploy in every frontline hex between hexes 3313 and 2319.
- Italian Reserve GHQ deployment rules still apply (3.2).
- Units may overstack by two units per terrain type beyond the limits prescribed by the TEC.
- Artillery-supported attacks against overstacked hexes receive a +2 DRM even if defensive artillery support is successfully employed. Defensive artillery support against an overstacked attacking hex negates one right odds column shift.
- Overstacked Italian or Austro-Hungarian units that attempt to retreat to absorb a step loss automatically incur a Panic result on the Morale Table (10.4).
19.6 Alpini Assault Tactics
The Allies may attempt to use Italian Alpini regiments as infiltration-capable (assault infantry) when conducting attacks in mountain and/or alpine hexes.
- On GT 10 (July 1918) the Allies rolls 1d6: 1–3: Alpini units may perform as infiltration-capable units in mountain and/or alpine terrain beginning on that GT. 4–6: Alpini units may perform as infiltration-capable units in mountain and/or alpine terrain beginning on GT 11 (August 1918).
- Alpini units may start a GT in any terrain, but may only perform as assault infantry in mountain or alpine hexes.
- The Central Powers receives 2 VP if this rule is employed.
Editor's note (section 19.0): the printed text contains the spellings "infilitration" (19.6) and an unclosed parenthesis after "Monte Tomba (hex 2508" (19.4); both are corrected here in the transcription. Printed wording otherwise retained.
Charts and Tables
Combat Modifiers (R7)
CRT
- 1R odds column shift for attacks supported by each successfully employed support (air, artillery, naval) marker.
- 1L shift for defense supported by each successfully employed support marker.
- 1L or 2L shifts for defending units based on terrain per the TEC.
- 1L shift when attacking unit morale is −2 or lower.
DRM
- +2 DRM for attacks against units out of supply.
- +1 DRM for attacks against units whose morale is −3 or lower.
- +1 DRM for concentric attacks (attacks from three or more sides).
- +1 DRM when attempting to employ German, British, and French support markers.
- +1 DRM when attempting to employ support markers (all nationalities) if air recon was successfully employed.
Special GT 1 and GT 2 Modifiers (R7)
GT 1 CRT & DRM
- 1R shift for all Central Powers attacks.
- 1R shift for attacks supported by two or more German artillery units.
- +3 DRM for all attacks supported by German artillery (gas).
- −2 DRM for employment of Italian artillery.
- Germans automatically employ artillery (no die roll required), along with all Austro-Hungarian artillery units within 3 hexes of 14th Army HQ.
GT 2 CRT & DRM
- 1R shift for all attacks supported by two or more German artillery units.
- +2 DRM for all attacks supported by German artillery (gas).
- −2 DRM for employment of Italian artillery.
Germans automatically employ artillery (no die roll required).
Casualty Track (R7)
Tracks steps lost by Austro-Hungarian and Italian units, numbered 1 through 20 (see 10.2 and 10.3).
Morale Table (R7)
| Die | Result Roll |
|---|---|
| 1 | Panic |
| 2 | Surrender |
| 3–6 | Retreat |
Notes:
- Die Roll is modified by defender's morale level.
- Panic: Defenders must absorb all losses and retreat one hex. On a die roll of 1–3, add one extra step loss.
- Surrender: No retreat after combat. Defenders must absorb all losses.
- Retreat: Defending units may retreat one hex.
Random Events Chart (R9)
A Events — GTs 2–6 (November 1917–March 1918)
- Rommel: During the 2nd Combat Sub-phase, any German assault infantry unit or stack receives a +1 DRM when attacking. Remove the counter after being played.
- Hunger: Decrease Austro-Hungarian morale by 1.
- Brest-Litovsk: Add 2 Austro-Hungarian RPs this turn. Remove the counter after being played.
- Torrential Rain: Movement costs are doubled in plain, rough, and marsh hexes.
- No Event: Nothing happens.
B Events — GTs 7–13 (April–October 1918)
- Hunger: Decrease Austro-Hungarian morale by 1.
- Mandatory Offensive: Increase Austro-Hungarian morale by 1. The Central Powers must launch attacks involving a total of 10 or more steps, which may occur in either or both Combat Sub-phases. If 10 steps are not available to attack, as many steps as are available must be employed.
- Mine Warfare: Select a hex in Italy occupied by Italian units and adjacent to Austro-Hungarian units. Roll 1d6:
- 1–4: 1 Italian step is eliminated (Allied player's choice). This event may be used prior to an attack against the targeted hex. If the hex is emptied by the mine attack, one or more adjacent Central Powers units may advance into the vacated hex. It is not considered an E result on the CRT.
- Diaz Reforms: Increase Italian morale by 1. Remove the counter after being played.
- Kaiserschlacht: The Germans launch a massive offensive on the Western Front. Roll 1d6:
- 1–4: withdraw half of the British and French ground units (rounded up);
- 5–6: withdraw half of the British and French ground units (rounded up) and all British and French air units and roll an additional 1d6 for each remaining British and French division;
- On a roll of 1–2: the division is withdrawn. Remove the counter after being played.
- Influenza: Roll 1d6 for all Allied units:
- 1–3: eliminate 2 steps (Allied player's choice);
The Turn Sequence panel printed on the Random Events Chart page repeats Section 4.1 and is not reproduced here.
Replacement Chart (R10)
| GT 1 | GT 2 | GT 3 | GT 4 | GT 5 | GT 6 | GT 7 | GT 8 | GT 9 | GT 10 | GT 11 | GT 12 | GT 13 | |
|---|---|---|---|---|---|---|---|---|---|---|---|---|---|
| Italy | – | 3 | 3 | 3 | 3 | 3 | 2 | 2 | 2 | 2 | 2 | 2 | 2 |
| Austria-Hungary | – | 3 |
Withdrawals Chart (R10)
| GT 1 Oct 17 | GT 2 Nov 17 | GT 3 Dec 17 | GT 4 Jan 18 | GT 5 Feb 18 | GT 6 Mar 18 | GT 7 Apr 18 | GT 8 May 18 | GT 9 Jun 18 | GT 10 Jul 18 | GT 11 Aug 18 | |
|---|---|---|---|---|---|---|---|---|---|---|---|
| Italy | – | – | 2 Inf. Divs | – | – | – | – | – | – | – | – |
| Austria-Hungary | – | 1 Inf Div | – | 2nd Is HQ, 3 Inf Divs | 3 Inf Divs |
Terrain Effects Chart (R10)
| Terrain | Stacking | Movement | Combat | Notes |
|---|---|---|---|---|
| Clear | 4 | 1 (2 in Torrential Rain) | — | |
| Rough | 3 | 1 (2 in Torrential Rain) | — | |
| Mountain | 2 | 2 (4 in Winter) | 1L | |
| Alpine | 1 | All | 2L | Impassable in winter. No LOS across. Only Mountain units may enter. |
| International Border | OTIH | OTIH | OTIH |
Notes: OTIH: Other terrain in hex. L: Left odds shift(s). R: Right odds shift(s). —: No Effect.
Missing From This Transcription
Editor's note: the Combat Results Table (CRT), the Game Turn Record Track (GTRT), and the Morale Track are printed on the separate center-spread sheet referred to in the rules' opening note. They are not in the rules file this transcription was made from (pages R1–R15 and the chart pages R7, R9, R10 of the insert). Those tables are not reproduced here. Consult the printed center spread or the e-rules at strategyandtacticsmagazine.com/site/e-rules/ for them.