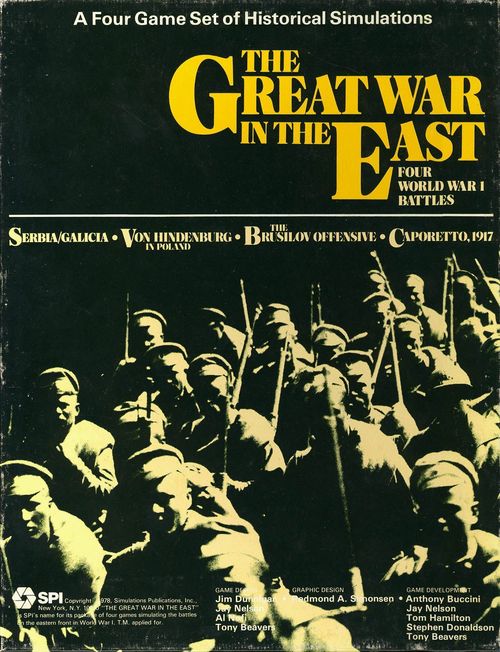
Caporetto, 1917: Catastrophe for Italy
Caporetto, 1917: Catastrophe for Italy Rulebook
Table of Contents
Table of Contents
- 1.0 Introduction
- 2.0 Game Equipment
- 3.0 Setting Up the Game
- 4.0 Sequence of Play
- 5.0 Movement
- 6.0 Stacking
- 7.0 Zones of Control
- 8.0 Combat
- 9.0 Supply
- 10.0 Command Control
- 11.0 Fortresses
- 12.0 Cavalry
- 13.0 Replacement of Lost Steps
- 14.0 Reinforcements
- Exclusive Rules: Caporetto, 1917
- 18.0 Rivers
- 19.0 Forced March
- 20.0 Pursuit
- 21.0 Heroic Leaders (Optional)
- 22.0 The Milano Strike
- 23.0 Surprise Attack
- 24.0 Victory Conditions
- 25.0 Tyrol Offensive Scenario (Hypothetical)
- Appendix
- Errata
1.0 Introduction
The battles that raged on the Eastern and Italian fronts of World War I had effects so broad and far reaching that they are felt in the world we live in today. The end results of these battles — of four years of total war — were that the great imperial hegemonies — German, Austro-Hungarian, Russian, and Ottoman — were dead, and that from their ashes was to emerge communism, fascism, and the origins of a century of conflict.
The Great War in the East: The Death of Empires is a set of games that allows Players to simulate some of these decisive battles which were marked by sweeping and devastating attacks and crucial encirclements. Each game uses this common set of Standard Rules as well as exclusive rules, a game map, and cardboard counters that are specific to that game. In each game, one Player or team of Players commands the actual Allied units involved, while their opponents command the Central Powers forces. The Great War in the East: The Death of Empires is of moderate complexity, and while it contains many new and unique concepts, the basic ideas and procedures are similar to those of other simulation games.
2.0 Game Equipment
2.1 The Game Map
Each 16" by 22" mapsheet portrays the area in which a crucial campaign of World War I was fought. A hexagonal grid overlays the terrain features to regularize movement and positioning of the playing pieces. The mapsheet also displays the Terrain Key, the Turn Record Track, and various visual aids.
2.2 Game Charts and Tables
Various visual aids are provided for the Players in order to simplify and illustrate certain game functions. These are the Terrain Effects Chart, the Combat Results Table, and charts and tables specific to each game, including the exclusive rules.
2.3 The Playing Pieces
The cardboard pieces represent the actual military units that took part in the original battle. The numbers and symbols on the pieces represent the strength, movement capability, and the type of unit represented by the piece. These playing pieces are referred to as "units."
2.31 How to Read the Units
Typical Combat Unit (front): Unit Size (superior unit designation, e.g. XX), Unit Type, Set-Up Hex (or Game-Turn and hex of entry), Individual Unit Designation, Attack Strength, Defense Strength, Movement Allowance.
Typical Combat Unit (back): Reduced Strength due to Combat Result: the unit is printed on the back with a reduced Attack Strength and Movement Allowance.
Typical Headquarters Unit (front): Command Strength, Attack Shift, Designation, Command Radius, Combat Strength, Set-Up Hex (or Game-Turn and hex of entry), Movement Allowance.
Typical Headquarters Unit (back): Reduced Strength due to Combat Result.
2.32 Unit Size Symbols
III = regiment; X = brigade; XX = division; XXX = corps
2.33 Unit Type Symbols
- Infantry (crossed box)
- Cavalry (diagonal box)
- Artillery (dot)
- Naval Infantry (crossed box with anchor)
- Supply Depot (solid box)
- Mountain Infantry (crossed box with bars)
Note that not all types appear in all games.
2.4 Definition of Terms
Attack Strength: The quantification of a unit's strength in terms of attack for the type of combat represented on the Combat Results Table.
Defense Strength: The quantification of a unit's strength in terms of defense for the type of combat represented on the Combat Results Table.
Movement Allowance: The quantification of a unit's mobility in terms of Movement Points. Basically, a unit expends one Movement Point for each hex of Clear terrain it enters.
Reinforcements: Units which do not begin the game placed on the Game-Map, but rather appear at a scheduled time and hex during a future Game-Turn.
Stacking Point: The number of units a Player may have in any hex at the end of any Phase is regulated by means of Stacking Points. Each unit is worth a number of Stacking Points which is never changed throughout the game, ranging from one to four Stacking Points per unit. Note: It is important that Players not confuse Stacking Points with Steps. Unlike Steps, a unit may never lose Stacking Points.
Step: Part of the total strength of a unit which is lost due to combat or other causes, with an attendant reduction in Attack and Defense strengths. Each unit has between one and four Steps. When a unit has lost all its steps, it is eliminated and removed from play.
Tactical Competence Rating: One of the more important concepts in the game is Tactical Competence Rating (TCR), which is referred to throughout the rules. Each army on each side will be given a Tactical Competence Rating in the Exclusive Rules. This is a quantitative evaluation of each army's capabilities. They range from 1 (excellent) to 4 (poor).
Zones of Control: The six adjacent hexes surrounding a unit which that unit is said to control.
2.5 Game Scale
See the Exclusive Rules of each game for its precise scale.
2.6 Parts Inventory
| Part | Individual Game | Quadri-Game |
|---|---|---|
| Game Map | 1 | 4* |
| Die-Cut Counter Sheet | 1 | 4* |
| Standard Rules Folder | 1 | 2† |
| Exclusive Rules Folder | 1 | 4* |
| Historical Article | 0 | 1 |
| Plastic Die | 0 | 1 |
| Game Box | 0 | 1 |
*different. †identical.
Note: Game Box and Plastic Die not included in subscription edition.
If any of the above parts are damaged or missing, write to Customer Service, Simulations Publications, Inc., 44 East 23rd Street, New York, N.Y. 10010.
2.7 Rules Questions
Questions concerning the rules for The Great War in the East Quad will be answered if phrased so that a simple yes or no reply will suffice and if the questions are accompanied by a stamped, self-addressed envelope. Mark the envelope "Rules Questions: Great War in the East Quad."
3.0 Setting Up the Game
Before the game can begin, a number of counters are placed on the Game-Map. Each counter is placed in the hex whose four-digit number appears printed on the unit. Units which have a one- or two-digit number accompanied by a letter are reinforcements. The number refers to their Game-Turn of arrival and the letter to the hex they arrive in. Some games have Scenarios in which this initial set-up varies (see Exclusive rules). Once the starting units have been set on the map, play may begin.
4.0 Sequence of Play
Each game is played in Game-Turns, each of which comprises two alternating Player-Turns. The Player whose Player-Turn is in progress is called the Phasing Player. Each Game-Turn proceeds strictly in accordance with the following Sequence outline. No action or function contrary to the Sequence of Play is permitted. To determine which Player is the Phasing Player, consult the Exclusive rules for each game.
A. First Player-Turn
- Movement Phase: Each Movement Phase is divided into the following segments:
- a. Initial Supply Determination Segment: The Phasing Player determines which of his units are out of supply (their Movement Allowances are halved for that Movement Phase, see Case 9.2).
- b. Reinforcement Segment: The Phasing Player places his reinforcements on the Game-Map.
- c. Command Control Segment: The Phasing Player determines which of his units he will place in Command Control by allocating Command Strength. Units to which Command Strength is allocated must be within the Command Radius of a HQ unit. For each of the remaining units he then rolls the die to see if they are in Command Control. He then places an "Out of Command Control" marker on all units that are not in Command Control.
- d. Movement Segment: The Phasing Player may move all of his units which are in Command Control after which time he removes all "Out of Command Control" markers.
- e. Attrition Segment: The Phasing Player determines which of his units are not out of supply and then rolls the die to determine if each one suffers attrition.
- Cavalry Withdrawal Before Combat Phase: The non-Phasing (second) Player may now roll the die, if he wishes, for each of his cavalry units which are adjacent to an Enemy (Phasing Player) unit to determine if the unit may withdraw two hexes (see Case 12.1).
- Combat Phase: Each Combat Phase is divided into two Segments:
- a. Command Control Segment: The Phasing Player determines which of his units he will place in Command Control for combat purposes by allocating Command Strength. Units to which Command Strength is allocated must be within the Command Radius of a HQ unit. He then places "Out of Command Control" markers on all units not in Command Control.
- b. Combat Resolution Segment: The Phasing Player may use his units to attack the non-Phasing Player's units in accordance with the rules of combat. During this Phase neither Player may move his units except when forced to do so as a result of combat.
B. Second Player-Turn
The second Player now becomes the Phasing Player and repeats the actions performed in Phases 1 through 4.
C. Game-Turn Record Interphase
The Game-Turn marker should be advanced one space on the Game-Turn Record Track to mark the end of one Game-Turn and signal the start of another.
5.0 Movement
General Rule: During the Movement Phase, the Phasing Player may move as many or as few of his units as far as he desires (within the restrictions of Command Control, Case 10.4), as long as each unit's Movement Point Allowance is not exceeded in a single Phase.
Procedure: Move each unit individually, tracing the path of its movement through the hexagonal grid. As each unit enters a hex the unit expends one or more Movement Points from its Movement Allowance.
Cases:
5.1 Movement Restrictions and Prohibitions
5.11 Friendly units may be moved only during the Friendly Movement Phase, although there may be some movement as a result of combat in terms of advances and retreats and withdrawal of cavalry before the Combat Phase. These are not considered movement per se and do not require the expenditure of Movement Points.
5.12 Movement is calculated in terms of Movement Points. Basically, one Movement Point of a unit's total Movement Allowance is expended for each Clear terrain hex the unit enters; other terrain costs more than one Movement Point to enter or cross. These effects are summarized on the Terrain Effects Chart (5.4).
5.13 Units may never be moved into an Enemy-occupied hex or undestroyed Enemy fortress.
5.14 A unit may never expend more Movement Points than its total Movement Allowance in any one Movement Phase. Unused Movement Points may not be accumulated until another Movement Phase, nor may they be transferred to another unit.
5.15 A unit may be moved from an Enemy-controlled hex during the Friendly Movement Phase (even into another Enemy-controlled hex, see 7.22) subject to all movement costs.
5.16 Only units using Railroad Movement (see 5.3) benefit from Railroad lines.
5.17 A unit that has expended no Movement Points in a given Movement Phase may always move at least one hex, regardless of Movement Point limitations, unless it is out of Command Control.
5.2 Effects of Friendly Units on Movement
5.21 A Friendly unit may be moved through hexes occupied by other Friendly units at no additional Movement Point cost.
5.22 There is no limit to the number of Friendly units which may pass through a given hex in any one Segment, and Friendly units may be overstacked at the end of any Segment as long as all Stacking limits are met at the end of each Phase (see Section 6.0).
5.3 Railroad Movement
5.31 During each Movement Phase, the Phasing Player may move a specified number of Stacking Points (see Case 6.1) of Friendly units, plus any of his HQ units, a specified number of hexes along Friendly railroad lines. These specifications vary from game to game and from army to army and are referred to as Rail Capacity and Railroad Movement Rate, respectively. All units which move by rail in a Movement Segment or remain entrained at the end of their Movement Segment (without moving) count toward Rail Capacity.
5.32 To use Rail Movement, a unit must first be moved to a non-Enemy-controlled hex containing a Friendly railroad line (as defined in the Exclusive rules). [Exception: Units with a Tactical Competence Rating of 1 may entrain in Enemy Zones of Control.] Once in a hex containing a Friendly rail line, a unit must expend additional Movement Points equal to its Tactical Competence Rating in order to be entrained. Once entrained, place an Entrained marker on that unit (this marker remains on that unit until it detrains). Only units which are in supply and in Command Control may be entrained.
5.33 Once entrained, a unit may be moved from one contiguous adjacent Railroad hex to another, following the railroad line. This unit may be moved up to the maximum number of hexes permitted by the Railroad Movement Rate. Entrained units may not enter an Enemy-controlled hex or any hex last occupied by an Enemy unit.
5.34 After a Player has finished moving a unit by rail, he may detrain at no additional Movement Point cost and resume moving that unit normally, provided that it has Movement Points remaining. However, only units with a Tactical Competence Rating of 1 may be used in an attack in the Combat Phase immediately following a Movement Phase in which they used Rail Movement.
5.35 Entrained units which are out of Command Control in the Movement Segment may freely engage in Rail Movement only. They may not detrain, entrain, or use normal movement.
5.36 Entrained units do not possess a Zone of Control and may not attack. Entrained units defend at half Defense Strength, rounded down. If attacked, they are automatically detrained.
5.37 In some games, Players will see that certain rail lines that exit the map are linked by rail lines off the playing area of the map. An entrained unit which exits from a friendly rail map-exit hex may be moved "off the map" paying the indicated number of Movement Points until it reenters the map at the appropriate hex. However, the unit may not re-enter the map into an Enemy Zone of Control (see Case 14.22).
5.38 All Off-Map Movement is Rail Movement. All units (except for HQ units) performing Off-Map Movement count against Rail Capacity. A unit may end its movement off-map. If it does so, the Phasing Player must note how many Movement Points the unit has moved toward its destination. These Movement Points may be applied to the next Game-Turn's Movement.
5.4 Terrain Effects Chart
| Terrain Type | Movement Cost, Tactical Competence Rating 1, 2 | Movement Cost, Tactical Competence Rating 3, 4 | Effect on Combat |
|---|---|---|---|
| Clear (all) | 1 | 1 | None |
| Forest (B,S,T,V) | 1 | 2 | None |
| Broken (S,T,V) | 1,2 | 2 | None |
| Swamp (all) | 2 | 2,3 | None |
| Rough (B,S,V) | 2 | 2 | None |
| Ridge hexside (C) | See Note in Case 16.0 | See Note in Case 16.0 | 1 is added to the die roll if any unit in an attack attacks across Ridge hexside. |
Notes:
- Terrain effects on combat are cumulative. Thus in an attack directed against a unit in a City by units attacking across a Minor River, the defending unit would be doubled and the stacking units would be halved.
- The left-hand column under Movement Costs refers to units with Tactical Competency Ratings of 1 and 2; the right-hand column refers to units rated 3 and 4. Whenever only one number is listed, it applies to both Ratings appropriate to that column. When two numbers are listed, the first number applies to units with Rating of 1 or 3, and the second number to units with Rating of 2 or 4, as appropriate to that column. Example: In Broken terrain, a unit Rated 1 expends 1 Movement Point per hex; a unit Rated 2 expends 2 Movement Points; and a unit Rated 3 or 4 expends 2 Movement Points.
- Letters refer to the games in which the Terrain Types appear: B = Brusilov, C = Caporetto; S = Serbia/Galicia; T = Tannenberg; V = von Hindenburg.
6.0 Stacking
General Rule: Each Player is restricted as to the number of Stacking Points he may have in a hex at the end of any given Phase. The number of Stacking Points permissible per hex varies from army to army and from game to game (see Exclusive rules).
Cases:
6.1 Stacking Restrictions
6.11 The Stacking Point Value of units are as follows:
- HQ units: 0 Stacking Points
- Regiments: 1 Stacking Point
- Brigades: 1 Stacking Point
- Divisions: 2 Stacking Points
- Corps: 4 Stacking Points
6.12 Fortresses and game markers never count toward Stacking limits.
6.13 Friendly units of different types and nationalities may stack together.
6.14 Any units in excess of the stacking restrictions at the end of any given Phase (not Segment) are eliminated, with the owning Player choosing which units to eliminate. Note: Losing a part of a unit does not reduce that unit's Stacking Point Value.
6.15 Units may overstack while retreating after combat. However, if a unit is forced to overstack at the end of its retreat, it is eliminated.
6.16 A unit's Stacking Point Value is a constant. It is never reduced, even if that unit is weakened due to step losses.
6.2 Stacking and Movement
6.21 There is no limit to the number of Friendly units that may enter or move through any hex during a Phase as long as Stacking limits are met at the end of that Phase.
6.22 There is no additional Movement Point cost to stack or unstack Friendly units.
7.0 Zones of Control
General Rule: The six hexagons immediately surrounding a hex constitute the Zone of Control of any units in that hex. Hexes upon which a unit exerts a Zone of Control, called controlled hexes, inhibit the movement of Enemy units. Fortresses and units in fortresses that would do so normally exert Zones of Control in the same manner as normal units. Units in an Enemy Zone of Control are never required to attack. Combat is completely voluntary.
Procedure: All units must expend one additional Movement Point (above and beyond terrain costs) to enter an Enemy-controlled hex.
7.1 Extent of Zones of Control
7.11 Zones of Control extend into all six hexes adjacent to the controlling unit's hex. Zones of Control do not extend across Prohibited hexsides.
7.12 All units exert Zones of Control at all times during the Game-Turn.
7.2 Effects of Zones of Control
7.21 Friendly units must pay one additional Movement Point to enter an Enemy-controlled hex, in addition to any cost incurred due to the terrain in the hex being entered.
7.22 Units may be moved directly from one Enemy-controlled hex to another, as long as they have sufficient Movement Points remaining to enter that hex (the terrain cost plus one for entering that Enemy-controlled hex).
7.23 There is never any additional Movement Point cost to move from an Enemy-controlled hex into a hex that is not Enemy-controlled.
7.24 The presence of Friendly units or fortresses (but not friendly Zones of Control) negate the effect of Enemy-controlled hexes for the purposes of tracing supply and retreat after combat. They do not negate Enemy Zones of Control for the purposes of movement.
7.25 If there are both Enemy and Friendly Zones of Control exerted into the same hex, both Zones co-exist, and that hex is mutually controlled by both Players. There is no additional effect of having more than one unit exerting its Zone of Control onto a given hex.
7.26 HQ units and supply depots never exert a Zone of Control.
8.0 Combat
General Rule: Combat occurs between adjacent opposing units at the Phasing Player's discretion. The Phasing Player is the Attacker, the non-Phasing Player is the Defender, regardless of the overall strategic situation.
Procedure: Total the Attack Strengths of all the attacking units involved in a specific attack and compare it to the total Defense Strength of the units in the hex under attack. State the comparison as a ratio: Attacker's strength to Defender's strength. Round off the ratio in favor of the Defender to conform to the simplified odds found on the Combat Results Table (see 8.8); roll the die and read the results on the appropriate line under the odds. Apply the result immediately consulting the Combat Results Option Table (8.9) before resolving any other attacks being made during that Combat Phase.
Cases:
8.1 Which Units May Attack
8.11 Friendly units may attack during the Friendly Combat Phase. They may then attack any and all Enemy units which are adjacent to them. Only those units directly adjacent to a given Enemy unit may participate in an attack upon that unit.
8.12 Attacking is completely voluntary; units are never compelled to attack, and not every unit adjacent to an Enemy unit need participate in any attack. A Friendly unit in a stack that is not participating in a given attack is never affected by the results of that attack. Units with an Attack Strength of zero and units with Combat Strengths in parentheses (see Case 10.51) may never attack.
8.13 An Enemy-occupied hex may be attacked by as many units as can be brought to bear in the six adjacent hexes.
8.14 No unit may attack more than once per Combat Phase, and no Enemy unit may be attacked more than once per Combat Phase.
8.2 Multiple Unit and Multi-Hex Combat
8.21 All units in a given hex must be attacked as a single Defense Strength. The Defender may not withhold a unit in a hex under attack. Different units in a hex may not be attacked separately, nor may one unit be attacked without involving the other units in the same combat.
8.22 Other units in a hex containing an attacking unit need not participate in that combat or any other attack. Thus when one unit in a stack is attacking a given hex, the other units in the stack could attack another hex, or not attack at all.
8.23 If a unit(s) is adjacent to more than one Enemy-occupied hex, it could attack all of them in a single combat. Thus, units in a single hex may attack more than one hex. The only requirement is that all attacking units must be adjacent to all defending units.
8.24 A given unit's Attack and/or Defense Strength is always unitary; that is it may not be divided among different combats either for attack or defense.
8.3 Effects of Terrain on Combat
(see Terrain Effects Chart, Case 5.4)
8.4 Combat Resolution
Combat odds are always rounded off in favor of the Defender. For example, an attack with a combined Attack Strength of 26 against a group of units defending with a Strength of 9 (26 to 9) would be rounded off to the next lowest combat ratio column on the Combat Results Table "2-1." The combat ratio column used is modified by the Tactical Competence Rating of the attacking units and the attack shift of the HQ units involved in the combat. The die is then rolled and the result dictated by the Combat Results Table is applied using the Combat Option Table.
8.5 Explanation of Combat Results
Each of the units in the Great War in the East QuadriGame has a number of strength levels called Steps. The results on the Combat Results Table direct the Players to an entry on the Combat Option Table (8.9). Under each entry are one or more options, one of which must be fulfilled by the units affected by the combat. These options will require the affected units to lose steps, be retreated, or a combination of both.
8.51 Regiments, most brigades (see Exclusive rules), and supply depots (which are treated as combat units) have one Step. Therefore, if such a unit is reduced one step, it is eliminated.
8.52 Divisions (and some brigades) have two Steps. The second Step being printed on the reverse side of the counter. Should such a unit be reduced one Step, it is flipped over to its weaker strength. Should it then be reduced another one Step, it would be eliminated. Note that some units (in some Scenarios) begin the game in a reduced state.
8.53 Corps have four Steps. The first (full strength) and third (half strength) are represented by the front and back, respectively of each corps counter. The second and fourth Steps of corps are indicated by placing a Corps Reduction marker on top of the counter representing the corps.
Example:
- No Step reduction (first Step): The corps unit at full strength (face-up) with no marker present.
- One Step reduction (second Step): Place a Corps Reduction marker "–1 from Full Strength" on top of the full strength side of the corps counter. This has the effect of reducing the full Attack and Defense Strengths of that corps by one.
- Two Step reduction (third Step): Flip the corps unit over to its weakened strength. No marker is placed on the corps counter.
- Three Step reduction (fourth Step): Place a corps reduction marker "–1 from Half Strength" on top of the weakened strength side of the corps counter. This has the effect of reducing the weakened Attack and Defense strengths of the corps by one.
- Four Step reduction: The corps is eliminated.
8.54 Each result on the Combat Results Table has two results (e.g., "1/2"). The first number is the Combat Result for the attacking units. The second number is the combat result for the defending units. Each number result refers the Players to an entry on the Combat Result Option Table (Case 8.9), which lists the options available to both the Attacker and Defender. Note: Only defending units may ever retreat as a result of combat. When both the Attacker and Defender suffer a combat result the Defender always applies his combat result first, regardless of which option he selects.
8.6 Retreat After Combat
8.61 Only defending units may retreat — never attacking units. The defending Player may elect an option on the Combat Results Option Table that requires an affected stack or unit to retreat one or two hexes. A unit may never be retreated into or through an Enemy unit or through Prohibited hexsides.
8.62 Retreats of Friendly units are conducted by the owning Player, within the parameters of Case 8.63. Units in a stack which retreat must retreat together and may not retreat individually.
8.63 Units must observe the following priorities in deciding which hex to retreat into:
- Toward the nearest Friendly supply source.
- If the retreating unit has a Tactical Competence Rating of 1, into non-Enemy controlled hexes (this priority is superceded by priority 1).
Units are never eliminated, however, if they are not able to observe the retreat priorities. Units may never end their retreat in a hex in violation of the Stacking restrictions. Units which would be forced to do so are eliminated instead.
8.64 If forced not to observe retreat priority 2, units with a Tactical Competence Rating of 1 may be retreated into or through an Enemy-controlled hex. Units with a Tactical Competence Rating of 2, 3, or 4 may not be retreated into or through an Enemy-controlled hex (unless that hex is occupied by a Friendly unit; see Case 7.24). If forced to so retreat they would be eliminated.
8.65 Units may be retreated through other Friendly units, within the bounds of Case 8.63, without disturbing the non-retreating units. The non-retreating units are not affected by the retreating units; they do not have to move out of the way of the retreating units.
8.66 If a unit is forced to retreat into a Friendly-occupied hex (either as a result of combat or cavalry withdrawal before combat) and that hex then undergoes an attack, the retreated unit does not add its Defense Strength to the units in the hex. Nor are its Steps counted to see whether the defending force is the larger side in that combat. If the units with which the retreated force is now stacked suffers a combat result causing them to retreat or be eliminated, the previously retreated force is eliminated. If the units with which the retreated force is stacked loses half its Steps the retreated force would also lose half its Steps (rounding up).
8.7 Advance After Combat
8.71 Whenever an Enemy force is forced to retreat (or is eliminated) leaving the hex it originally occupied vacant as a result of combat, any or all Friendly victorious units which participated in the combat are allowed to advance into that hex, subject to the Stacking limit (Exception: see Case 8.75).
8.72 Advancing victorious units may ignore Enemy Zones of Control.
8.73 The option to advance after combat must be exercised immediately, before any other combat resolution. Units are never forced to advance after combat. After advancing, units may not attack in that Phase, even if their advance places them adjacent to Enemy units whose battles are yet to be resolved or who were not involved in combat. However, advances are useful in cutting off the retreat of Enemy units whose combat has not yet been resolved.
8.74 Victorious defending units may never advance after combat — only victorious attacking units.
8.75 "Ils Ne Passeront Pas!"
In certain cases where all the defending units have been eliminated, if they were in supply at the moment of combat, no attacking units may advance into the vacated hex. This happens:
- When all defending units have been eliminated as a result of selecting option "1" after a combat result of 2.
- When all the defending units have been eliminated as a result of selecting option "1" after a combat result of 3.
In either of these two events, no attacking units may advance into the vacated hex. This represents the fact that the defending units have been eliminated due to holding their ground to the last man — "Ils ne passeront pas!"
8.8 Combat Results Table
Combat Ratios (Attacker to Defender), by Attacker's Tactical Competence Rating.
Key: Result to left of slash refers to Attacker; result to right of slash refers to Defender. # = Combat result, to be used on Combat Results Option Table; - = no effect; E = mandatory elimination of affected unit(s).
Note that units may not attack at less than the minimum ratios listed. Attacks at greater than the maximum ratio listed are resolved as though they were at the maximum combat ratio. See Section 8.0 for complete explanation of Combat Results.
The table is one grid of eight odds columns. The Attacker's Tactical Competence Rating selects which ratio labels the column headings (three label rows below), and the die roll selects the row.
| Attacker's TCR | Column 1 | Column 2 | Column 3 | Column 4 | Column 5 | Column 6 | Column 7 | Column 8 |
|---|---|---|---|---|---|---|---|---|
| TCR 1 | 1-4 | 1-3 | 1-2 | 1-1 | 2-1 | 3-1 | 4-1 | 5-1 |
| TCR 2 and 3 | 1-3 | 1-2 | 1-1 | 2-1 | 3-1 | 4-1 | 5-1 | 6-1 |
| TCR 4 | 1-2 | 1-1 | 2-1 |
8.9 Combat Results Option Table
Attacking Unit Options
| Combat Result | Options |
|---|---|
| 1 | The attacking force must lose a number of Steps equal to one-half the total number of affected steps. The total number of affected Steps is always equal to the number of Steps present in the smaller force at the moment of combat, regardless of whether the smaller force is the Attacker or Defender. |
| 2 | The attacking force must lose a number of Steps equal to the total number of affected Steps. The total number of affected Steps is always equal to the number of steps present in the smaller force at the moment of combat, regardless of whether the smaller force is the Attacker or Defender. Thus, if the attacking force is the smaller, all attacking units are eliminated. |
Defending Unit Options
| Combat Result | Options |
|---|---|
| 1 | 1. Half of the total steps of all affected units are eliminated. 2. Each affected unit (or stack containing any affected units) is retreated one hex. |
| 2 | 1. All affected units are eliminated (Case 8.75). 2. Half of the total steps of all affected units are eliminated and each surviving unit (or stack containing any surviving units) is retreated one hex. 3. Each affected unit (or stack containing any affected units) is retreated two hexes. |
| 3 | 1. All affected units are eliminated (Case 8.75). 2. Half of the total steps of all affected units are eliminated and each surviving affected unit (or stack containing any such units) is retreated two hexes. |
| E | All affected units are eliminated. |
Explanation:
Any unit(s) receiving a result on the Combat Results Table refer to the Combat Result Option Table. Affected defending units refer to the Defending Unit portion of the Table; affected attacking units refer to the Attacking Unit portion. A defending unit that receives a combat result of 1, 2, or 3 has a choice of options; a defending unit that receives a combat result of E is automatically eliminated. An attacking unit that receives a combat result of 1 or 2 must follow the instructions listed for that combat result on the Combat Result Option Table.
Note that, if the force (unit or stack of units) which receives a combat result (i.e., attacker or defender) is smaller (in Steps) than its opponent, all units in that force are affected and must undergo a combat result option. If the force which receives a combat result is larger (in Steps) than its opponent, only a number of Steps equal to the number of affected Steps in the opposing force is subject to a combat result option. The player who owns the larger force chooses which of his units are affected.
The size in Steps of each force is determined at the moment of combat. When a Combat Result Option calls for a stack or single unit to lose half its total Steps, any fraction is rounded up. An option requiring a defending stack(s) or the defending force to lose a number of Steps may be satisfied from any unit or combination of units in each affected stack or force, as the owning Player sees fit, so long as the required number of Steps are eliminated.
The defending Player chooses one option for the entire defending force in an individual combat. If any units in a defending stack undergo an option that requires them to retreat, then all units in the stack (including any unaffected units) must also retreat along with those units along the same path and retreat to the same hex.
All surviving Steps must be retreated when a Player elects to retreat a force as a combat result option. All units of both forces are affected if neither force is larger than the other. A defending force always undergoes its combat result option first.
9.0 Supply
General Rule: Units not in supply are penalized with respect to their movement and attack abilities. They may also lose Steps through attrition as a result of being out of supply (however, see Case 9.24).
Cases:
9.1 Supply Determination
9.11 Supply for Phasing units is determined with respect to the following:
- For movement purposes: during the Initial Supply Determination Segment
- For attrition: during the Attrition Segment
- For combat purposes: at the instant of combat.
9.12 Units are in supply if they can trace a line of supply to a supply source. This line of supply may not exceed that unit's Supply Range (see Exclusive rules).
9.13 The line of supply is traced from the unit in question to a Friendly supply source (do not count the hex the unit occupies). A unit may trace supply to a supply source which is either a Friendly railroad, Friendly mapedge (where a Friendly railroad line exits the map), or a supply depot unit that is itself in supply.
9.14 A supply line may not be traced through an Enemy-occupied hex; it may be traced through a maximum of two Enemy-controlled hexes only if the unit whose supply line is being traced has a Tactical Competence Rating of 1.
9.15 A Friendly rail hex is a supply source only if a path of contiguous rail hexes, free of Enemy-occupied and Enemy-controlled hexes, can be traced from it to a Friendly map edge and the hex was not last occupied by an Enemy unit.
9.16 A supply depot is in supply only if it is within its Supply Range (free of Enemy-occupied and Enemy-controlled hexes) of another supplied Friendly supply depot, or within Supply Range of a Friendly railroad hex which can be used for supply. Supply depots may form a chain from a Friendly railway hex to supply Friendly units (including other supply depots).
9.17 Lines of supply may be traced through hexes which contain only Enemy HQ units.
9.2 Effects of Being Out of Supply
9.21 All units which are out of supply have their Movement Allowances and Attack Strengths (not Defense) halved (round fractions down, but never below one). Being out of supply has no effect on Rail Movement.
9.22 All Phasing units which are determined to be out of supply during the Attrition Segment of the Friendly Movement Phase must roll for attrition. The Phasing Player rolls the die individually for each of his own units that is out of supply. On a die roll of 1, 2, or 3, that unit loses half of its remaining Steps (fractions rounded up). Any other die roll has no effect.
9.23 Attacking (not defending) units determined to be out of supply at the instant of combat must check for attrition as per Case 9.22. This die roll takes place immediately before the odds are computed and that unit's combat is resolved.
9.24 HQ units are the only units immune from attrition under Cases 9.22 and 9.23.
10.0 Command Control
Cases:
10.1 HQ Units
10.11 The HQ units represent the various commanders and their staffs. Each HQ unit is rated according to the ability of the commanding officers. This ability is represented by the Attack Shift, Command Radius, Command Strength and Combat Strength which have the following effects:
- Attack Shift: Each HQ unit may provide a Shift to the right of a number of columns equal to its attack shift on the Combat Results Table, for one attack per Friendly Combat Phase.
- Command Strength: The maximum number of units, represented in Stacking Points, within a given HQ unit's Command Radius (see below) which may receive from it the benefits of being in Command Control.
- Command Radius: The maximum distance (in hexes) that a unit may be from a HQ unit eligible to be in Command Control and receive that HQ's Attack Shift.
- Combat Strength: The Defense Strength of normal HQ units, and the Attack and Defense Strength of Heroic leader HQ units.
10.12 HQ units which have an "H" next to their Combat Strength are "Heroic" leader HQ units. They differ from other HQ units only with regard to their additional effect on combat (see Case 10.2).
10.2 Effects of HQ Units on Combat
HQ units have the following effects on combat:
- Heroic Leaders and normal HQ units may aid one attack within their Combat Radius each Combat Phase with their Attack Shift, which enables the Combat Results Table odds column to be shifted a number of columns to the right equal to the HQ unit's attack shift (see Case 10.21).
- Heroic Leader HQ units may use their Combat Strength for attack and defense, and normal HQ units may use their Combat Strength for defense, when stacked with two or more Stacking Points of Friendly units (see 10.41).
- HQ units may place units in Command Control. Attacking units out of Command Control have their Attack Strength halved (see Case 10.32).
10.21 Attack Shift
Each HQ unit has an attack shift. It may not be used for defense. This represents the ability to Shift the final combat odds of one attack a number of columns on the Combat Results Table to the right equal to the Attack Shift of the HQ unit. Thus, an HQ unit with an attack Shift of 2 could use it to turn a 2-1 attack into a 4-1 attack by shifting it two columns to the right. For an HQ unit to give the benefit of its Attack Shift to an attack, at least half of the attacking units (in terms of Steps, excluding other HQ units and depots) must be within that HQ unit's Command Radius.
10.22 Attack Shift Limit
A given attack may receive only one Shift per Command Level (subject to Case 10.21). For example, an attack could receive a shift from a Corps HQ and shift from an army HQ. It could not receive a Shift from two corps HQ or two army HQ units.
10.23 Heroic Leaders
Certain HQ units are designated as being Heroic leaders. Heroic leaders are those with an "H" next to their Combat Strength. In addition to the Attack Shift they may, when stacked with two or more Friendly Stacking Points, add their Combat Strength to the attack or defense in which that stack is participating.
10.24 Heroic leaders may not apply their Attack Shift to a different combat from the one in which they are applying their Combat Strength.
10.3 How to Determine Command Control
10.31 At the start of the Command Control Segment of the Movement Phase, the Phasing Player must determine the Command Status of all his units, and place an Out of Command Control marker on all those that are not in Command Control. The number of Stacking Points worth of units which may be in Command Control may not exceed the Command Strength of the HQ unit to which they are tracing command. Once placed in Command Control, a unit is in Command Control until the end of that Movement Phase.
10.32 A unit may be placed in Command Control if it is within the Command Radius of a HQ unit. The owning Player then decides which of his units to apply an HQ unit's Command Strength to. Note that if a unit is in Command Control due to Case 10.41, it does not count toward any HQ's Command Strength. Optional: Players who value simplicity may decide to treat the Command Strength of all HQ units as unlimited — they may benefit all the units in their Radius.
10.33 The Command Radius is traced through the hex grid from the hex the HQ unit is in (exclusive) to the hex occupied by the unit being commanded (inclusive). The Command Radius may never be traced through Prohibited terrain, Blocked hexsides, or Enemy-occupied hexes.
10.34 If the Tactical Competence Rating for a given HQ unit is 1, that HQ unit's Command Radii may be traced through Enemy Zones of Control. If an HQ unit's Tactical Competence Rating is 2, 3, or 4, that HQ unit's Command Radii may not be traced through Enemy Zones of Control. For this purpose, the presence of Friendly units in an Enemy-controlled hex negates the Enemy Zone of Control's effect.
10.35 Being entrained or out of supply has no effect on HQ units whatsoever.
10.36 Remember that a Player determines which of his units are in Command Control for movement purposes in the Command Control Segment of his Movement Phase, and for combat purposes in the Command Control Segment of the Combat Phase.
10.4 Effects of Being Out of Command Control
10.41 At the end of each Movement Phase Command Control Segment, the Phasing Player may roll the die for each of his units which are out of Command Control. If the die roll is greater than that unit's Tactical Competence Rating, the Out of Command Control marker is removed from it and the unit is in Command Control for that Movement Phase. If the die roll is less than or equal to that unit's Tactical Competence Rating, that unit remains out of Command Control.
10.42 Attacking units determined to be out of Command Control in the Command Control Segment of the Combat Phase have their Attack Strength halved. This may result in them being halved twice, thus reducing their Attack Strength to ¼ of normal (if they are also out of supply). Units out of Command Control due to being outside a Command Radius during the Command Control Segment of the Combat Phase may not reenter Command Control through a die roll as in 10.41.
10.43 Units with a Tactical Competence Rating of 3 or 4 which are out of Command Control (or out of an HQ unit's Command Radius if they are the non-Phasing units) at the instant of combat add one to the result on the Combat Results Table, with 3 on the table becoming an E.
10.5 Effect of Enemy Actions on HQ Units
10.51 Attack shifts may be used only to benefit Friendly attacks. They may not be used to aid the defense of Friendly units. In addition to the use of their Attack Shift, Heroic leader HQ units may attack and defend with their full Combat Strength, and normal HQ units may defend with a Strength of 1 when stacked with two or more Stacking Points of Friendly combat units. The Combat Strengths of HQ units are never reduced by being unsupplied.
10.52 All HQ units, including Heroic leaders, do not exert Zones of Control. They do not block Enemy lines of supply, retreat or Rail Movement — these can both be traced over and adjacent to them. A Friendly combat unit with an Attack Strength of greater than zero may even move into the hex only containing an Enemy HQ unit (this is an exception to Case 5.13), in which case the Enemy HQ must immediately displace to the hex containing the nearest Enemy unit and/or fortress. Friendly unit retreats may also displace Enemy HQ units. Enemy Displacement may not occur if all six hexes surrounding the Enemy HQ unit are occupied by Friendly units or (if the HQ units have a Tactical Competence Rating of 2, 3, or 4) by Friendly-controlled hexes. Thus, only HQ units with a Tactical Competence Rating of 1 may displace through Enemy Zones of Control. HQ units not stacked with Friendly combat units must displace, at any time during the Enemy Movement Phase if Enemy units are adjacent to it. HQ units stacked with Friendly combat units may never displace.
10.53 HQ units which are part of a defending stack defend with their full Combat Strength provided they are stacked with two or more Stacking Points of Friendly defending units. If there are fewer than two Friendly Stacking Points in the defending hex, HQ units may not add their Defense Strength, regardless of whether they are Heroic or not. HQ units always suffer the same combat results as the Friendly units they are stacked with. If all the Friendly combat units a HQ unit is stacked with are eliminated it also is eliminated (exception: see 10.54). Defending HQ units may only retreat when one or more of the units they are stacked with retreats.
10.54 Certain army-level HQ units have a reverse side, printed with reduced Strengths. Such units may, if eliminated as a result of combat, displace as in Case 10.52 instead of being eliminated. The Enemy Player still receives any Victory Points for eliminating the unit, however. (This represents setting up an alternate HQ under surviving elements.)
11.0 Fortresses
General Rule: Fortresses are permanent elaborate defensive positions. They are printed on the map.
Cases:
11.1 Fortresses and Combat
11.11 Fortresses may never attack. They defend with their printed Defense Strength only. If a Friendly unit is defending in a fortress hex, that fortress adds its Defense Strength to the Defense Strength of those units being attacked.
11.12 Fortresses are affected by combat results in the same manner as normal units with the exception that they must absorb all losses in Steps. They may never retreat.
11.13 All fortresses have four Steps. For purposes of absorbing losses (only), each fortress Step loss is equivalent to two combat unit Steps. Example: If two divisions are stacked with a fortress, (8 Steps: 4 for the fortress and 4 for the two divisions) and the combat result is a 1, the defending Player would have to lose one half of 8 Steps, which would be 4 Steps. They could absorb this loss either by losing the two divisions (4 Steps) or by losing 2 fortress Steps. If an unoccupied fortress is attacked, with a result of 3, the defending Player would have to lose 3/2 (150%) of four Steps which would be 6 Steps. The loss must be absorbed by using 3 fortress Steps.
11.14 Fortresses which have lost two of their fortress Steps use the smaller of their two Defense Strengths. Players should place a "Fortress Destroyed" or "Fortress Weakened" marker in the hex the fortress occupies to reflect this. Players should use Corps Reduction markers to record intermediate Fortress Step losses.
11.15 Once a fortress loses a Step or is eliminated, it may never be replaced.
11.2 Fortress Supply
11.21 Fortresses never count against Stacking limits.
11.22 Fortresses are always in supply. In addition, a maximum of one unit of any size, which is stacked with a Friendly fortress, may be in supply provided it does not attack. This is called "feeding off a fortress." If the unit were to attack, the owning Player would roll for attrition as described in Case 9.22.
12.0 Cavalry
Cases:
12.1 Cavalry Withdrawal Before Combat
Each Player has a Cavalry Withdrawal Before Combat Phase. This occurs between the Enemy Player's Movement and Combat Phases.
12.11 In this Phase, any Friendly Cavalry units (whether or not they are in Command Control) which are adjacent to Enemy units may attempt to withdraw two (no more or less) hexes.
12.12 Cavalry withdrawal is not automatic. The owning Player must roll one die for each cavalry unit attempting such a withdrawan. A die roll higher than the unit's Tactical Competence Rating indicates a successful withdrawal before combat. If the unit does not roll higher than its Tactical Competence Rating, it may not withdraw.
12.13 If the withdrawal is successful, the withdrawing unit is moved two hexes. Only units with a Tactical Competence Rating of 1 may withdraw into or through an Enemy-controlled hex. A unit should withdraw toward the Friendly supply source, but if this is not possible, it may withdraw to another hex.
12.14 Cavalry Withdrawal Before Combat costs no Movement Points.
12.15 If a cavalry unit is not withdrawn or if it ends its withdrawal in an Enemy-controlled hex, it may be attacked in the ensuing Combat Phase.
12.16 Any of the Phasing Player's units (i.e., on the side that is not making the withdrawal) which are adjacent to a hex which is vacated by Cavalry Withdrawal Before Combat may be moved immediately into that hex at the owning Player's discretion, subject to all Stacking rules.
12.17 Cavalry units which Withdraw before Combat into a hex which contains Friendly units never add their combat strength to the Defense Strength of those units during the ensuing Combat Phase; withdrawn units are, however, affected by all combat results which apply to units in that hex (see Case 8.66).
12.2 Cavalry Combat Limitations
12.21 Cavalry may use their full Attack Strength only when attacking hexes containing only Enemy cavalry, depot, or HQ units. If the hex being attacked contains any other type of unit, the attacking cavalry units have their total Attack Strengths reduced by 75% (round fractions down). Thus it would require cavalry units with a total Attack Strength of 4 to attack a hex containing a non-cavalry unit with a combined Attack Strength of 1. Fractional Attack Strengths are ignored.
13.0 Replacement of Lost Steps
Divisions which have lost one Step, and corps which have lost one or two steps, may be restored to full strength during the Step Replacement Phase. The Phasing Player may roll the die for a number of such units and/or Steps (see Exclusive rules for the number of units for each game) which meet all the following criteria:
- There may be no Enemy units within a specified distance of that unit (see Exclusive rules).
- That unit may not have participated in combat (attacked or defended) during the preceding Game-Turn.
- The unit may not have been moved in the preceding Movement Phase of this Game-Turn.
If the die roll for a unit (see Exclusive rules for the range of the die-roll) is successful, that unit is returned to full strength. Cavalry units, fortresses, and supply depots are not eligible for replacement of lost Steps.
14.0 Reinforcements
General Rule: Both Players receive reinforcements. These appear during the owning Player's Movement Phase on the Game-Turn and lettered Entry Hex specified on the counter.
Cases:
14.1 Movement of Reinforcements
14.11 A reinforcement unit expends no Movement Points to be placed on the map in its specified, lettered Entry Hex.
14.12 Certain reinforcement units are designated as arriving entrained. In the Movement Phase when they enter the map on a rail line as a reinforcement, such units are considered already entrained and pay no additional Movement Point cost.
14.13 In several cases, more than one unit is scheduled to appear in the same Game-Turn. These units may appear stacked in the Entry Hex during the Reinforcement Segment. (Remember that the Stacking limit only applies at the end of a Phase.)
14.14 Once a unit is placed on the map as a reinforcement, it may be moved normally beginning with the subsequent Movement Segment of that Movement Phase.
14.2 Restrictions
14.21 Reinforcements may not enter the map in a hex which is currently occupied by an Enemy unit or in an Enemy Zone of Control.
14.22 If, and only if, a scheduled entry hex is Enemy-occupied or Enemy-controlled, the reinforcing unit may enter the nearest unblocked mapedge hex to the scheduled entry hex in the direction of the nearest Friendly unit. However, reinforcements so blocked are delayed by one Game-Turn in their arrival (e.g., they appear during the next Friendly Movement Phase; Exception 14.32).
14.23 Entrained reinforcement units whose Entry Hex is blocked have the additional option of using Off-Map Movement (see Cases 5.37 and 5.38).
14.24 A Player may deliberately withhold reinforcements from Game-Turn to Game-Turn, bringing them into play (if at all) on some later Game-Turn. However, reinforcements must appear on their scheduled hex, alternate hex, or travel off-map by rail.
Exclusive Rules: Caporetto, 1917
15.0 Introduction
Caporetto is a simulation of the combined Austro-Hungarian and German offensive which almost destroyed the Italian Army in the autumn of 1917. This was the first operational use of special shock troops trained in infiltration techniques. These Stosstruppen were using the Italian Front as a training ground in preparation for the big German Spring Offensive of 1918.
16.0 Modifications to Standard Rules
General Rule: This Section details modifications to the Standard Rules required by this particular game. Players should read the Standard Rules first. Otherwise, many terms and concepts will be unfamiliar. The numbers refer to the Case in the Standard Rules being modified.
2.3 Playing Pieces: There are no superior unit designations. Units without a set-up hex or Game-Turn of entry appear only in the Tyrol Offensive Scenario (excepting the Italian 41st and 42nd Cavalry Divisions). Headquarters units have no Command Strength. Stosstruppen are marked with a diagonal stripe through the counter. The Italian 19th Division is treated like a Corps for all purposes; its counter has a corps size designation (xxx).
2.31 How to Read the Units (Headquarters): The Headquarters counter shows a Command Strength, a Command Radius, an ID, a Set-up hex, a Defense Strength and a Movement Allowance.
2.32 Markers: The following markers are used.
- Full Strength -1 (front) / Half Strength -1 (back): Corps Reduction markers.
- OCC (front): Out of Command Control.
- MOVED (front): Moved.
- Un-Supplied (back): Unsupplied.
- Fort DEST (front): Fort Destroyed.
- Fort Wknd (back): Fort Weakened.
2.4 Definition of Terms:
Tactical Competence Rating: Tactical Competence Ratings are not assigned to an army as a whole, but vary by unit within each army. Units with a Movement Allowance of 8 or 10 have a TCR of 1. Units with a Movement Allowance of 4 or 6 have a TCR of 2. (Note: for TCR effects unique to Caporetto see modifications to Standard Rules Cases 5.37, 8.4, 10.33, and 12.1 and Exclusive Rules 20.0 and 23.2).
Allies: The Allies are Italy, France and Great Britain.
Central Powers: The Central Powers are Austria-Hungary and Germany.
Stosstruppen: Stosstruppen are "shock troops", specially trained for infiltration tactics.
2.5 Game Scale: One Game-Turn = 48 hours. One Hex = 5.55 km.
4.0 Sequence of Play: The Central Powers Player is the first Player. The second Phase is the Withdrawal Before Combat Phase, and applies to all TCR-1-rated units.
4.1 Game Length: The game is played in 15 Game-Turns, representing October 24 to November 21, 1917, but may be ended earlier by mutual agreement between the Players.
5.31 Rail Movement: Rate: Central Powers = 44 hexes, Allies = 36 hexes. Capacity: Central Powers = 12 Stacking Points per Game-Turn. Reinforcements count against this limit. Allies = 16 Stacking Points per Game-Turn. Reinforcements do not count against this limit on the Game-Turn of their arrival.
5.32 Friendly Rail Line: All rail lines on the Central Powers side (north and east) of the trench system are friendly to the Central Powers. All rail lines on the Allied side (south and west) of the trench system are friendly to the Allies.
5.32 Entrainment (printed as 5.32 in the source): All units expend 2 Movement Points to entrain, regardless of TCR.
5.34 Detrainment: Artillery units may not use their Barrage Strengths to support an attack in the same Player-Turn they have detrained.
5.4 Terrain Effects Chart: For Rivers, see Exclusive Rules Section 18.0. Ridge hexsides are impassable to Artillery and Supply Depot units. The Movement Point Costs to cross a Ridge hexside are +1 Movement Point for Alpine units and +2 Movement Points for Infantry and cavalry units.
6.0 Stacking: The Stacking Limit is 12 Points.
6.11 Stacking Value: A Corps is 9 Stacking Points. The Monitor unit has no Stacking Points.
7.0 Zones of Control: Stosstruppen do not pay any Movement Point Costs to enter an Enemy-controlled hex. All other units pay 1 Movement Point to enter an Enemy-controlled hex.
7.1 Extent of Zones of Control: Zones of Control do not extend from one Trench hex to another Trench hex, unless both hexes are part of the same contiguous Trench line. Zones of Control extend across Ridge hexsides for Alpine units only.
7.26 Unit Without Zone of Control: The Italian Monitor unit never exerts a Zone of Control.
8.14 Multiple Use of Artillery: See Exclusive Rules Case 17.26.
8.4 Combat Resolution: When units of differing TCR are jointly participating in an Attack, the Attack is resolved using the combat odds column corresponding to the TCR possessed by the majority of the Attacking Stacking Points, excluding Artillery and Headquarters. If the TCRs are of equal weight, use the TCR 1 column.
8.51 Brigade Steps: Brigades with values printed on the back of the counter have two steps. Brigades printed on one side only have one step.
8.61 Retreat After Combat: Only TCR 1 units may retreat over Ridge Hexsides.
8.62 Retreat and TCR: In Retreat, a stack's TCR is determined as in Exclusive Rules Case 8.4.
8.63 Retreat and Stacking: Units may be overstacked as a result of Retreat, but the overstacked condition must be alleviated by the end of the next Movement Phase or excess units are eliminated. The Owning Player decides which excess units are eliminated.
8.75 Ils ne Passeront Pas!: During the first five Game-Turns only, a defending Italian unit receiving a Combat Result of 2 or 3 may exercise option "1" (denying the Central Powers Player the hex), only after rolling one die and obtaining a die result which is equal to or less than the number of the Game-Turn. This die roll is done after the Combat Result has been obtained. Beginning with Game-Turn 6, there is no special restriction on use of the Ils ne Passeront Pas option.
9.12 Supply Range: Allied units = 6 hexes. Central Powers units = 4 hexes. The Allied Player may trace a supply line from Venezia (if it is in supply) via Lagoon hexes to any Lagoon coastal hex; this path is included in the Allied supply radius count.
9.13 Supply Source: Hex 0124 is a Supply Source for Central Powers units. Hex 0334 is not a Supply Source for the Central Powers units under Standard Rules Case 9.13 (friendly mapedge rail hex) but is under Standard Rules Case 9.15 (tracing to hex 0133).
9.15 Rail Line: See Exclusive Rules Case 9.19.
9.18 Supply Lines: Only units with a TCR 1 rating may trace supply lines across a Ridge hexside. Central Powers' supply lines cannot be traced through hexes occupied by the Italian Monitor unit.
9.19 Rail Interdiction: A friendly railroad hex which is within 2 hexes of an enemy Artillery or Monitor unit cannot be used as a supply source, unless it is also a Mountain terrain hex. Such an interdicted hex also interrupts the path of contiguous rail hexes of Standard Rules Case 9.15.
9.21 Movement Effects for Units Out of Supply: Stosstruppen, when Out of Supply, have a Movement Allowance of 6, not 4.
9.22, 9.23, 9.24 Attrition: Central Powers units in Clear or City Terrain do not undergo attrition when Out of Supply.
9.25 Italian Monitor: The Italian Monitor unit is always in supply.
10.0 Command Control: There is no Command Strength factor; all units within Command Radius are in Command Control. HQ units may benefit any friendly unit regardless of nationality.
10.2 Heroic Leader: For the Rommel Heroic Leader counter, see Exclusive Rules Case 21.0.
10.33 Command Radius: Command radii may be traced through a Ridge hexside only to a TCR 1-rated unit.
10.55 Monitor Command Control: The Italian Monitor unit is always in Command Control and never affects Central Powers' Command Control. An Allied unit stacked with the Monitor unit is always in Command Control.
12.1 Withdrawal Before Combat: When withdrawing before combat, all units rated TCR 1 are treated as if they were Cavalry. (See Exclusive Rules Case 23.31.)
12.2 Cavalry Combat Limitations: Standard Rules Case 12.2 does not apply to Caporetto.
13.0 Replacement of Lost Steps: Brigades are eligible for Step Replacement. Step Replacement must take place at a minimum distance of 5 hexes from any supplied enemy unit (excluding the Monitor unit). Exception: Step Replacement can take place in a Fortress hex within 5 hexes of a supplied enemy unit if a line of supply may be traced from the Fortress to a friendly Supply Source uninterrupted by enemy units, enemy zones of control, prohibited hexsides or Ridge hexsides. Central Powers units replace a lost step on a die roll of 1. Italian units replace a lost step on a die roll of 1 in Game-Turns 3-9, 1-2 in Game-Turns 10-12, 1-3 in Game-Turns 13-15. Italian units in Game-Turns 1 and 2, and all French and British units may not replace lost steps. Corps may only replace 1 step at a time; Corps with only 2 steps remaining can be rebuilt.
14.12 Movement of Reinforcements: All reinforcements arrive entrained, but Allied reinforcements do not count against Rail Capacity on the Game-Turn of their arrival.
14.3 Allied Reinforcements: Allied reinforcements arrive at hex 1833, only. They can arrive there even if the hex is in an enemy Zone of Control; they cannot arrive during any Game-Turn in which the hex is enemy-occupied. For the Italian 41st and 42nd Cavalry Divisions, see Exclusive Rules Case 22.0.
14.4 Central Powers Reinforcements: Central Powers' Reinforcements whose counters show only the Game-Turn of arrival (without a letter indicating an arrival hex), can arrive at any lettered hex or at hexes 0901, 2804, or 2806.
17.0 Artillery
General Rule: Artillery Brigades and the Italian Monitor unit can assist in combat through use of their Barrage Strengths, which are printed on the counters in parentheses.
17.1 Artillery in Attack
17.11 In attack, the Barrage Strength of the supporting unit is added to the Attack Strength of the units it is supporting. The Barrage Strength is not affected by river hexsides.
17.12 To support an attack, the supporting unit must be adjacent to or stacked with one of the attacking units. It cannot be separated from either the attacking unit or the defending unit by an Impassable or Ridge hexside.
17.13 In Mountain terrain, the supporting unit must be stacked with one of the attacking units.
17.14 A supporting unit can support only one attack per Game-Turn.
17.15 To receive support, the attack must be conducted with a total of all Attack Combat Strength Points involved in the attack equal to at least one-half the supporting Barrage Strength. To adhere to this requirement, the Attacking Player may voluntarily reduce the number of Barrage Strength points contributed (to below the Barrage Strength of the supporting unit). "Unused" Barrage Strength Points may never be contributed to a separate attack. (See Exclusive Rules Case 17.14.)
17.16 Supporting units never suffer combat losses in an attack.
17.17 Rail interdiction (Exclusive Rules Case 9.19) is automatic and does not interfere with other functions by an Artillery Brigade or the Italian Monitor unit.
17.2 Artillery in Defense
17.21 In defense, the Barrage Strength of the supporting unit is added to the Defense Strength of the unit it is supporting. The Barrage Strength is not affected by river hexsides; it is doubled by mountain terrain.
17.22 To support a defense, the supporting unit must be stacked with or adjacent to one of the defending units, and cannot be separated from the defending unit(s) by Impassable or Ridge hexsides.
17.23 In Mountain terrain, the supporting unit must be stacked with one of the defending units.
17.24 A supporting unit can support only one defense combat per Game-Turn.
17.25 Artillery and Monitor Barrage support is allocated to defending units after enemy Barrage support and Headquarters shifts have been declared.
17.25 (second paragraph printed under the same number in the source) There is no limit on the amount of Barrage Strength Points from one or more supporting units contributed to the defense.
17.26 An Artillery Brigade not stacked with a Division or Corps does not use its Barrage Strength to defend itself; it uses its Defense Strength. An Artillery unit which is stacked with a Division or Corps may choose to contribute its Defense Strength instead of its Barrage Strength when the stack containing the Artillery unit is attacked. An Artillery Brigade using its Defense Strength when attacked may support adjacent units with its Barrage Strength. An Artillery Brigade which has allocated its Barrage Strength to the defense of an adjacent unit may only use its Defense Strength if the hex containing that Artillery Brigade is attacked.
17.27 A support unit does not incur combat loss when supporting a Defense, unless it is stacked with the unit being supported. The Monitor unit is never affected by combat.
17.3 Monitor Unit
The Italian Monitor unit represents numerous shallow-draft monitors and gunboats which provided inshore fire support from waters too shallow for the Austro-Hungarian Navy.
17.31 The Italian Monitor unit moves only in all-sea or coastal hexes. It cannot enter hexes containing rivers or Major Rivers unless the hex also contains coastal waters. It must move from hex to hex via a contiguous path of sea or coastal water, at a cost of 1 Movement Point per hex.
17.32 The Monitor does not affect and is not affected by land units except when it functions as an artillery support unit, transmits Command Control (Exclusive Rules Case 10.55), or interdicts supply (Exclusive Rules Cases 9.18 and 9.19). It does not have a Zone of Control and does not pay Movement Point Costs for entering a Zone of Control. It is always in Supply and in Command Control, is never affected by combat, does not block Movement or Command Radius, and has no Stacking Points.
18.0 Rivers
Commentary: Weather was bad during the first phase of the offensive, there was snow in the mountains and rain in the plains. The numerous rivers remained flooded throughout the campaign. The Italians succeeded in destroying bridges at critical moments, although they stranded a few small units on the wrong side.
18.1 Minor Rivers: All units expend 1 Movement Point to cross a Minor River hexside.
18.2 Major Rivers: Central Powers' units expend 3 Movement Points to cross the Tagliamento and Piave Rivers where these are Major River hexsides; they expend 2 Movement Points to cross all other Major River hexsides. Allies' units expend 1 Movement Point to cross all Major River hexsides.
19.0 Forced March
General Rule: All units may temporarily increase their Movement Allowance through Forced March.
Procedure: When moving any unit, the phasing Player announces the unit is being Force Marched. Upon completion of that unit's movement, he undertakes Step Loss Procedure for it.
Cases:
19.1 Effects of and Restrictions on Forced March
19.11 Forced March adds 1 Movement Point to units with a Movement Allowance of 4 and adds 2 Movement Points to units with a Movement Allowance of 6 or 8.
19.12 Forced March cannot be used with units whose Movement Allowance, whether permanent or temporary (see Case 24.2), is 10, cannot be used with Supply Depots, and can only be used during a Movement Phase.
19.2 Forced March Attrition
19.21 A Corps Force Marched automatically takes a 1 Step Loss.
19.22 When a division or brigade has been Force Marched, the owning Player must, upon completion of that unit's movement, roll one die. On a 1-3, the division or brigade takes a 1 Step Loss. On a 4-6, the division or brigade takes no Step Loss.
20.0 Pursuit
General Rule: If a unit retreats more than 1 hex, attacking units with a rating of TCR 1 may advance the same number of hexes, if the advance follows the same route as the retreating unit, does not violate stacking restrictions, and does not cause the attacking unit to occupy a hex containing an enemy unit other than a supply depot or a headquarters. Given these conditions, if an attacking unit advances into a hex containing only a supply depot or only a Headquarters, the depot is eliminated and the Headquarters is displaced to that hex occupied by the retreating unit.
21.0 Heroic Leaders (Optional)
Commentary: Erwin Rommel was a Captain in charge of a battalion of the Bayrischer Alpenkorps Division, distinguishing himself through many daring and successful exploits, during the Caporetto Campaign. On the Italian side, Brig. Generals DiGiorgio and Ferretti performed heroically in extracting their troops from the disaster. While high level leadership was not particularly distinguished on either side, this optional Section incorporates some of the flavor of the effects of lower-level heroism.
Cases:
21.1 Rommel
21.11 The Rommel Counter has a Stacking Point Value of 0 and is always stacked with the Bayrischer Alpenkorps (BA) Division. If the BA Division is eliminated, so is Rommel.
21.12 The Rommel Counter has a Heroic Leader Combat Value of 1, which is added to any Attack made by the BA Division. Rommel does not give Command Control and does not benefit the Defense.
21.1 DiGiorgio-Ferretti Provision
21.21 There is no counter for DiGiorgio or Ferretti.
21.22 Once each Game-Turn, the Allied Player may add one point to the Defense Combat Strength of any two Italian units which are in Supply. This Provision is exercised during the Game-Turn Record Interphase for the following Game-Turn.
21.23 The DiGiorgio-Ferretti Provision does not give Command Control and may not be used in the Attack.
22.0 The Milano Strike
Commentary: The Italian 41st and 42nd Cavalry Divisions were employed in breaking a strike by workers in Milano.
General Rule: The arrival Game-Turn of the Italian 41st and 42nd Cavalry Divisions is dependent upon the date the strike in Milano is suppressed.
Procedure: At the beginning of each Allied Player-Turn, the Allied Player rolls a die. A result equal to or less than the number of the Game-Turn indicates that the strike has been crushed. Two Game-Turns later the 41st and 42nd Cavalry Divisions arrive as reinforcements.
23.0 Surprise Attack
Commentary: When the Central Powers' big guns opened fire for the assault at 2 a.m. on October 24, 1917, the Italian High Command had known for two days that the attack was coming. Preparations at Second Army HQ, however, were woefully lacking. More important than the partial operational surprise, was the tactical surprise achieved by the Stosstruppen's infiltration tactics, diametrically opposed to accepted World War I offensive doctrine. The combined effects of both tactical and operational surprise are simulated in this Section.
23.1 Attack Shift
During Game-Turn 1 only, all Central Powers attacks made by stacks containing Stosstruppen benefit from a column shift of one column to the right on the CRT, in addition to command shifts.
23.2 Stosstruppen Movement
During Game-Turns 1 and 2, all Stosstruppen units have a temporary Movement Allowance of 10 Movement Points, not 8.
23.3 Italian Reaction
23.31 During Game-Turn 1 only, Italian TCR-1-rated units may not withdraw before combat.
23.32 During Game-Turn 1 only, Italian TCR-2-rated units may not retreat through an enemy Zone of Control even if there is a friendly unit occupying the hex. This is an exception to Case 7.24.
24.0 Victory Conditions
Commentary: The Central Powers originally sought to achieve a limited victory and give some easy combat experience to the Stosstruppen in preparation for the Spring Offensive against France. The Stosstruppen had no plans to cross the Tagliamento River. Surprised by their own success, the Central Powers reached out to convert their gains into a strategic victory, which would demolish the Italian Army and take Italy out of the war. When the magnitude of the disaster set in, the Italian High Command sought to delay the offensive long enough to allow most of the Italian Army to withdraw from the trap and set up a new and shorter defense line — Italy's last stand — on the Piave River.
24.1 Central Powers Victory Points
24.11 The Central Powers Player receives 10 Victory Points for each supplied division, corps or artillery step southwest of the Piave River and southeast of the 14xx hexrow at the end of the game.
24.12 The Central Powers Player receives 20 Victory Points for each Italian Fortress destroyed.
24.13 The Central Powers Player receives 5 Victory Points for each French or British Step Lost, 2 Victory Points for every Italian Corps eliminated, and 1 Victory Point for every Italian division or artillery brigade eliminated.
24.2 Allied Powers Victory Points
24.21 The Allied Powers Player receives 5 Victory Points for each supplied division, corps or artillery step in or northeast of the diagonal hexrow from 0128 to 2516 at the end of the game. Two brigades count as a division (artillery excepted).
24.22 The Allied Powers Player receives 5 Victory Points for each Stosstruppen Step Lost.
24.23 The Allied Powers Player receives 40 Victory Points if he has a supplied unit in Trieste or Trent at the end of the game.
24.3 Victory Determination
24.31 The Player with more Victory Points wins. If both players have the same amount of Victory Points, the game is drawn.
24.32 The Central Powers Player has won a Decisive Victory if he has met the requirements of Exclusive Rules Case 24.31 and has destroyed all the Italian Fortresses.
24.33 The Allied Powers Player has won a Decisive Victory if he has met the requirements of Case 24.31 and has eliminated 5 German Stosstruppen divisions.
24.4 Special Rommel Victory Points (Optional)
If the Rommel counter is eliminated, the Germans and Italians each lose 20 Victory Points, and the British and French each gain 20 Victory Points.
25.0 Tyrol Offensive Scenario (Hypothetical)
Commentary: After Caporetto, the Germans often wished they had committed themselves from the start to a decisive offensive designed to take Italy out of the War. This Scenario depicts a historical alternative possibility. What if the Germans had made additional troops available to the Austro-Hungarians, troops which were trained in Stoss techniques but never sent south? What if the Austro-Hungarians had moved other available cavalry and infantry divisions from their general reserves and from other less active fronts? What if they had then made a major effort to coordinate the Caporetto offensive with a similar offensive from the Tyrol salient around Trent?
In order to produce a more balanced game, this Scenario also hypothesizes that the British and French lived up to their earlier promises, reinforcing the Italian front before the offensive broke.
25.1 Modification to Caporetto Rules
Beginning with Game-Turn 3, French units may replace lost steps on a die roll of 1. Beginning with Game-Turn 6, British units may replace lost steps on a die roll of 1.
25.2 Central Powers Forces
25.21 In addition to the units in the Historical Scenario, the Central Powers Player may set up the following German units in any hex in or northwest of the Austro-Hungarian trench line between 0833 and 0222: 195th and 79th Reserve Stosstruppen Divisions (4-5-8).
25.22 In addition to the units in the Historical Scenario, the Central Powers Player may set up the following Austro-Hungarian units: the 1st, 8th and 9th Cavalry Divisions (1-2-8); the 25th, 26th and 46th Infantry Divisions (2-3-6); and Depots 10 through 14. These units may be placed in or on the Austro-Hungarian side of any Austro-Hungarian trench line. Their use in the Tyrol sector is suggested the first time this Scenario is played.
25.23 The Central Powers Player may transfer any 4 German Stosstruppen divisions from their set-up hexes in the Historical Scenario to set-up hexes in or behind the Austro-Hungarian trench lines between 0833 and 0209, providing that Stacking Limits are not exceeded. If two or more are transferred, one Corps HQ may also be transferred and if four are transferred, one Army HQ may be transferred. The Austro-Hungarian 33rd Infantry Division (2-3-6) may be set up in any hex vacated under this Case.
25.3 Allied Powers Forces
25.31 In this Scenario, the Allied Player sets up first.
25.32 The Italian XXV Corps (3-4-6) is not set up, but arrives as a reinforcement on Game-Turn 10.
25.33 All French and British units given in the countermix are set up in Italian Fortress hexes, but not in excess of Stacking Limits.
Appendix
Players may wish to experiment with some or all of the following options, which are provided as suggestions since they have neither been playtested nor developed as fully as the two regular Scenarios.
A. Free deployment for either or both Players, keeping of course to the proper side of the trench lines, in either the Historical or the Tyrol Offensive Scenarios.
B. Matching the Central Powers' Order of Battle for the Historical Scenario with the Allied OB for the Tyrol Offensive Scenario. This represents an earlier Allied fulfillment of the Anglo-French promise to deploy troops to the Italian front before the offensive was launched. Alternatively, matching the Central Powers' Order of Battle for the Tyrol Offensive Scenario with the Allied OB for the Historical Scenario. This represents a German commitment to a decisive campaign in Italy without tipping the French and British off to what was in the works.
C. If the Italians had not allowed certain previous defensive positions to deteriorate after their advance to the Isonzo earlier in the war, they might have put up more effective resistance. One such line ran from hex 1334 to hex 1326; another ran along the rail line from Gemona through Udine to Gorizia. Units of either Player occupying a hex in these switch lines add 1 to their Defense Combat Strength; the lines have no other effect on play.
Errata
The following corrections are from a one-page errata sheet for Caporetto distributed at grognard.com (dated 9/7/2005). It is a fan-compiled errata document, not a publisher release; it is reproduced here for reference. The rules above are transcribed as printed in the 1978 booklet, and the corrections are not merged into the text.
CAPORETTO
16.0 (correction, Case 2.31): The number on the top left of the HQ counter in Caporetto is the Attack Shift, not the Command Strength; see modification of Section 10.0.
16.0 (clarification, Case 9.12): "Lagoon Coastal hexes" include 2526, 2524, 2523, 2522, 2425, 2423, 2421, 2325, 2324, 2323, and 2322. "Lagoon hexes" include 2424 and 2422.
17.0 (clarification): The Barrage Strength of artillery units is printed in parentheses on each of the counters.
25.22 (correction, lines 6-7): "and the four extra Depot units provided in the counter-mix, which are numbered 10-13."