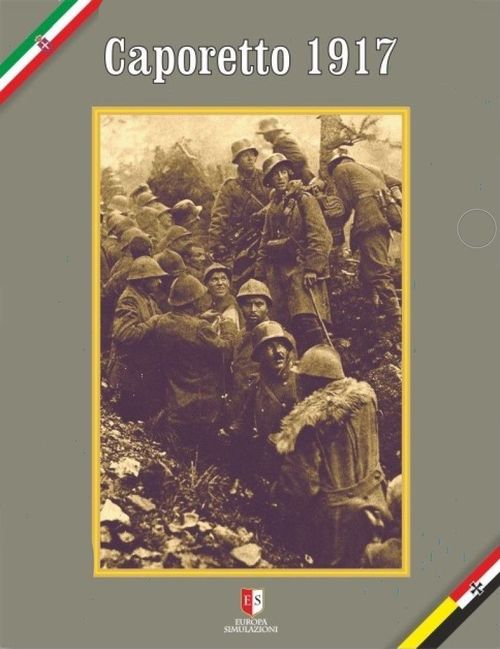
Caporetto 1917
Caporetto 1917 Rulebook
Table of Contents
Table of Contents
- 1.0 Introduction
- 2.0 Components
- 3.0 Game Terms
- 4.0 Sequence of Play
- 5.0 Reinforcements
- 6.0 Logistics
- 7.0 Command
- 8.0 Weather
- 9.0 Supply
- 10.0 Movement
- 10.2 Assault Declaration
- 10.3 Non-Activated Units Movement
- 10.4 Forced March
- 11.0 Stacking
- 12.0 Combat
- 13.0 Activation Completed
- 14.0 Reaction by the Non-Active Player
- 15.0 Disorganization
- 16.0 Step Losses
- 17.0 Trenches
- 18.0 Artillery
- 19.0 Isonzo River
- 20.0 Recovery
- 21.0 Special Rules
- 22.0 Fog of War (Optional Rule)
- 23.0 Victory Conditions
- 24.0 Scenario 1: Historical Campaign Game – "Das Wunder von Karfreit"
- 25.0 Scenario 2: "What If" Campaign Game – "The End of the Caporetto Legend"
- 26.0 Scenario 3: "On to Cividale"
- 27.0 Scenario 4: "Monte Maggiore"
- 28.0 Tolmino Holding Map
- List of Abbreviations
- Historical Notes: Prologue to Caporetto
- Historical Notes: The Battle of Caporetto
- Design Notes
- Bibliography
- Abbreviated Sequence of Play
- Dedication
1.0 Introduction
Caporetto 1917 is an operational level game simulating the first four days of the most famous battle in Italy of the First World War. The game rules are an evolution of the former games in the series, Strafexpedition and Gorizia 1916. While game concepts have been maintained, some essential aspects, as the time scale, have been changed.
Each game plays with its own rules.
The opposing sides are the Austro-Hungarian/German (AHG) army and the Italian (IT) army.
2.0 Components
2.1 The Map
The game maps display the area over which the battle was fought. The maps are overlaid with a hexagonal grid (hexes) that is used to regulate movement and fire. Each hex contains one or more types of terrain. The various terrain types are listed on the Terrain Effects Chart and are discussed in the rules below. In many cases approximations of the real terrain are used to adapt the geographical features to the hexagonal grid.
Each hex also has an elevation level, each level represented by a different color (see the TEC). When more than one elevation level is present in a hex, the relevant level is the one present in the center of the hex.
A small map is included, focused on the Tolmin Bridgehead, to be used for artillery deployment and fire, in order to avoid stacking problems in the area. Only artillery units in battery mode can be placed on this map. When they are set to move mode, they are transferred to the regular map.
2.1.1 Game scale
Each hex represents about 900 meters across. Each game turn represents one half day. Game Turns are 12 hours long, and for each day there is an AM and a PM Game Turn. AM and PM game turns are identical.
2.2 The Counters
There are four types of counters in Caporetto 1917: Combat units, Artillery units, Formation Headquarters and Informational markers.
2.2.1 Combat units
These counters represent the military units on the battlefield; they are mostly battalion-sized. The front side of a Combat unit's counter displays the unit's full strength; the back side shows its reduced strength (in a two-steps unit).
Combat unit types include:
- Infantry
- Mountain Infantry
- Bersaglieri
- Bicycle
- Cavalry
- Machine-guns
- Engineer
- Flamethrowers
- Infiltration Capable Infantry
Combat unit counter key: Formation name/color; Battalion/Regiment ID; Division ID; Morale Value; Combat Factor; Movement Allowance; Machine Gun Factor.
2.2.2 Artillery units
Each Artillery unit represents several batteries, not necessarily corresponding to a "battalion" in size. The front side of an Artillery unit is the unit's "fire" mode side, while the back is its "move" mode side. Artillery units display the number of the Corps to which they are attached on the right of the unit symbol and the Division on the left. The shield in the top left corner identifies the Wing of the artillery unit in Scenario 1: Grey for Left, Black for Right.
Artillery units include:
- Light Artillery
- Medium Artillery
- Heavy Artillery
- Bombard / Minenwerfer
Artillery unit counter key: Identification; Division Attachment; Corps Attachment; Bombardment Factor; Movement Allowance; Range.
2.2.3 Units and Formations
Combat Units are grouped into "Formations," which generally correspond to Regiments or Brigades. A Formation's command is represented by a Headquarters counter (HQ). Combat Units and HQs have a colored horizontal bar on their top side, and a name or number, to identify the Formation to which they belong.
Formation Headquarters (HQs) counter key: Formation identification and reference color; Initiative Value; Command Range; Division ID; Commander Name.
The badge underneath the Morale Value is the Formation Badge for the Italian units. Austro-Hungarian and German units display the recruiting area and regional badge beside the Formation number (see table below). The form/color of this badge has no effect on play.
The printed key lists these Austro-Hungarian and German recruiting-area badges, in this order (the badge graphics are shown on the printed page and have no effect on play):
- Slovenia
- Croatia
- Czech (Bohemia)
- Bosnia – Herzegovina
- Romania (Transylvania)
- Poland (Galicia)
- Ukraine (Ruthenia and Bukovina)
- Hungary
- Austria
- Bavaria
- Prussia
- Wurttemberg
- Silesia
- Brandenburg
Some units are Independent units and do not belong to specific Formations. These units do not show any colored bar on the top of their counter. They may be attached to a specific Formation during operations as the player sees fit (see 7.3 and 7.4). Independent units may belong to a specific Division. In this case they can only be activated with Formations of their own Division.
2.2.4 Informational markers
These are used to indicate specific conditions for units in hexes. Their use is explained throughout the rulebook.
2.2.5 Charts and Tables
The use of each chart and table is explained in the rules.
- Formations Display (FD)
- Terrain Effects Chart (TEC)
- Assault Table and Bombardment/Defensive Fire Table
- Charts with: Surrender and Eliminated units Boxes, Logistics Points Track (LPT) and Game Turn Record Track (GTRT)
2.2.6 Set Up Sheets
Here are the information to set up your units for each scenario. On the division column there are the names of the Division Commander below the Division ID. They have no markers or influence in the game, they are for historical interest only.
2.2.7 Dice
Two six-sided dice are included in the game.
3.0 Game Terms
The most used terms during play are summarized in this section:
Formation and Formation HQ: Combat units in the game are grouped in formations which generally correspond to Brigades or Regiments. Each Formation is identified by its name or number, and by a colored band across the top of each unit belonging to it. Every Formation has an HQ unit with an Initiative Value and a Command Range span. The HQ unit is the Formation center of operations and represents the command center for the units belonging to the Formation. It does not represent real officers and staff in the field, rather just the area of operations and the capacity of the staff. The counter is also used during the Command Phase, to decide which Formations will be activated during the current game turn.
Battalion equivalent: A battalion-equivalent consists of: any battalion-size, also reduced, unit or up to four Generic Infantry company. Machine Gun (MG), Flamethrowers and HQs units are always excluded from this computation.
Command Range: The maximum distance in hexes a unit may be from its Formation HQ and still be in Command.
Player Initiative: This represents the willingness of one side to commit its resources to the battle. In Caporetto 1917 the Initiative is always on the AHG side.
Activated Formation: The Formation chosen to receive both command and logistical support to undertake offensive operations during the current Action Phase.
Action: All activities undertaken by units belonging to an Activated Formation are collectively called an Action. Actions are composed of Steps ordered in the Action Phase Sequence.
Active player: The player (side) who activates a Formation in an Action Phase and will conduct Assaults in the same Phase. The opposing player is the Inactive player.
Logistics Points (LP): LPs represent the logistical effort of each side. They represent the use of logistical resources, like ammunitions or war materials, and the coordination of rear area operations. They are the "fuel" for any offensive or defensive activity. In Caporetto 1917 LPs are only used by the IT side.
Combat Factor: It represents a unit's strength in combat. It is for the most part a function of the number of soldiers in the unit. It may be reduced by losses suffered.
Machine Gun Factor: It represents a unit's firepower from Machine Guns and support weapons, and the ability to emplace and use them.
Morale Value: It represents the level of training and experience of the unit. It affects a unit's endurance and ability to sustain the strain of combat.
Bombardment Factor: It represents the number and caliber of the guns in an artillery unit.
Range: A Range is a path of contiguous hexes. All ranges are calculated from the hex projecting the range (exclusive), to the destination hex (inclusive). Ranges include the maximum distance in hexes that an artillery unit can fire, LoS distance, Supply and Command range.
Line of Sight (LoS): A straight line between two non-adjacent hexes that allows units in them to observe each other. It is blocked by intervening hex or hexside terrain that is higher than that found in either the observing or target hex. Usually is SIX (6) hexes. It can be increased by height or reduced by Weather.
Movement Allowance: The capacity of a unit, expressed in Movement Points, to move on the battlefield.
Zone of Control (ZoC): The six hexes immediately surrounding each Combat unit represents its Zone of Control. All Combat units (except Flamethrowers) project a ZoC. HQ and Artillery units do not project a ZoC. A unit's Zone of Control never extends into hexes into which the unit cannot move. ZoCs do not extend into Town, Woods, or enemy Trench hexes or hexsides, nor across Crags or unbridged River hexsides.
Trenches: In the game there are two types of Trenches: in the hex and along the hexside. Each Trench has a Level, ranging form 0 (destroyed) to 2, which represents the amount of earthworks and defensive measures deployed. All Trenches are printed on the map. A Trench with a double line indicates a Level 2 on map Trench. A single line indicates Level 1. Level 0 is represented by a marker.
Disorganization: The amount of wearing out inflicted upon units through combat. It can increase due to bombardment, lack of food and ammunition supply, combat fatigue, etc. and it is measured in Disorganization Points.
Surrender threshold: If a unit's Disorganization Level equals or exceeds its Morale Value, the unit's cohesion breaks down. When close to the enemy it might surrender.
Victory Points: VPs are gained by each player, based on geographical objectives, unit losses, or other game actions. The Victory Points are used to calculate the winner of the game if a Sudden Death Victory is not achieved.
4.0 Sequence of Play
Select one the available Scenarios and setup units according to the specific instructions. The game is played in turns. On each game turn (GT) undertake the following actions in the order listed below. In each Phase, if not specified, the activities are conducted concurrently.
-
Reinforcement Phase (5.0): Reinforcement units are placed on the map, following the scenario instructions (6.0). LPs are added to the Logistics Points Track (LPT) for the IT side.
-
Command Phase (6.0, 7.0): Each player secretly decides which of his Formations he will activate during this turn. If a Formation is chosen for activation place the corresponding HQ counter on the appropriate box on the Formation Display. The IT player can place a Formation HQ counter on the Formation Display by the expenditure of one (1) Logistics Point. Moreover, to attach any 5 Artillery units to a Formation requires one additional (+1) Logistics Point (see rule 7.3). There is no need to designate now the exact Artillery units that will be attached to the Formation; this will occur at the moment a Formation will be activated. Expended LPs are immediately deducted from the LPT total.
The AHG side does not use LPs and may activate all of his Formations in one GT. His Formations do not need artillery attachments now. They can receive artillery attachment for free when activated.
-
Initiative Phase: In Caporetto 1917, the AHG player has the Initiative in every Scenario for the duration of the game.
-
Weather Phase: The Weather is historically determined. Check the GTRT to see which Weather condition is in effect for the current Game Turn.
Errata (19/01/2025): The Weather is historically determined. Check rule 24.11 to see which Weather condition is in effect for the current Game Turn.
-
Engineering Phase:
- 5.1 Players complete Trench repair (17.3)
- 5.2 Players start new Trench repair (17.3)
- 5.3 Players may blow up bridges (19.2)
5.0 Reinforcements
5.1 During the Reinforcement Phase units scheduled to arrive during the current Game Turn are placed in the indicated hexes, in violation of stacking limits if necessary. Before the end of the GT, they must be moved so as to respect the stacking limits. If the hex remains over-stacked at end of the GT, they suffer over-stacking penalties as per rule 11.6.
5.2 Reinforcements which cannot be placed on the map due to enemy units or enemy ZoCs (not negated by the presence of friendly units) blocking the entry hexes will be delayed until the conditions for their placement on the map can be fulfilled. Reinforcements may be voluntarily delayed and can enter the map during a later GT without penality as the owning player sees fit.
6.0 Logistics
The IT player has a number of Logistics Points at the beginning of the scenario and may receive more of them during the game as per the scenario instructions.
The total number of Logistics Points currently accumulated by the one player can be written down (hidden from the opposing player) or tracked on the General Track (player's choice). New Logistics Points received during the Reinforcement Phase are added to the total on the LPT. Logistics Points spent in the Command, Initiative, or Action Phase are immediately deducted from the running total on the LPT.
6.1 Without LPs, the IT player cannot activate any Formation, and his units can only move during Phase 10 (Non-Activated Unit Movement Phase).
6.2 The AHG side is considered to have an unlimited number of LPs available during the game and it may activate all of his Formations with the maximum Artillery units number in each GT.
7.0 Command
7.1 Command Range. The Command Range is printed on each HQ counter, and cannot extend through enemy units. If the Command Range passes through an enemy Zone of Control that is not negated by the presence of friendly units a die is rolled; on a result of 1 to 3 the Command Range is blocked. A result of 4 to 6 allows the Command Range to pass through that hex. Terrain features have no influence on Command Range.
7.2 Formation Display. The Formation Display (FD) is used during the Command Phase to place the HQ counters of the Formations that can be Activated during the current Game Turn. The Italian FD has six boxes, corresponding to: Formations receiving no Artillery support; Formations which will be activated with 1-5 Artillery units in support; with 6-10 Artillery units; with 11-15 Artillery units; Formations not Activated; Formations after Activation. The AHG FD is much simpler and self explaining.
7.3 Italian side Command Phase. During the Command Phase, the IT player determines which Formations he will activate, and if he will use Artillery units during the Action Phases. To activate a Formation, a player spends one (1) Logistics Point. For every 5 (or fewer) Artillery units attached to the activated Formation, 1 additional Logistics Point is required (ex.: 4 LPs are spent to activate one Formation (1) and 13 Artillery units (3); 2 LPs for one Formation (1) and 1 Artillery unit (1)). The IT player may not spend more Logistics Points than those currently available on the LPT.
*Note:* During the Command Phase the IT player determines how many Artillery units he will use during the Formation's activation. Specific Artillery units are attached to a Formation at the moment of the Formation's activation.
7.4 AHG side Command Phase. During the Command Phase, the AHG player may decide to activate any or all of his Formations. During the Activation, each Formation may use the maximum number of Artillery units (15 units).
7.5 Independent units. During an Action Phase a maximum of two Independent battalions (or equivalent) may be freely attached to an activated Formation, without the expenditure of any LPs.
*Exception 1:* Any number of Engineers, Flamethrowers and Machine-guns (MG) units can be attached over the two battalion limit.

*Exception 2:* There is no limit to the number of Independent Divisional units that can be attached to a Formation of the same Division.

Independent units are attached to a Formation when the Formation is activated in an Action Phase. Independent units belonging to a specific Division, can be attached only to Formations belonging to the same Division.
7.6 Placing HQs. When a Formation is activated during an Action Phase, the Formation's HQ unit is placed on the map and the Command Range is traced from it. A Formation HQ counter must be placed in a hex on a valid Line of Supply (see 9.2 and 9.4.1). The HQ unit may be placed in an enemy ZoC, but not stacked with an enemy unit. Independent units attached to a Formation have to be within the Command Range of the HQ they are attached to. If needed, mark activated Independent units with an "Activated" marker as a reminder that they cannot be activated twice in the same turn. A Formation HQ must be placed on the map so that at least one of his subordinate units is in command.
7.7 Units of the activated Formation that are in Command at the moment of that activation may conduct all the activities in the Action Phase. Units of the activated Formation that are out of Command at the moment of the activation are marked with an "Out of Command" marker. A Formation without its own subordinate units on the map cannot be Activated.
7.8 Out of Command: Out of Command units cannot counterassault (12.4), observe for Artillery fire (12.1.1), recover from Disorganization (20.6), or be activated. They can move during the Non-Activated Units Movement Phase (10.3), and their Defensive Fire is halved (round up). NOTE: The "Out of Command" status can also be obtained as a consequence of enemy Bombardment.
7.9 Divisional Integrity: Formations belonging to the same Division must be activated in sequence. When a player begins activating a Formation of a different Division, no other Formation of the former Divisions can be activated during the same GT.
*Exception:* Reaction activation is not affected by this rule.
7.10 Division Activation. During an Action Phase (NOTE: NOT a Reaction Phase), a player can choose to activate all the Formations belonging to the same Division that received the required Command Points to be activated. These units run together the single Steps of the Action Phase.
During a Division Activation, units from different Formations CANNOT participate in the same Assault, neither by assault nor by support fire.
7.11 Formation Exchange. Two Formations, one on the front line and one on the rear, can be activated together in the same Action Phase, to let them exchange position on the front. Both Formations need to have had an LP spent to be activated.
First the units of the rear Formation, if they decide to move, are moved, according to the movement rules, into any hex(es) occupied by the units of the first line Formation (only). Then units of the first line Formation can be moved; if they move and have enough MPs to do so, they must end their movement at least one hex further from any enemy unit.
IMPORTANT: Exchanging Formations can move only during this Activation, and cannot attack or bombard.
8.0 Weather
Errata (19/01/2025): 8.0 Weather: Weather conditions affect operations in several ways. The weather conditions are listed in rule 24.11. Weather conditions are in effect during the whole Game Turn.
Weather conditions affect operations in several ways. The weather conditions are displayed on the Game Turn Record Track. Weather conditions are in effect during the whole Game Turn.
8.1 The possible weather conditions are:
- Clear: No effect.
- Fog: Only elevation Level 1 and 2 (see TEC) are affected by Fog.
- No LoS is possible into or from Fog hexes (i.e. units in Fog hexes cannot observe or be observed).
- ZoCs do not extend into or from Fog hexes.
- Defensive Fire is shifted two columns left firing into and from Fog hexes (not cumulative).
- Infiltration Fire (10.1.2) is not allowed if one of the two hexes is in Fog.
- Overcast: Maximum LoS range is Four (4) hexes.
- Light Rain: LoS is Two (2) hexes.
- Blizzard: Only High Mountain hexes are affected by Blizzard. All restrictions applied to Fog hexes are applied also to Blizzard hexes and further ...
- Artillery Bombardment Factors are halved firing in Blizzard hexes.
- Infantry movement cost into any Blizzard hex is increased by ONE (1). Artillery Movement costs are doubled.
- Assault and Counter-Assault Resolution on the Assault Table are shifted one column left into and from Blizzard hexes (not cumulative).
9.0 Supply
To operate at full efficiency, every unit needs supplies of food, ammunition, and equipment. Therefore, the lack of a supply line can reduce the efficiency of a unit, even to the point of surrender.
9.1 Supply status is checked for units of both armies during the Supply Phase.
9.2 Lines of Supply. A unit is supplied if it can trace an unblocked path of no more than 5 hexes to a Road (see 10.0.4) hex, and then an unblocked path of unlimited length from that hex along the Road net, to a friendly supply source (see 9.2.3).
9.2.1 A Line of Supply is blocked by an enemy unit or enemy ZoC. A friendly unit in a hex negates the effect of the enemy ZoC along the "off Road" part of the Line of Supply. The "on Road" part of the Line of Supply can never be adjacent to an enemy unit, even if friendly units are present. The road part of a Supply Line cannot cross a Foot Bridge.
Note: Roads do NOT cross the Rivers on Blown Up bridges.
9.2.2 Lines of Supply and Crags. A Line of Supply can be traced across a Crag hexside, but the unit must be adjacent to that Crag hexside.
9.2.3 Supply Sources. German/Austro-Hungarian Supply Sources are all the hexes with Roads exiting the map edge on the gray border; Italian Supply Sources are all the hexes with Roads exiting the map edge on the green border.
9.3 Out of Supply units. A unit that cannot trace a Line of Supply during the Supply Phase is Out of Supply. Units that are Out of Supply add one (1) Disorganization Point during each Supply Phase in which they are Out of Supply.
When a unit's Disorganization Level becomes equal to its printed Morale Value, the unit surrender if it is adjacent to an enemy unit and it will go in the Surrendered Units Box. If no enemy unit is adjacent, the unit remains on the map with a Disorganization Level one less than its surrender threshold (see 15.4).
9.4 Supply and HQs. HQs themselves are not affected by being Out of Supply. However, a HQ counter must be placed (see 7.6) in a hex along a valid Line of Supply (i.e., a supplied hex).
9.4.1 Artillery interdicting HQ's Lines of Supply. Play note: this rule imposes limitations to a HQ placement.
An enemy Artillery unit in "fire" mode may interdict the "on Road" (only) segment of a HQ's Line of Supply, and that HQ's Formation may not activate. The interdicted Road must be within range and under direct observation from the enemy Artillery unit (that is it must be along a Line of Sight traced directly from the Artillery unit as per 12.1.1). Interdiction is automatic and does not consume LPs. The Artillery unit may have already fired either offensively (12.1) and/or defensively (12.2). Exception: German HQs are not affected by this rule 9.4.1.
10.0 Movement
Units are moved one by one or as a stack during the Tactical Movement Step in which they are activated, during the Non-Activated Unit Movement Phase, or during a Counter-Assault Step. They move using the hexagonal grid, paying Movement Points for each hex entered, and hexside crossed, depending upon terrain (see TEC).
10.0.1 Every unit has a Movement Allowance per Game Turn expressed in Movement Points; Movement Points cannot be accumulated from Game Turn to Game Turn. Movement Points not used in a Game Turn are lost.
10.0.2 The cost to enter each hex or to cross a hexside is shown on the Terrain Effects Chart. Some terrain features are on hexsides only (e.g. Rivers). In these cases, the terrain cost of the crossed hexside is in addition to the terrain cost of the hex entered.
10.0.3 No minimum move. If a unit does not have enough Movement Points to enter a hex, it cannot do so. It can use Forced March (10.4) to do it. There is no "Minimum Move" permitted.
10.0.4 Roads. The term "Road" includes any kind of Road/Track/Railroad. A unit moving along a Road may use the movement cost for that kind of Road (Road/Track/Railroad), ignoring the other terrain present in hex or hexside. Units cannot use any form of Road while stacked; only single units or Battalion equivalent can move along a Road.
Exception: see also rule 11.5
A unit may not use a Road to enter a hex occupied by the equivalent of a battalion (or more), or an Artillery unit in "Move" mode (see also 11.3). Any number of MG, Flamethrowers and HQs units never block a Road.
NOTE 1: Artillery units in "fire" mode do not affect Road Movement.
NOTE 2: As it is forbidden to move along a Road as a stack of battalions, move the battalions that are going to use a Road one by one.
Units can use Roads in enemy ZoC, but are affected by a Fire DRM (see Fire Table DRMs) if subject to (1) Infiltration Fire (see 10.1.2) or (2) Defensive Fire (12.2) if under ROAD ASSAULT marker (see 10.2.5).
10.0.5 Entering enemy occupied hexes. During any Movement Step or Phase no unit may enter a hex containing an enemy non-Artillery unit. Units may enter hexes with only enemy Artillery units (see also rule 18.4).
10.0.6 Every unit can move only once per turn; either during the Action Phase Movement Step if its Formation is activated and the unit is in Command, or during the Non-Activated Unit Movement Phase, or during a Counter-Assault Step. When a unit has completed its movement, and the movement of another unit has begun, the former unit cannot be moved again.
10.0.7 Elevation Level change. A unit that moves upslope pays +1 MP cost, negated by Roads. Exception: Mountain Infantry units do not pay the additional +1 for Elevation Change. TEC NOTE: For artillery units, only Mountain Artillery units can change Level off Road.
10.0.8 Hexes and Hexsides Terrain. When a hex contains different terrain types, the hex terrain is the terrain in the middle of the hex. When the hexside has different terrain types, the hexside terrain is the terrain covering the majority of the hexside. Use common sense when you are going upslope, or crossing mountain crest or valley terrain.
Example: hexes 3628 and 3629 are at the same Elevation level. To go from one hex to the other, you must cross a higher elevation level hexside. So you are moving upslope in this case.
For combat purposes, the defender is on the terrain in the middle of the hex. Exception: Town, Stream, and Mountain Top are features of the hex, even if not in the middle of the hex.
10.0.9 Crags. Only Mountain Infantry (not Artillery) units can cross, enter, or assault through a Crag hexside without using a Road. If a Mountain infantry unit moves off road across a Crag hexside it costs its entire Movement Allowance. For other units, Crag hexsides without Roads are impassable for all purposes.
10.0.10 Streams and Mountain Tops. Units in Stream hexes move and attack upslope when moving or attacking not along that same Stream. While moving or attacking along the same Stream, consider the terrain levels as in 10.0.8. Units moving to or attacking a Mountain Top always are considered to be moving or attacking upslope.
10.1 Tactical Movement
Tactical Movement takes place during the Tactical Movement Step of the Action Phase.
10.1.1 Movement and Zones of Control (ZoC). Units using Tactical Movement can enter and/or exit enemy Zones of Control. To exit a ZoC hex a unit must expend one additional MP if no other friendly combat unit is in the EZoC hex. A unit entering an enemy ZoC must stop there, but it can Assault if it has enough remaining MPs to enter the assaulted hex (see also 10.2.5). Forced march (10.4) can be used to extend the movement allowance. Exception: see 21.5.1.
10.1.2 Infiltration Movement and Fire. The movement, including retreat by a defender, from a hex adjacent to an enemy unit/stack to a hex adjacent to the SAME enemy unit/stack is called Infiltration Movement. A unit or stack of units can conduct Infiltration Fire when an enemy unit moves or retreats from an adjacent hex directly into another hex adjacent to the same unit or stack.
Exception: Infiltration Fire CANNOT be performed into enemy Trenches (see 17.7.1) or across Crag hexsides or into/from Fog/Blizzard hexes (it is enough that one hexside or hex is Crag, Blizzard, Fog to activate this exception).
Infiltration Fire is calculated like Defensive Fire (see 12.2), however artillery may not participate. Total the Machine Gun Factors from all the units adjacent to both hexes (i.e., the hex the unit began its movement in and the hex the unit ended its movement in).
Infiltration Fire can be performed as many times as friendly stacks or single units move through the same hexes adjacent to the enemy (Exception: 12.3.2). It is resolved in the entered hex, applying that hex's terrain modifications, and any crossed hexside modifications (such as a River hexside). If the target hex includes other units only the moving units are affected.
10.2 Assault Declaration
10.2.1 Activated units ending the Tactical Movement Step adjacent to enemy combat units can Assault them, only if they have enough MPs to enter the enemy occupied hex. To declare an Assault, place an "Assault" marker on the assaulting infantry unit(s) or stack, pointing towards the hex to be assaulted.
10.2.2 Assault always is voluntary. In a stack, some units can assault while others are withheld, or assault a different hex.
10.2.3 An Assault declaration cannot be revoked, and the Assault will be resolved during the next Assault Step, regardless of the results of Offensive Bombardment, and Defensive Fire. If at the end of the Assault step the defender hex will result to be empty due to any reason, also because the Offensive Bombardment results eliminated all units in the target hex, assaulting units must advance into the attacked hex up to the stacking limit (11.0).
10.2.4 Units from more than one hex may declare an Assault against a single hex, but only units up to the stacking limit of the defender hex can Assault at one time. If the first Assault fails, other units up to the stacking limit that declared the Assault must resolve it, and so on. After the first Assault against a hex, the defender in the hex can voluntarily retreat (See 12.3.5).
10.2.5 To place an "Assault" marker costs the same number of Movement Points as if the assaulting unit was entering the hex to be assaulted, but ignoring all effects due to enemy ZoCs. If a unit does not have enough Movement Points left to enter the hex to be assaulted, it may not assault (but see 10.4). It is possible to Assault along Roads. In that event, declare it using the ROAD ASSAULT marker (see 10.0.4).
10.2.6 Support Fire Declaration. Activated German and Austro-Hungarian units with a modified MG factor greater than zero can provide "Support Fire" for activated Assaulting units in the same Formation. Support Fire is resolved during the Offensive Bombardment Step (see 12.1.7). During the Action Phase a unit can declare Support Fire if it is adjacent to a hex that is the target of an Assault. Place a Support Fire marker upon the firing unit.
Only one unit from each hex can provide Support Fire to an Assault. Support Fire cannot be declared from a hex that has an Assault marker.
There is no MP cost to place a Support Fire marker. Support Fire triggers Defensive Fire against the unit conducting the Support Fire. Units conducting Support Fire and which are subject to defensive fire can take advantage of the terrain they occupy.
10.3 Non-Activated Units Movement
10.3.1 During the Non-Activated Units Movement Phase, all units not previously activated during the Game Turn, and not activated Out of Command units, can move following the general Movement rules. They cannot Assault nor enter enemy artillery units' hexes. They can exit an enemy ZoC at the normal cost of 1 additional Movement Point (see 10.1.1).
NOTE: In Command Units of Formations activated during any Action Phase ARE Activated Units, even if they did not move during their Formation Action Phase.
10.3.2 Strategic Movement. In this Phase (only), if all a unit's movement, including the start and end hexes, takes place at least 3 hexes (2 intervening) from any enemy unit, then the unit can double its Movement Allowance declaring the use of Strategic Movement. Units using Strategic Movement cannot use Roads in hexes occupied by a battalion equivalent.
Strategic movement may be combined with Forced march (see 10.4). Out of Command units cannot use Strategic Movement.
10.4 Forced March
During any Movement Step or Phase, all non-Artillery units can increase their Movement Allowance by 50% using Forced march. At the end of a Forced march, each unit adds one (1) Disorganization Point.
Forced march can be used to declare an Assault, and the Disorganization Point is suffered after the Assault Declaration but before the Offensive Bombardment.
Units with a Disorganization Level (DL) one less than its Surrender threshold cannot use Forced march. Mark units using Forced march with the marker, to remember they cannot recover from Disorganization (see 15.0).
11.0 Stacking
Errata (19/01/2025) – Clarifications about Stacking (11.0):
- Stacking limit in NON High Mountain hex: ANY TWO battalion units or battalion equivalents plus one unit as by 11.5. OR ALL the units belonging to the same regiment plus one unit as by 11.5. NOTE: if you have high stacks, use the regiment markers.
- Stacking limit in High Mountain hex: ONE battalion or battalion equivalent plus one unit as by 11.5.
- Emplaced artillery units do not affect and are not affected by what above. They have their own stacking limits: TWO for normal artillery units, ONE for Artillery Groups, ONE unit of any kind in High Mountain hex. Suggestion: use the small Tolmino map for the emplaced artillery units.
Stacking refers to having more than one unit in the same hex.
11.1 No more than TWO battalions equivalent of the same player may stack in a hex. An Artillery unit in move mode is considered to be a battalion equivalent for stacking purpose.
Exception 1: All of the units belonging to the same Regiment can stack in the same hex. Only TWO battalions equivalent (but see 11.5) can declare an Assault from the hex, or defend against an Assault, but all of the units in the defender hex will be affected by any Combat result.
Exception 2: see 11.5.
Exception 3: Artillery units in "fire" mode (emplaced) count for stacking only as emplaced artillery units, other units are not affected by emplaced artillery units (i.e. a hex can contain 2 emplaced artillery units plus two units of any other kind).
In High Mountain hexes, the limit is reduced to ONE Battalion equivalent.
11.1.2 Up to four Generic Infantry Company units are counted as a single battalion for ALL purposes when stacked together.
Errata (19/01/2025): 11.1.2 Up to four Company units are counted as a single battalion when stacked together.
11.2 Stacking limits must be checked at the end of any Movement Step or Phase (Activated or Non-Activated), and at any moment during the Combat Steps (including retreats). Exception: see 11.3. Movement through friendly units in violation of the stacking limits is permitted, but at the end of movement the limit must be met. Exception: see 11.4.
11.3 See 10.0.4 for limits to the units moving along roads and the appropriate road movement rate. Units moving through friendly units on Roads over the Road stacking limit, or on Artillery units in "Move" mode, must pay the movement cost of the other terrain in the hex (i.e. roads and bridges do not exist for them).
Errata (19/01/2025): 11.4 Assault and Counter-Assault happen within the hex, so the stacking limit is TWO battalions equivalent for each side (ONE battalion in High Mountain terrain) plus one unit as by 11.5.
11.4 Assault and Counter-Assault happen within the hex, so the stacking limit is TWO battalions equivalent for each side (ONE battalion in High Mountain terrain). See also 12.3.1. Exception: 11.5
Errata (19/01/2025): 11.5 ONE unit of MG, OR High Mountain, OR Infiltration Capable company can stack for free for any purpose (even stacking on roads and combat). Clarification: any company over the first one counts for stacking. Formation HQ and Flamethrower units, and all markers do not affect stacking.
11.5 ONE unit of MG, High Mountain, or Infiltration Capable company can stack for free for any purpose. Formation HQ and Flamethrower units, and all markers do not affect stacking.
11.6 If no alternative to overstacking exists after a retreat, every unit in an overstacked hex at the end of the retreat, adds one (1) Disorganization Point. Exception: 15.4.3.
12.0 Combat
During each Action Phase several types of combat can take place. During the AHG Player Action Phase, the AHG Player will have the first opportunity to assault enemy units. Then the IT Player will have an opportunity to Counter-Assault (the order is reversed during the IT Player Action Phase). Before any assault is resolved, the assaulting player can use Offensive (Barrage) Fire, after which the defending player may use Defensive Fire.
12.1 Offensive Fire
The purpose of Offensive Fire is to soften the enemy defenses before assaulting them, or simply to wear down enemy units. The target must be within the firing Artillery unit range and observed.
Artillery fire can be Direct or Indirect. Light Artillery units only can use Direct Fire. Medium Artillery units can fire at full Strength in Direct Fire, or half strength in Indirect Fire. Heavy Artillery and Bombard/Minenwerfer can fire both without penalties.
In Direct Fire the Artillery unit must have straight line to the target without any intervening terrain Elevation Level higher than the target and the firing hexes, and the target must be observed. In Indirect Fire the target is within the Artillery unit's range and observed.
NOTE: Weather has no effect on Direct Fire determination, only on Observation.
12.1.1 Artillery Observation
A target hex is Observed if it is possible to trace an uninterrupted Line of Sight (LoS) from an observer hex to the target hex.
A LoS is traced from the center of the observer hex to the center of the target hex (Exception: if the observer is in Town, Village, Locale, or on a Mountain Top, he can choose any point of the feature drawing or the Mountain Top as starting point of the LoS).
The LoS in Clear Weather is SIX (6) hexes.
Observer hexes are hexes occupied by an In Command friendly unit in:
- A friendly Trench hex
- A Town, Village, or Locale hex
- A Mountain Top hex
- A hex with a friendly Artillery unit
12.1.1.1 Terrain Effects on LoS. LoS is blocked by any intervening hex whose terrain Level is higher than both the target and the observer hexes (always remember that when many levels are present, the level of a hex is the one passing through the center of the hex; if a disagreement arises between players on this, resolve it with a die roll).
12.1.1.2 If the observer hex is at a higher level than the target hex, the LoS can be one hex longer for each level of difference between observer and target with Clear Weather, to a maximum LoS of ten (10) hexes.
12.1.1.3 Woods and Town hexes block LoS only if at the same elevation level as either the observer or the target hex.
Errata (19/01/2025): 12.1.1.3 For the purpose of blocking a LOS, Woods and Towns add one level to the hex where they are.
12.1.1.4 A LoS passing along a hexside is blocked only if both adjacent hexes are blocking.
LOS Example: Treviso Brigade HQ indicate 0610 as Observer hex (it is an occupied Mountain Top and in range of the HQ). The Artillery unit, activated with the Treviso Brigade, could fire to all the indicated hexes, except 1007, because the LOS is blocked by the town (Vrh) in hex 0908, at the same elevation as the target hex.
12.1.2 Offensive Fire
Offensive Fire can be Bombardment or Interdiction Barrage (but see also Support Fire, 12.1.7). Each Artillery unit can perform Offensive Fire only once per Game Turn. Mark Artillery units which have performed Offensive Fire with a red "Act" marker, as a reminder.
12.1.3 Bombardment
Artillery units can Bombard during the Bombardment Step of an Action Phase with the Artillery units attached to the activated Formation. Exception: German and AH Regiments at the beginning of their Activation can choose the attached artillery units from among those still eligible.
Every unit first designates its target hex before resolving the Bombardment. If the target hex contains both artillery in Fire mode and other units, the firing player must choose to target either the artillery in Fire mode (counterbattery fire) or the other units (artillery In Move mode are other units), and the bombardment will affect that unit category only. The firing player can divide his firing units between the two target categories in the same hex.
Each Artillery unit can bombard one target hex only, and one target category only per activation.
12.1.4 When all the targets are designated, resolve Bombardments one by one. For each target:
- A. Calculate the total number of Bombardment Factors.
- B. Find the matching column on the Bombardment Table.
- C. Total the column shifts due to terrain in the target hex as applicable. All modifiers are cumulative and are totaled before using them as a net total shift. The maximum net column shift is three (3).
- D. Roll one die, cross reference the result on the column to find the result of the Bombardment.
12.1.5 Bombardment results:
- - : No Effect.
- * : Roll again, 1-3 = "D1", 4-6 = "-".
- D#/$ : The number after "D" indicates the Disorganization Points inflicted to each target unit (see 12.1.3); the purple number after "/" indicates the total number of steps lost by the target units (in total, not per unit; losses are applied as equally as possible, the owning player decides how).
- An "S" result indicates "Suppressed". Mark the affected units with an "Out of Command" marker. If previously activated in the GT, mark them as "Activated" as well.
- A "T" result indicates that the Trench Level (if any) in the hex is reduced by one. A "T" result also implies a (S) result. "T" results are possible only if the Bombardment is also by Bombard/Minenwerfer, Medium, or Heavy Artillery units.
12.1.5.6 On a die roll of "6", there is an additional "friendly fire effect". Roll one die to randomly select a hex adjacent to the bombardment hex. Any units (enemy or friendly) in this hex receives the same Bombardment at halved strength. If the adjacent hex is not occupied there is no additional effect.
- Exception 1: Fire by Artillery units with direct LoS (observing the target) and Support Fire are not affected by the Friendly Fire rule.
- Exception 2: On GT 1 no friendly fire is possible.
12.1.6 Interdiction Barrage
Artillery units can fire Interdiction Barrage, even in hexes without enemy units, during the Artillery Phase. The observer hex of Interdiction barrage is not required to be in command. Total the Bombardment Factors firing at the hex and mark the hex with an appropriate numerical marker (see figure). Every enemy or friendly unit entering, or already in the hex, during the Game Turn will undergo a Bombardment at half strength of the Interdiction Marker. Both players can interdict the same hex; total both strength points to determine the Interdiction Barrage value.
A unit can be target of Interdiction Barrage only once per hex in the same GT. Interdiction Barrages do not affect Artillery units while emplaced but do affect Artillery units on their move side. Interdiction Barrage rolls are subject to "friendly fire effect" (see 12.1.5.6 above).
Deduct 1 LP for every 5 Artillery units firing Interdiction Barrage. Exception: AH-German Artillery does not consume LPs.
Mark Artillery units which performed Interdiction Barrage with a red "Act" marker. The marker is removed in the Supply and Rally Phase.
12.1.7 Support Fire
During the Bombardment Step, the unit's MG factor is added to the Bombardment Fire. If no Artillery unit is bombarding the hex, resolve the Support Fire like Bombardment, with the same modifications, although no observation is needed.
Support Fire firing without artillery is affected by Trench hexsides only if the fire is across them.
Remove the Support Fire marker just after executing it.
Errata (19/01/2025): 12.1.7 Support Fire: The last sentence is "Remove the Support Fire marker at the end of the Assault Resolution."
12.2 Defensive Fire
During the Defensive Fire Step, defending Infantry and Artillery units can fire at enemy units marked with an "Assault" or "Support Fire" marker but only at them. A hex containing assaulting units is referred to as the target hex for Defensive Fire. Each unit firing during a Defensive Fire Step can fire against only one hex.
12.2.1 Each defending side Infantry unit adjacent to Assaulting/Supporting enemy units can fire at them, even if not directly affected by the assault (Exception: only assaulted units can fire defensively against assaulting units in Fog or Blizzard). The same Infantry unit may fire again during a different Action Phase of another enemy Formation. If the firing unit is adjacent to more than one hex occupied by assaulting/support firing units, it must choose the target hex to fire at, and can fire only at that hex.
Note: Combat units with a Machine Gun Factor equal to "0" are able to fire Defensive Fire. Positive column shifts, and/or Artillery Defensive Fire will allow it to fire.
12.2.2 Defensive Fire is resolved against all (and only) Assaulting/Supporting units in the target hex. Units that did not participate in the assault but occupy the same hex as the Assaulting units are not affected.
12.2.3 Defending units in different hexes can fire at the same target hex, and different units in the same hex can fire at different hexes.
12.2.4 Artillery units can perform Defensive Fire if they fulfill one of the following requirements:
- A. They are within a SIX hex range from the target hex (marked with an "Assault" marker), and the target hex is observed.
- B. They are within a SIX hex range from the target hex and they have a direct LoS to the target hex.
The provisions of rules 12.2.2 and 12.2.3 also apply to Artillery units. Heavy Artillery and Bombard/Minenwerfer units cannot fire defensively.
12.2.5 Artillery units contribute to Defensive Fire by one quarter (¼) of their total printed Bombardment factors.
[Transcriber's note: the printed rule refers to "Case A" and "Case B" without restating them in this section. They are read here as the two requirements of 12.2.4, A and B, as printed on the same page.]
In Case A, this contribution may not exceed the maximum of the total printed Defensive Fire from other non-Artillery units, with a minimum of 1 point.
Example 1: a unit firing Defensive Fire with a Machine Gun Factor of 2 can receive the support of 8 Artillery Bombardment Factors, so 2 additional points of Defensive Fire.
Example 2: a unit with a Machine Gun Factor of 0 can receive the support of 4 Bombardment Factors, so 1 additional point of Defensive Fire).
In Case B there is no limit to the number of Artillery units that can fire.
12.2.6 For each hex with assaulting units that is the target of Defensive Fire, total the Machine Gun Factors of all the adjacent units that execute Defensive Fire, and add the total Bombardment Factors of the firing Artillery units as per 12.2.5.
12.2.7 Each Artillery unit can perform Defensive Fire only once per Game Turn. Mark Artillery units which performed Defensive Fire with a "Def. Fired" marker, as a reminder.
12.2.8 Firing Defensive Fire does not prevent Artillery units from firing during their own Offensive Bombardment Step, if activated or vice-versa.
12.2.9 Once all targets are designated, resolve Defensive Fire one by one. For each target:
- A. Calculate the Defensive Fire total.
- B. Find the matching column on the Defensive Fire Table.
- C. Shift the column according to the Terrain Effects Chart and the notes under the table, to find the final column. All modifiers are cumulative. If different shifts for the same reason (such as different Trench Level) are gained by different firing hexes against the same target, use the most advantageous for the firer. The maximum net column shift is three (3).
- D. Roll one die, cross reference the result on the final column to determine the result.
12.2.10 Defensive Fire Results:
- - : No Effect
- * : Roll again, 1-3="D1", 4-6="-"
- D#/$ : The number after "D" indicates the Disorganization Points inflicted to each target unit (see 12.1.3); the purple number after "/" indicates the total number of steps lost by the target units (in total, not per unit; losses are applied as equally as possible, the owning player decides how).
An "S" result indicates "Suppressed". Mark the affected units with an "Out of Command" and an "Activated" marker. They lose any "Assault" marker.
A Defensive Fire "T" result has no effect on Trenches, but note that a "T" result also implies a (S) result.
12.2.11 If the Offensive Bombardment eliminates all units in the defending hex, the Defensive Fire by other eligible units (see 12.2.1) is resolved before the Assaulting units can enter the empty defender hex. (i.e., the units in adjacent hexes can fire to the Assaulting units before they advance).
12.3 Assault Resolution Step
During the Assault Resolution Step, the Active Player tries to seize enemy occupied hexes through Assault.
12.3.1 Even if the assaulting units remain in the Assault marker hex, consider them in the hex indicated by the arrow of the Assault marker, within the stacking limits. Note that both players must respect their own stacking limits only. Therefore, the maximum number of battalions equivalent that can be in an assaulted hex is 4 (2 in defense, 2 in assault), or 6 if two emplaced Artillery units are also in the hex. But see Exception 1 of 11.1, and 11.5.
If the target hex of an Assault is left empty by the Defender, it must be entered by the Assaulting units up to the stacking limits, even if all defending units are completely wiped out by Offensive Bombardment. Leave the Assault marker in the assaulting hex until the end of the Action Phase.
12.3.2 All the declared Assaults are resolved one by one. All Assaults are considered to be simultaneous; therefore, assaulted and assaulting units cannot perform Infiltration Fire against units that are retreating adjacent to them from another assault in the same Phase. If more units than the legal stacking limit declared an Assault against a hex, and the first Assault fails, other units up to the stacking limit (NOTE: Remember that the stacking limit is that of the defender's hex) that declared the Assault must resolve it, and so on. After the first Assault against a hex, the defender in the hex can voluntarily retreat (See 12.3.5).
12.3.3 Assault resolution:
- A. Total the Combat Factors of all the assaulting units and divide it by the total of Combat Factors of the defending units, getting a strength ratio (ex. 11:3 = 3.66:1).
- B. Round down the ratio to the nearest strength ratio on the top row on the Assault Table (ex. 11:3 = 3.66:1 is rounded down to 3.5:1; 3:5 is rounded to 1:1.75).
- C. Execute any applicable column shifts due to terrain and other modifiers, as below the Assault Table. To apply the hexside terrain modifier in an Assault, all the hexsides crossed by the Assaulting units must be of that terrain type. The column shifts are calculated starting from the ratio obtained, even if beyond the limits of the table. Each shift reduces or increases the ratio by one. (i.e. 7:1 to 6:1 or 1:4 to 1:3). All modifiers are cumulative. First all column shifts in favor of the defending hex are calculated; then these are subtracted from the columns shift in favor of the attacker. The maximum net column shift is three (3). If the resulting final column is below 1:2, the result is automatically D2R/1 to the attacking player. If the resulting final column is above 5:1, always use the 5:1 column. Assaults against a zero-strength stack are always resolved on the 5:1 column.
- D. Roll one die, cross reference the result with the final column to find the result and apply it immediately.
12.3.4 Results in the top row of each box of the Assault Table refer to the attacker; in the bottom row to the defender.
Assault results:
- - : No Effect
- D#/$ : The number after "D" indicates the Disorganization Points inflicted to each affected unit; the purple number after "/" indicates the total number of steps lost by the affected hex (in total, not per unit).
- The letter "R" indicates that the affected units must retreat from the hex (see 12.3.5).
The first step loss must be taken from the unit whose Morale was used in the combat (usually the highest value).
12.3.5 Retreat. When combat results require, the owning player must retreat the affected units one hex. The attacker leaves each of his units into the same hex from which they started the Assault, the defender retreats his units into an adjacent hex (from which an Assault was not launched during the current Activation Phase), following the priorities below:
- A. If empty, one of the hexes opposite to those from which the Assault was started, or adjacent to one of them.
- B. Any other empty hex
- C. A friendly occupied hex, without violating the stacking rules (see 11.0).
- D. A friendly occupied hex, violating the stacking rules (see 11.0), causing an increase of Disorganization by one (1) to all the units in the hex, as per rule 11.6.
12.3.5.1 The retreat by multiple defending units may take place into different hexes. The retreat cannot take place across impassable hexsides. Exception: Mountain troops (ONLY) can retreat across Crag hexsides at the cost of two (2) Disorganization Points. If the Surrender Threshold is reached, the unit surrenders.
12.3.5.2 If there are no hexes available for a retreat, the units that must retreat will surrender. NOTE: Step losses are inflicted before a retreat, so units that cannot retreat must absorb losses before surrendering.
12.3.5.3 Following an Assault result, artillery units in "fire" mode cannot retreat: they remain in place, and are captured at the end of the Action Phase in which there are still enemy units in their hex after the Counter-assault Step.
12.3.5.4 If the retreat is through hexes adjacent to the same enemy units, other than those that just Assaulted (or any other units that are still under an Assault or Support Fire marker during the current Step), those enemy units can fire at the retreating units. In this case, fire as in Infiltration Fire (see 10.1.2 for Infiltration Fire conditions). This rule only applies to retreating defending units (attacking units remain in the Assault's origin hex).
12.3.5.5 Infiltration Fire occurs against the retreating unit(s) only. The non-retreating unit is not affected.
12.3.5.6 An Assaulting unit compelled to retreat after a Counter-assault is obliged to retreat into the same hex from which it started the original Assault.
12.3.5.7 A retreating stack can choose to retreat an additional hex, at the cost of an additional Disorganization point at the end of the retreat. Each retreating unit must roll a die. If the result is higher than its printed Morale, the unit routs (it is eliminated, but not surrendered). NOTE: This can help to disengage from a critical situation at the cost of disorganization. Note that the Disorganization will be inflicted at the end of the retreat, so the retreating units will not surrender because of it, even if they could remain just below the surrender threshold (see 15.4).
12.3.6 An assault on a "0" strength combat unit is resolved on the 5:1 column.
12.3.7 Units retreating to a hex under Assault do not participate in the Assault but are affected by the results.
12.3.8 Advance after Combat. If the defending hex is vacated after an attack, all of the units taking part to the winning assault must enter the target hex. Units advancing are not subject to Infiltration Fire.
12.4 Counter-assault
During the Counter-Assault (Steps E, F and G of the Action Phase), the Inactive player's non-activated units just retreated from an Assault, and non-activated units not adjacent to any other enemy units besides those in the hex being counter-assaulted, are eligible to retake by Counter Assault a hex just lost to an enemy Assault.
12.4.1 All eligible units belonging to any Formations, within 2 hexes of the previously Assaulted hex may employ their full Movement Allowance to launch a Counter-assault (they are required to spend any additional Movement Points to enter the hex as per rule 10.2.5).
12.4.2 Mark the Counter-Assaulting units with Assault markers. Support Fire can be applied as per 10.2.6.
12.4.3 The procedure is the same as for regular Assaults, but the players' roles are reversed, Artillery cannot fire either Offensively or Defensively and Trenches are not considered.
12.4.4 At the end of the Counter-Assault step, adjust the Trench Level in the hex as per rule 17.5. Mark the counter assaulting units as activated.
13.0 Activation Completed
During Step H of an Action Phase (see the Sequence of Play, 4.0), the Formation HQ counter that has just implemented the Action is placed in the "Brigades After Activation" box, to indicate the end of that Formation's operations for the current Game Turn.
14.0 Reaction by the Non-Active Player
During the Opponent Reaction Step, the Non-Active Player can try a reaction with one of his Formations not yet activated. The player indicates the Formation he wishes to react with, placing the HQ unit on the map, and rolling one die. If the result is less than or equal to the HQ's Initiative Value, the Formation is Activated immediately.
A Reaction Phase is like an Action Phase, and it is divided in the following steps:
- A. Tactical Movement and Assault Declaration
- B. Bombardment
- C. Defensive Fire (by the Initiative Player)
- D. Assault Resolution
- E. Counter-Assault Declaration (by the Initiative Player)
- F. Counter-Assault Defensive Fire
- G. Counter-Assault Resolution (by the Initiative Player)
- H. Reaction Completed
There is no Reaction to a Reaction Phase.
If the Formation received LPs during the Command Phase to have artillery attached, it is activated normally.
If the Formation did not receive LPs during the Command Phase, the maximum number of artillery units that can be attached to the Reaction Formation is the HQ's Initiative Value and the Activation cost in LPs is doubled (Examples: 2 LPs for Activation without Artillery, 4 LPs for Activation with fewer than 6 Artillery units). Exception: AHG activation (see rule 7.4).
If the Formation did not receive LPs in the Command Phase and no LPs are available now, it cannot React. Exception: AHG activation (see rule 7.4).
If the die roll is higher than the HQ's Initiative Value, the Formation is not activated, its counter goes back to the Formation Display, and it can be activated later in the Game Turn through Reaction or during a standard Activation.
After a Formation has completed its movement, the HQ counter is placed in the "Brigades After Activation" box (it has performed its Action for the current turn and cannot be activated again during the current turn), and the Action goes back to the Initiative Player.
15.0 Disorganization
Disorganization represents the amount of wear and tear inflicted upon units through combat. It can increase due to bombardments, lack of food and ammunition, combat fatigue, etc. The level of Disorganization of a unit is expressed by the number of Disorganization Points it has accumulated.
15.1 The current Morale of a unit is equal to its printed Morale Value minus any Disorganization Points.
15.2 Disorganization Points may be suffered through Bombardment, Assault, Forced march or lack of Supply.
15.3 A unit's current Morale affects Assault results (see modifiers on the Assault Table).
15.4 Surrender. At the moment a unit's Disorganization Level is equal to or higher than its printed Morale Value, the unit surrenders if it is adjacent to an enemy unit. Place it in the Surrendered Units Box. If no enemy unit is adjacent to it that could move into its hex, the unit remains on the map with a Disorganization Level one less than the surrender threshold. Exceptions: see 15.4.2 and 15.4.3
15.4.1 During any kind of combat, Disorganization Points are inflicted first and then step losses. This means that a one-step unit that receives a result that both increases the Disorganization Level to or above the surrender threshold and eliminates its last step, is placed in the Surrendered Units Box (not the Eliminated Units Box).
15.4.2 At the end of each Assault the winner, which would otherwise surrender due to Disorganization will not surrender. It will end up with a Disorganization Level one less than the surrender threshold.
15.4.3 If Disorganization Points inflicted by over stacking (see 11.6) will cause the surrender of a unit, it will end up with a Disorganization Level one less than the surrender threshold (i.e., no surrender is inflicted by over-stacking).
16.0 Step Losses
16.1 Combat units can have one or two steps. When the first step is lost, flip the unit to its reduced side. If the unit's rear is blank, the unit is eliminated. When a reduced unit lose a step, it is eliminated. Exception: German battalions, see 21.10.
16.2 Every unit eliminated by surrender must be kept in the Surrendered units box, as this is relevant for Victory calculation (see 23.0).
16.3 Artillery units have one step, which can only be eliminated through Bombardment (see 18.6), or capture (18.3, 18.4). Their reverse side is their current movement status. Note: Artillery may Surrender.
17.0 Trenches
17.1 An Engineer unit that does not move or Assault during a Game Turn can repair the trench in its hex.
17.2 For every 5 hexes (or fraction of) with Engineer units repairing Trenches 1 LP is spent from the IT total. AHG side does not spend LPs.
17.3 Indicate the repairing unit by flipping it to its building side during the Engineering Phase. Should the repairing unit move away, Assault, be Assaulted, or successfully bombarded (any result other than "No Result"), before the Trench is completed, the Trench repair is aborted. The Trench repair is completed during the following GT's Engineering Phase.
17.4 Friendly Trenches provide a defensive bonus against Bombardments and Assaults and make Defensive Fire more effective. Trench effects are in addition to other terrain in the hex and hexsides (see the Assault/Fire Table for details).
17.5 At the end of a Counter-Assault step, if any unit of the original Assaulting player is in the assaulted hex, the Trench Level is decreased by 1.
17.6 Trenches are like a terrain feature but may be used by their own side only. They can be reduced or eliminated by Movement, Bombardment or Assault (Exception: 17.8). As an alternative, during the Artillery Phase each player can reduce Trenches occupied by friendly non-Artillery units by one level. When a friendly unit enters an empty enemy Trench hex during Movement reduce the Level by 1 but never below 1.
17.7 Trench hexes are connected where the trench line is printed on the map and continuous between them. Exception: Trench hexes are never connected across Rivers.
17.7.1 Moving adjacent to enemy units between friendly connected Trench hexes does NOT trigger Infiltration Fire.
17.7.2 Moving along friendly connected Trenches is like using a Track (if no Road is present). Moving along connected Trenches using them like a Track is not affected by friendly units for stacking purposes.
17.8 On Map Trenches are Level 2 and Level 1. Mark a decrease of the level (by Bombardment or Assault) with normal Trench markers. No printed Trench HEX can be reduced below Level 1. Printed Trench HEXSIDES CAN be destroyed; use Trench "0" markers to indicate this.
17.9 Trenches along hexsides have an effect only if Assault, or Support Fire, against their hex is conducted across them. Bombardment is affected like in trench hexes, regardless the firing direction.
17.10 In "Caporetto, 1917" no new Trenches can be built. Existing damaged ones can be repaired by Engineer units.
18.0 Artillery
18.1 Artillery units have two sides, one to indicate that the unit is moving and the other to indicate that the unit is emplaced and ready to fire. Flip the Artillery units over during the Artillery Phase to show the condition they will have for the whole game turn (moving or in battery). Note: changing to the "move" side could cause an Artillery unit to over stack, as per rule 11.1. This is not a problem, provided the over stacking situation is resolved in any upcoming Movement step or phase.
Artillery units can move during the Artillery Units Movement Phase only, as they can be activated only to fire. The "moving" side has a Bombardment Factor of "0" and a red background Range, while the "firing" side has a Movement Allowance of "0" and a yellow background Range. All Artillery units have Morale Value "5".
18.2 Artillery Emplacement. Medium and Heavy Artillery units take several game turns to be emplaced in battery, therefore they cannot fire in the same turn in which they change from "moving" to "firing" mode. Light Artillery and Bombard units are ready to fire in firing mode.
Place an additional "Disorganized 2" marker on Medium Artillery units, when they change from "move" to "fire" mode.
Place an additional "Disorganized 4" marker on Heavy Artillery units, when they change from "move" to "fire" mode.
18.3 Artillery units have a Combat Factor of "0", when defending against Assaults. During enemy movement an Artillery unit automatically surrenders at the moment an enemy unit enters the artillery unit's hex. After Assault combat, if an Artillery unit(s) is the only unit remaining in a defending hex, the artillery unit is captured (i.e. it is placed in the Surrendered Units Box).
18.4 While moving, an Artillery unit can enter an enemy ZoC only if the hex is occupied by a friendly combat unit. Artillery units can be subjected to Infiltration Fire.
18.5 An Artillery unit has only one step.
18.6 Every Disorganization Point against an Artillery unit reduces its Bombardment Factor by half its printed value (i.e. an Artillery unit with 2 Disorganization Points cannot fire), keeping fractions. When its Disorganization Level reaches "5", the unit surrenders as per rule 15.4.
18.7 To mark an Artillery unit which fired during Defensive Fire, mark it with a "Def. Fired" marker. To mark an Artillery unit which fired in Offensive Bombardment, mark it with an "Act" marker. Artillery units which both fired offensively and defensively are marked with the combined "Act & Def. Fired" marker.
18.8 Artillery Attachment. Artillery units with Division attachment can only be attached to, or fire defensively with, Formations of the same Division. Artillery units with Corps attachment can be attached to any Formation. NOTE: Some Formations have no Division attachment, they can only activate Corps artillery.
18.9 Artillery Groups. To make the game easier and faster, some artillery units are grouped in a single unit per type per Division or Corps. Set them up in the hex printed on their back. Their Artillery points can be used and spread at will, according to their type limits, as they were in that hex.
Only German and AH artillery units can take advantage by this rule:
- 18.9.1 Artillery Group units cannot move and no other emplaced Artillery unit can stack with them.
- 18.9.2 Artillery Group units are attached to a Formation as described in the setup booklet.
- 18.9.3 Artillery Group units cannot fire Defensive Fire.
- 18.9.4 Artillery Group units cannot be subject to counterbattery fire.
19.0 Isonzo River
19.1 The Isonzo is the main river on the map. In Autumn rain makes it impassable without a bridge.
19.1.2 Wherever a road crosses a river, there is a bridge. Across the Isonzo River there can be two types of bridges: Normal and Foot Bridges (see TEC). All the bridges on other rivers are Normal Bridges. NOTE: Streams are not Rivers. Stream crossings are not considered bridges for this rule purpose.
All units can cross Normal Bridges. Artillery units cannot cross Foot Bridges. The road part of a Supply Line (9.2) cannot cross a Foot Bridge.
19.2 Blowing up a Bridge. During the Engineering Phase, a player can attempt to blow any river bridge (not only over the Isonzo River) that is within two hexes of an engineer. The hex between the Engineer unit and the bridge hex must be free of enemy units or ZoC (unless occupied by friendly units). Roll one die; on a roll of 1-4 the bridge is blown.
19.2.1 The first time a AHG unit moves adjacent to a bridge or a foot bridge across the Isonzo River, and this is beyond the starting frontline, roll one die to see if it is Blown. On a roll of 1-3 the bridge is blown. This die roll is mandatory, it is not voluntary.
19.2.2 Disregard blown bridges. They are considered not to exist, as are their roads.
19.3 Repairing bridges. Engineer units can repair bridges (see 21.1). To be eligible to repair a bridge an Engineer unit must be adjacent to one side of the bridge, or in the bridge hex, and no enemy unit can be in the hex opposite the bridge for the whole process. During the Engineering Phase, the engineer unit begins by flipping to its reverse side. During the building process the Engineer unit cannot move. If the engineer unit is forced out of the hex or Disorganized, it is turned to its normal side. If an engineer unit is still on its building side at the beginning of the following Engineering Phase, the bridge is complete; remove the Bridge Building/Blown Up marker.
19.4 Bridge markers never count against stacking limits.
20.0 Recovery
NOTE: There are no Replacements in "Caporetto, 1917".
20.1 Disorganization Recovery. During the Rally Phase all supplied units that did not Forced march during the current Game Turn, and are not in enemy ZoC, can reduce their Disorganization Level by one point. Out of Command units cannot recover from Disorganization.
21.0 Special Rules
21.1 Engineer Units. Engineer units are treated like normal Infantry units but cannot Assault if they have a white Combat Strength value. Engineer units with Bridging Capacity ("P" in place of Machine Gun Factor) can repair and build bridges over the Isonzo River (20.3). All Engineer units can repair other bridge types. Only Engineer units can repair Trenches (17.3).
21.2 Cavalry Units. Cavalry units receive a bonus of one column shift right when assaulting enemy units in Clear terrain (not in Trenches), and give a bonus of one column shift right to enemy units firing (Offensive and Defensive) at them. Cavalry units do not receive any Trench bonus indicated in the TEC for fire or assault. Dismounted Cavalry units are represented as Infantry and are treated like them.
21.3 MG Companies. MG units are treated like normal Infantry units but cannot Assault. One MG company unit can stack for free in addition to the normal stacking limit. NOTE: MG companies are combat units and can absorb step losses from Bombardment/Fire or Assault.
21.4 Flamethrowers. Flamethrowers units do not have steps and they are not affected by stacking limits. Only one Flamethrowers unit can stack in any hex. Flamethrowers units must always be attached to an Infantry unit it is stacked with. Any step loss result from Defensive Fire against a unit with an attached Flamethrowers eliminates the Flamethrower unit as additional result. Units with attached Flamethrowers get one column shift right when Assaulting enemy Trenches or Towns, and each Assault can be affected by one Flamethrowers unit only. Flamethrowers units can be attached to another unit of the same Formation they are stacked with at the end of any Phase, but cannot change attachment twice in the same game turn. They are removed from play if the unit they are attached to is eliminated.
21.5 Infiltration Capable Units. Infiltration Capable units are any units with the Infiltration Capable symbol on their counter, a black triangle over the NATO symbol.
21.5.1 Infiltration Capable Units Movement. Regarding Movement, Infiltration capable units are not affected by enemy ZoCs, or adjacent enemy units; i.e. there are no Movement Costs to enter/exit enemy ZoCs and they can move freely from enemy ZoC to enemy ZoC (subject to Infiltration Fire).
21.5.2 Flank Assaults. Infiltration Capable units can make Flank Assaults. A Flank Assault is made under the following conditions:
- There is another unit (even not Infiltration Capable) Assaulting/Support Firing from the opposite side of the defending stack, or
- There are at least 2 other Assaulting/Support Firing stacks (they do not need to be Infiltration Capable) not adjacent to the Infiltration Capable assaulting stack.
Flank Assaults inflict a free additional Disorganization Level loss to the defender before to calculate odds of the first Assault.
Errata (19/01/2025), replacing the conditions above: Infiltration Capable units can make Flank Assaults. There is a Flank Assault if other friendly units (they do not need to be Infiltration Capable) are Assaulting/Support Firing the defending hex from:
- An hex directly opposite to the Assaulting hex; or,
- Two other surrounding hexes with one hex between each attacker-occupied hex; or,
- Other three or more hexes.
Flank Assaults inflict a free additional Disorganization Level loss to the defender before to calculate odds of the first Assault.
21.5.3 Assault on the Move. Any single Activated Infiltration Capable unit can resolve the Assault during the Tactical Movement Step immediately after declaring the Assault, before moving any another unit of the same Formation. If there are other activated units adjacent to the Assaulted hex that can provide Support Fire (10.2.6), they can do it before the Assault resolution (see sequence below). Mark them with Support Fire marker.
The single unit Assault on the Move is resolved according to the following sequence:
- A. Assault Declaration
- E. Support Fire (see 12.1.7)
- F. Defensive Fire (by the opponent Player)
- G. Assault Resolution
- H. Counter-Assault Declaration (by the opponent Player)
- I. Counter-Assault Defensive Fire (by the active Player)
- J. Counter-Assault Resolution (by the opponent Player)
After the Assault on the Move, the Assaulting and Support Firing units cannot Move, Assault or Fire again in the same Activation. Mark them as "Activated".
GAME NOTE: The Assault on the Move is a powerful tool, use it as wise as possible.
21.5.4 German Tactical Superiority. If all Assaulting units are German Infiltration Capable units, the Assault is not limited to three positive column shifts modifiers. The number of positive shifts they can use is unlimited.
21.6 Rommel Abteilung. Erwin Rommel had an important role in Caporetto Battle. The player owning the Wurttemberg Gebirgs Battalion can create the Rommel Abteilung. This is an additional Formation whose creation is declared during the Command Phase. It can be composed by substituting a maximum of four company units stacked together of the Wurttemberg Gebirgs Battalion with the Rommel Abt. "holding" unit (see 21.11). The Rommel Abteilung act like any Formation, with First Lieutenant Erwin Rommel as its Commander. Use his marker when this Formation is activated.
Units of the Rommel Abteilung have the following bonuses:
- They have one additional Movement Point. They can leave the holding unit and move away from it. Mark them as activated at the end of the activation.
- The owning player can roll 2 dice for each Assault they perform, choosing the result from one of them. If you roll a double, Rommel is injured, and the Rommel Abteilung cannot be formed again in next game turns.
21.7 Isonzo Left Bank. From hex 1019 up to hex 1006 (both hexes included), the left bank of the river Isonzo (south-east of the map) is out of play (impassable). Reinforcements can arrive there but must move to the other bank as soon as possible.
Errata (19/01/2025): 21.7 Add: They can assault and fire across the Isonzo where possible.
21.8 Bicycle and Motorized units. The Bicycle units and the Italian Motorized Artillery unit can use the Roads at half cost of the hex entered, if this hex is not adjacent to enemy units.
21.9 Exiting the Map. Italian and AH-German units can exit the south-west map edge using Roads, from 1001 to 6001, paying the Road cost they are moving on for the "virtual hex" just off the edge.
21.10 German Battalions. German battalions have one step for each SP. Each step is one company. When the first step is lost, flip the full-strength unit to its reduced strength. When the second step is lost, mark it with a step loss marker (-1 Strength Point, -2 MG points, no effect on movement allowance). When the third step is lost, exchange the battalion unit with a generic company of the same type and Morale. Exception: some battalions have Strength 3, these will be substituted by a company after the second step loss.
At the beginning of their movement, companies can be detached from a German battalion, simply remove one or more steps from the battalion and add the same number of companies to the stack of the same type and Morale. These companies will have the same Disorganization Level as the parent battalion unit.
Generic companies that START, or FINISH, any Action Phase in the same hex with a reduced battalion can be absorbed, and the battalion recovers the equivalent number of steps. The battalion unit will have the same Disorganization Level as the lowest level of the absorbed companies.
21.11 German Regiments Holding Boxes. The Holding Boxes Chart has a box for each German Regiment, to help to unclutter the map. The German player can use the Regiment unit as a substitute of all the units of that regiment in the same hex. Remember stacking rules, and that only two battalions, eventually plus one company, can Assault from a hex.
22.0 Fog of War (Optional Rule)
Normally players cannot examine opponent stacks beyond the top unit. The following optional rule offers a more realistic simulation of the fog of war.
22.1 Stacking order, from the top:
- Artillery units in Fire Mode (if any)
- Combat units with MG factor higher than zero
- Other Combat units
22.2 Disorganization markers are kept under the affected units.
22.3 Each player can watch enemy stacks:
- Up to level 1 if not observed
- Up to level 2 if observed
- Up to level 3 if adjacent
giving the opponent the information needed during the combat steps only (i.e. strength, current Morale, etc.).
23.0 Victory Conditions
The campaign game ends when one of the following conditions is met:
- When the AH-German Player obtains a Breakthrough (see 23.2)
- When the AH-German side is forced into an Offensive Halt (see 23.3)
- The moment the last Game Turn is completed.
At the end of a game because of conditions 2 and 3 the Victory Conditions are checked. The number of Victory Points needed to win is given in the scenario instructions.
23.1 The Victory Points are gained in the following ways:
- Victory Points for geographical objectives: The player must be the last player to have had a non-Artillery unit enter or move through the VPs hex. VPs are printed on the map (see TEC).
Historical Note: The Mt. Matajur was one of the most important objectives of the German XIV Army Headquarters, so important that the Army chief of staff, Conrad Krafft von Dellmensingen promised the highest German Army award, the "Pour le Merit", the "Blue Max," to the first field commander to conquer that mountain top. Historically, the recognition was awarded to the lieutenant Schnieber, of the 12th Division, who arrived in hex 3117 (Mt. della Colonna) and claiming to have conquered the top. Actually, the first to conquer the Matajur was Lieutenant Erwin Rommel, with the troops of the Württemberg Gebirgs battalion on October 26 th. There is a marker to remember this event that goes to the player who conquers hex 3017 first.
- Victory Points for units leaving the map: For each Formation exited from the south-west map edge, the AHG-German player gets 5 VPs. To get the VPs, all of the surviving units of the Formation must have exited.
- Victory Points for losses inflicted to the enemy: 1 Victory Point is awarded for every 10 steps lost due to surrender. A surrendered battalion is equal to two steps, even if it was only one step when surrendered. Every company or cavalry unit is equal to one step. Every captured Artillery unit is equal to 5 steps. AH-German surrendered steps will be deducted from the Italian ones before the VPs calculation.
- Victory Points for counterattacks: During the Game Turn in which a VP hex has been conquered by AH-German, if the Italian player retakes it (by counterattack, or other reason), the affected AH-German player loses double of the hex's VPs from the final total. Keep separate track of them.
23.2 AH-German Breakthrough. Scenario instructions specify the conditions under which a German Breakthrough is possible.
23.3 AH-German Offensive Halt. The AH-German offensive comes to a halt when the AH-German side (both wings in Scenario 1) does not take a VP hex for two consecutive Game Turns.
24.0 Scenario 1: Historical Campaign Game – "Das Wunder von Karfreit"
Scenario 1 covers the historical Caporetto Campaign, highlighting the Italian deployment mistakes, the weather influence, and the tactical and operational superiority that led to such a dramatic breakthrough, described by General Krauss as "Das Wunder von Karfreit" (The Miracle of Caporetto).
24.1 Characteristic of the battle was the rigid separation between the Italian front line sectors of XXVII Corps (General Badoglio) and IV Corps (General Cavaciocchi). This was about the same division of the area of operations of German III Corps (General Stein Group) and German LI Corps (General Berrer Group). Designer Note: Alpenkorps was attached to Stein Group, but play balance and the Sector Line made me to decide to attach it to Berrer Group (Left Wing). It is only a "designer trick", not historical attachment.
Each player takes control of the troops in one of the two sectors. The troops in one sector are grouped in a Wing (Right or Left). In each Sector one player controls the AH-German Wing while the other controls the opposite Italian Wing. The two sectors on the map are separated by a Yellow Line. We will refer to the Left-Wing Player who controls Italian IV Corps, German Group Berrer (LI Corps), and Austro-Hungarian Group Scotti (XV Corps); and to the Right-Wing Player who controls Italian XXVII and VII Corps, Austro-Hungarian Group Krauss (I Corps), and German Group Stein (III Corps).
24.2 All of the Formations in one Sector must be activated before starting to activate Formations in the other Sector. The Sector to start with is decided randomly.
24.3 Formations and units starting in a sector cannot cross the Sector boundary. Exception: Vicenza Brigade is controlled by the Left-Wing player and must move as soon as possible to the other side of the sector boundary. Units forced to retreat across the boundary must reenter their Sector as soon as possible.
Errata (19/01/2025): 24.3 Add: Interdiction barrage fire can only be fired into your own artillery sector.
Some hexes belong to both sectors (for example: hexes from 1624 to 1923; all such hexes are surrounded by a sector line). Units of both sides can enter such hexes but cannot end a Phase in them. If this happens due to a combat result, at the end of the Phase move the affected units to the closer hex within their own sector. If overstacking happens, apply 11.6.
Units starting the game in these hexes cannot move or assault. They can be bombarded and assaulted by any AHG player. In such case, their defensive fire, Disorganization recovering and retreat are handled by the opponent. If they are forced to retreat, they will have to do it towards the Sector where their Formation is.
Supply Lines run within their own Sector only, including the hexes belonging to both Sectors. They are interrupted by the Sector boundary.
If triggered, Infiltration Fire (see 10.1.2) is mandatory against enemy units moving adjacent the Sector boundary.
24.4 A player is never forced to activate one Formation in his sector, he can always choose to pass, leaving to his opponent his Action Phase for that Sector. A reaction cannot be made in a sector where no enemy Brigade was activated in the same Action Phase.
24.5 Scenario Length: 8 Turns, starting on October 24th AM, and ending at the end of October 27th PM. The AH-German player has the Initiative for the duration of the game.
24.6 Scenario Map Area: Both maps are used.
24.7 Victory Conditions: Victory Conditions are per Sector. The AH-German player in whose sector gained more VPs is the winner.
24.8 Set Up Rules: Units of both Italian Wings are set up first, as indicated in the set up instructions. The AHG-German Wings set up second. According to the set up instructions, units must be setup in the specific indicated hexes, or, when "From
During the set up, units of the AH 1st Division can stack up to three battalions in one hex as if they belong to the same regiment.
Set up Italian Artillery units emplaced. Artillery units can be set up off road.
If players wish, they can deploy units by "equivalent type and value" rather than by ID, if they belong to the same Formation. This could make setup easier, although not historical.
Bridge at hexes 3926-3927 is blown.
An orange dot in the lower left corner indicates that the unit is for Scenario 2 only.
Errata (19/01/2025), Set Up Errata, Scenario 1, Italians:
- Set up hex of III/87 is 4128.
- Set up hex of III/88 is 3726.
- In the set up note of the Italian Vicenza Brigade the reference is to point 24.3.
- In the IV Bersaglieri Bde the battalions LXX, LXXI and LXXII belong to 20th rgt. Counters are correct.
- Reinforcements:
- I Bersaglieri Bde. XIII / 6 Bersaglieri Btn. Entry hex is 1212.
- Alliney 1407 MG comp. entries on GT 25 AM at 6217 (as in Scenario 2).
Errata (19/01/2025), Set Up Errata, Scenario 1, AHG:
- AH Artillery units of X Army are set up in the Raibl Sector - From 5031 to 4730.
- GER Artillery unit I Korps, 3 Div. (Heavy Art.) is set up as by "From 4531 to 4230".
Errata (19/01/2025), Set Up Errata, Scenario 2, Italians:
- Reinforcements: Parma Bde - battalions I/50, II/50, III/50 and MG companies 353 and 1000 enter on GT 27 AM at 6202 (i.e. the whole brigade at the same time and place).
24.9 Special Rules: GT 1 starts with the Artillery Phase (Phase 6). Italian artillery units cannot be changed to their "Move" side on GT 1.
Errata (19/01/2025): 24.9 The reference is to point 7.5 not 7.4.
During GT 1, no Italian Formation can be Activated during the Command Phase and only previously Assaulted Italian Formations can be activated during the Reaction Phase. Independent units can be activated according to 7.4. During the Non-Activated Unit Movement Phase, the Italian player can move only Independent units, and units of Formations that were Assaulted or Bombarded during GT 1 and that did not react. On GT1 Strategic Movement (10.3.2) cannot be performed.
24.9.1 Note: During GT 1 there is no Engineering Phase, however rule 19.2.1 is in effect.
24.9.2 The Salerno, Arno, and IV Bersaglieri Brigades cannot move until Assaulted, or until GT 5.
Salerno, Elba, Firenze, Arno, Foggia, and IV Bersaglieri Brigades cannot activate any artillery, nor have artillery firing Defensive Fire with them. Design Note: These Brigades were just arrived at the front, and had no artillery attached to them.
24.9.3 Trenches. For every 5 hexes (or fraction of) with Engineer units repairing Trenches in the same Wing 1 LP is spent from that Wing's total. AHG side does not spend LPs.
24.10 Isonzo Bridges Bottlenecks. During GT 1, every Italian unit crossing the Isonzo River must stop in its hex after crossing a bridge (NOTE: They can cross the Isonzo ONLY on a bridge). Historical Note: The quick breakthrough of the first lines created panic among the rear personnel, choking the Isonzo crossings.
24.11 Weather:
- On GT 1: Fog on terrain Levels 1 and 2, Blizzard on High Mountain, and Light Rain on the intermediate levels.
- On GT 2: Light Rain.
- From GT 3 to the end of the game: Clear.
24.12 Preparatory Artillery Bombardment:
Errata (19/01/2025): 24.12 The reference is to point 6.3 not 6.4.
On GT 1 the following rules are in effect:
- AH-German artillery can fire without any attachment restriction.
- The AH-German player can Bombard only during step 6.4 of the Artillery Phase. Mark with an "Act & Def. Fired" marker the artillery units bombarding in this step. These cannot be used further in the Action Phases.
- Resolve the Bombardments one by one, without need to declare all of them before.
- The following hexes can be considered as observed, even if no LoS is possible to them:
- With Trench
- With Artillery
- With Town, Village or Location
- With Bridge/Footbridge hexside
- With Mountain Top
- With Road/Track.
Hexes subject to Gas or Mine Attacks (24.13) cannot be target of Preparatory Bombardment.
24.13 Gas and Mine Attacks: Historical Note: The beginning of the offensive had the support of four mines along the Monte Nero ridge to soften the Italian defense, and by the 35th Chemical Pioneer Battalion, which had 900 Phosgene Gas Projectors. The mines had little impact, mainly because the Italians were aware of their digging, and left only small detachments over them. But the gas attack was devastating because the Italian gas masks were useless against the German Phosgene gas, and 800 Italian soldiers died in this.
During the Artillery Phase of GT 1, the four Mine Attacks, and the Gas Attack are resolved on the Bombardment Table in the hexes indicated on the back of the counters, using the column indicated. These attacks are not affected by terrain, or by any other modifier. The Gas attack affects only the units. It has no effect over the Trenches; Mines affect Trenches like Heavy Artillery. Both these kinds of attack are resolved during step 6.4 of the Artillery Phase and the Preparatory Bombardment.
24.14 Logistic Points: Only the Italians use Logistics Points in the scenario. Each Italian Wing starts the scenario with 20 Logistics Points, and receives 2 LPs per GT per Wing, starting with GT 2. Right Wing and Left Wing have separate markers to track the available LPs.
The AH-German player has no limit to Logistic Points and can Activate Formations and artillery without LPs.
The affected Italian Wing loses 5 LPs for each of the following hexes (Supply Centers) captured for the first time by the AH-German player:
- 2623 (Smast) – Left Wing player
- 3519 (Creda) – Left Wing player
- 2119 (Drenchia) – Right Wing Player
- 1516 (Kambresco) – Right Wing Player
24.15 Special Geographic Victory Points. There is a marker to be setup in hex 3017 (Mt. Matajur) that goes to the player who conquers hex 3017 first. This marker grants the owning player the VPs printed on the map.
24.16 AH-German Breakthrough. If during any Game Turn Victory Check Phase, one AH-German Wing controls all the following hexes in his sector, he wins a Complete Victory, regardless of Victory Points.
- Left Wing: Plava (1105), Prepotto (1801), hex 1312, Gagliano (2401), Cividale (2602)
- Right Wing: Cividale (2602), Faedis (3702), Attimis (4503), Tarcento (5101), S. Giorgio (6217)
25.0 Scenario 2: "What If" Campaign Game – "The End of the Caporetto Legend"
When the first news about an expected offensive on the high Isonzo Valley arrived at the Italian High Command, Cadorna disbelieved them, and left the 2nd Army staff to organize the defense, departing from his HQ in Udine for a rest near Vicenza and an overview of the front in that sector.
Even the 2nd Army staff was left without its head, General Capello, who felt sick and left the HQ to his deputy, General Montuori, returning to the HQ only on October 23rd.
At the moment of Cadorna's return, the reports had become dramatic, but he still underestimated the AH and German menace. His generals did the rest.
On October 21st Lieutenant Maxim, a Romanian officer of the AH 50th Division, defected to the Italian lines, bringing with him the detailed offensive plan on the Mrzli sector, and the general offensive plan, including the timetable.
The poor Italian troop rearrangement was made even worst by the chaotic and hasty deployment of the few days before the offensive.
What if Cadorna had trusted the information he got and took time to prepare to counter the threat, keeping a better overview of the defense preparation?
Scenario 2 leaves the Italian side free to deploy its frontline and reserve units according to his own plan, within some historical "could have been" limits. Furthermore, some units that were available in the area are at the Italian player disposition.
Scenario 2 involves two opponents fighting each other: the AH-German player against the Italian player. The Sectors boundary has no effect.
25.5 Scenario Length: Same as 24.5.
25.6 Scenario Map Area: Same as 24.6.
25.7 Victory Conditions: Victory points are scored as by 23.0, and only the AH-German player earns them. At the end of the game, if no Breakthrough or Offensive Halt is obtained, the victory is checked as below:
- Less than 90 VPs: Italian Victory
- Between 91 and 120 VPs: Draw
- More than 120 VPs: AH-German Victory
25.8 Set up Rules: Both players set up their units as indicated in the set up instructions, the Italian player sets up first. Units must be setup in the specific indicated hexes, or, when "From
Bridges at hexes 1524-1624 and 3926-3927 are blown.
NOTE: The German I/CIII Engineer (Pioneer) unit can set up as building a bridge over 1524-1624 if no Italian unit is in 1624. The building will end during Phase 5 of GT1.
Counters Errata (19/01/2025), Scenario 2: The following Italian units must have the optional units orange dot (i.e. they are used in Scenario 2):
- Parma Brigade 353 MG Company
- Parma Brigade 1000 MG Company
25.9 Special Rules: During the First Game Turn, no Italian Formation can be selected for activation during the Command Phase. Italian artillery units cannot be changed to the "Move" side on GT 1.
25.9.1 No bridge can be blown during the Engineering Phase of GT 1. However, Rule 19.2.1 is still in effect during GT 1.
25.10 Isonzo Bridges Bottlenecks: Not in effect.
25.11 Weather: Same as 24.11.
25.12 Preparatory Artillery Bombardment: Same as 24.12.
25.13 Gas and Mine Attacks: Same as 24.13, though the AH-German player can place the Mines and the Gas attack in any Italian Trench hex adjacent to the one indicated on the back of the counters.
25.14 Logistic Points: The Italian player starts the scenario with 50 Logistics Points, and receive 5 LPs per GT, starting from GT 2. The AH-German player has no limit to Logistic Points and can Activate Formations and artillery without LPs. The Italian player loses 5 LPs for each of the following hexes (supply depots) captured by the AH-German player:
- 2623 (Smast)
- 3519 (Creda)
- 2119 (Drenchia)
- 1516 (Kambresco)
25.15 AH-German Breakthrough. If during any Game Turn Victory Check Phase, the AH-German player controls at least 6 (six) of the 10 hexes indicated at rule 24.16, he wins a Complete Victory, regardless of Victory Points.
26.0 Scenario 3: "On to Cividale"
The Battle of Cividale was part of the last act of the Caporetto breakthrough drama. The few and disorganized reserves of the Italian supreme command attempted a desperate resistance on the last buttresses of the Julian Alps, while Cadorna has already decided on a general retreat on the Tagliamento River.
26.1 Scenario Length: 2 Turns, starting on October 27th AM, and ending at the end of October 27th PM. The AH-German player has the Initiative for the duration of the game. Weather is Clear.
26.2 Scenario Map Area: The map area between Judrio River (1701/1801) and hex column 33xx is used.
26.3 Victory Conditions: The player who controls the most of the following hexes is the winner: 3303; 3002; 2602 (count as double); 2401; 2006; 2106; 2405; 2503.
26.4 Set up Rules: The Italian player sets up first as indicated in the set-up instructions. The AH-German player sets up second as indicated in the set up instructions. Artillery units can be set up off road.
26.5 Special Rules: The Italian player has 5 LPs. The AH-German player has unlimited LPs (as in the Campaign game).
27.0 Scenario 4: "Monte Maggiore"
Monte Maggiore was considered the northern pillar of the defense line that Cadorna intended to build, to contain the Austro-German breakthrough. Its fall was the event that led him to declare a general retreat, while the forces gathered to defend it attempted a desperate rearguard action.
27.1 Scenario Length: 2 Turns, starting on October 27th AM, and ending at the end of October 27th PM. The AH-German player has the Initiative for the duration of the game. Weather is Clear.
27.2 Scenario Map Area: The map area between hex column 33xx and the Northwest map edge is used.
27.3 Victory Conditions: The player who controls most of the following hexes is the winner: 3906; 4005; 4207; 4610; 4809; 5306; 5308.
27.4 Set Up Rules: The Italian player set up first as indicated in the set up instructions. The AH-German player set up second as indicated in the set up instructions. Artillery units can be set up off road.
27.5 Special Rules: The Italian player has 5 LPs. The AH-German player has unlimited LPs (as in the Campaign game).
28.0 Tolmino Holding Map
To reduce the stacking in Tolmino area, and to make checking the artillery LoS an easier task, you may use the "Tolmino Map" for emplaced artillery units (only). When an artillery unit is flipped to its Move mode, it is placed on the "regular" map. Artillery units not on the Tolmino Map are used in the normal way.
List of Abbreviations
- Gebirgs, GbSch: Gebirgsjäger, Gebirgs Schützen (Mountain troops)
- FJ: Feldjäger battalion
- H: Honved (Hungarian Army)
- LW: Landwehr (Territorial Troops)
- LS: Landeschützen (Territorial Troops)
- NK: Népfelkelösèg (Hungarian Territorial Troops)
- RGF: Regia Guardia di Finanza (Border guards)
- Inf.: Infantry
- MG: Machine Guns
- Eng: Engineer
- Brs., Bers.: Bersaglieri
- Bers. Cicl.: Bersaglieri Ciclisti
- Cav.: Cavalleria
- Dism. Cav.: Dismounted Cavalry
- Mt.: Mountain artillery
Historical Notes: Prologue to Caporetto
Historical notes as printed. The author byline printed under the heading is omitted.
Caporetto is a picturesque mountain town, located in the upper Isonzo Valley. It was always a border town; its German name is Karfreit, and its Slovenian name is Kobarid, but in history it has an Italian name.
Probably this is the most famous battle of the Italian history, it is synonym of "catastrophe" and it is used in the Italian language with the same meaning.
Also known as the Twelfth Isonzo Battle, the Battle of Caporetto was the consequence of the Eleventh Isonzo Battle that saw the Italian Army advance across the Isonzo River, and creating a salient, threatening both Ljubljana and Trieste.
To push back the Italians and reducing the likelihood of a new Italian offensive in the near future, an offensive was necessary, but the weakened Austro-Hungarian Empire did not have enough resources. Reluctantly, Emperor Charles had to seek German help.
Between 2nd and 6th of September, General Konrad Krafft von Dellmensingen, expert in mountain warfare, inspected the Italian Front, along the upper Isonzo River, where the Austro-Hungarian headquarters had identified a potential weak point of the Italian line. On the 8th of September he gave a positive opinion for an offensive between Tolmino (Tolmin) and Plezzo (Bovec), although defining it as "a gamble" due to the tough terrain and the positions held by the Italians. Ludendorff decided to proceed, and formed a new army, the 14th, with 7 divisions drawn from the various fronts. Alpenkorps and 200th, mountain warfare experts, from Romania, 12nd and 26th from the French Front, 5th and 117th from Russia and building the new Jäger Division, gathering several Jäger battalions.
Beside them, some of the elite Austro-Hungarian divisions were attached, such as the 22nd Schutzen and the 3rd "Edelweiss", and the divisions on spot (55th, 50th, and 1st), veteran of the area. Three more AH divisions (4th, 13th, 33rd) formed the army's reserve.
On September 11th, the new 14th Army was assigned to general Otto von Below, with Krafft von Dellmensingen as chief of staff.
The plan was to break through the Italian line coming out from the Tolmino bridgehead, conquering the Kolowrat ridge (LI Corps under General Berrer, with 200th and 26th divisions), and the Isonzo valley up to Caporetto (III Bayer Corps under General Stein, with Alpenkorps, 12th, 50th AH, and 117th), before descending along the valleys beside the Natisone river to Cividale. On the left wing was the AH XV Corps (AH 1st, and German 5th divisions) under General Scotti, which had to descend along the Korada ridge, on the right of the Isonzo River. The right wing was composed by the AH I Corps (3rd, 22nd, 55th, and German Jäger divisions), under General Krauss, that had to overrun Plezzo, and force the Saga strait, acting as right cover force. By request of General Below, this Corps, formerly attached to the contiguous 10th Army, was attached to the 14th Army by mid-September.
The second step planned the advance towards Udine, and the Tagliamento River, cutting off the Italian 4th Army on the North-Eastern Alps, and the 3rd Army on the Carso, and forcing them to retreat.
The offensive start was planned for October 22nd.
An enormous amount of preparatory work was begun, also increasing the road and railway capabilities in the valleys leading to the assembly points, to transport artillery and ammunition, while the infantry would arrive at the last moment, to keep the preparations secret. Precautions were taken such as having the German officers in charge of the preparations wear Austrian headgears, while German fighter aircraft squadrons kept the Italian recon aircrafts out.
German aircrafts had also the task to photograph the whole area of the front, to improve the existing Austro-Hungarian maps, so every official on the field from Lieutenant and up could have an accurate map of the territory where he had to operate.
By the end of September, the Alpenkorps was moved to Trentino, where it had to act some demonstrative actions, to deceive the Italian intelligence.
Despite all of these efforts, by the beginning of October the Italian intelligence was aware that an offensive was under preparation somewhere from the Julian Alps to the sea. But inside the command chain different points of view were sprouting to bring about disaster. General Cadorna's intention was to prepare a defense in depth, based on local counterattacks, while General Capello, commander of huge 2nd Army deployed in the menaced sector, was a supporter of a counteroffensive from the Bainsizza Plateau concurrently with the AH-German offensive, expected just against the Bainsizza Plateau. As consequence, he deployed his first line troops, and reserves, with the gravity center too south of the sector in danger.
But still, they didn't believe in a massive enemy offensive. The leaves of the 2nd Army soldiers were not suspended, and the brigades that had to act as the reserve were mostly composed by units coming from the frontline for refit and replacements. Cadorna spent the first two weeks of October visiting the Trentino sector, leaving Capello to supervise his Army sector without control.
When Cadorna was back in Udine, the seat of the overall Italian HQ, it was the time of Capello to leave its position, being forced to be hospitalized for nephritis. His deputy took over, General Montuori.
In the meantime, the offensive date had to be postponed to October 24th, due to the delay in deployment of the I Corps artillery.
On the night between 21st and 22nd of October, a Romanian officer, Lieutenant Maxim, deserted on Mount Mrzli, taking with him the plan of the offensive in his sector, taken care of in every detail, from the start time, to the sequence of the barrage of artillery, to the advance plan, and the forces involved.
It was like to rise a curtain. General Montuori started in a hurry to rearrange the troops deployment. In this frenzy rearrangement, the border between the IV and the XXVII Corps was moved on the bottom of the Isonzo Valley, moving the border from valley edge to the river itself, leaving the right bank under responsibility of the XXVII Corps, while the IV Corps moved away the Bersaglieri regiment who was manning that part of the front. The Napoli Brigade, which had to replace the Bersaglieri, did not arrive to close the gap before the start of the offensive, and the road from Tolmino to Caporetto was incredibly open.
Rugged reinforcement troops arrived quickly, but with no time to deploy behind the threatened area.
On 23rd General Capello came back from the hospital, in time only to harangue his corps commanders and give summary instructions. Also the instructions to the artillery were confused. Even if the instructions coming from Cadorna were clear, going down along the command chain, they became confused. IV Corps commander ordered to reply to the enemy fire, even if it was not clear if during the enemy counterbattery or preparatory phase, while the XXVII Corps commander (General Badoglio) ordered to wait for his own order. This order never arrived, because of the destruction of the telephone wires, and the weather hindering any optical signal.
The time is: 02.00 of the 24th of October 1917.
Historical Notes: The Battle of Caporetto
With the German punctuality of 2 o'clock sharp, the first phase of the preventive bombardment began, aimed at hitting the communication centers, the rear areas and the Italian artillery, the latter also with gas shells.
In the sector of the Italian IV Corps, the Italian artillery began a poorly coordinated counter-battery fire, which gradually died down, not so much due to the Austrian gases, which were not very effective on the mountainsides, but rather due to the request to save ammunition in order to only hit the assault troops at the exit of the trenches with certainty. They won't be able to do it because when the Austro-Hungarians troops come out of their trenches, they will be covered by fog and rain.
In the XXVII Corps sector, the artillerist are even waiting for the order to open fire from the Corps Commander, General Badoglio. This order will never arrive because the first phase of the German bombing has the very objective of interrupting communications. The few batteries that will begin to fire late in the morning on their own initiative will do so on targets that are now empty and useless.
At the bottom of the valley of Plezzo, the gas launchers of the 35th Chemical Pioneer Battalion go into action, covering the Italian front line with phosgene gas (the so-called Blue Cross, from the color of the cross with which the cylinders were marked). The gas blends in with the fog, and the Italians don't even realize they are being attacked. For the few who manage to put on the gas mask, before dying there is the terrifying awareness that they are useless.
Austrian artillery officer Fritz Weber, after his arrival on the Italian lines after the gas had cleared, describes how sudden the deaths were, striking the officers in the mess while they were eating, the telephone operators at their posts, and the sentries leaning on the edge of the trench. An entire Italian battalion was wiped out, leaving a gap in the front line...
At 6:00, after a pause, the destructive fire against the trenches and the front lines begins. It is a bombardment of unprecedented intensity on the Italian front. The Germans themselves who observe comment: "I would not want to be an Italian down there today". The heavy-caliber shots flatten the trenches, tear up the wire fences, and force the Italian infantrymen to take refuge in shelters and caves.
While on Mt. Rombon the attacks of the 3rd Austro-Hungarian division are repelled in the snowstorm, in the Plezzo basin the 22nd division passes through the lines left unprotected by gas or bombing and bypasses the positions that are still resisting. Only the counterattacks of the Ceva Alpine battalion somehow slow down the Austro-Hungarians, who at the end of the day are in front of the Saga pass.
Along the ridge that leads from Polounik to Monte Nero, despite the heavy bombardment and the explosion of several mines, the Italian line of the Genova and Etna Brigades resists all the day, locally also thanks to targeted counterattacks by the reserves. The Caltansetta Brigade also held back the Austro-Hungarians, certainly not helped by the trenches on the counter slope under the Mrzli, where they were so advanced that the Austrians on the crest only needed a leap to enter them, but thanks to the second line of the Pleza, where the reserves were well positioned.
What the soldiers of these brigades do not know is that behind them, along the Isonzo valley, the Germans are swarming almost undisturbed.
While on the left of the Isonzo the 12th German Division encounters some resistance, which it manages to overwhelm, arriving at the Caporetto Bridge in mid afternoon, and forcing it to be blown up, on the right of the river its advance finds no opposition until the town of Smast, where it forces a detachment of the Foggia Brigade to surrender, before attacking and conquering Caporetto. By the end of the day its most advanced troops arrive at Creda. A 24 km march, practically an exercise, which leads to the encirclement of two Italian divisions, the 43rd and the 46th.
During the night, some units of the 43rd Division managed to escape the encirclement across the Trnovo bridge and reach Mount Stol, while the 46th was destined for captivity.
The toughest job, the Jeza, the Podklabuch, and the Kolovrat ridge, fell to the spearheads of the German device: the Alpenkorps and 200th division.
Between 9 and 9.30, when the shells had not yet completely stopped falling on the Italian lines, the German vanguards came out of their trenches and, covered by the fog, approached the Italian front lines. Here the small surviving outposts, devastated by the bombing, were quickly captured, and the all-out defense line was reached practically without a fight. Here the Italian units were still mostly in shelters and caves, where they were easily bottled up and forced to surrender. The few units that managed to escape the surprise fought as best they could, against an enemy overwhelming in men, and above all, in firepower, which overtook them and enveloped them. Few escaped death or capture. However, the Jeza remained in Italian hands, at least for one night, during which the Val Adige Alpine Battalion sacrificed itself, remaining practically alone to hold the summit.
The first day of the offensive has practically already dealt a mortal blow to the Italian defensive device, but what condemns the Italians is the lack of reserves capable of maneuvering. In fact, the VII Corps (3rd and 62nd Divisions) have been given orders to garrison the Kolovrat line, practically already outflanked from the right, and undefended on the left along the Natisone Valley, practically condemning it to destruction, while the other two brigades immediately available on the left are reduced in strength and weakened by dysentery.
Only the 47th Division, composed of two Bersaglieri brigades, can face the Germans, and remains between the Korada and the Isonzo to cover the retreat of the troops from the Bainsizza. It will be an important rearguard also during the retreat towards the Tagliamento.
In the next two days, the Austro-Hungarian and German forces had no choice but to make as much headway and take as many prisoners as possible, while the few surviving Italian forces attempted unlikely resistance and roadblocks, in the face of orders that did not contemplate maneuver, but only resistance to the bitter end on the spot, often allowing themselves to be outflanked and destroyed. A last attempt to rebuild a defensive line occurred on October 27, when reinforcements rushed in attempted resistance on the Korada - Monte Purgessimo - Monte Maggiore line.
The early fall of Monte Maggiore finally pushes Cadorna to order the general retreat to the Tagliamento River, but not before Cividale also falls after the breakthrough and destruction of the brigades placed in defense in front. Thus ends the Battle of Caporetto, and begins the retreat, in many cases rout, of Caporetto. Not even the Tagliamento will be able to stem the impetus of the German and Austro-Hungarian troops, driven by the desire for revenge, by self-esteem, and, last but not least, by hunger.
Monte Grappa and the Piave will be insurmountable for them. On the Mountain and the River that would become Sacred to the Fatherland, the remaining Italian forces will manage to contain even the best German troops, but that's another story.
Design Notes
After the publishing of the game "Strafexpedition 1916", the publisher proposed doing the next game on Caporetto, but I replied that it made no sense to make a simulation game about a battle whose outcome was destined even before it began. So, the second one was "Gorizia 1916".
Over time, I began to study the battle of Caporetto better, gradually discovering the complexity of the situation, finding the necessary challenges for a game, and at the same time the desire to dispel many clichés about the best-known war episode in Italian history.
The challenge: within a battle whose outcome was obvious, I discovered the rivalries within the Austro-German army, despite the high-sounding name of the operation: "Waffentreue" (Fidelity of Arms). Hence the idea of putting two factions in competition, both in attack, and both in defense. Moreover, an idea already exploited in other simulation games, where the result was obvious.
Disclosure: In addition to the extraordinarily bad disposition for battle, the confused orders, and the lack of communications immediately following the exceptional (for the Italian Front) artillery preparation, the Italians also had to deal with the new infiltration combat tactics, who had already reaped successes in Riga against the Russians, and which would also upset the British and French defenses in a few months. As well as with a superiority of enemy fire, both in artillery (3:1), and in small arms (5:1).
Furthermore, most of the Italian battalions were understrength, due to the unreplaced summer battles losses and the winter leaves (that were not suspended even on the eve of an enemy offensive…).
Finally, they also had to suffer the arrows of fate: the fog. It covered the battlefield in the early hours of October 24th mixed with the gas that exterminated more than one battalion of the Friuli Brigade in Plezzo. The fog also covered the movements of the German troops, both in approaching the Italian positions upset by artillery, and in advancing unnoticed along the Isonzo valley up to Caporetto. The same fog that prevented any optical communication, on which the Italian commands relied in the event of the destruction of telephone lines, as in fact happened, leaving units without orders, and commands without information.
In short, a whole series of pieces contributed to creating the mosaic, which the commander of the Austro-Hungarian I Corps, General Alfred Krauss called "The Miracle of Caporetto" (Das Wunder von Karfreit).
So, the "what if" scenario, which examines an Italian defense organized by the player, could not be left out. It considers the units actually available on that sector of the front.
Regarding the game system, it is basically the same as the two previous games, with a few more details about the use of artillery, and the addition of the characteristics of the tactics implemented by the Central Powers. We therefore find the Preparatory Bombardment, which allows you to strike even in the absence of observation, the Support Fire, which uses the firepower of machine guns and portable weapons in attack, the infiltration capacity, based on the principle of outflanking and exhausting movement without worrying about the flanks, to penetrate the enemy lines. There is also a touch of color, with the exceptional performances of the future Desert Fox, Erwin Rommel, at that time a simple Lieutenant but already capable of leading his men in extraordinary enterprises.
Enjoy the game, and learning something more about Caporetto.
Bibliography
Bibliography as printed (German, English and Italian sources).
German
- Conrad Krafft von Dellmensingen – "Der Durchbruch am Isonzo"
- Erwin Rommel – "Infanterie greift an"
- Alfred von Krauss – "Wunder von Karfreit"
- Hans Killian – "Wir Sturmten Durchs Friaul"
- Fritz Weber – "Isonzo 1915, 1916, 1917"
- Manfried Rauchensteiner – "Waffentreue"
- Edmund Glaise-Horstenau – "Österreich-Ungarns Letzter Krieg, 1914-1918"
- Helmut Schittenhelm – "Wir Zogen Nach Friaul"
- Hubert Fankhauser – "Regimentsgeschichte des k.u.k. Infanterieregimentes Graf von Khevenühuller Nr. 7, 1914-1918"
English
- Mark Thompson – "The White War"
- Ronald Seth – "Caporetto"
- Cyril Falls – "Caporetto 1917"
- John Macdonald, Zeljko Cimpric – "Caporetto and the Isonzo Campaign"
Italian
- Paolo Gaspari – "Le Bugie di Caporetto". Ed. Gaspari
- Alessandro Barbero – "Caporetto". Ed. Laterza
- Adriano Alberti – "L'importanza dell'azione militare italiana. Le cause militari di Caporetto". Ufficio Storico dello SM dell'Esercito Italiano
- Ufficio Storico dello SM dell'Esercito Italiano – "L'Esercito Italiano nella Grande Guerra (1915-18)". Ist. Poligrafico dello Stato
- Gianni Pieropan – "Storia della Grande Guerra sul fronte Italiano". Mursia
- Marco Martini; Silvio Stok – "I Tracciati delle Trincee sul Fronte dell'Isonzo". Gaspari Ed.
- Paolo Gaspari – "I Nemici di Rommel". Gaspari Ed.
- Paolo Gaspari – "Rommel a Caporetto". Gaspari Ed.
- Paolo Gaspari, Paolo Pozzato – "Non Solo Rommel, Anche Rango". Gaspari Ed.
- Paolo Gaspari, Marco Mantini, Paolo Pozzato – "Generali nella Nebbia". Gaspari Ed.
- Paolo Gaspari – "La Verità su Caporetto". Gaspari Ed.
- Guido Alliney – "Caporetto sul Mrzli". Gaspari Ed.
- Giuseppe Boriani – "L'Ultima Retroguardia". Gaspari Ed.
- Gian Luca Badoglio – "Il Memoriale di Pietro Badoglio su Caporetto". Gaspari Ed.
- Alberto Cavaciocchi – "Un Anno al Comando del IV Corpo d'Armata". Gaspari Ed.
- Marco Pascoli – "La Battaglia Dimenticata della Val Resia". Gaspari Ed.
- Basilio Di Martino – "L'Aviazione Italiana a Caporetto". Gaspari Ed.
- Angelo Gatti – "Caporetto". Il Mulino.
- Alberto Monticone – "La Battaglia di Caporetto". Gaspari Ed.
- Filippo Cappellani, Basilio Di Martino – "Un'Esercito Forgiato nelle Trincee". Gaspari Ed.
Abbreviated Sequence of Play
-
Reinforcement Phase (5.0): Reinforcement units are placed on the map, following the scenario instructions (6.0). LPs are added to the Logistics Points Track (LPT) for the IT side.
-
Command Phase (6.0, 7.0): Each player secretly decides which of his Formations he will activate during this turn.
-
Initiative Phase: In Caporetto 1917, the AHG player has the Initiative in every Scenario for the duration of the game.
-
Weather Phase: The Weather is historically determined. Check the GTRT to see which Weather condition is in effect for the current Game Turn.
-
Engineering Phase:
- 5.1 Players complete Trench repair (17.3)
- 5.2 Players start new Trench repair (17.3)
- 5.3 Players may blow up bridges (19.2)
- 5.4 Engineer units with Bridging capability (see 21.1) can place "Bridge Building" markers, or complete Bridge Building (see 19.3).
-
Artillery Phase: Each player places his Artillery units on their "move" or "fire" side (see 18.0).
- 6.1 Players place their Artillery units on their "move" or "fire" side (see 18.0). See also 18.2 for Artillery Emplacement.
- 6.2 Players may conduct Artillery Interdiction (12.1.6)
- 6.3 AHG player may conduct Preparatory Bombardment (24.12)
Dedication
"The lack of resistance of units of the 2nd Army, cowardly withdrawn without fighting, or ignominiously surrendered to the enemy, allowed the Austro-Germanic forces to break our left wing on the Julian front."
With this bulletin on October 28th General Cadorna unfairly blamed his soldiers for the defeat of Caporetto. This simulation, through gaming, wants to show how the events really took place, and to rehabilitate the memory of the soldiers who lost their lives, even in captivity, because of the Battle of Caporetto.