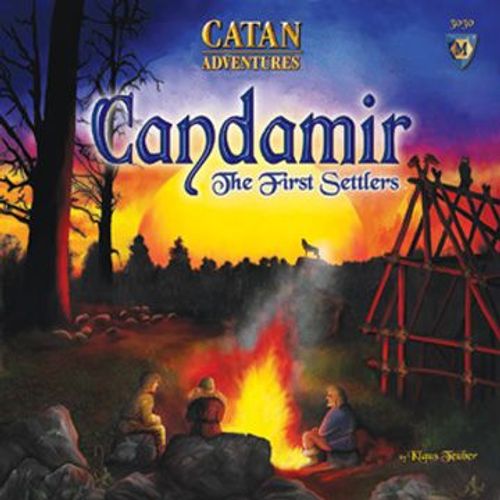
Candamir: The First Settlers
Candamir: The First Settlers Rulebook
Table of Contents
Table of Contents
Components
- 1 Game Board
- 48 Wooden Pieces (4 figures, 40 victory point cubes, 4 round disks)
- 48 Exploration Tiles
- 4 Character Boards
- 12 Potion Tiles
- 8 Equipment Markers
- 4 Endurance Markers
- 16 Experience Markers
- 90 Resource and Ingredient Cards
- 29 Movement Cards
- 22 Adventure Cards
- 8 Character Cards
- 1 Wooden Die
- 2 Card Holders
- 1 Shuffle Cards Board
Game Set Up
The Game Board
Place the board in the middle of the table. There is a description of the board on the next page.
Place the Exploration Tiles
Turn all the hexagonal tiles face down (so the side with the number is up) and sort them by color. If there are four players, all the tiles are used. If there are only three players, remove all the tiles with the number "4," and remove all the "3" and "4" tiles if there are only 2 players (place the extra tiles back in the box).
Mix the remaining tiles fully. Place them (still face down) on the matching spaces on the board. Make sure that each tile is placed on a space on the board that matches both color and number with what is on the tile.
Take Your Playing Pieces
Choose a color and take the matching wooden pieces. You should have 10 victory point markers (cubes), 1 destination token (disk), and one adventurer (figure). Place all the adventurer figures in the village at the center of the board. Place all your other pieces in front of you.
Deal the Character Cards
Take all four female character cards and mix them thoroughly. Give one of these cards to each player. Each character has both a male and female version. Both are identical. The name of the matching male character is shown in parentheses on the female character card. If you want, you may exchange your female character card for the equivalent male character card or vice versa.
Sort the Resource and Ingredient Cards
Sort the resource and ingredient cards by type. Put the three resources (ore, hide, and lumber) in one card holder and the three ingredients (herbs, honey, and mushrooms) in the other holder. Place both holders near the game board. Give each player 1 "lumber" card to start the game with. During the game, you will hold all of your resource and ingredient cards in your hand, secret from the other players.
Prepare the Adventure Cards
Sort the adventure cards by the number on the back. Shuffle each of the three decks separately face down. Place the "3" stack on the table, then place the "2" stack on top of it. Finally, place the "1" stack on top of the "2" cards. Place the completed stack near the board. Turn the top three cards face up and place them in a row next to the stack.
Game Overview
The right side of the game board shows the landscape of the island Catan. The village of the settlers lies in the grassland. To the east stand the mountains. From the mountains a river runs across the grassland and to the west edge of the board through the forest. In the illustration below, all of the spaces that the river flows through are marked in blue.
The left side of the board shows the village. Next to each house is a chart showing which goods that home's owner desires. To the left of the board are shown the two card holders with the resource and ingredient cards. To the right are the adventure cards, with three of them already turned face up. For clarity, the hexagonal discovery tiles and the player figures are not shown in the illustration.
The board's regions are labeled: Lumberjack Camp, Hunter Camp, Village, River Crossing, Forest, Grassland, Miner Camp, Mountains.
The Needs of the Settlers
The village side of the board shows the houses of the settlers Jared, Osmund, Candamir, and Brigitta. Each of these settlers has a "wish list" of goods (swords, chests, and window coverings) and animals (cattle and goats) that he or she needs. In order to succeed in the village, you will need to supply these goods and animals to the settlers.
Who knows where you will find cattle and goats? They are hidden on the small hexagon tiles placed on the board. You will also find raw materials there: ore, lumber, and hides. You must use these raw materials to create desired goods. For example, you would need 1 ore, 1 lumber, and 1 hide to make a chest.
Your biggest challenge is to explore the countryside of Catan and find the most valuable exploration tiles—with cattle, goats, and resources. While you wander over Catan, you will encounter adventures and random events. The stronger, faster, more charismatic, and skillful your character becomes, the easier you will be able to overcome the dangers you encounter and win valuable resources.
If you discover a goat or cattle, or you build a desired good, then you can mark your success by placing one of your victory point cubes on a matching space in one of the settlers' wish lists, always filling spaces in the highest empty space in a column.
The first player to place all 10 of his victory point cubes on the game board is the winner!
Your Character's Abilities
Basic Values
Your character has four abilities: Strength, Prowess (fighting skill), Agility, and Charisma. At the beginning of the game, your score for each ability is only equal to the Base value shown on your character card. During the game, you can increase your ability scores by earning experience and/or finding equipment. These improved skills are recorded on your character board. The character board marks the Basic Value, Experience Box, Equipment Box, and Individual Character Skills.
Earning Experience
When your figure reaches an exploration tile that shows an experience point, you can increase one of your abilities: either place a purple experience marker with the "1" side up on an empty experience box, or turn over an experience marker you have already placed so the "2" side is facing up.
You only have 3 experience markers numbered "1" and "2," so you will only be able to improve 3 of your abilities by 1 or 2 points.
You also have 1 experience marker numbered "3" and "4." You can use this to increase an ability beyond +2. When you earn an experience point, you may choose to replace a marker showing "2" with your "3/4" marker with the "3" face up. This will make your "1/2" marker available for use with a different ability. Later you can increase the ability one more time by turning the "3" over to the "4" side.
Note: You can upgrade to your "3/4" marker when you have at least 1 experience marker with the "2" showing in one of your experience boxes, you do not have to use all three of your "1/2" markers before you can use the "3/4" marker.
Equipment
If you land on an exploration tile that has a picture of a shield, bear-tooth necklace, bow, or boots on it, you discover some valuable equipment! Place a pink equipment marker (with the number "2") on the equipment box bearing the same (matching) picture. Equipment always increases an ability by 2 points.
Example of an experienced character: This character has a Prowess of 5. (Shield (2) + Experience (3) + base value (0) = 5)
If you reach an exploration tile that shows a piece of equipment you already own, you instead earn 1 experience point, and may increase an ability of your choice. You may never have two of the same piece of equipment.
Skills
Each character also has 2 individual skills, which help them during the game. See page 6 for a complete description of these skills.
Sequence of Play
Each player rolls the die, and the player with the highest roll goes first.
On your turn, you may first trade (see page 6). Then you may perform one of the two following actions:
- explore; or
- if your figure is in the village, you may "build and brew."
After you finish your action for the turn, play passes to the player on your left who begins the next turn.
(1) Exploration
A. Prepare to Set Out: Limit on Resources and Ingredients
If your figure is in the village, you may begin exploring only if you have in your possession 5 or fewer resource cards AND 5 or fewer ingredient cards. If you have more than the maximum number of cards, and you decide not to "build and brew," you must discard down to 5 resources and 5 ingredients.
Important: The hand limit is separate for resources and ingredients. So, for example, if you have 6 resource cards and 4 ingredient cards, you would have to discard 1 resource card before you could begin exploring.
B. Choose Your Destination
Now you select the goal of your exploration. If your goal token (the round wooden disk) is not on the board, you may secretly look at any 2 face down exploration tiles anywhere on the board and return them face down to their original places. Then you may place your goal token on any exploration tile that does not already have one on it (you do not have to choose a tile you just examined). Once you have claimed a tile, no other player may take it from you. Usually, you will try to reach your goal token by the shortest possible route, but this is not required. You may make as many detours as you wish, and you may actually be forced to from time to time.
C. How to Move and How Far to Go
Movement: You will move your figure from square to square, always vertically or horizontally (never diagonally). You may move into any space, even if it is occupied by another player's figure or a goal token.
Distance: The maximum number of spaces you may move on your turn is determined by your character's current endurance. So, for example, if your character's endurance marker is on the "3" space, then you could only move your figure up to 3 spaces that turn.
D. The Movement Cards
To begin moving, take the deck of movement cards into your hand. Do not examine them or change the order of the cards.
1. Turn Over a Movement Card and Point it Towards the Board
Before you can move your figure to another space, you must turn over the top card from the movement card deck and place it face up in front of you.
Important: The movement card must always be played so that the sky on the card is pointed towards the board, no matter which side of the board you are sitting on.
2. Move Your Figure
Now you must move your figure into one of the four adjacent spaces.
3. Resolve Any Events or Adventures
After you move your figure, you must check if the movement card you turned over shows an event in that direction. If it does, then you have encountered something during your travel (see "Events on the Movement Cards" on page 5).
Example: (See the illustration on the right) If the figure moves down (red arrow), she will have to fight a bear, if it moves left (blue arrow), she will find some valuable herbs. If it moves up (green arrow) or to the right (green arrow), there would be no event.
You will not always be able to go the direction you want to, if there is an event in the way. For more on this, see "Your Way is Blocked" on page 5.
As soon as you reveal the "shuffle cards" board, the movement cards beneath it are shuffled back together, a new movement deck is created, and you continue your travels. When you have finished moving for the turn, the cards you turned over are placed at the bottom of the movement deck.
E. Ending Your Exploration
Your exploration ends when:
- you have turned over a number of movement cards (and moved your figure into a number of spaces) equal to your current endurance, or
- you have moved your figure to the space with your goal token.
If you did not reach your goal token: Your movement for the turn ends in the space your figure is in. On your next turn, you may continue moving towards your goal token.
If you reached your goal token: You…
- return your figure to the village space in the middle of the board,
- remove your goal token from the board and place it in front of you,
- take the exploration tile you moved to and place it face up in front of you.
Now you receive the reward shown on the exploration tile:
- For each resource pictured on the tile, take 1 matching resource card from the tray.
- If the tile shows a goat or cattle, place one of your victory point cubes on the appropriate space of one of the wish lists—always the empty space closest to the top of the list.
- If an experience point or equipment is shown on the tile, mark the improvements on your character board (see "Your Character's Abilities" on page 3). If there are 3 or 4 players, some equipment appears twice in the game. If you reach an exploration tile that shows a piece of equipment you already own, you instead earn 1 experience point, and may increase an ability of your choice. You may never have two of the same piece of equipment.
Then you end your turn by placing the movement cards you used face down to the bottom of the movement deck and passing the whole deck to the player on your left.
(2) Building and Brewing
If your figure is in the village at the beginning of your turn, you may choose to manufacture goods (build) and/or brew drinks.
Important: You may not build and brew if your goal token is still on the board, even if you ended your move on the village space (it is treated as grassland in this case).
A. Manufacturing Goods (Building)
Each wish list shows 1 or 2 columns of goods desired by that settler, in addition to any goats or cattle. Each column lists 4 goods. Only the good in the highest open space (without a victory point cube) is currently desired.
Since there are no "goods cards" for the things you create, you cannot build items and save them for later. You can only manufacture goods if there is an open space at the top of one of the wish lists for that item.
When you create a good, you simply pay the resource cost (return the cards to the tray), and place one of your victory point cubes in the matching space. So, you could build a chest for 1 x hide, 1 x ore, and 1 x lumber. A sword requires 2 x ore and 1 x lumber. And a window cover would be 2 x hide and 1 x lumber. The costs for each type of good are shown above the village on the board.
If you have enough resources, you can build more than one item on the same turn. These items could be given to the same settler, or to different ones.
Example:
(A) Right now Osmund wants: 1 sword (left column), 1 window covering (second column), 1 cattle (third column), and a goat (right column). All these needs are the highest open space in each column.
(B) The blue player has paid the resources to make a sword, and places one of his victory point cubes on the space with the sword. Now Osmund wants (from left to right): 1 chest, 1 window covering, 1 cattle, and 1 goat—but he no longer wants a sword.
B. Brew Drinks
In order to brew the different drinks, you will need ingredients: honey, mushrooms, and herbs.
- For 1 mushroom and 1 herb, you can brew 1 of Brigitta's potions.
- For 1 honey and 1 mushroom, you can brew 1 healing potion.
- For 1 honey and 1 herb, you can brew 1 mead.
The brewing costs are shown at the top of your character board.
When you brew a drink, take the appropriate type of tile and place it in the matching space on your character board with the side showing one drink face-up. If you brew a second drink of the same type, turn the tile over to the side showing 2 drinks. The effects of each type of drink are described on page 6.
C. Rewards for Manufacturing Wanted Goods
When you place a victory point cube on a wish list, you receive an additional reward.
- If you place a cube on Brigitta's list, she will reward you with 1 Brigitta's potion and 1 mead. If you already have 2 drinks of that type, then there is no additional reward.
- If you place a cube on Jared's list, he will give you a bag of seed. Osmund will supply you with a sheep. Candamir will assist you in building part of your new house.
Your rewards from Jared, Osmund, and Candamir are not represented by cards or tiles. Instead, you can simply count the number of victory point cubes on each settler's wish lists to see how many of each item you have earned. For example, if you have 2 cubes on Jared's list, and 1 cube on Osmund's list, then you have 2 bags of seed and 1 sheep.
D. Special Victory Points
You can earn special victory points for having the most seeds, the most sheep, or the largest house. If you are the first player to place a third victory point cube on Jared's, Osmund's, or Candamir's wish list, then you get 1 special victory point! The special victory point is marked by placing one of your cubes in the matching box at the bottom of the village section of the board.
But your special victory points are not safe! If another player has more victory point cubes on that settler's wish list than you, then he has taken the special victory point away (and replaces your cube with one of his own)!
Example: The blue player has placed his third victory point cube on Osmund's list, so he places another cube on the special victory box for "most sheep." On a future turn, the orange player succeeds in placing her fourth cube on Osmund's list—one more than blue has! Blue must remove his victory point cube, and orange may now place one of hers in the box.
The End of the Game
When any player places his last victory point cube on the board, the game ends. That player is the winner!
Other Rules
(1) Exploration Details
Events on the Movement Cards
Finding Ingredients
When you move your figure in a direction that shows an ingredient (on the movement card), you may take the appropriate ingredient card from the tray.
Important exception: If you already have 5 ingredient cards in your hand, you cannot draw any more (see "Hand Limits" on page 6).
Hidden ingredients: Some ingredients are marked on the cards with parentheses. You can only collect these ingredients if your character has the "herbalist" skill (see page 7).
Bears, Wolves, Snakes, and Candamir
If you move towards one of these events, you will have to test one of your abilities. The ability you will have to test is shown by its icon next to the picture of the animal or Candamir.
Resolving a Test
Roll the die. Add the result of the roll to your total score for the ability you are testing. If the final score is at least as high as the number shown on the movement card, then you have succeeded!
Example: If this player moved towards Candamir (to the left), he would have to test his strength. He would succeed if the total of his strength plus the die roll was at least 6. If he moved towards the snake, he would have to test agility and get a total score of at least 5.
Success and Failure
Success: If you succeed at a test, you may receive a reward! If you overcome a bear with prowess, you may take up to 2 hides. If you successfully hunt a wolf using agility, then you may take 1 hide if you wish. If you are able to help Candamir fell trees (with a strength test), you may take a reward of 1 lumber, if you want it. But, you can only take a reward if you have less than 5 resources in hand (see "Hand Limits" on page 6).
Failure: If you fail to match the target on a test, then you will immediately lose 1 or 2 endurance: move your endurance marker down 1 or 2 spaces. If you lose endurance, and you already turned over enough movement cards (or more) to match your new endurance, then your turn ends. But, if you have a healing potion, you may drink it right away, which may allow you to make more moves (see "Drinking Potions and Mead" on page 6).
Important: Even if you fail a test, you still move your figure into the new space you chose. If you still have endurance left, you can continue moving that turn.
Example: A player with 3 endurance turns over her second movement card for the turn, and moves towards a bear. She is unable to beat the bear in the prowess test, so her endurance drops to 1. Normally, this would be the end of her turn, but she decides to drink a healing potion, which raises her endurance back to 3 again. Now she can turn over another movement card.
The rewards and penalties for each type of event are shown at the bottom of your character board.
The "?"-The Adventure Cards
If you move in the direction of a question mark, you will have an "adventure." You must select one of the three face up adventure cards by the board and read the title to the other players. Then you must test the ability shown on the card. Just like other events, you must at least match the required number with the sum of your ability score and the die roll.
Some adventure cards show two symbols. They require you to make two tests! First you must pass the test for the first symbol, before you can attempt a test against the second symbol. You only complete the adventure if you can pass both tests.
Some adventure cards also show an ingredient or mead. You must pay the shown ingredient or mead in order to attempt the adventure. If you do not have the required item, then you must choose a different adventure.
If you succeed at all the tests shown on the adventure card, you receive the reward shown. Then, place the adventure card in front of you and draw a replacement from the deck and place it face up next to the other two adventure cards.
If you fail to complete the adventure, the card remains face up with the others. You also suffer any penalty shown on the card, usually 1 or 2 endurance. If you fail one of the adventures that required you to pay a mead or ingredient card, you do not get to take the item back.
The Hero of Catan
If you are the first player to successfully complete 3 adventures (you now have 3 adventure cards in front of you), then you earn a special victory point, and may place a cube in the box for the "Hero of Catan." Of course, if another player completes more adventures than you, then you must remove your cube from the hero box, and that player places one instead.
Your Way is Blocked
You may only move in the direction of an event or adventure if you have a chance of overcoming the challenge there.
Example: A player wants to move her figure north, but there is a bear shown on the movement card in that direction with a challenge of "8." She can only move in that direction if her character's prowess score is at least 2, or if she is willing to use one of Brigitta's potions so she has a chance to beat the bear if she rolls a "6" on the die.
The Edge of the Board: Of course you may not move in a direction that would take your figure off the edge of the board. You must stay on the board during your moves.
Endurance of "0" or "-1"
If your endurance drops to 0 or less while you are facing an event or adventure, your current journey for the turn ends unless you can immediately drink a healing potion. You may not use your special character skills to move any further that turn. But, if you fell to endurance 0 or less after you moved to the space your goal token was on, you still claim the exploration tile and any reward on it before you return to the village. Either way, on your next turn, you have two choices:
- Drink 1 or 2 healing potions so that your endurance is again over 0. In this case you can move normally, or choose to "build and brew" if you are in the village.
- Do nothing for the entire turn (neither moving nor "building and brewing") and raise your endurance back up to 4.
Note: You may also choose to forfeit your entire turn to raise your endurance back up to 4 if your current endurance is 1, 2, or 3.
Hand Limit While Moving
While you are moving, you may not have more than 5 resource cards and 5 ingredient cards in your hand. If you have the maximum number, you cannot gain any more from events or adventures.
If you already have 4 resources, for example, and you defeat a bear, then you would only receive 1 hide card (instead of the 2 you normally get for beating a bear). You may not choose to discard another resource so you can take the second hide.
However, if you reach your goal token and return to the village, you always get to take the reward shown on the exploration tile, even if this brings your total hand size to more than 5 resources.
The same rule applies to ingredient cards. If you already have 5 ingredients in your hand, and you move in a direction that would normally earn you another, you may not discard a card to make room for the new ingredient.
The Lumberjack, Hunter, and Miner Camps
Instead of placing your goal token on an exploration tile, you may choose to place it on one of the three camps (see the illustration of the board on page 2). If you move your figure onto the camp you have marked, then you return to the village and take one of the resource shown on the camp space.
(2) Trade
At the beginning of your turn, you may trade with other players or, make 3-for-1 exchanges with the bank. It does not matter if your figure is in the village or in the wilderness, you can trade either way.
Trade With Other Players
You may freely trade resources, ingredient cards, equipment, and potions with the other players. You may not trade experience points or adventure cards you have earned. Any exchange both players agree to is allowed.
If you are not in the village, you may not accept any trade that would give you more than 5 resources or ingredients (see "Hand Limit," above).
3 : 1 Exchange
You may turn in 3 identical resources to take 1 other resource card from the tray. Likewise, you can turn in 3 identical ingredient cards to take 1 other ingredient.
Example: A player returns 3 herb cards to the tray and takes 1 honey card for himself.
You may not exchange 3 resources for 1 ingredient or vice versa. You can only exchange resources for resources and ingredients for ingredients.
(3) Drinking Potions and Mead
When you drink, you must turn in the matching tile to the supply, or turn a tile showing 2 potions to the other side with 1 potion.
Brigitta's Potion
You can drink one of Brigitta's potions before you roll the die for any test to increase your total score for that ability by +2. You may not drink two potions at once to get a +4 bonus. Only one potion can be used for each test. If you use a drink for a roll against an adventure card that requires 2 tests, then you only receive the bonus on one of the rolls. If you want a +2 bonus on both rolls, then you will have to drink 2 potions (one for each test).
Healing Potion
You may drink 1 or 2 healing potions at any time. Each healing potion you drink increases your current endurance by 2 levels. If your endurance is "3" and you drink a healing potion, you will only raise your endurance 1 point, because you can never have an endurance higher than 4.
Mead
You may use 1 or 2 mead, but only at the end of your turn. Each mead you use can cause other players to lose 1 endurance. Each player who has as many victory point cubes on the board as you have, or more, must lose 1 endurance. You do not lose any endurance when you use mead. No player's endurance may ever fall below -1.
(4) Individual Character Skills
Each character has two special skills. One of these skills gives that character the ability to move one space further at the end of the turn if that character stops moving in a particular type of terrain. You may only use this bonus movement if your current endurance is at least 1, however (see "Ending Your Exploration" on page 4).
Rider
If you end your movement for the turn in a grassland space (including a grassland space with the river in it), you may make a bonus move: turn over 1 movement card and move your figure 1 more space.
Climber
You receive a bonus move if your figure ends the regular movement for the turn in a mountain space.
Forester
You receive a bonus move if your figure ends the regular movement for the turn in a forest space (including forest spaces with the river in them).
Swimmer
You receive a bonus move if your figure ends the regular movement for the turn in any space that has the river in it.
Herbalist
If your character has this skill, you can find hidden ingredients when you explore. Hidden ingredients are marked with parentheses on the movement cards.
Inga's Friend
If you succeed in a "Catch Snake" test on a movement card, you may take any 1 ingredient card of your choice from the tray.
Goods Trader
You may exchange 2 resource cards for 1 other resource of your choice once at the beginning of each of your turns.
Scout
Before you place your goal token when you are in the village, you may examine 3 exploration tiles (instead of the usual 2).
Two Example Turns
Turn A
- The player has set his goal token and is ready to set out from the village. He draws the top movement card (1). There is a snake to the right, and he decides it is too dangerous, so he moves one space up and takes an herb card.
- The next movement card (2) shows a bear to the bottom. Feeling brave, he moves down one space but rolls a "1." Too bad! His total prowess is only 5, which added to the roll only makes 6. The bear has a value of 8, so he cannot beat it and he loses 2 endurance (A).
- Normally, his turn would be over, since he has drawn 2 movement cards and his endurance is only 1. But, he decides to drink a healing potion (B) and his endurance rises to 3 again (C). Now he can turn over a third card and move to the right (3).
- Since his endurance is 3 and he has turned over 3 cards, his normal movement for the turn has ended. Since his character has the "swimmer" skill, and he has ended his move in a river space, he gets one bonus move. He turns over the next card and moves 1 space up. Now his turn is done.
Turn B
- On his next turn, he continues his journey by turning over a movement card (1) and moving to the right: another bear! This time he rolls a "3." Combined with his prowess of 5, his score is 8, which is enough to defeat the bear. He takes 2 hides from the tray.
- He turns over the next movement card (2). He moves to the right and must face a snake. He uses his Brigitta's potion, returning the tile to the supply (D) and rolls a "4." His agility is only 1, and combined with the potion his total score is only a 7. Not enough to defeat the snake. So, he loses a point of endurance. Since he has reached his goal token, he returns his figure to the village and takes the exploration tile.